
 First of all, how has it been over 6 months since my last post?! Well, after the Battle to Seattle campaign and v2.5 release I took a bit of a breather from Dinosaur Cowboys. Then before you know it Christmas came around. And then here we are in 2015. Like I mentioned in my last post my wife and I had a kid, so that’s also been a big factor. Also getting into the computer game Euro Truck Simulator 2 (of all games?!) and back into Awesomenauts also took some time. Regardless my apologies for the lack of posts here.
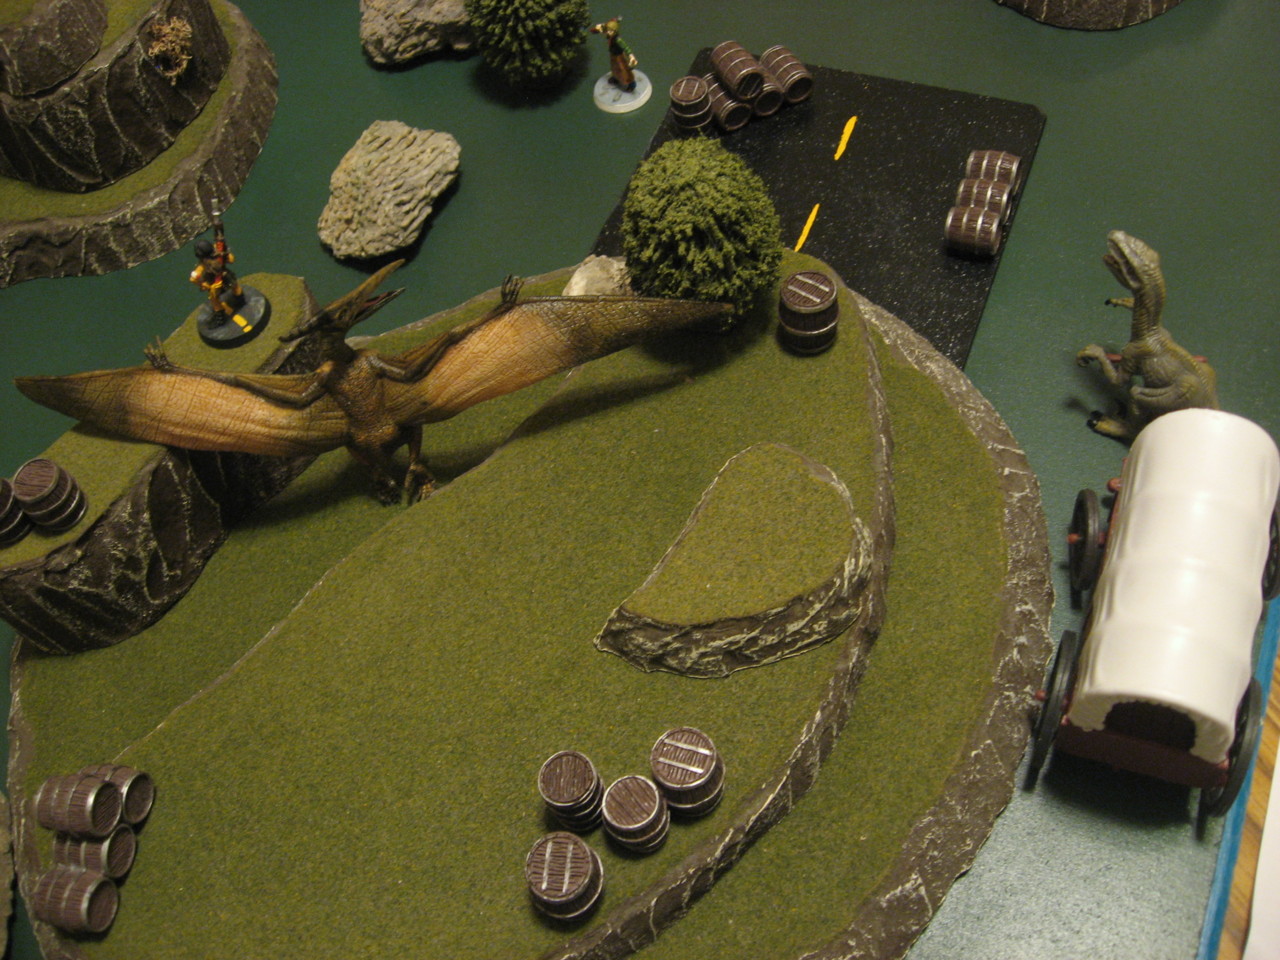
But I finaaaaally took the time to sit down and play Dinosaur Cowboys yesterday, which I’ve been meaning to do for quite a while. I used a single 3’x4′ board covered with a lot of terrain, as well as some real-life fossils that I collected when I was a teenager. The Flapper area was designed to look like a small landing pad/airport with crates and a wagon nearby.
There aren’t a ton of pictures or notes because I ended up playing with my wife, so there was less time to catalog every turn.
Deployment and Objective
First of all for the sake of simplicity no Features were used. The Objective was “Escort”, where a Civilian has to basically traverse the board and escape. The Deployment was “Layered” to give the impression of fighting through a series of enemy lines (with the unspoken exception that the Civilian would be deployed in the further region from their escape area).
To add a bit of narrative flavor I figured the Civilian is an Archaeologist who found a rare fossil in South Dakota. Before he could return to the nearest city with his find the Black Hill Raiders descended on him and took him prisoner. Now the Raiders are trying to move him to a Flapper (aka the Arnold Schwarzenegger “Get to the chopper Flapper!”) to escape the area, return to their hideout, and ransom the fossil (and Civilian) to the highest bidder. Local homesteaders the Birkshire Family get wind of this plot and assemble to stop the kidnapping. So a fun little twist on what’s normally “good guys escorting through bad guys”. Remember that Flappers are Pterodactyl replacements for airplanes in Dinosaur Cowboys.
Posses
Now the posses involved might sound familiar, and that’s because they are pulled directly from the 9-page Quickdraw Rules. Both posses have $1,000 and 100 IP, so pretty standard. The Black Hill Raiders use a Raptor and focus on melee, so the Layered deployment really helped them. The Birkshire Family have quite a few powerful guns like an Ultra Repeater, 500kW Walker Revolver (when explained to my wife she said “That seems like it does a lot of hits”), etc. So the match up should be interesting. I played the Raiders and my wife played the Birkshire Family.
You can get the PDFs here:
Setup and A Few Pictures
The game lasted 5 turns.
The Layered deploy REALLY made a mess of everything. There were some possible “Shot in the Back” moments right from the get-go, due to later groups ending up behind enemies.
For the Black Hill Raiders, Betty One-Eye (Necromunda Escher Juve figure) and The Blade (Dark Sun Mul figure) deployed far to the north of the Flapper, with their Civilian nearby. The plan is to use the mix of melee and firepower to escort the Civilian and distract enemies as they went. Opposite them from the Birkshire Family is Brother Jerrid (preacher figure) and the trusty Ducky mount Drake.
The final deployment zone belonging to the Black Hill Raiders consisted of Maynard Dereus, the shotgun wielding leader (Necromunda Ratskin Shaman figure). Behind him is Malice, the Raptor dinosaur. I had wanted to use the Papo “alternate” paint scheme for this dinosaur, but I think it got bent in the storage bin as it wasn’t standing up properly.
And the last deployment zone for the Birkshire Family, which included the Flapper, had Mama Hanna (Warhammer 40,000 Schaeffer’s Last Chancers figure) with her Ultra Repeater on a hill, and nearby Papa Jonas (bartender figure) blocking the east flank.
Here you can see a few views of the deployment:


From left to right: View from the southern Flapper end of the table, focus on the middle deployment zones, high level view looking west (you can see how everyone ended up pretty much on one flank).
I can’t speak for the Birkshire Family, but I know my plan with the Black Hill Raiders was to split my enemies up. So the Raptor would move south towards the Flapper zone to lock down and distract foes there (classic dinosaur move really), while Maynard would flank into the northern split of Birkshire Family. The Civilian would Hustle every turn in a desperate attempt to stay in cover and not get killed.
Here are a few more pictures of deployment, since like I said once the dice started rolling the photos stopped coming.

On the left you can see the northern deploy, with the Civilian visible (he’s the Prospector looking fellow in the blue hat). Notice how close the Ducky is…could get ugly right away.
On the right is the Flapper “end zone”, with a few supply crates and a nearby wagon. For the purposes of this game the Flapper and wagon dinosaur are just scenery and not something you interact with.
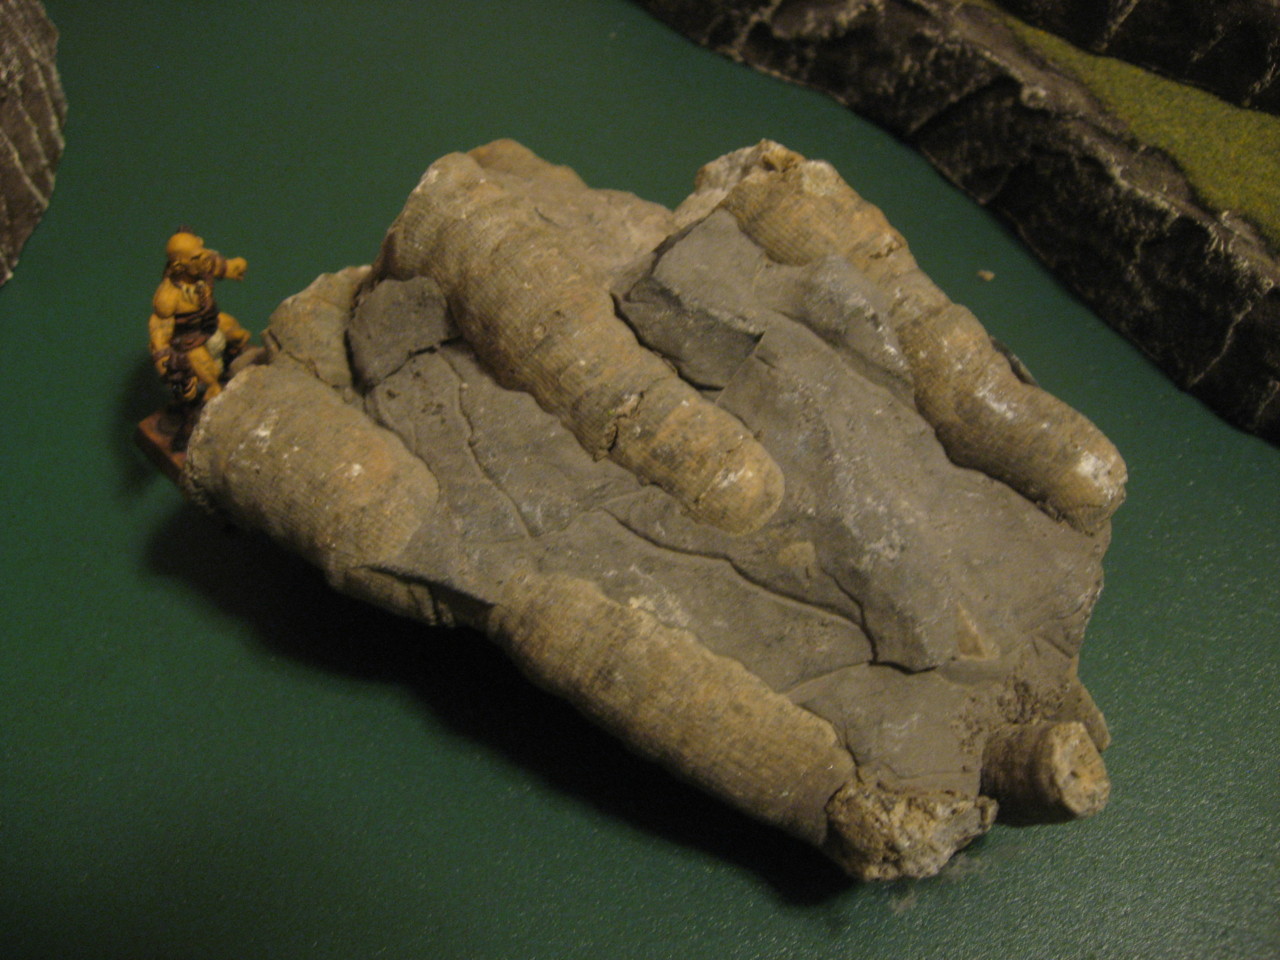
If you’re into fossils, well, here are some zoomed in shots of a few. They make great, thematic terrain pieces, just a bit drab in color (maybe they need a gloss spray). In general they vary from nice cover pieces to full on line-of-sight blocking hunks o’ rock.

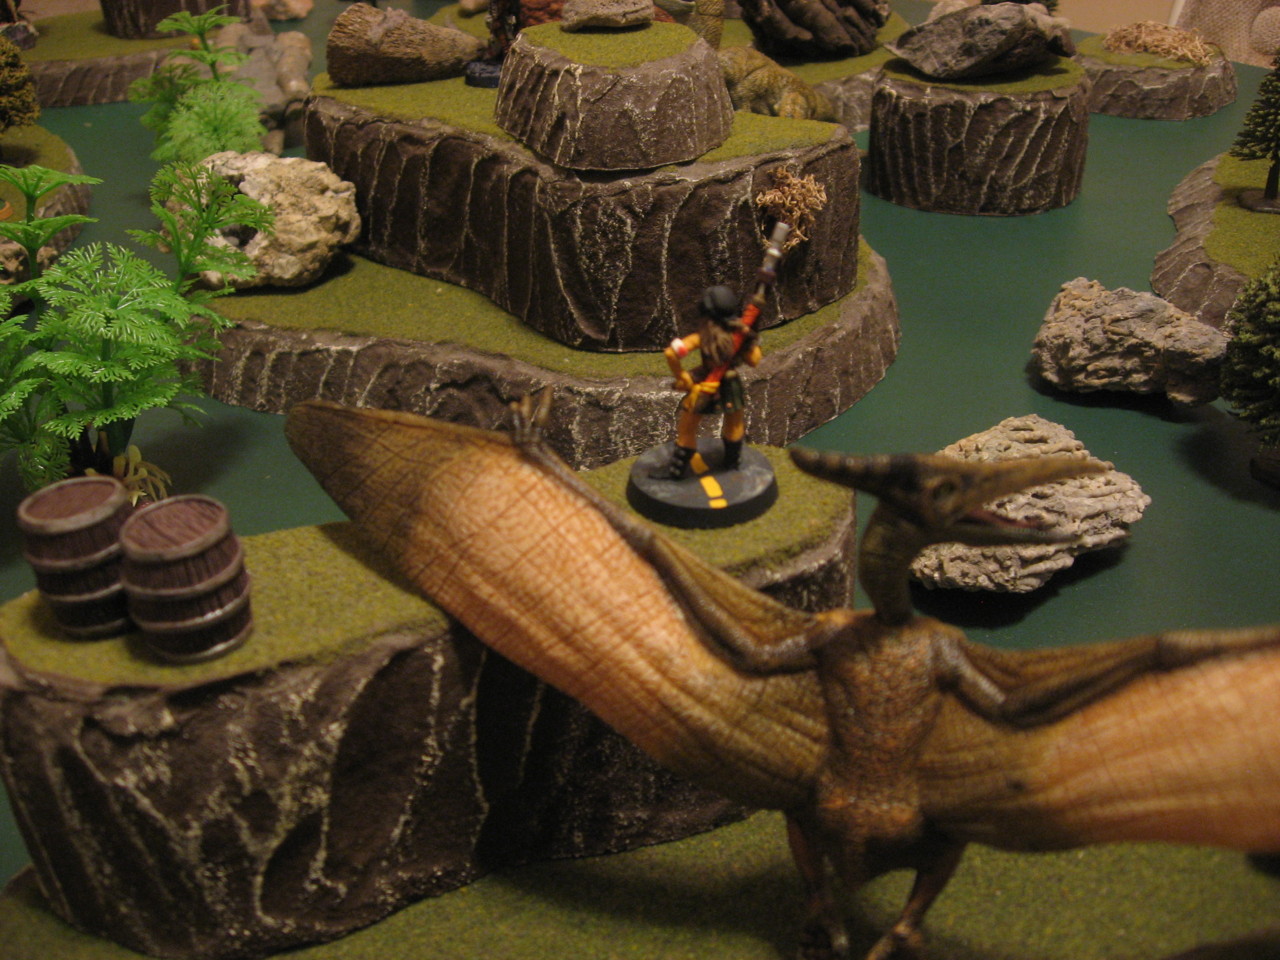
And finally some cinematic shots, first of the Black Hill Raiders leader Maynard overlooking the battlefield from his perch. Then a shot of Mama Hanna awaiting her foes in the Flapper area.

 After Action Report
As for the game itself, Birkshire started by Charging the Ducky into melee with Betty One-Eye, thankfully avoiding the Civilian for now. The Blade counter-Charged into Brother Jerrid, who was nearby on the hill. Of course he then promptly got blasted backwards when Brother Jerrid did “Fan the Hammer” with his 500kW Walker Revolver, followed by a Speed Reload. Maynard had a terrific Saber weapon, so in the interest of utilizing that as soon as possible he climbed down the cliff and moved towards the Ducky. Meanwhile the Civilian ran forward as much as possible. On the backline the Raptor moved towards Papa Jonas but couldn’t quite reach him and didn’t want to risk a Charge. Mama Hanna fired at the Raptor to begin whittling down his Hitpoints.
Turn 2 saw the start of some long dinosaur combats. The Ducky did consistent, but LOW damage to Betty One-Eye, while she alternated between pistol fire and using her Flail depending on what the best odds were. Meanwhile the Raptor Charged at Papa Jonas, but ended up missing nearly all of his 1A-5D attacks through the course of the game. The fact that Mama Hanna used “Get Up!” on Papa Jonas meant he survived the initial Charge and then stayed in combat to futilely try to use his Scattergun.
First blood went to The Blade, who Charged in again and managed to kill Brother Jerrid before being shot down by Mama Hanna in turn. A worthwhile trade as the Civilian had a nearly unobstructed run to the Flapper now, with just Mama Hanna standing in the way.
Turn 3 was much of the same, with the Civilian taking a shot from Mama Hanna. But his substantial 14 HP pool meant more than a few Ultra Repeater hits would be needed. Eventually Maynard Charged into the back of the Ducky, and the pain started…like really, really started. The Saber hits at 3A-6D, with +1 Attack on Charge, so you can imagine how long the Ducky lasted. He basically never cleared Panic and took 11 HP of damage on the first Charge. Unfortunately the Black Hills Raider player (me, haha) didn’t use the “Berserker” Trait for a glorious 6A-6D attack (which likely would have one-shot the Ducky, combined with the existing damage from Betty One-Eye).
Turn 4 saw the Raptor and Papa again fail to hit each other. Papa unfortunately needed a Reload on his pistol fairly early on in the fight, otherwise he could do more reliably done damage that way instead of a risky 1A-5D Scattergun shot hitting on 8+. Luckily the Raptor is hitting on 8+ as well. The Civilian is within a turn of the Flapper now, but took another shot from Mama Hanna on the way and is down to 5 HP. As expected the Ducky didn’t last another turn against Maynard’s wrath, freeing up the two Black Hill characters to move towards the Flapper area.
Turn 5 wrapped up some of the attacks. After killing the Ducky last turn, Maynard had moved south, and this turn could move again and Charge at Mama Hanna. The successful Charge dropped her like a sack of bricks. This left Papa Jonas alive, and the Civilian one Activation away from the Flapper. Summoning his courage the Birkshire leader left combat with the Raptor (who failed to Snap Attack, which would have killed Papa), and angled his line of fire to get one last shot on the Civilian.
Annnnnnd promptly missed! Because he is the Leader he can’t “Yeehaw!” himself, so with that, the Civilian activated, moved to the Flapper, and the game was over. Victory to the Black Hill Raiders!
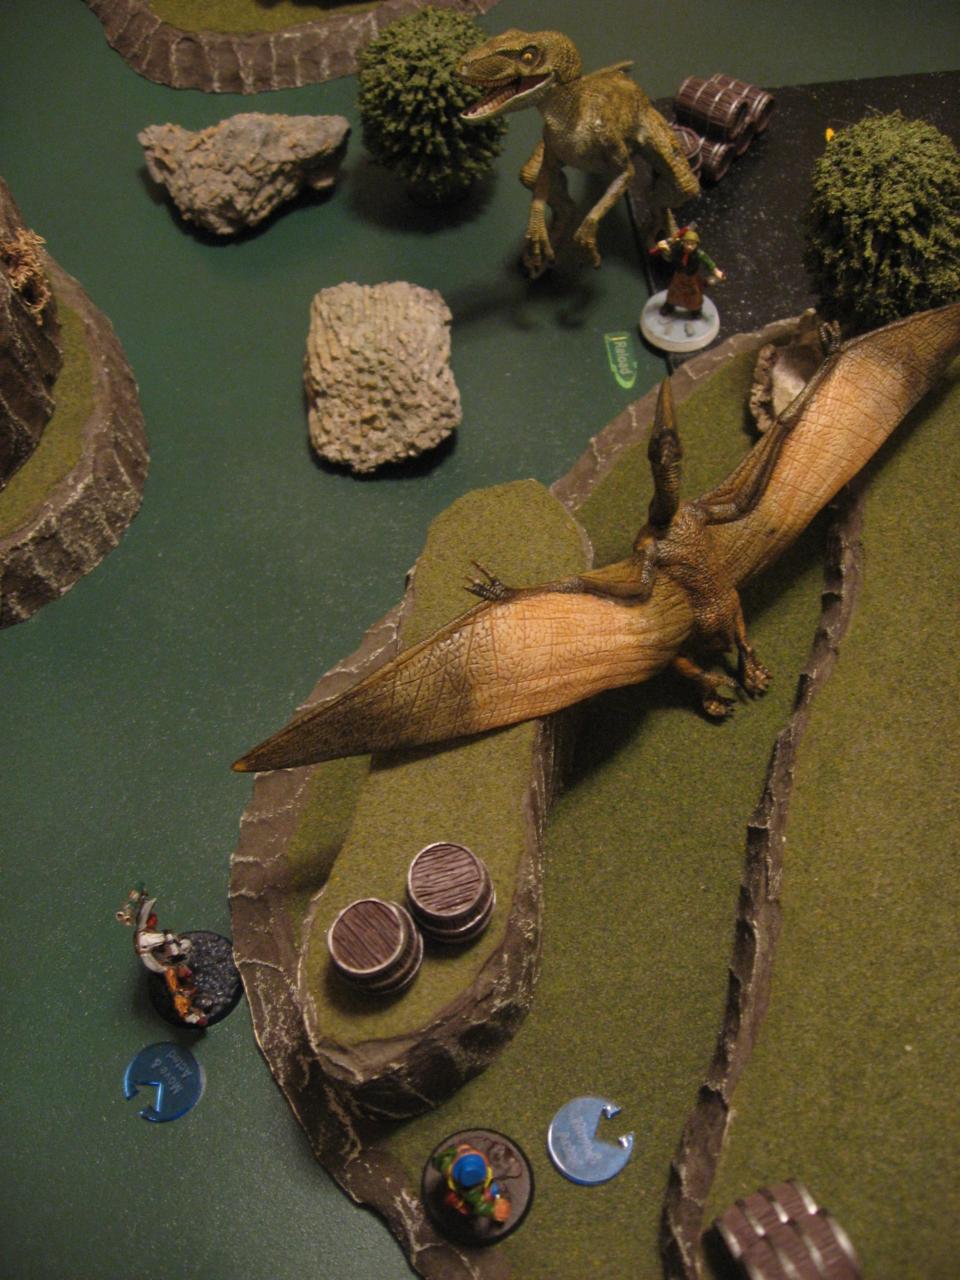
Here you can see the final, desperate shot of Papa Jonas as the Civilian rounds the hill towards the Flapper.
What’s Next?
Great fun all around! With deployment and rules explaining the game still only took about an hour. As you know I’m so happy with the state of the Dinosaur Cowboy rules. I do have some very minor tweaks (this is literally one of my TODO items: – Fix capitalization in Quickdraw rules for “100kw” instead of “kW”), but otherwise it’s all good.
I won’t make any promises of getting another game in on this table, or doing the Lego town I mentioned in my last post. Instead I’ll just say hopefully I talk to you again soon!


Leave a comment