Battle Report: Operation Black Box

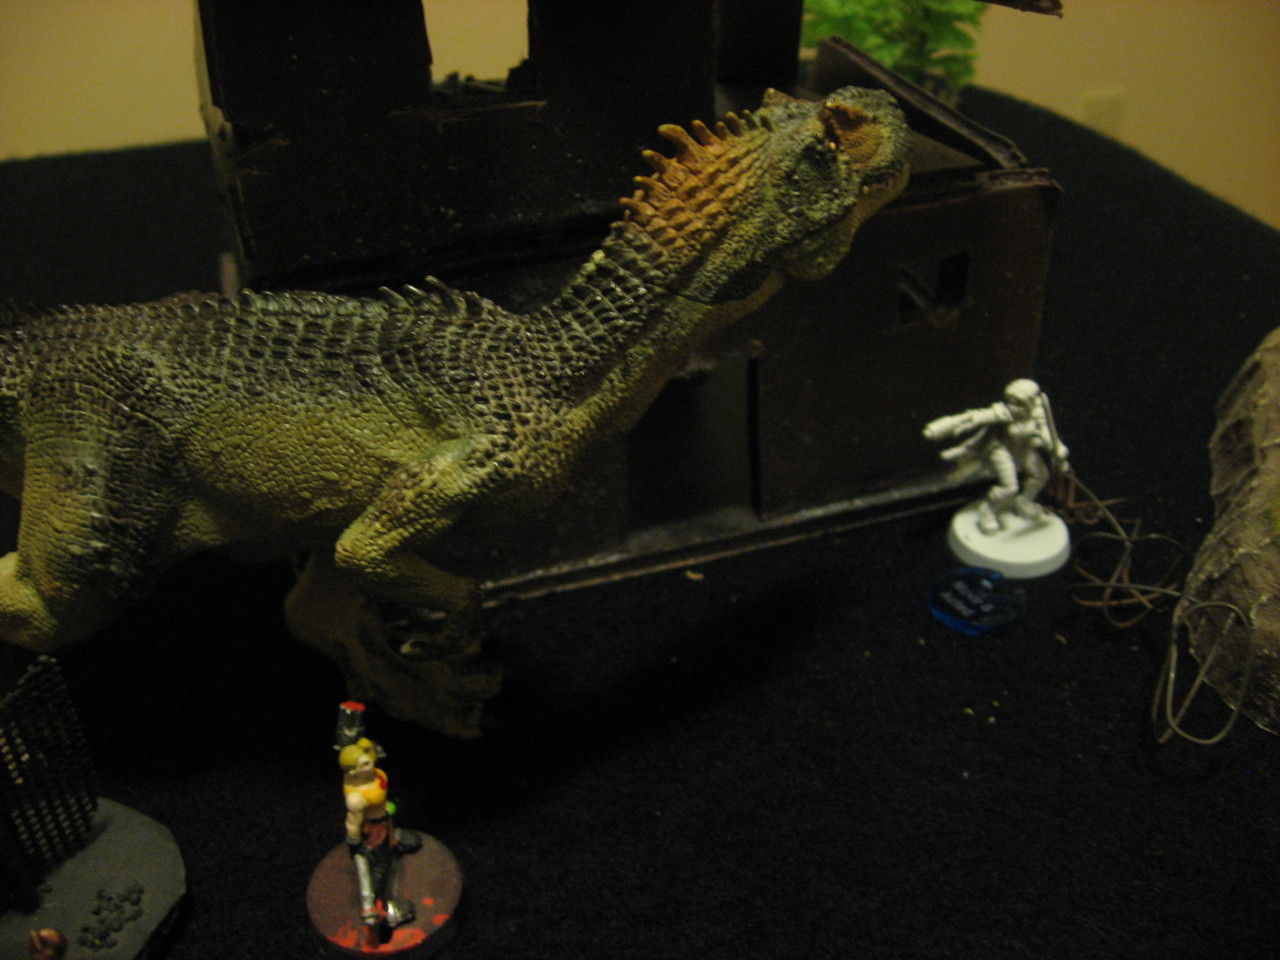
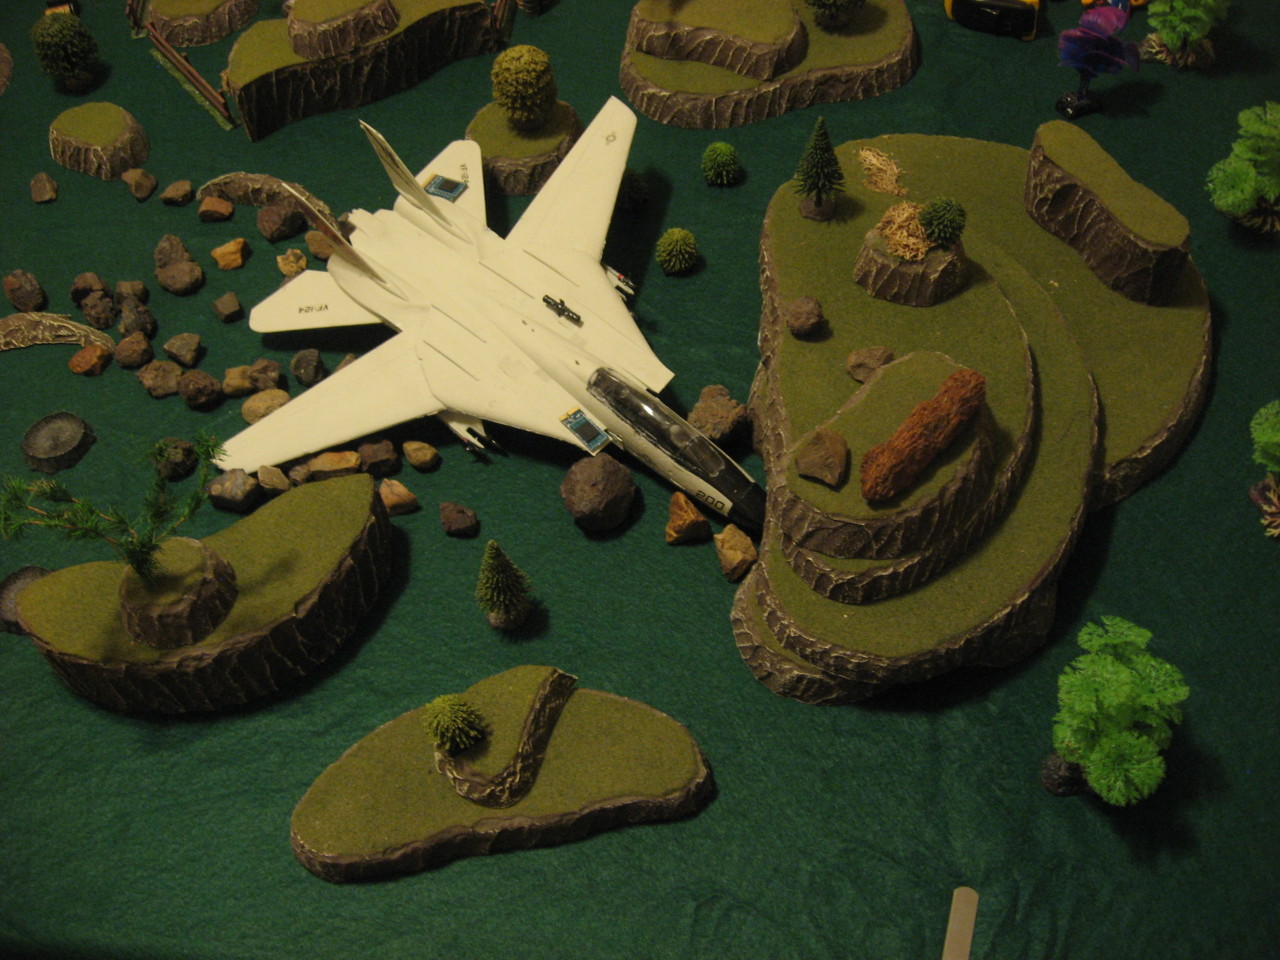
Finally a battle report! The elapsed time since my last game session here is criminally long, and well overdue for some new content. So I wrangled together a few posses, grabbed a pal, dug up an old childhood F-14 Tomcat airplane model, and set out to play some Dinosaur Cowboys v2.6!

Also some of the inspiration for one of the posses comes from the Defense of the Ancients computer game. In other words the moba Dota 2, which just had a huge 7.0 patch update. The largest tournament for professional e-sport players of Dota 2 has a prize pool of $20 million plus. So yeah, players of that game should recognize some familiar names and roles, like Vanguard the tanky leader, or Desolator the ranged sniper.

Also I realize I mix up my past and present tense when I write these. I really don’t mean too, but it’s such an ingrained bad habit I have trouble breaking. I think it’s because I writing the session report after the fact, so I tend to the past tense, but sometimes think of new information and use the present tense. Hopefully it doesn’t throw you off too much.

Background
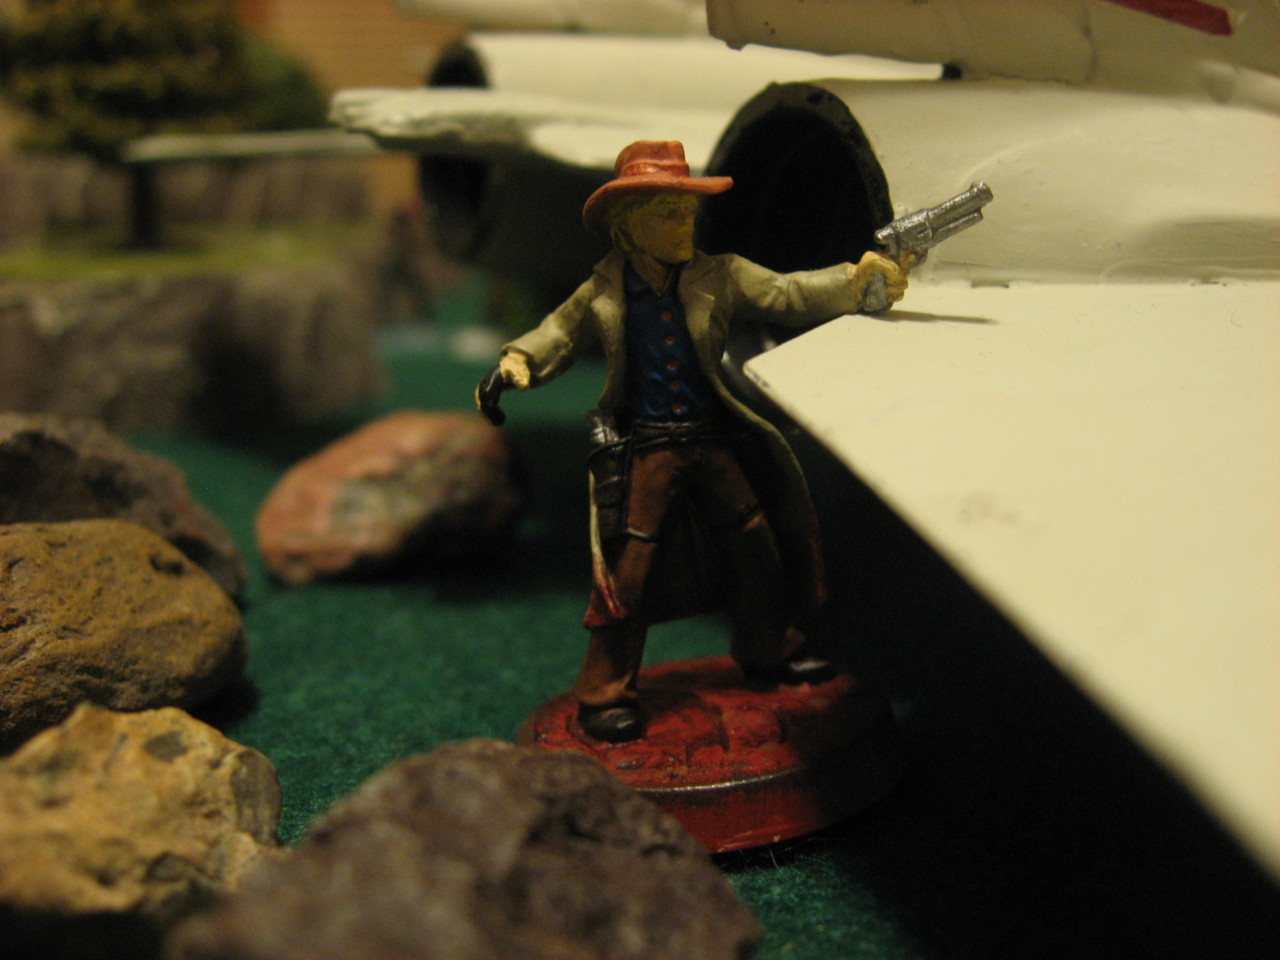
Rumors have started of a strange new allegiance in the wasteland: Ascendants. Some sort of sky people…old tech scientists drifting down from on high…power and concepts beyond Dusters and even Neotechnoist reasoning. Word of an artifact spreads to eager ears in the noble, wealthy circles in the city of Hope. Some kind of aerial war machine was found. Records were searched in secret, and a highly specialized and trained commando squad was dispatched to recover a “black box” from this old tech airplane.

dc-operation-black-box-0023

But the commando squad was not quite as airtight and flawless as their Neotechnoist hirelings would like. One of the members, fearing the corrupting influence of old tech, went rogue and started trying to raise a posse to fight off the commando squad, destroy the black box, and stop any war machine from being recreated.

Setup
dc-operation-black-box-0019
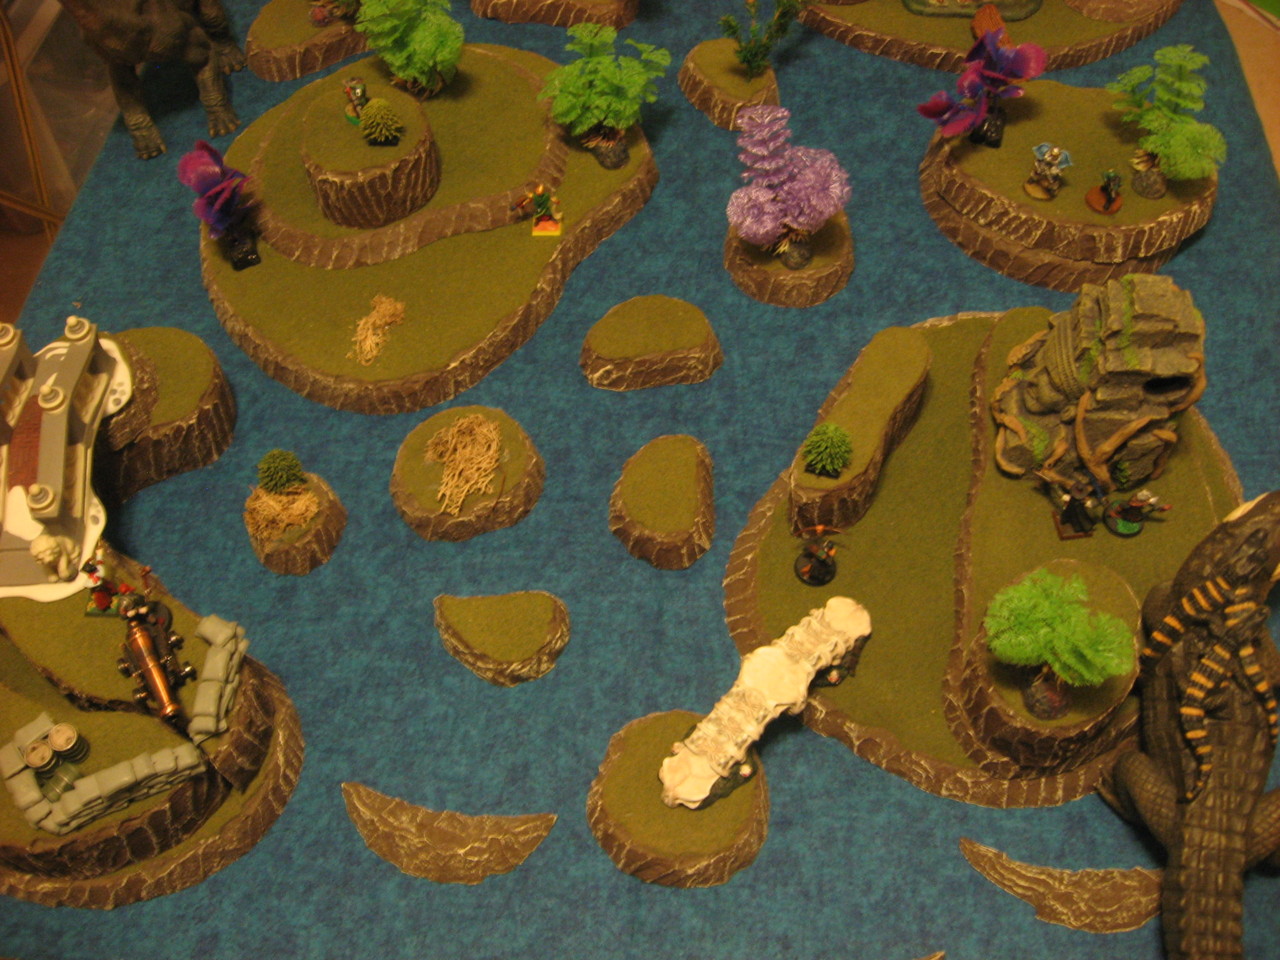
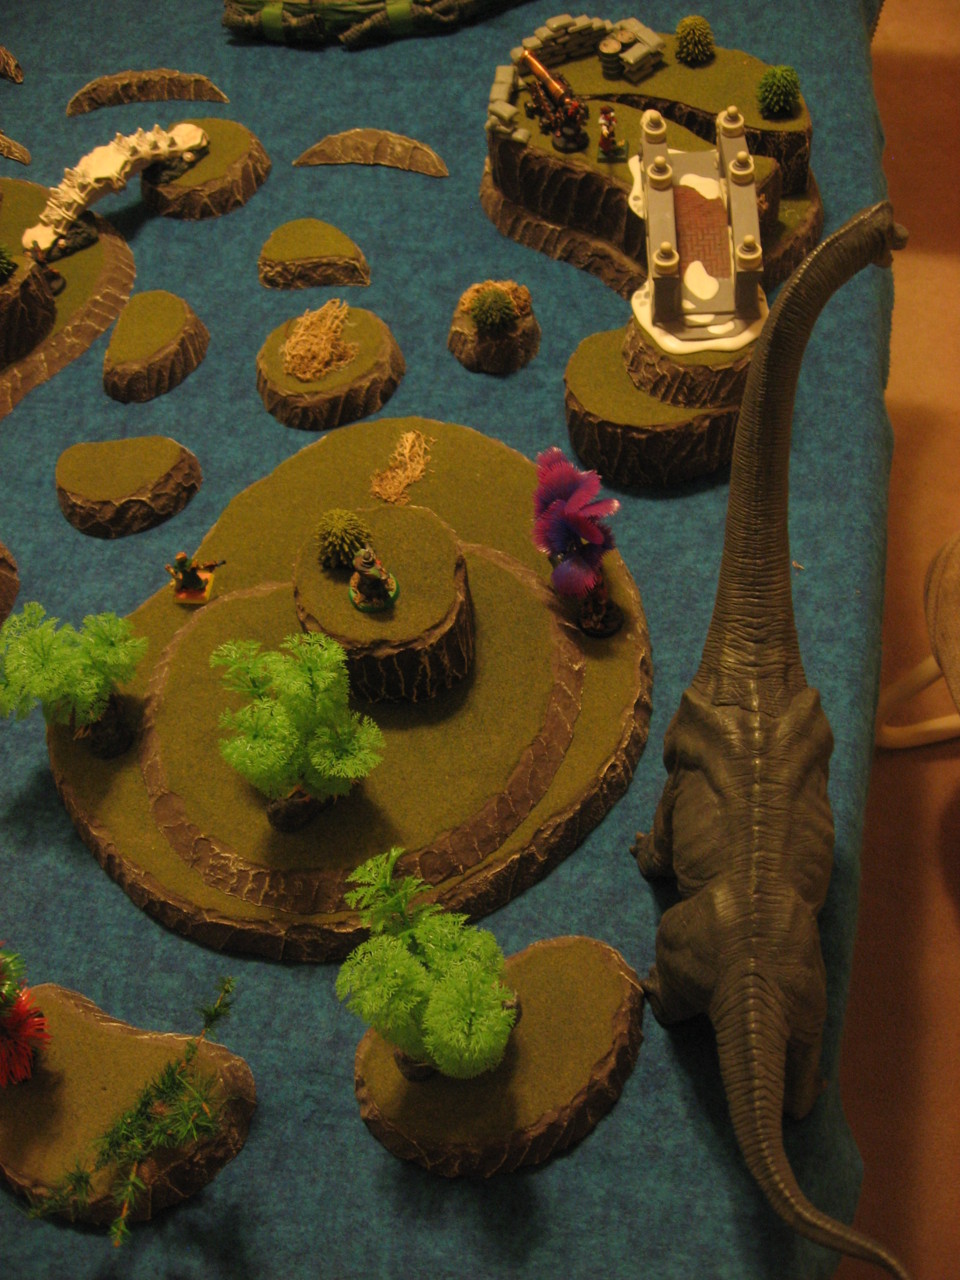
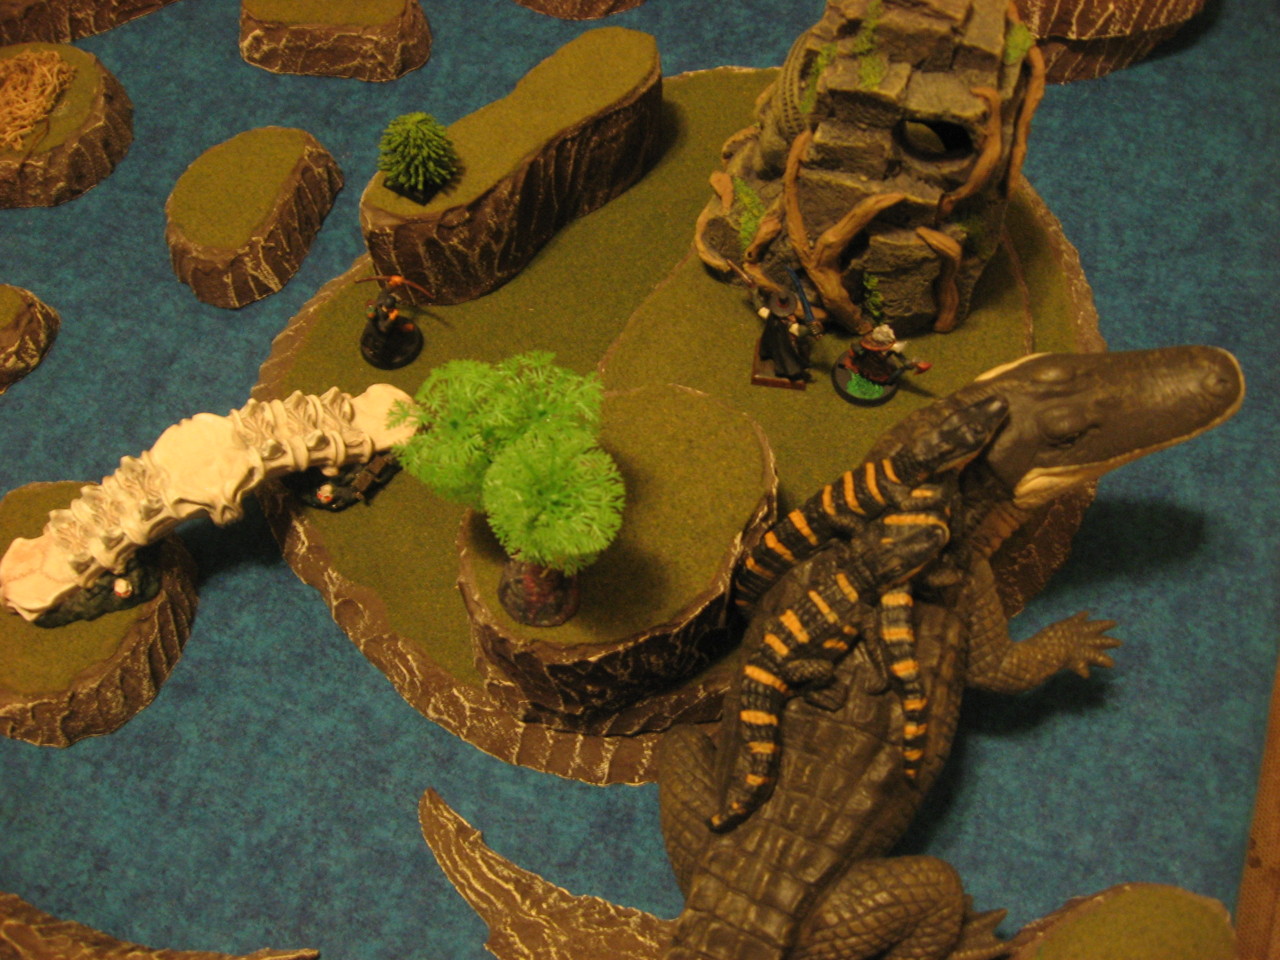
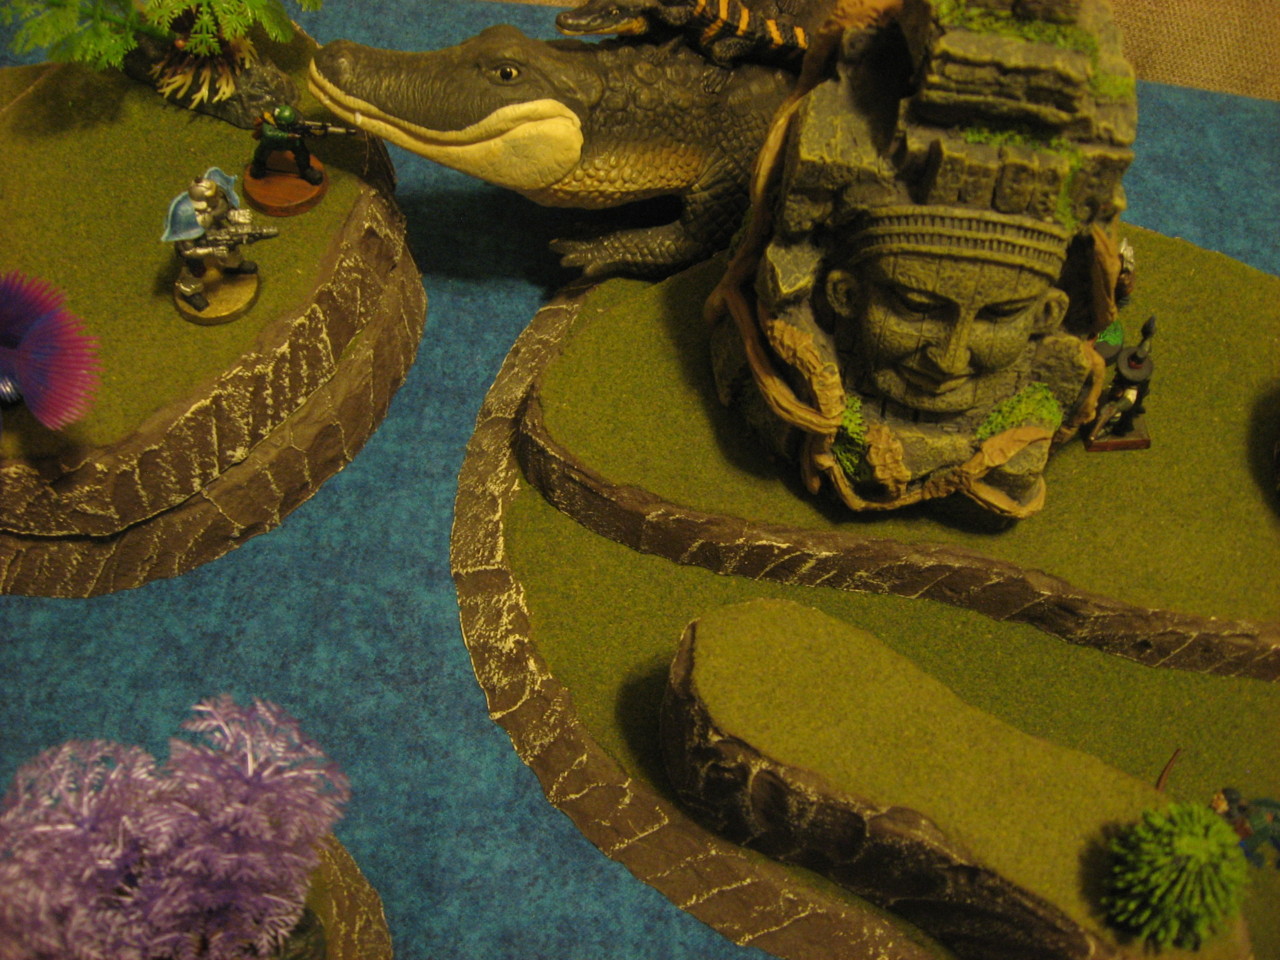
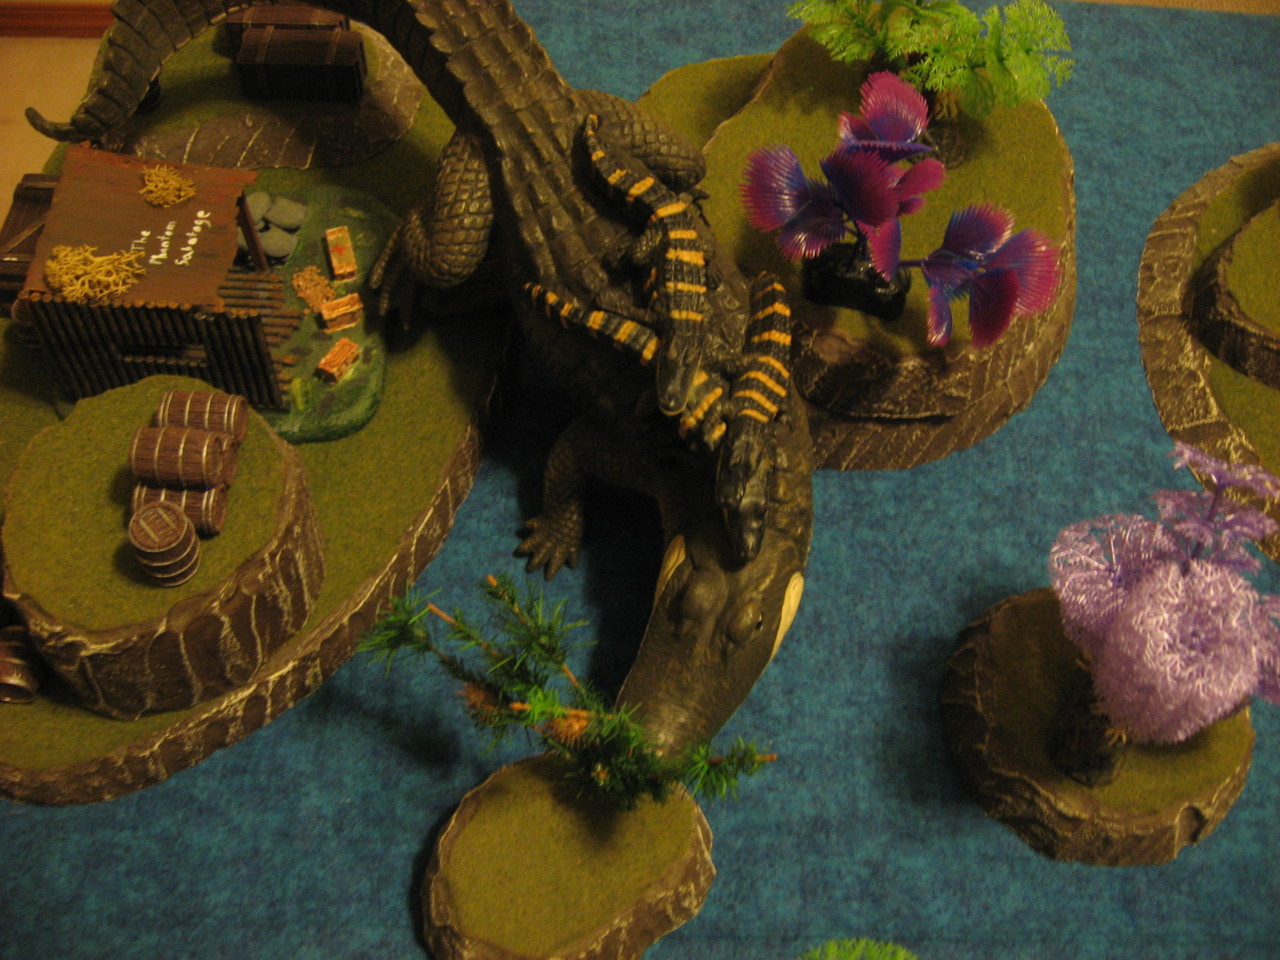
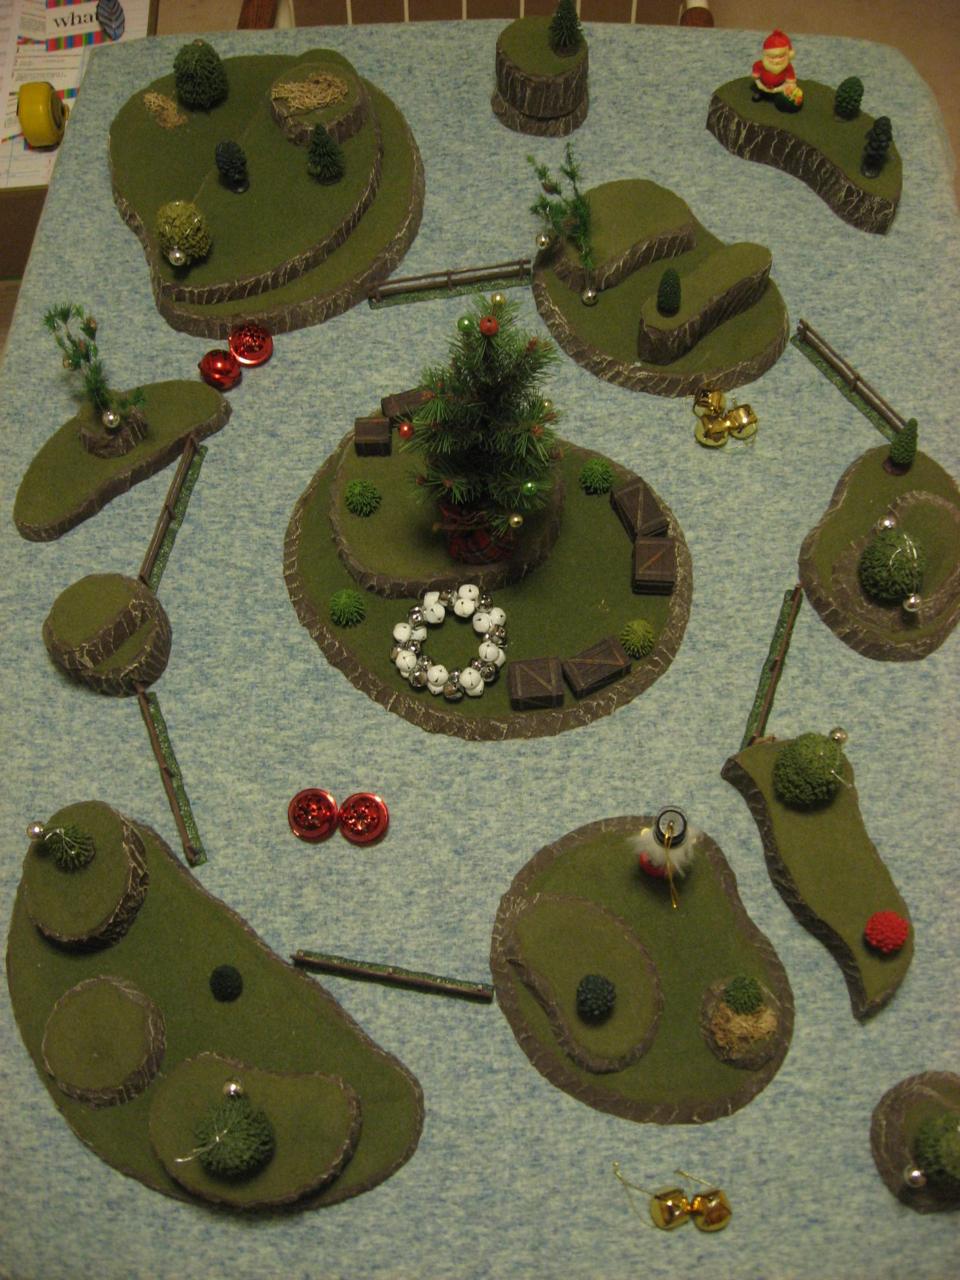
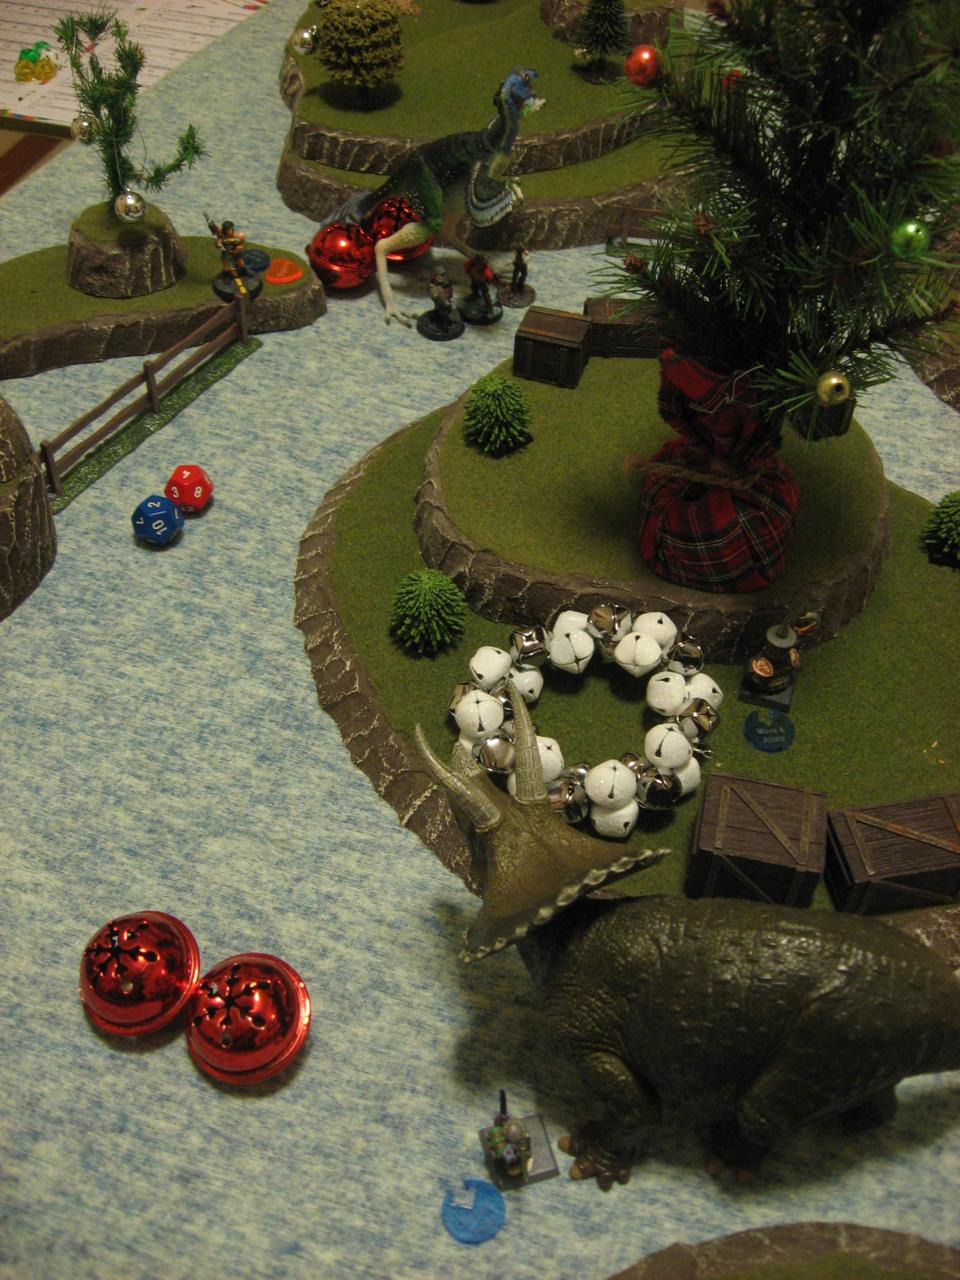
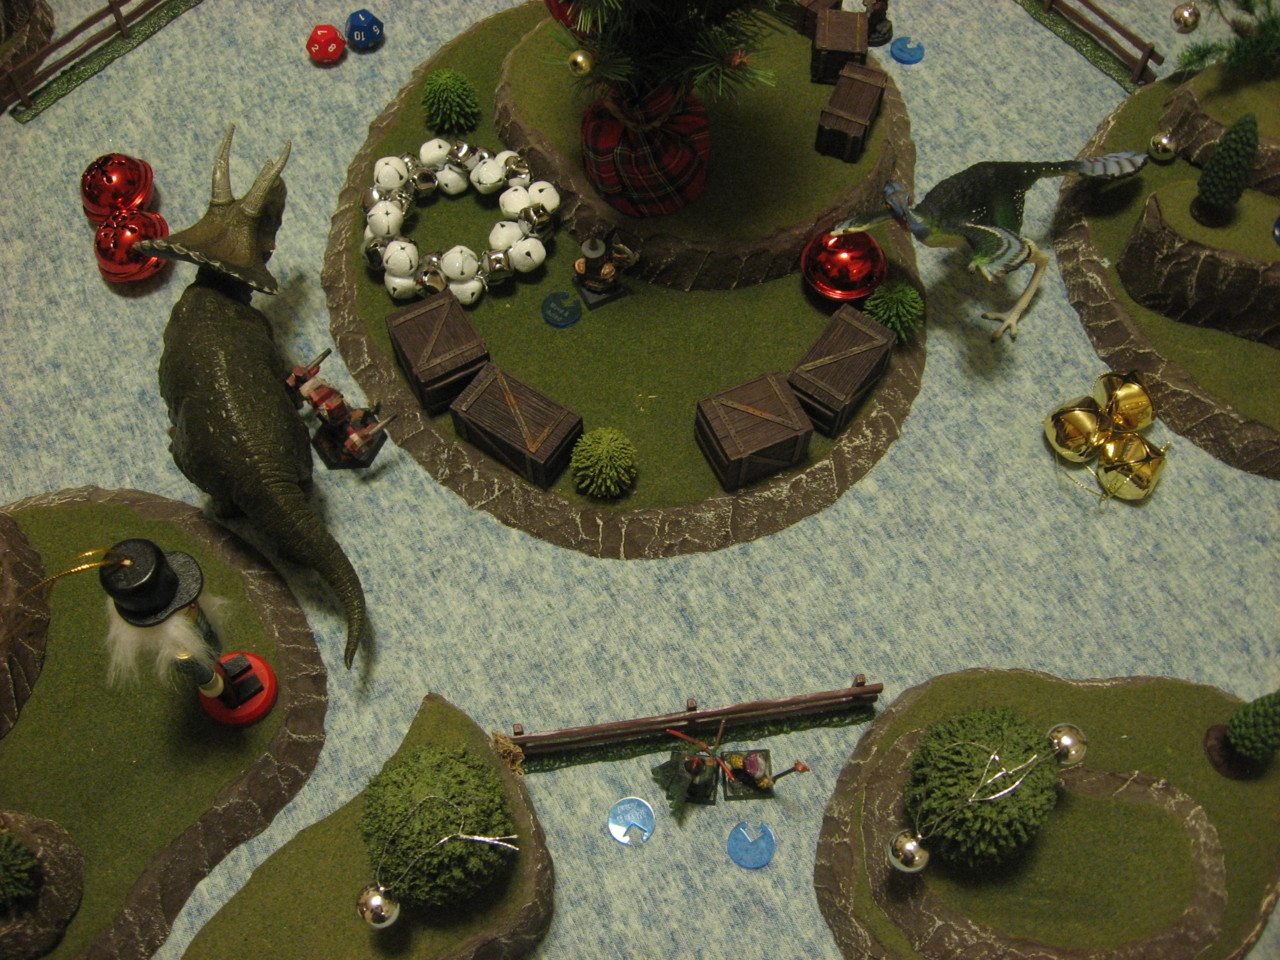
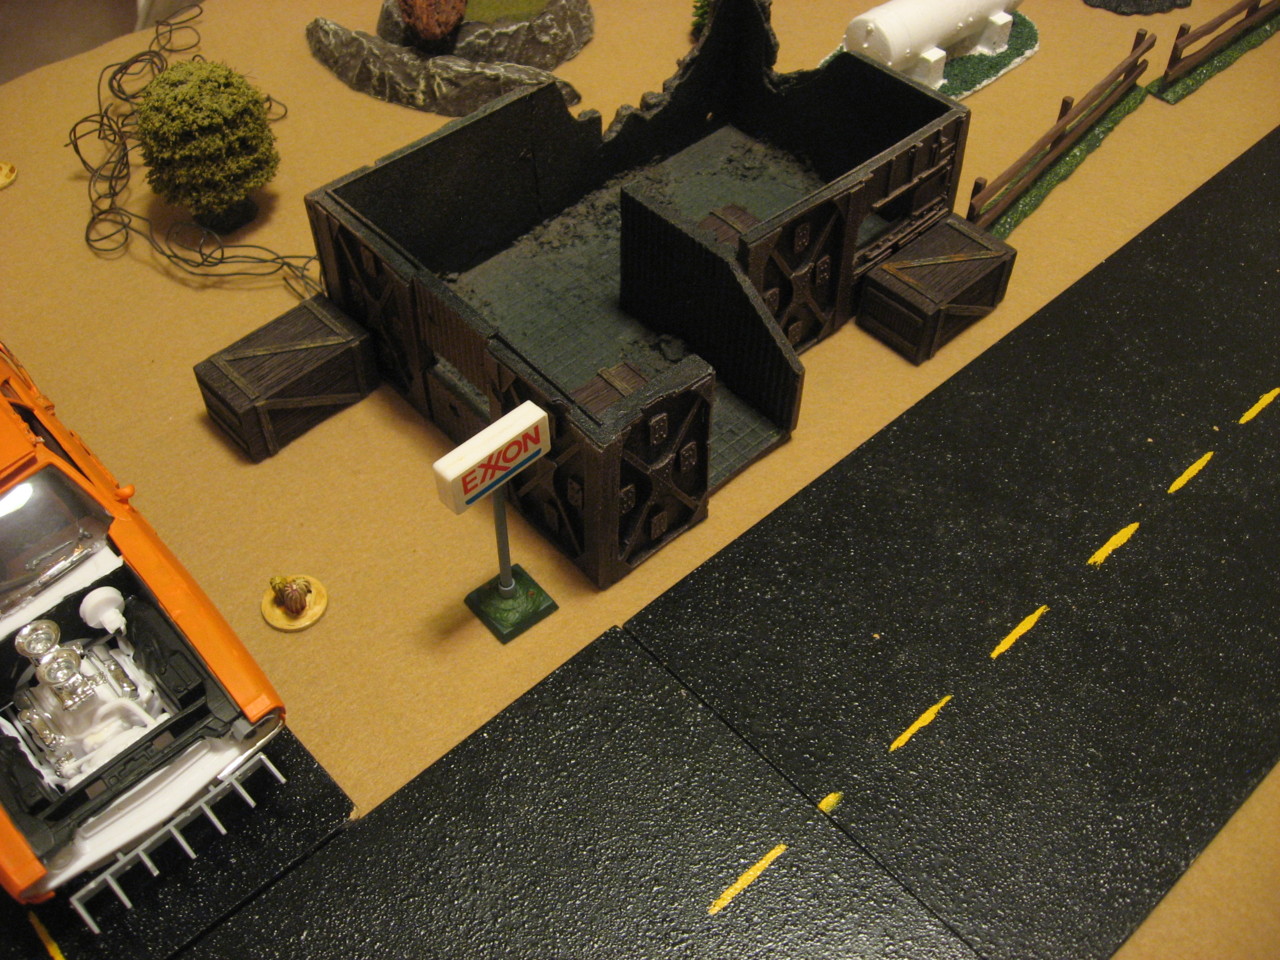
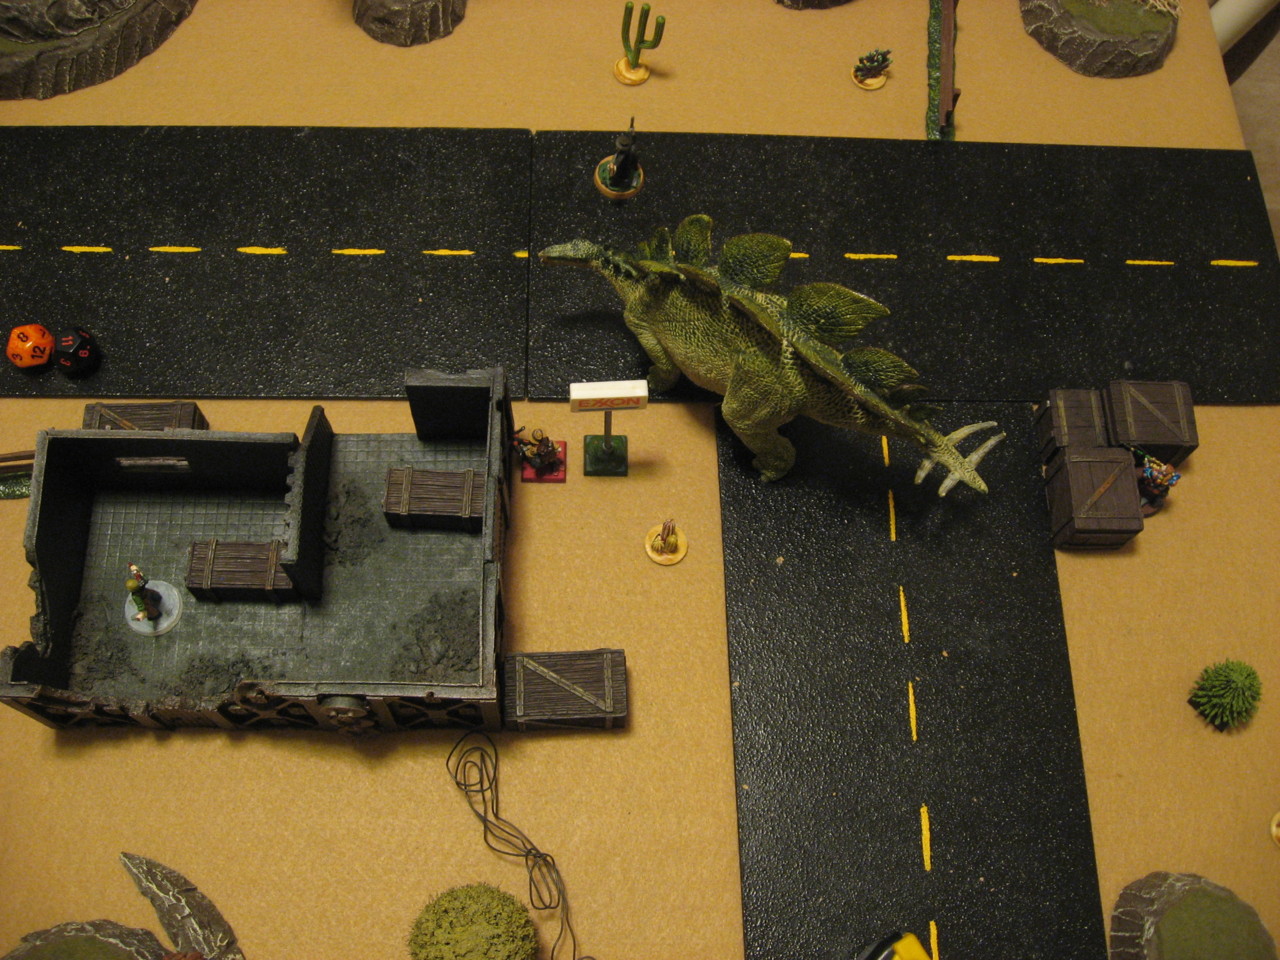
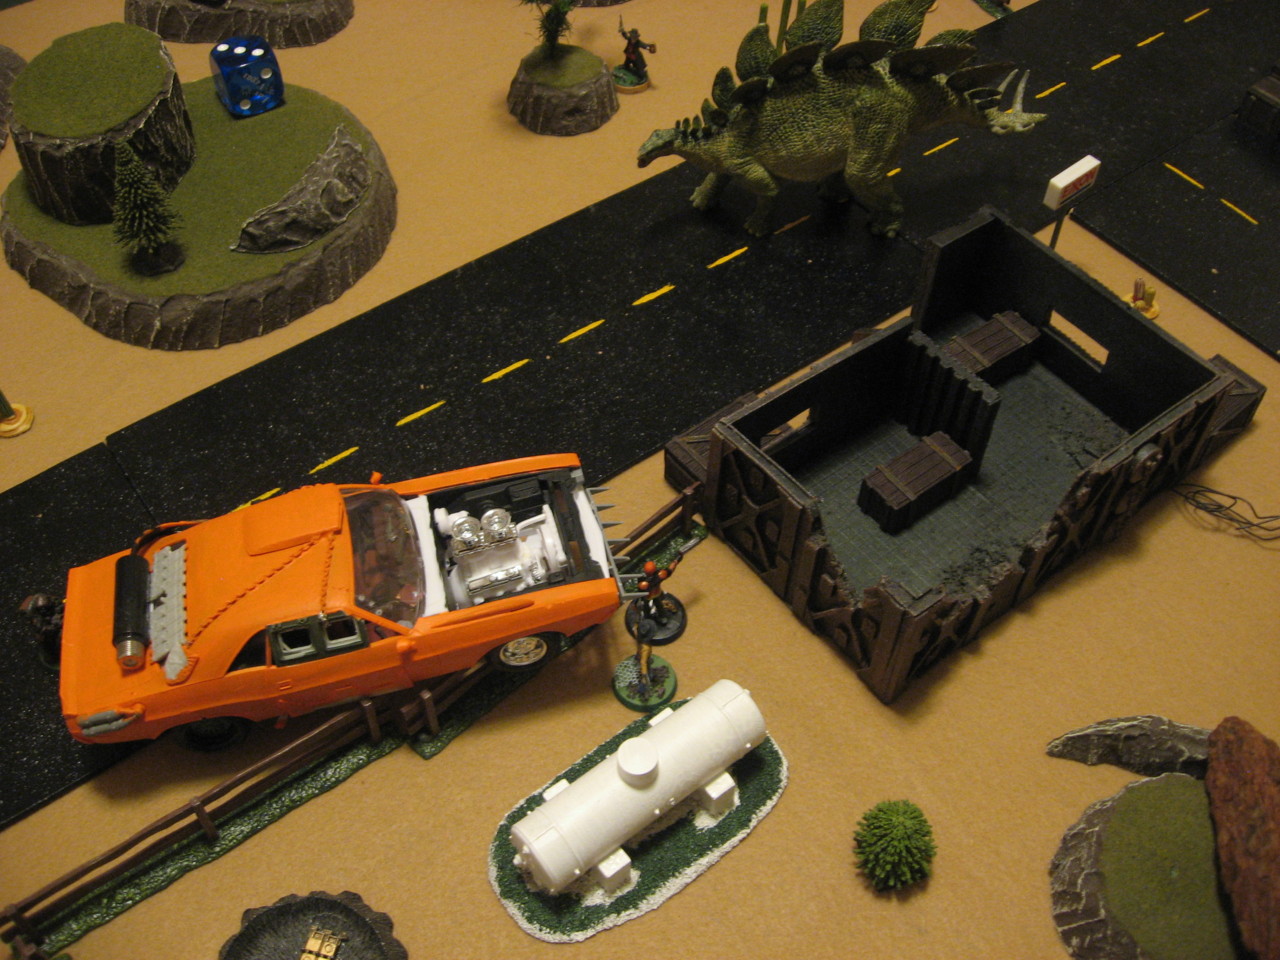
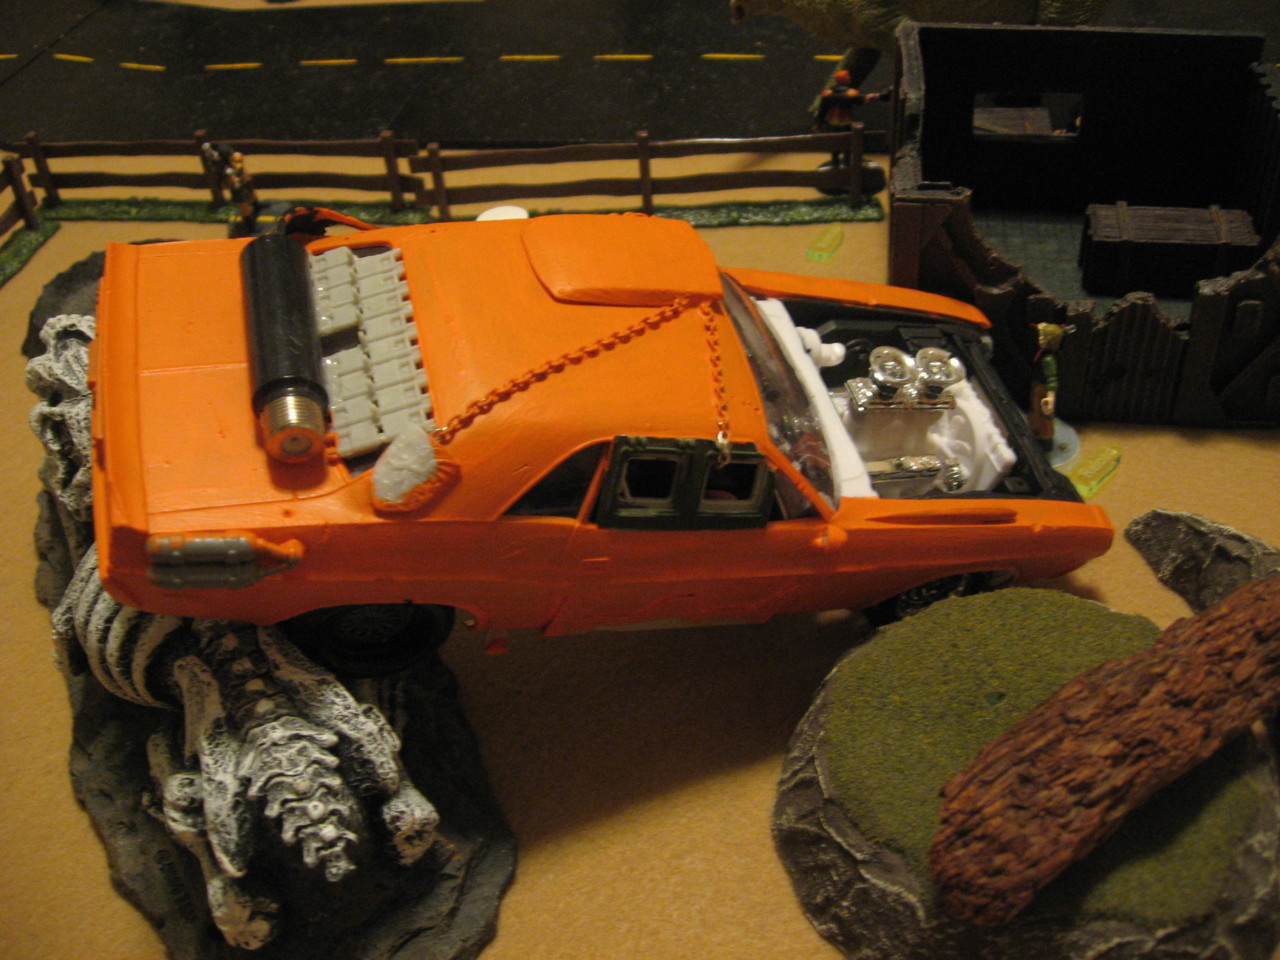
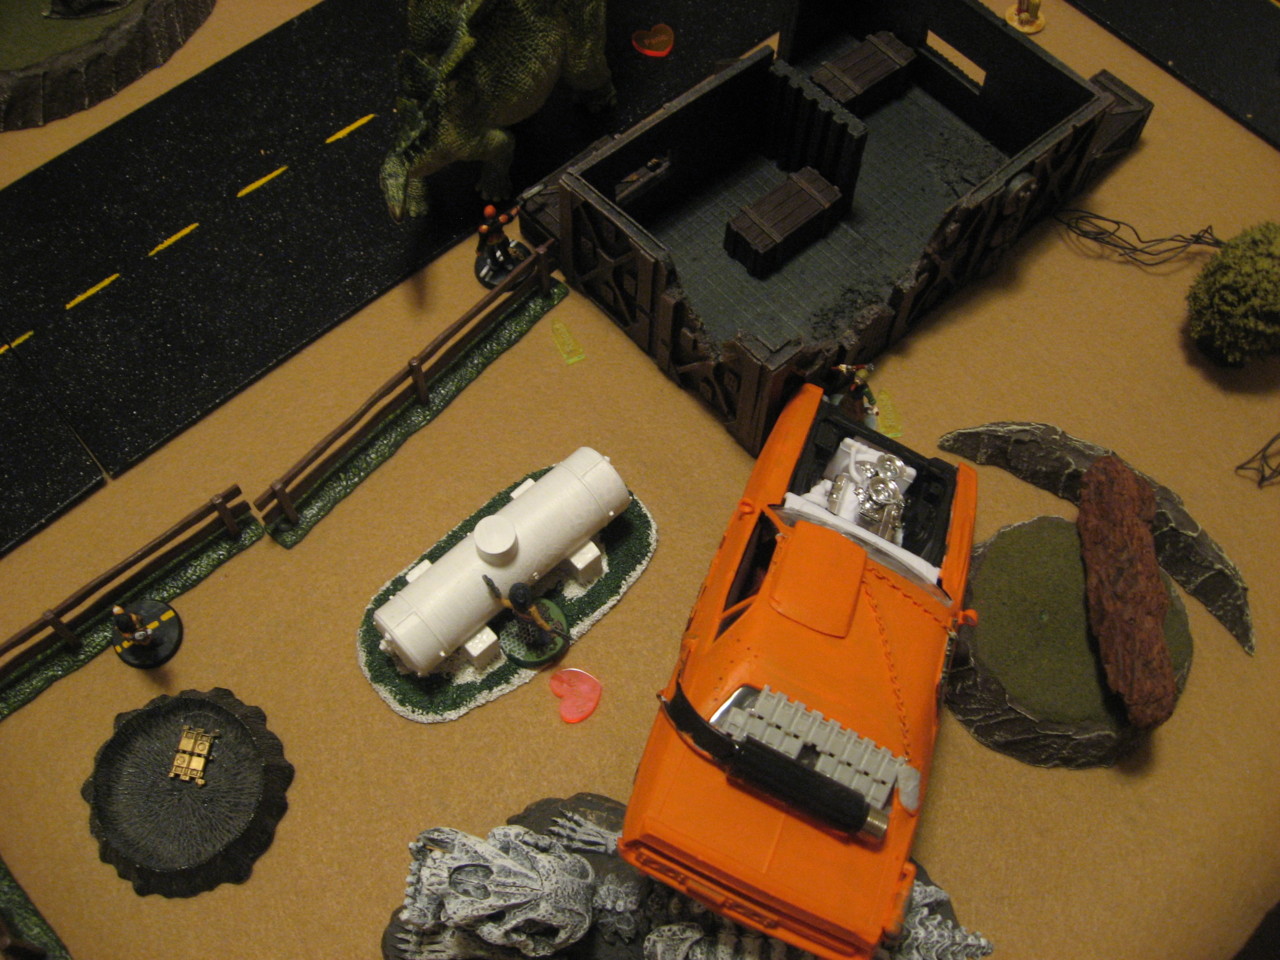
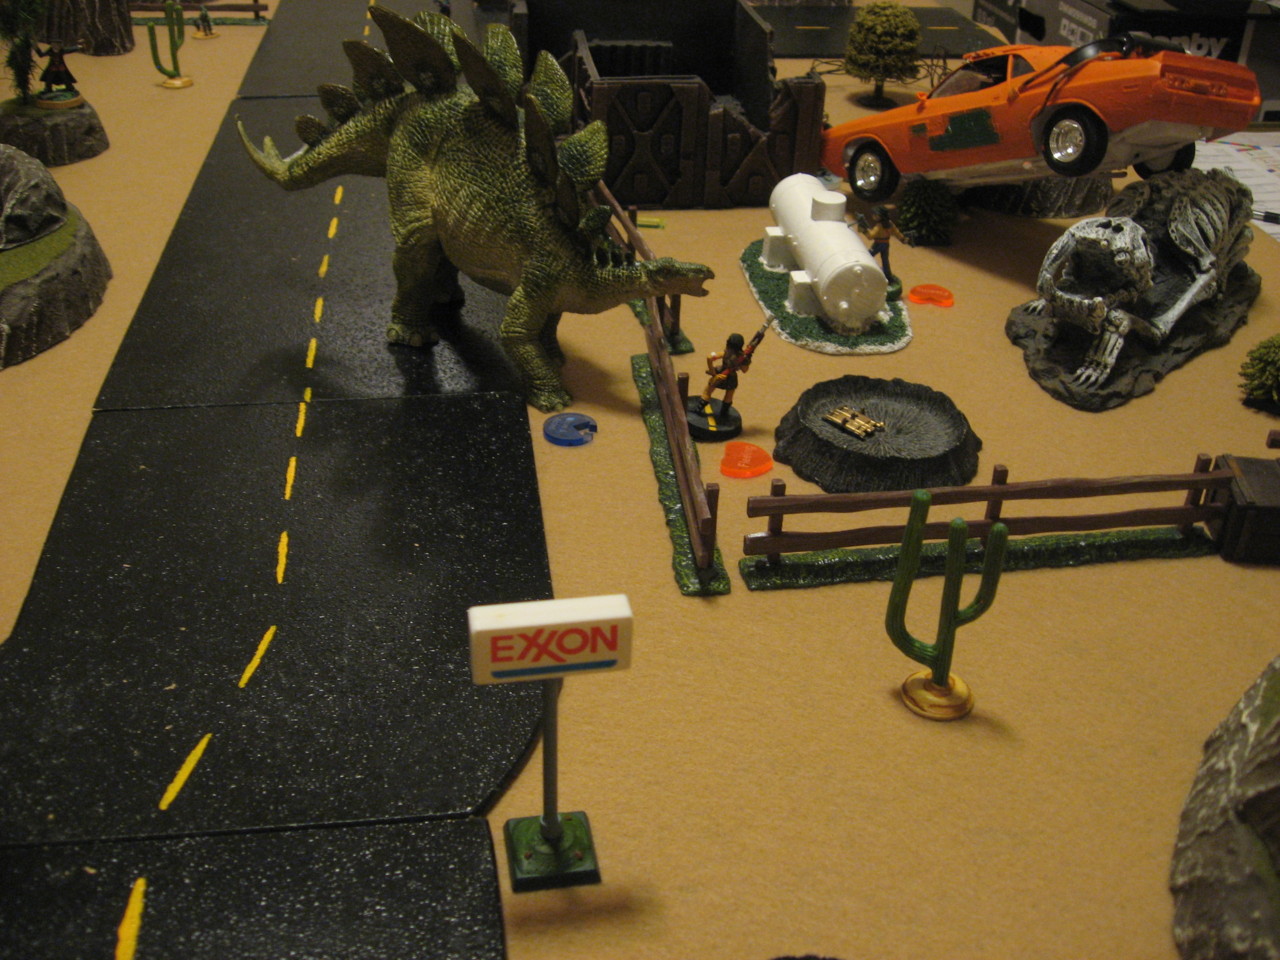
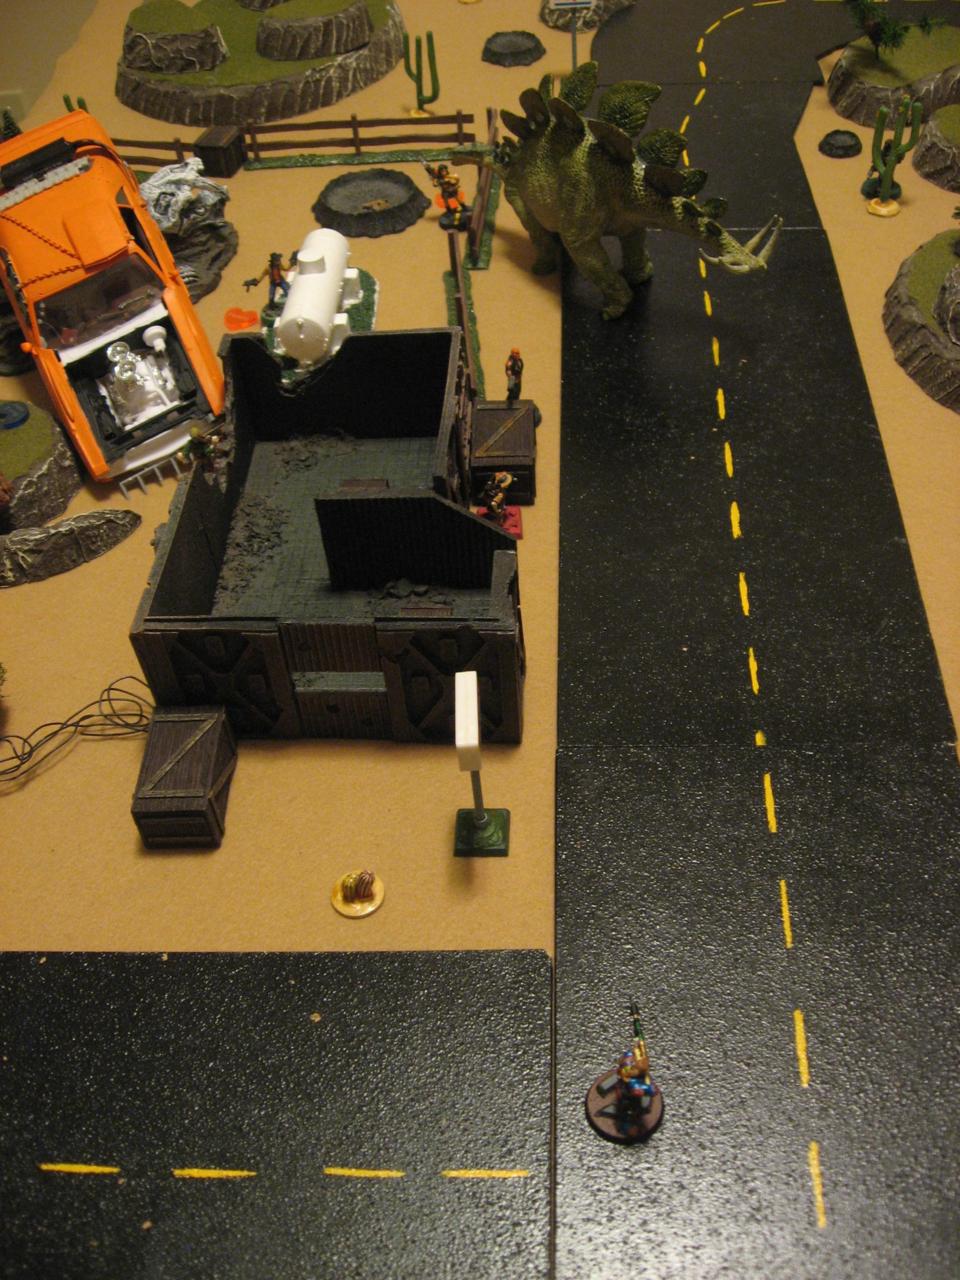
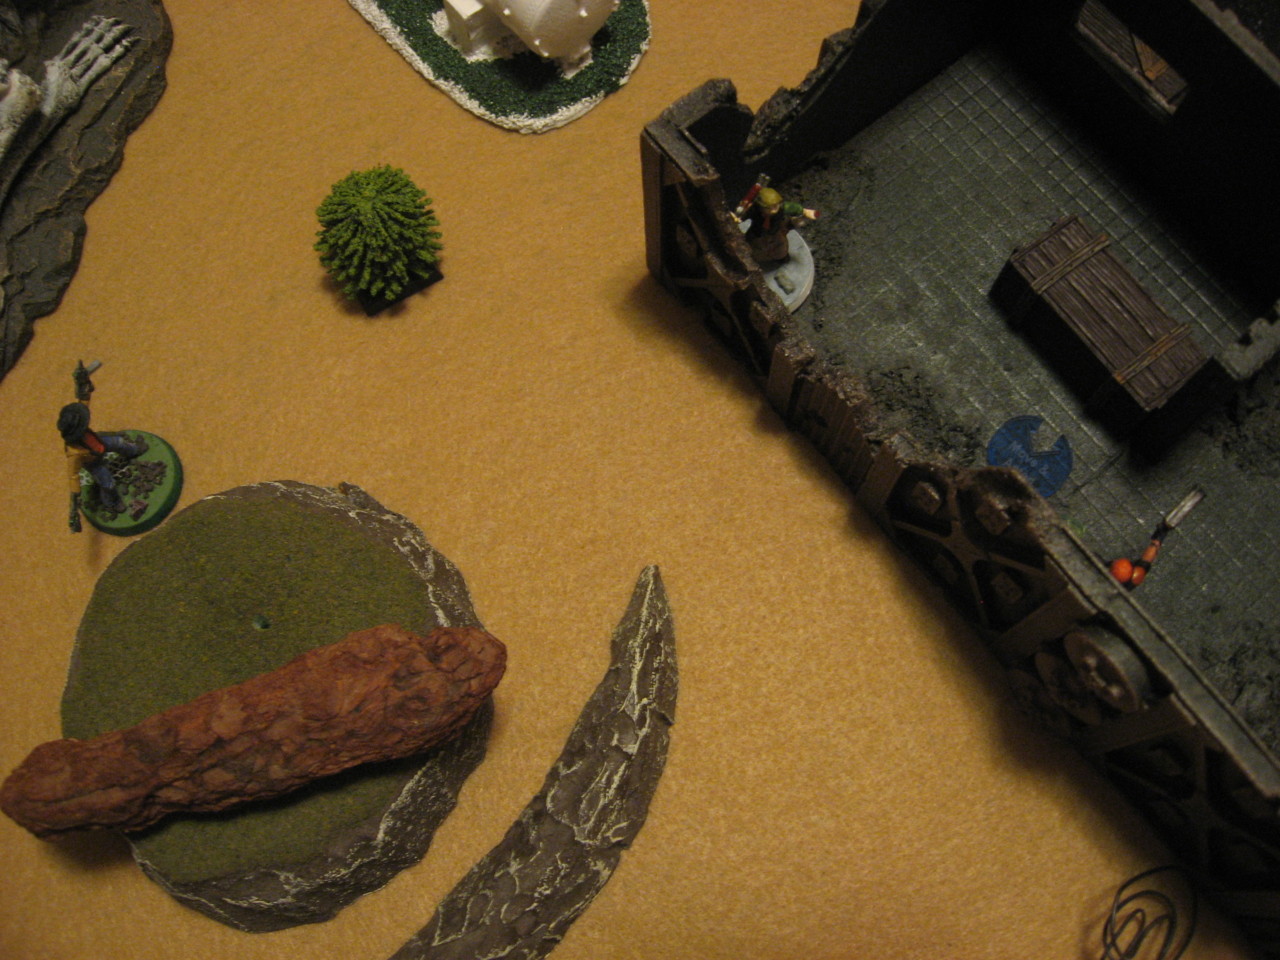
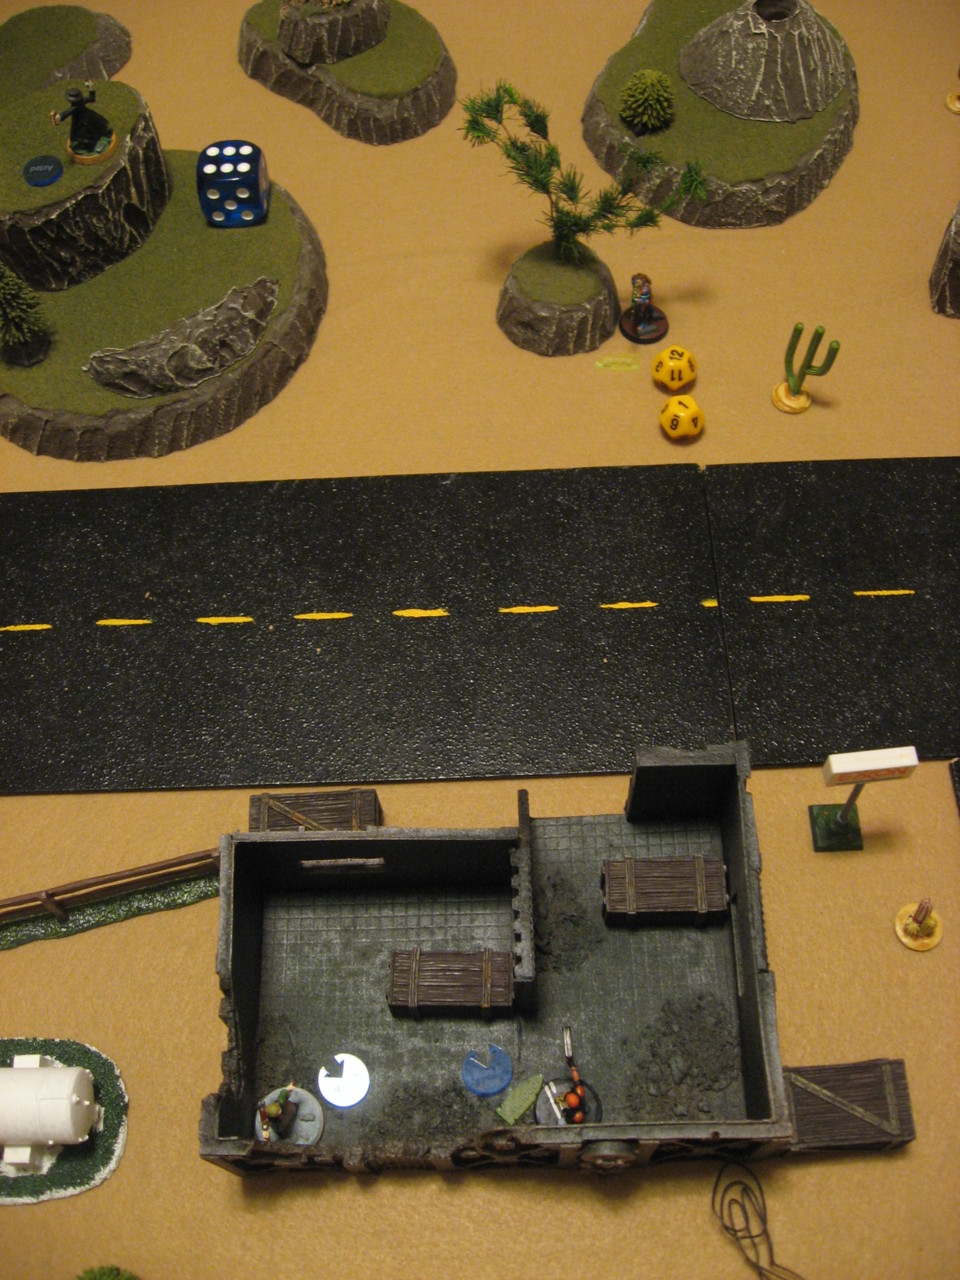
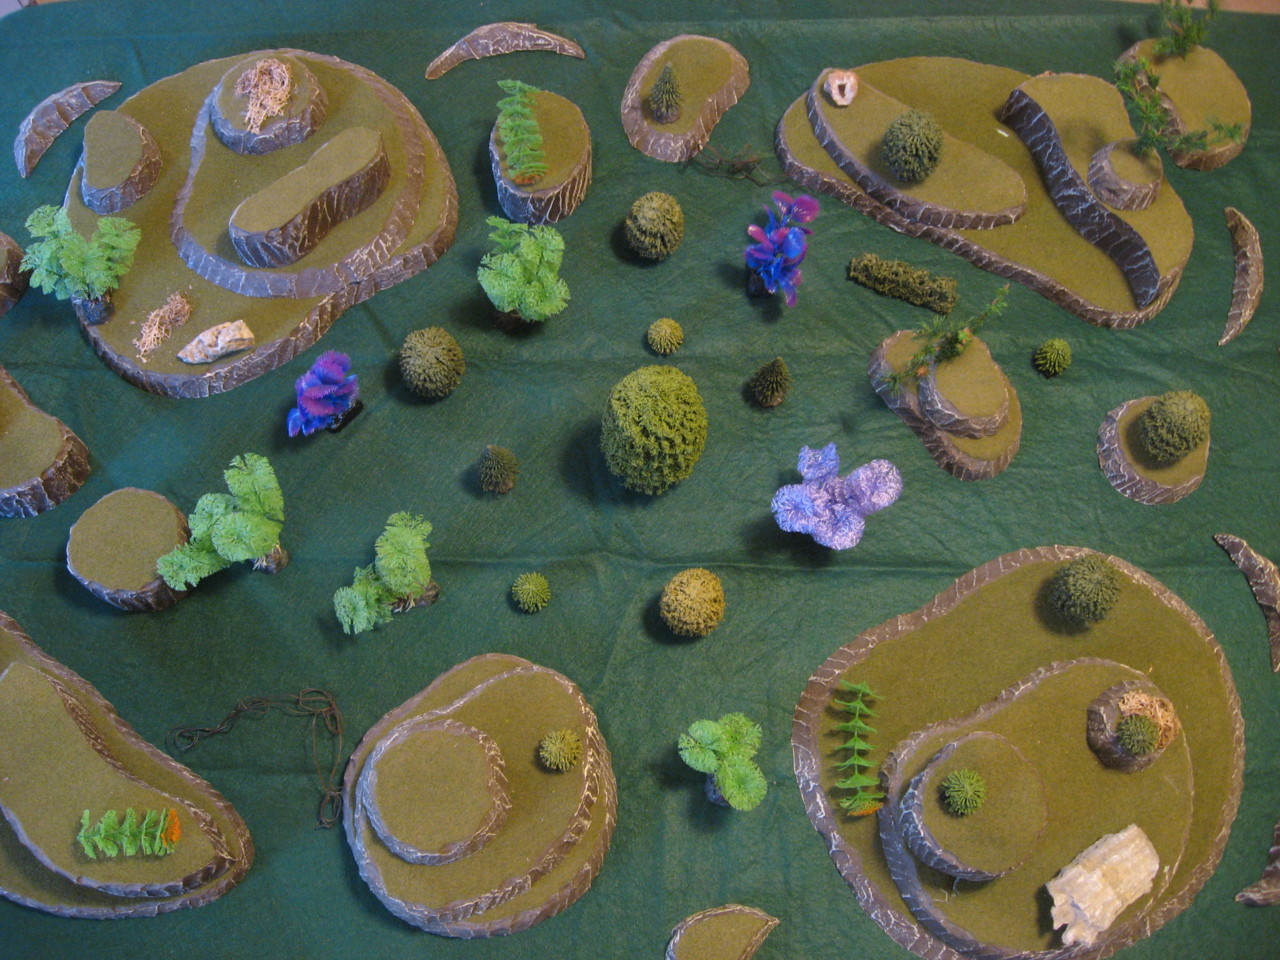
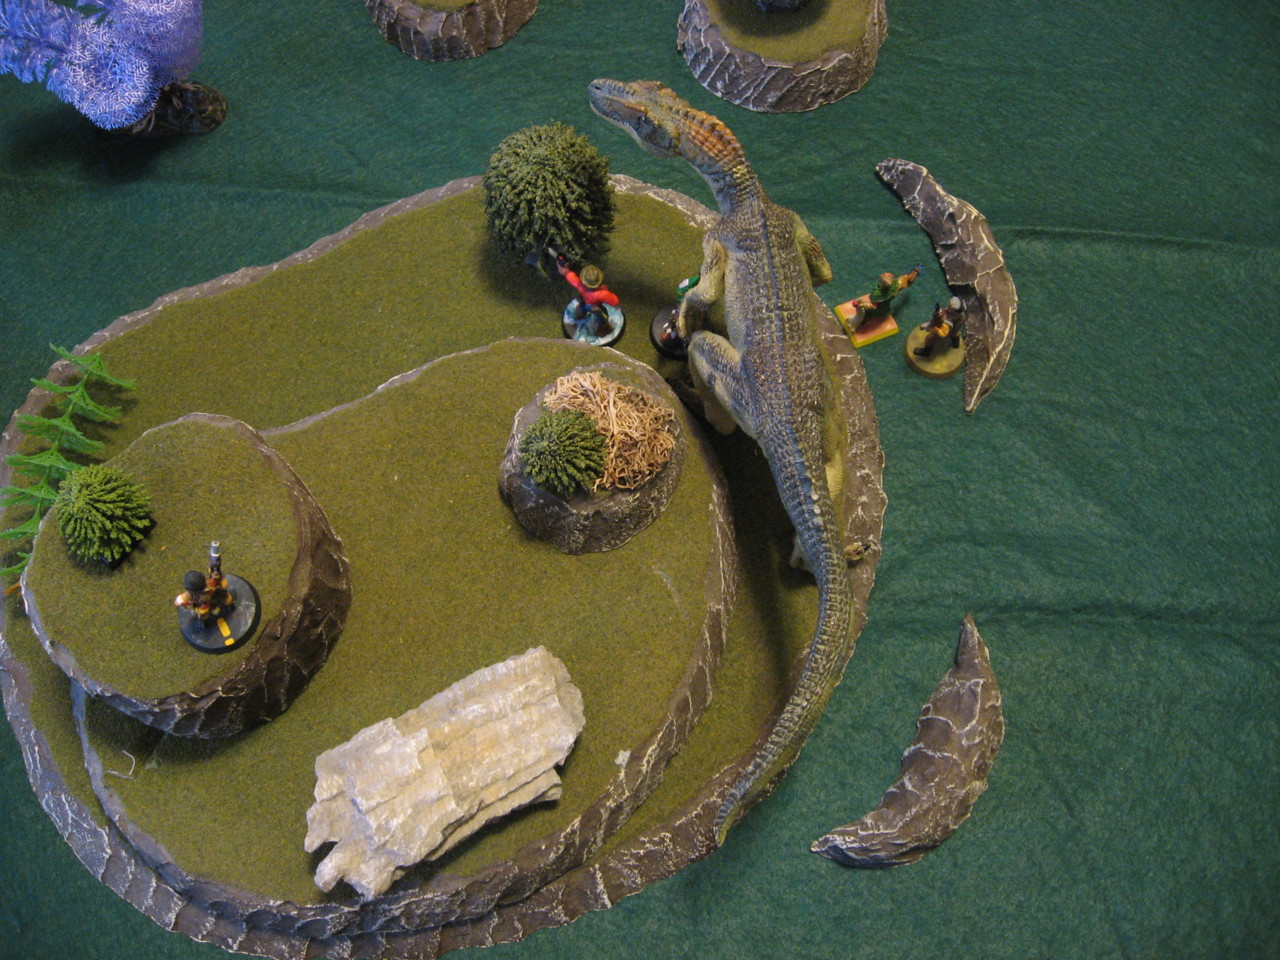
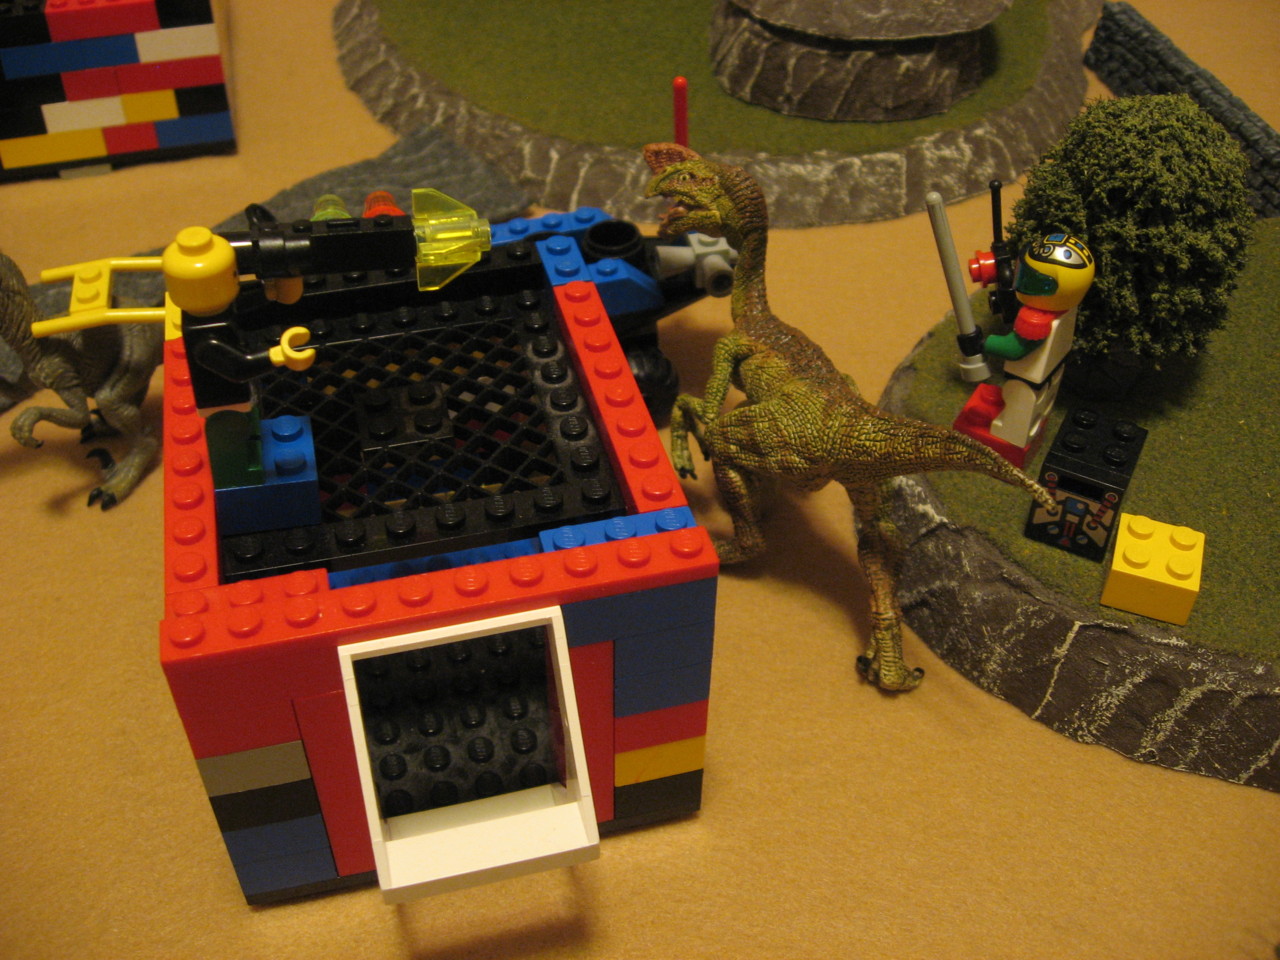
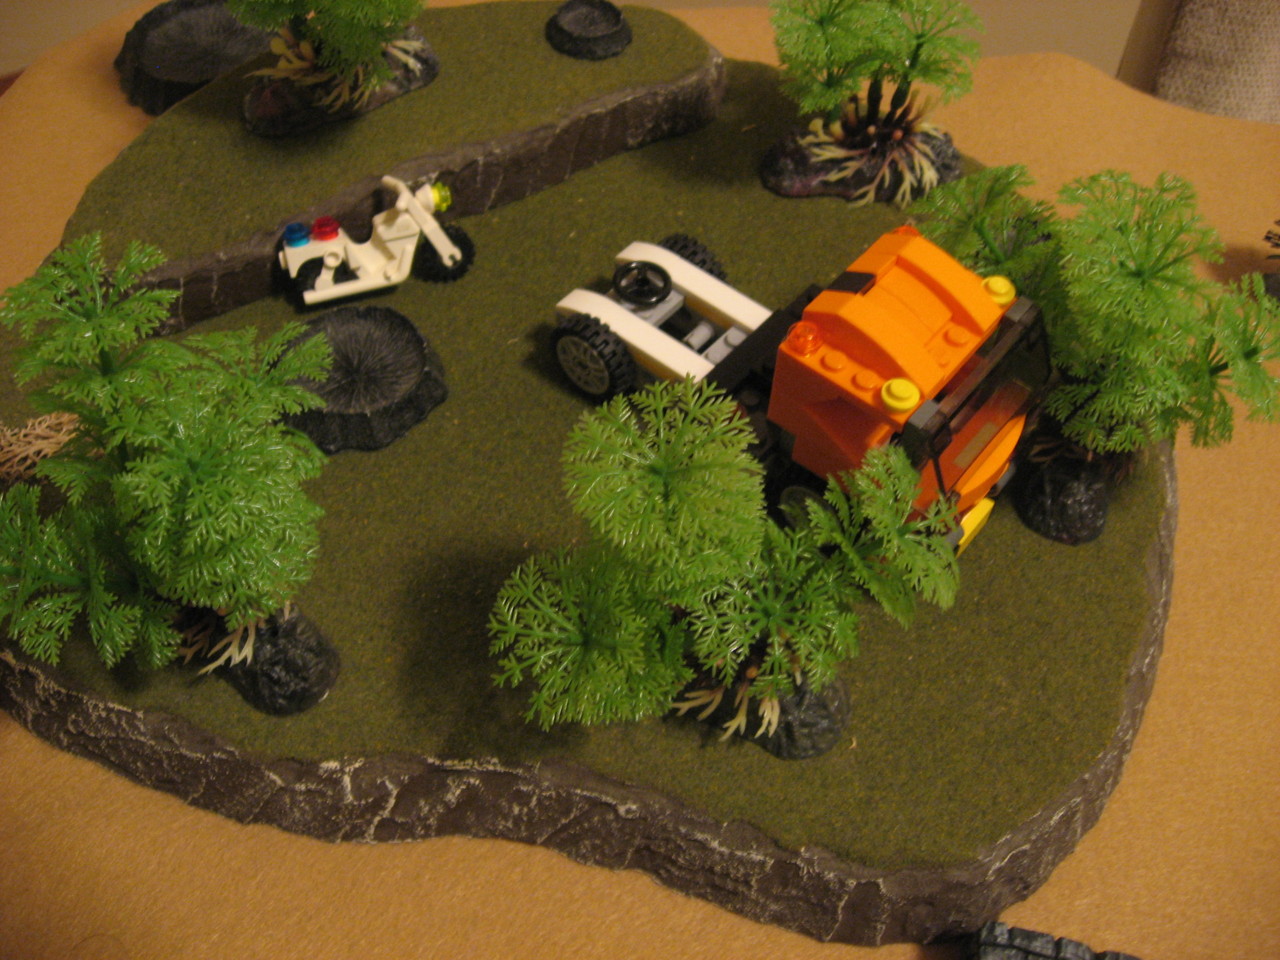
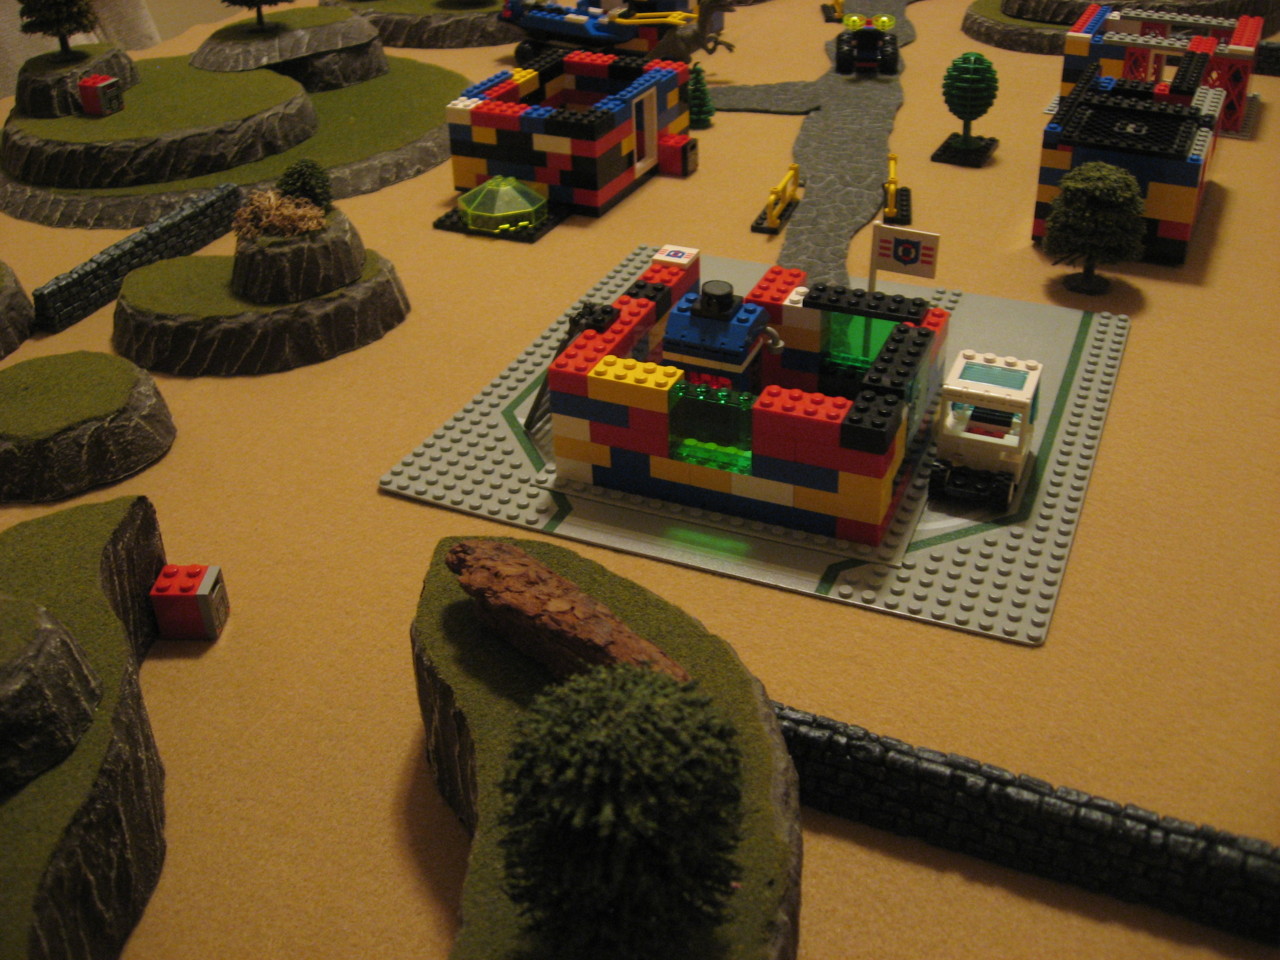
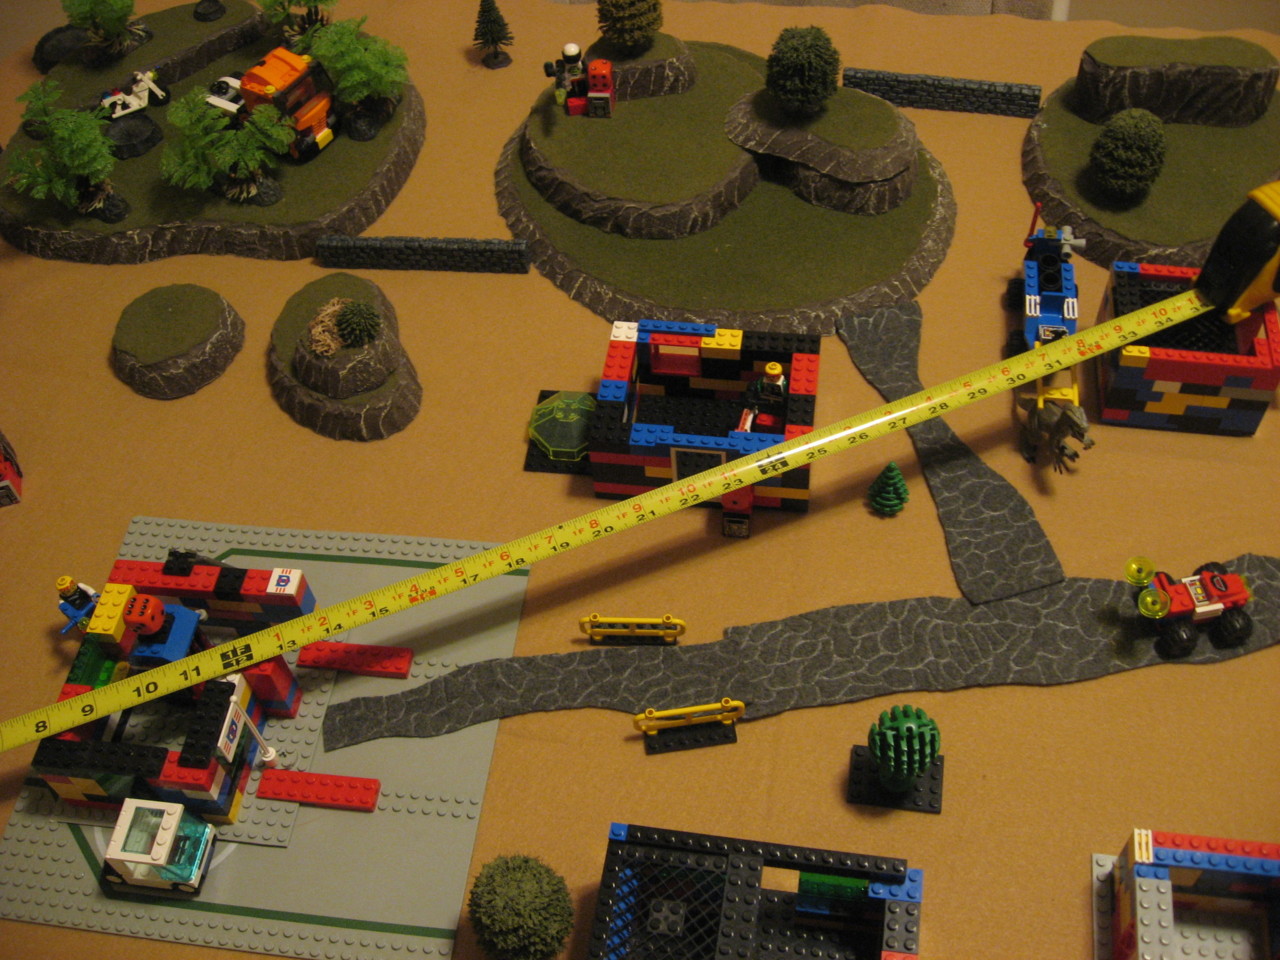
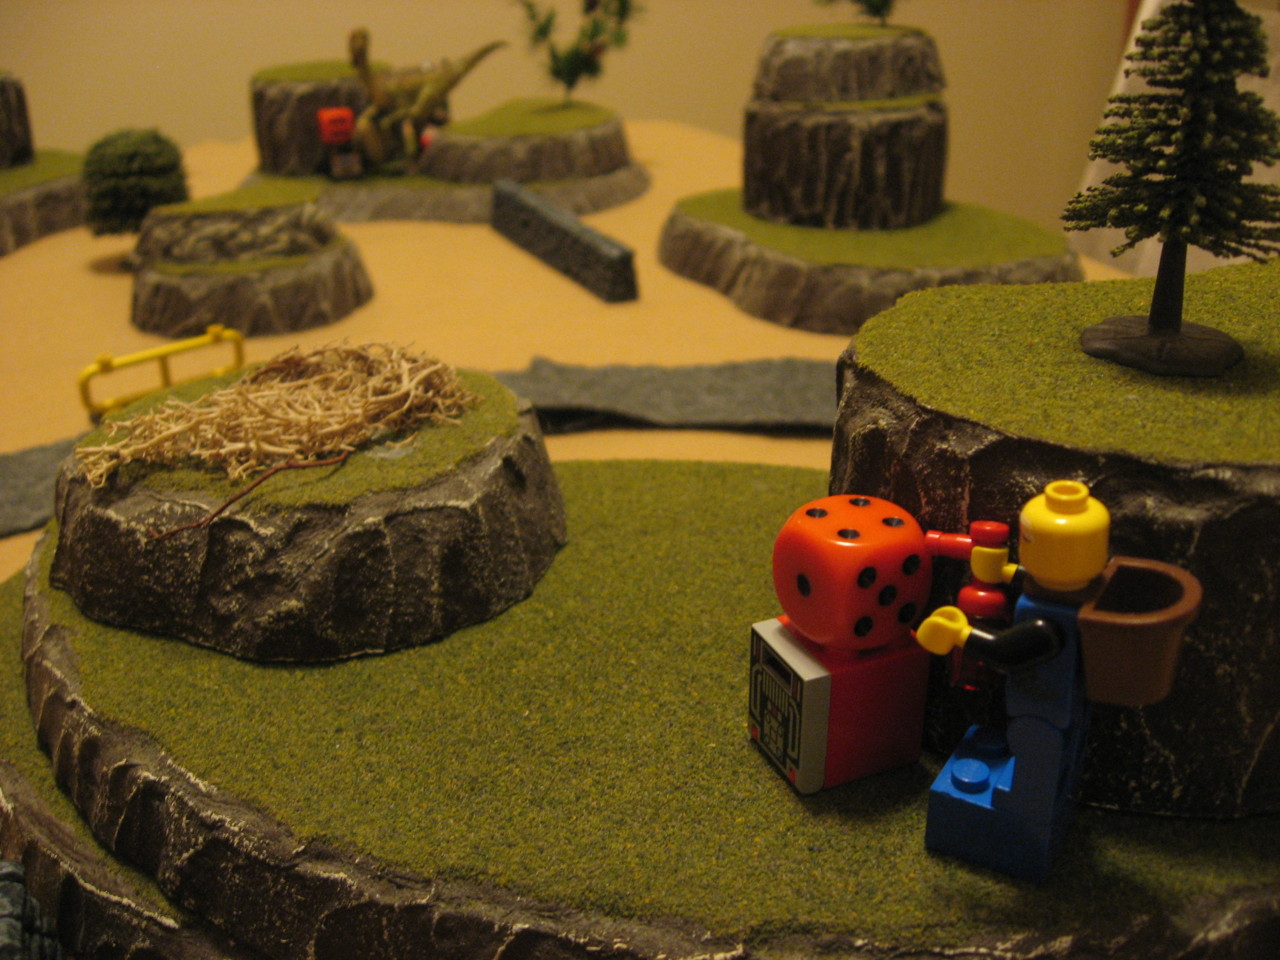
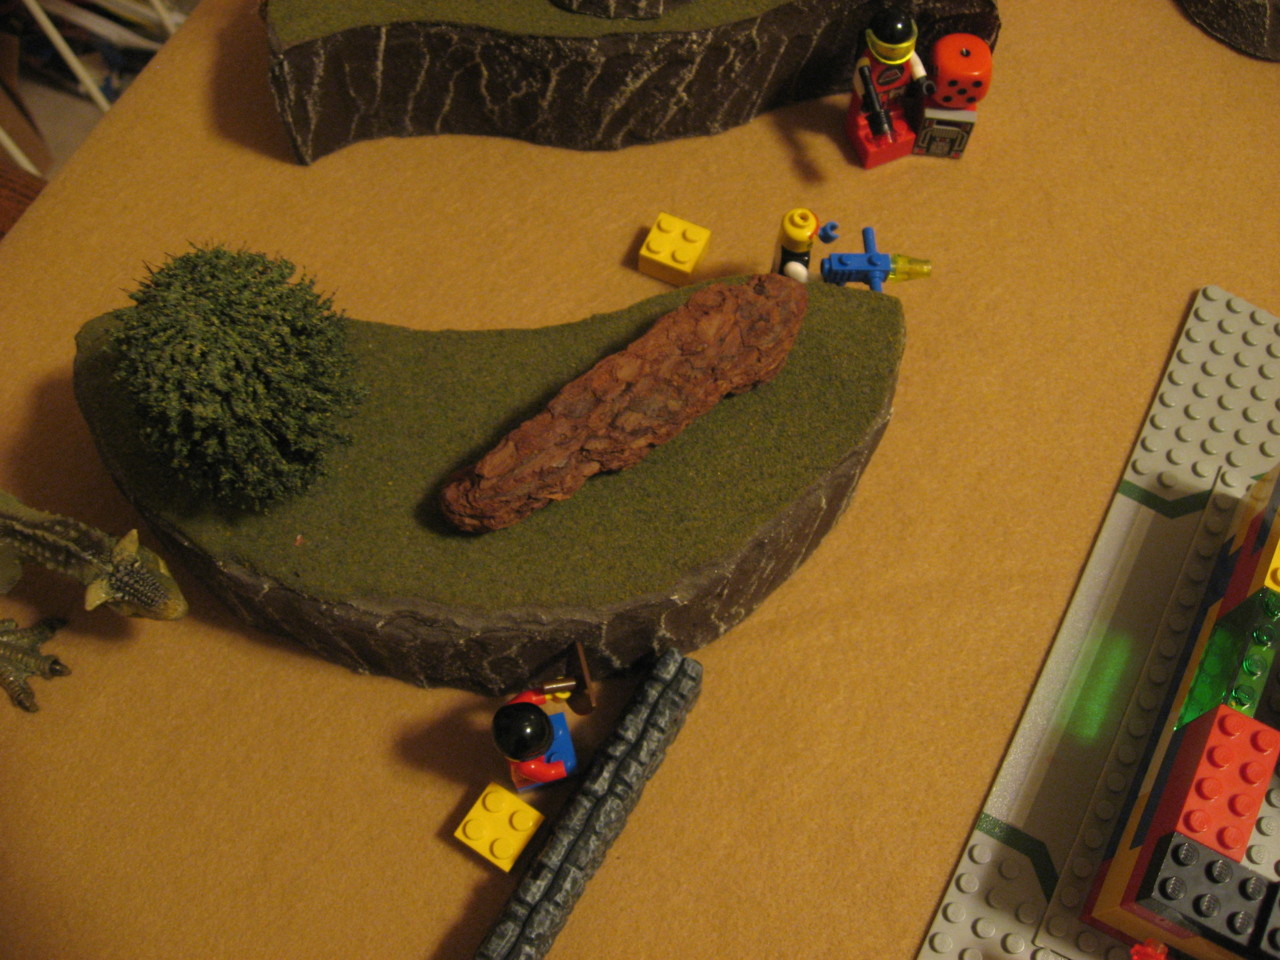
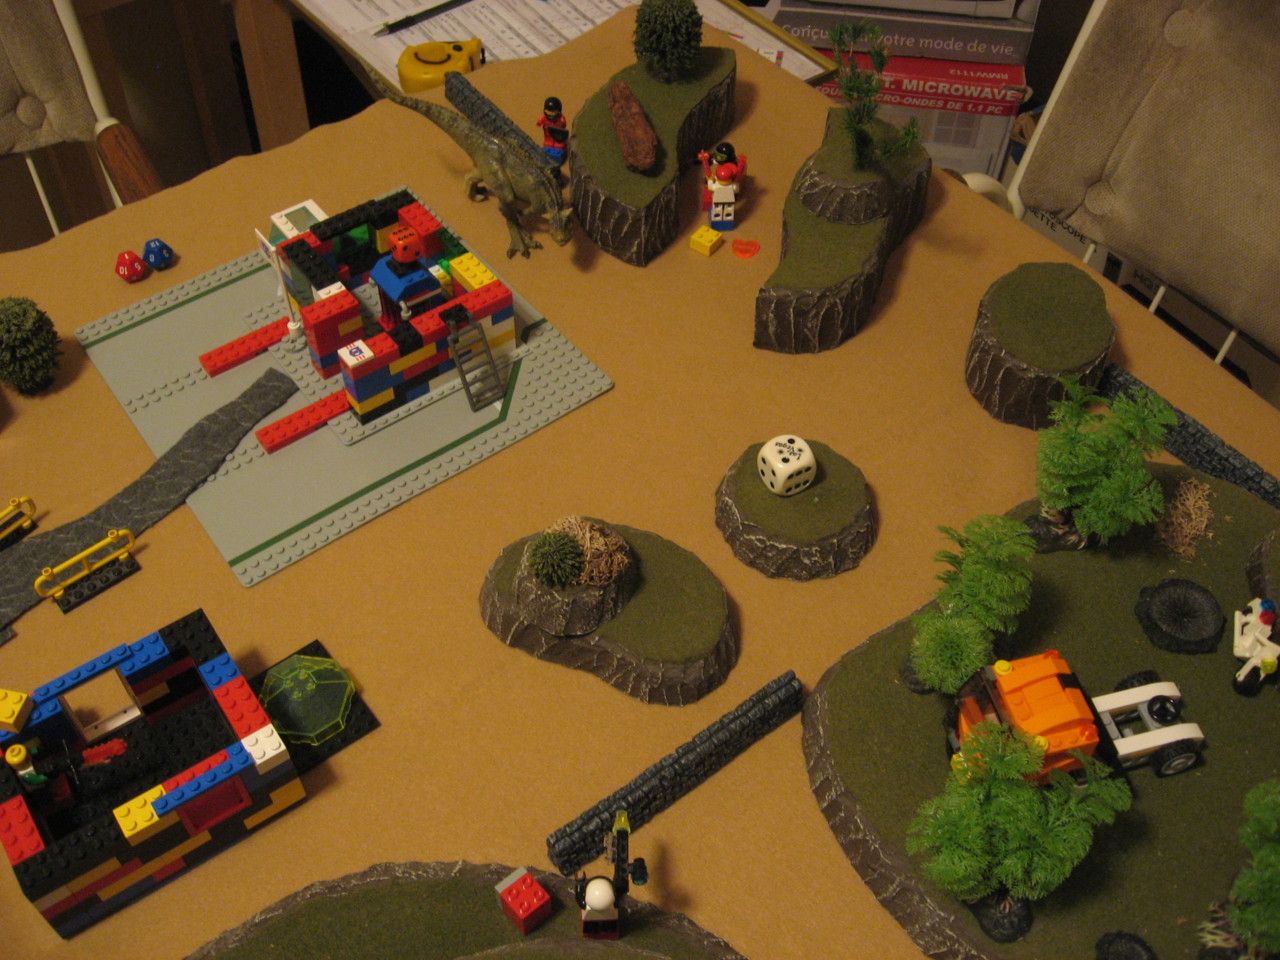
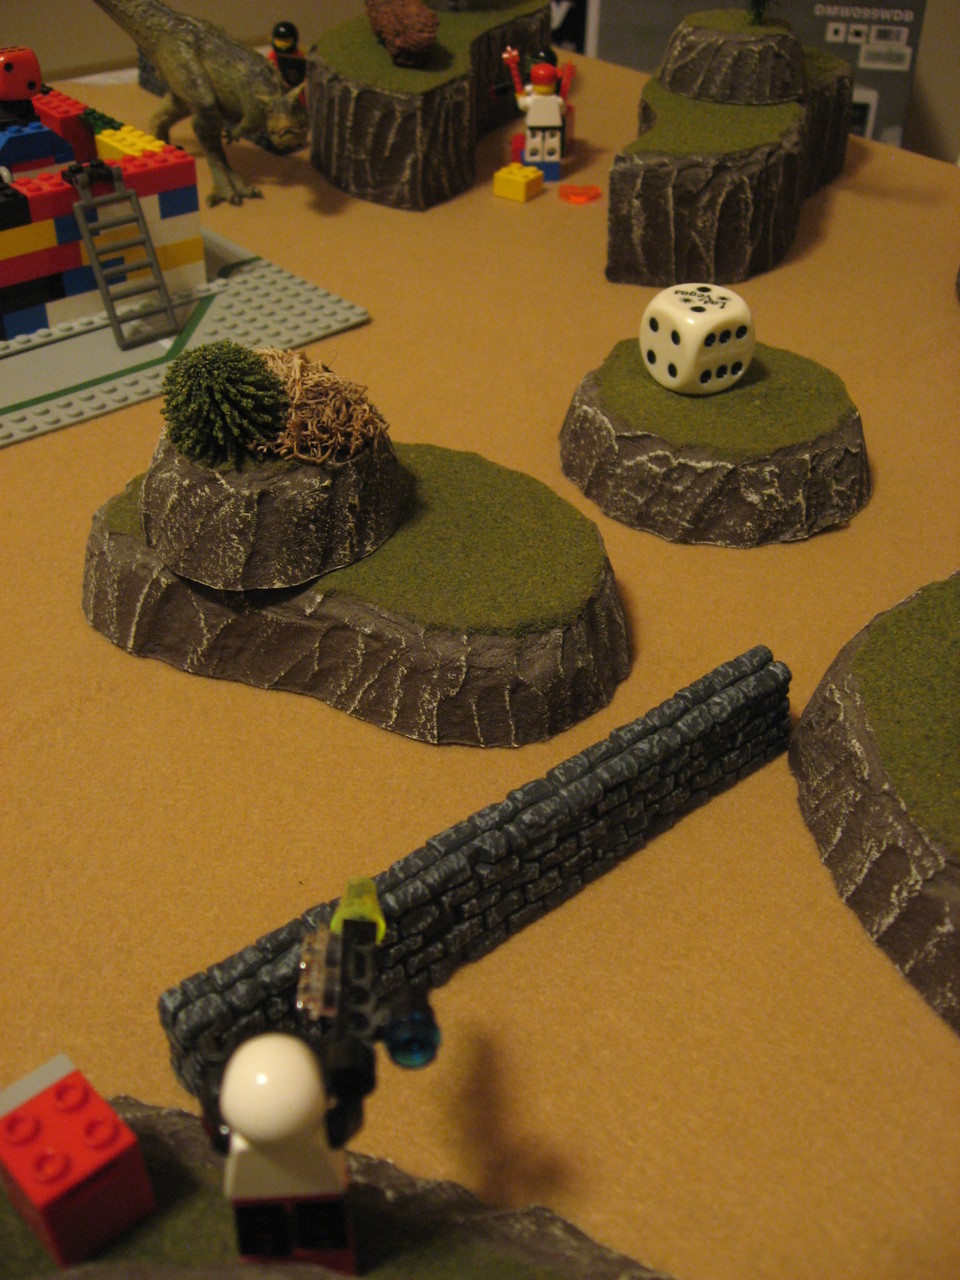
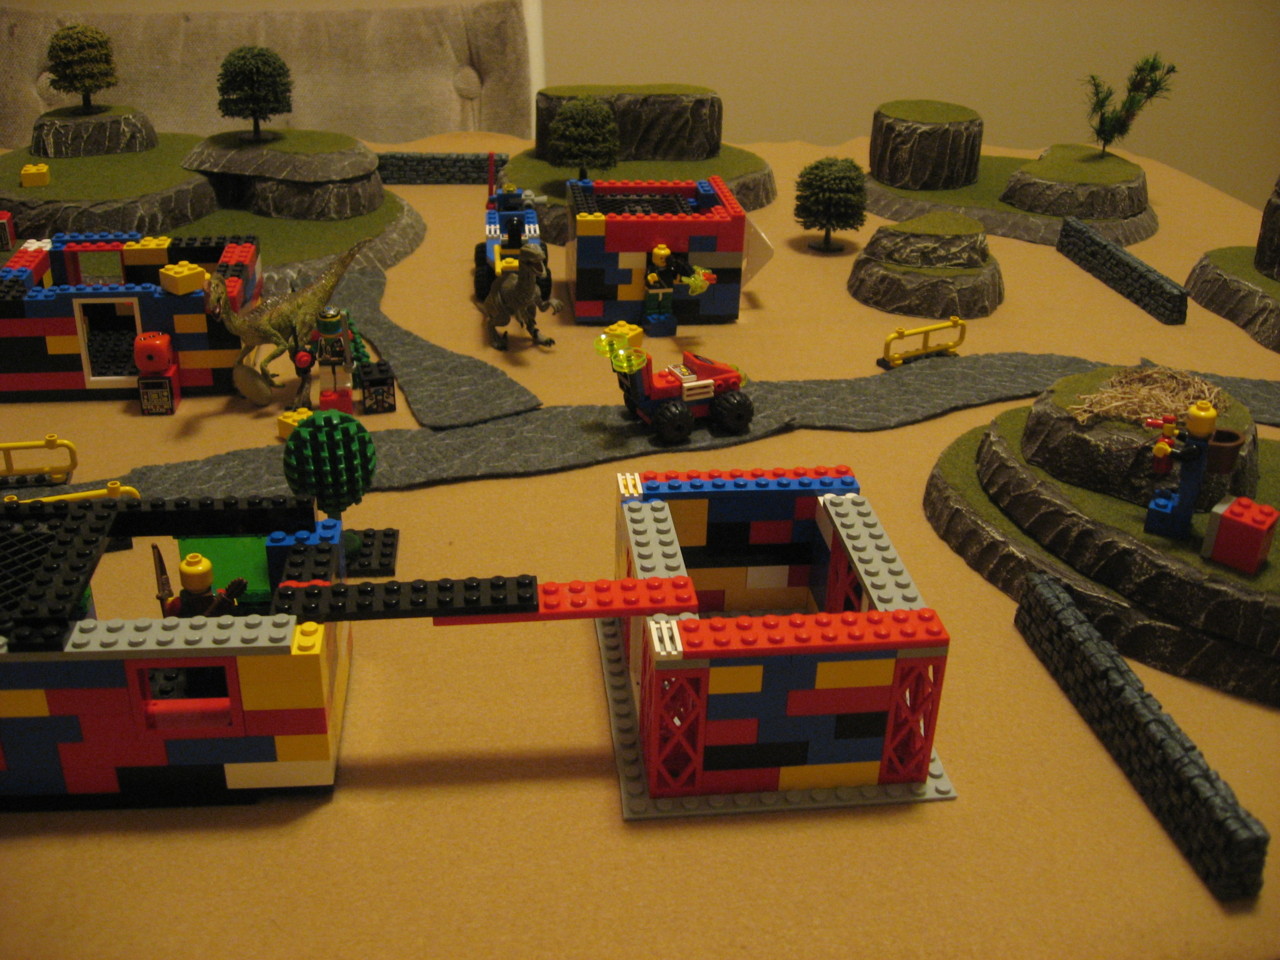
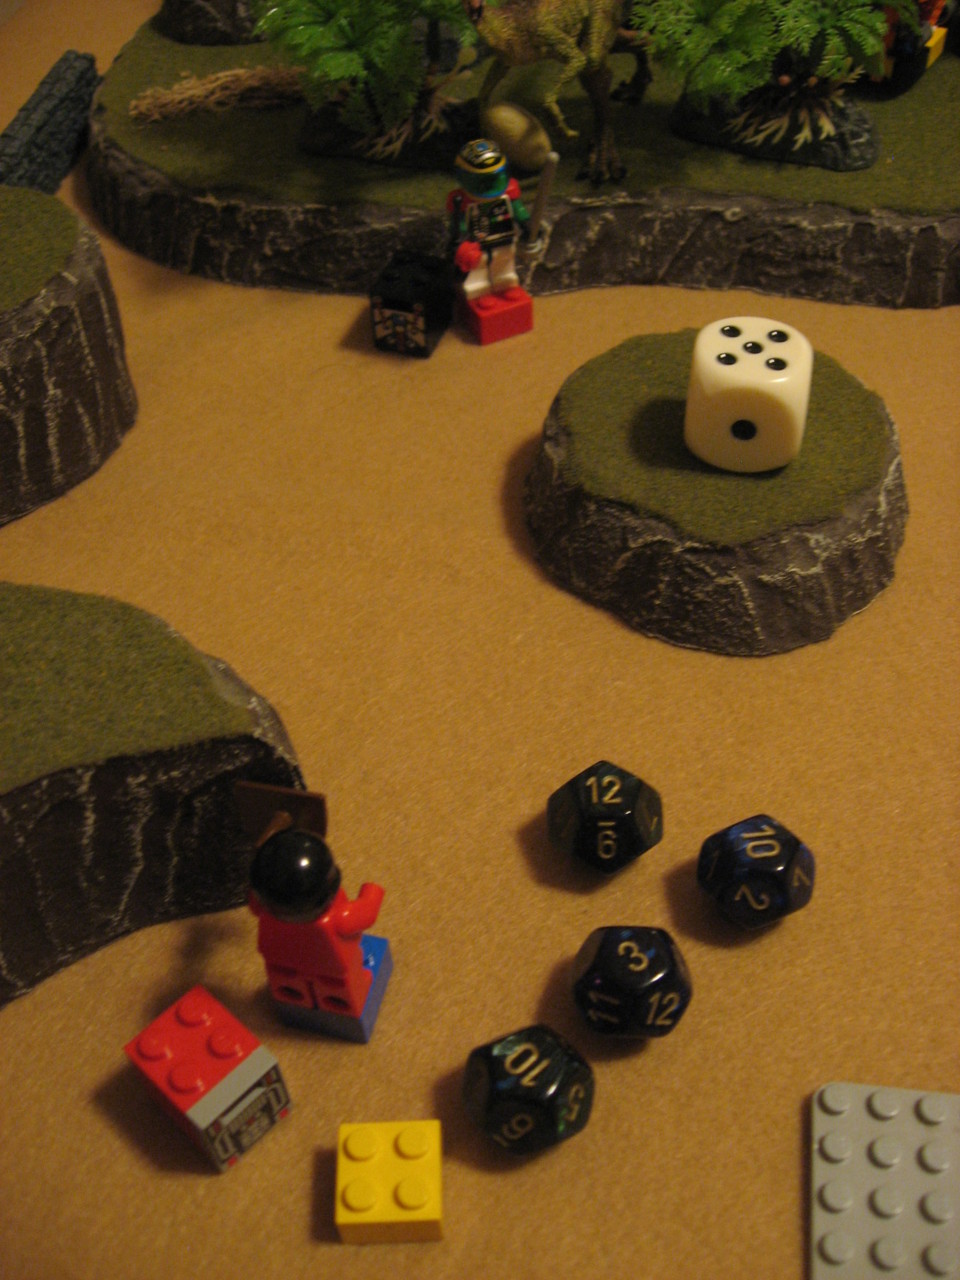
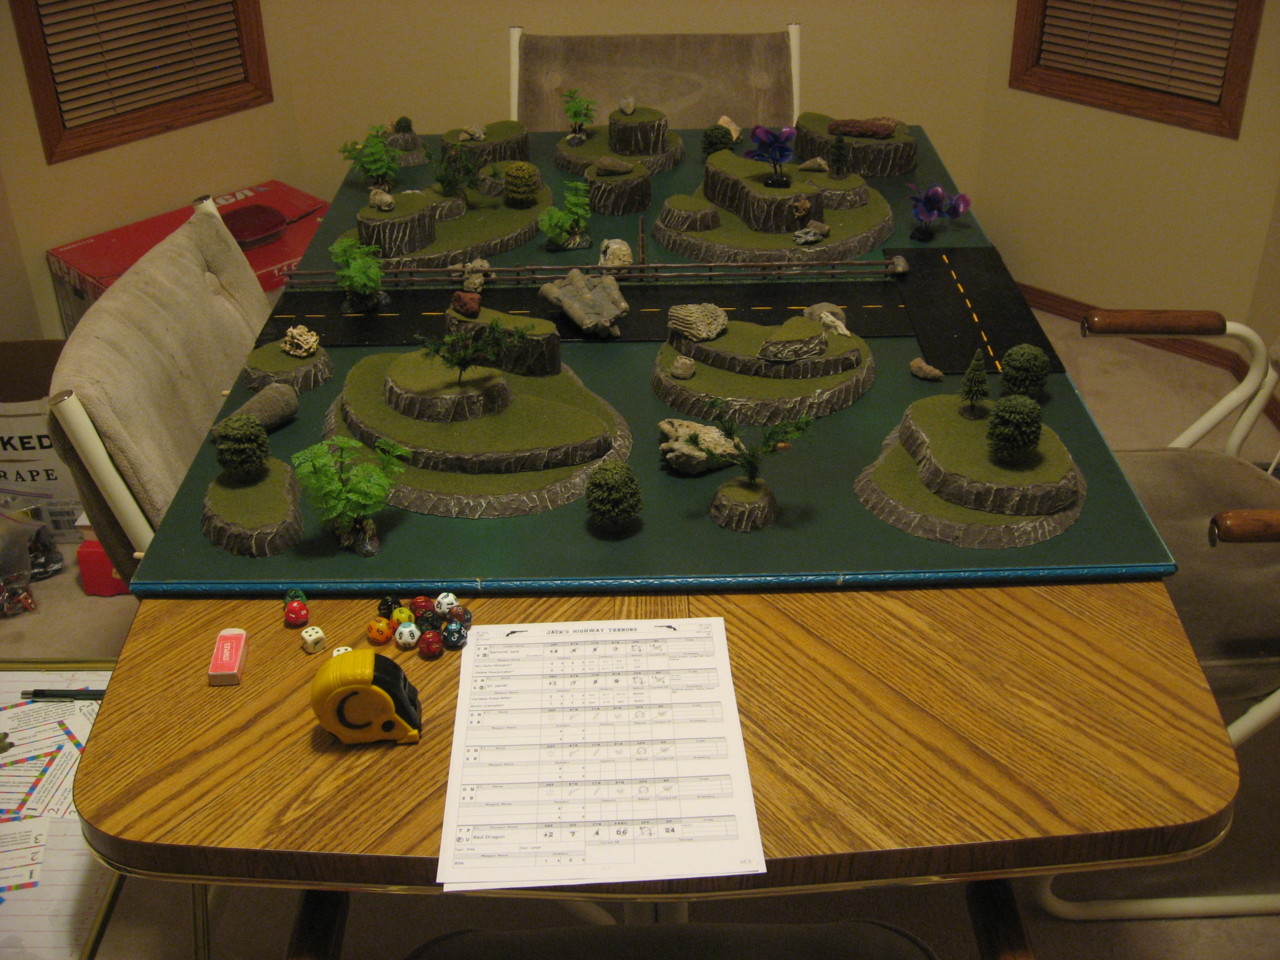
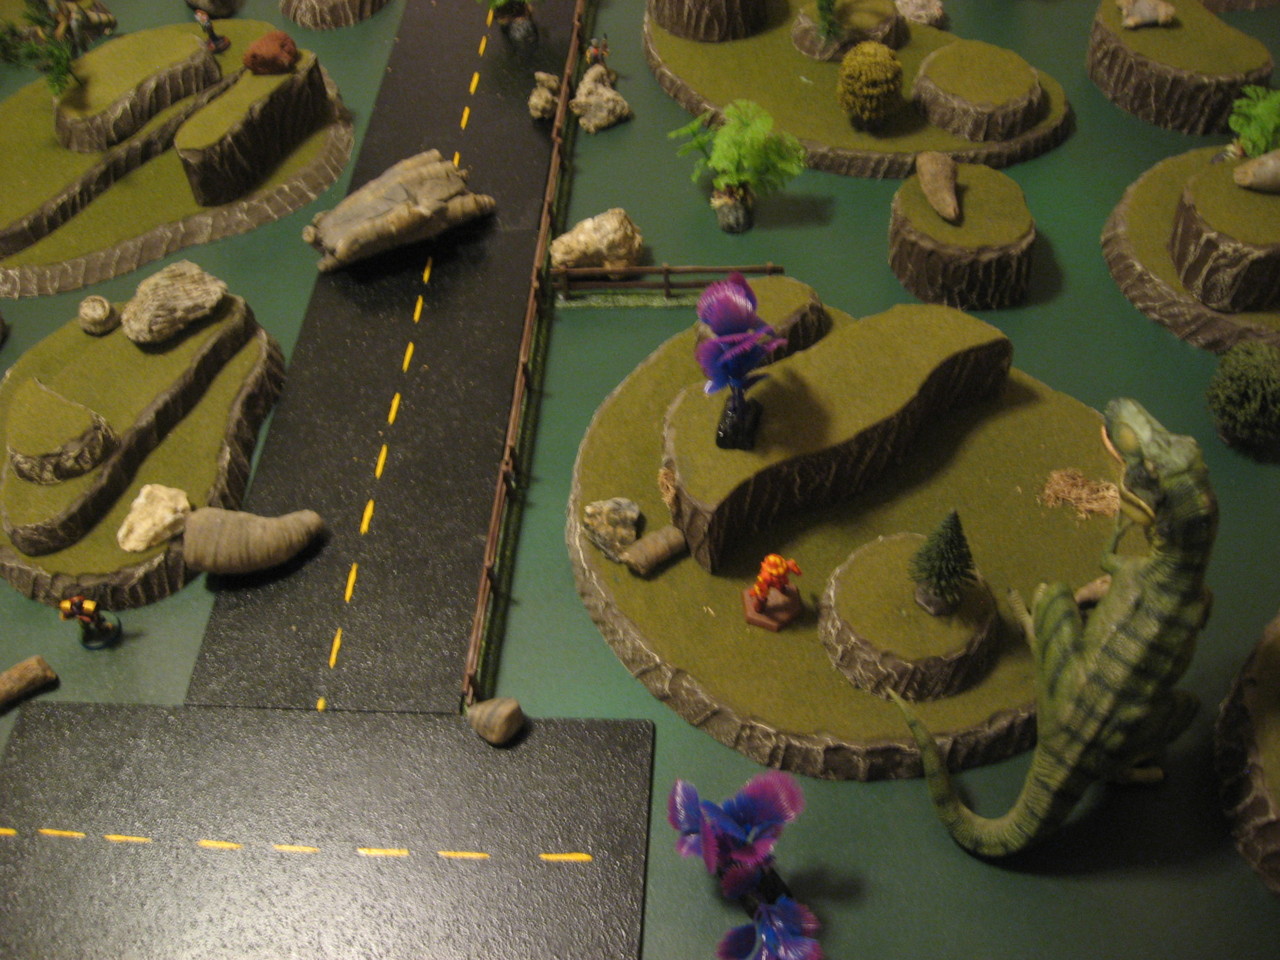
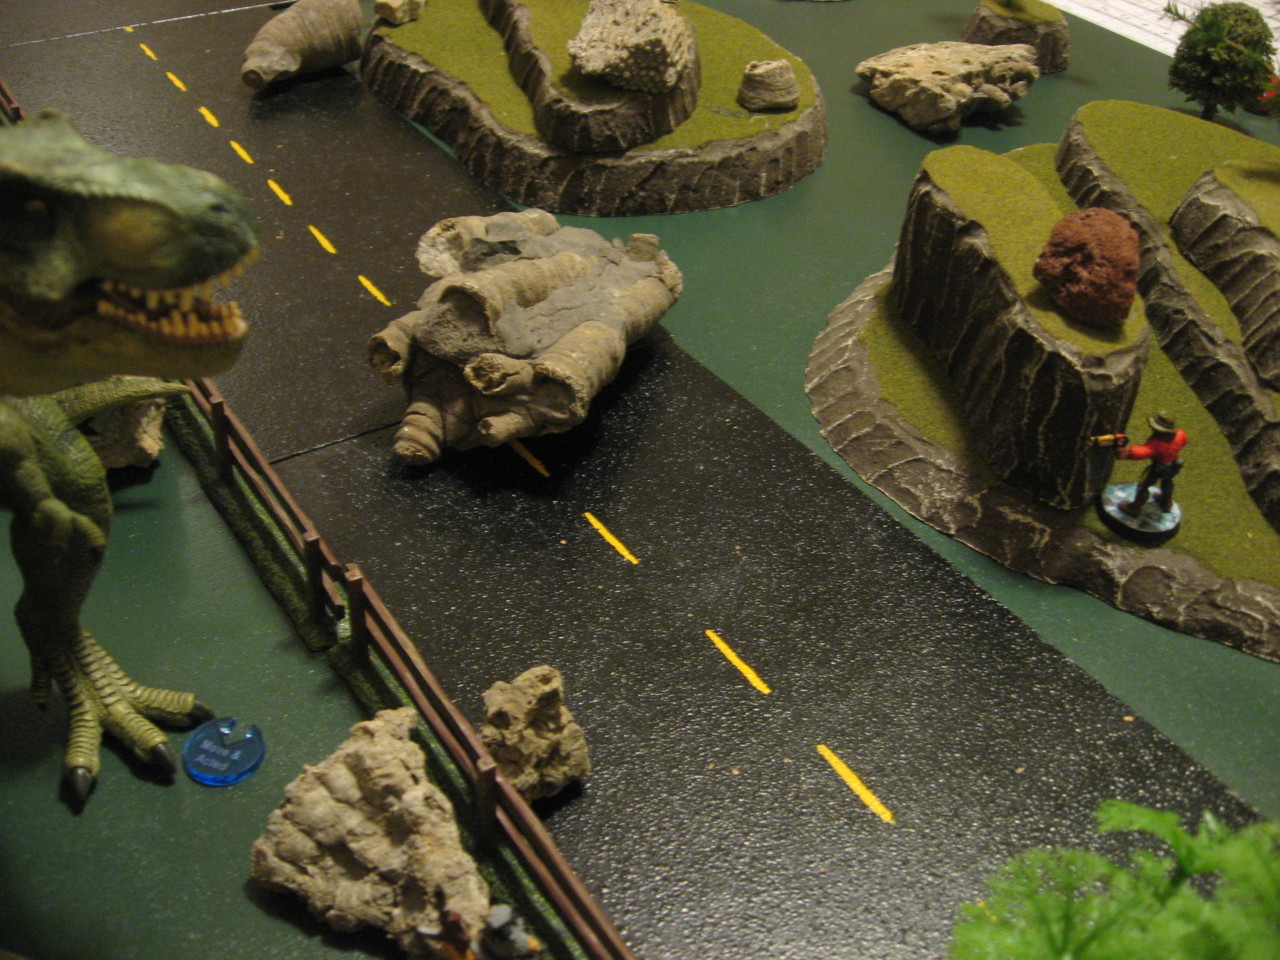
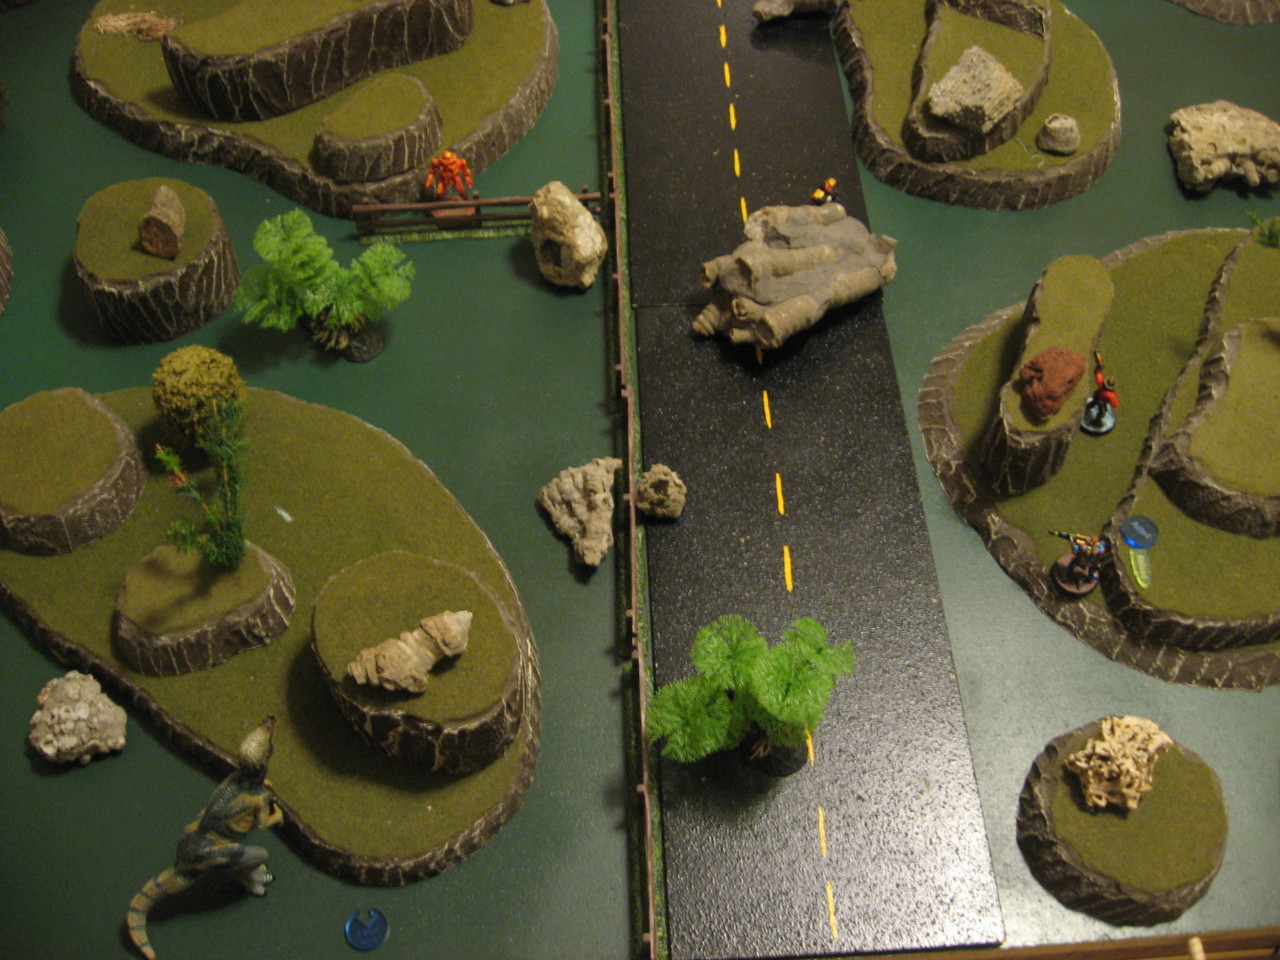
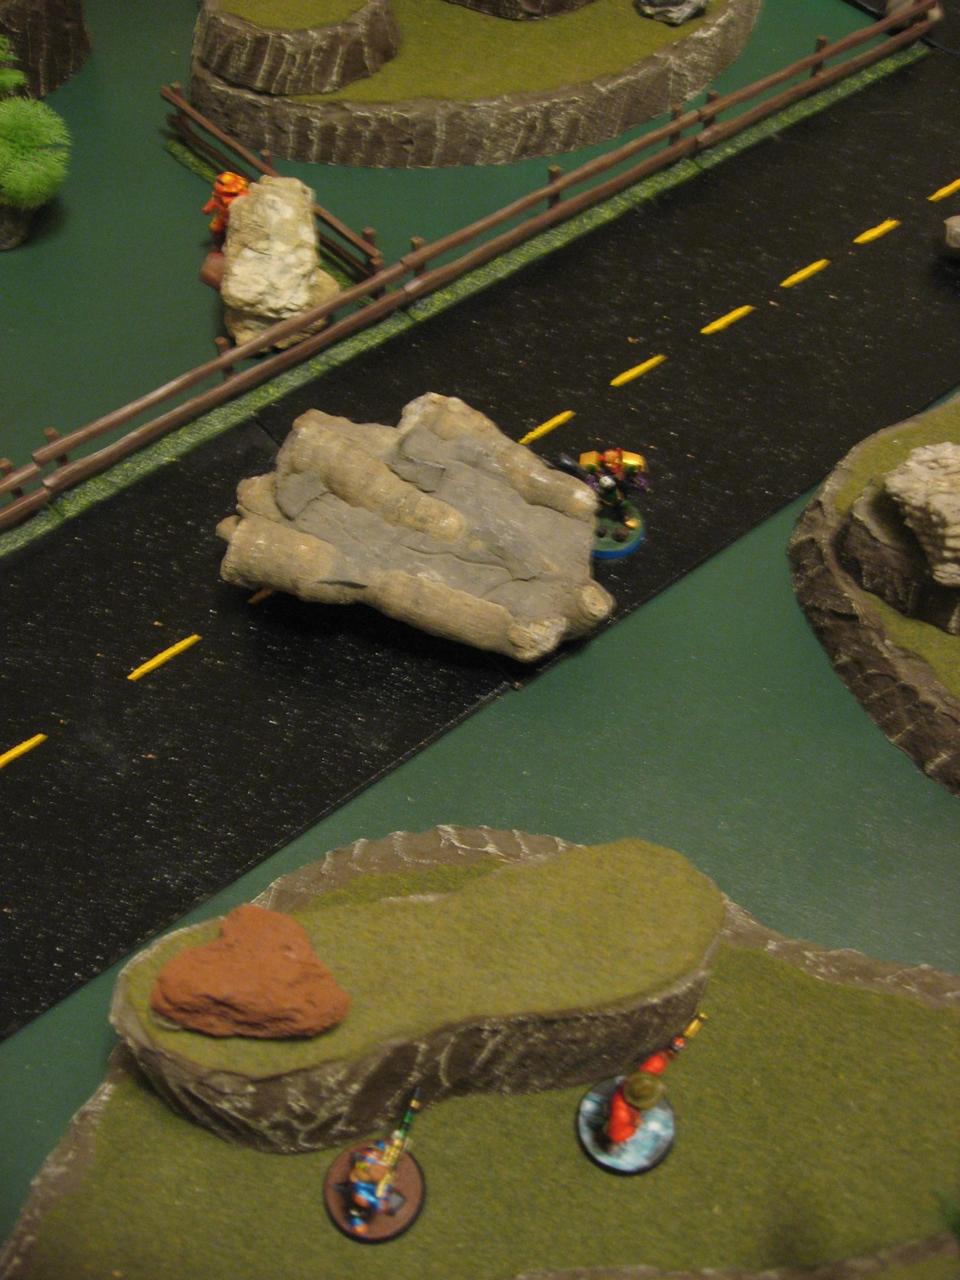
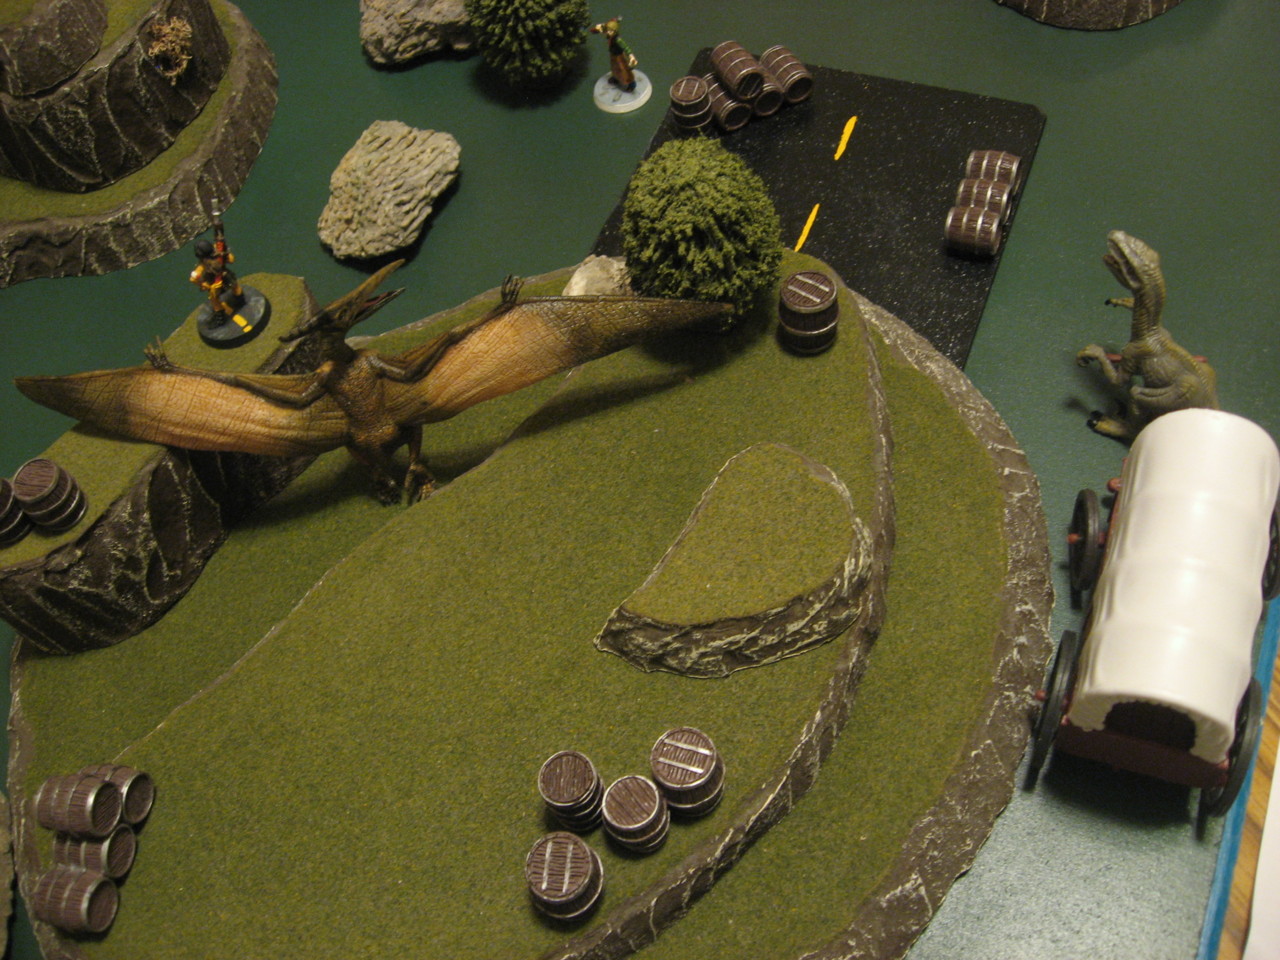
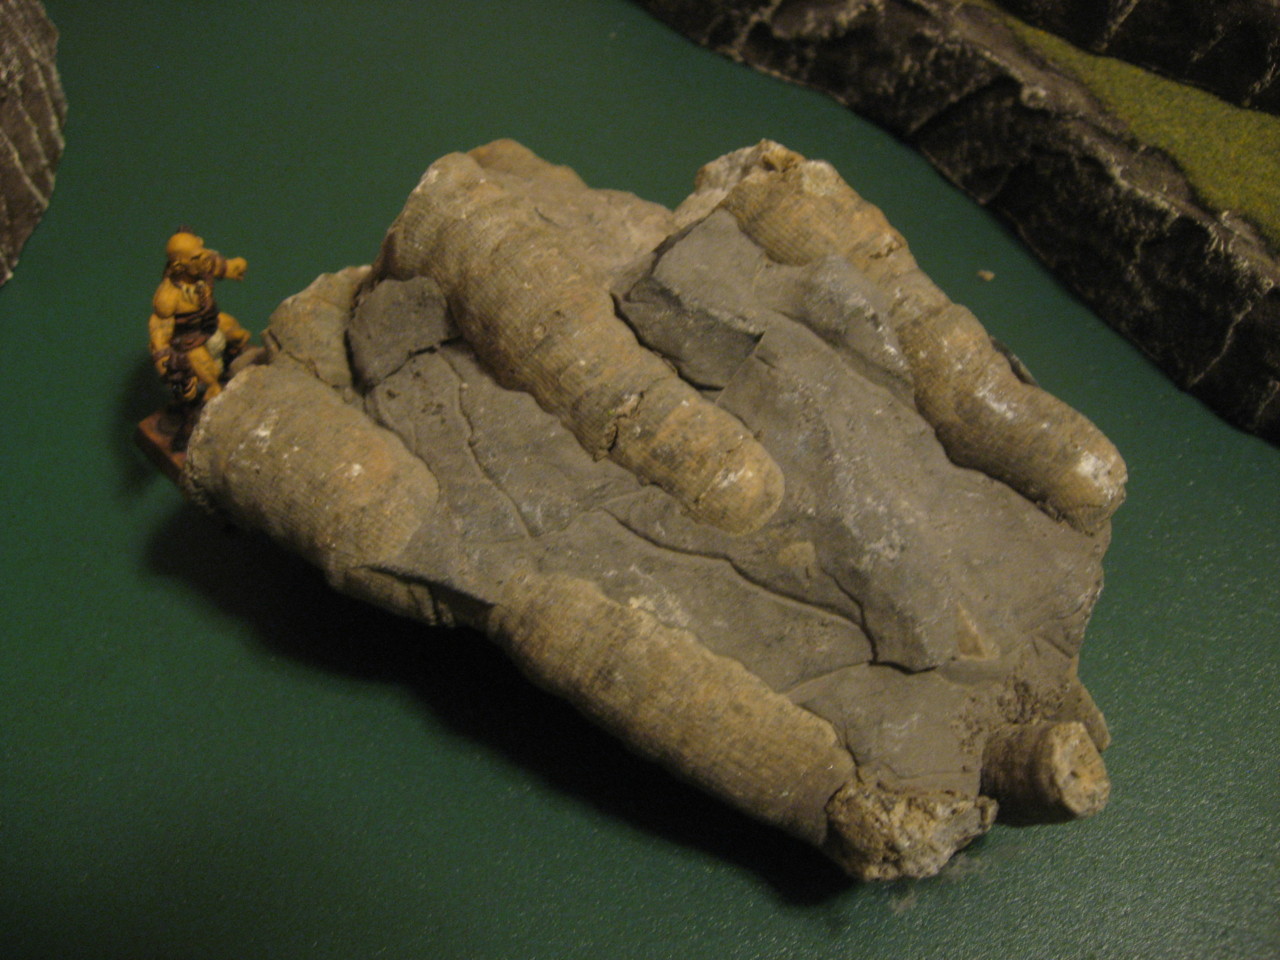
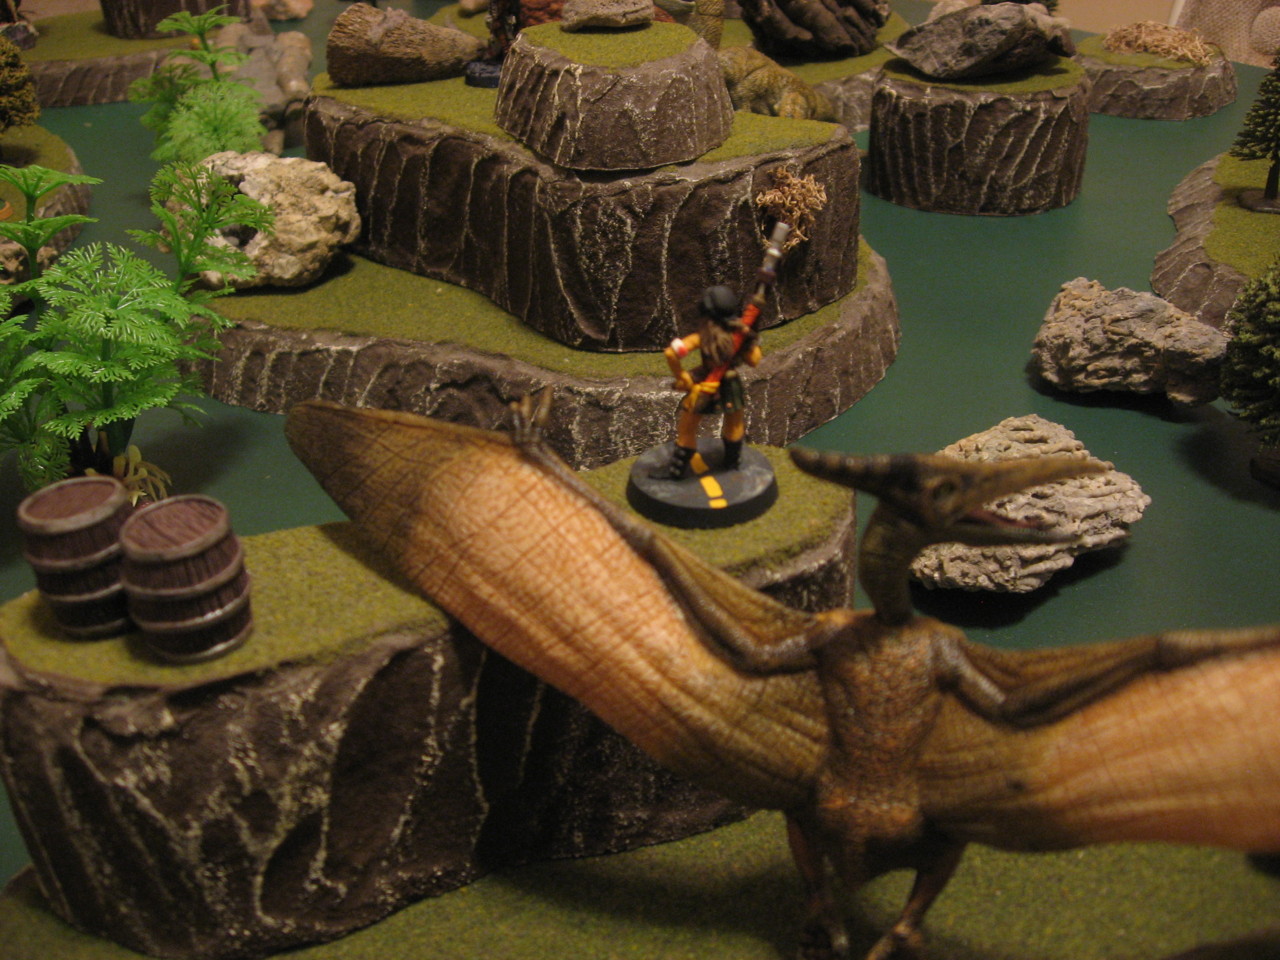
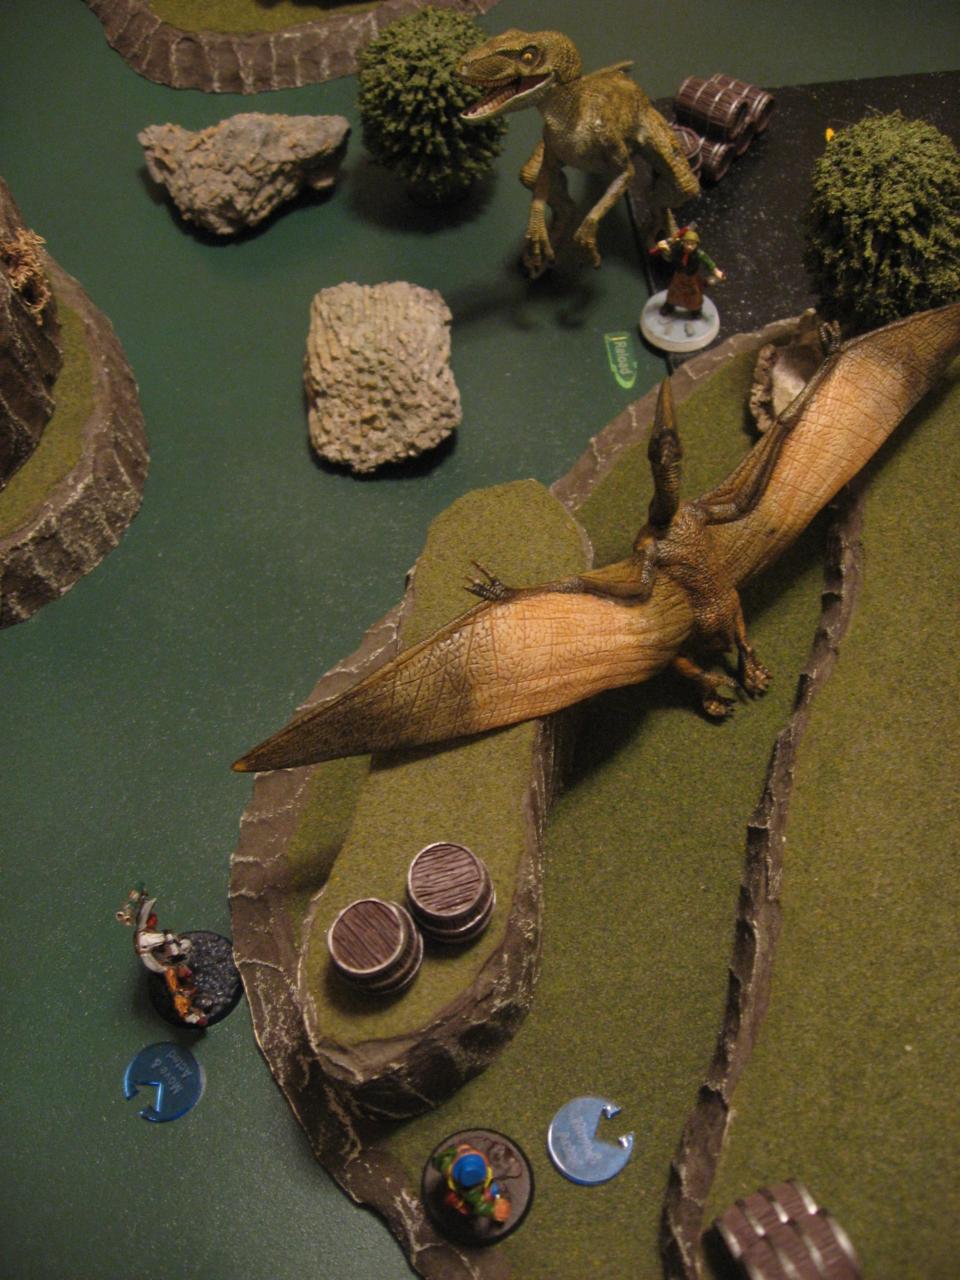
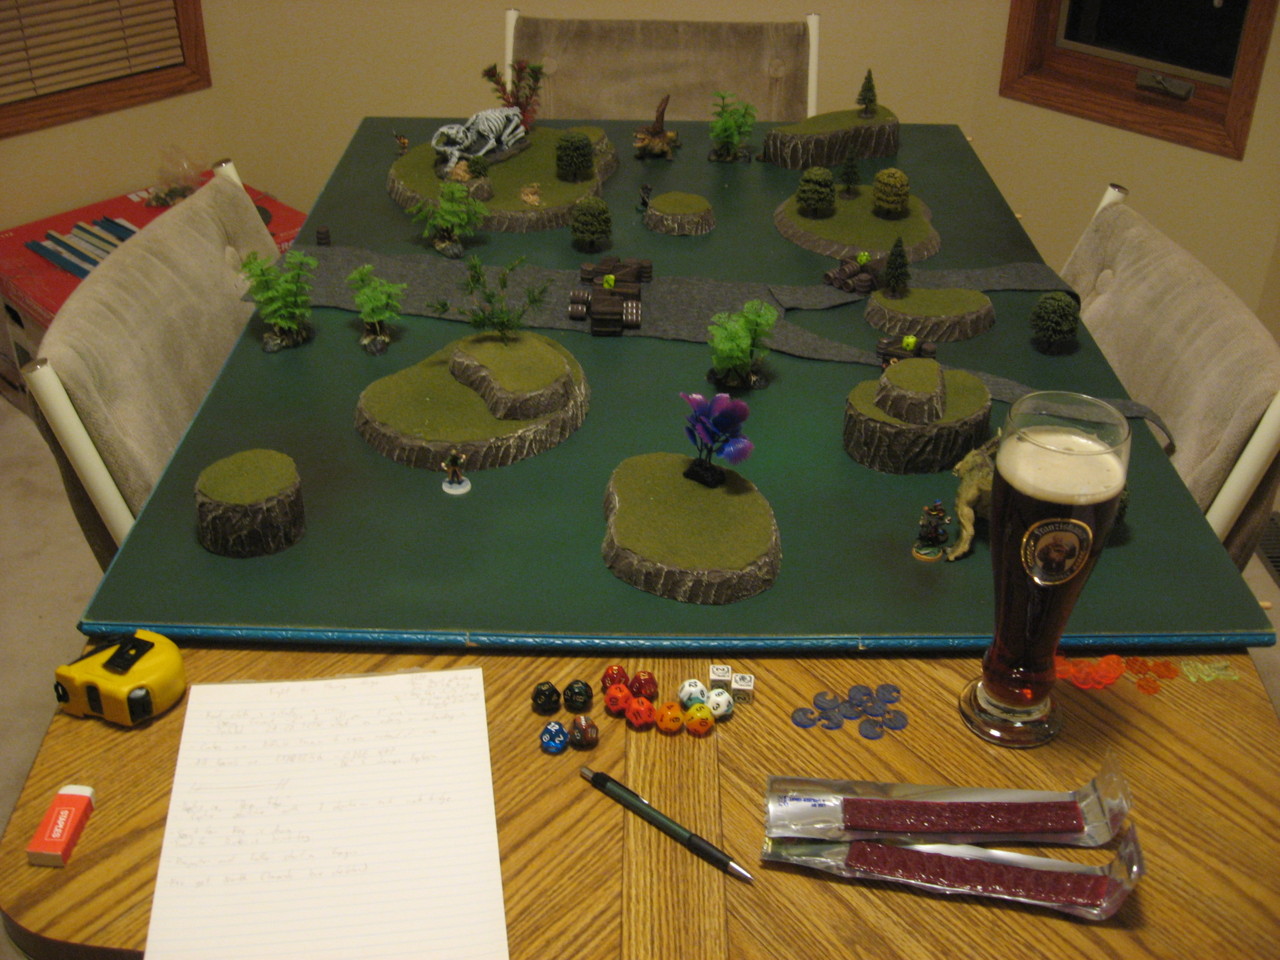
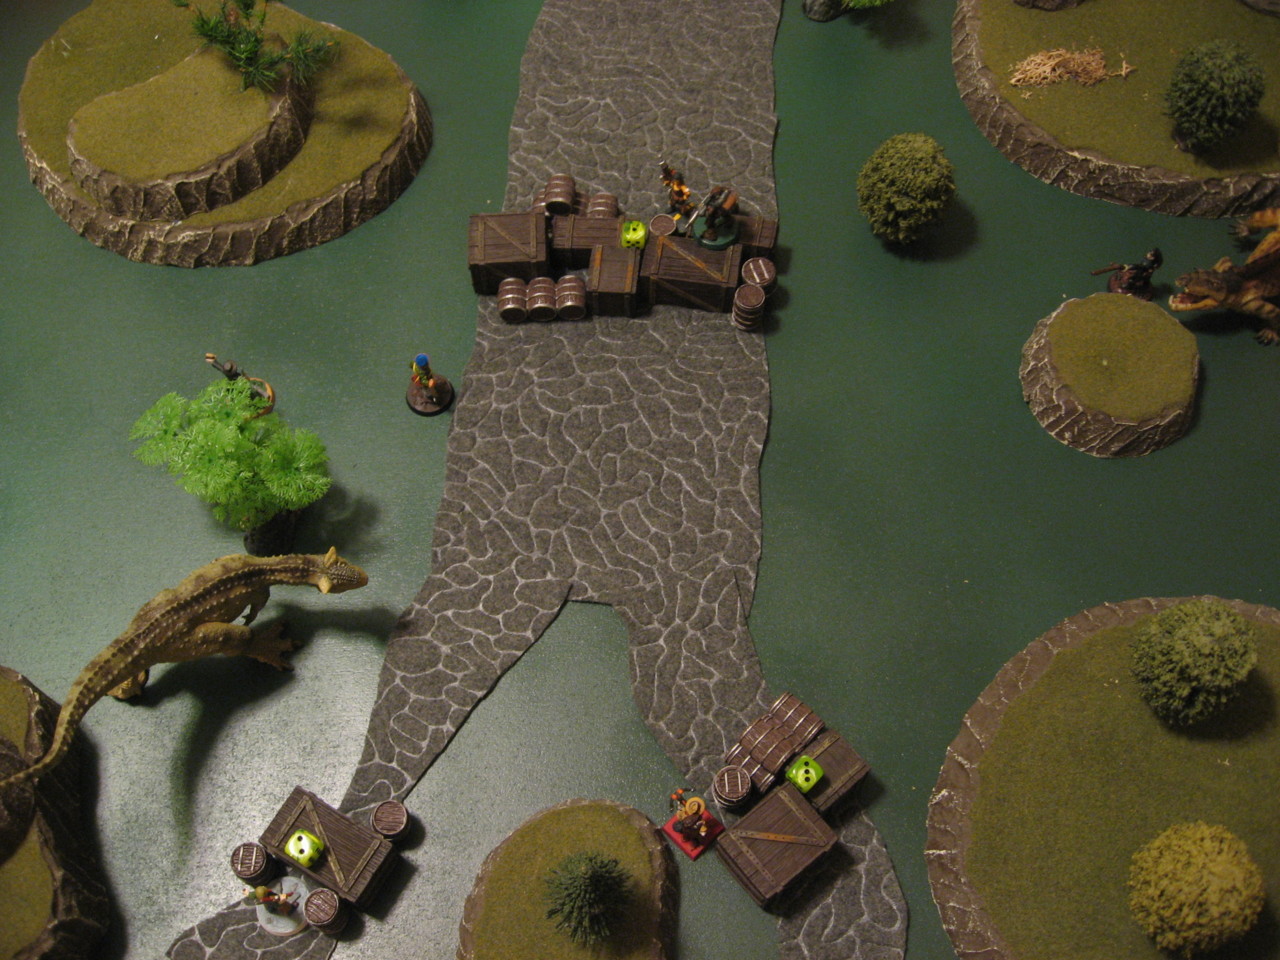
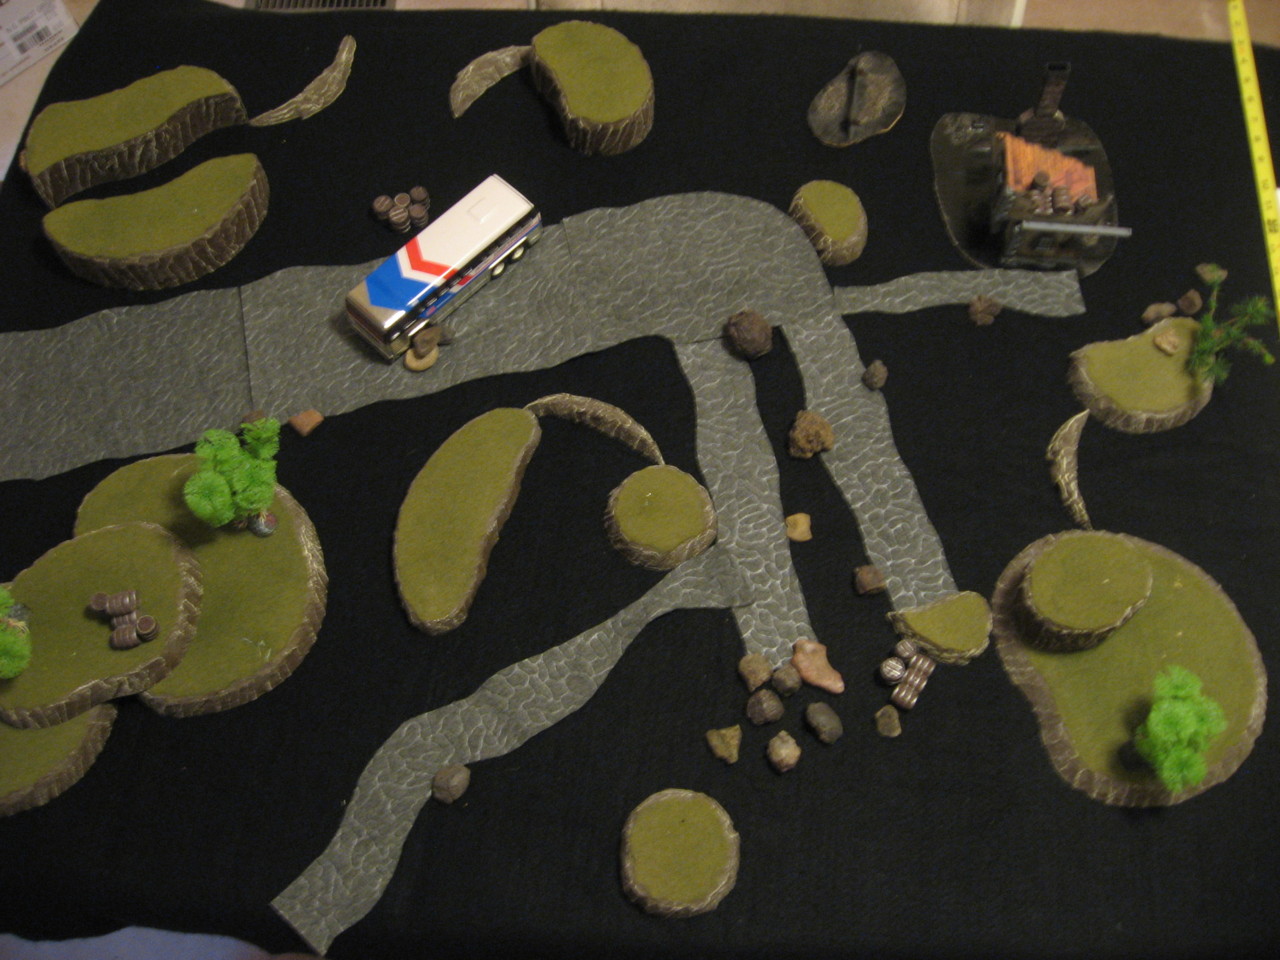
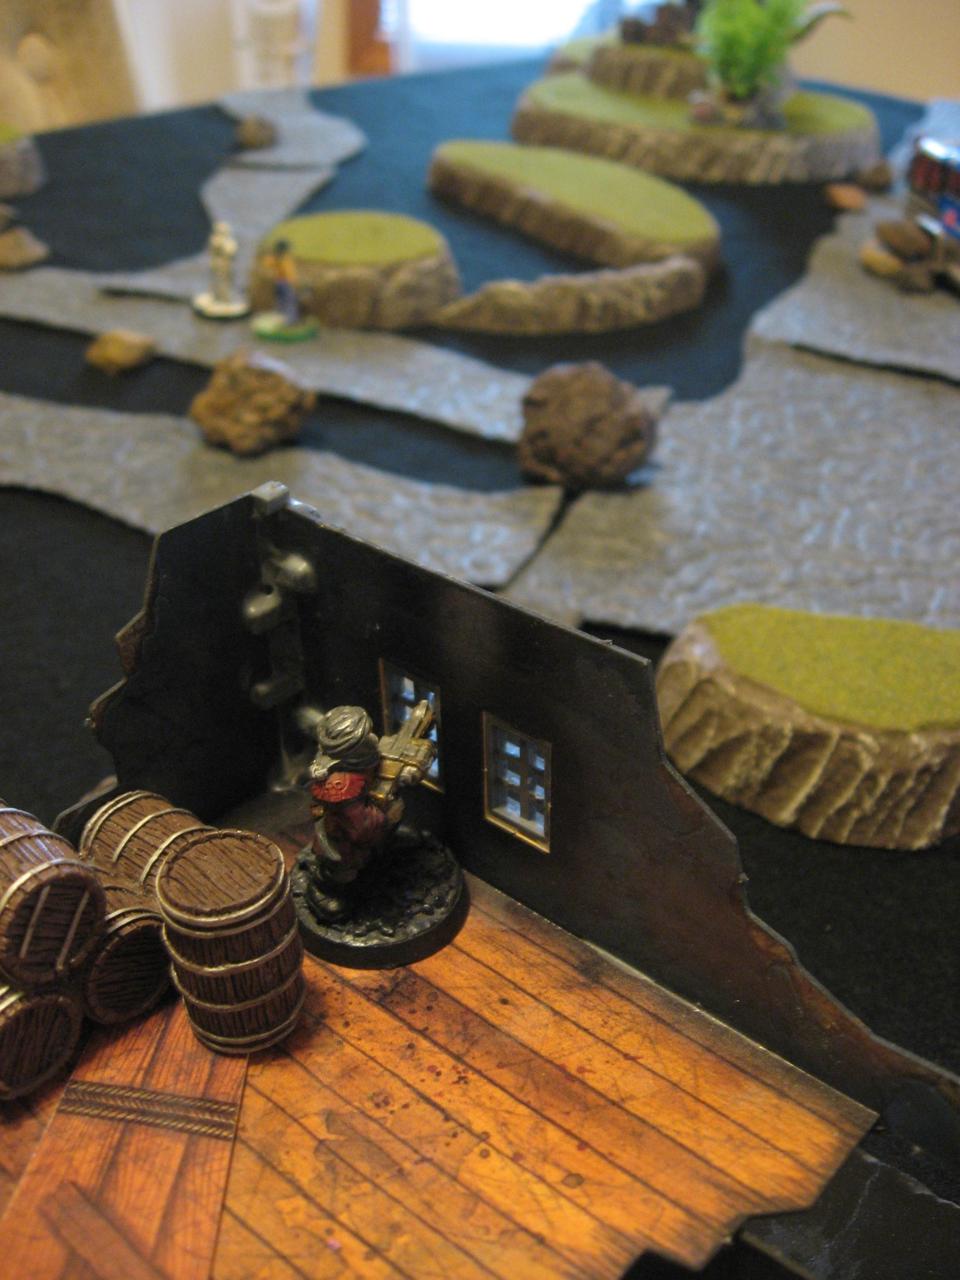
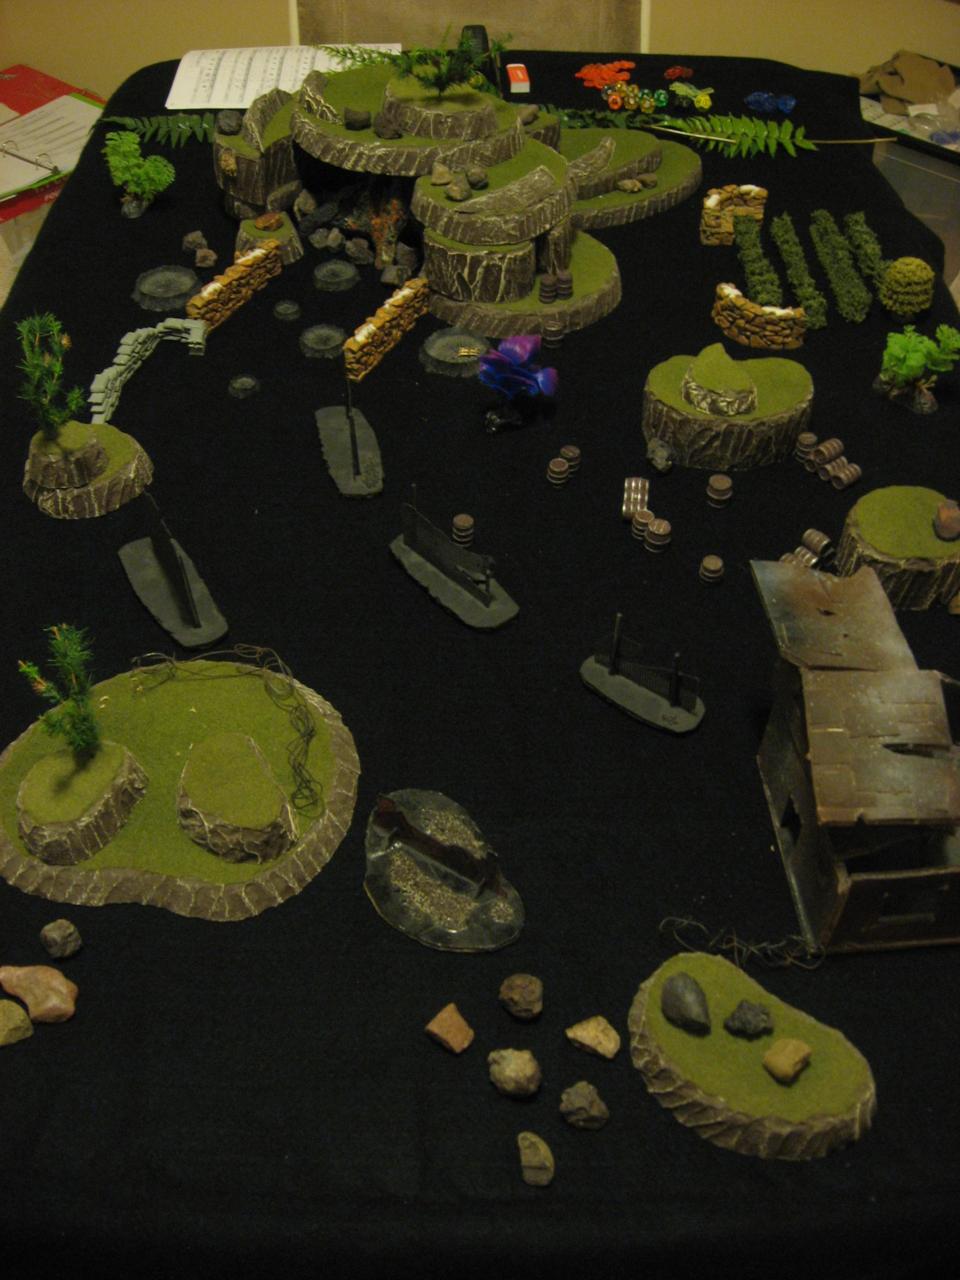
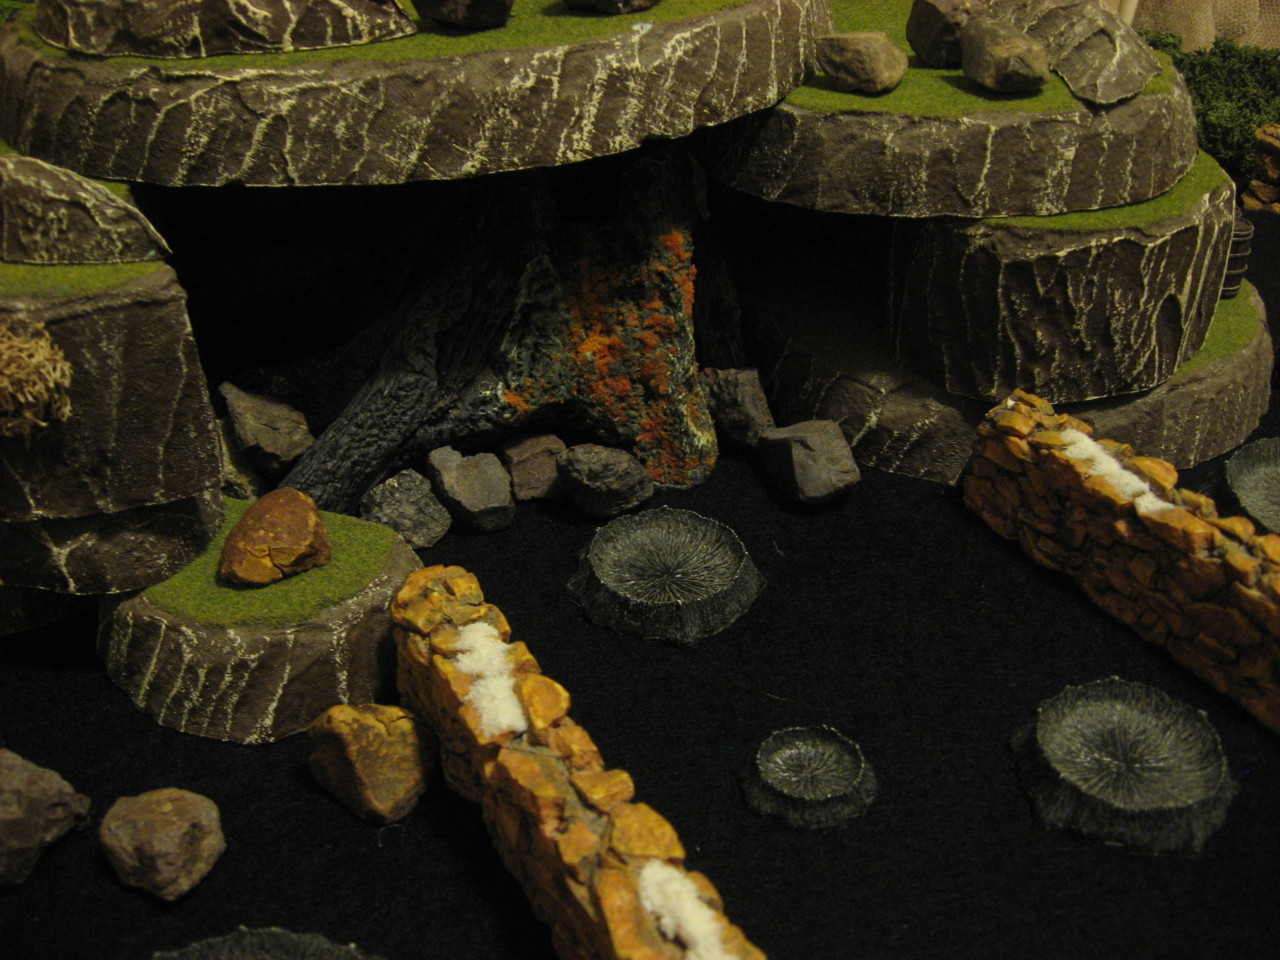
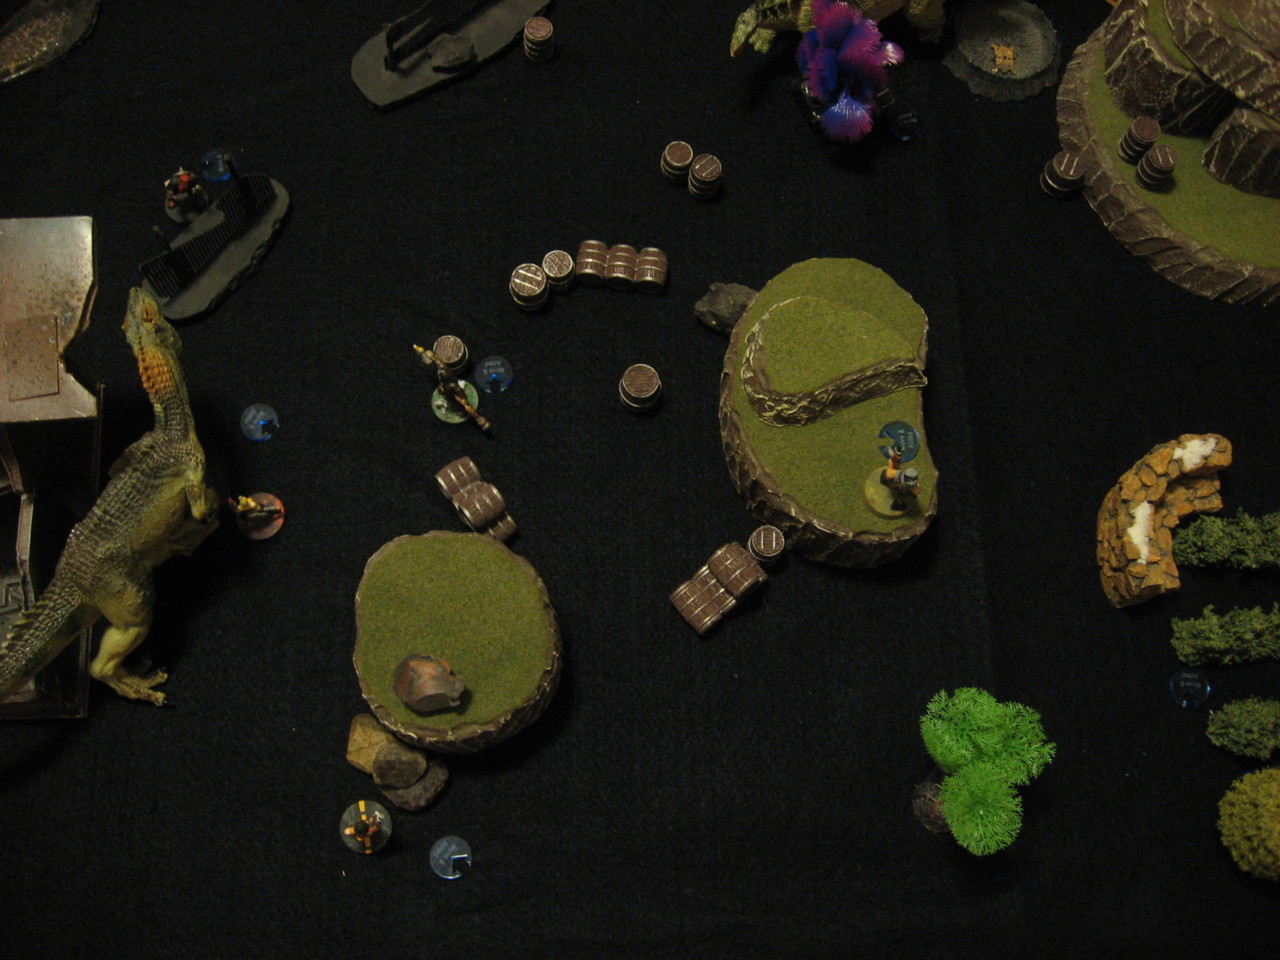
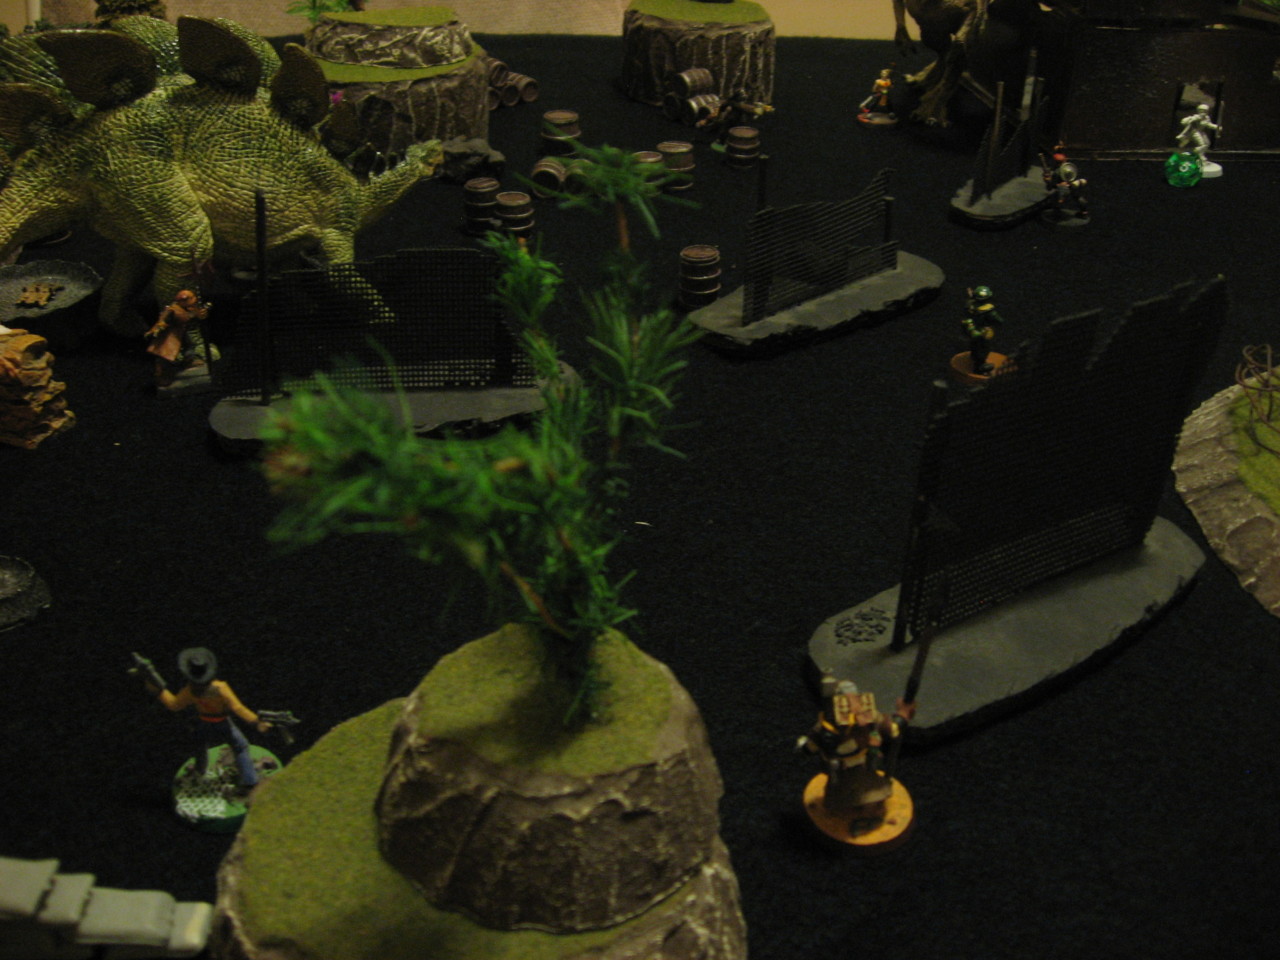
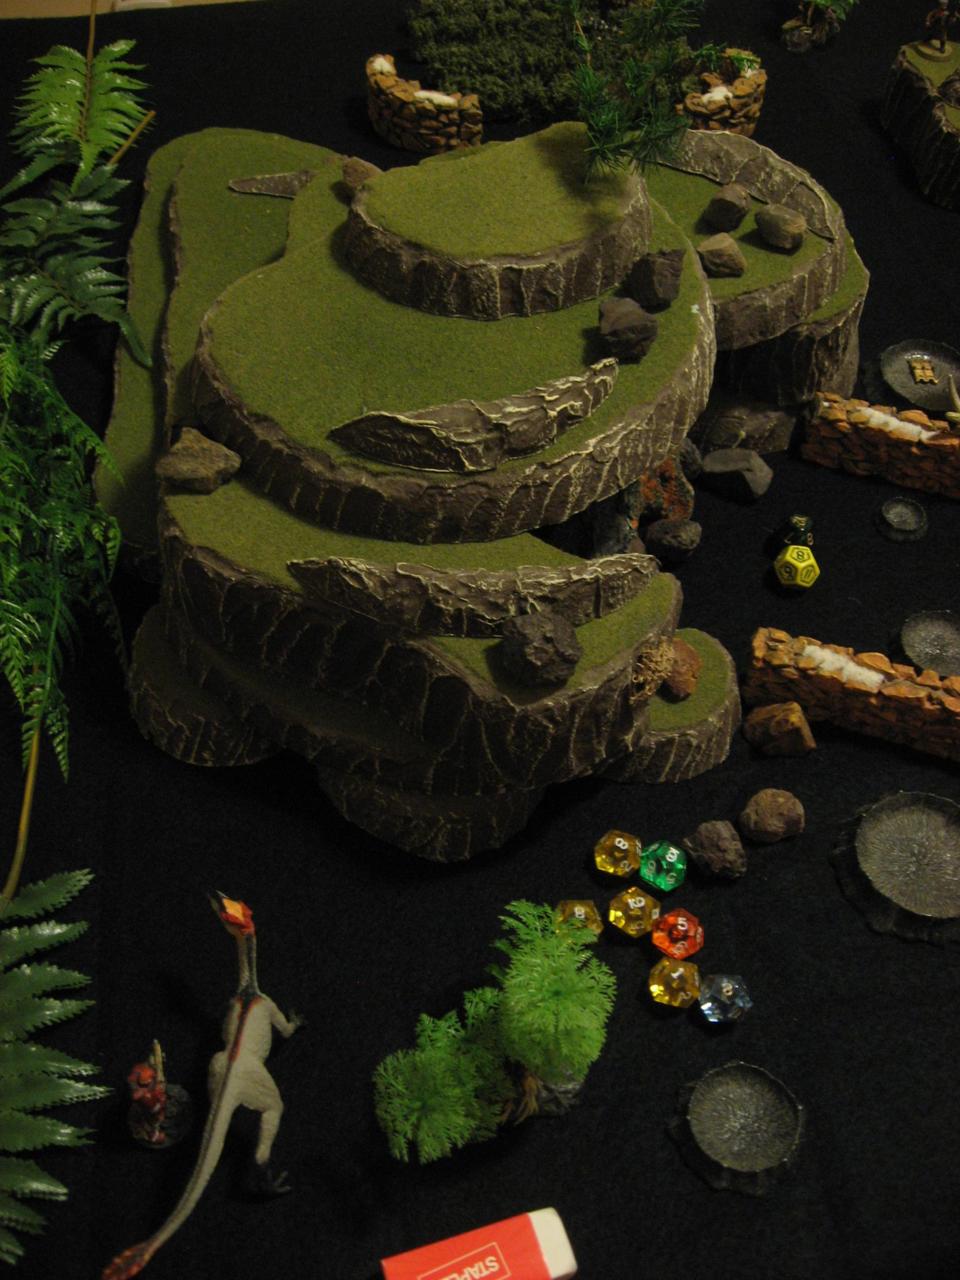
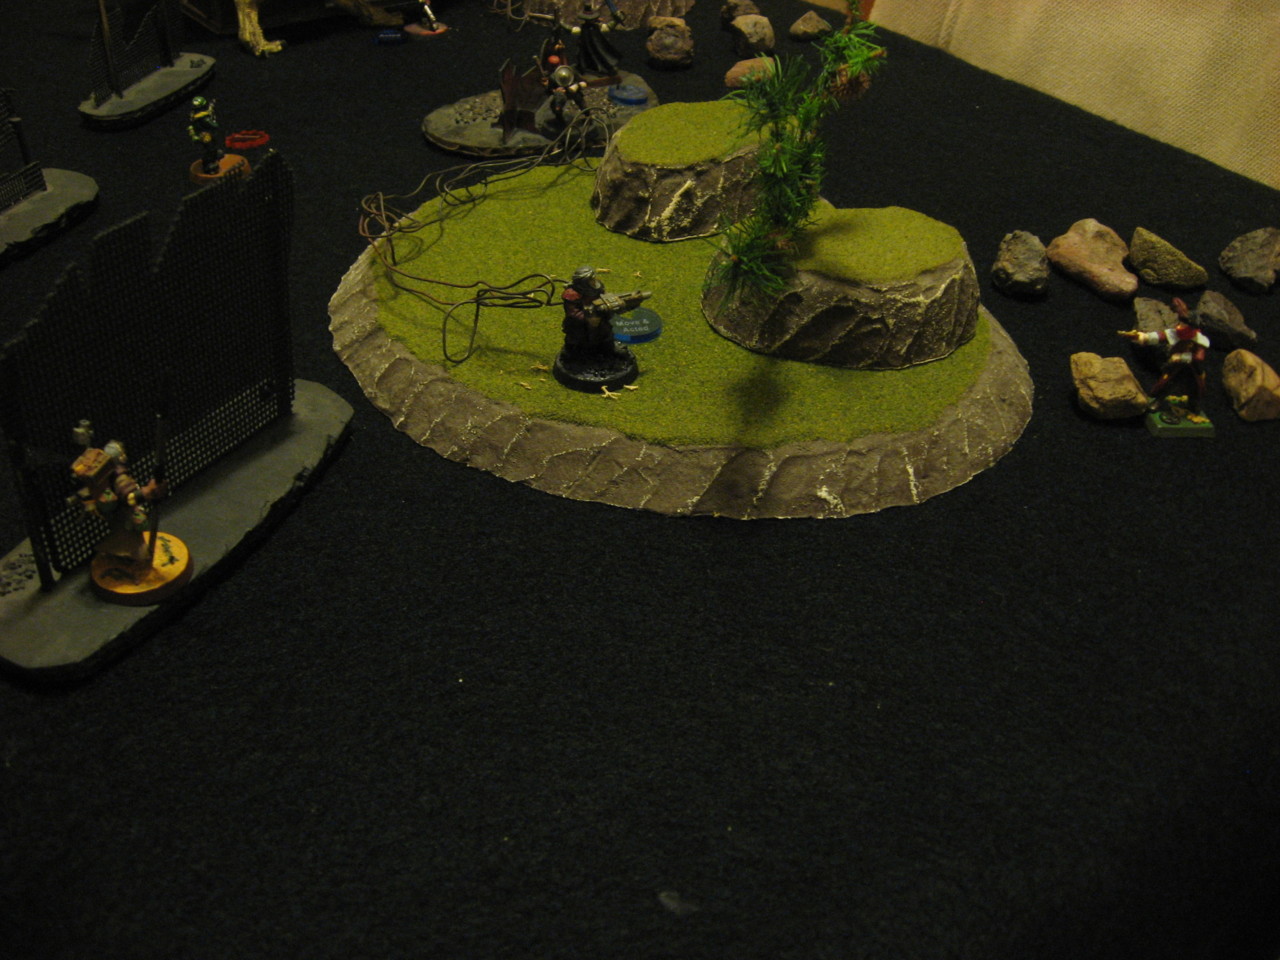
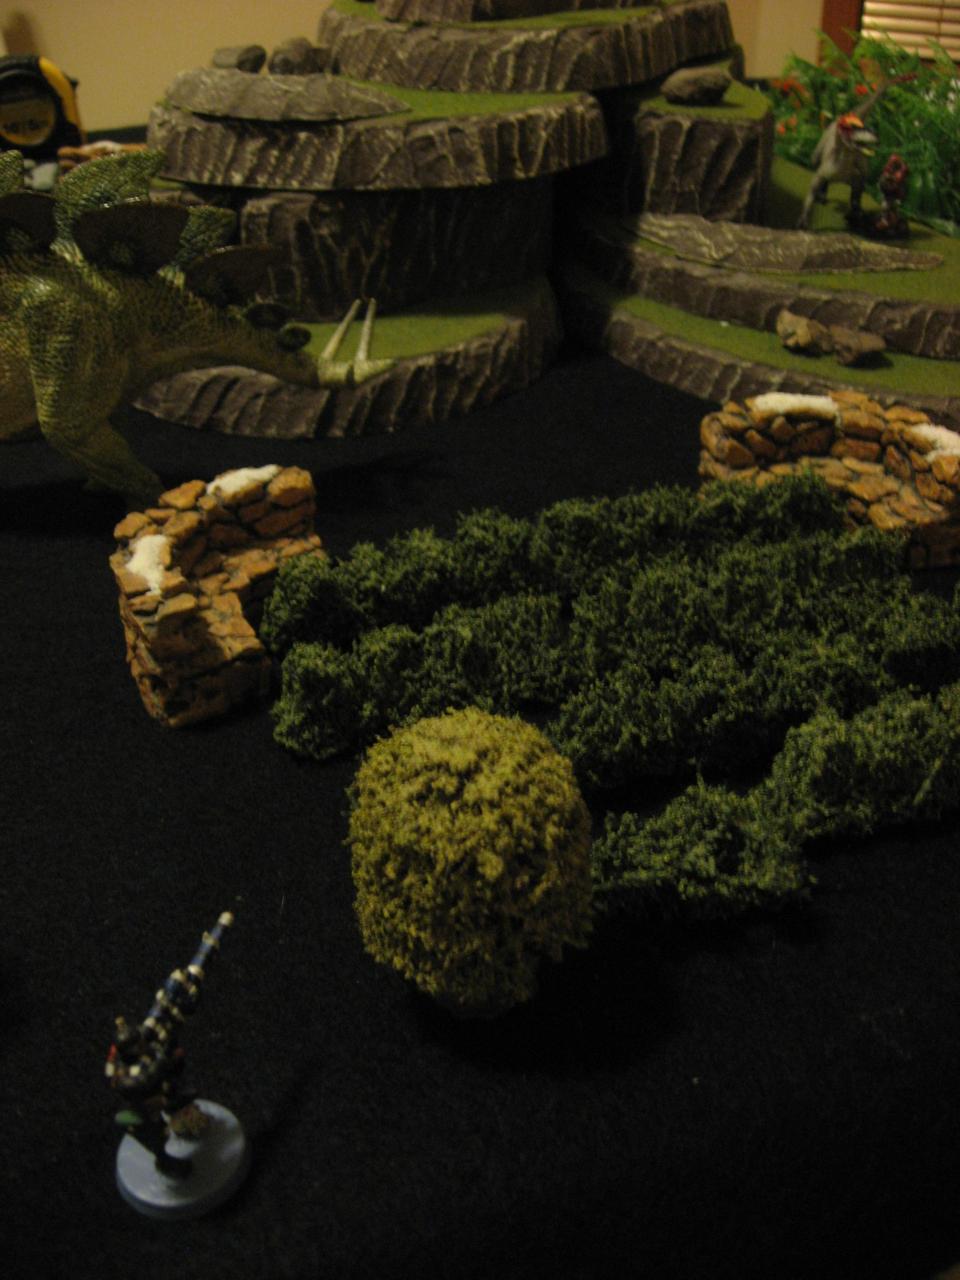
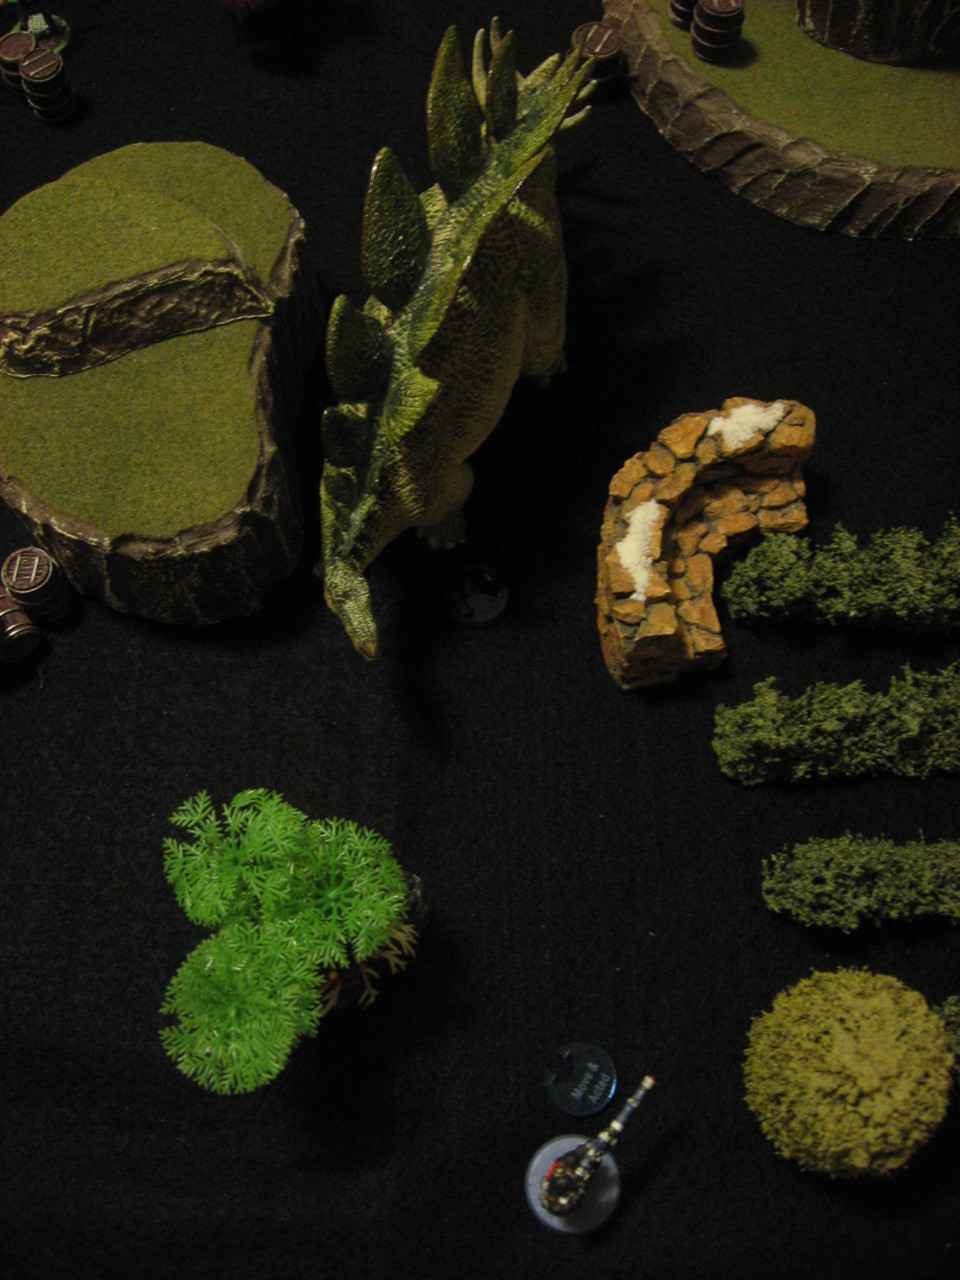
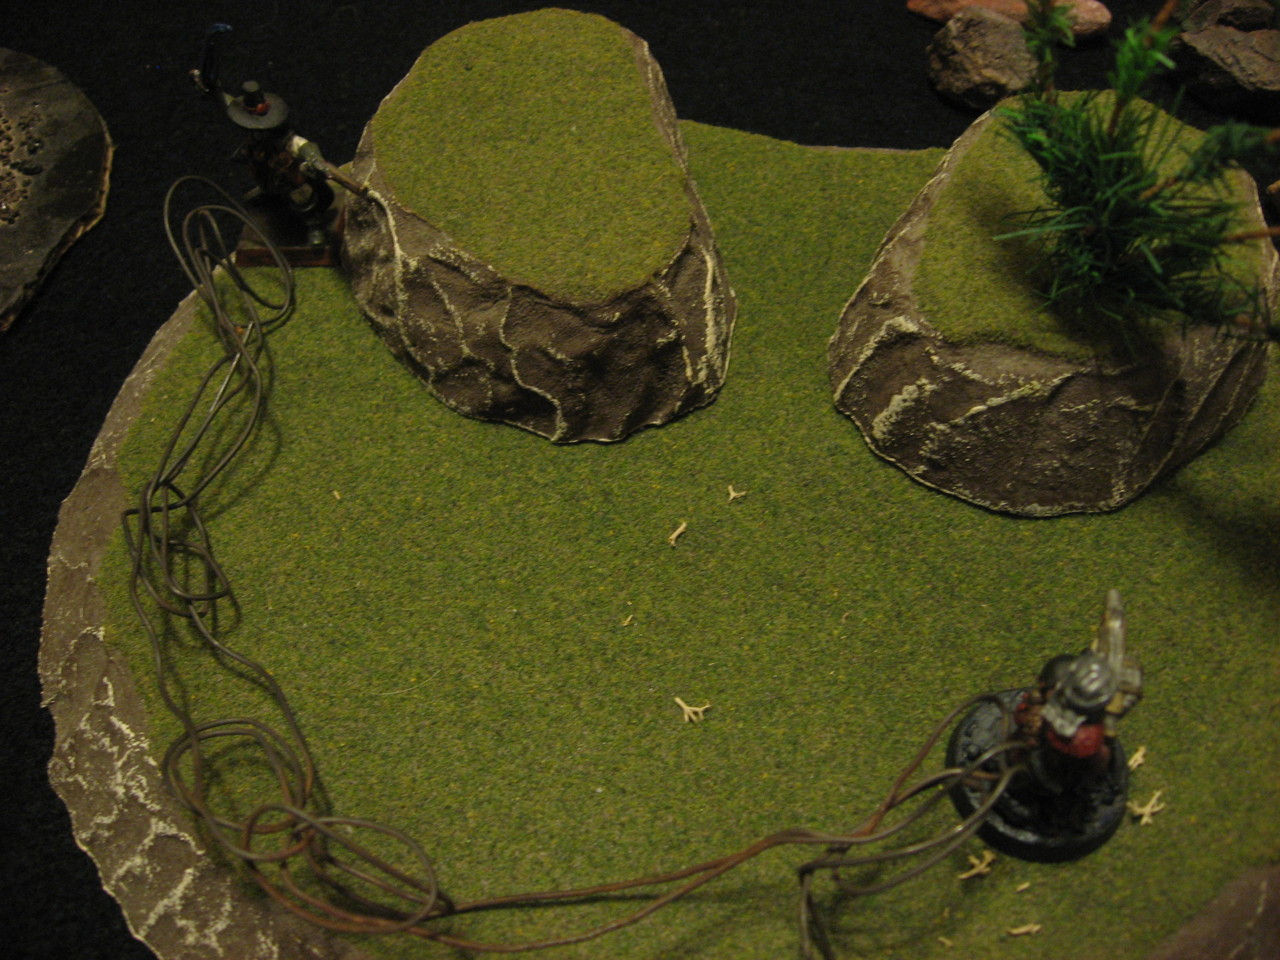
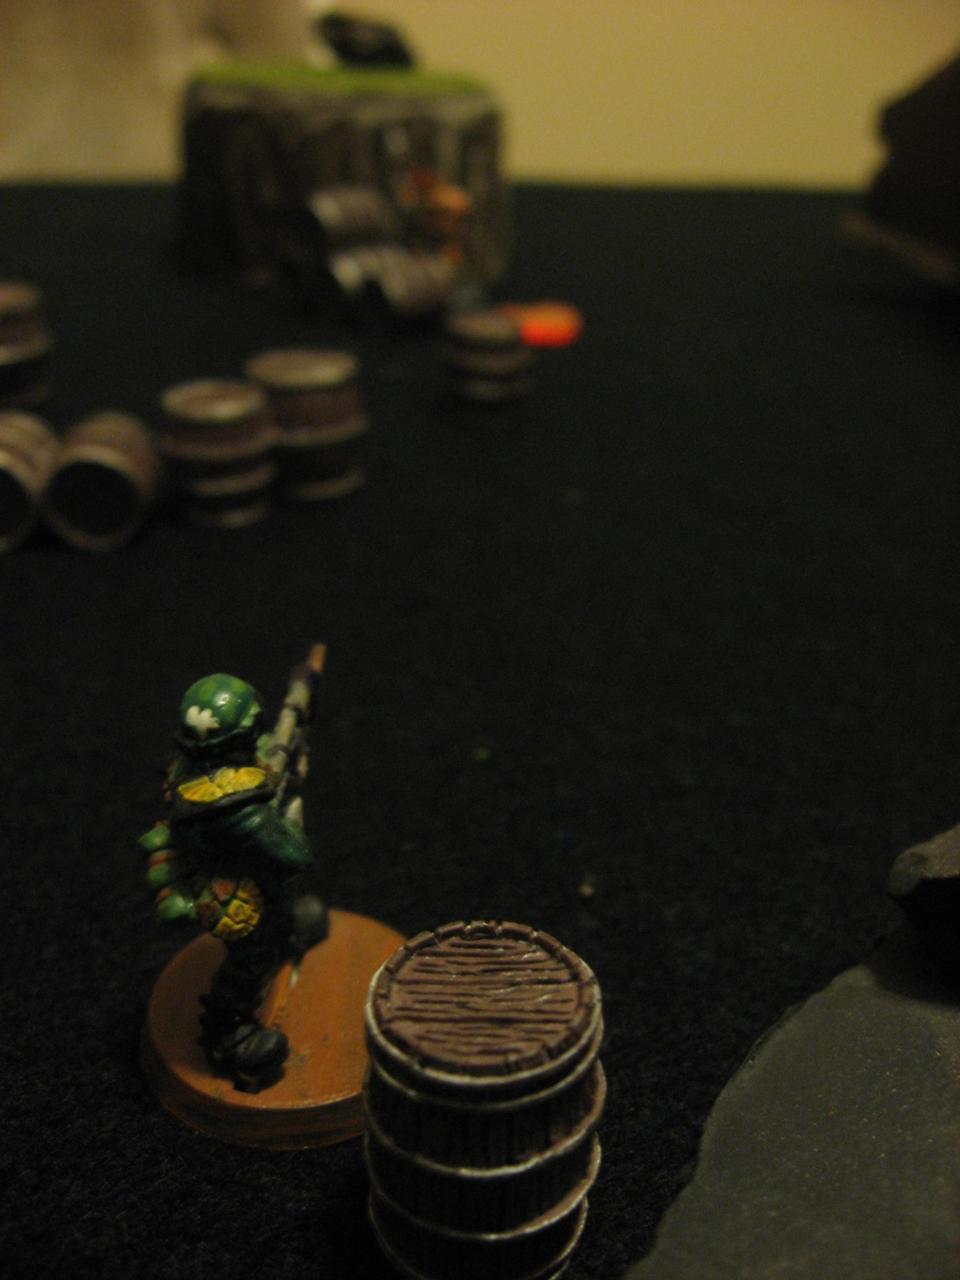
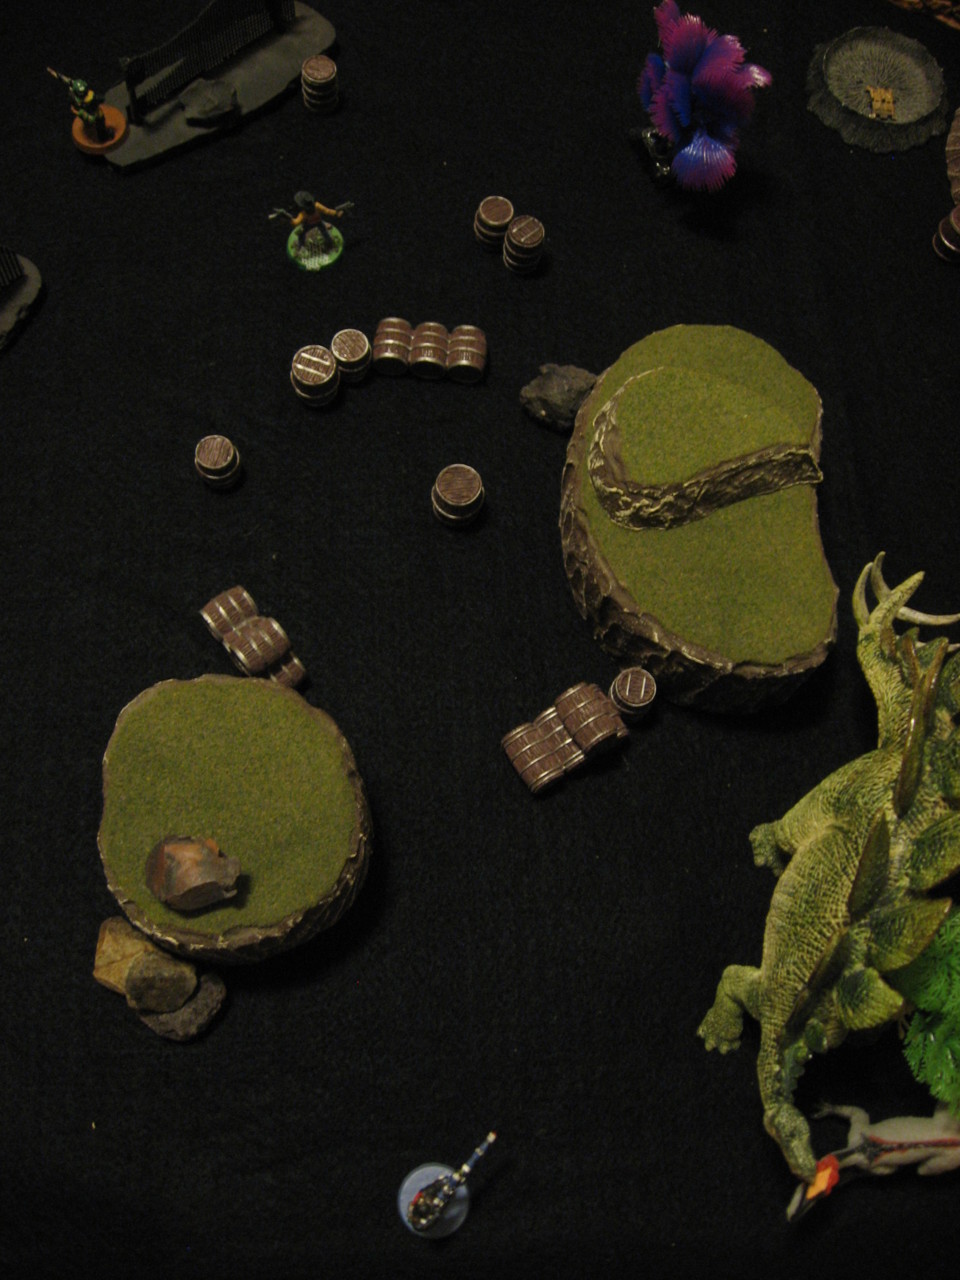
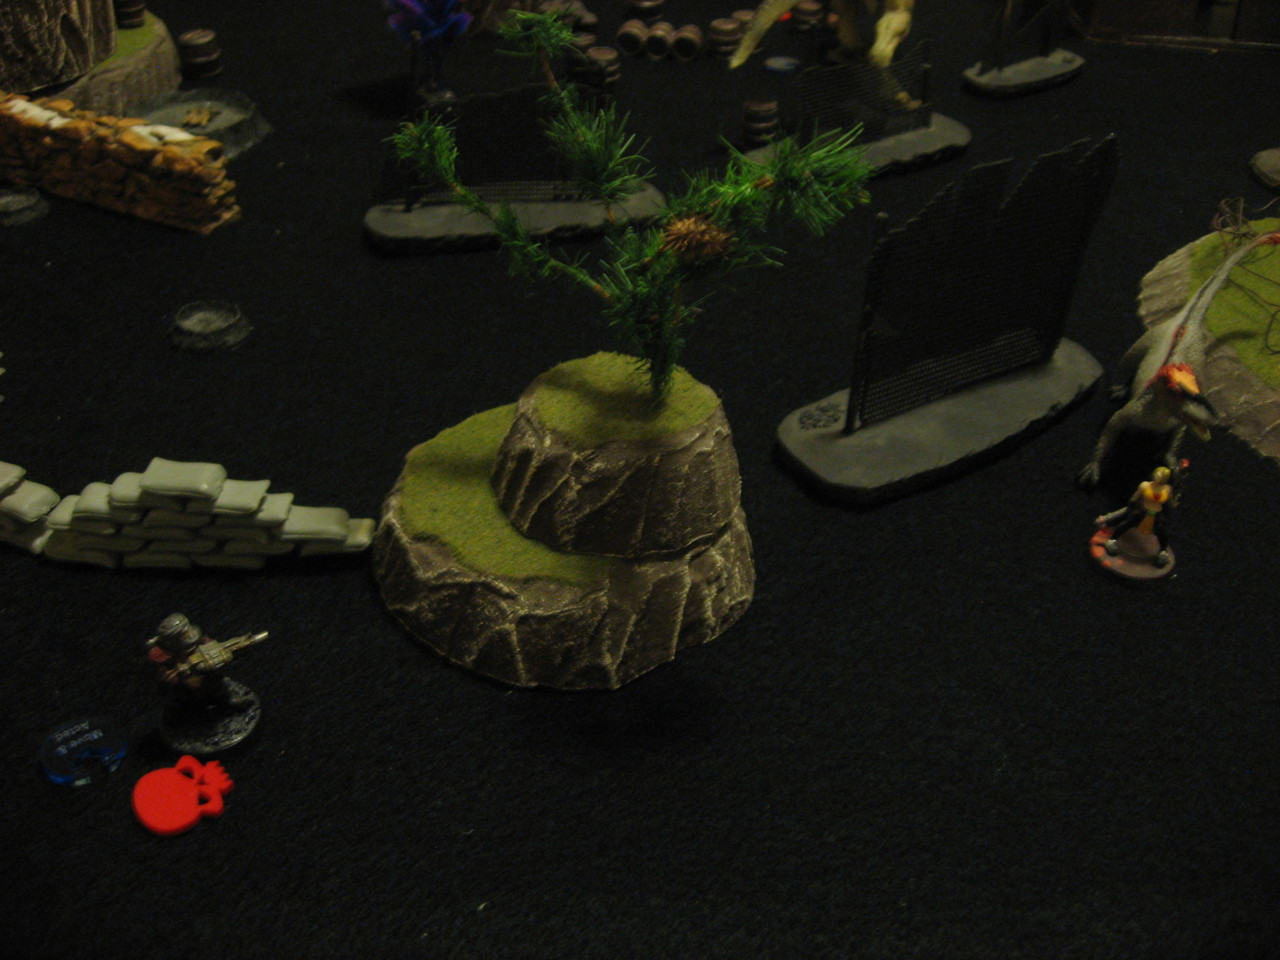
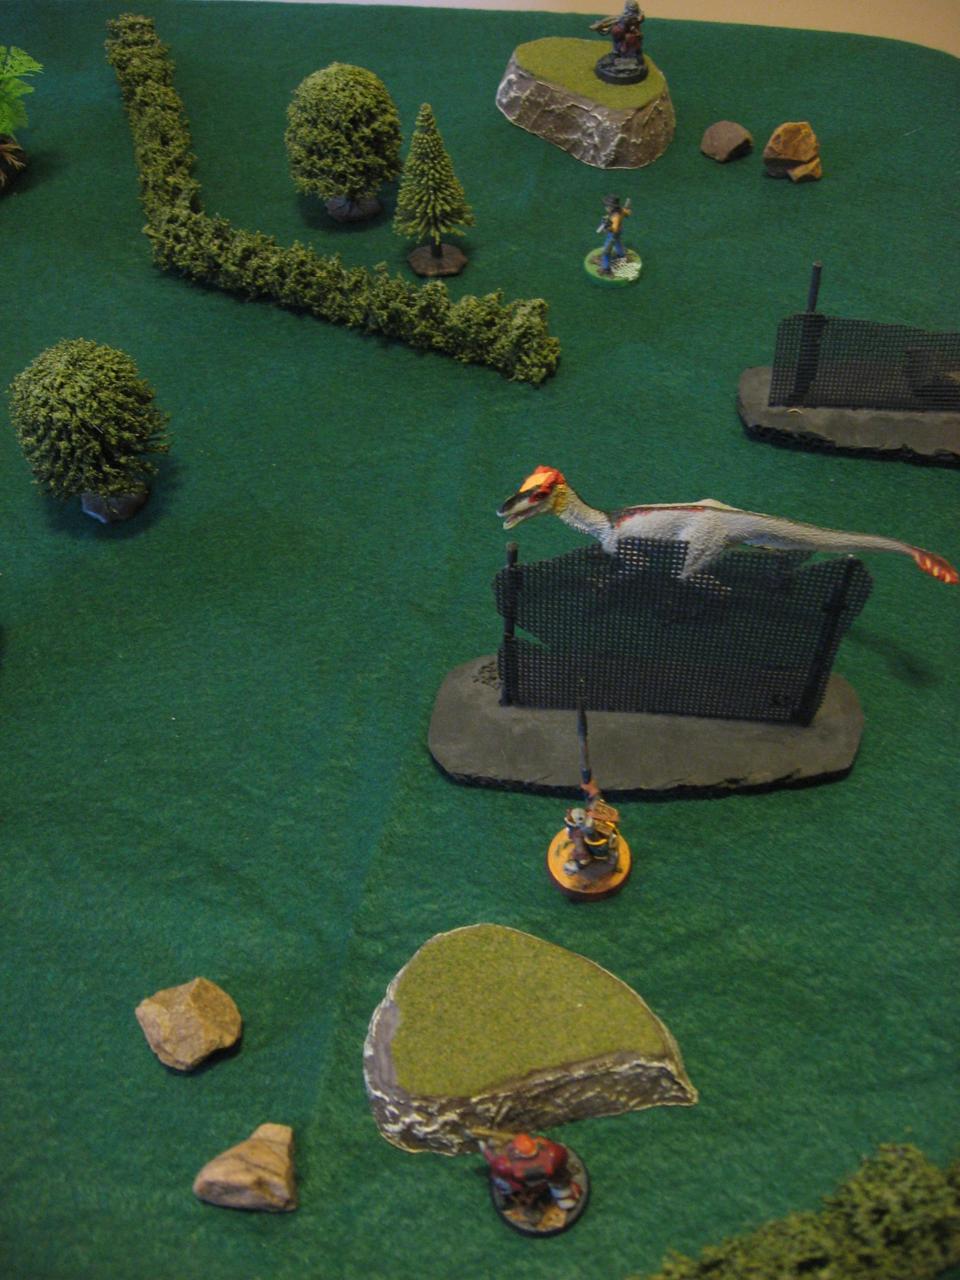
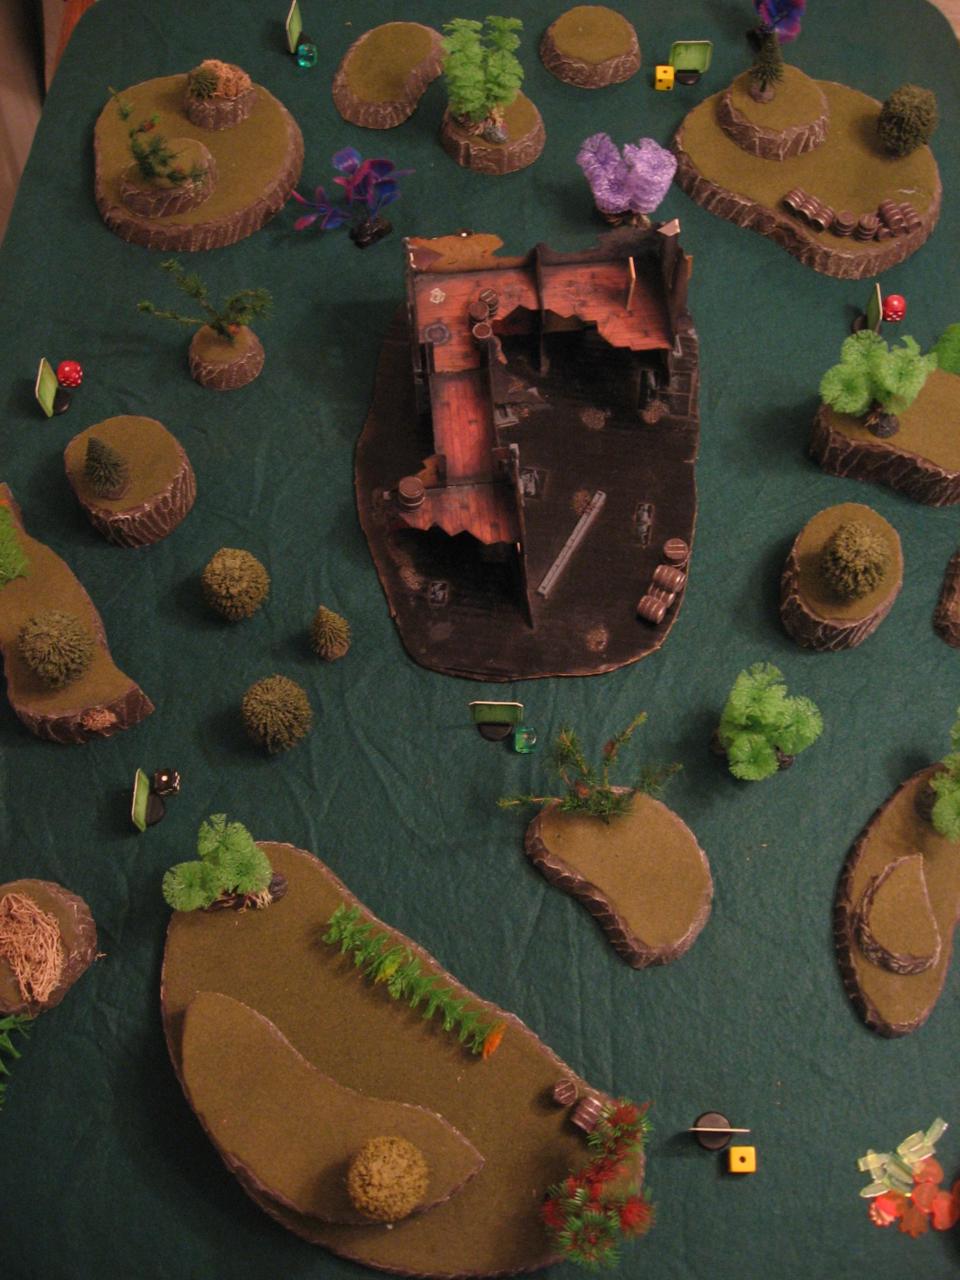
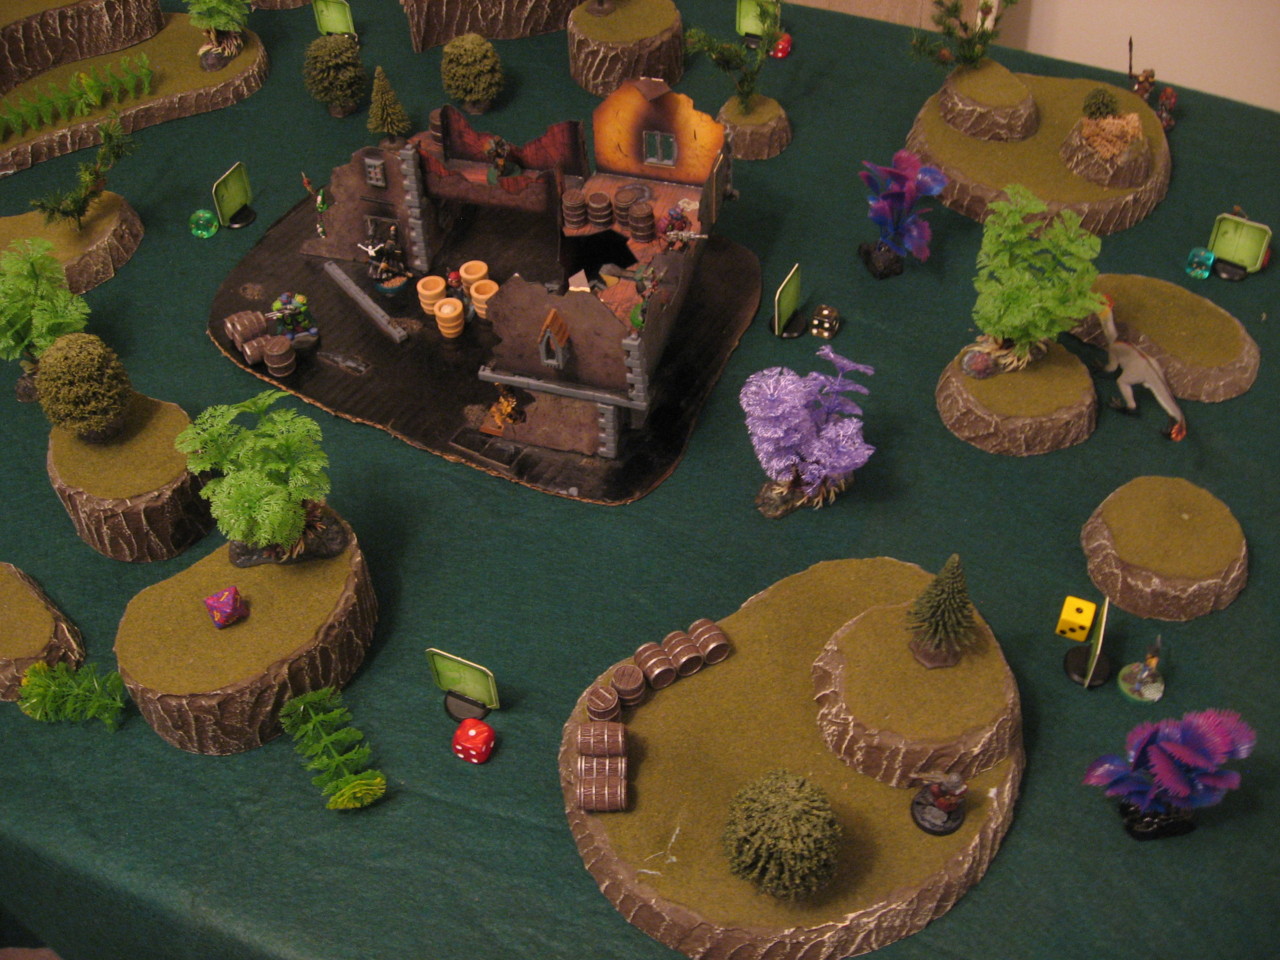
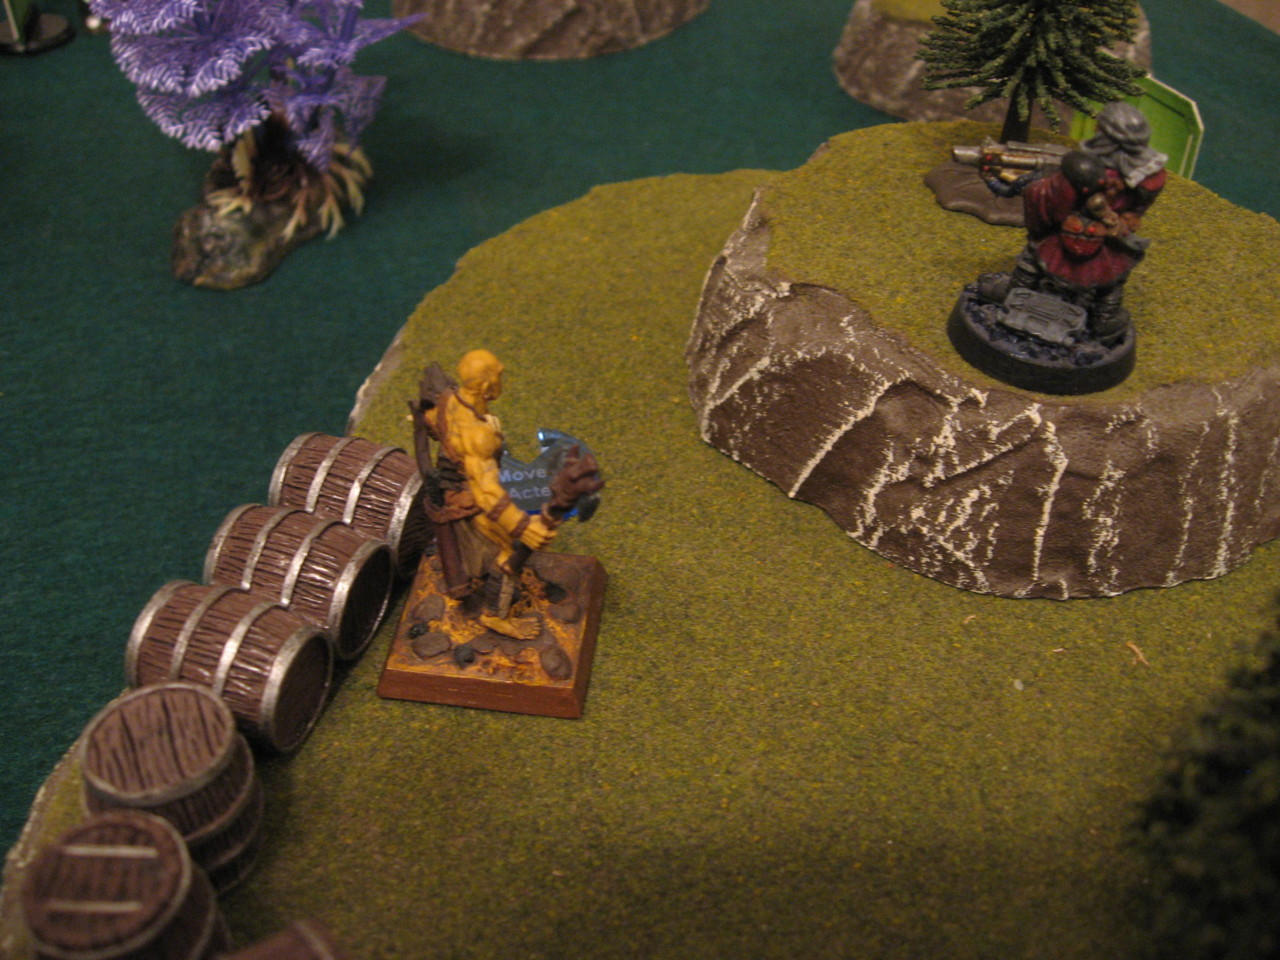
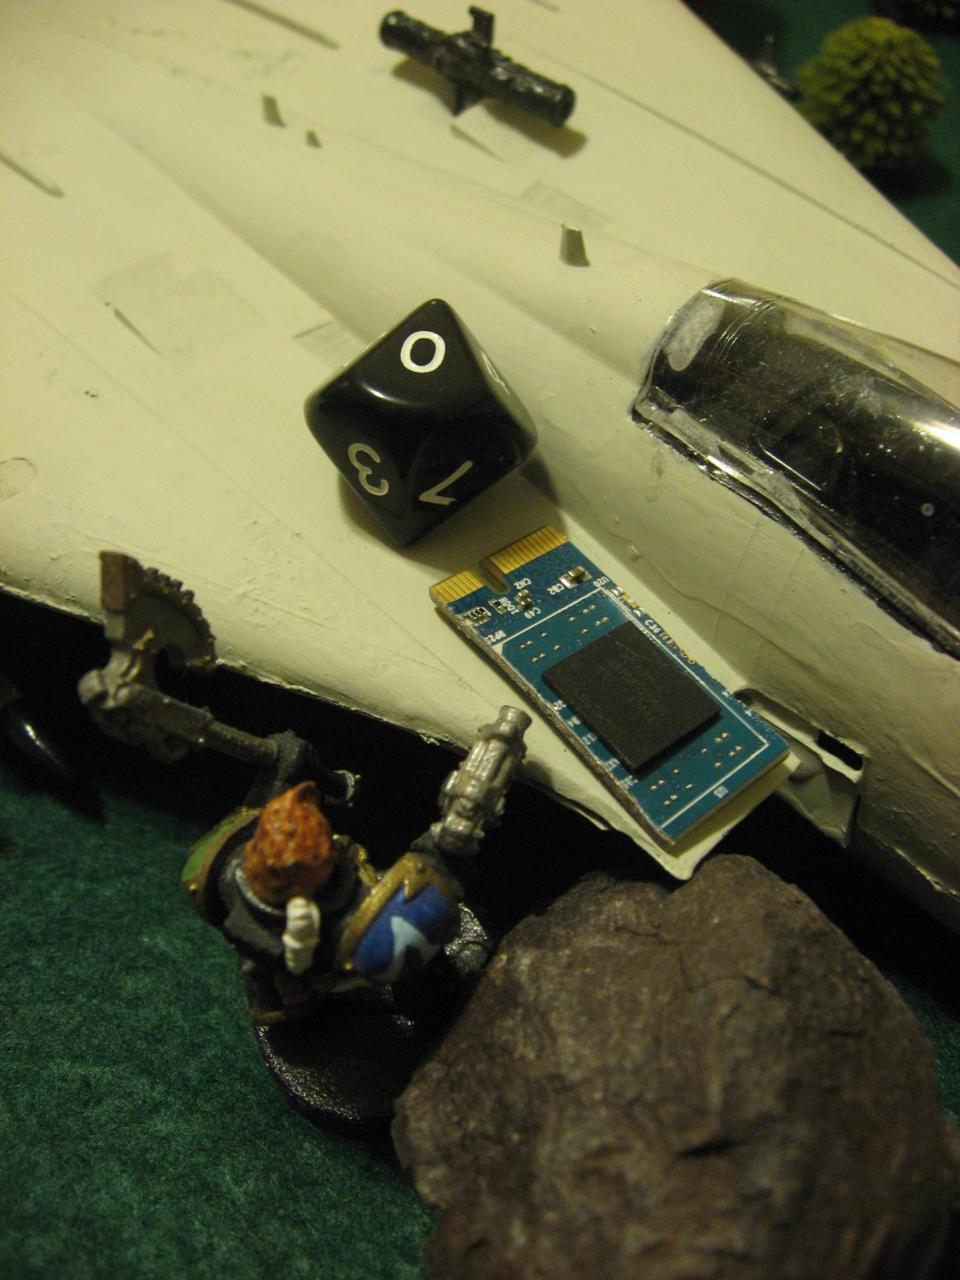
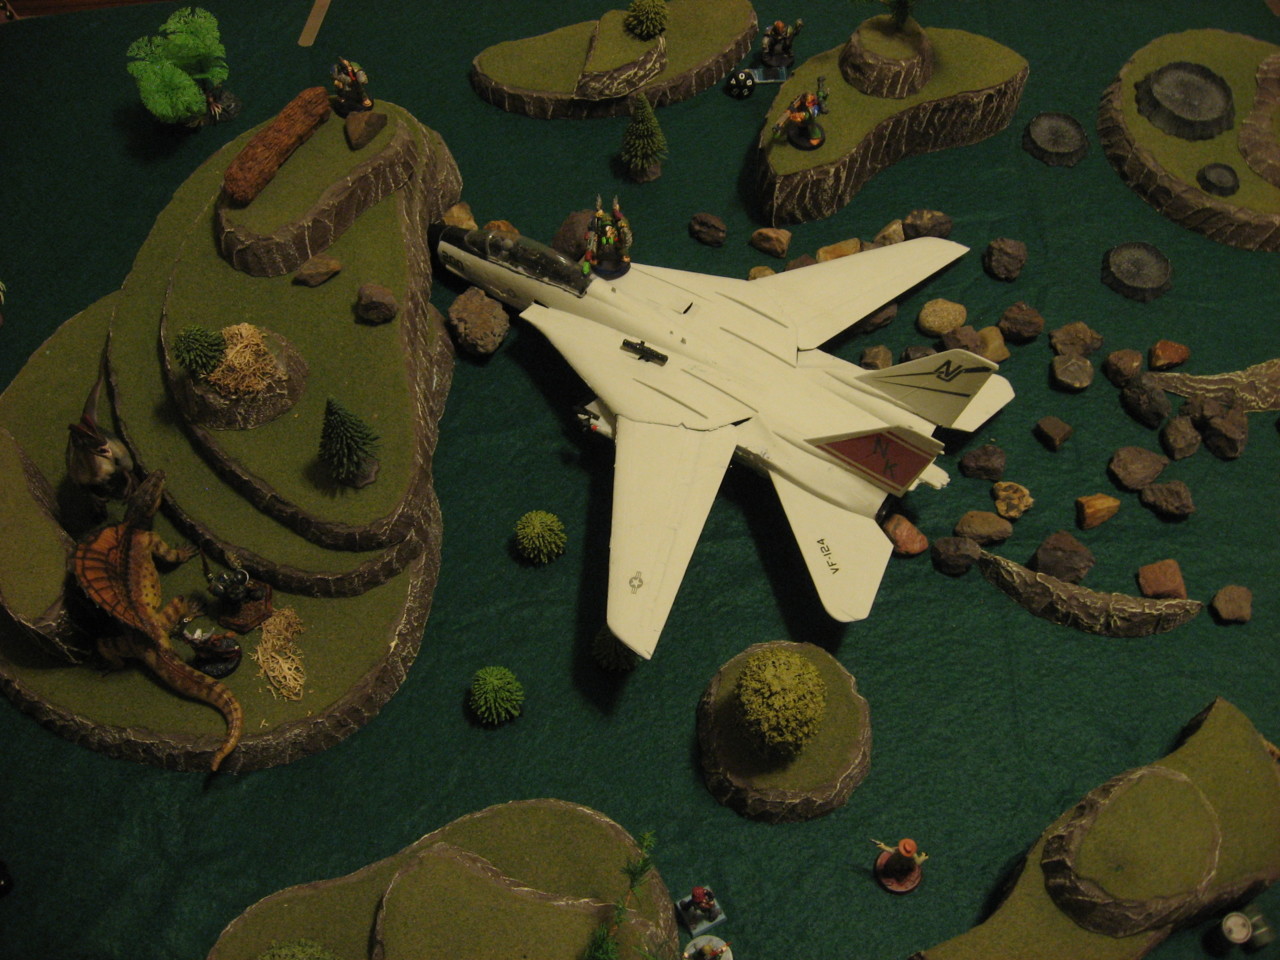
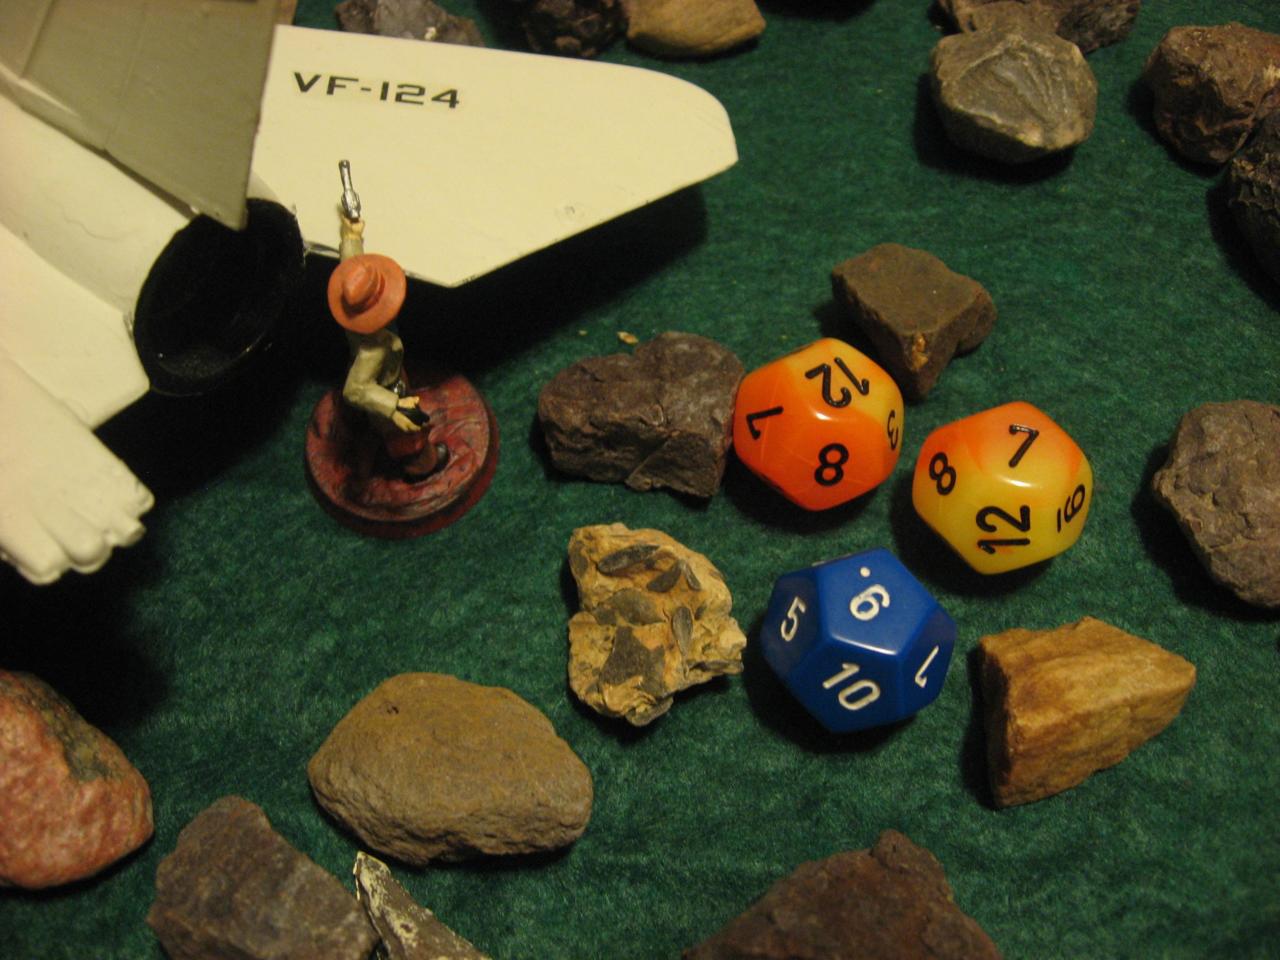
The central feature of the table was the crashed and decaying F-14 Tomcat. I used a bunch of trailing rocks to make a slide/crash zone and hopefully give some sense of weight to the plane. The pilot was likely heading for the softer jungle at the edge of the table, but fell short and crashed into a solid stone hill. Otherwise an old corral/pen containing barrels and a sabertooth skeleton, a few hills and the usual trees, and the table was set.

A simple “Edge” deployment would be used, along the long table edges, to really start close to the airplane.

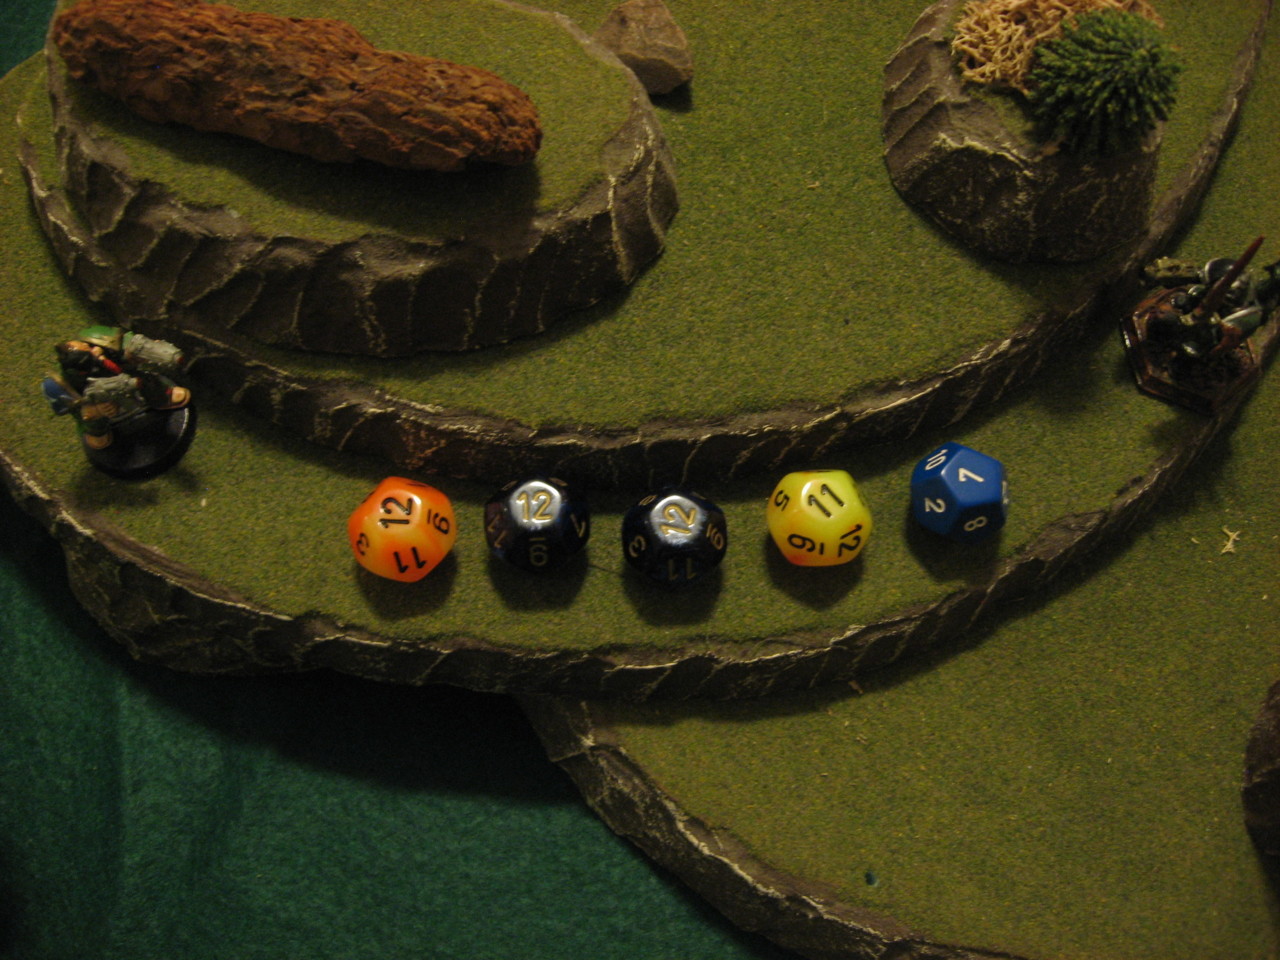
A turn limit was set: 6 turns, with a situational 7th if either the black box or engine parts were still in play at the end of the 6th turn.

Objectives
dc-operation-black-box-0016For this game Secret Objectives would be used. Specifically the Delta Commando Squad had to “Smash & Grab” the black box and engine pieces from the airplane. The Eastwood Rovers had to “Demolish” the same pair of objectives. And there was a main public Objective of “Capture” with the F-14 Tomcat being the contested objective.

dc-operation-black-box-0024
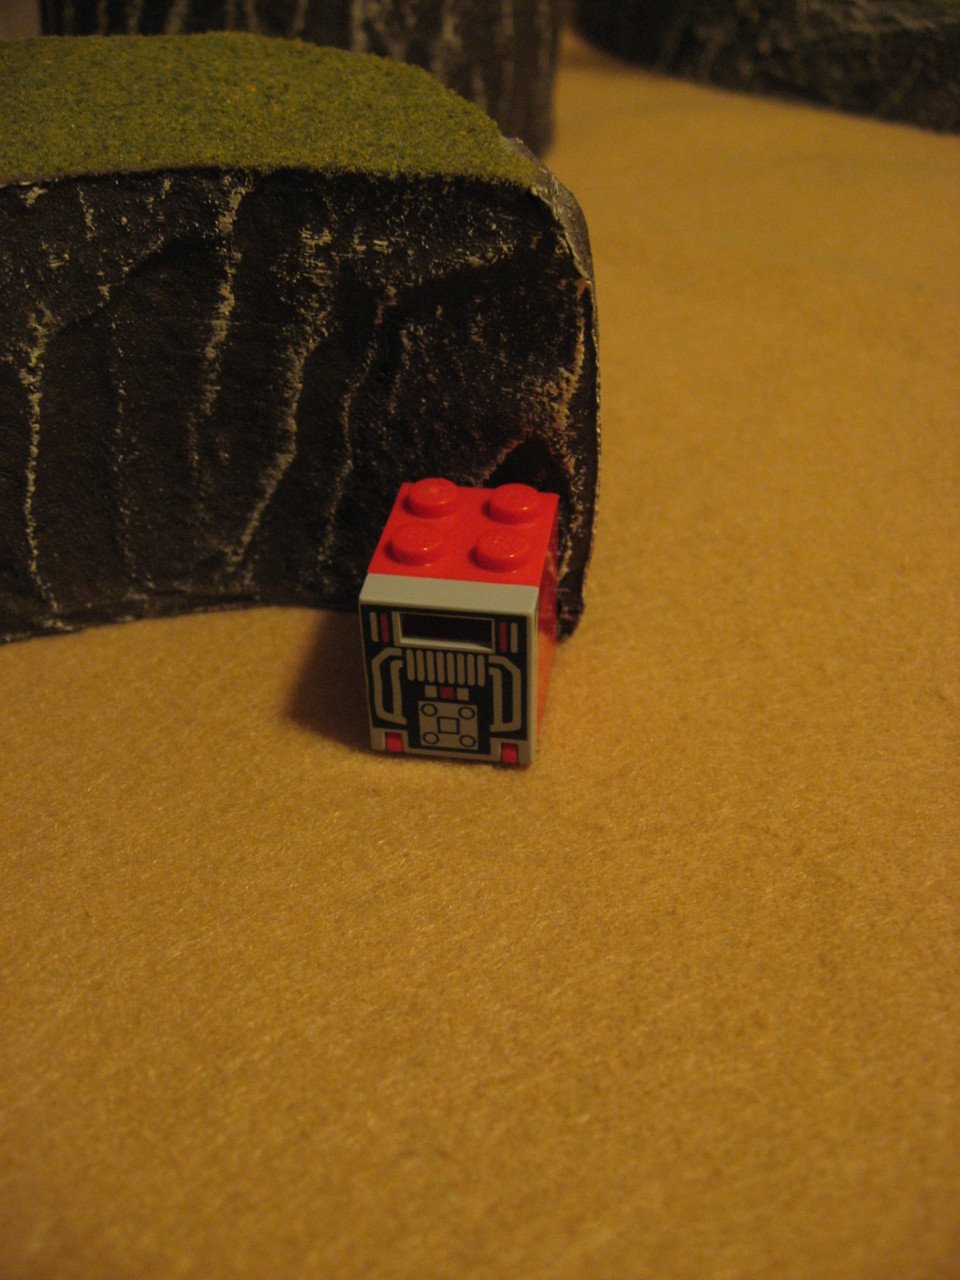
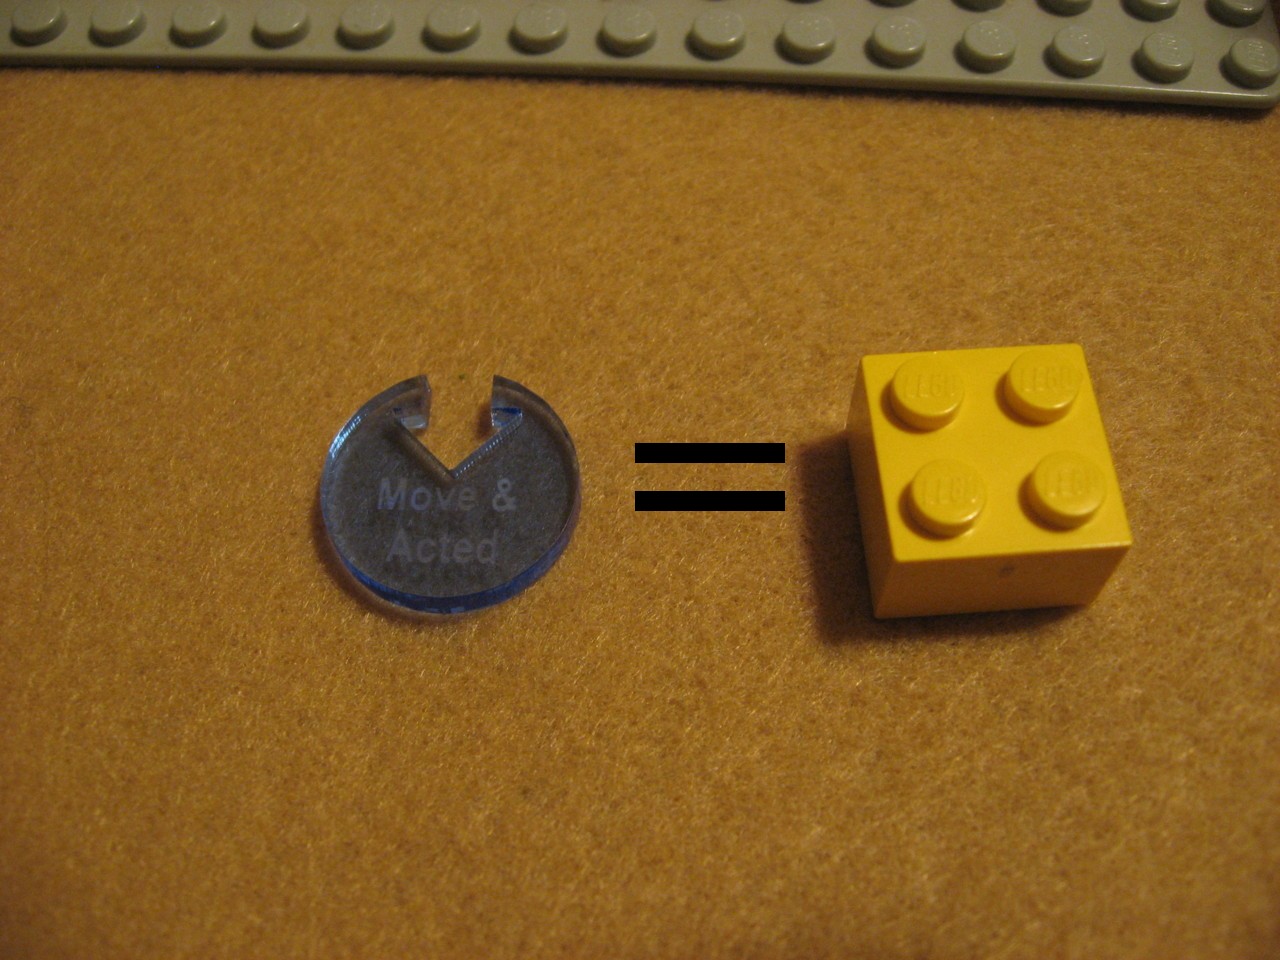
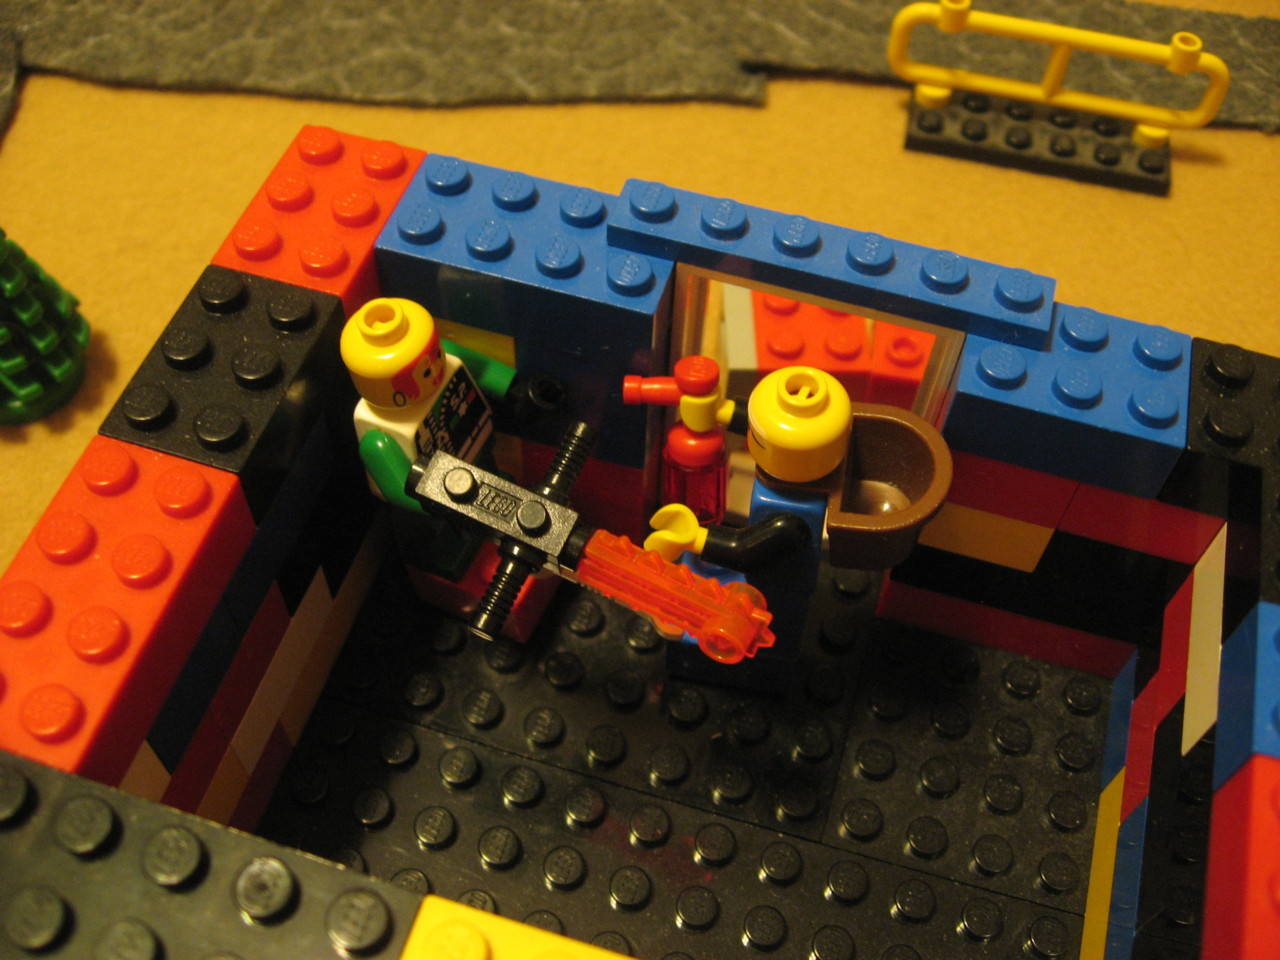
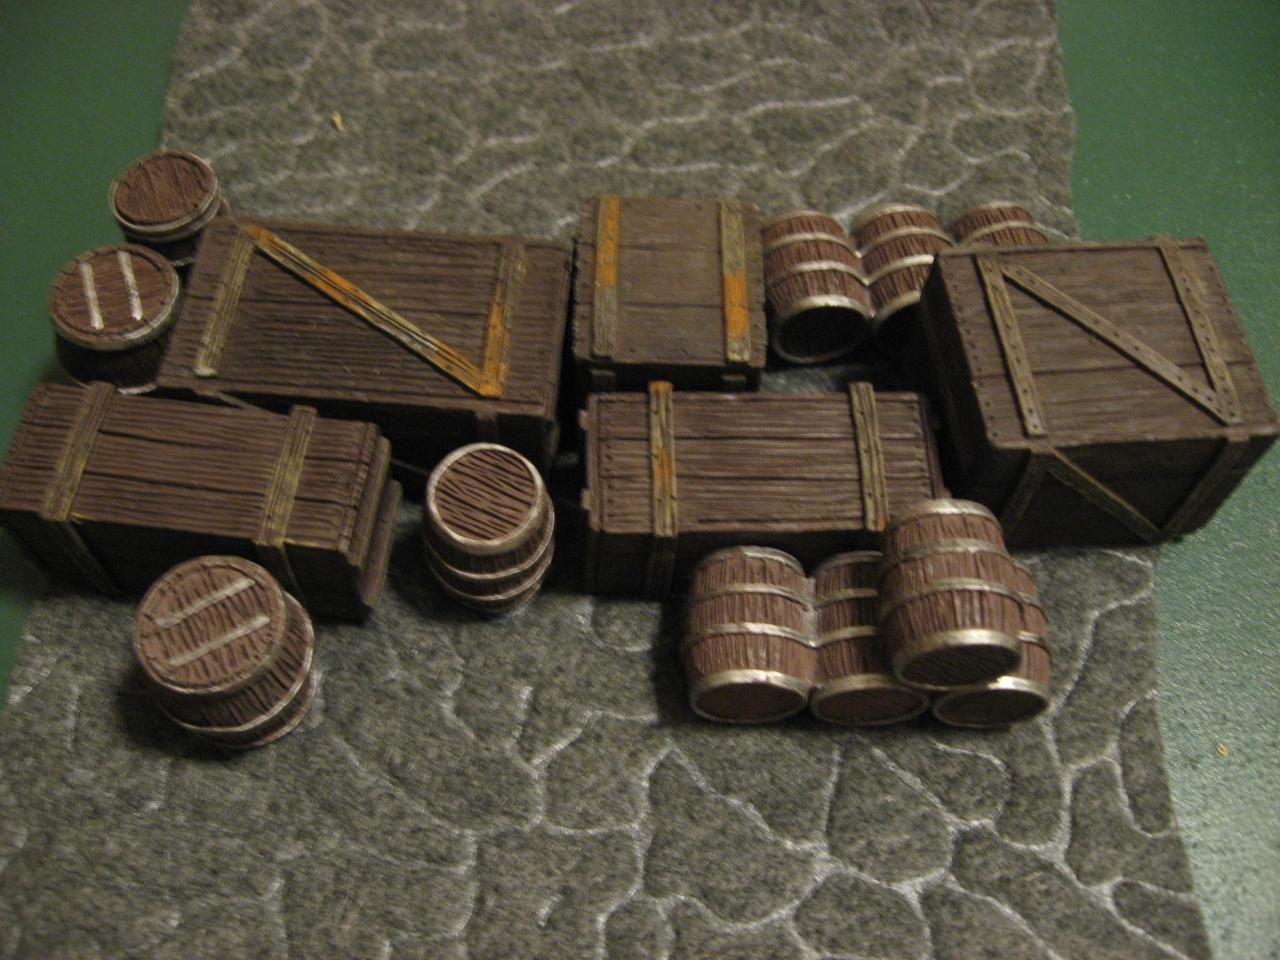
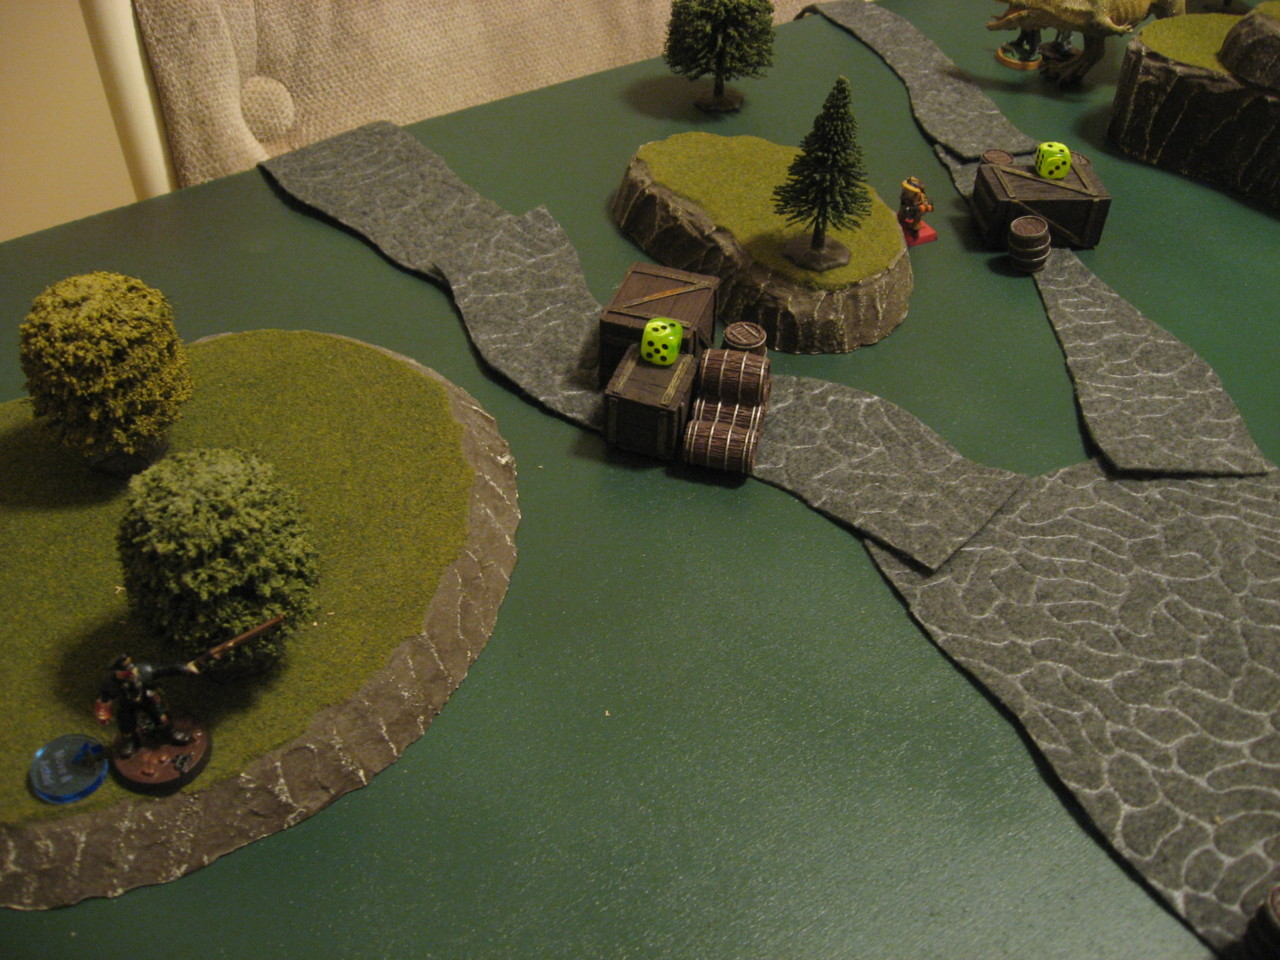
The black box and engine parts were represented by pieces of actual computer RAM, which looked pretty neat and fit well! They would have DEF 2 and HP 10.

Features
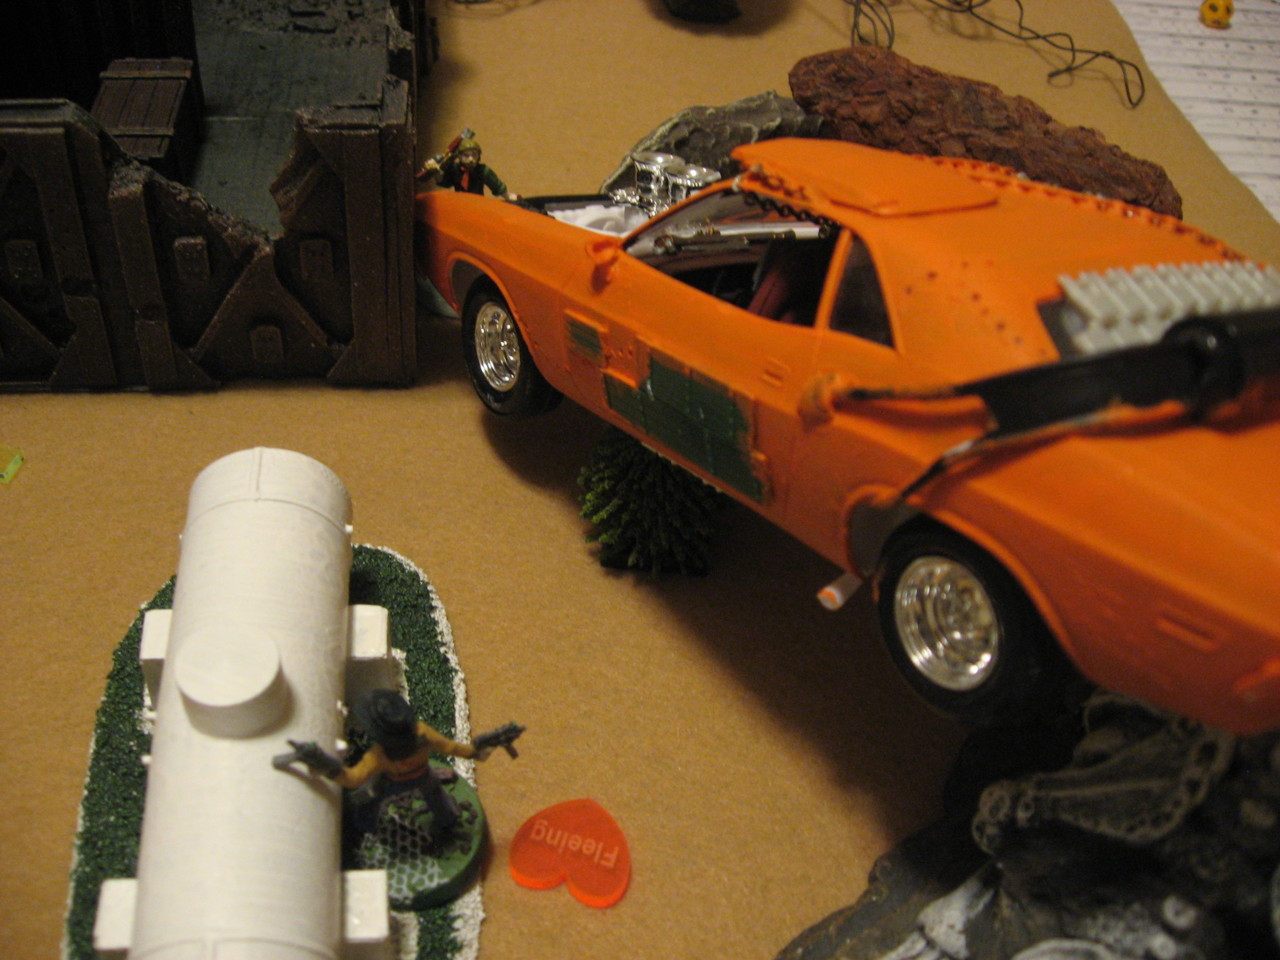
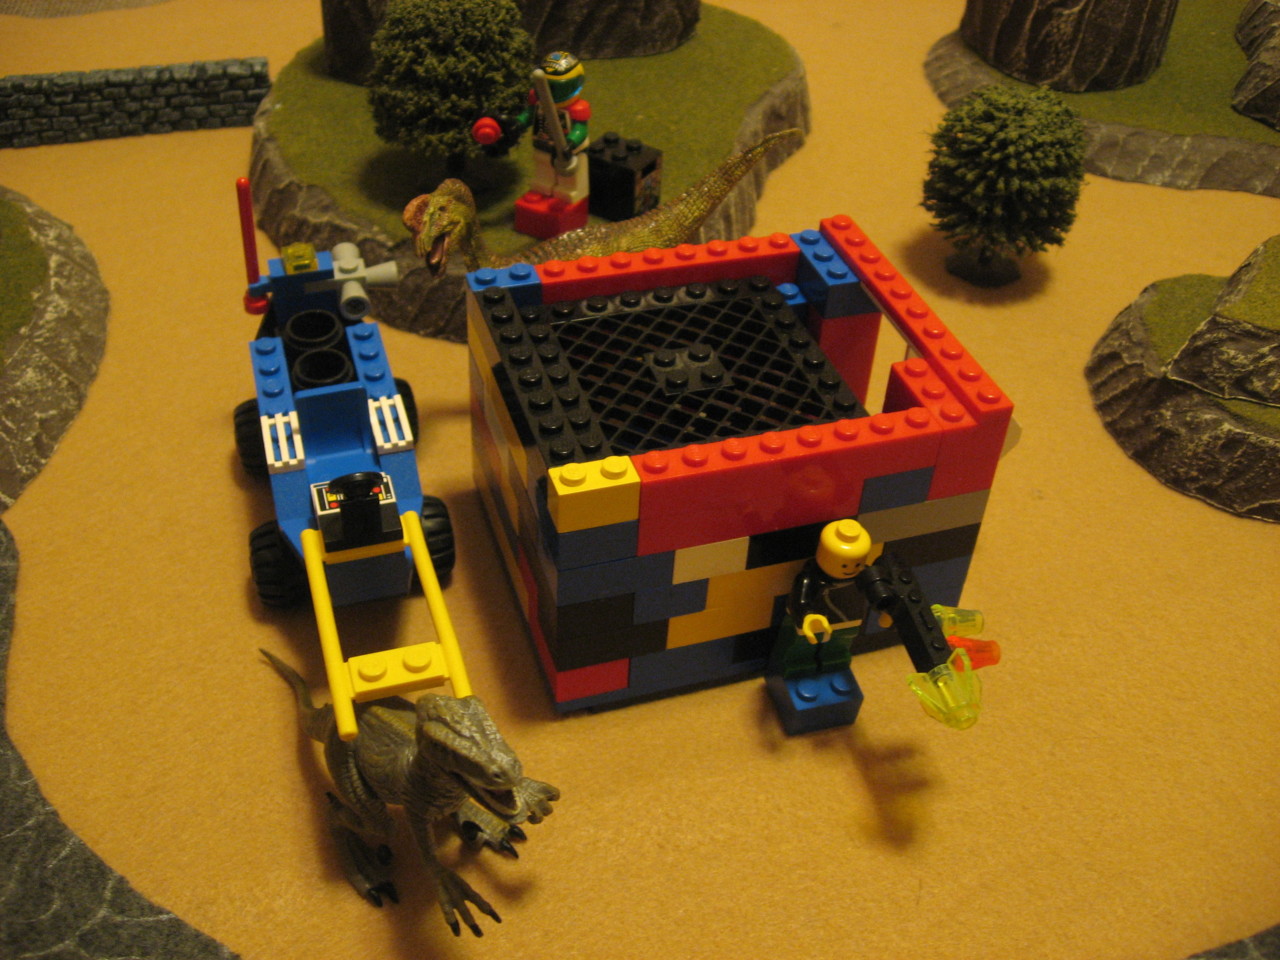
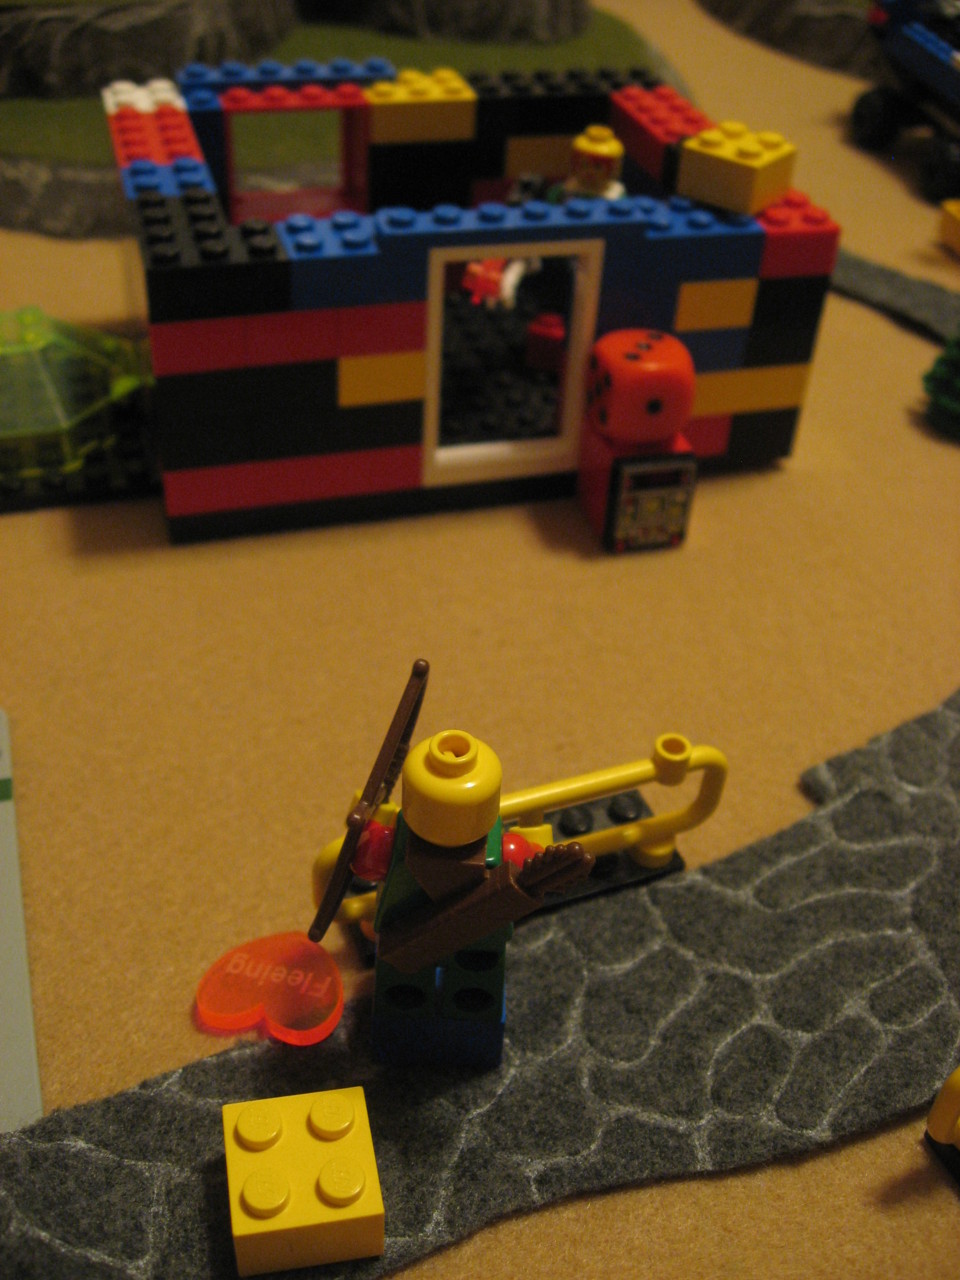
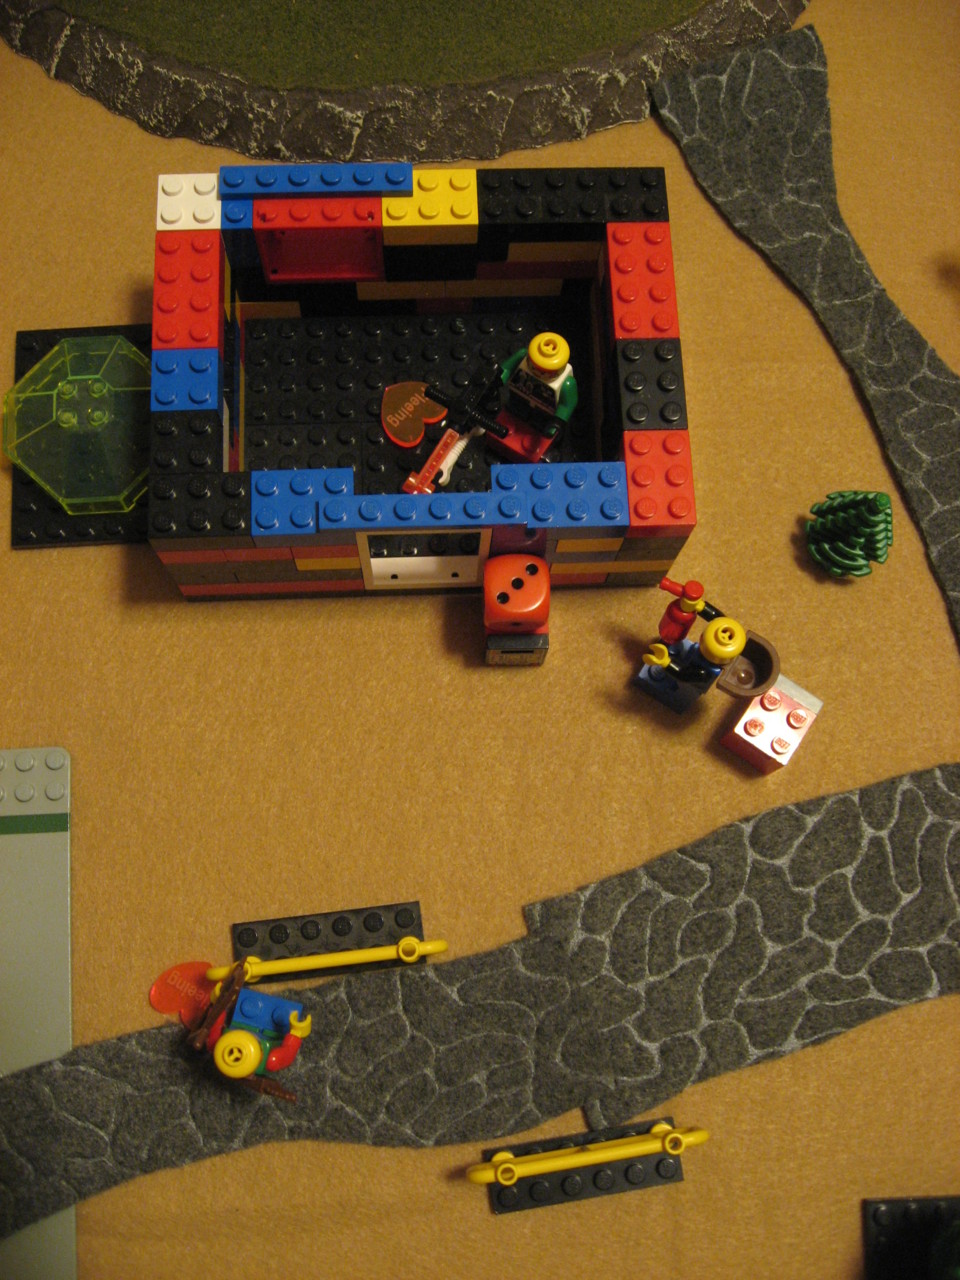
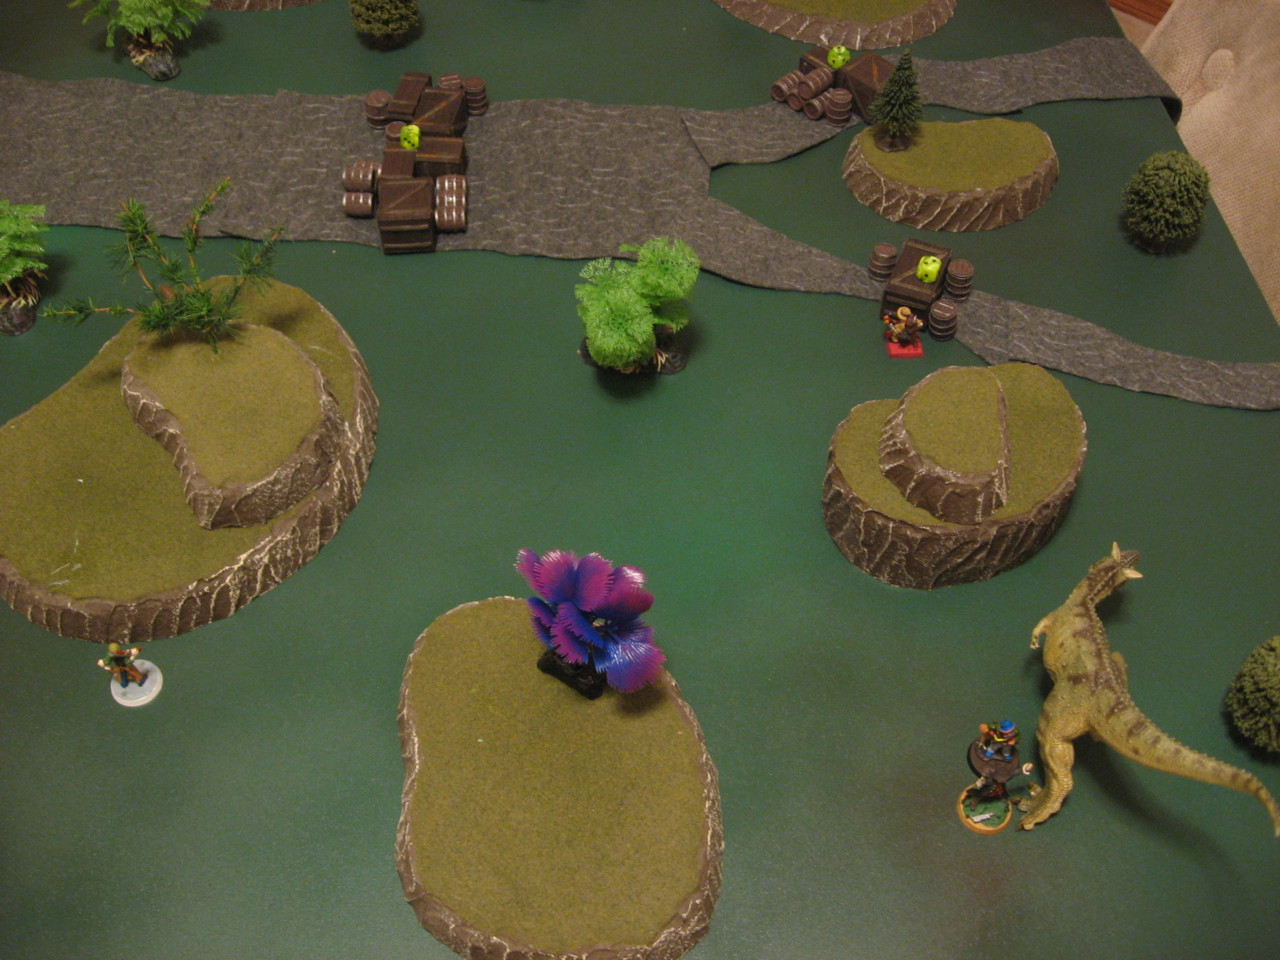
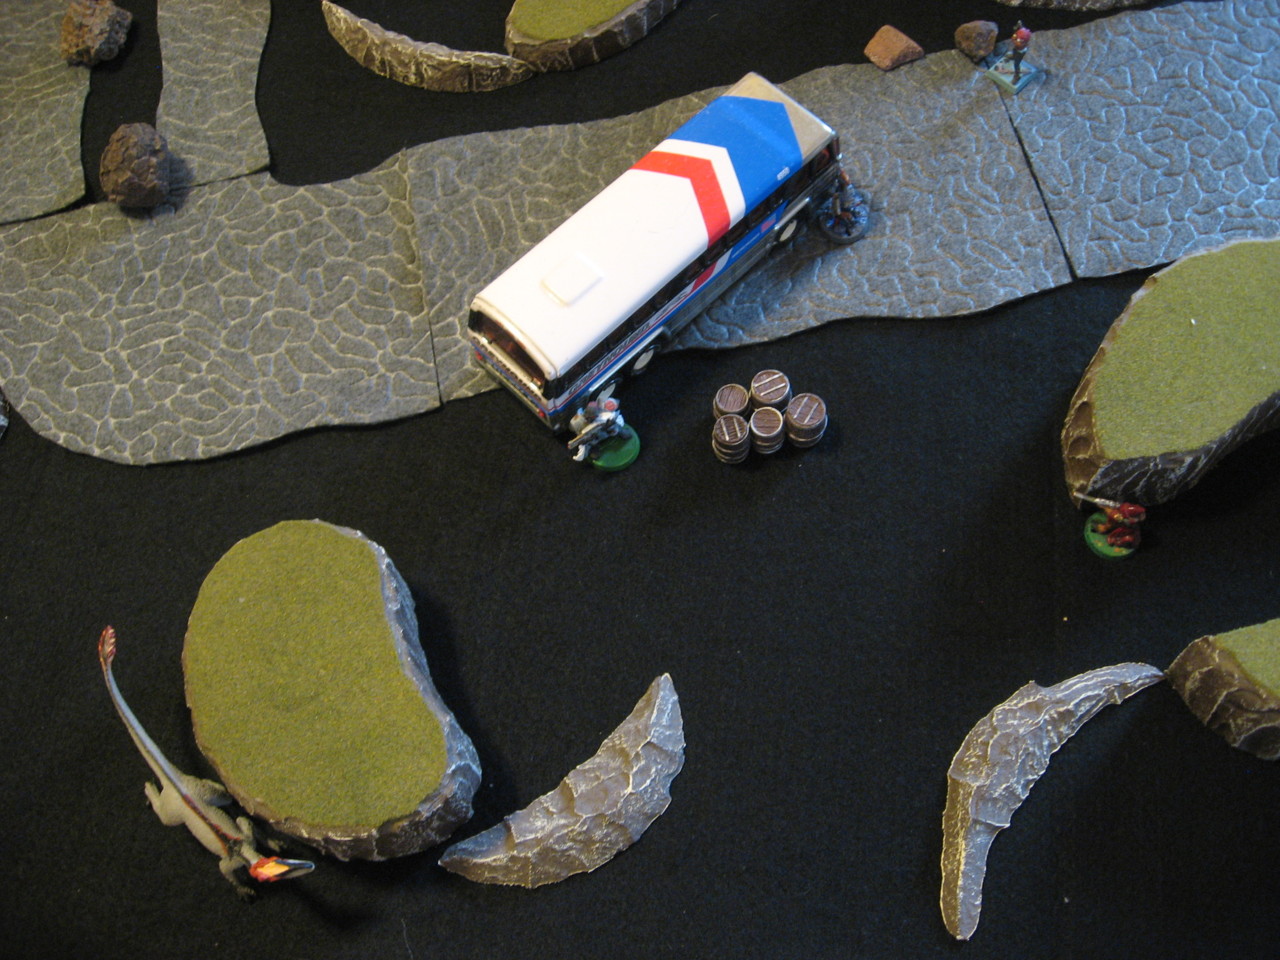
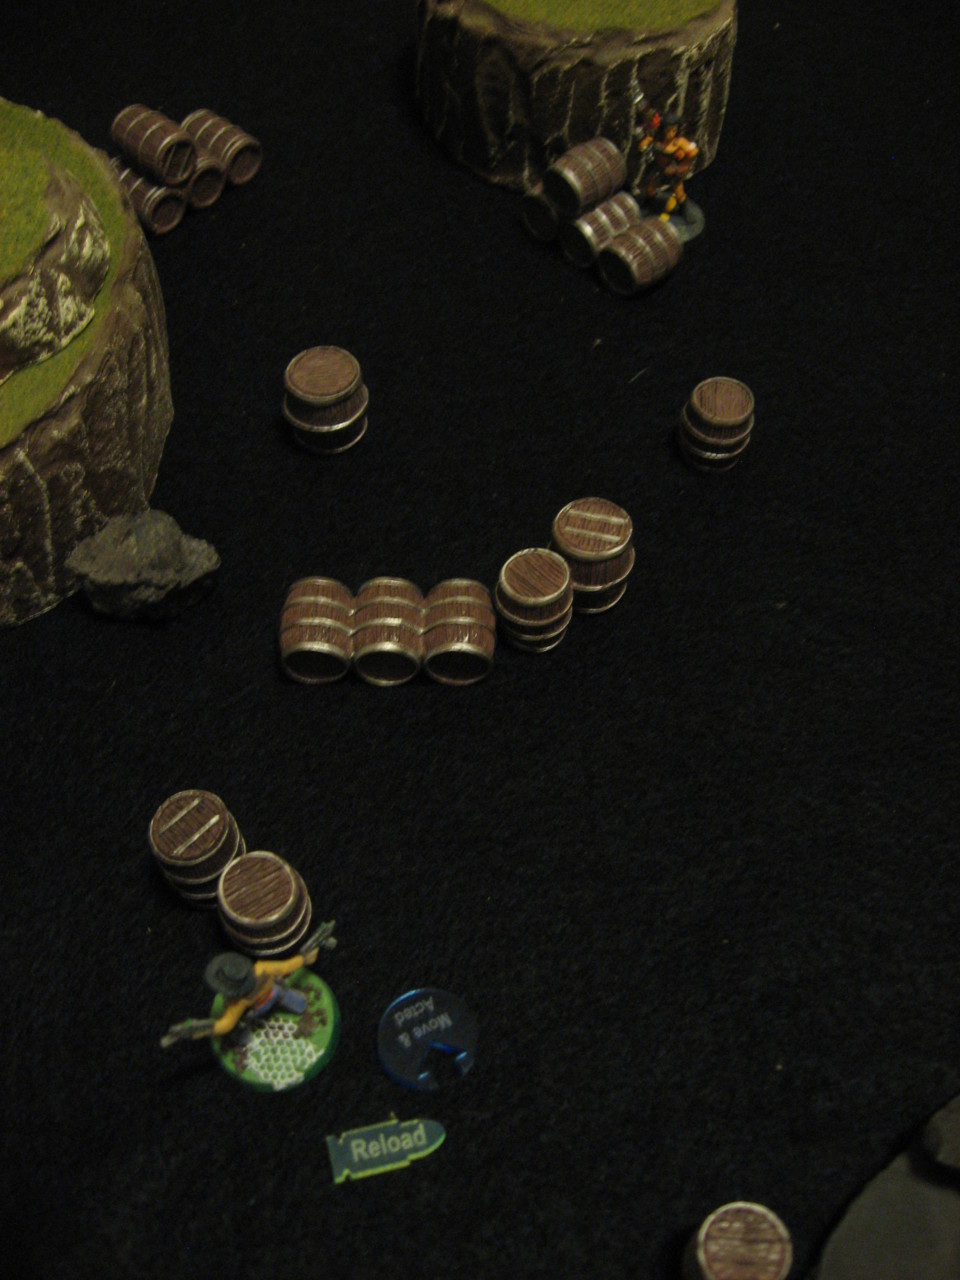
As for Features a few “Weapon Emplacements” were used as part of the airplane. Specifically a Flare Gun (represented by the black minigun on the model), and a pair of Wagon Blazer equivalents (basically flamethrowers) which originated from the missiles hanging under the swing wings.


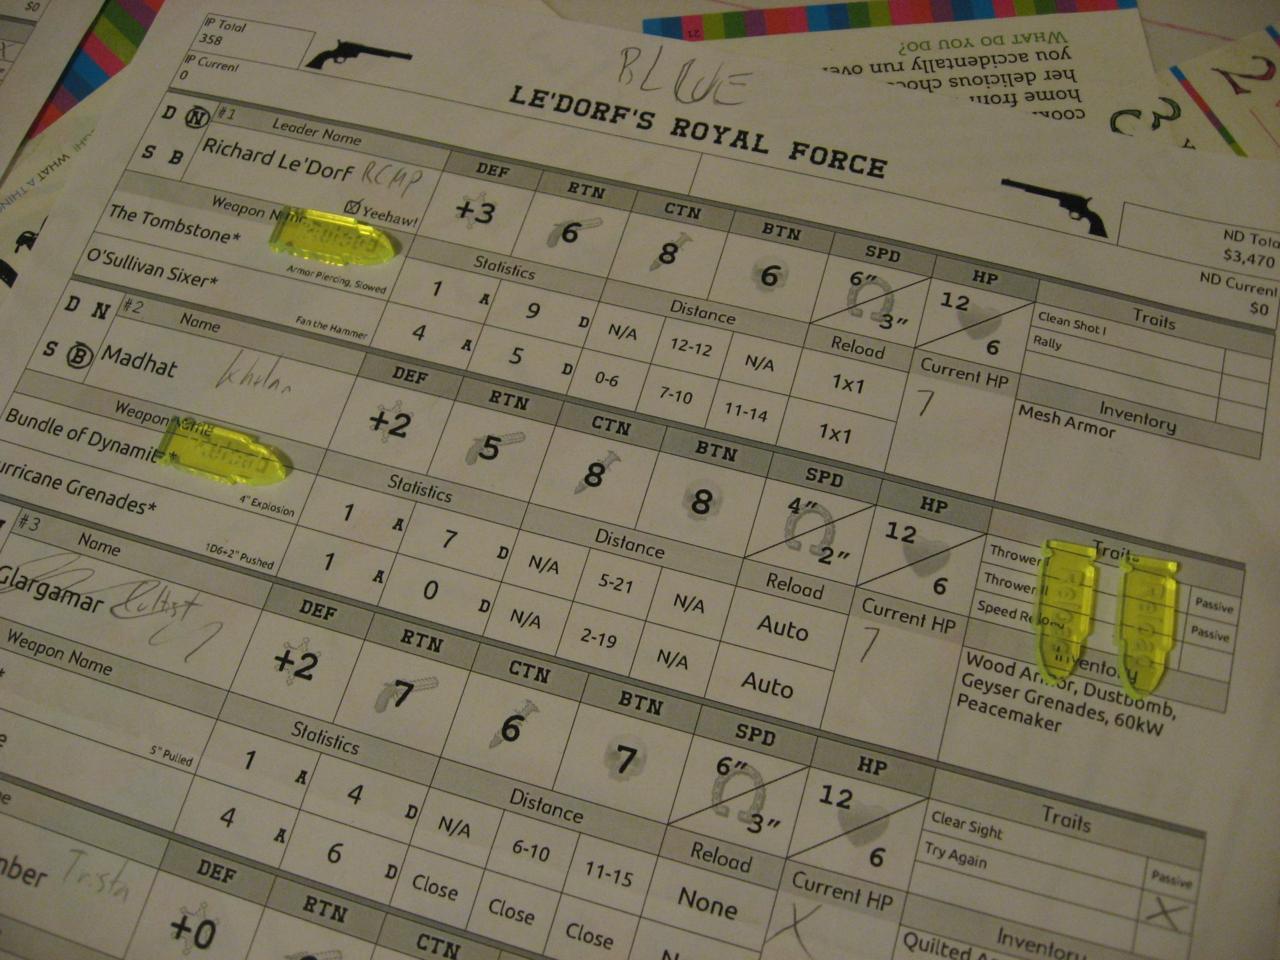
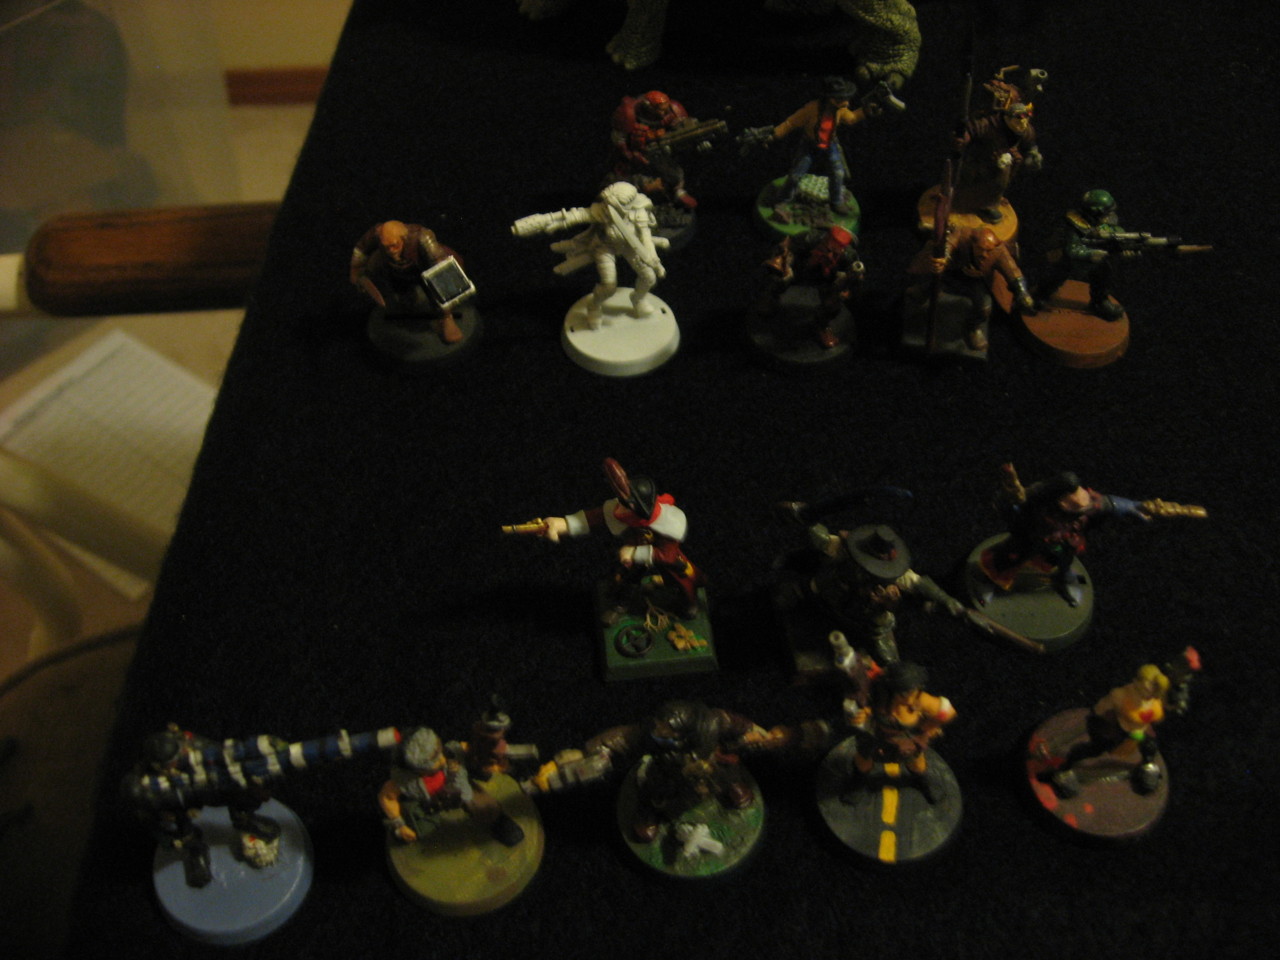
Posse: Delta Commando Squad – 130 IP, $1,700 ND, 4 traits – PDFSaloon
dc-operation-black-box-0011
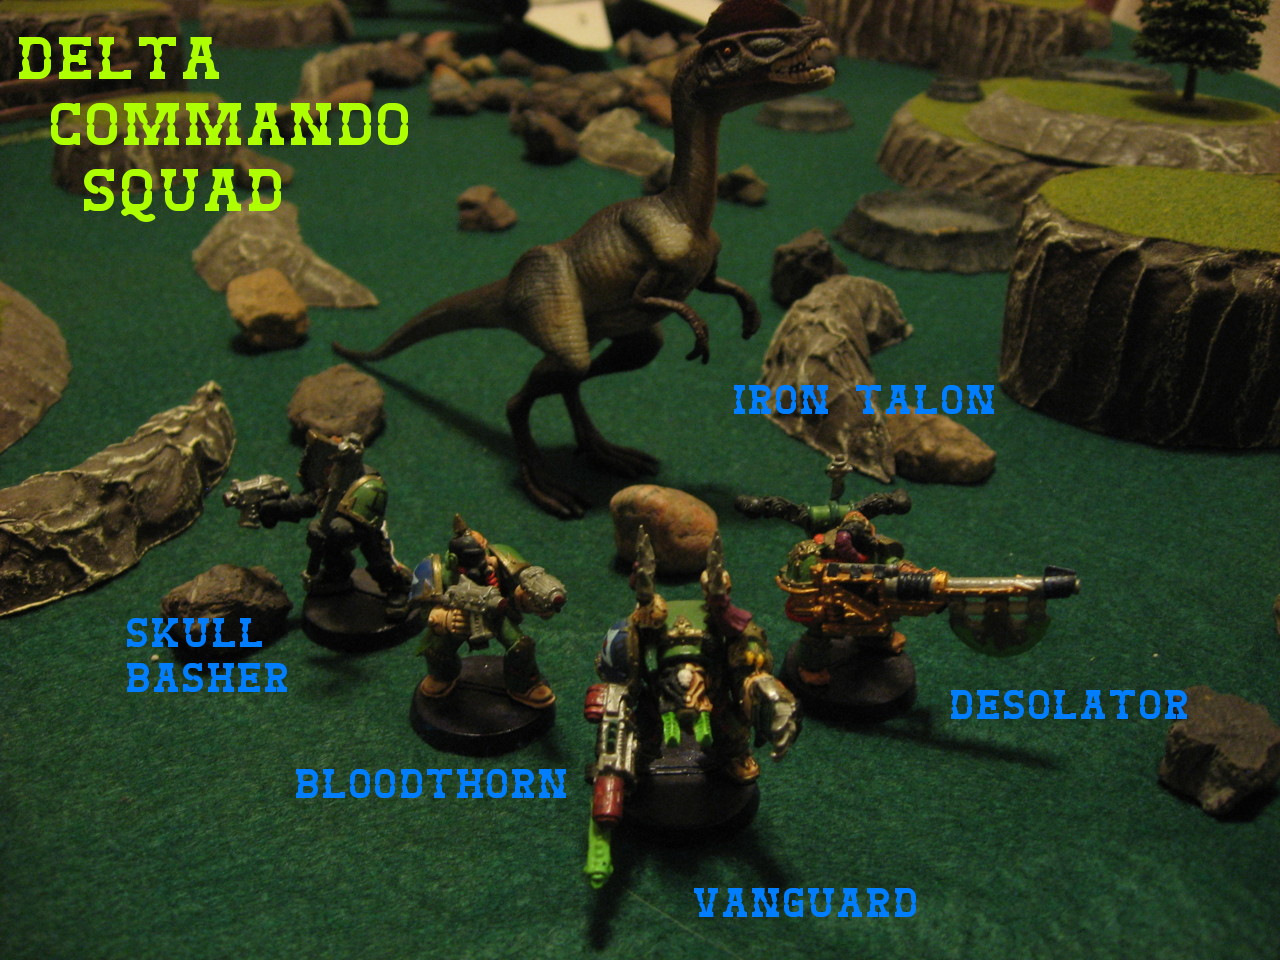
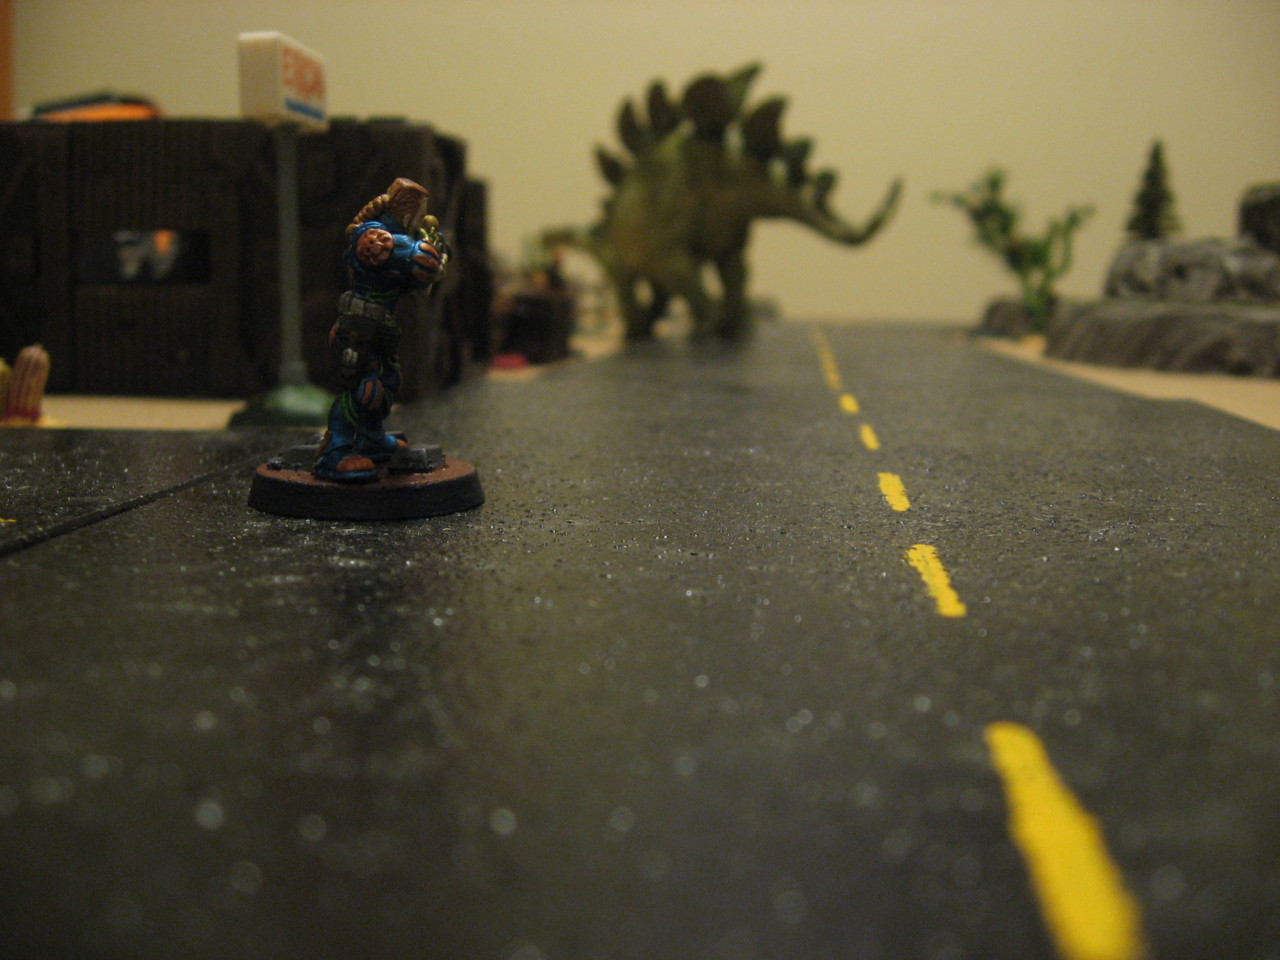
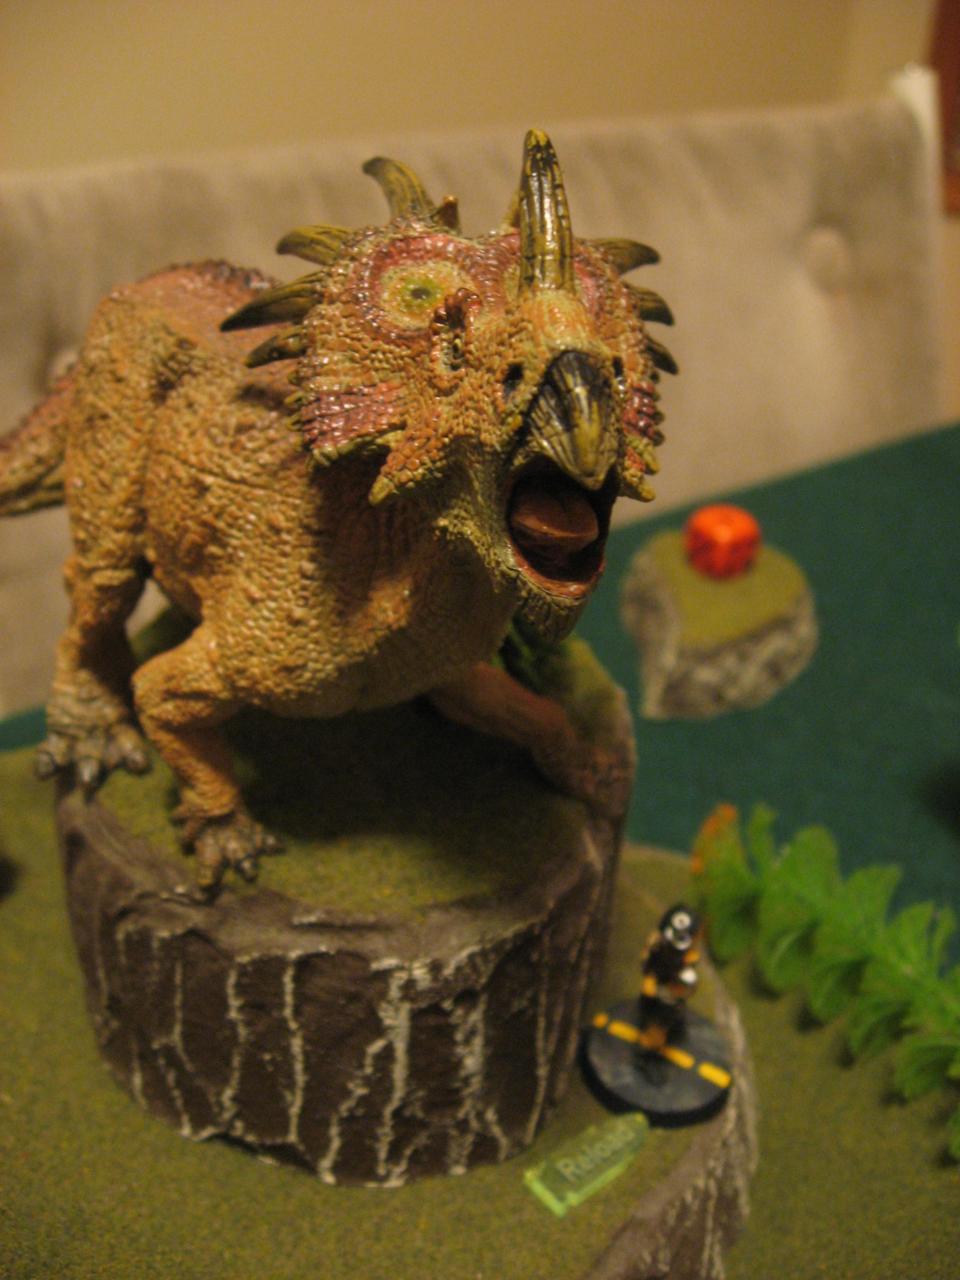
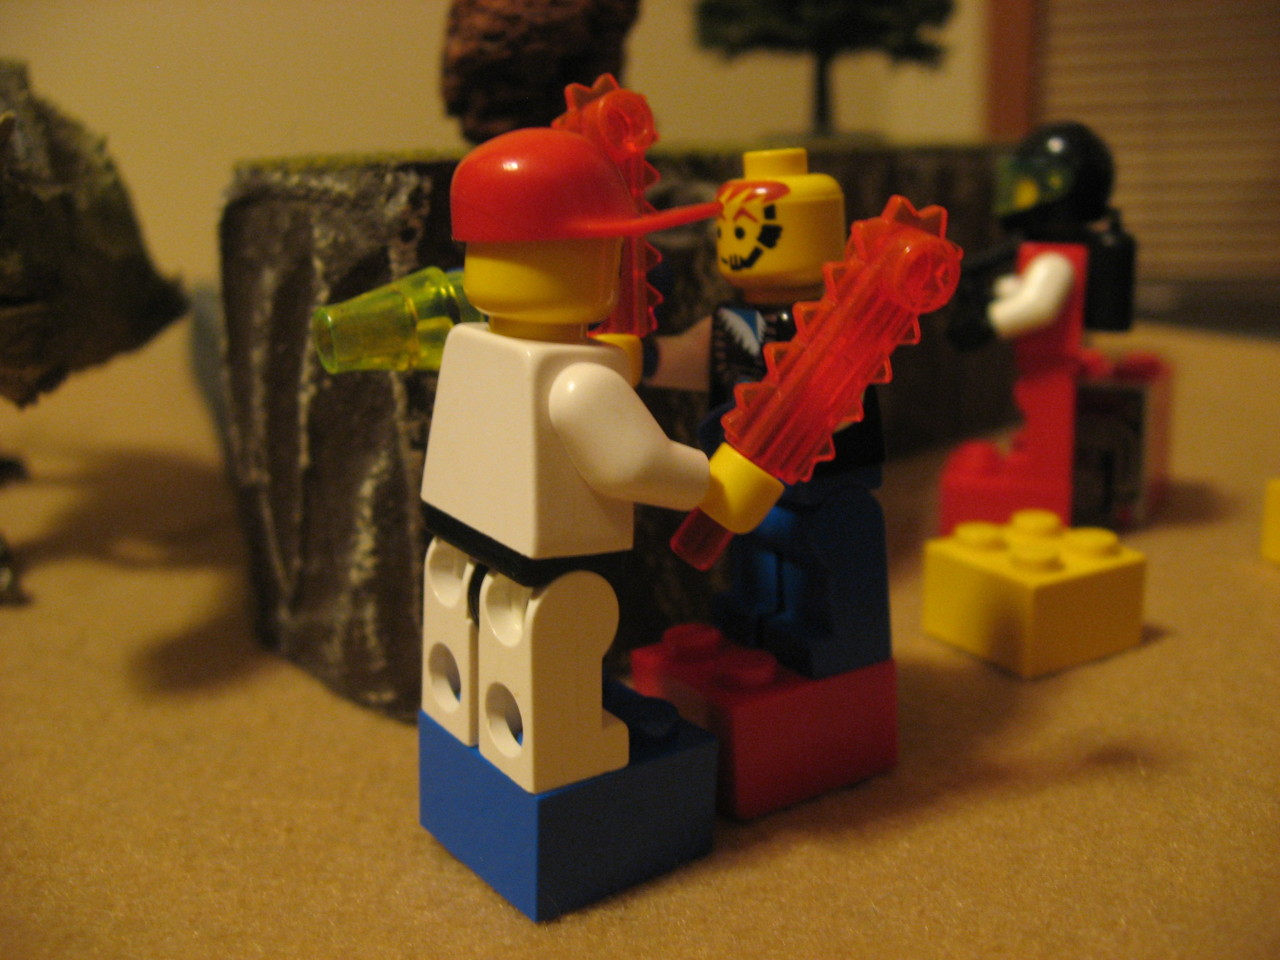
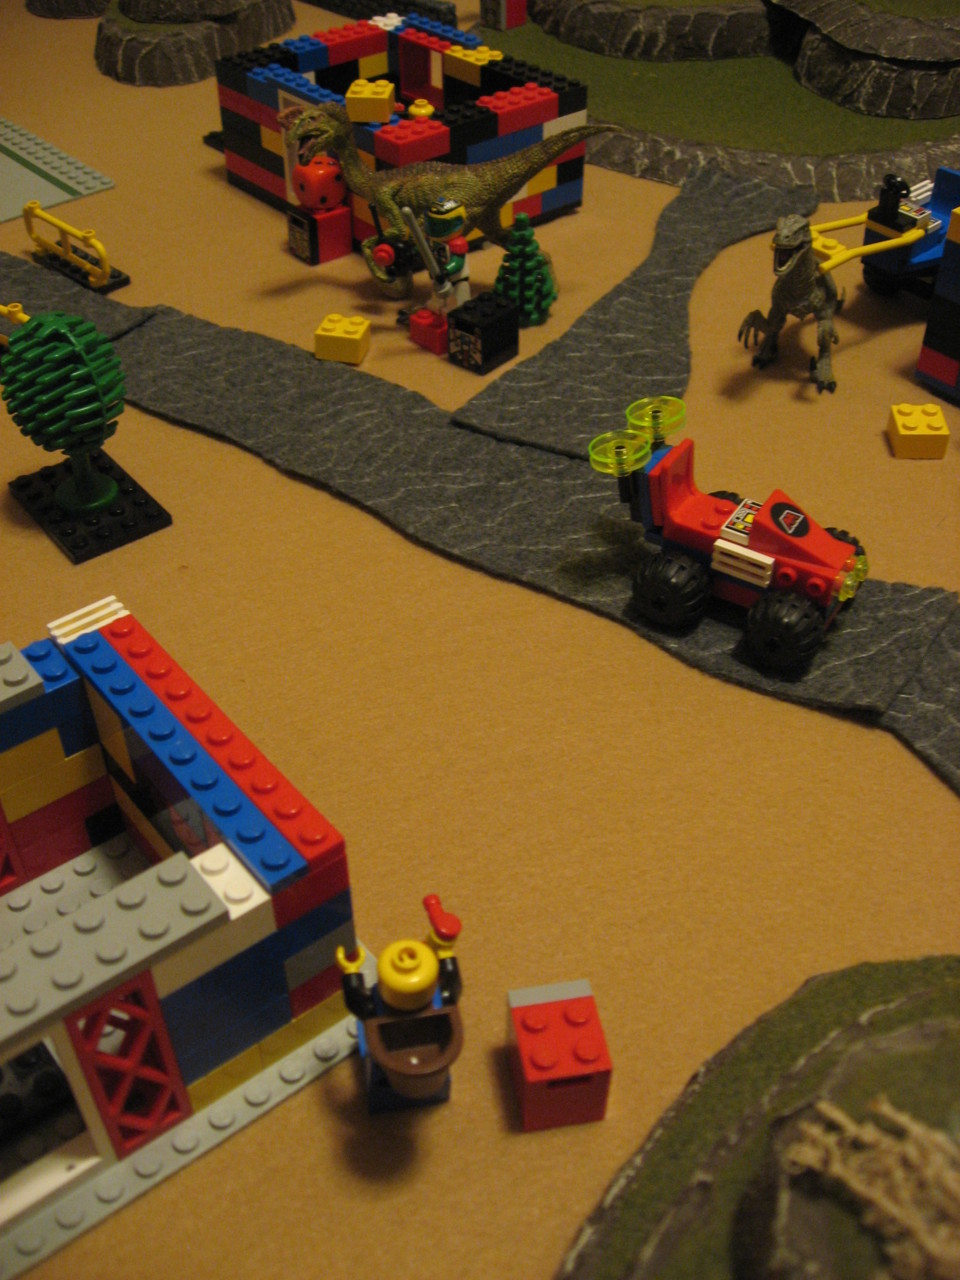
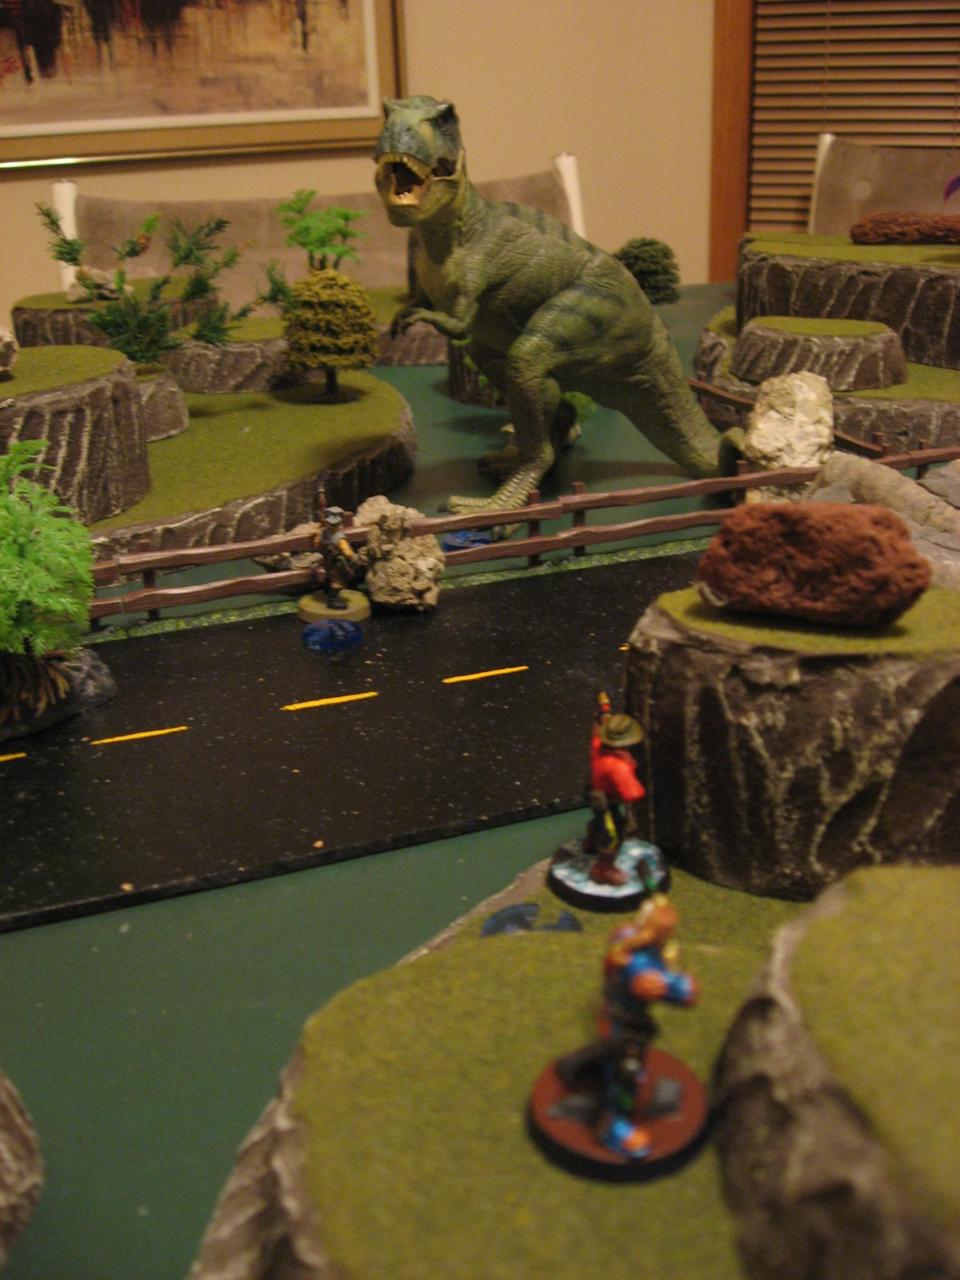
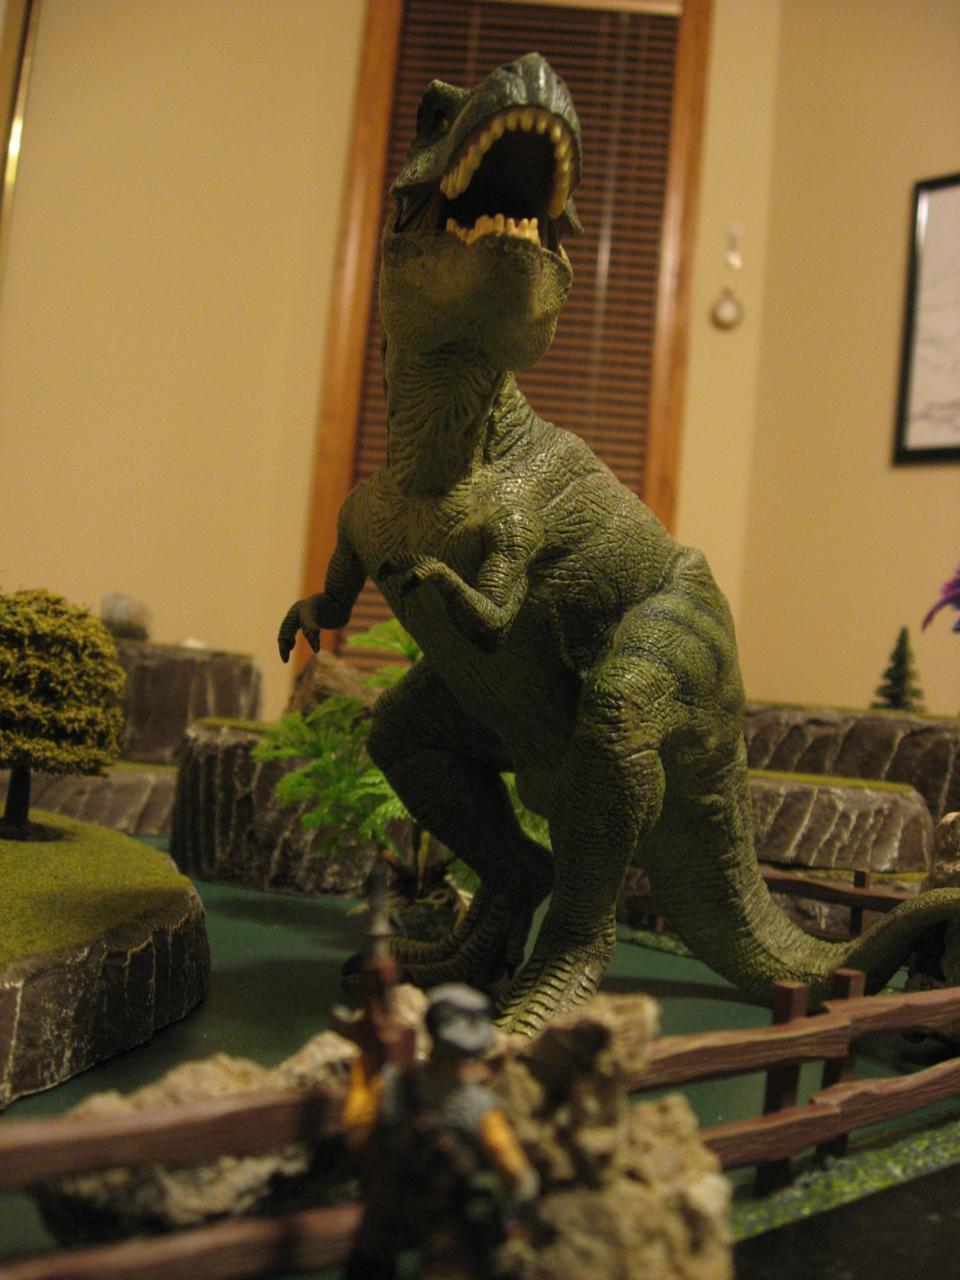
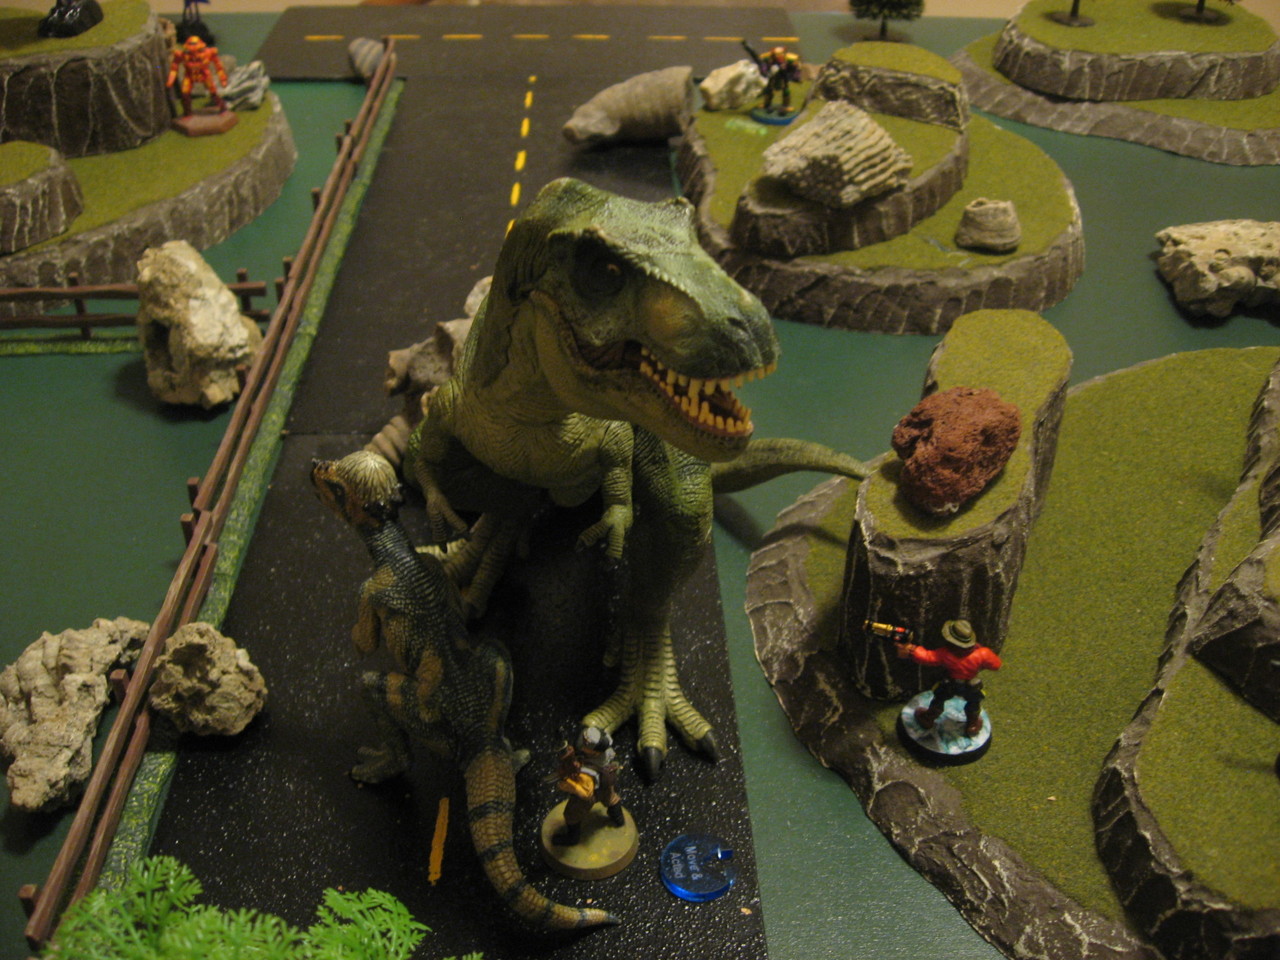
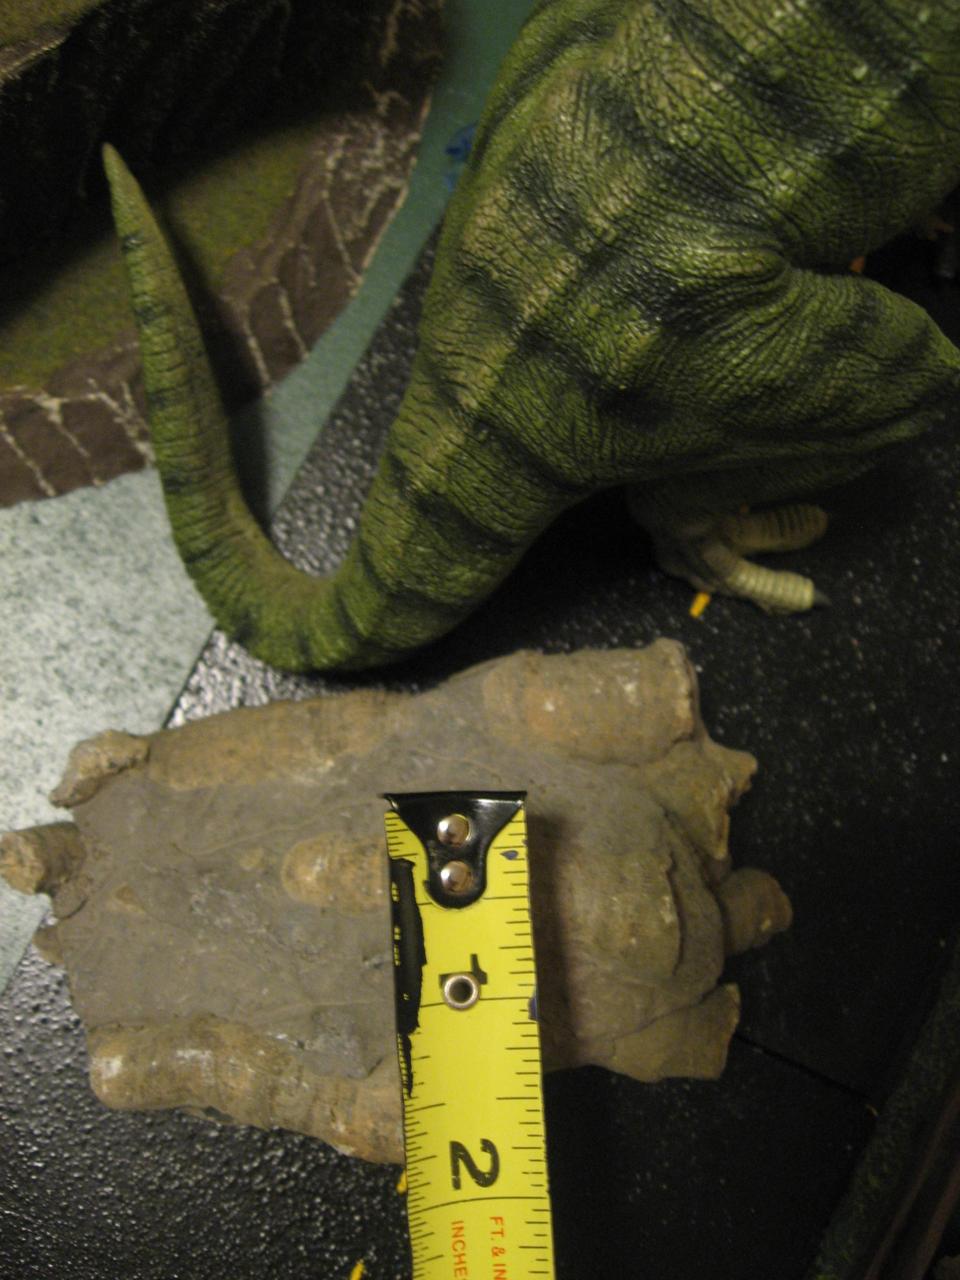
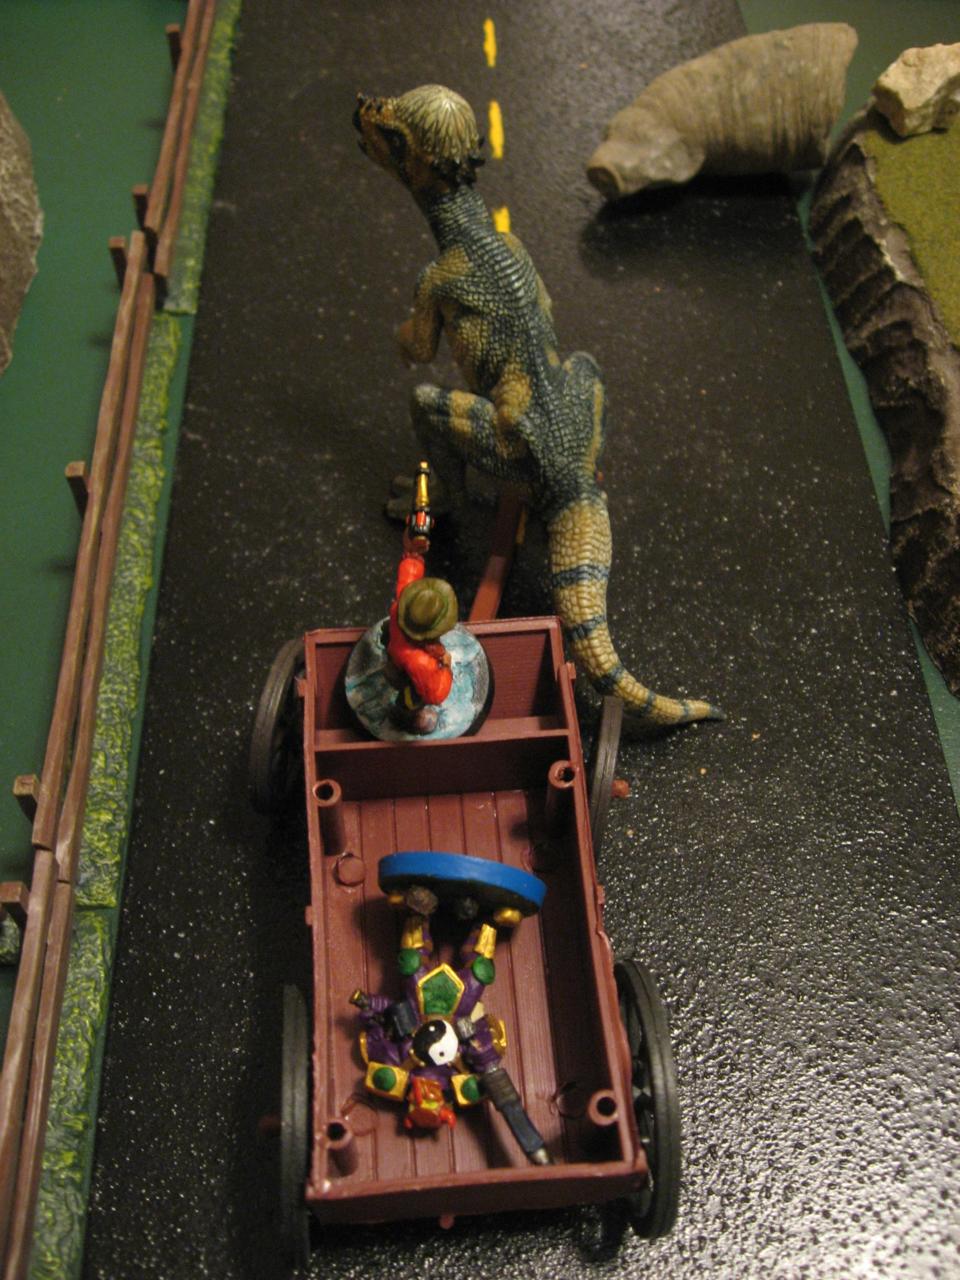
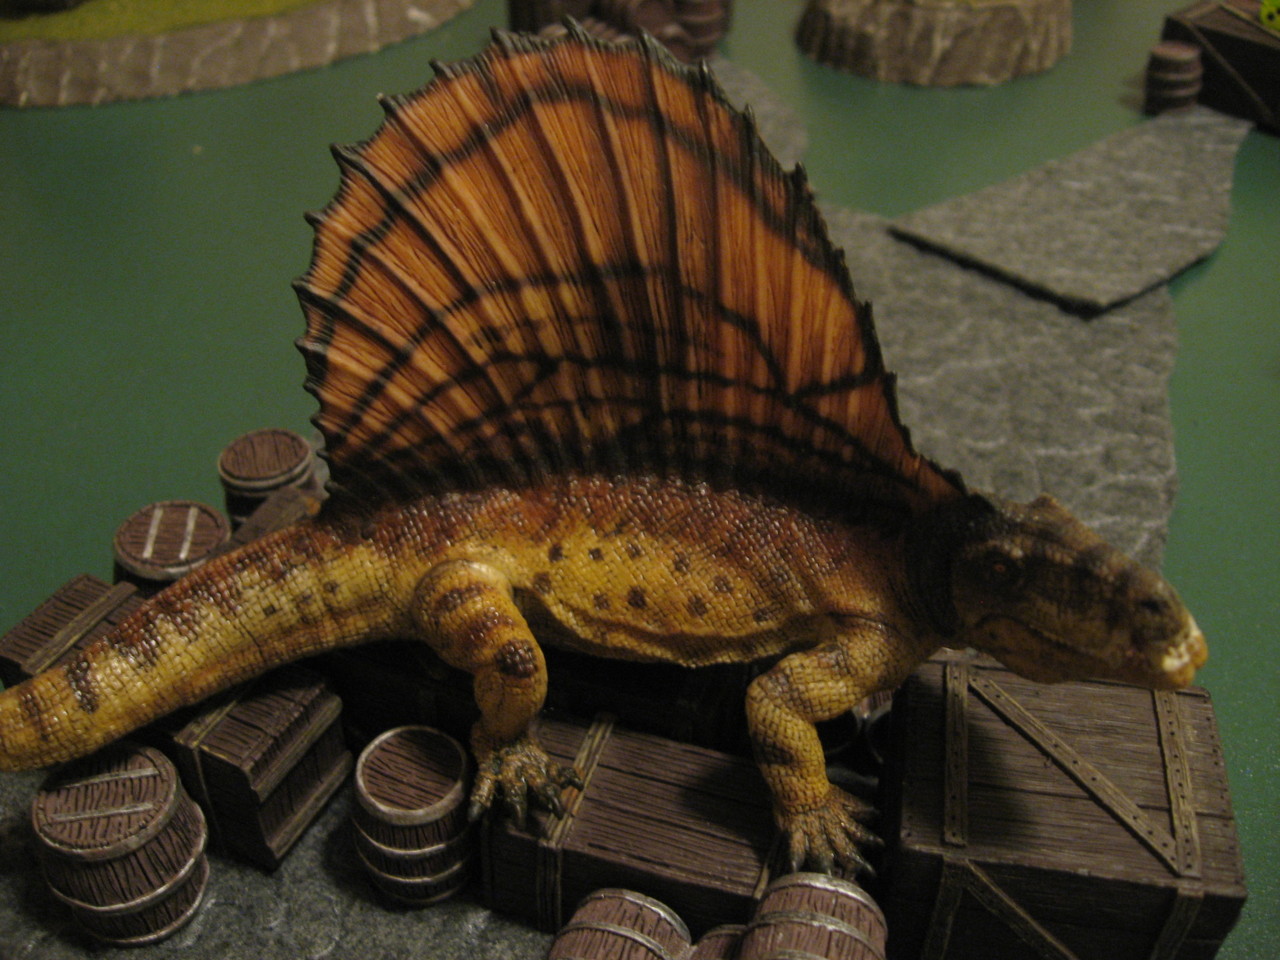
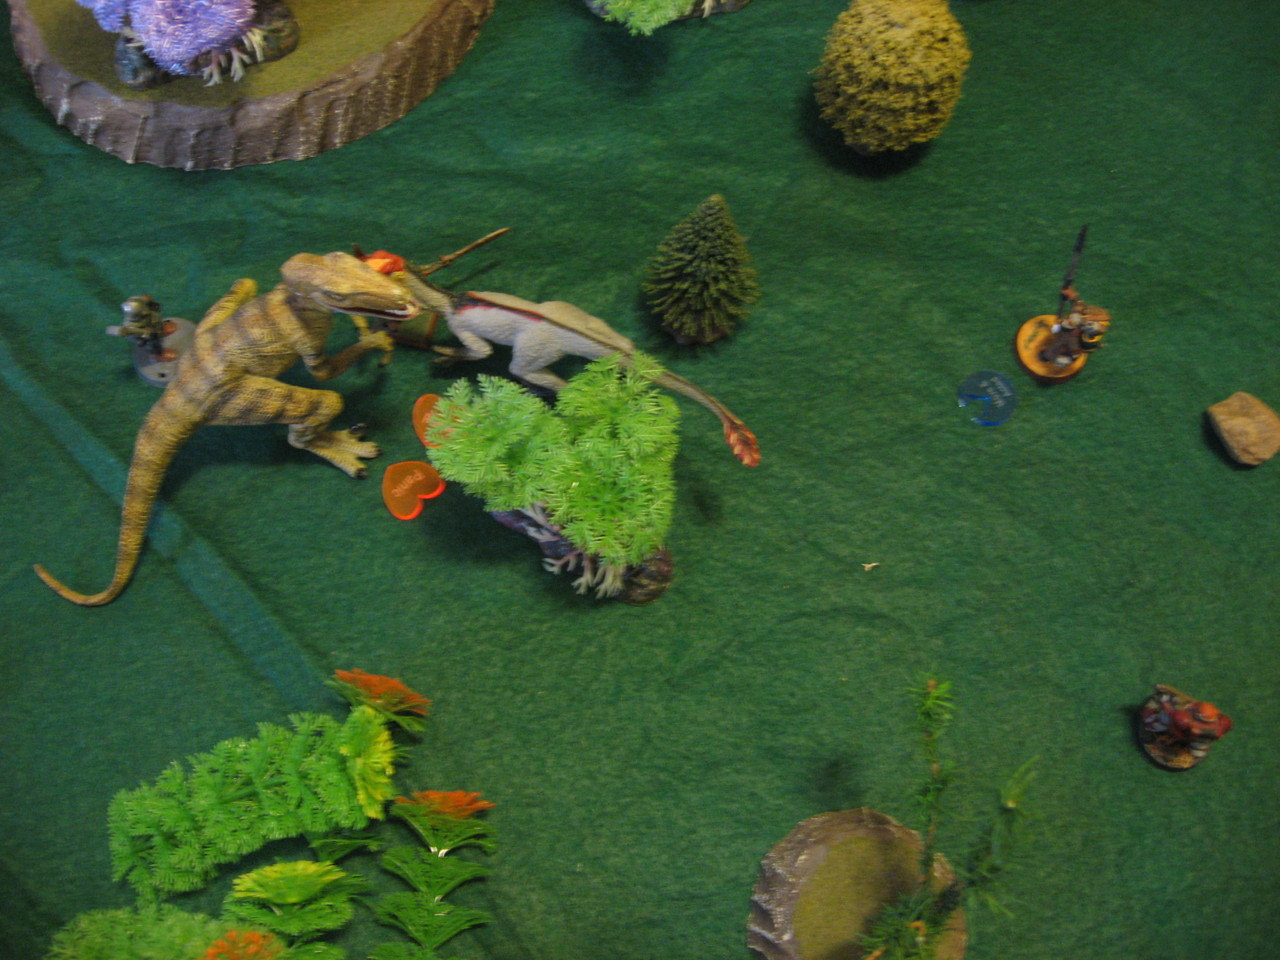
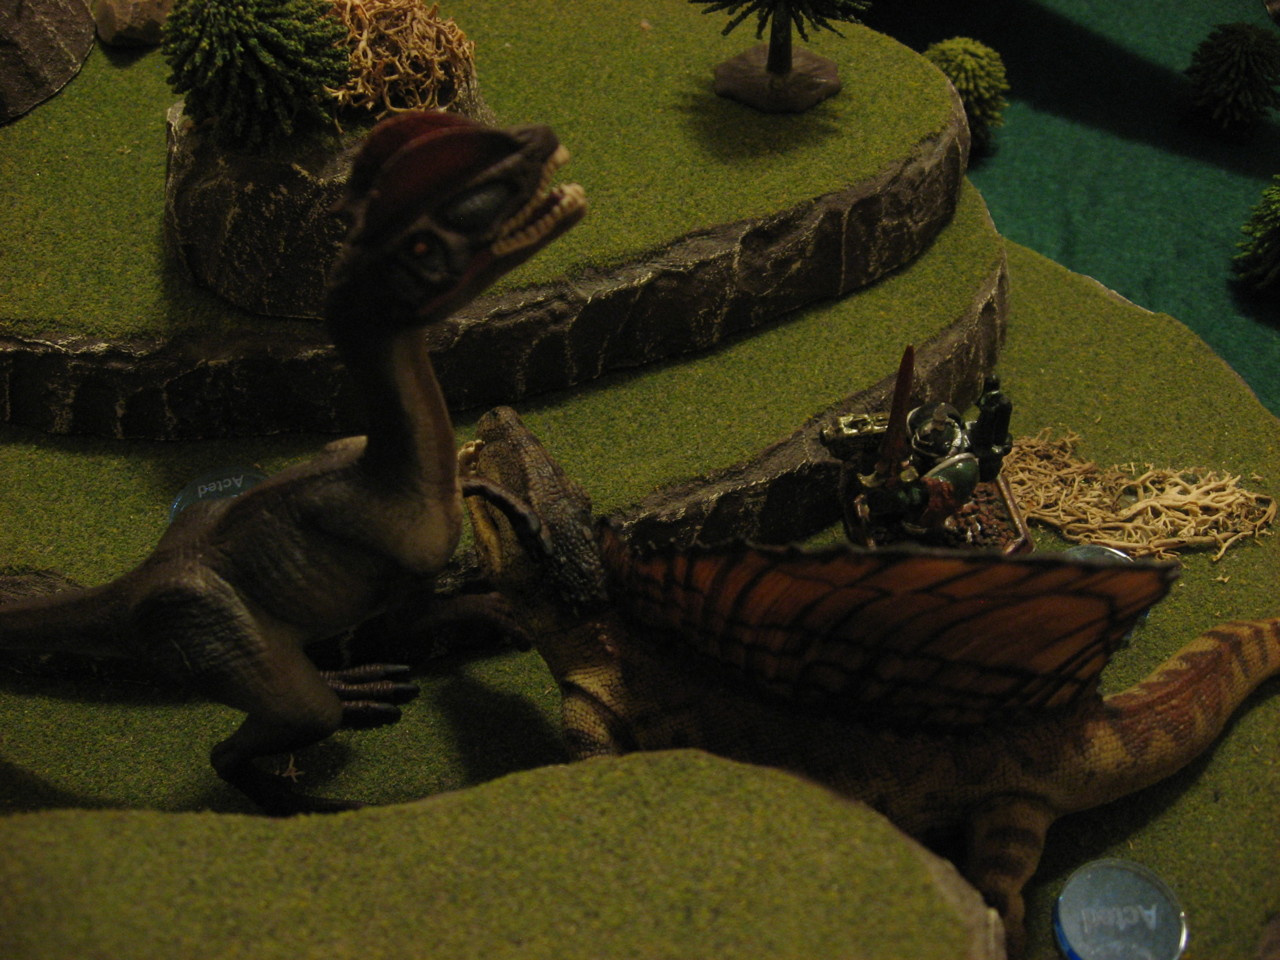
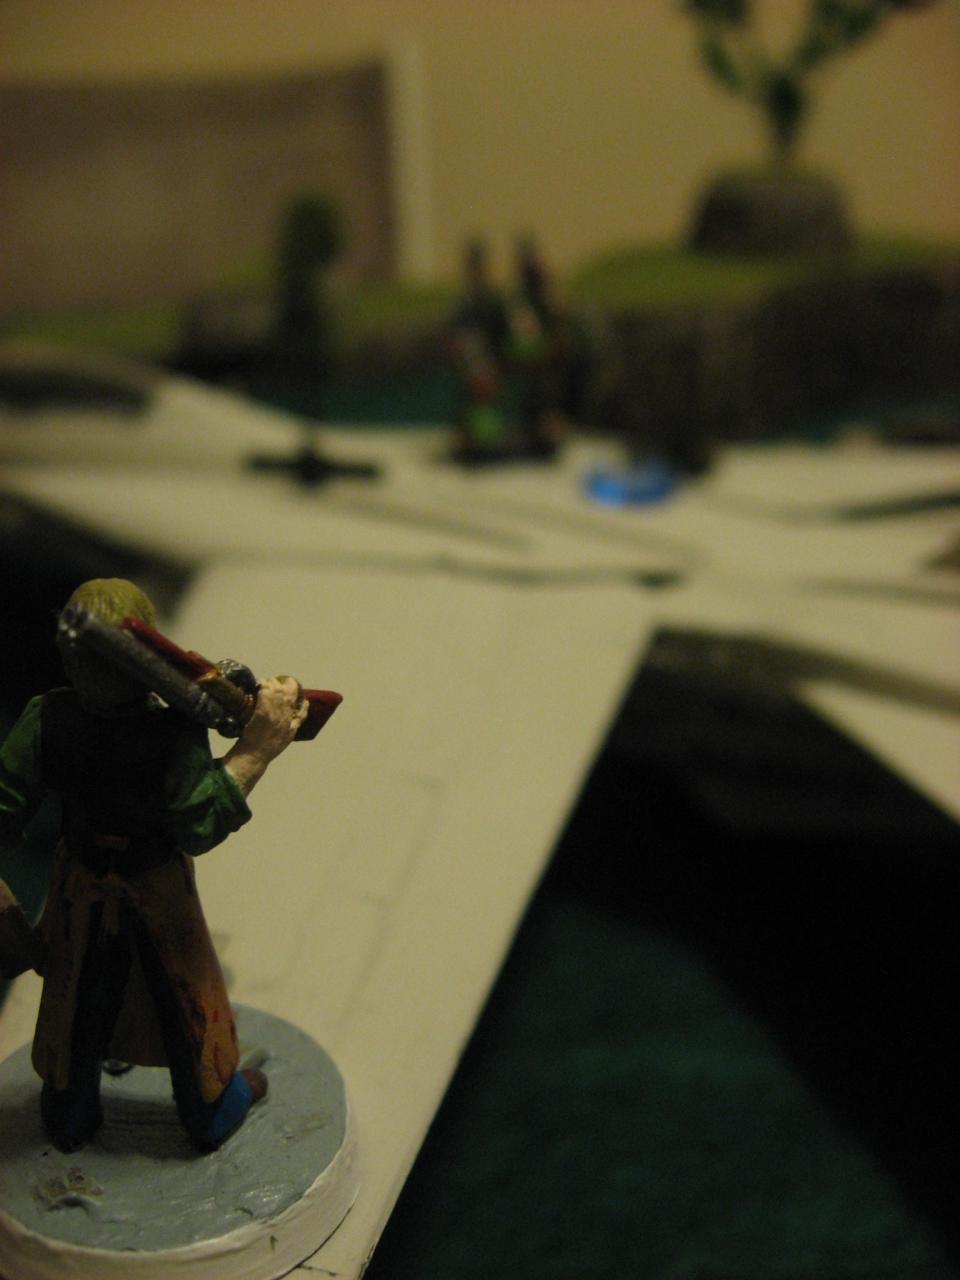
I busted out some old, old figures for this posse. Like high school era Plague Marines from Warhammer 40,000. One of the few times I tried to do a consistent, matching color scheme. I also used my new-ish Dilophosaurus toy dinosaur, made famous as the “spitter” from Jurassic Park.

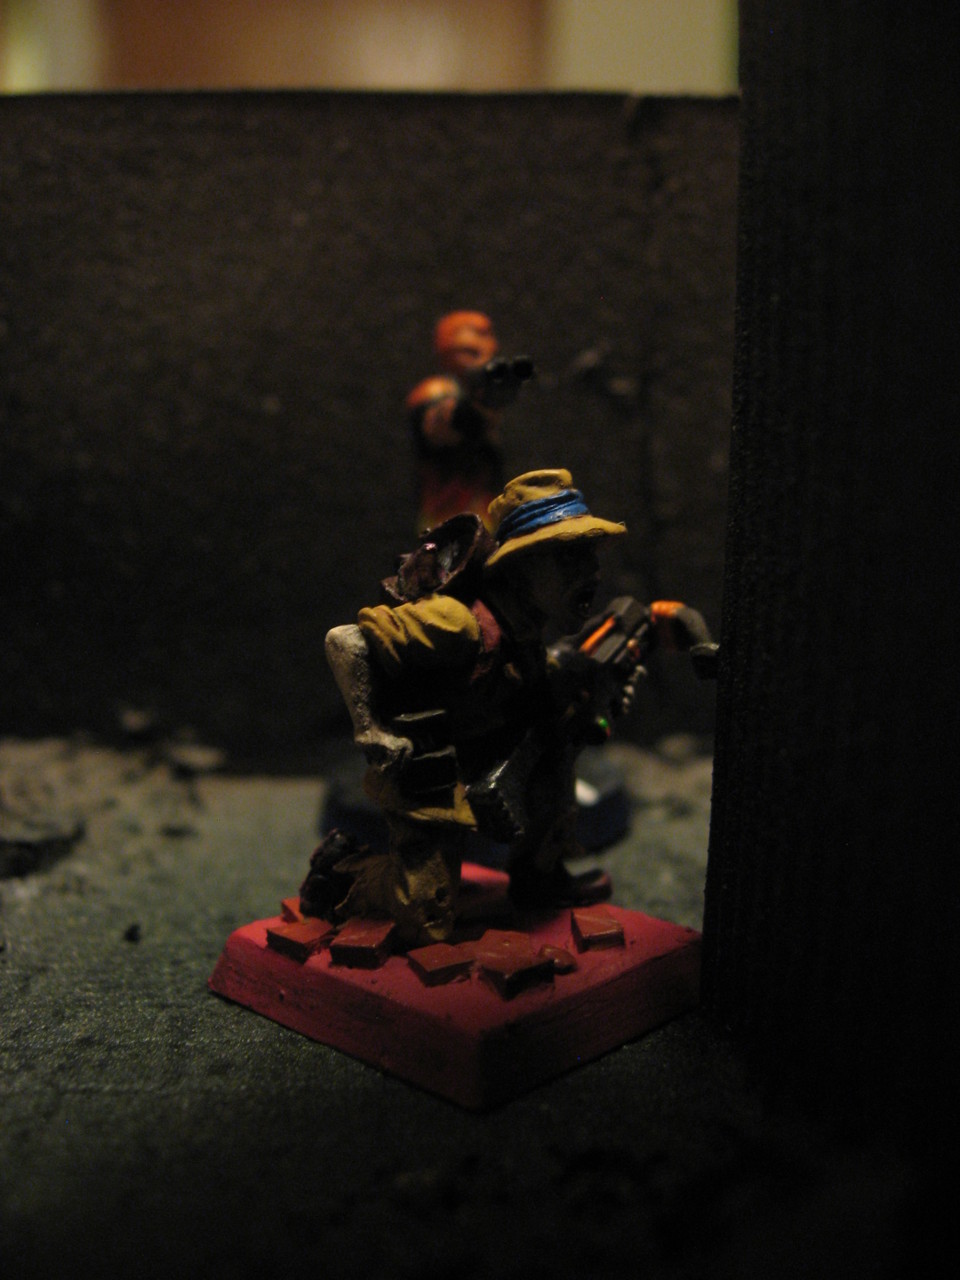
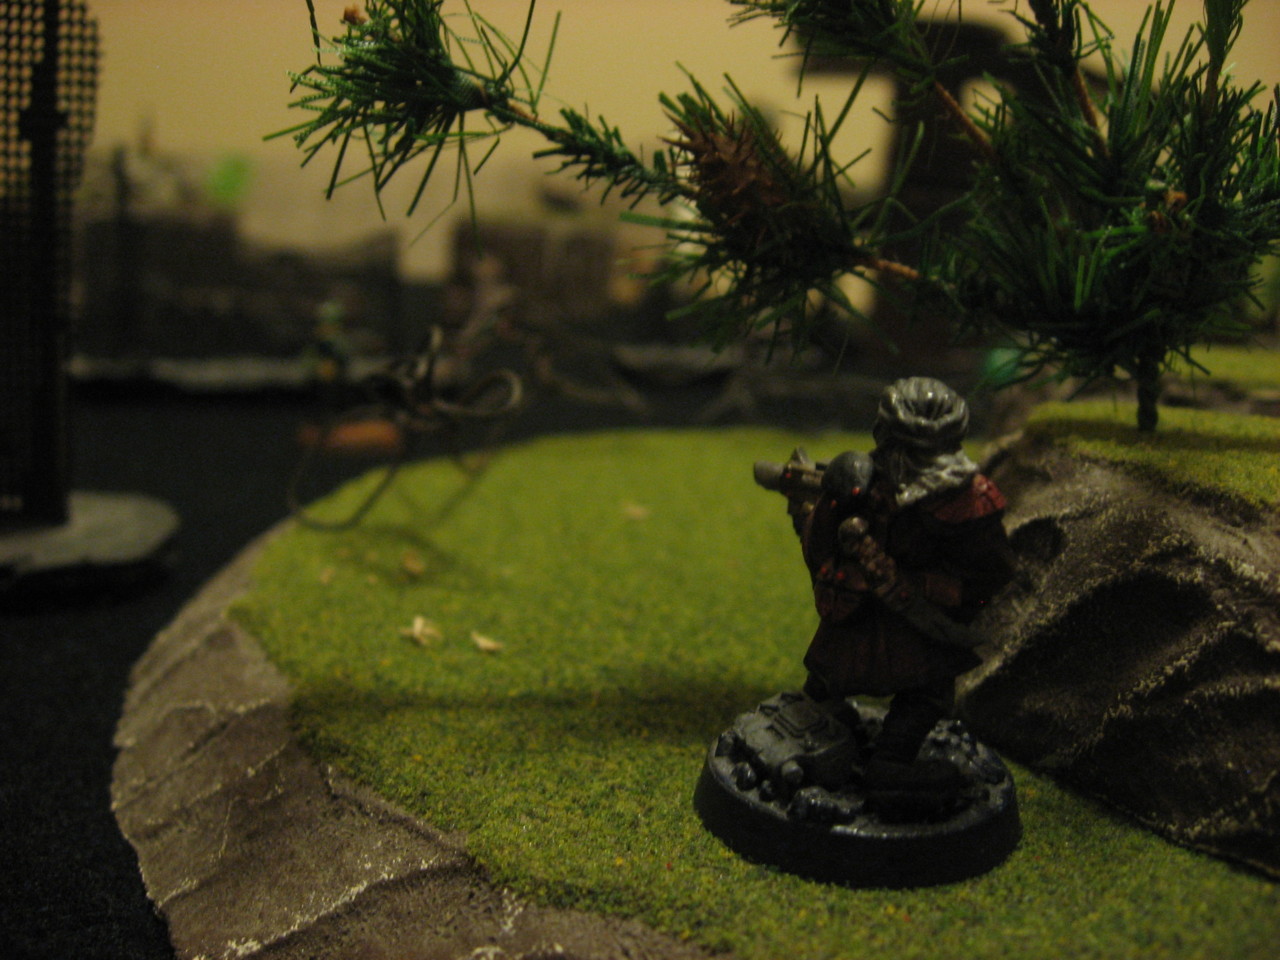
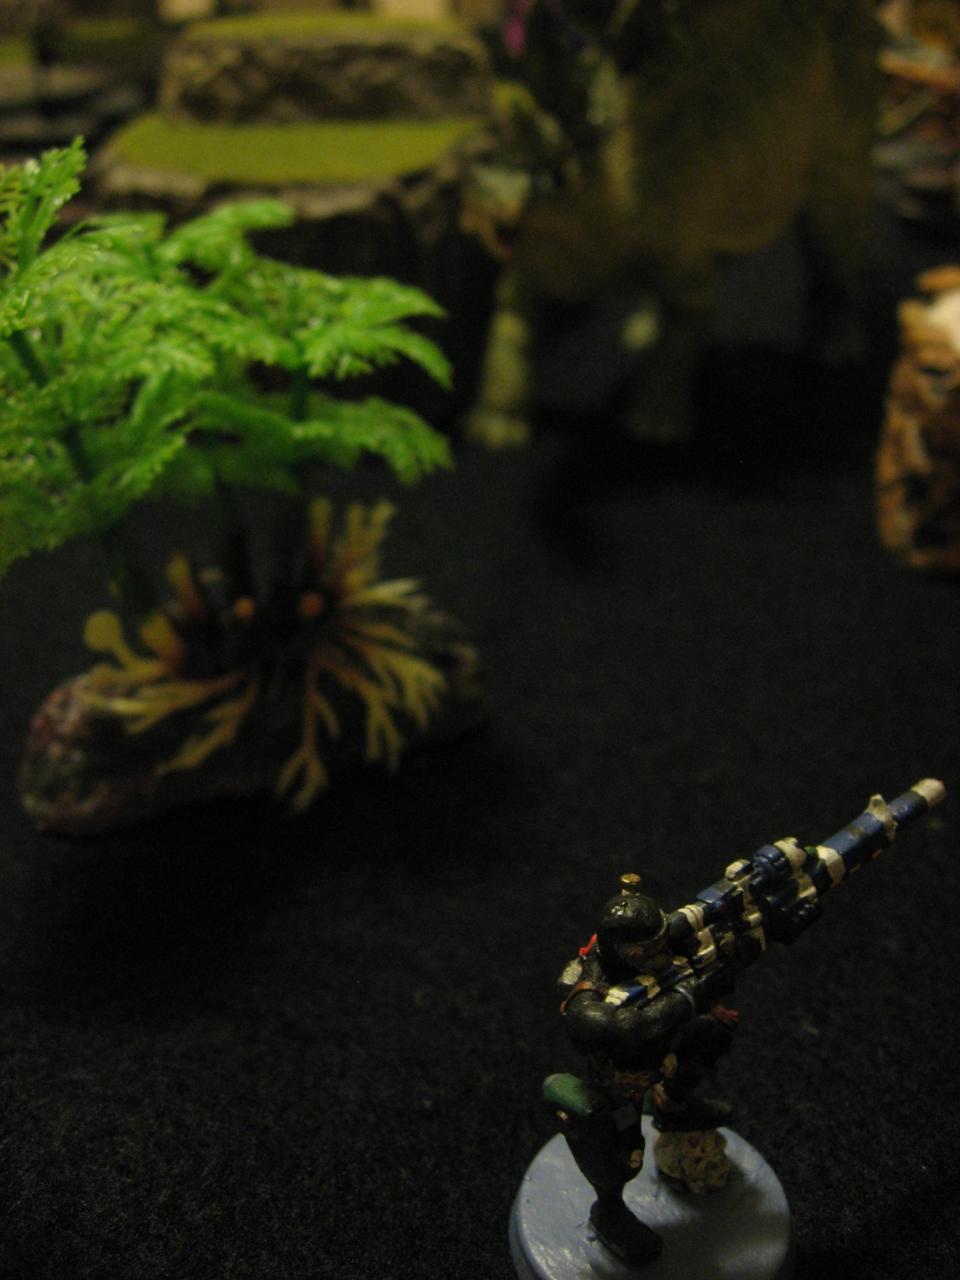
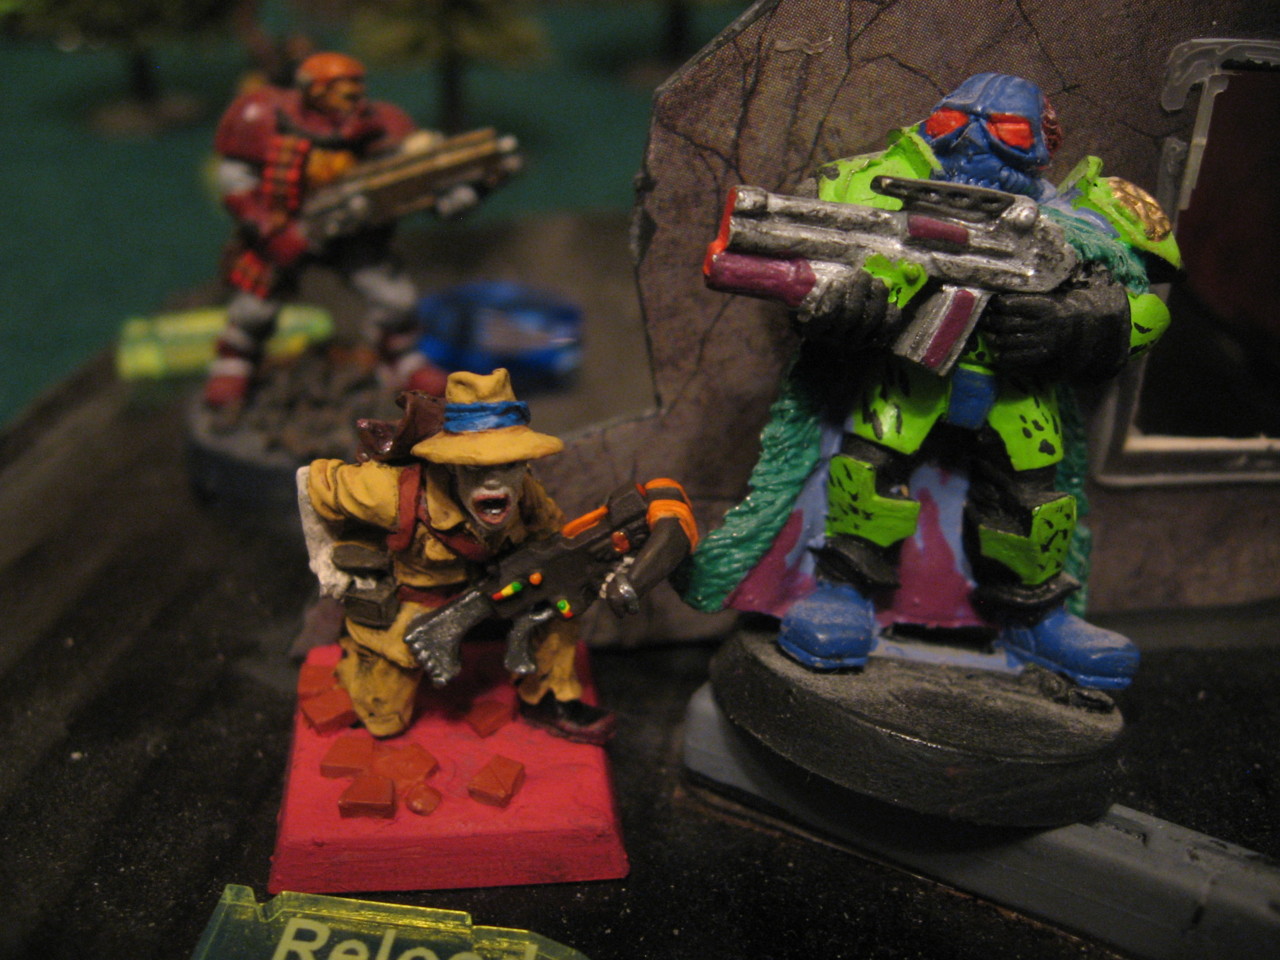
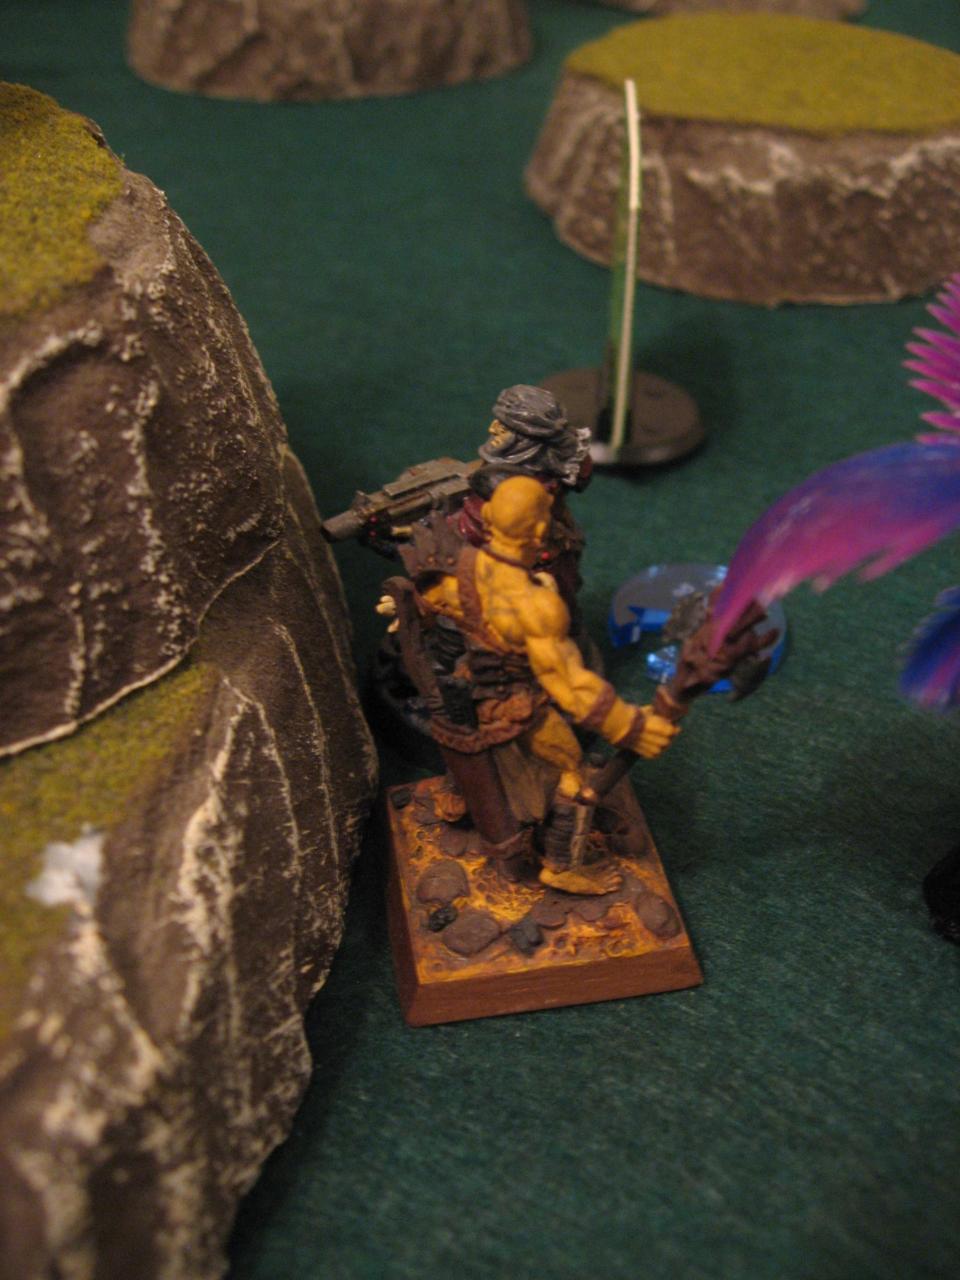
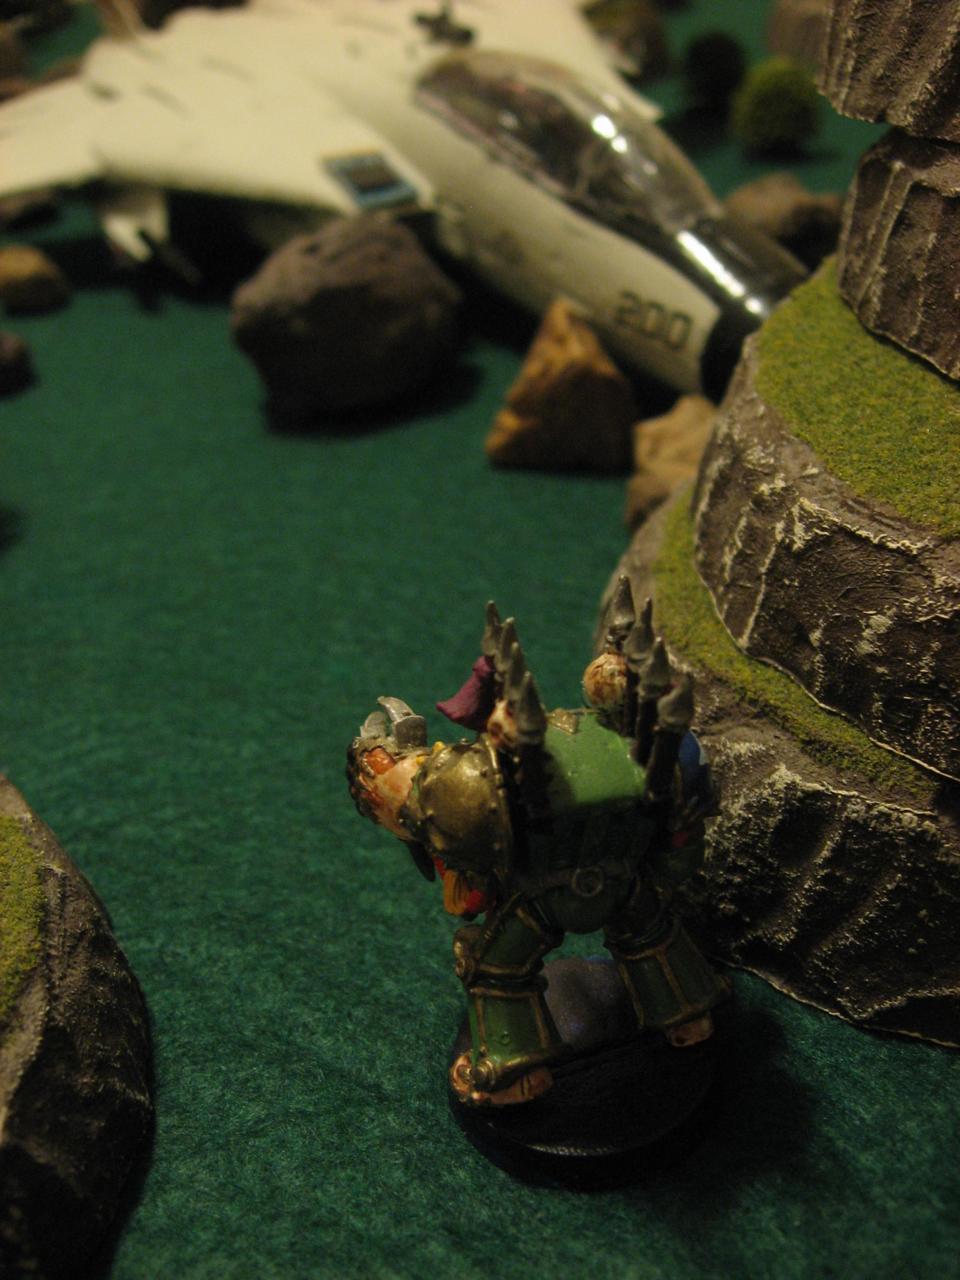
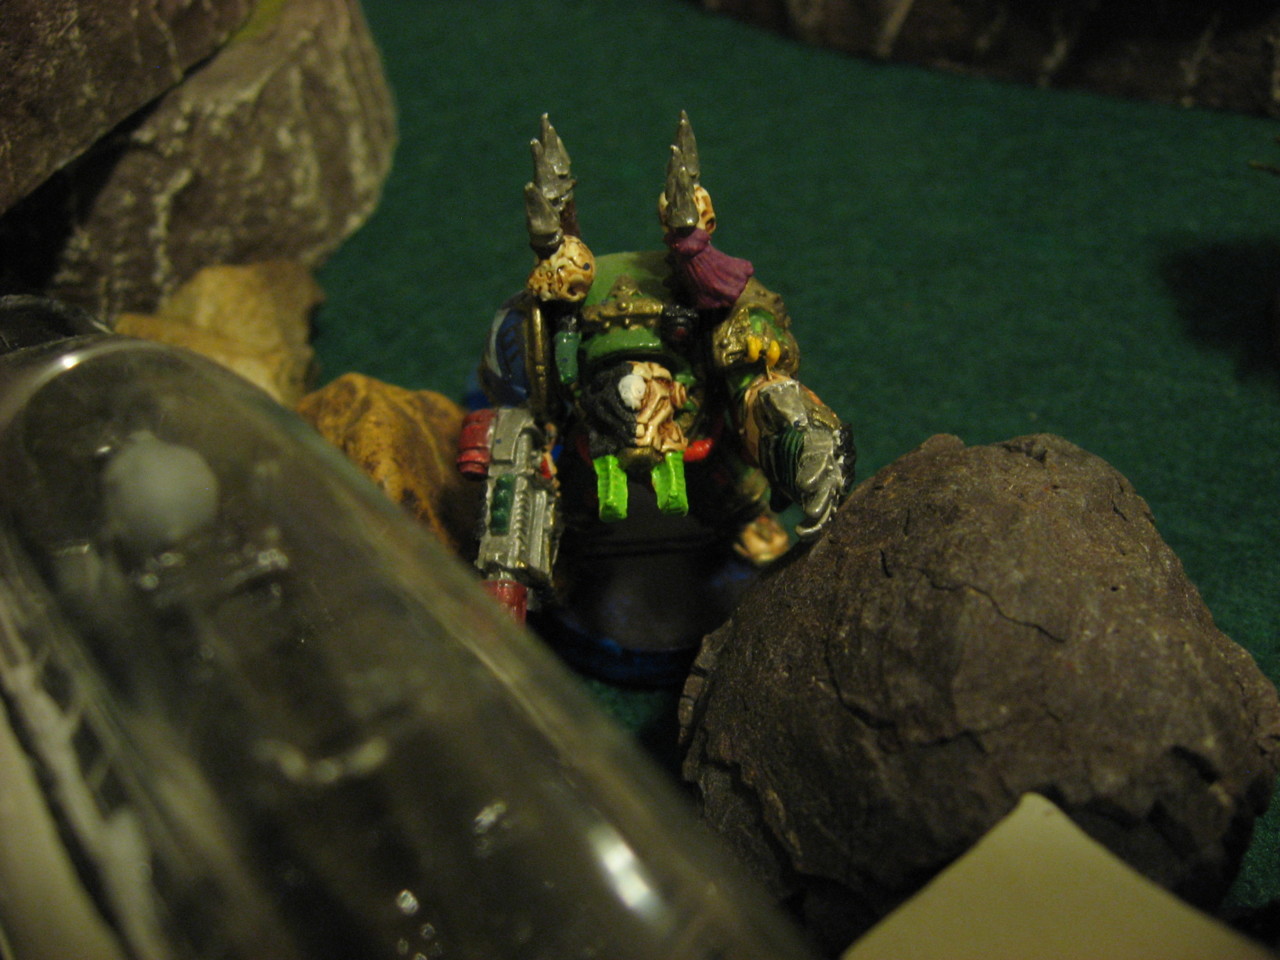
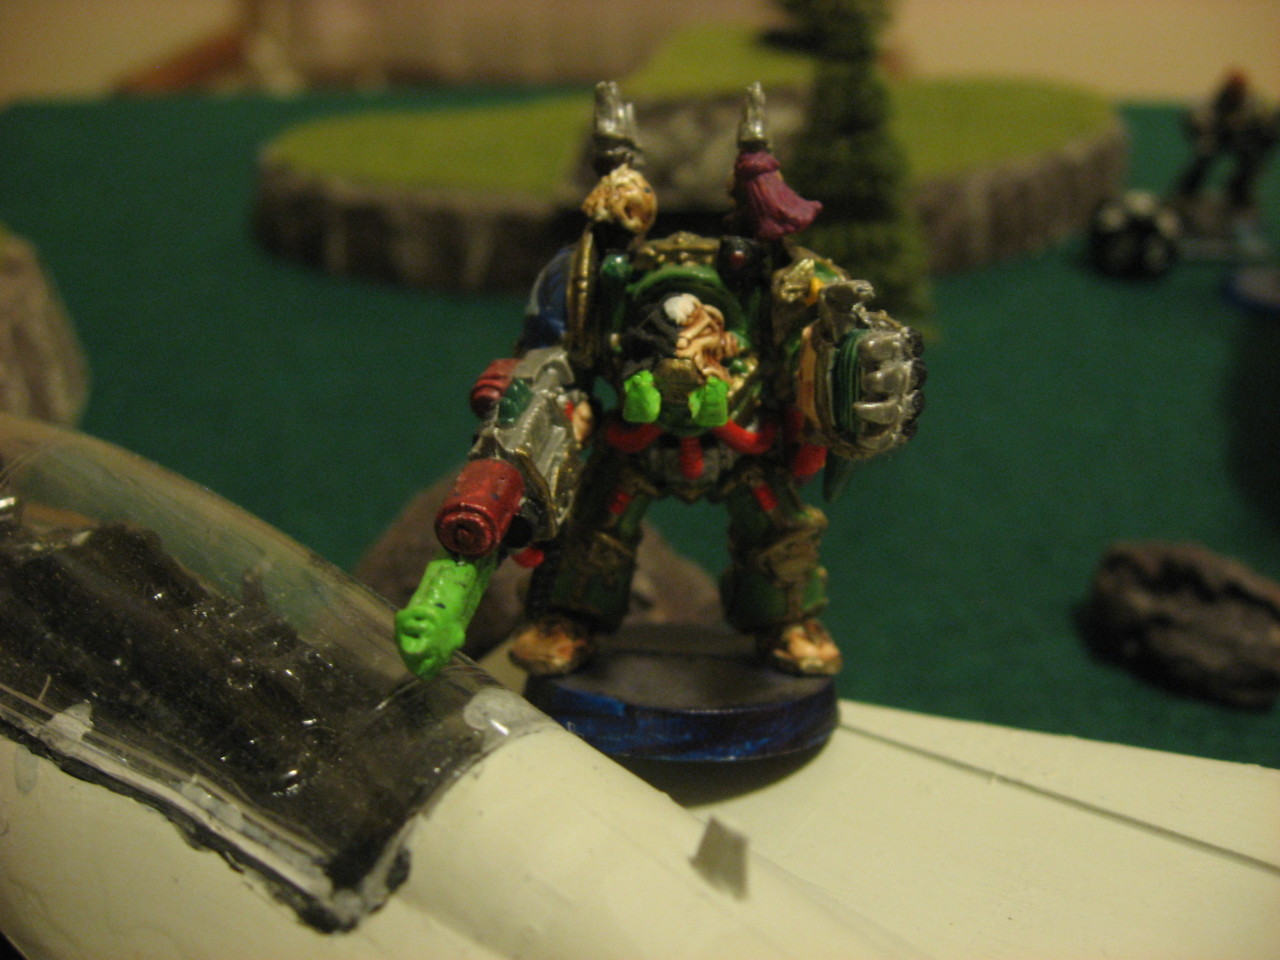
As mentioned above the intent was the mirror some of the functionality from Dota 2 items into Dinosaur Cowboy characters. Starting with Vanguard (a shield in the computer game) who is represented here by DEF 3, HP 14, and the Thick Skin trait (a one time boost of +2 DEF). Next up was Bloodthorn, a midrange damage dealer with a Volcanic Pistol and Coil Gun for utility. Then the sniper Desolator who has a Twin Rifle, but the miniature has a massive lascannon haha. And finally Skull Basher, a melee monster with a Claw Axe and one of my favorite close combat traits: Onslaught (+4 Attacks instead of +1 on Charge). The Dilophosaurus was bought as a Raptor, in this case named Iron Talon, who is Feral but has no traits.

The strategy and plan was to rush and capture an objective and hurry it off the table with Skull Basher. Sort of a trade off since he ideally wants to be moving forward into melee, not away from the violence. But he’s also significantly faster than the rest of the human members. Otherwise the rest would setup a perimeter, rain down fire, and let the dinosaur distract and hold off the enemy.

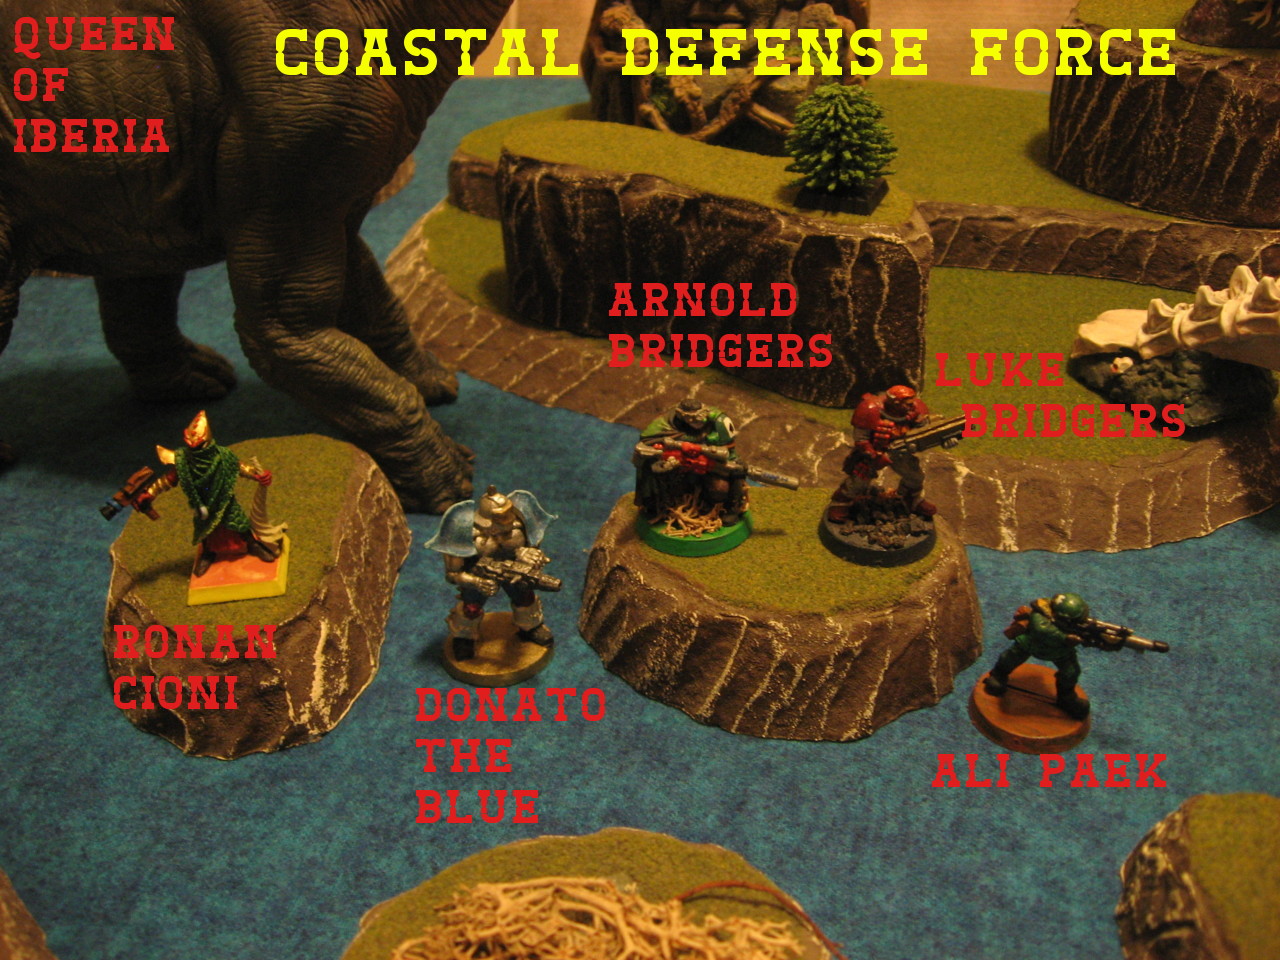
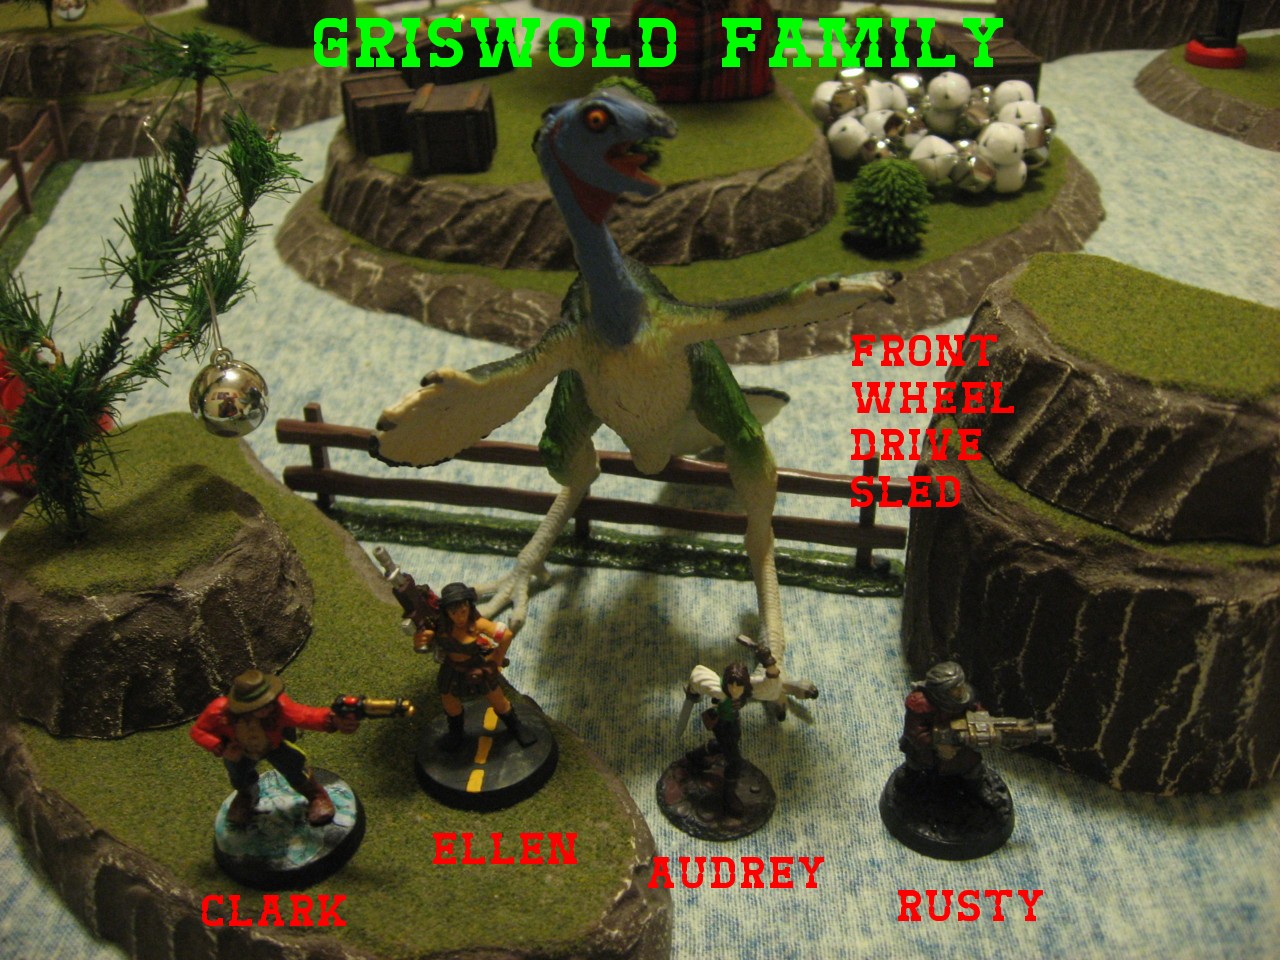
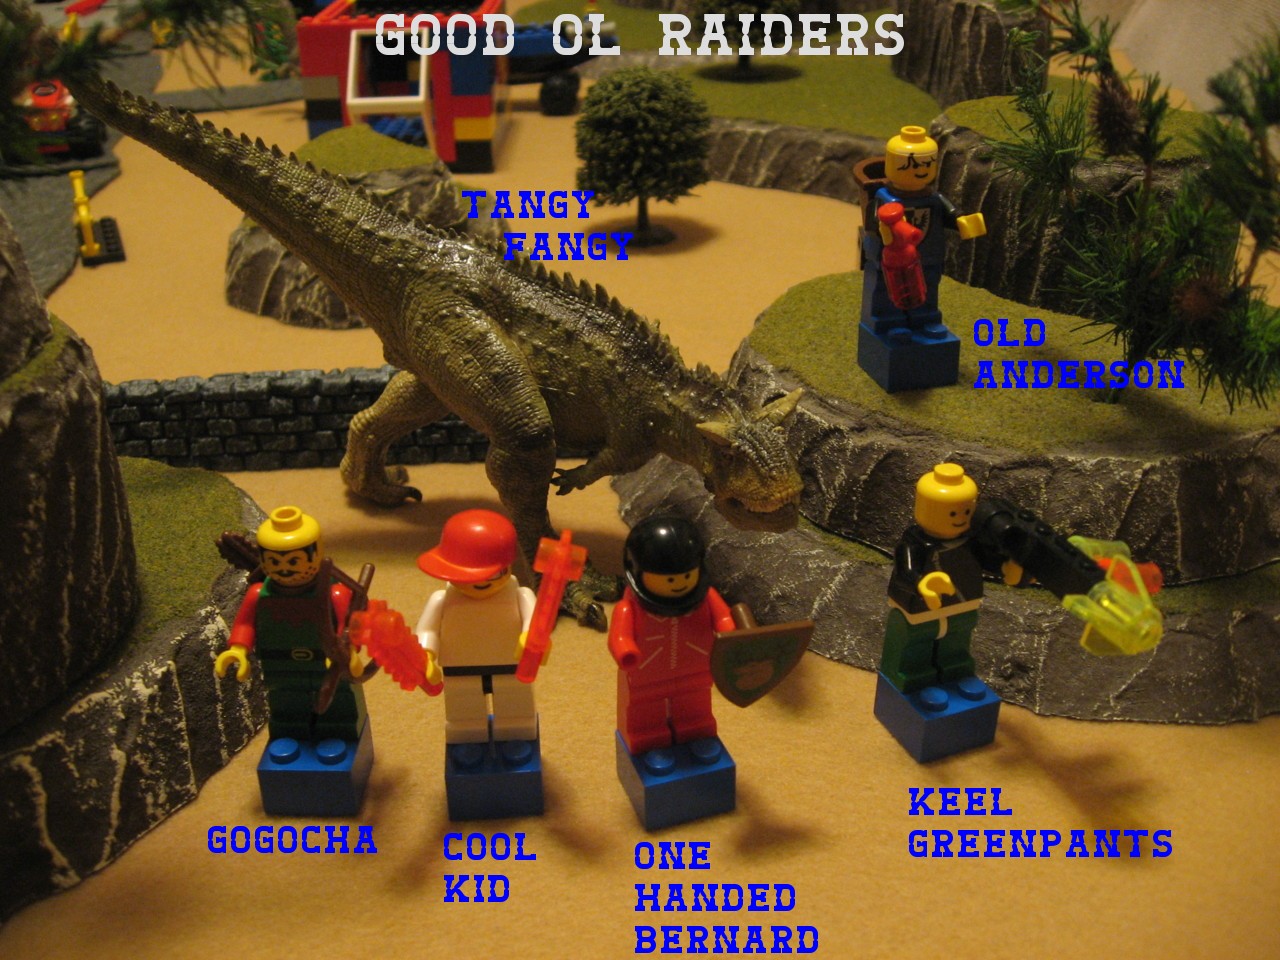
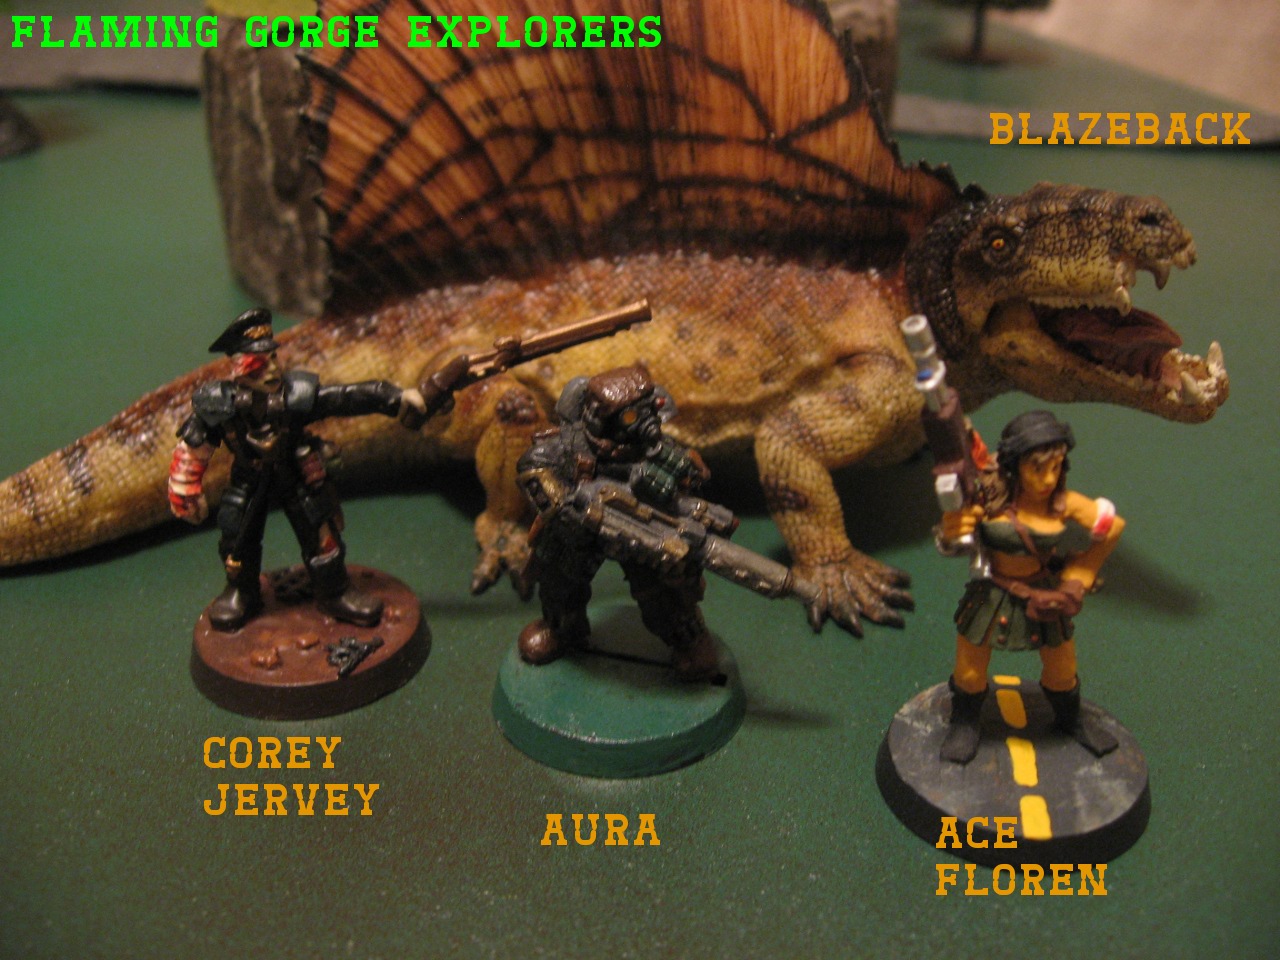
Posse: Eastwood Rovers – 130 IP, $1,700 ND, 4 traits – PDFSaloon
dc-operation-black-box-0003
dc-operation-black-box-0004
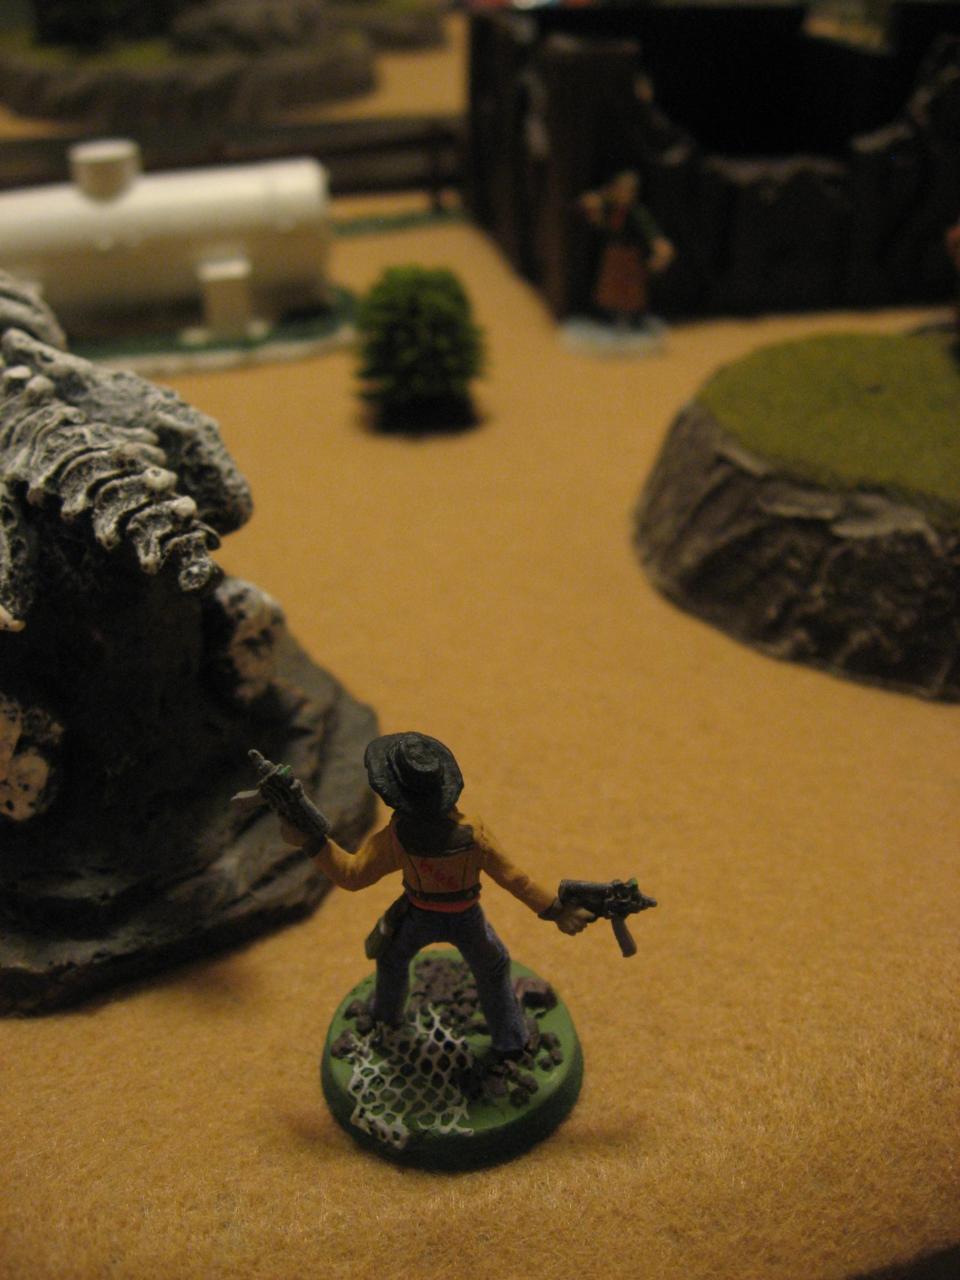
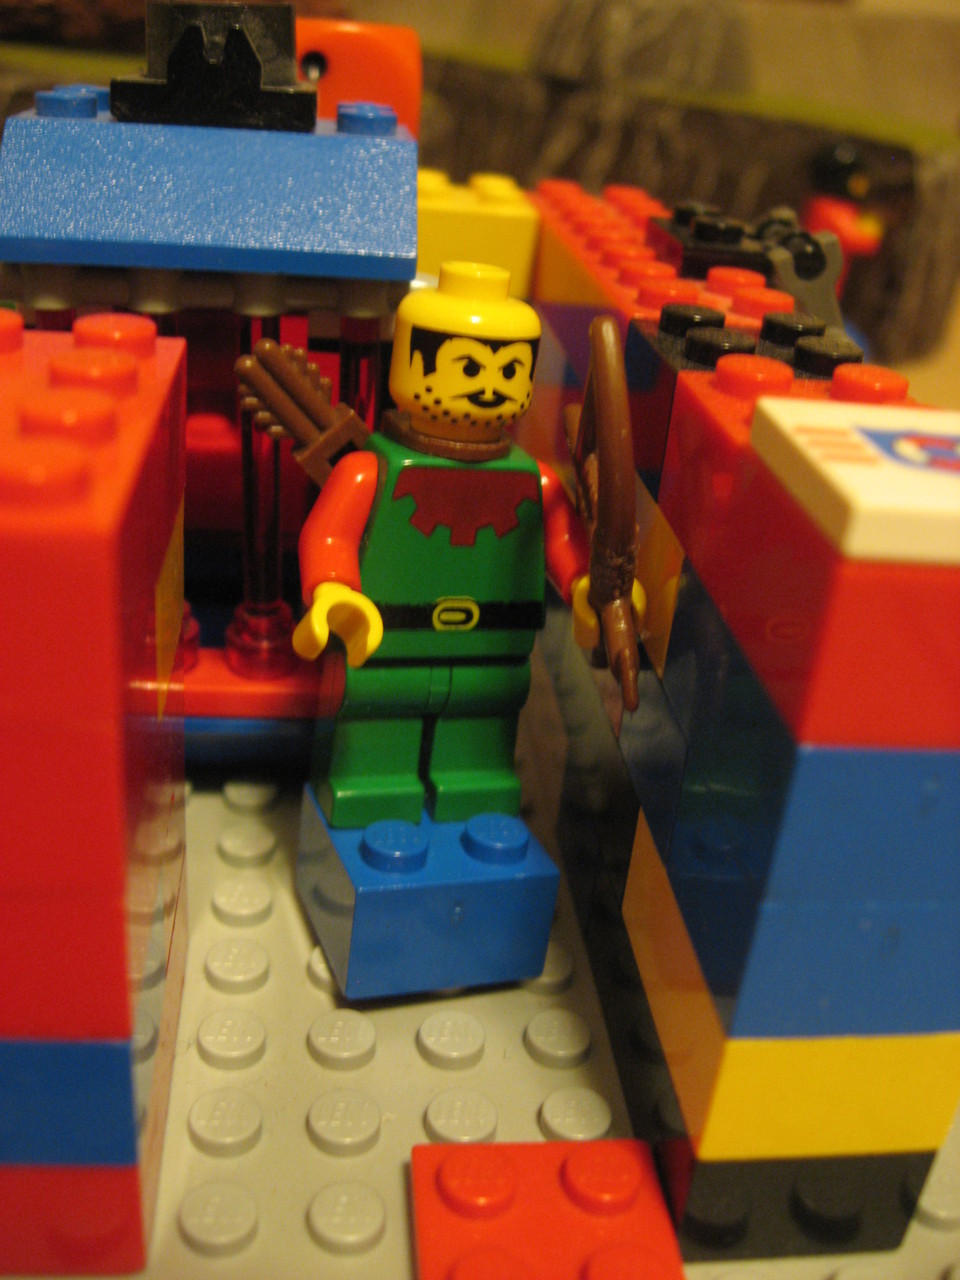
I think this is the debut of one of my new-ish (notice a trend?) miniature that looks vaguely like Clint Eastwood from his spaghetti westerns. I mean not as much as another mini I have, but certainly a generic looking cowboy fellow. I had painted a “fan the hammer glove” on his hand, to help grip the hammer. Otherwise the miniatures should look familiar, except maybe the defector Plague Marine. He was actually from an old, old game I wrote called “Twilight” (yes, before the movies), which is why he’s customized for an RPG and on a hex base.

Also yes I know the posse picture above is washed out. I didn’t have much luck, but the rest of the photos are spot on, thankfully.

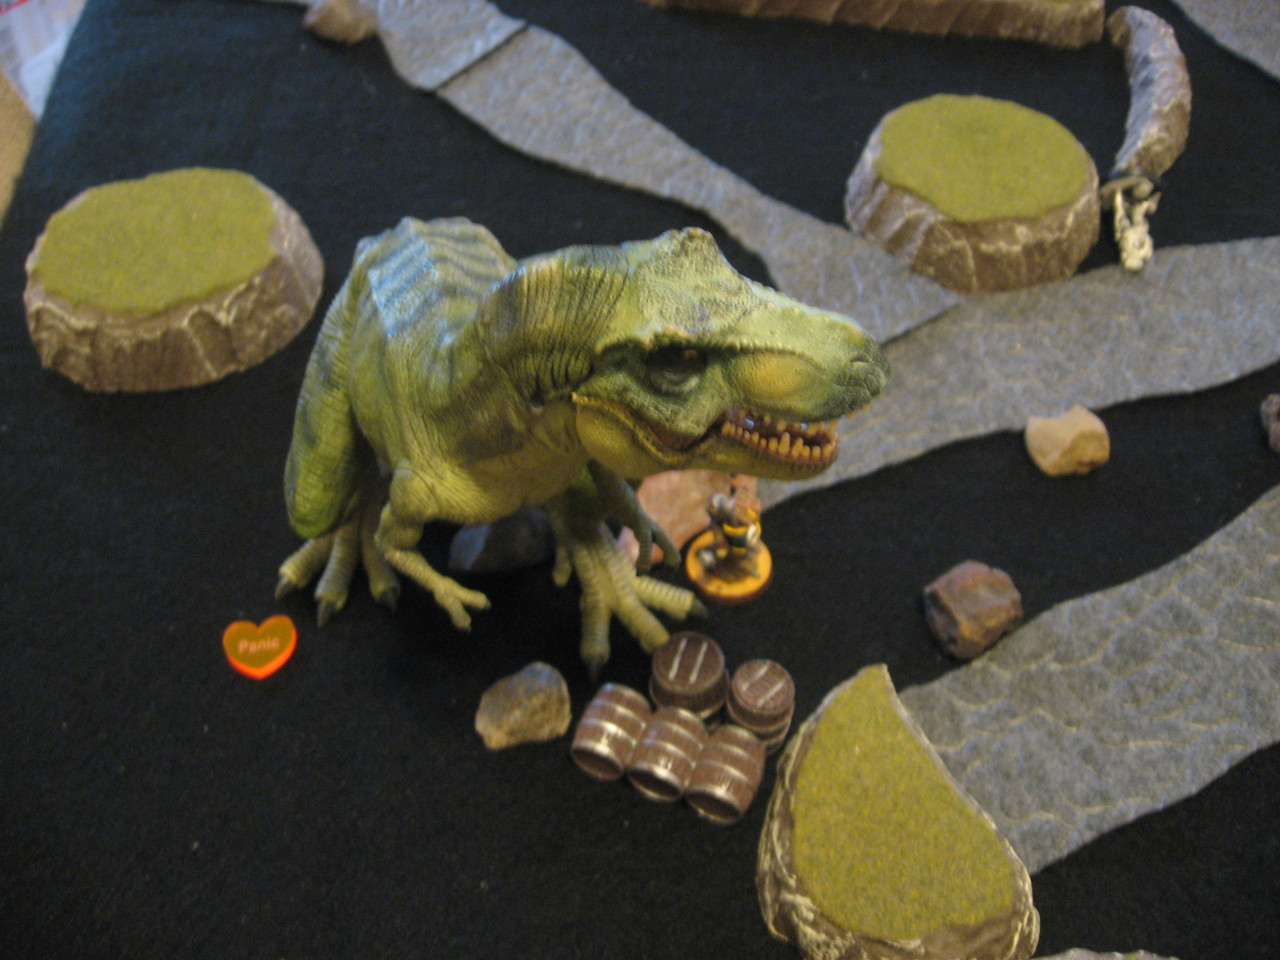
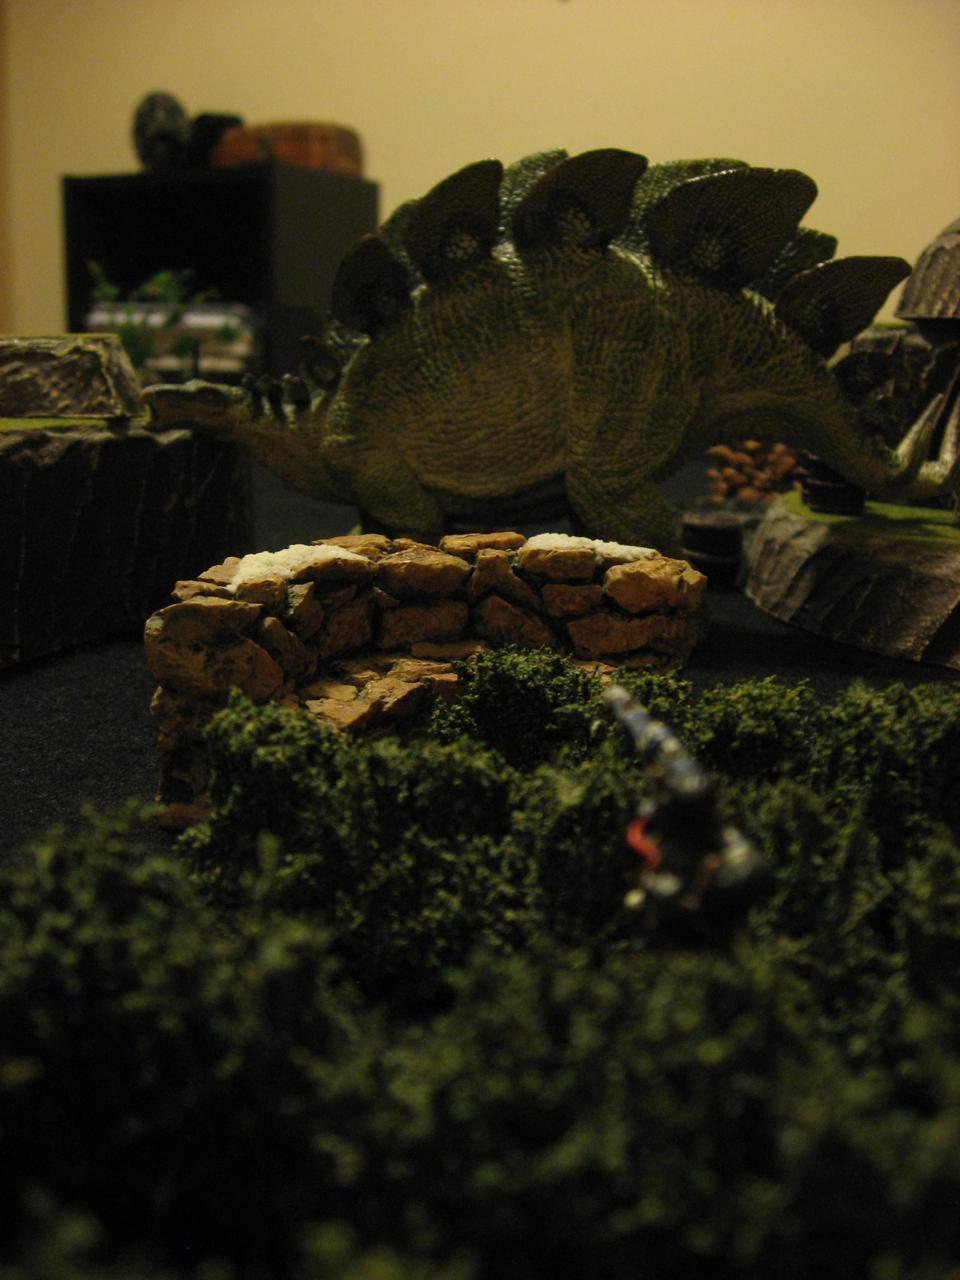
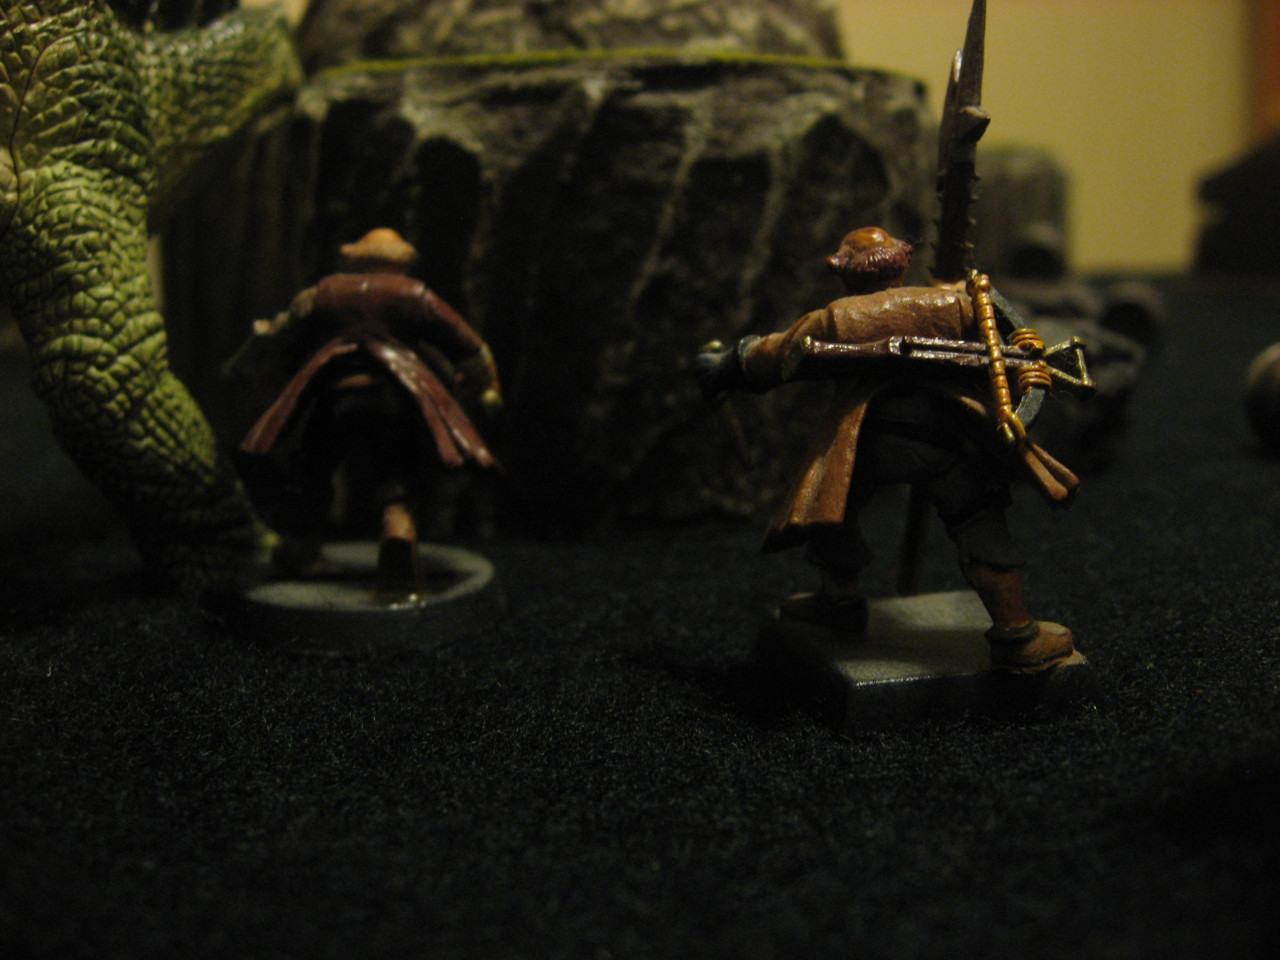
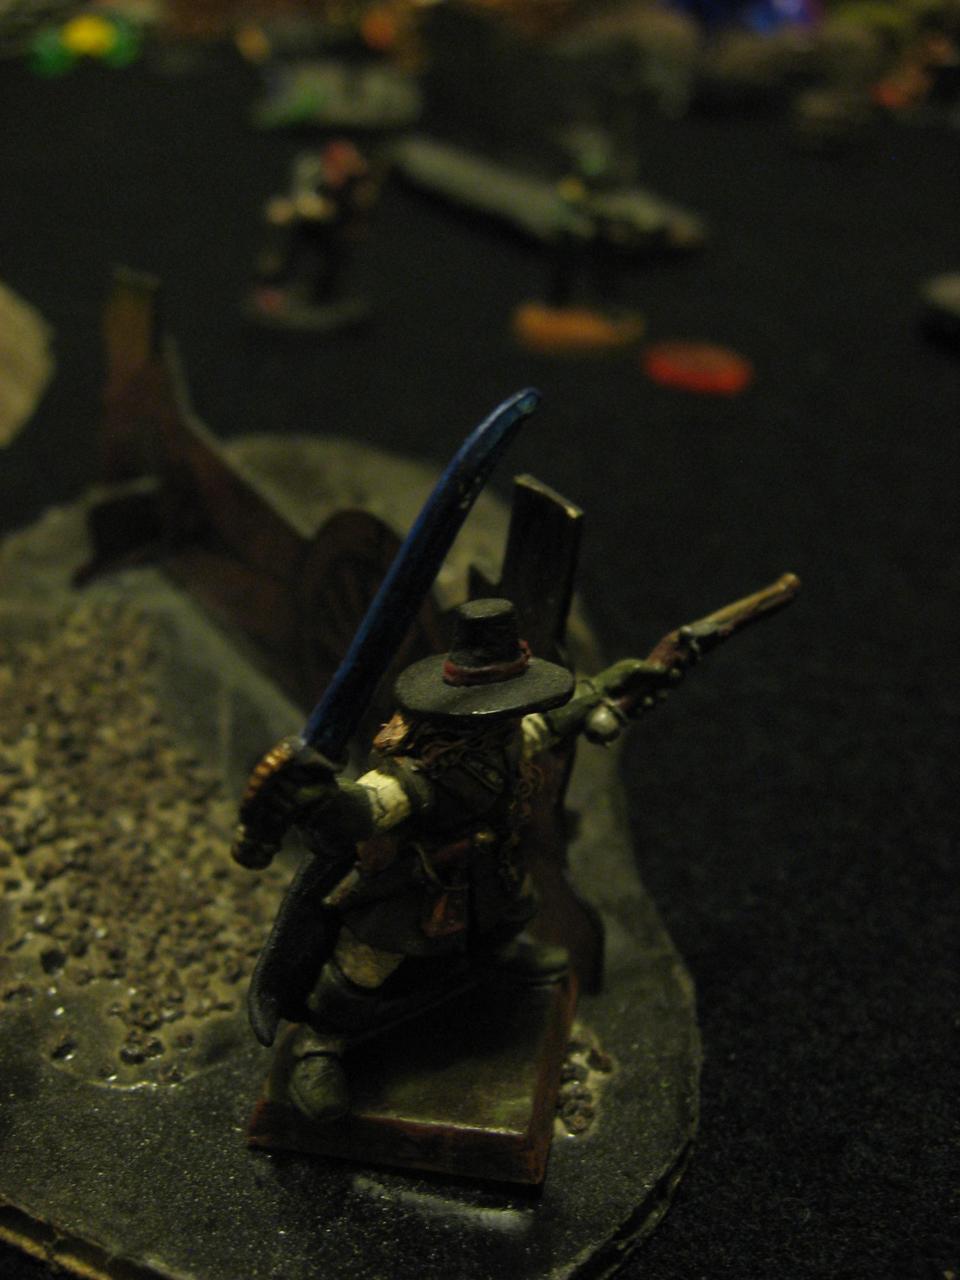
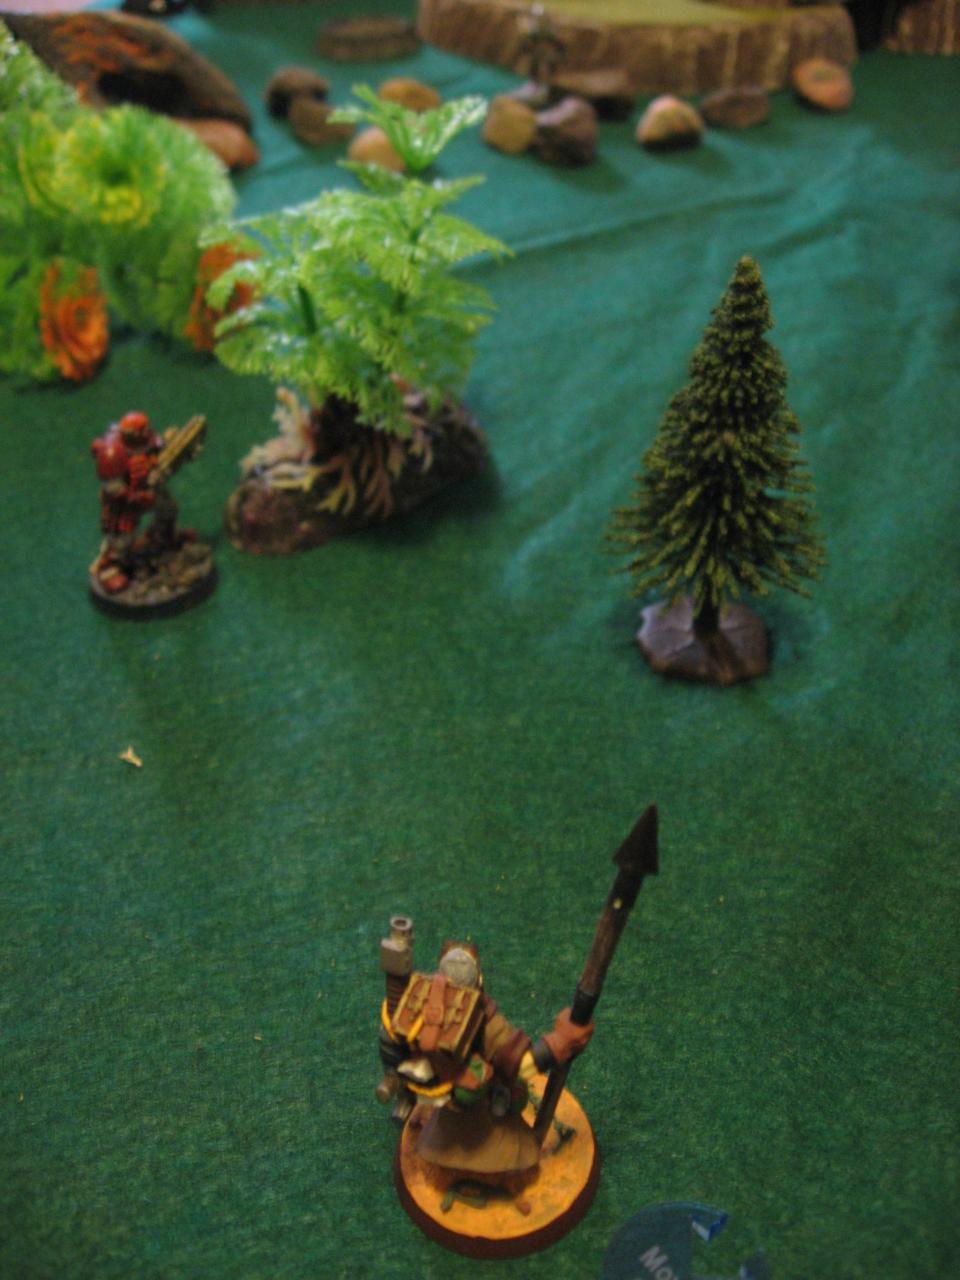
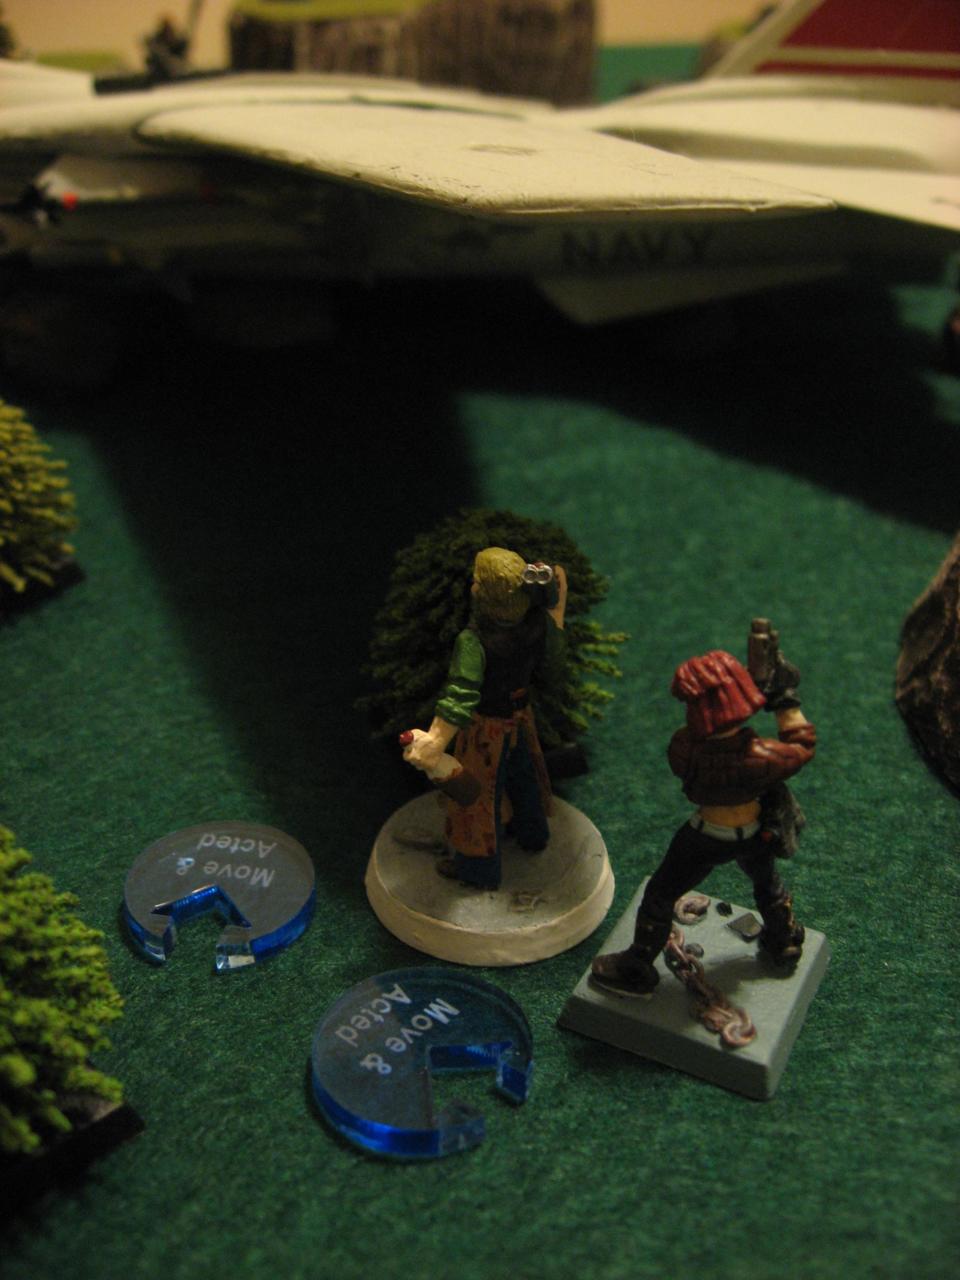
Anyway to celebrate the newly painted miniature the rest of the posse is somewhat Eastwood themed. The leader is named Pale Rider and has a massive Ranch Blaster, with the usual plan of using Fan the Hammer weapon ability then the Speed Reload trait to be ready to rock. Alexander Keith is my recurring bartender character, and a paintjob I love. He had the mighty Streetsweeper Shotgun and the dicey, but potentially life saving trait Inspire. Sister Sara is the medic, because I really like the healer type traits like Doctor. D12 times two is a lot of potential healing. Powder Monkey was a funny case, since he looks like a Savage but is actually a Neotechnoist. So a reversal of the usual “going native” empire soldier, and is instead a naturalized wildman trying to meld with the upper classes. And finally the defector from the Delta Commando Squad was represented by Dominator (from the Dota 2 “Helm of the Dominator”). He had a Cutlass but likely not enough Defense or Hitpoints to reach combat with it. The dinosaur was a Fin, one of Papo’s better sculpts (which is saying a lot considering their high quality!) who is named after a less popular Eastwood movie: Eiger.

The plan is simple: shoot objectives. Pale Rider will be the main attacker in that case. Sister Sara will move forward with Keith, Powder Monkey, and Dominator, and try to keep them all healthy. Eiger will likely shield Dominator, or try to get into close combat as a team.


Turn 1
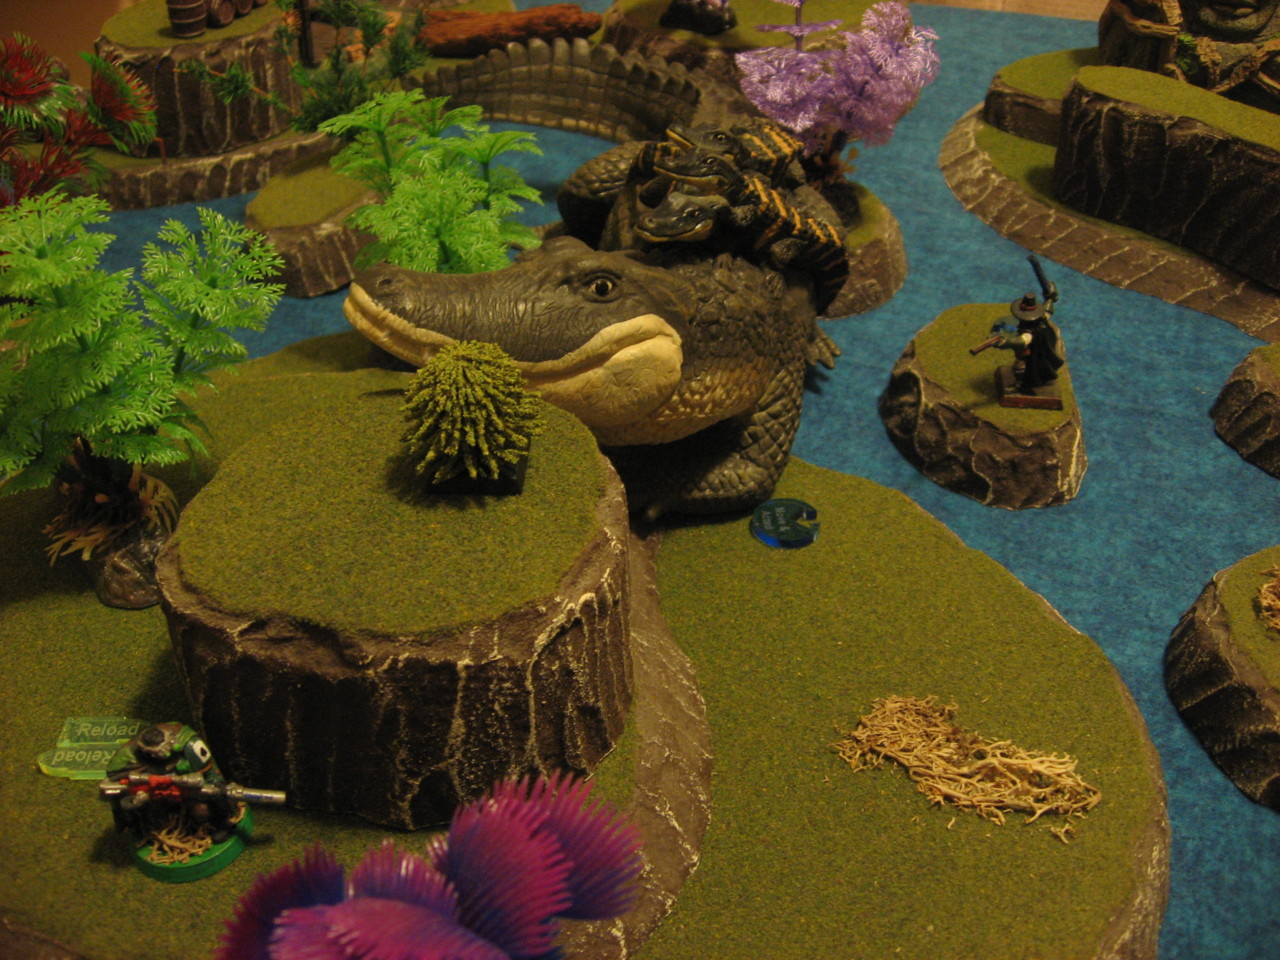
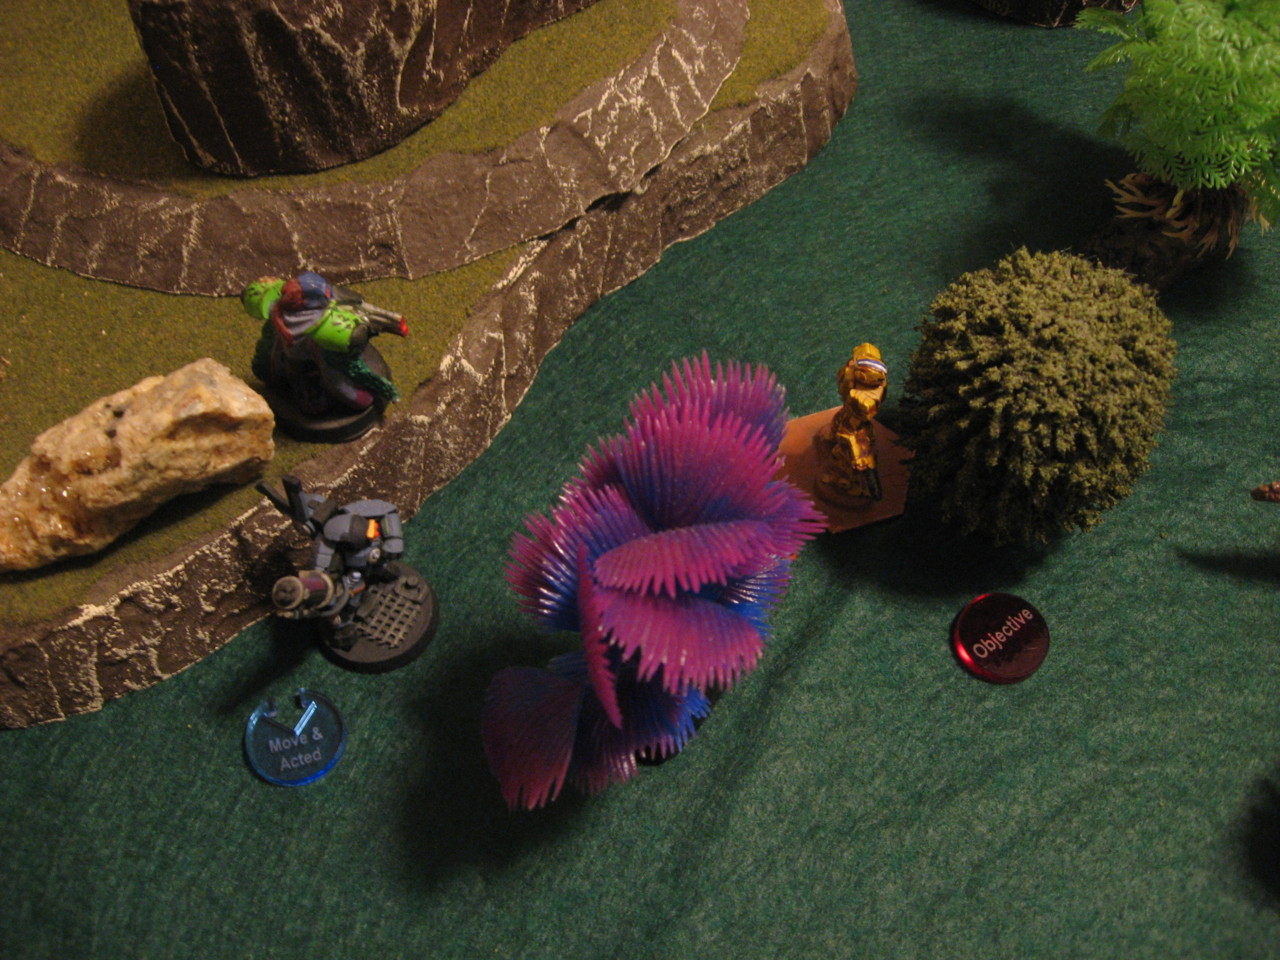
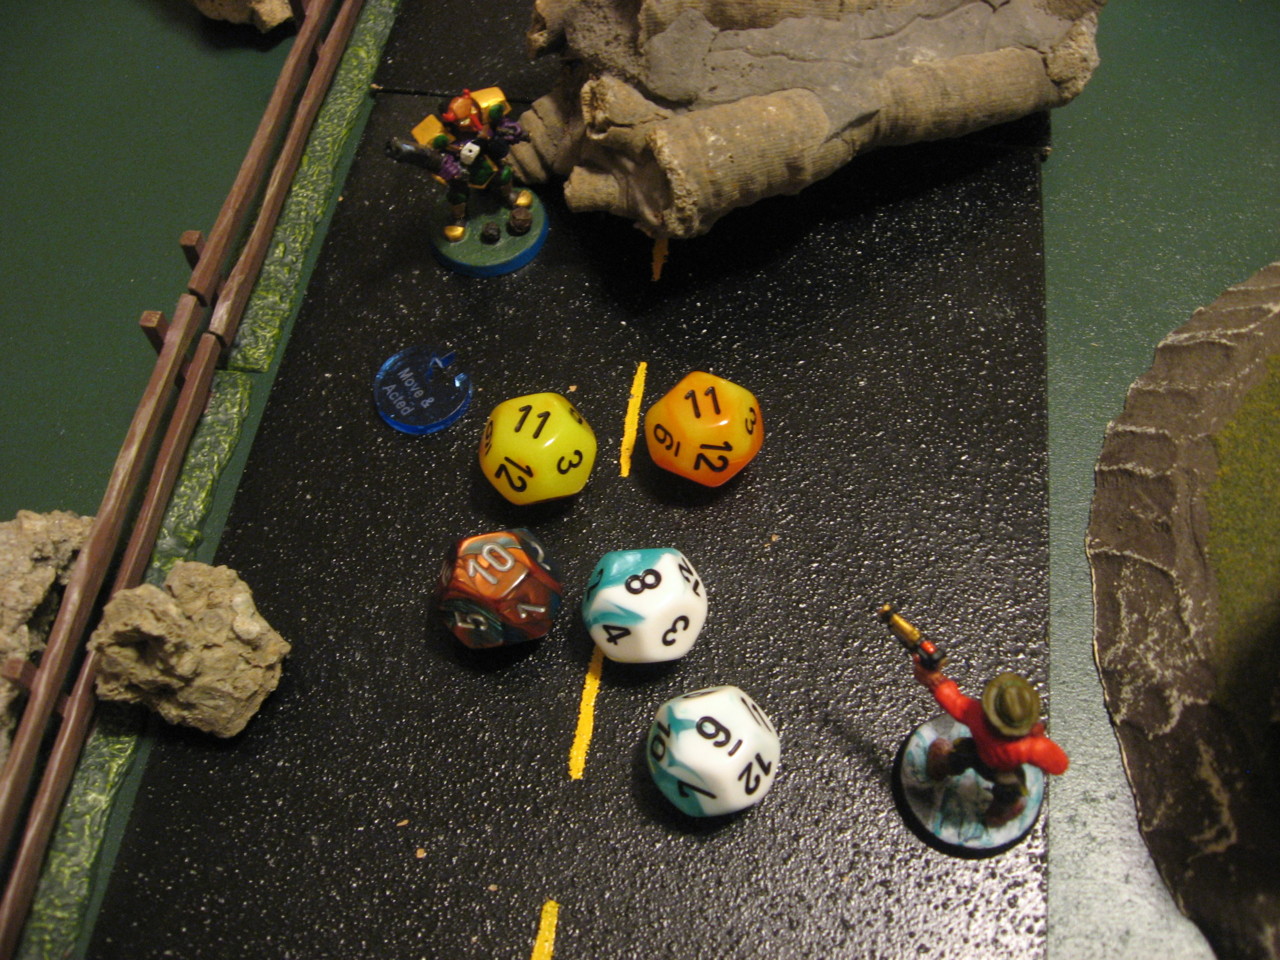
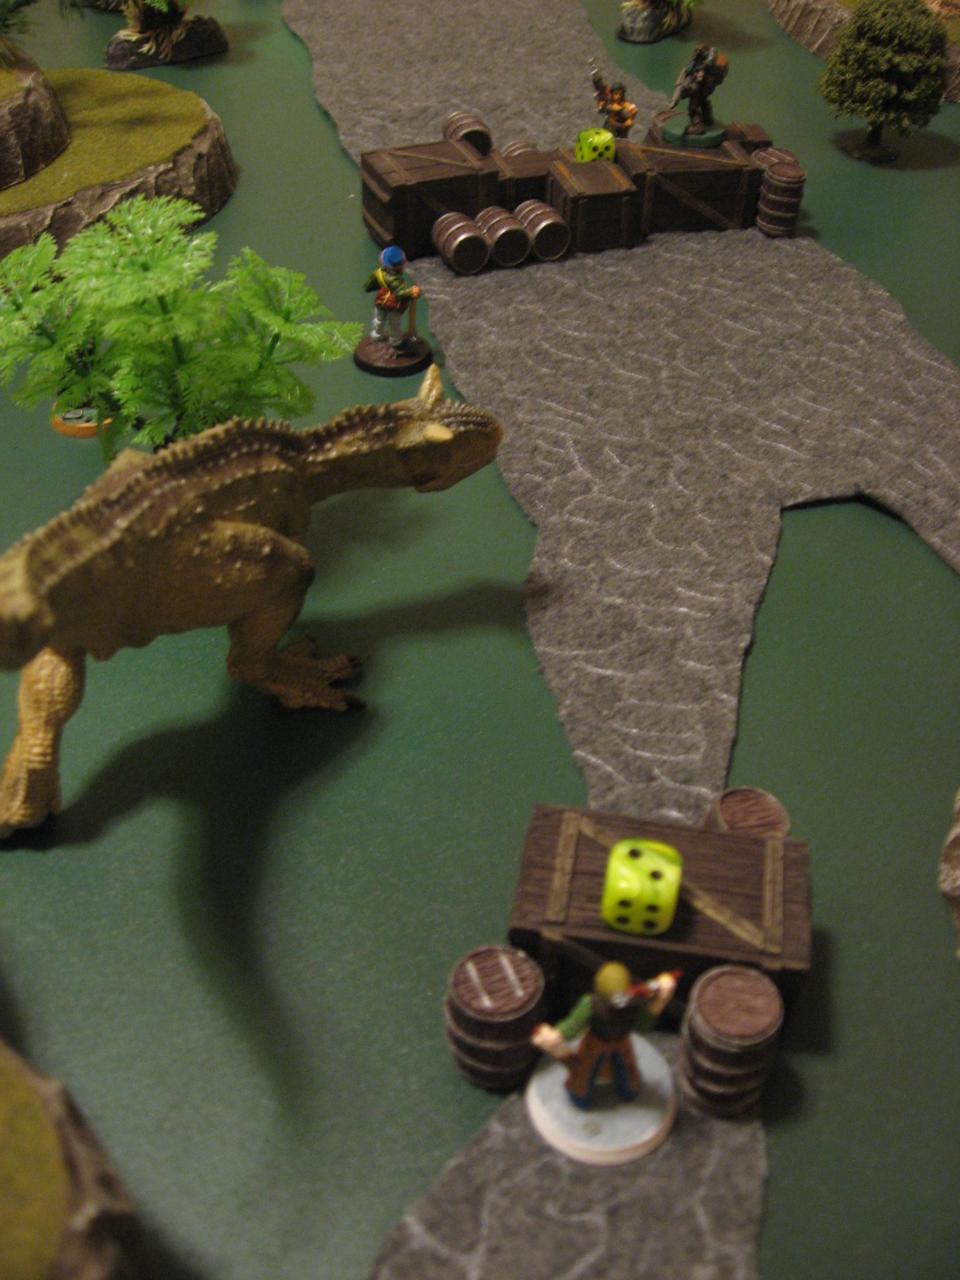
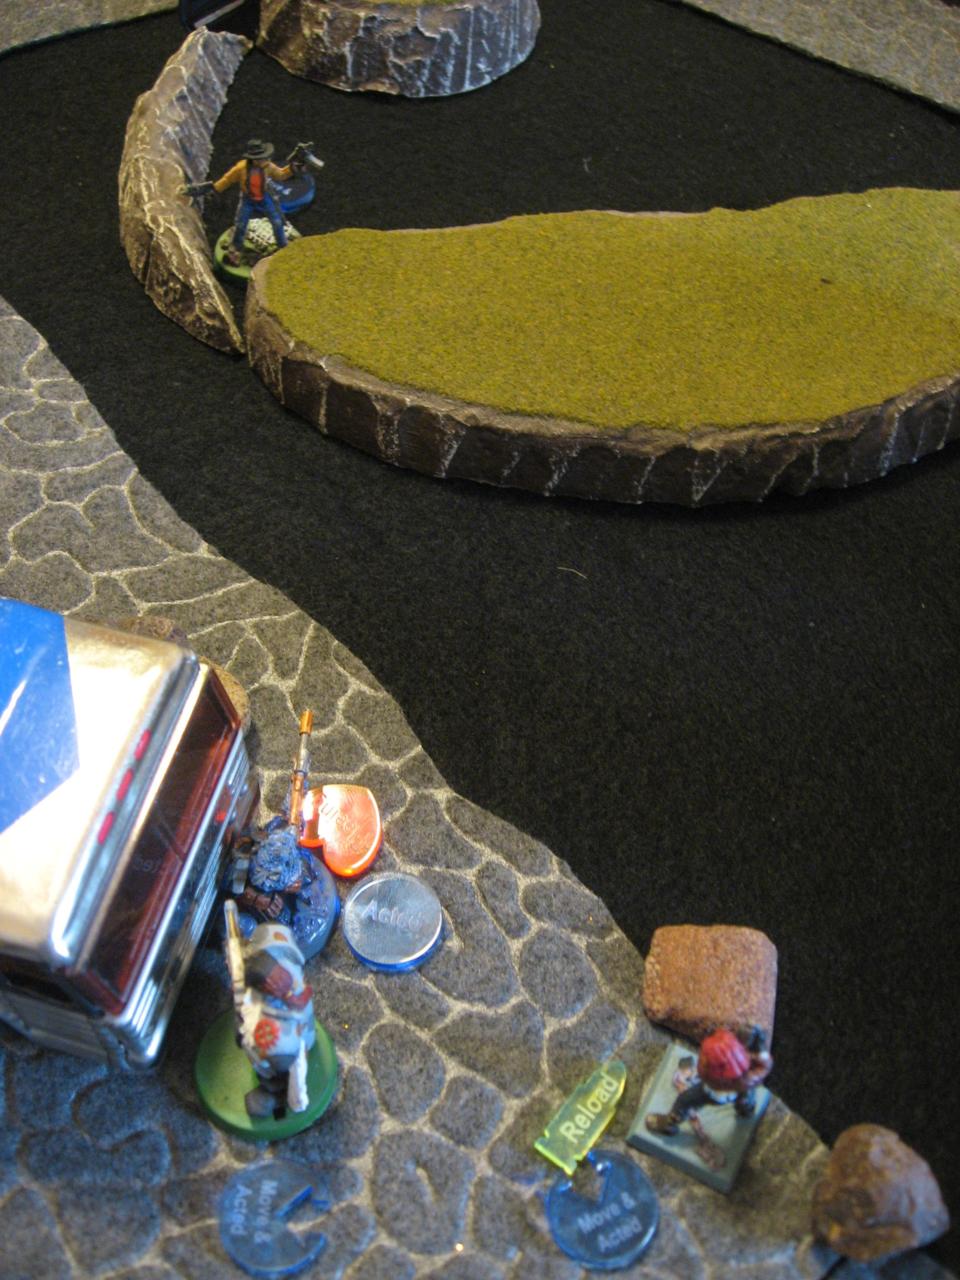
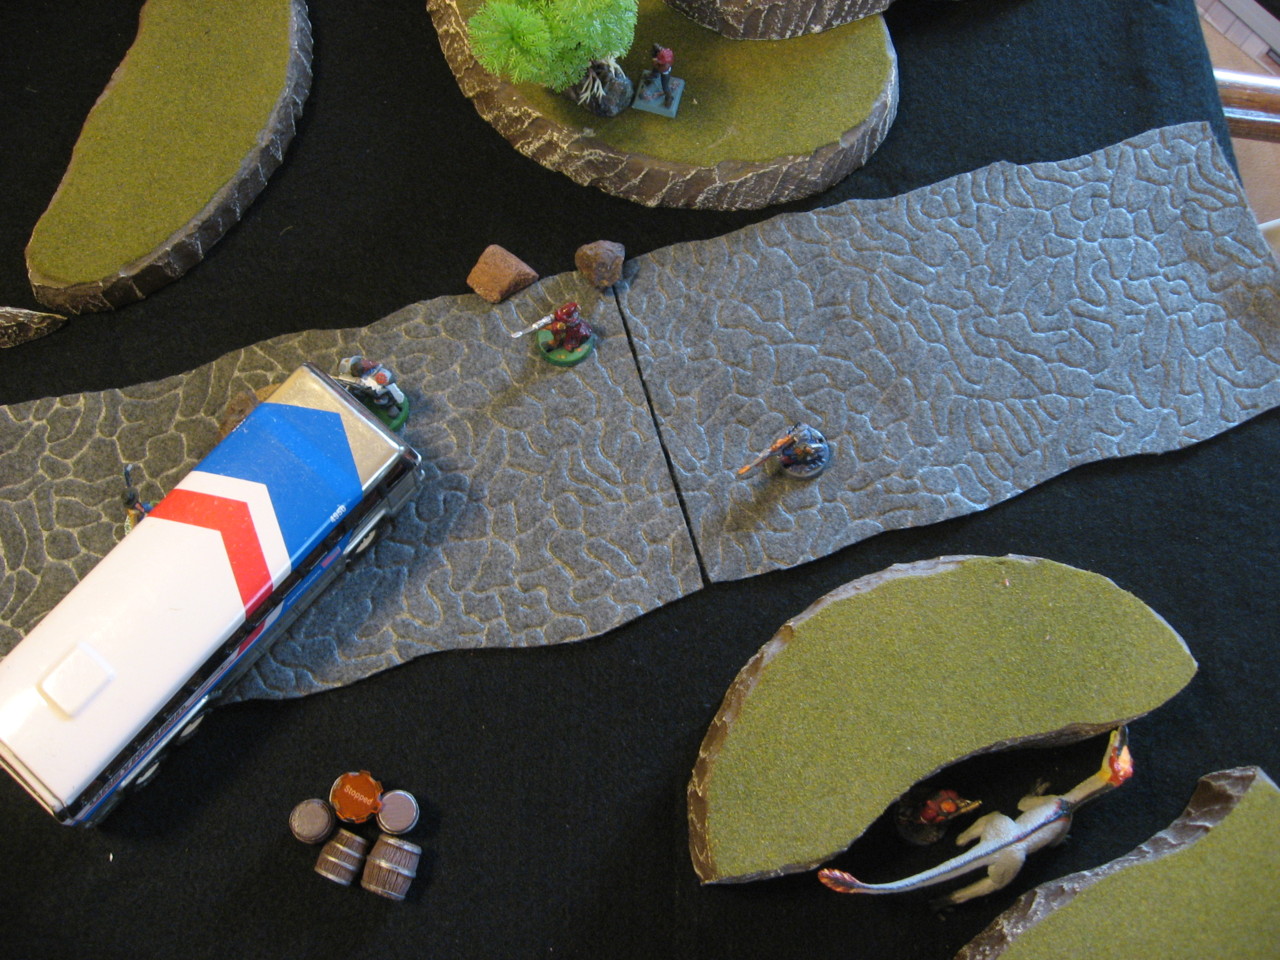
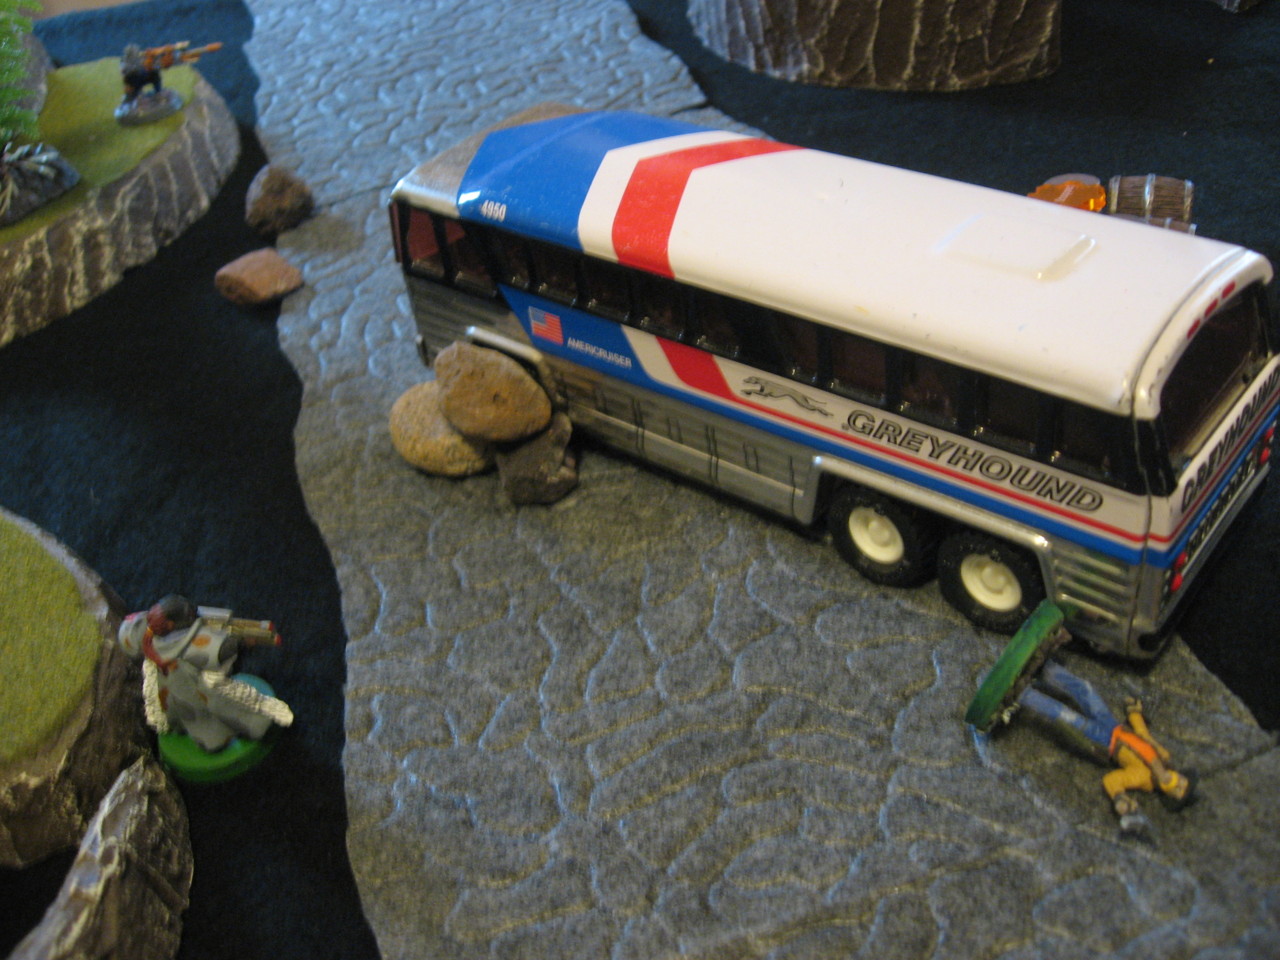
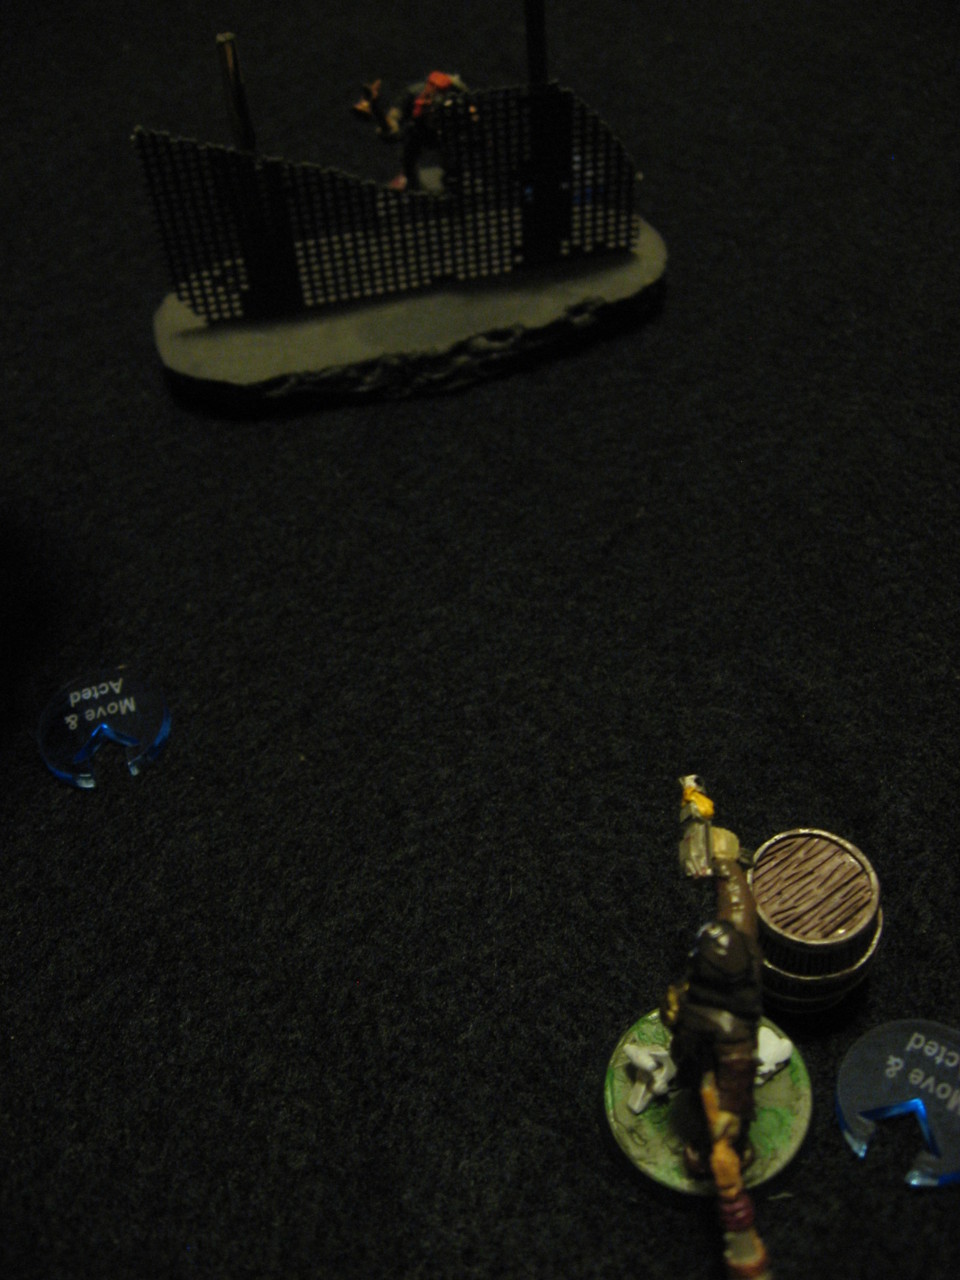
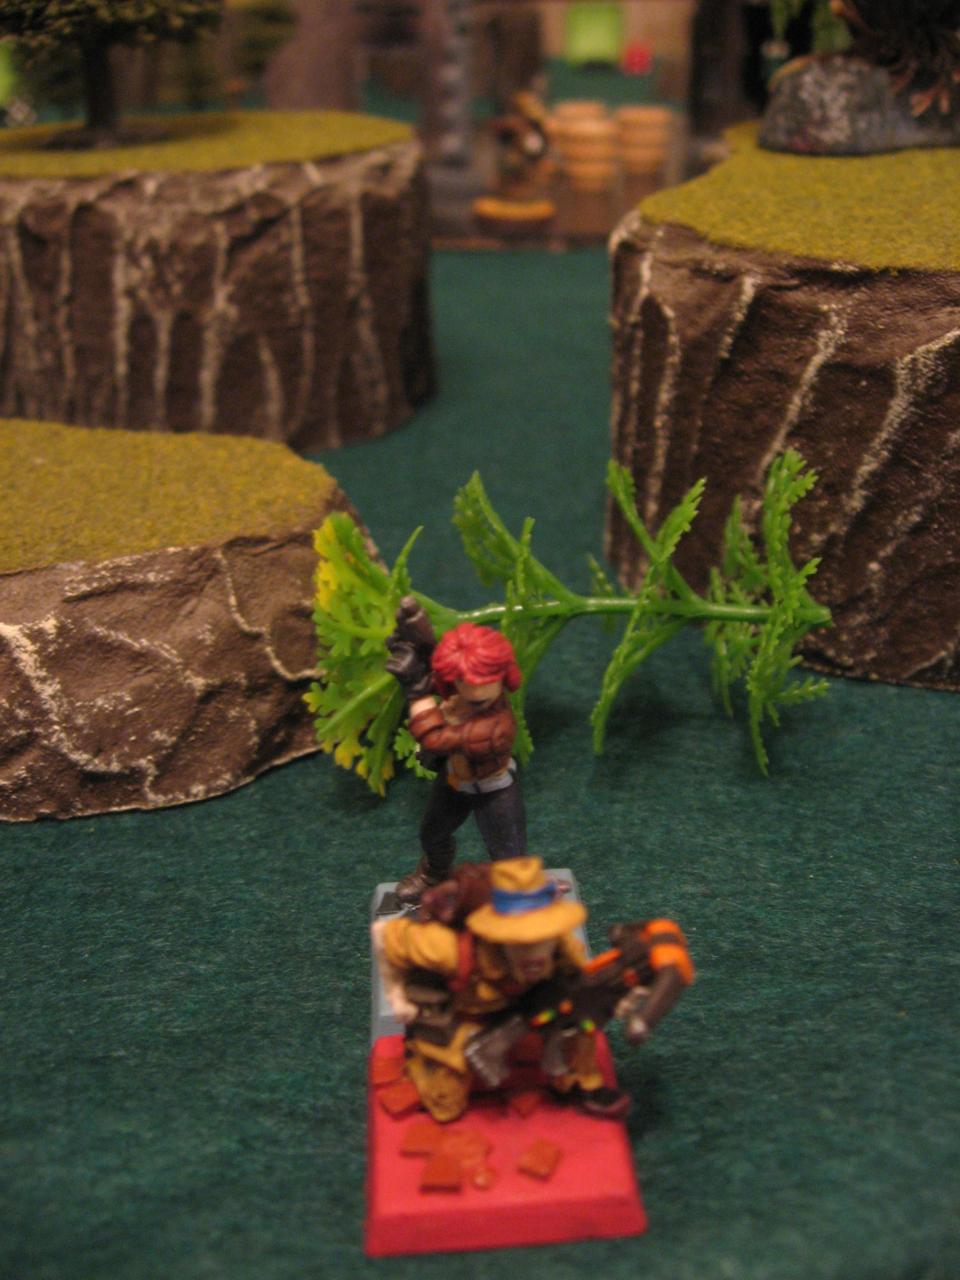
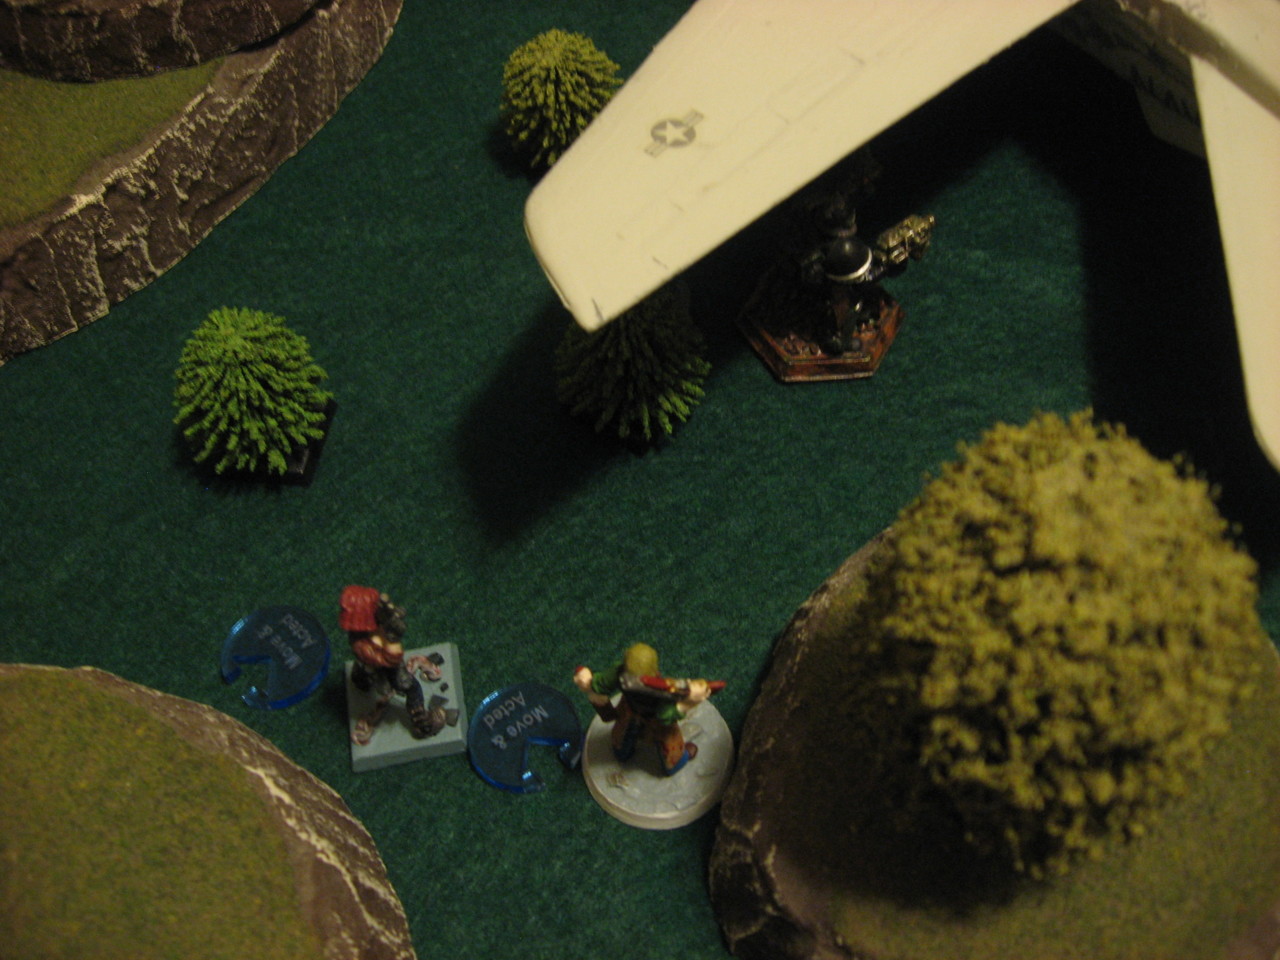
The Delta Commando Squad setup first, opting for the right side, or east, or kitchen-ward, haha. They were able to deploy Skull Basher far enough forward that he could reach the black box objective on the first turn. On the opposite edge the Eastwood Rovers set up in a fairly tight formation, since there were no explosive weapons to fear.
dc-operation-black-box-0026dc-operation-black-box-0032dc-operation-black-box-0028

The first turn more or less nullified the Secret Objectives, which was kind of funny. Pale Rider and Alexander Keith were able to destroy the engine parts objective on their side of the table. And Skull Basher grabbed the black box on the other.

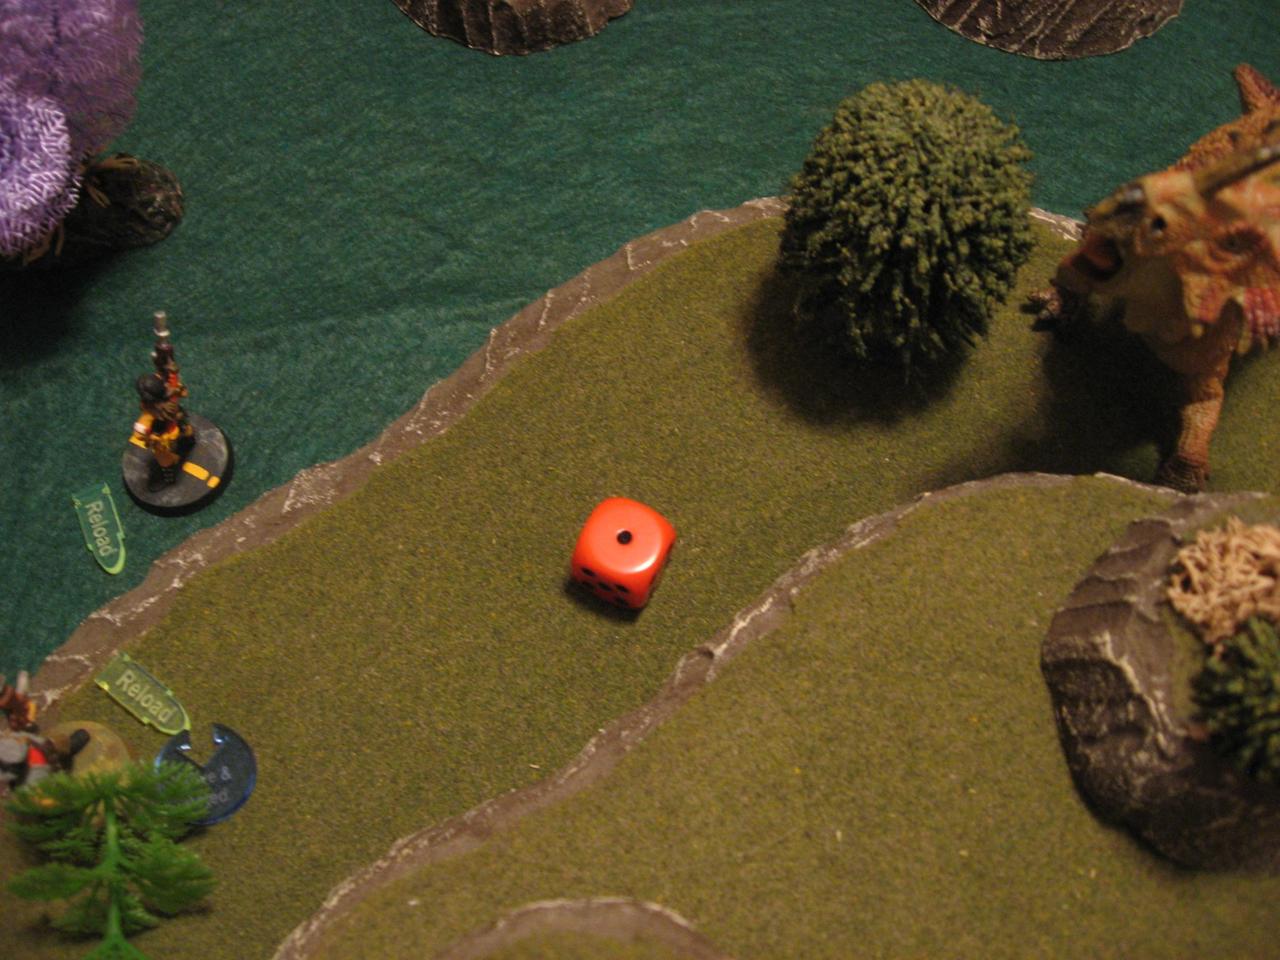
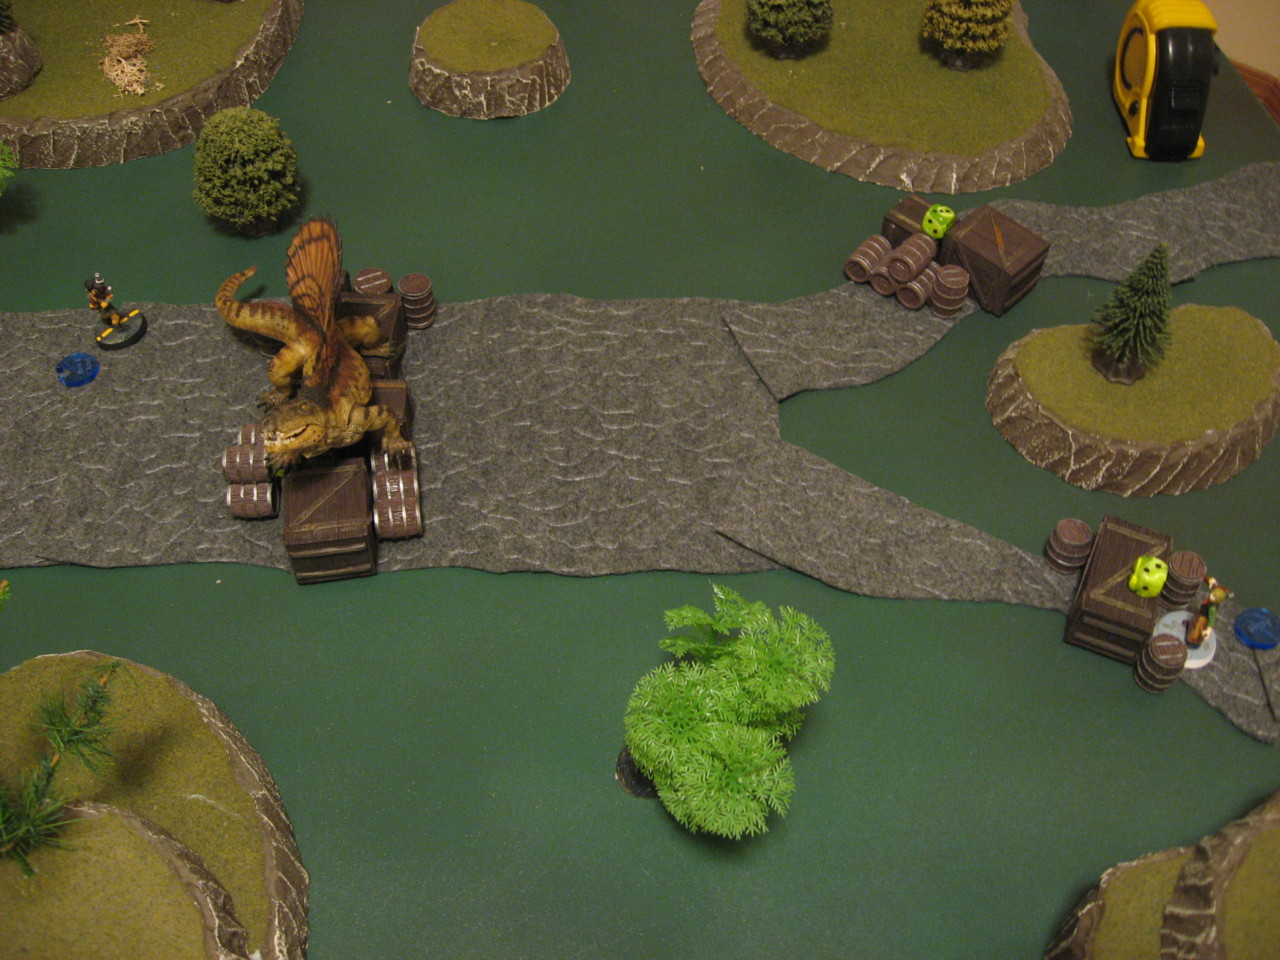
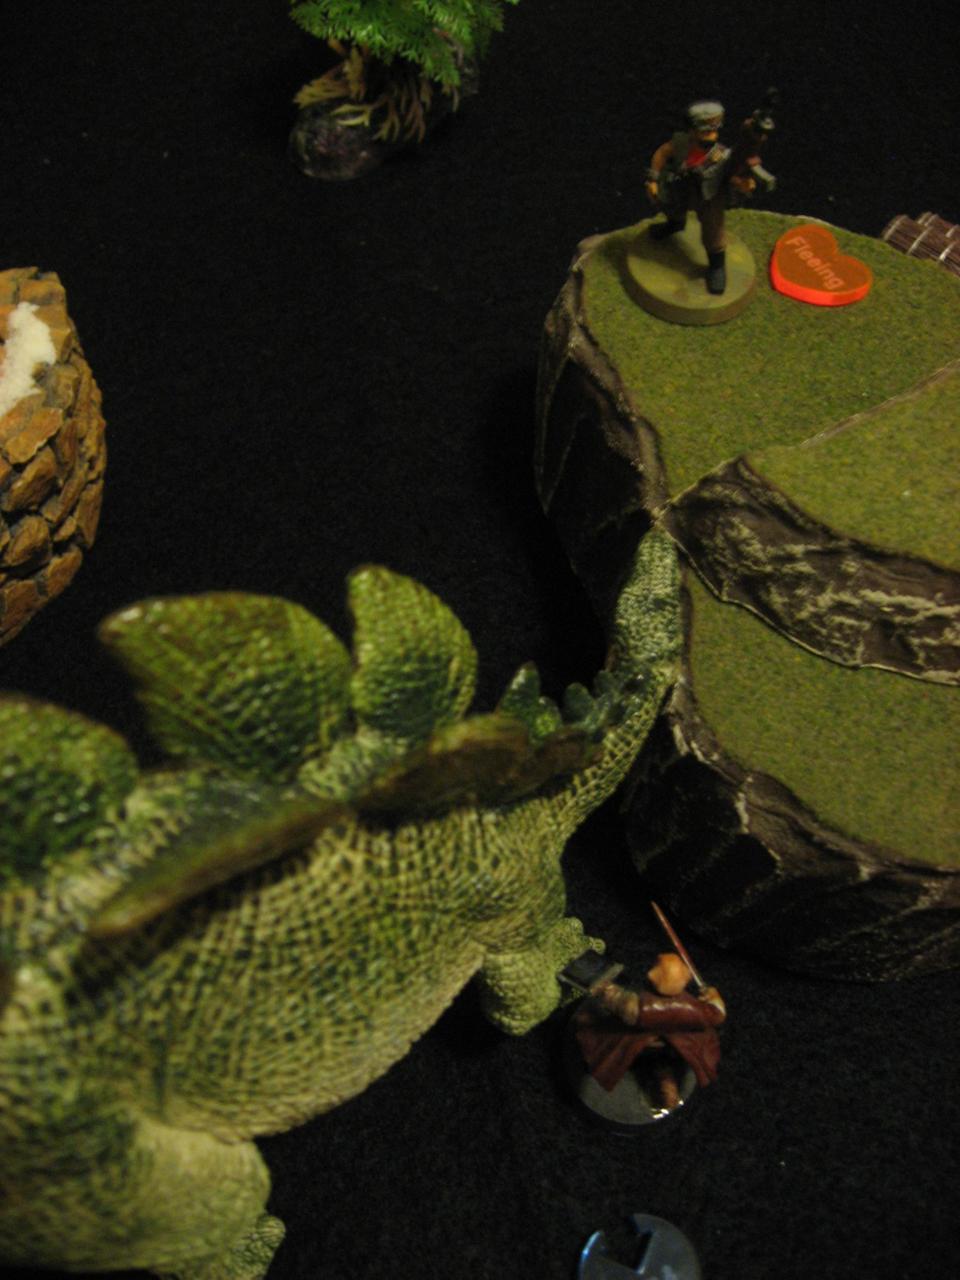
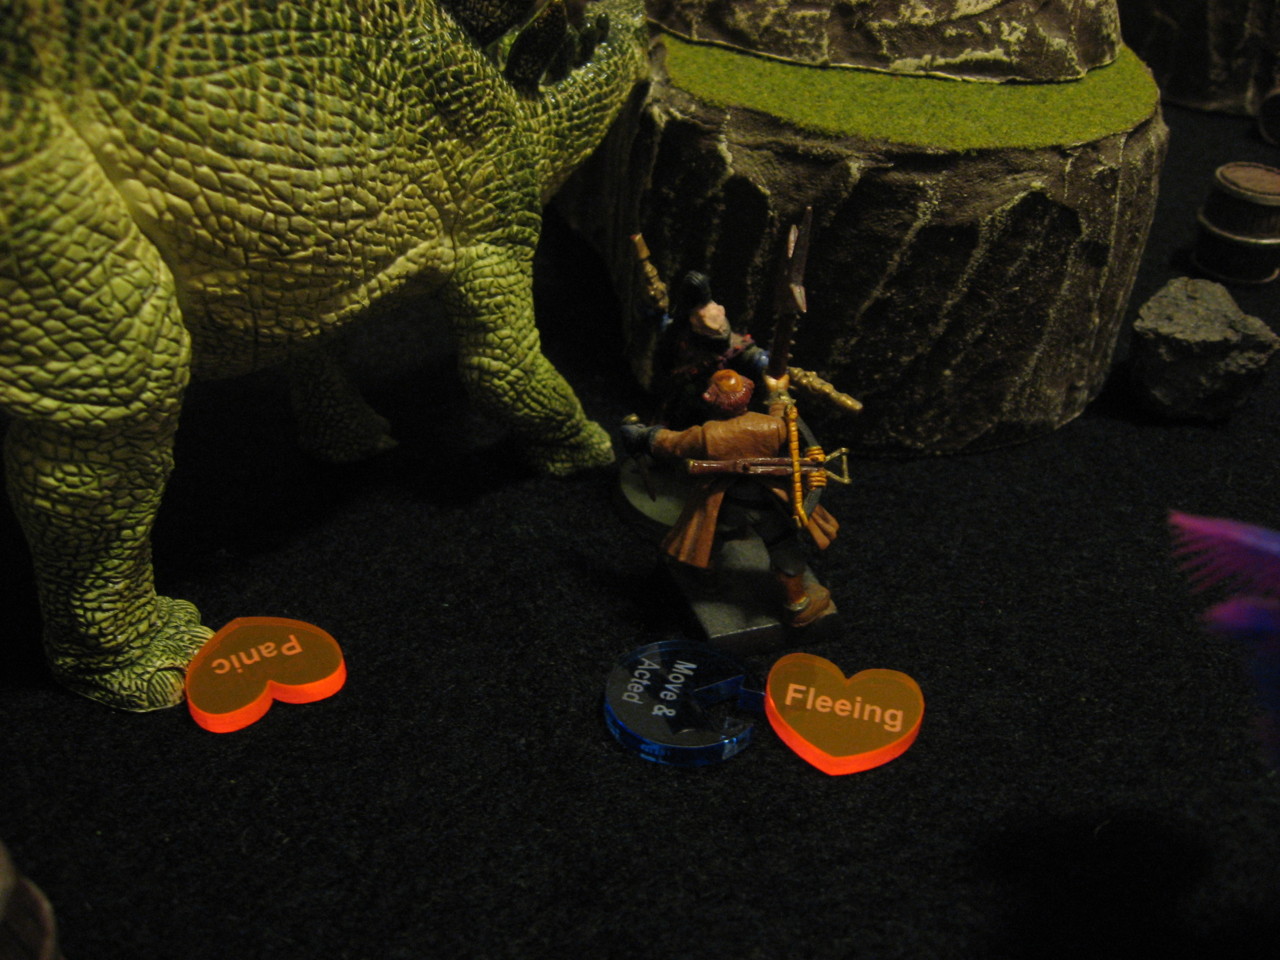
In terms of shooting at living things Powder Monkey managed a lucky hit on Iron Talon that caused Panic. The dinosaur had edged forward around the hill, but still presented a fairly big target. Iron Talon attempted a far 5″ Charge against Eiger, but failed and was a bit exposed. From on top of the hill Desolator hit Alexander Keith for 6 damage. The bartender then failed his Bravery Test and would be Fleeing. The Commando sniper had a fairly good view of the battlefield, but the F-14 Tomcat did a good job of blocking line of sight for some of the approach.

dc-operation-black-box-0036dc-operation-black-box-0038dc-operation-black-box-0040dc-operation-black-box-0045

Turn 2
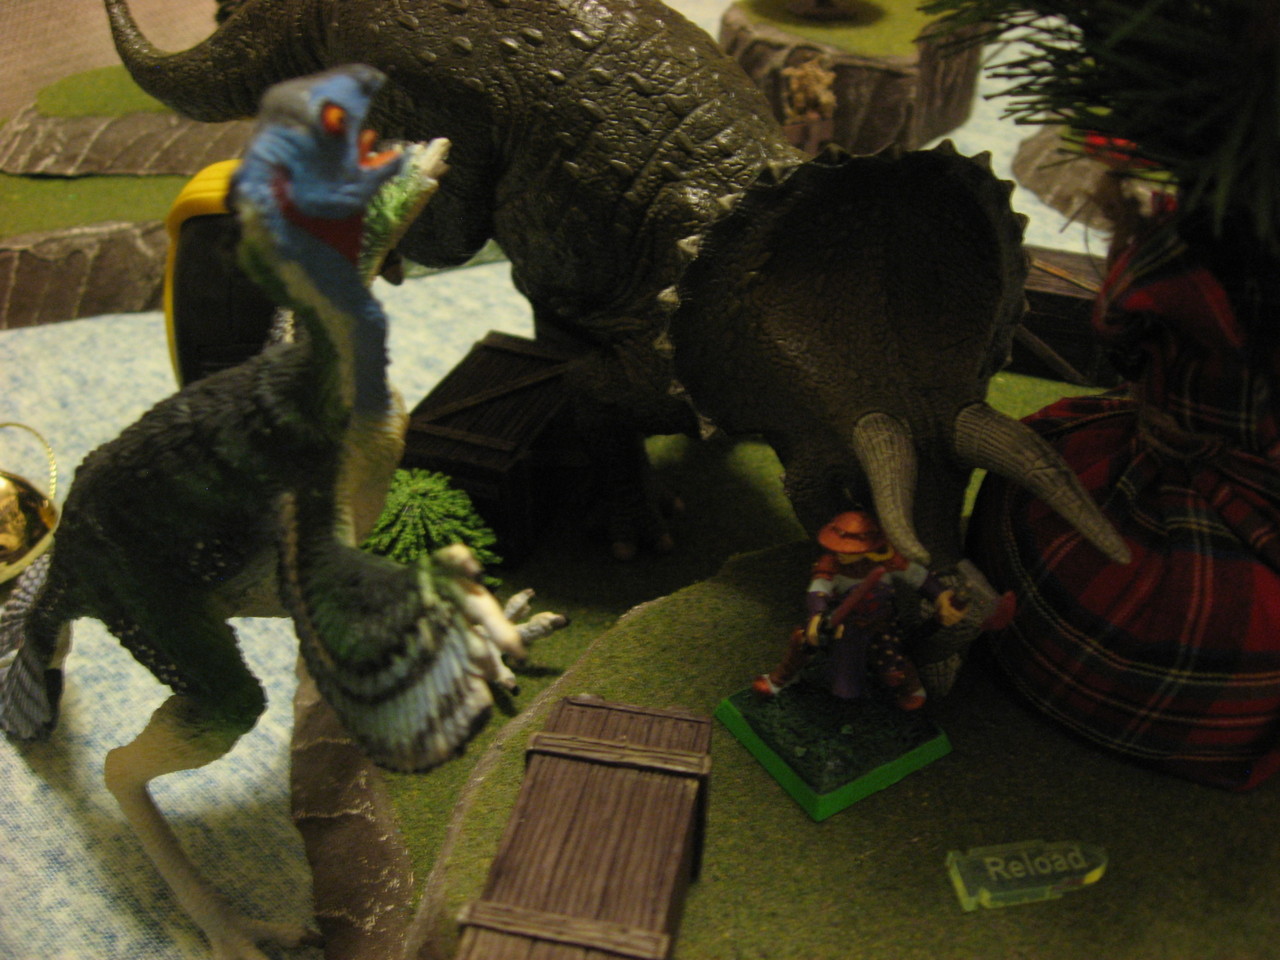
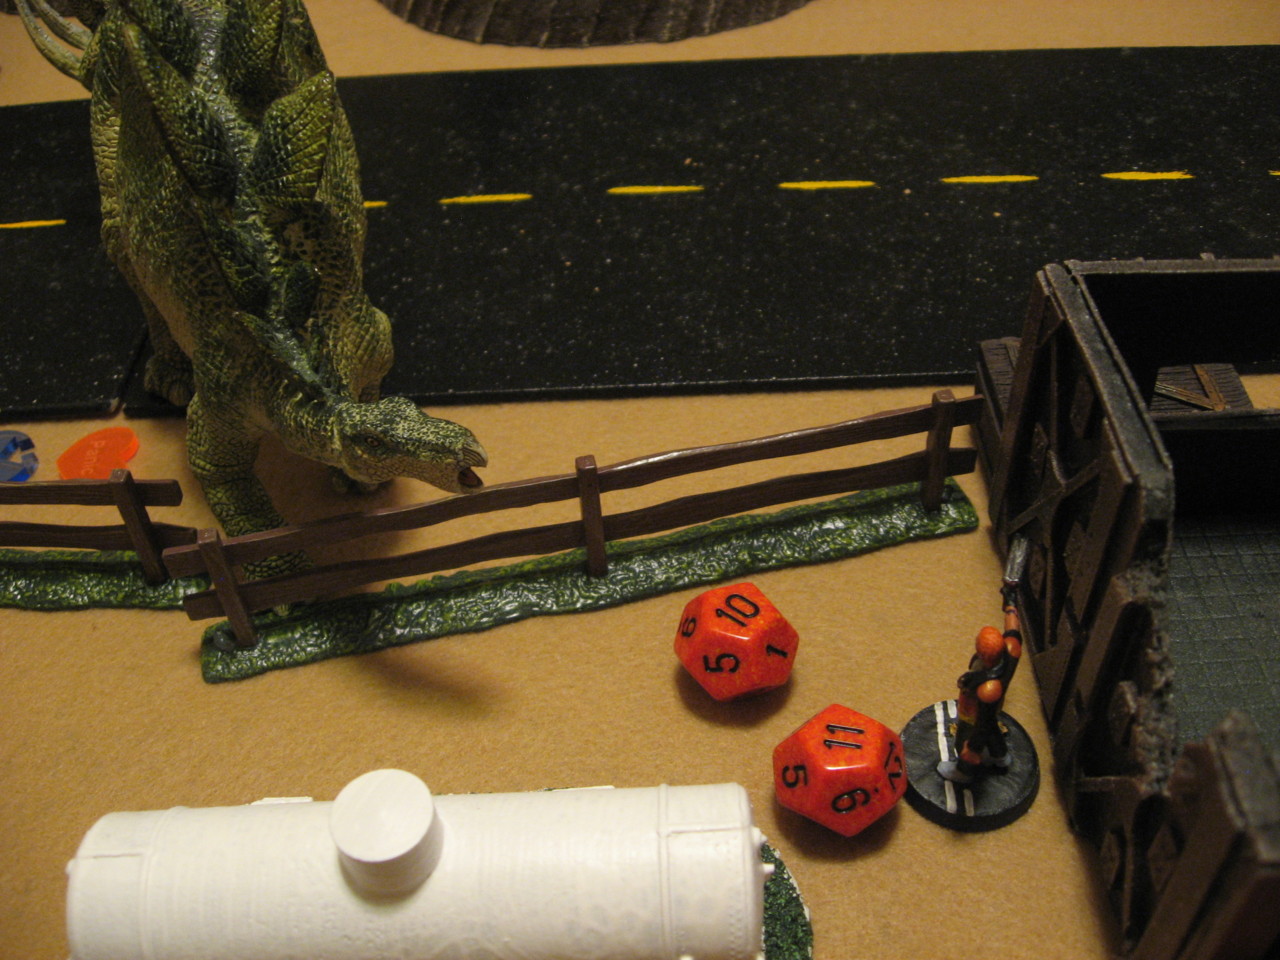
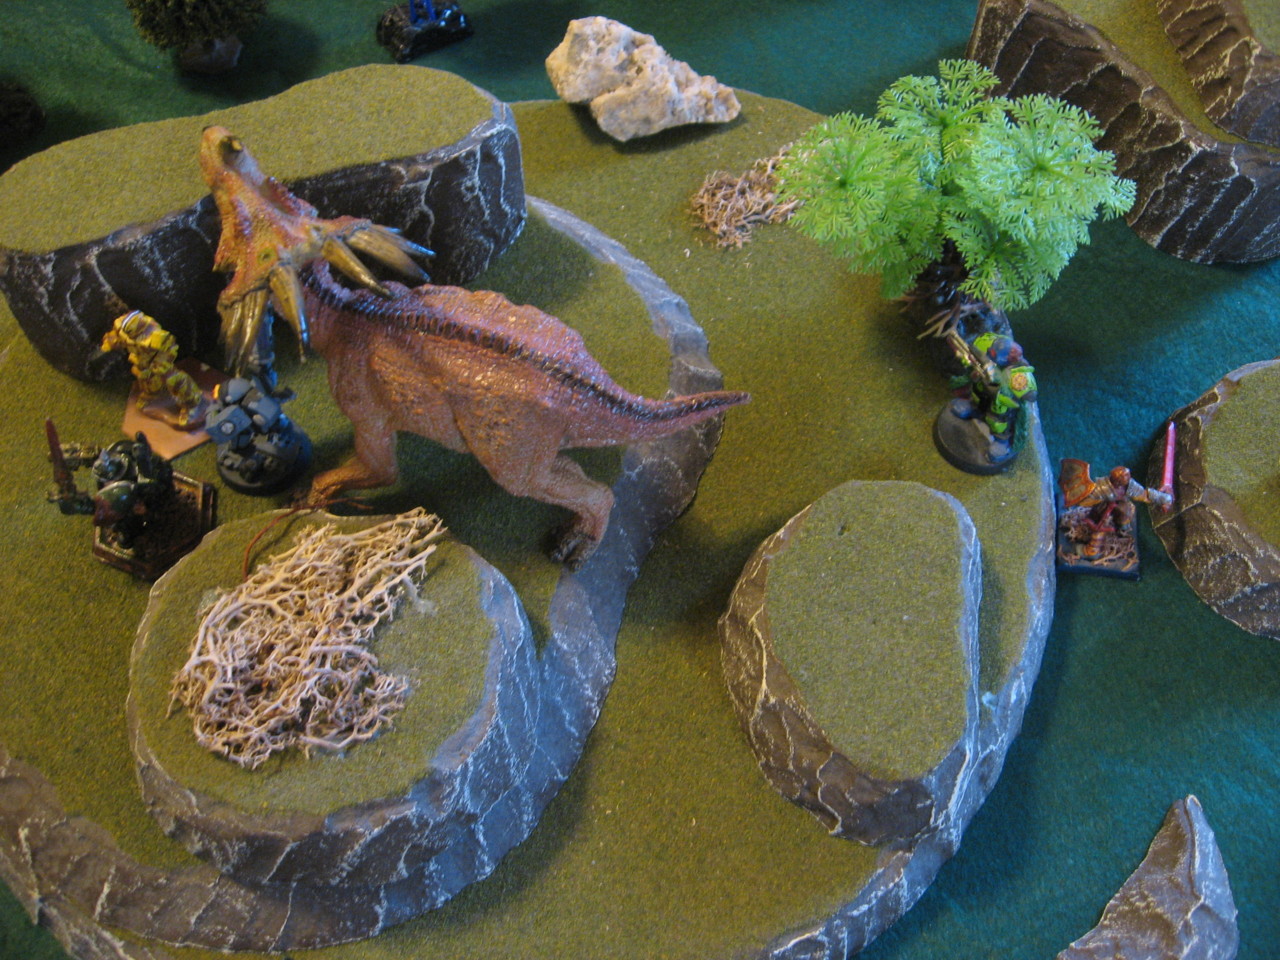
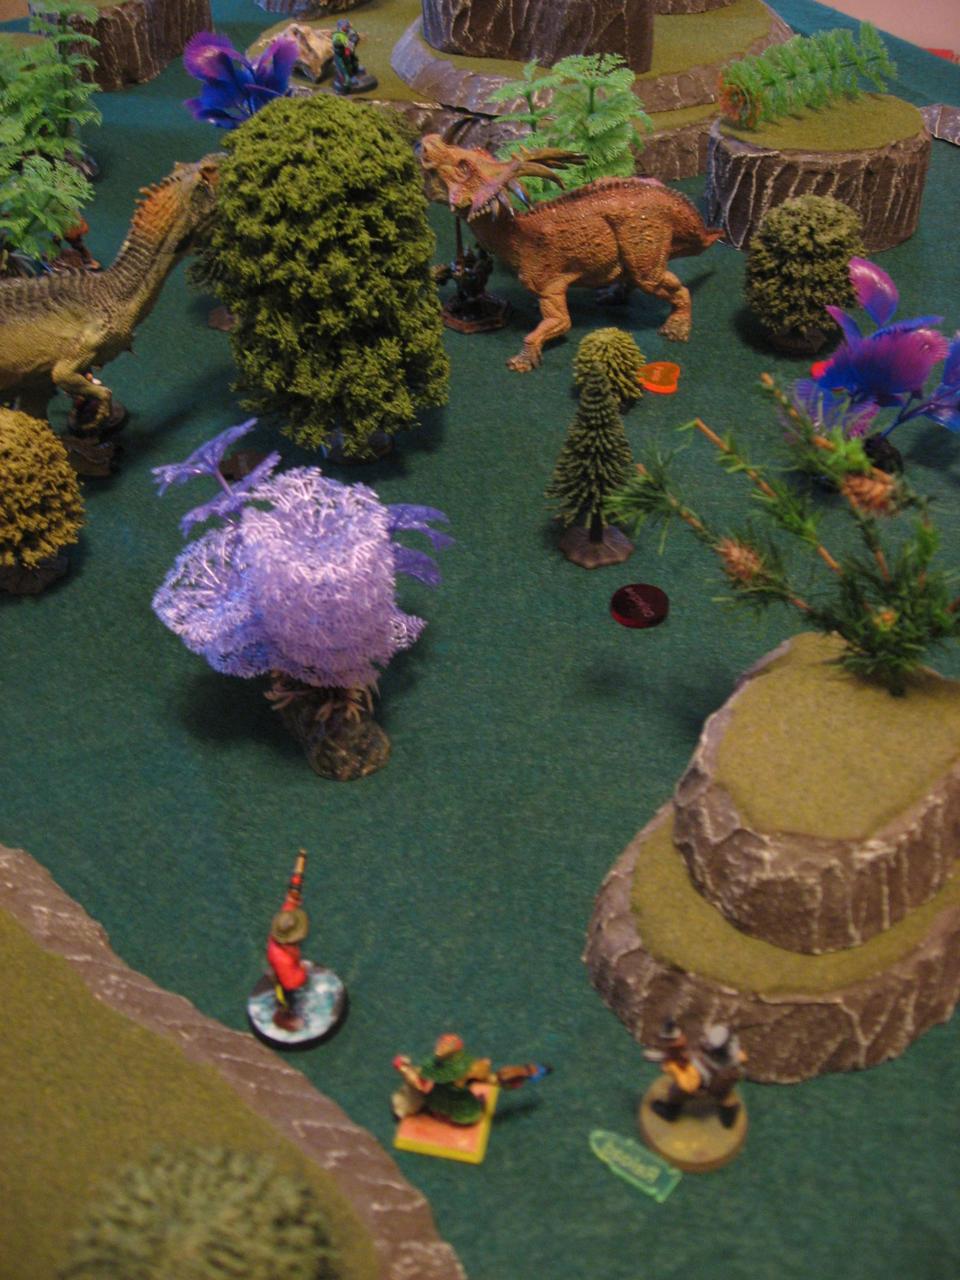
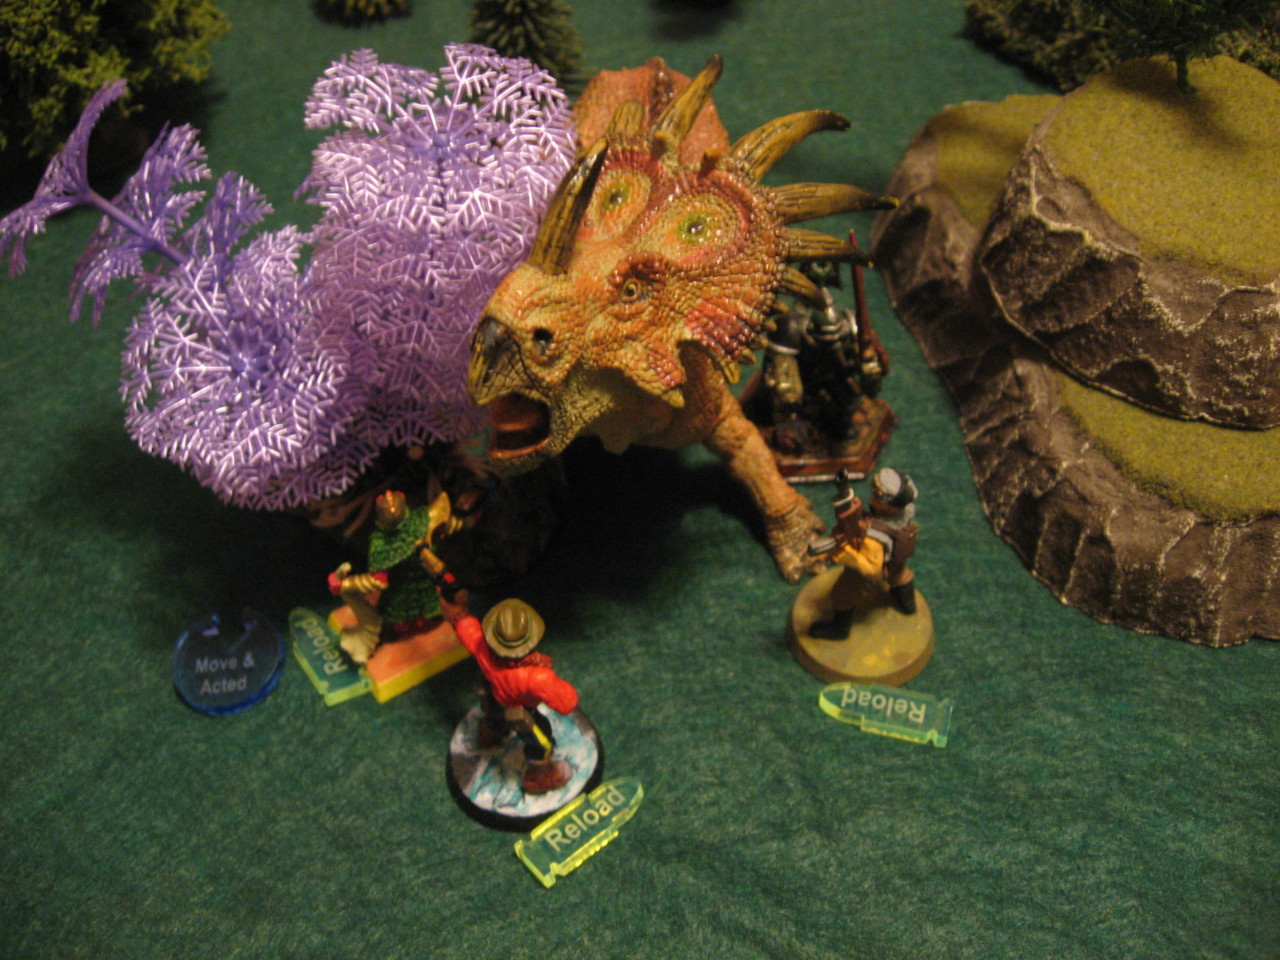
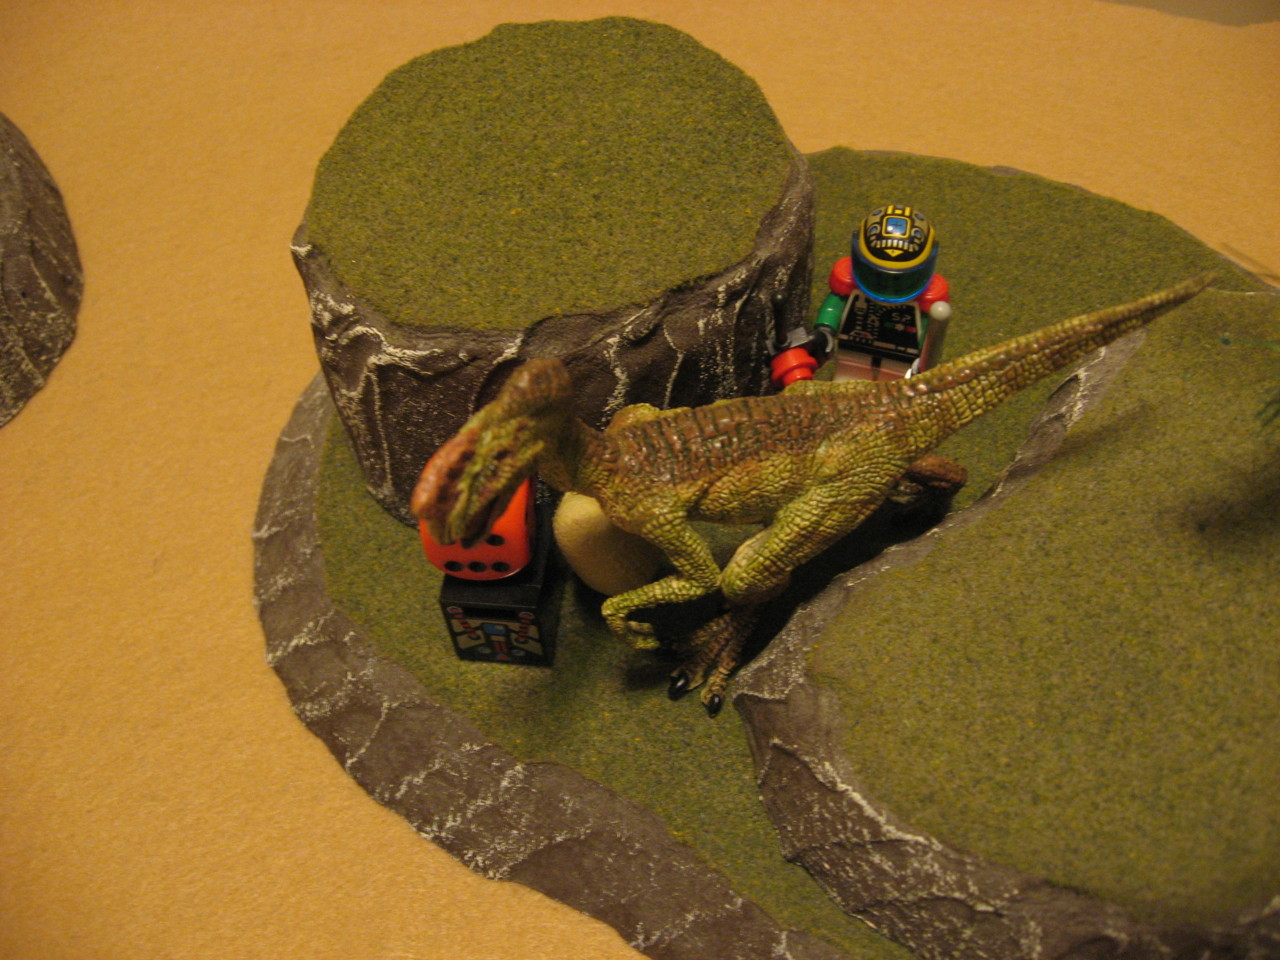
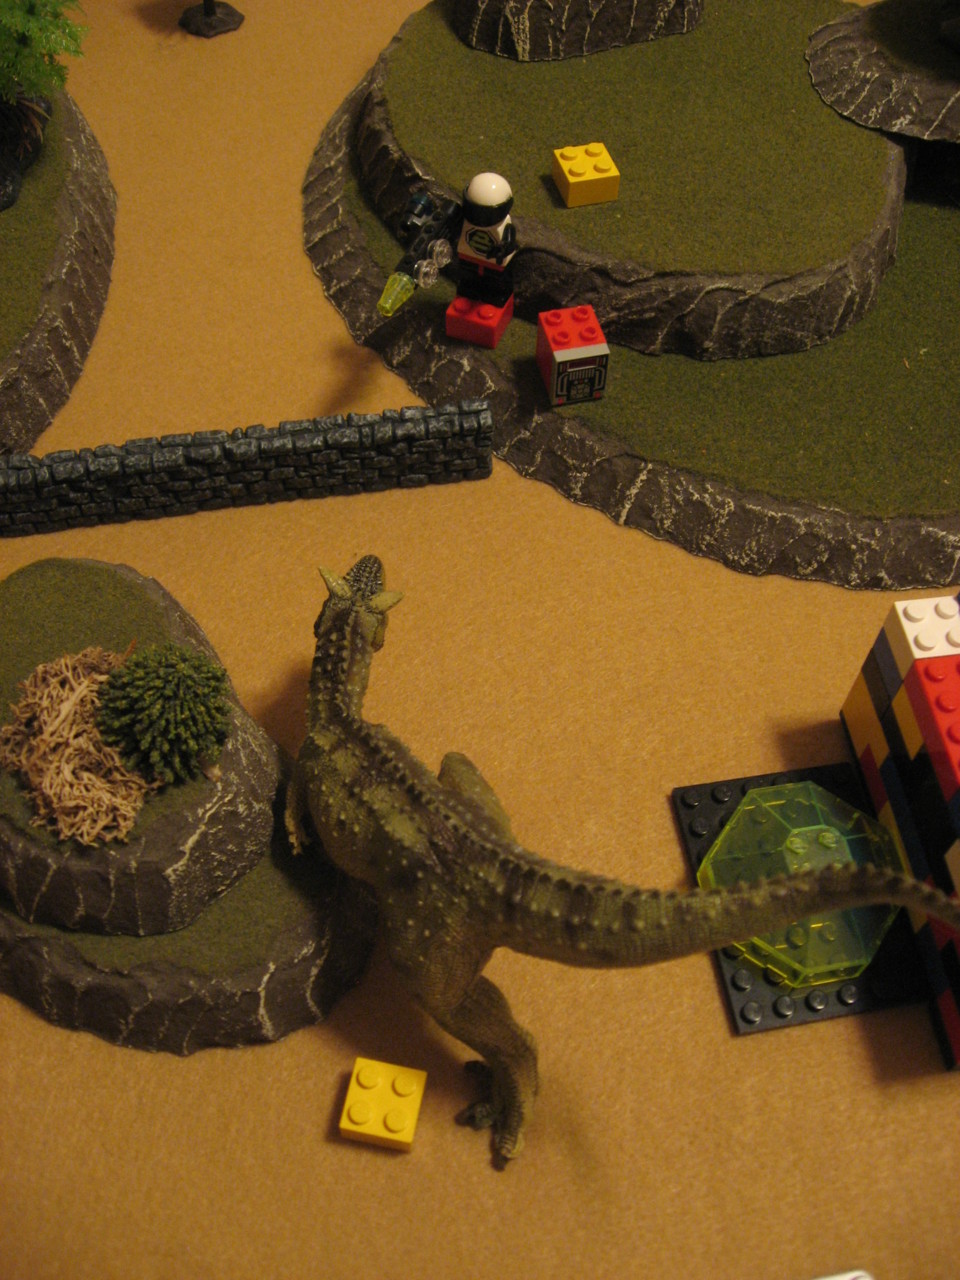
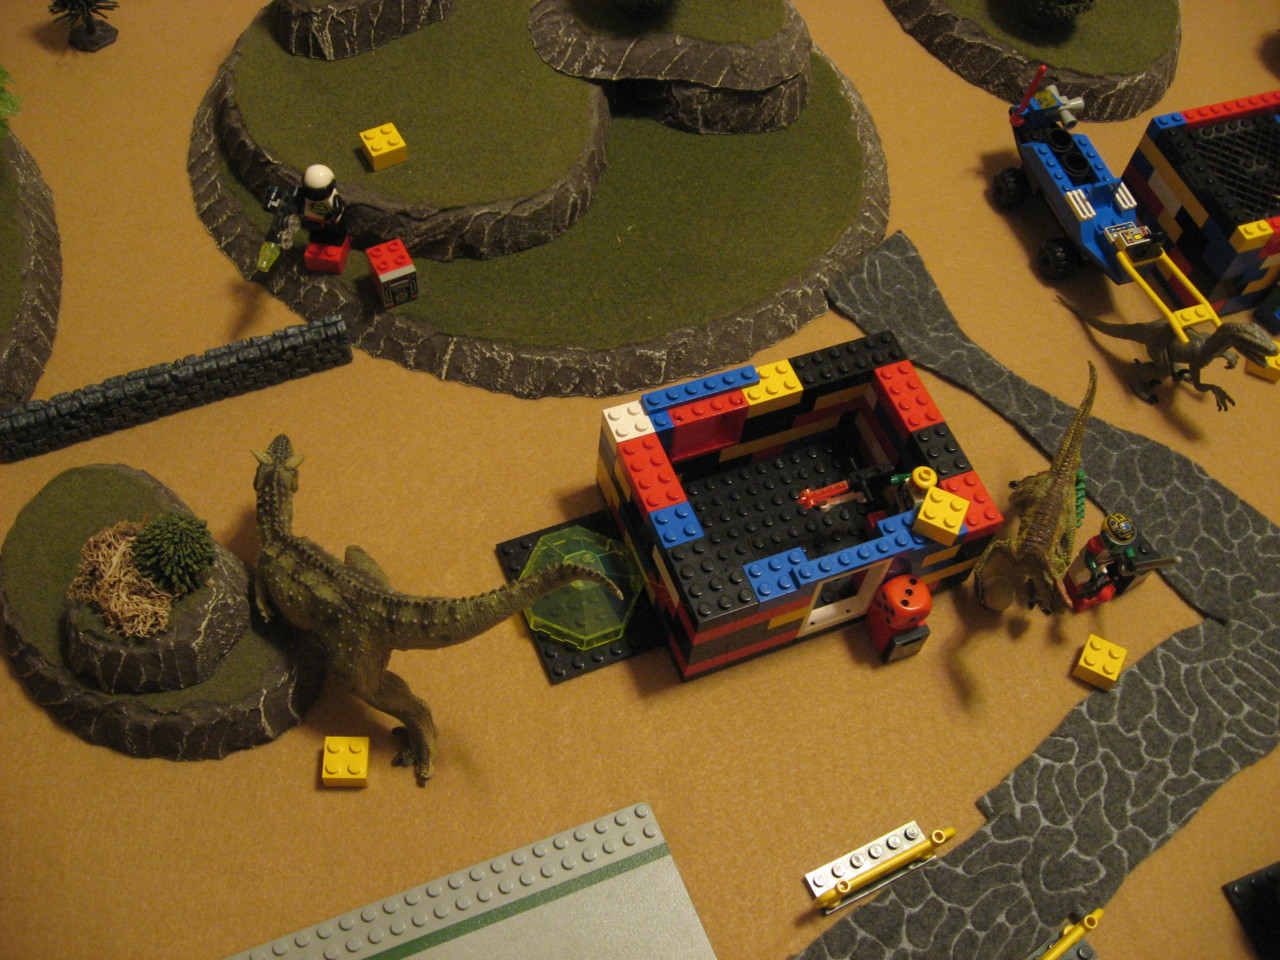
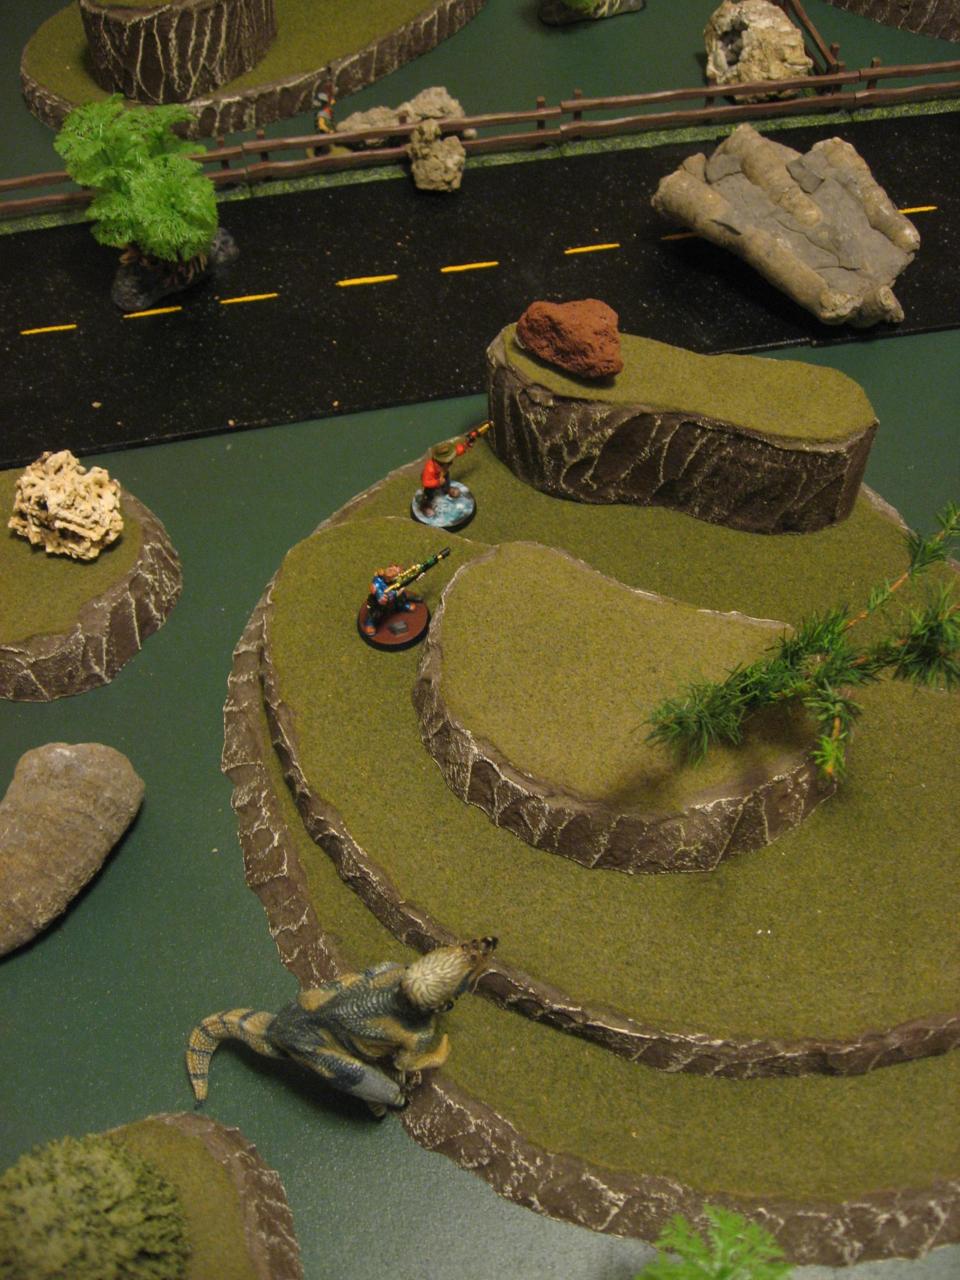
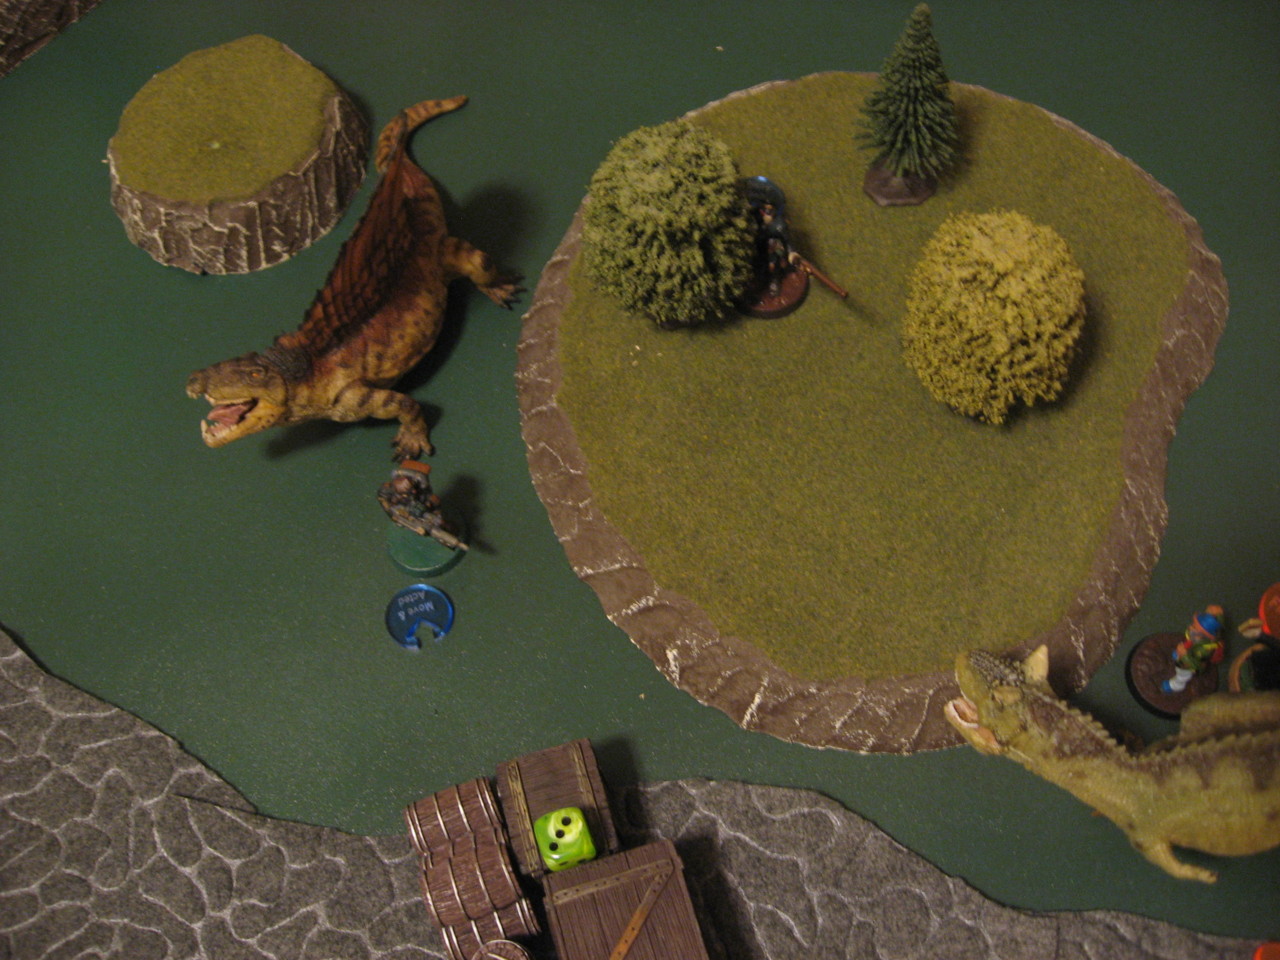
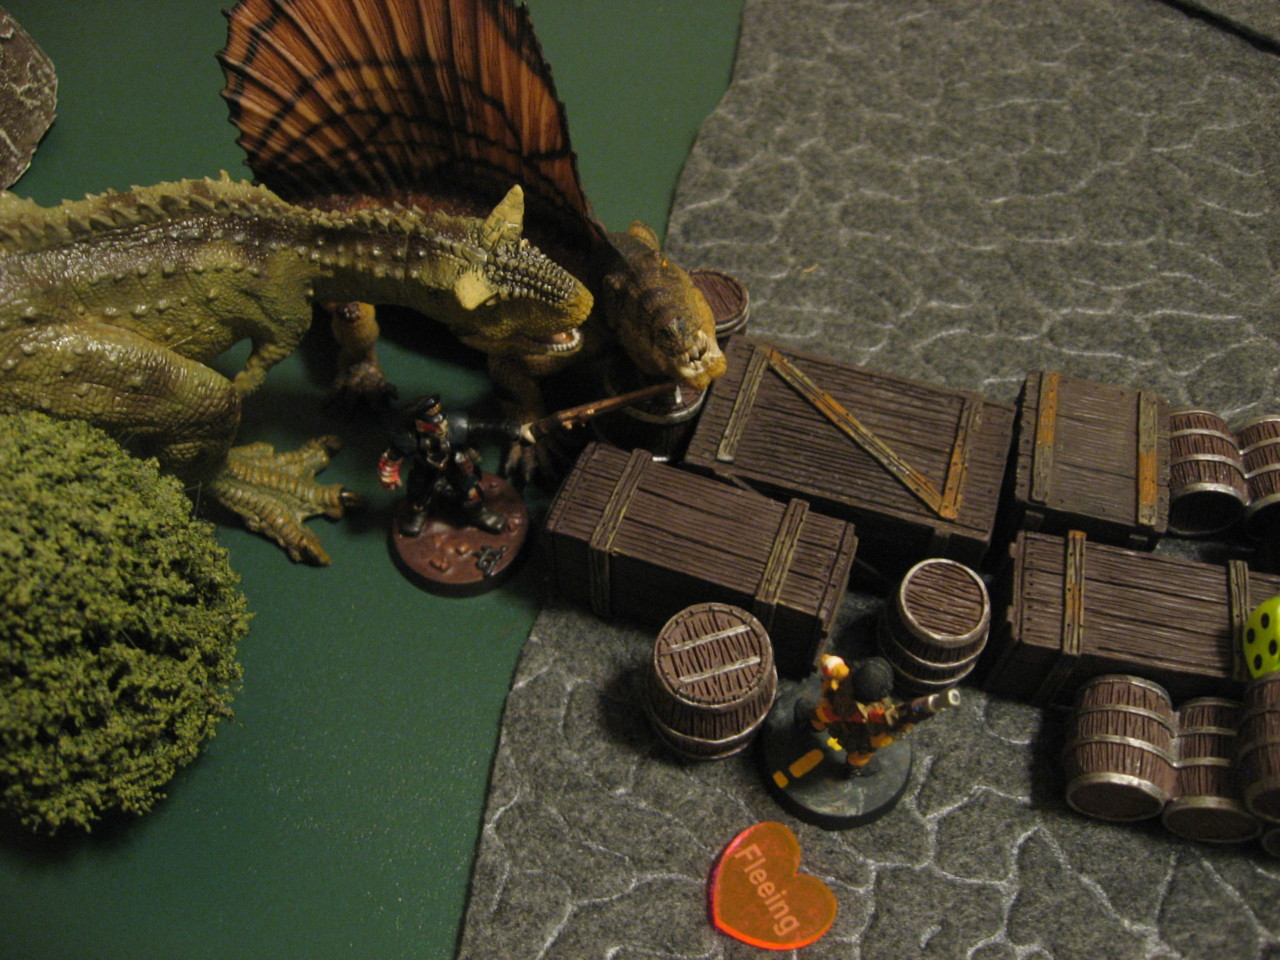
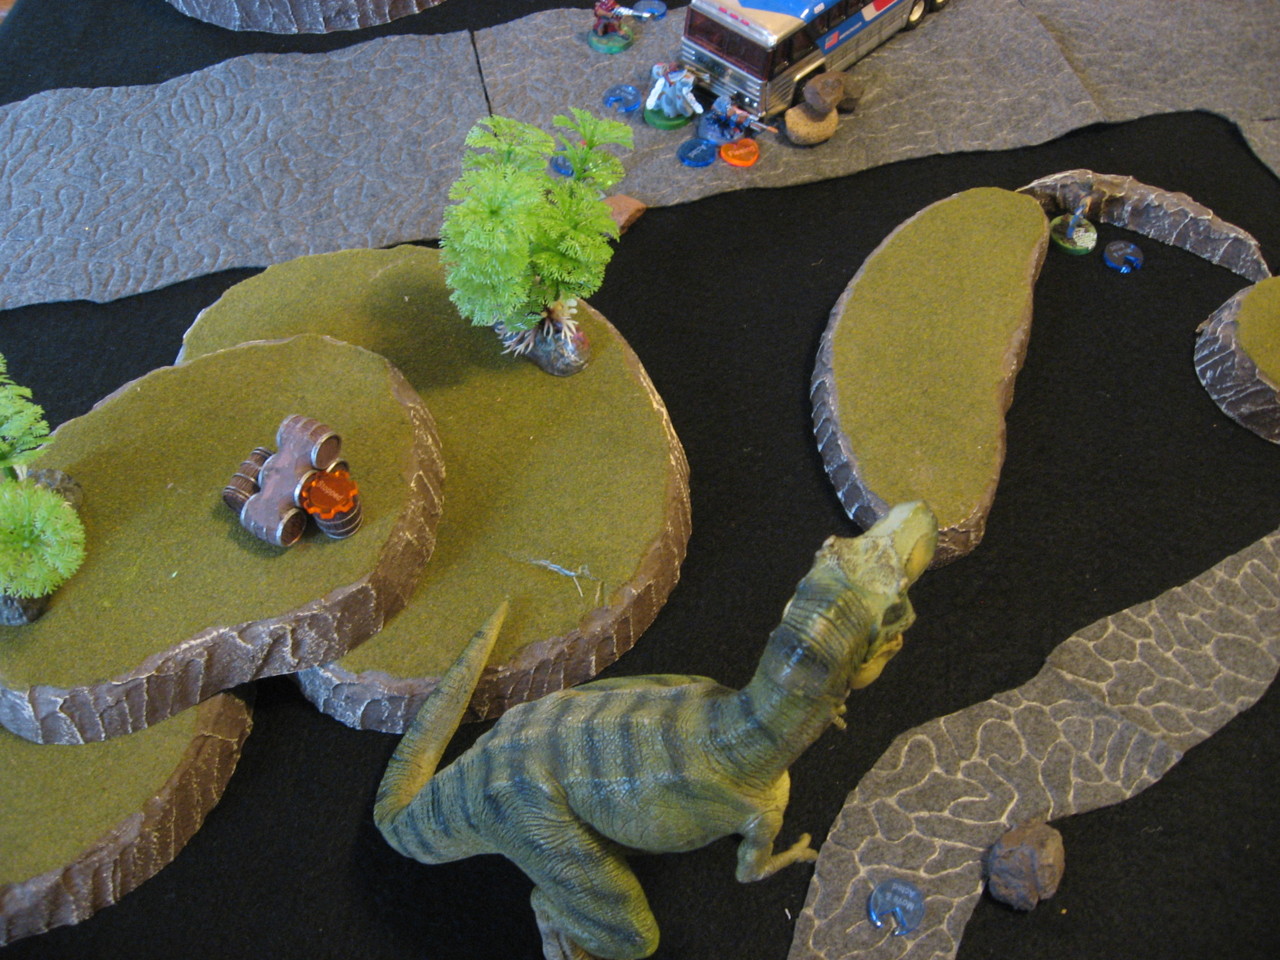
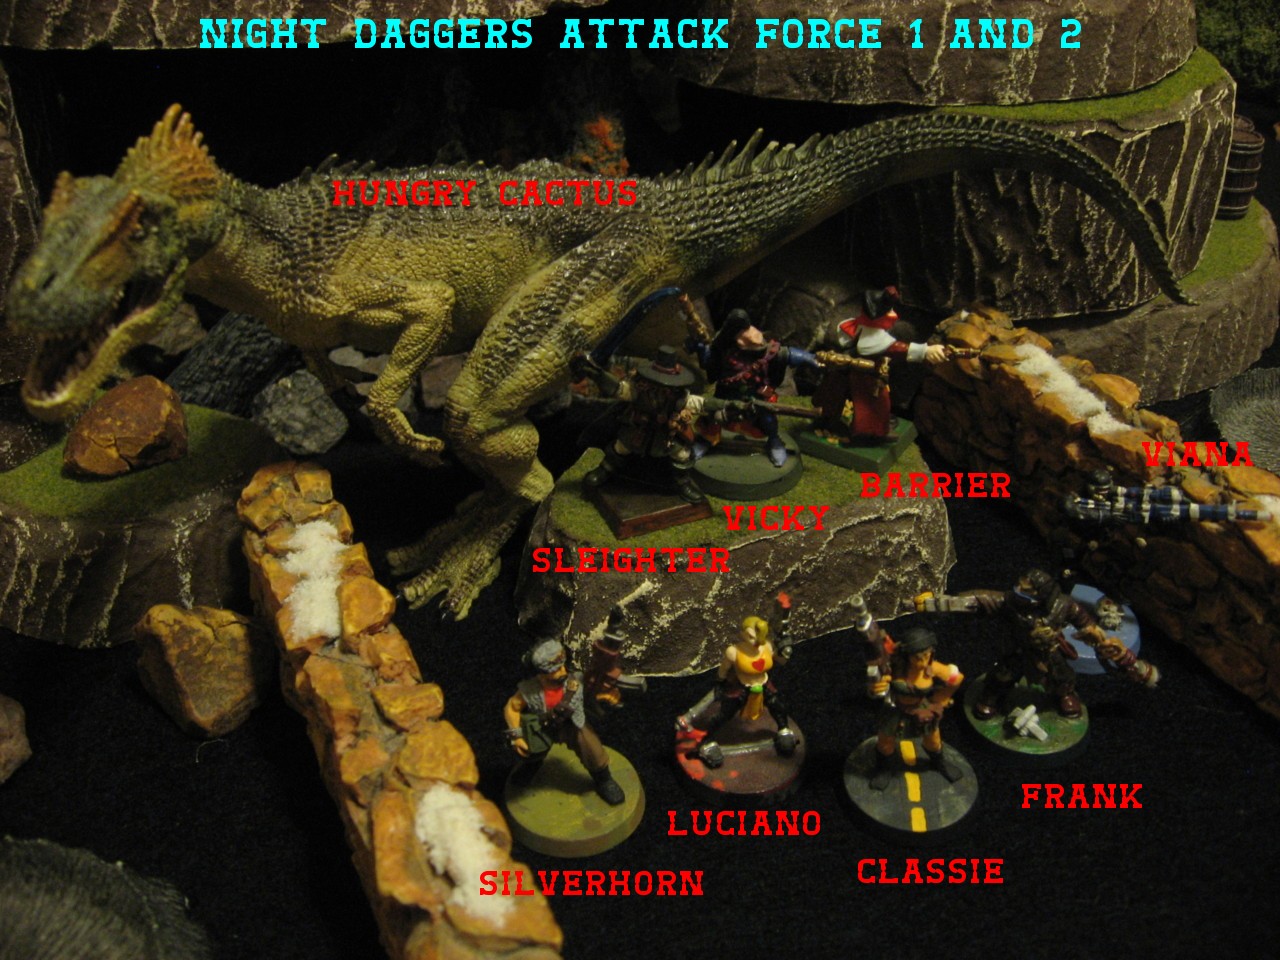
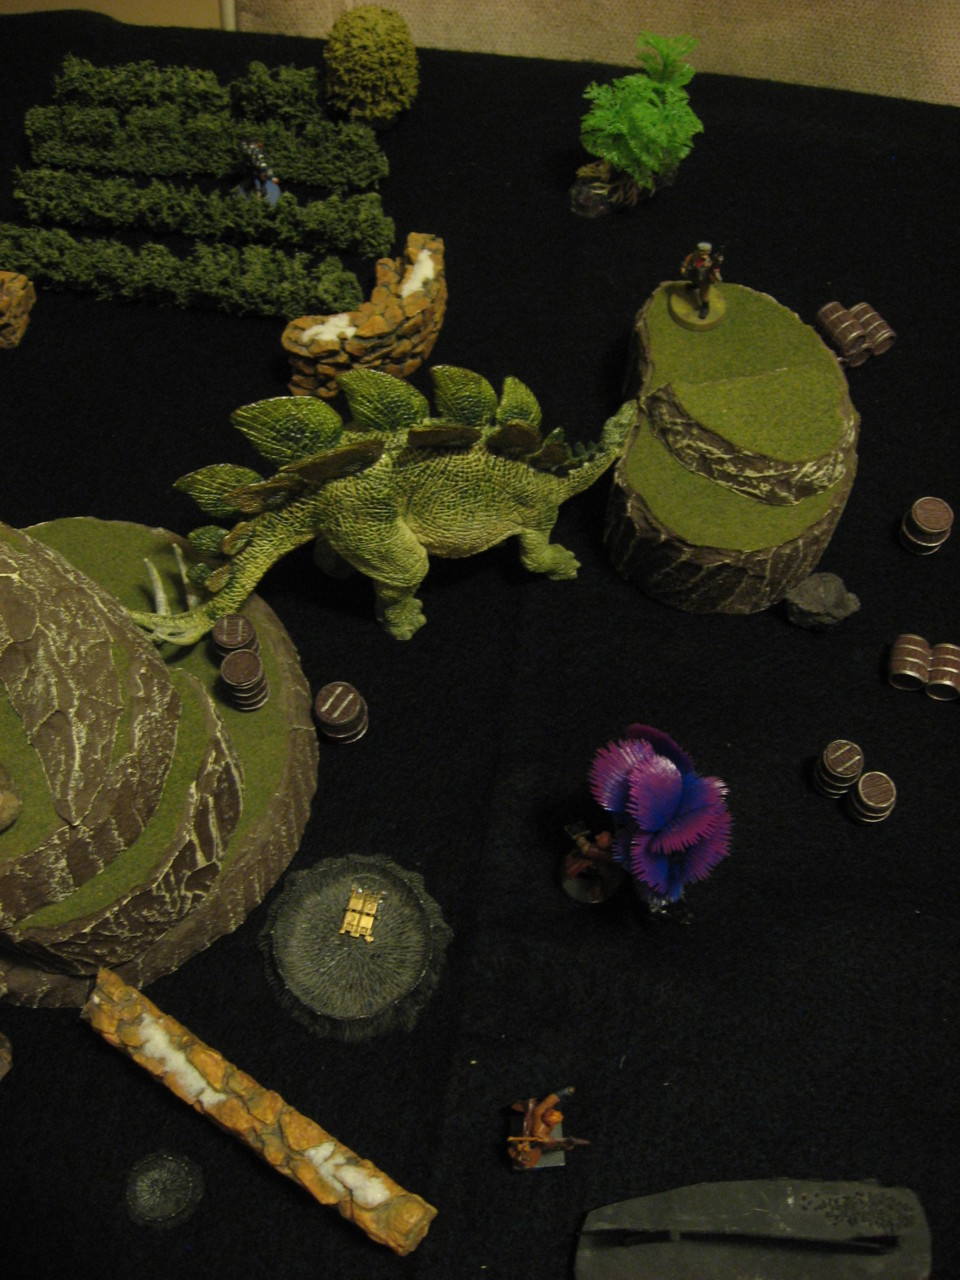
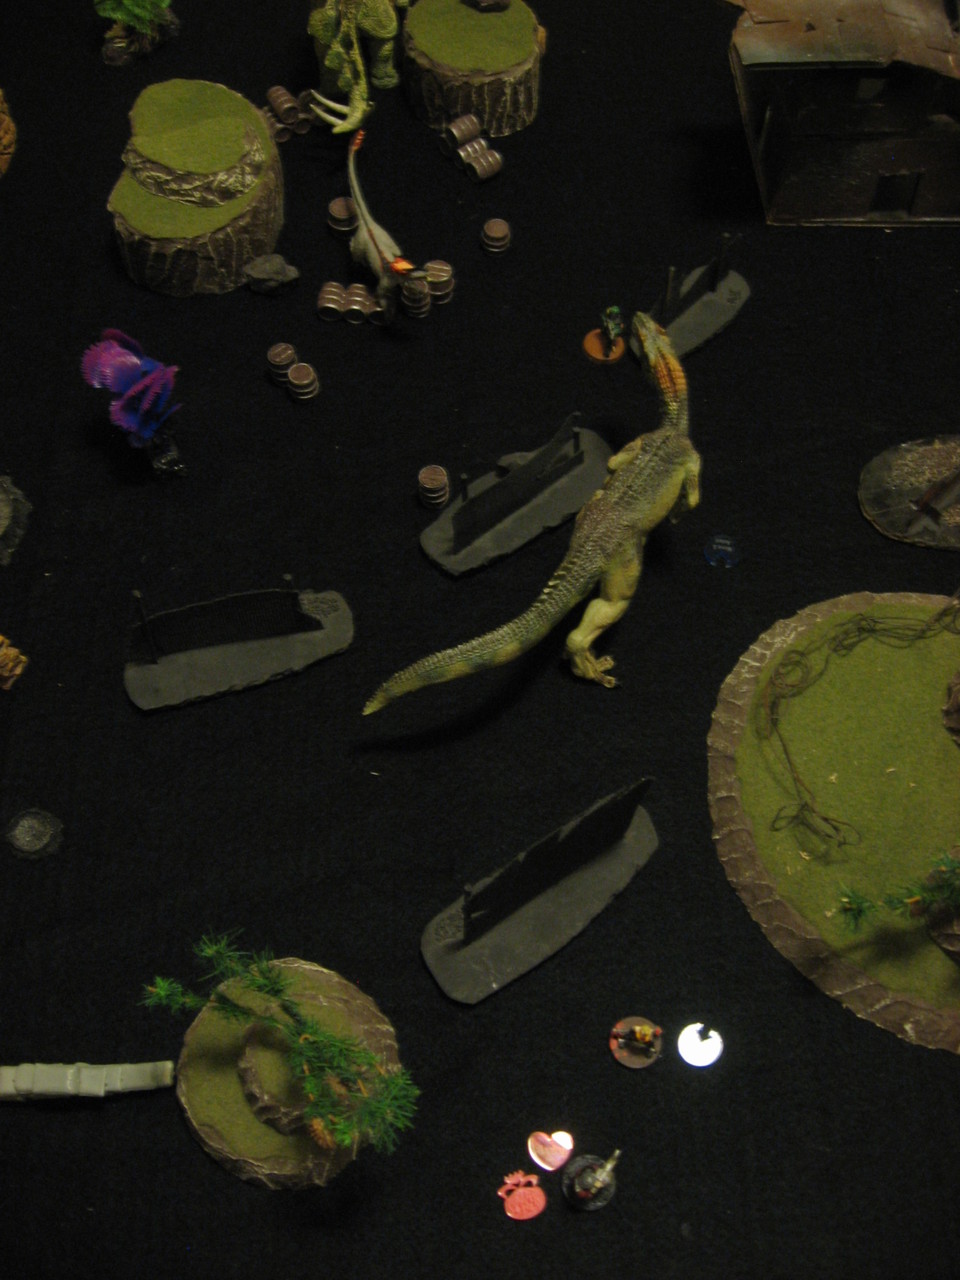
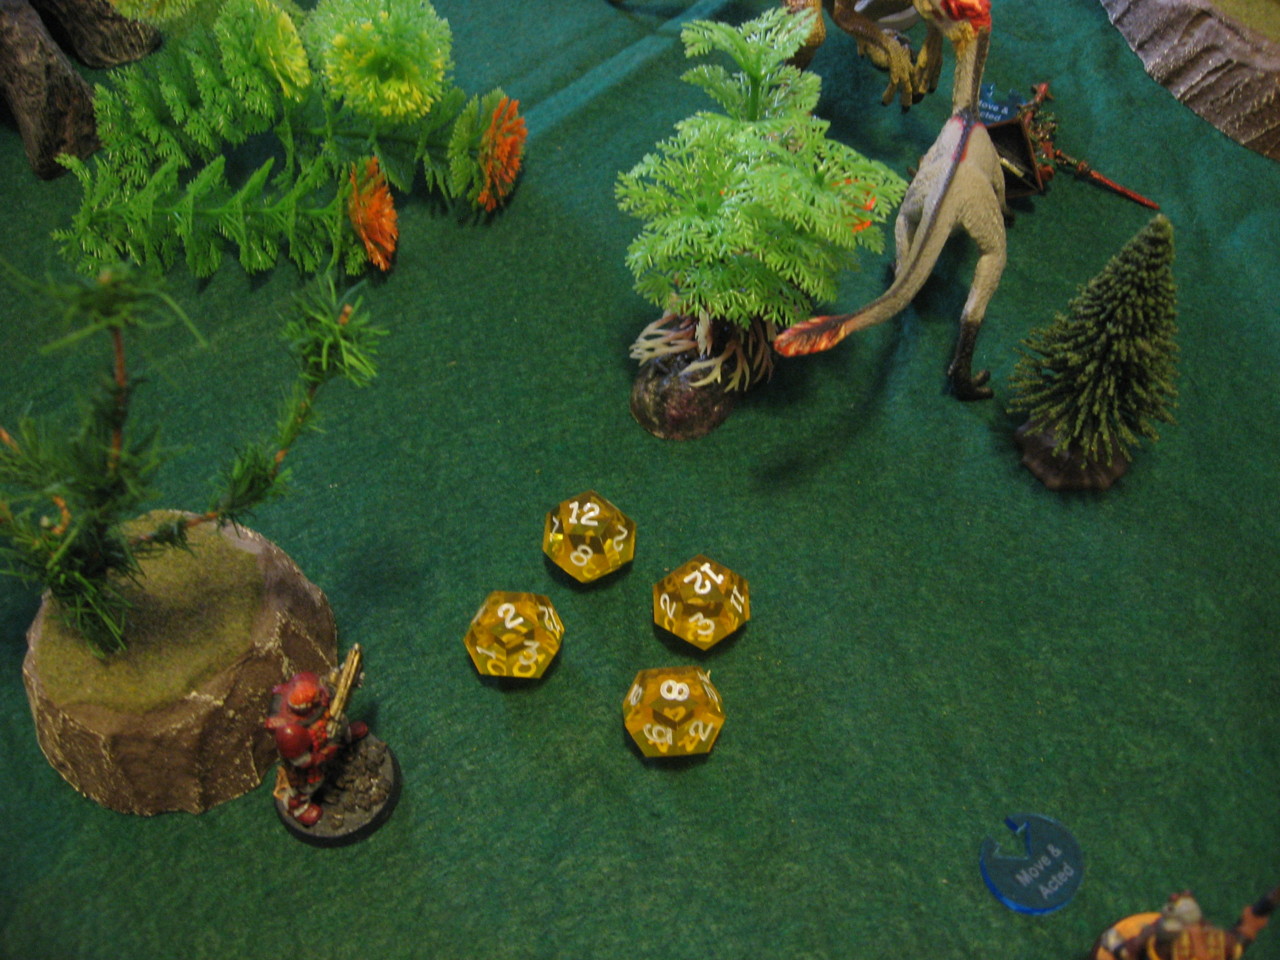
This turn the dinosaurs met in combat. For all the thematic dinosaur training and discpline, and both player’s idea of using the dinosaur to distract human enemies, the beasts still went right for each other and started tearing in. Iron Talon succeeded at his much closer 1″ Charge, hitting Eiger quite handily. Bloodthorn mounted the tall hill the F-14 Tomcat had crashed into, and fired down at Eiger. The Fin dinosaur took a pounding and was quickly down to 6 HP.

dc-operation-black-box-0054dc-operation-black-box-0057dc-operation-black-box-0053

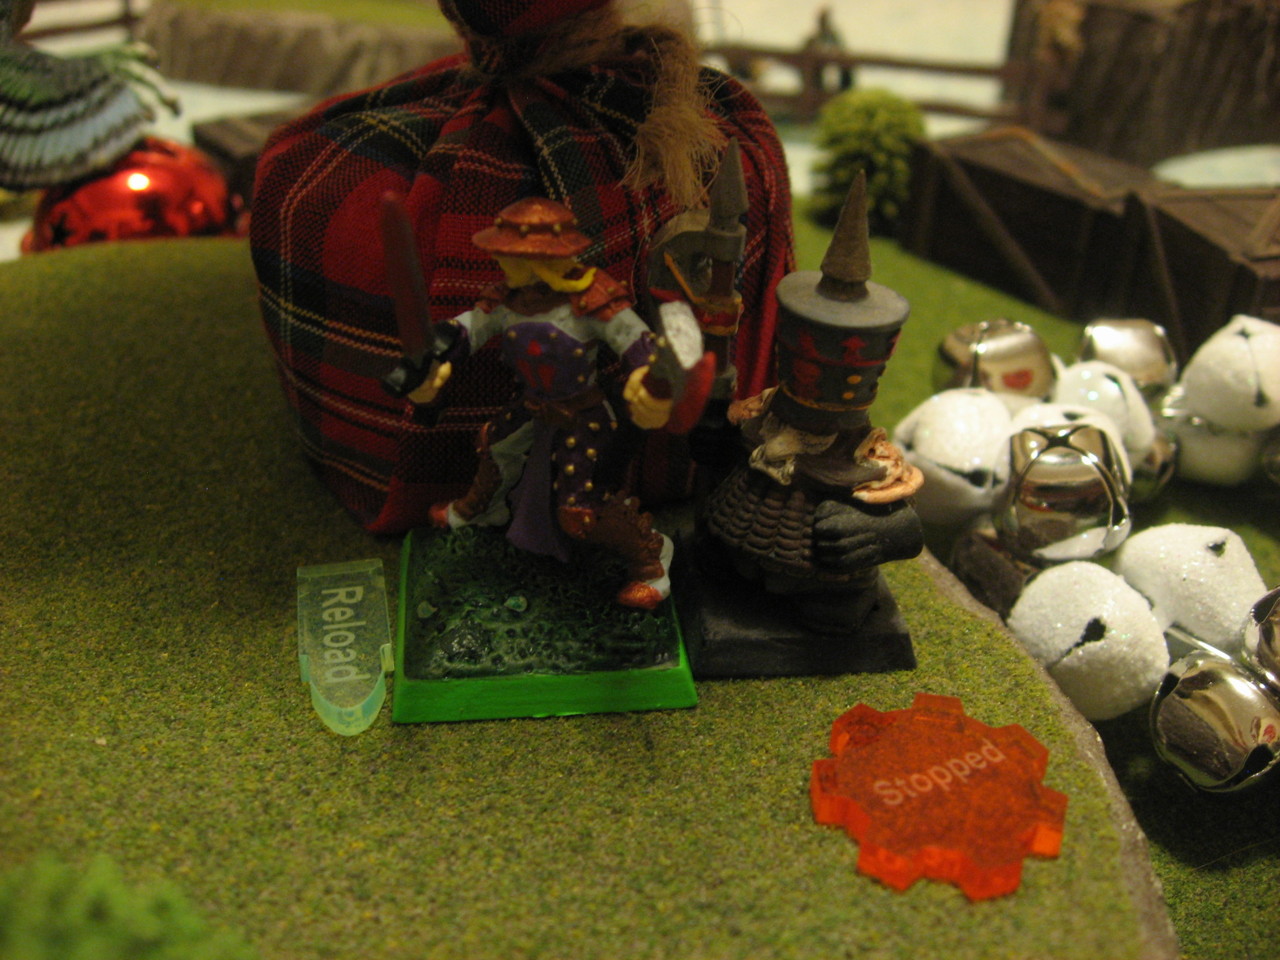
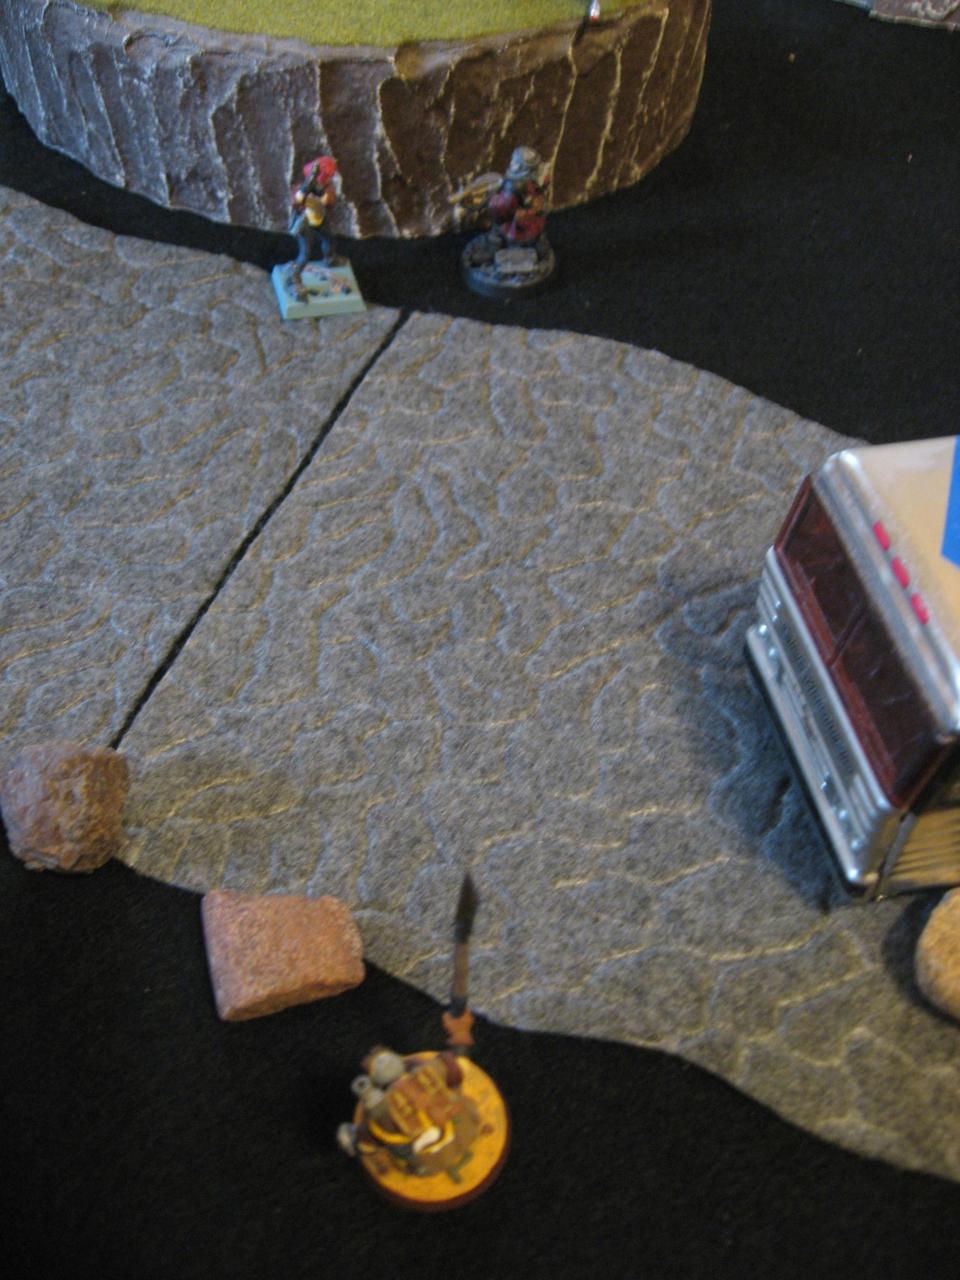
Meanwhile Skull Basher rushed the black box towards the table edge, as was the Delta Commando Squad secret objective. Vanguard mounted the plane, trying to draw a bead on an Eastwood Rover. The leader trusted in his DEF 3 to keep him safe in the mean time.

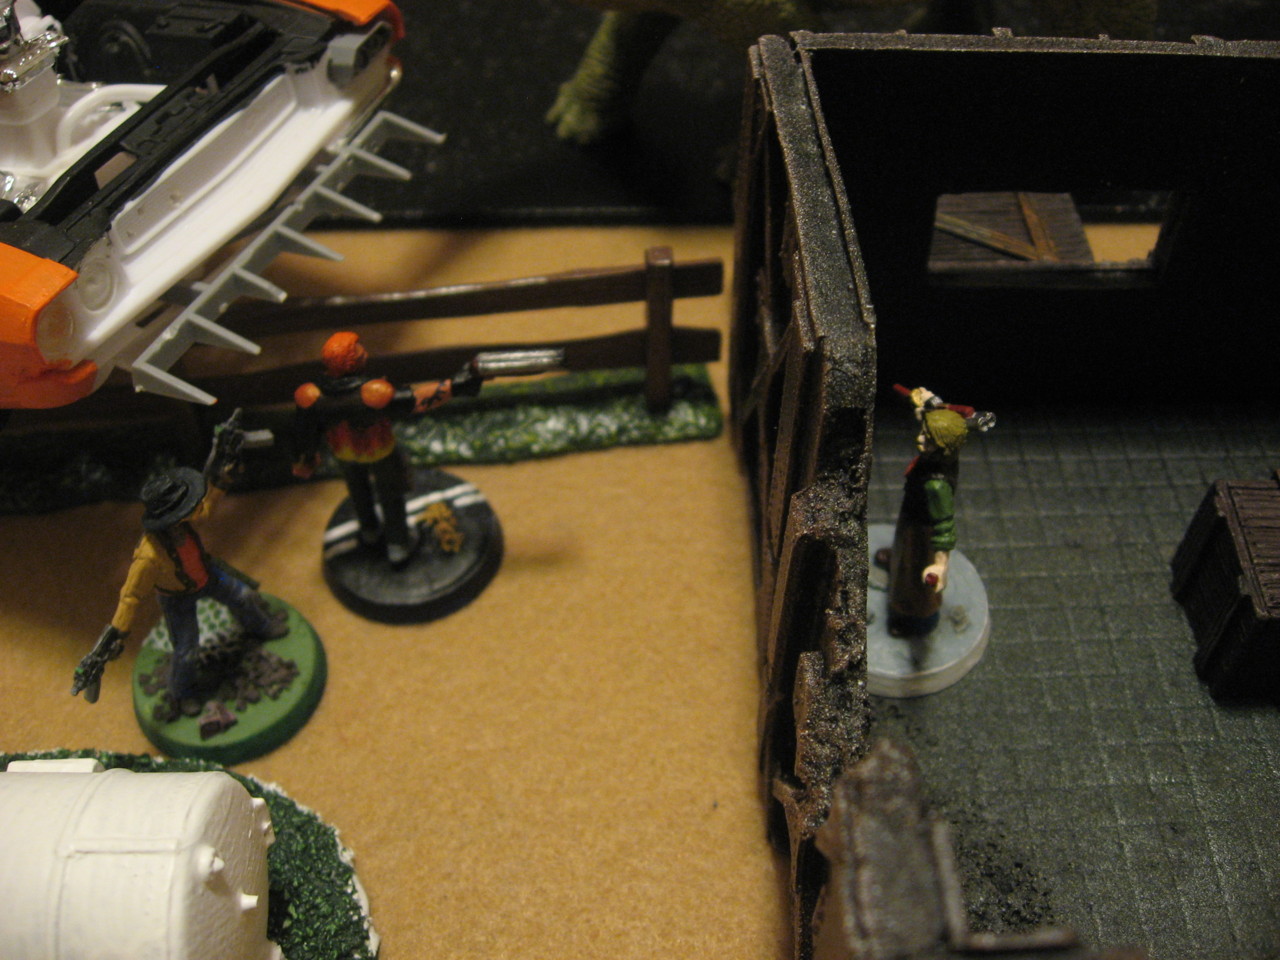
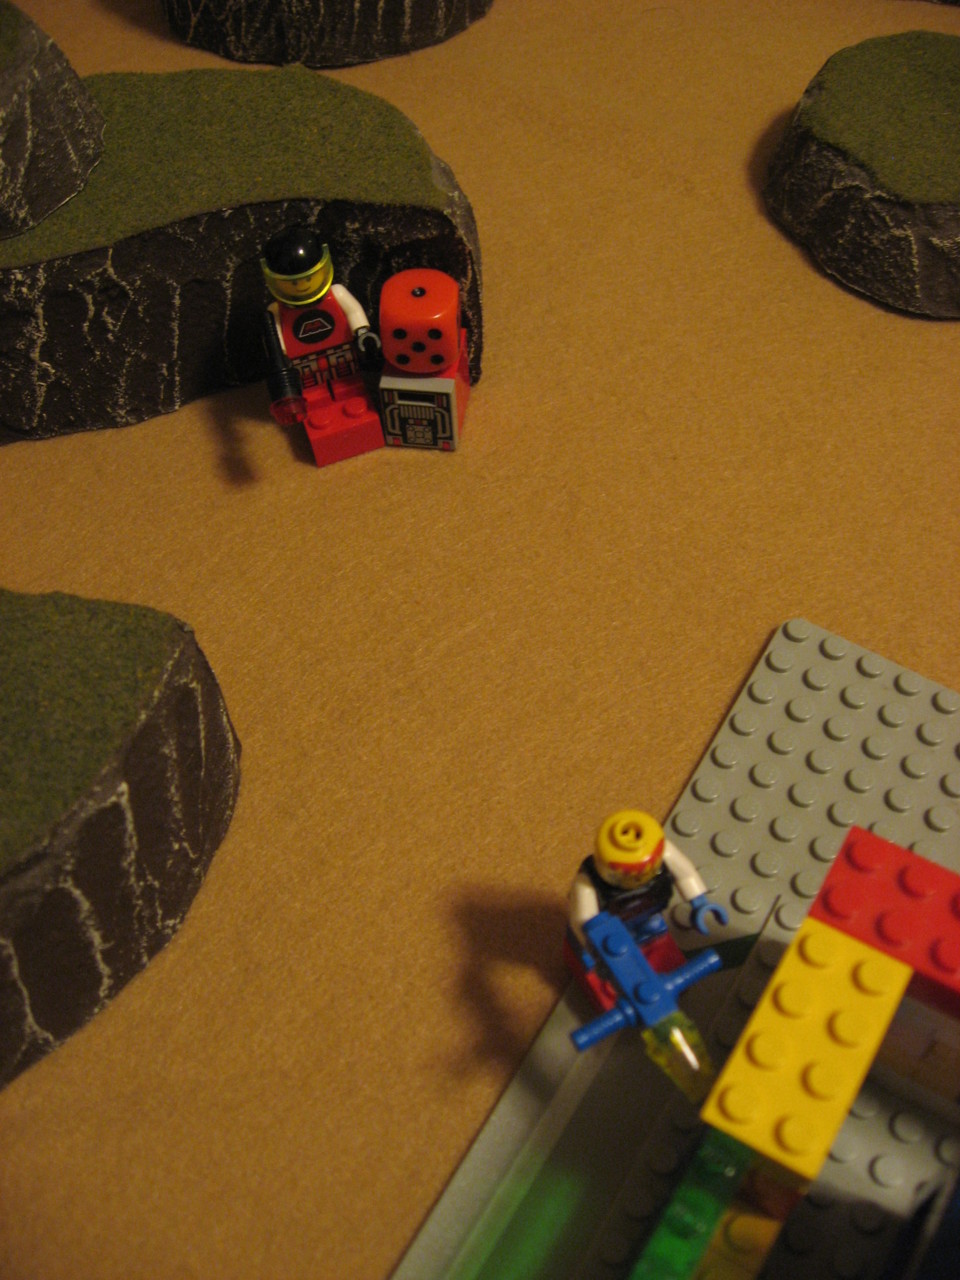
Sister Sara did her medical duty and healed Alexander Keith back to full Hitpoints, thanks to her Doctor trait and Small IRP. Keith had fallen back from Fleeing. The pair were a bit away from the plane, under the wing of which Dominator advanced to try to avoid shots from Desolator.

dc-operation-black-box-0050dc-operation-black-box-0058dc-operation-black-box-0064

Turn 3
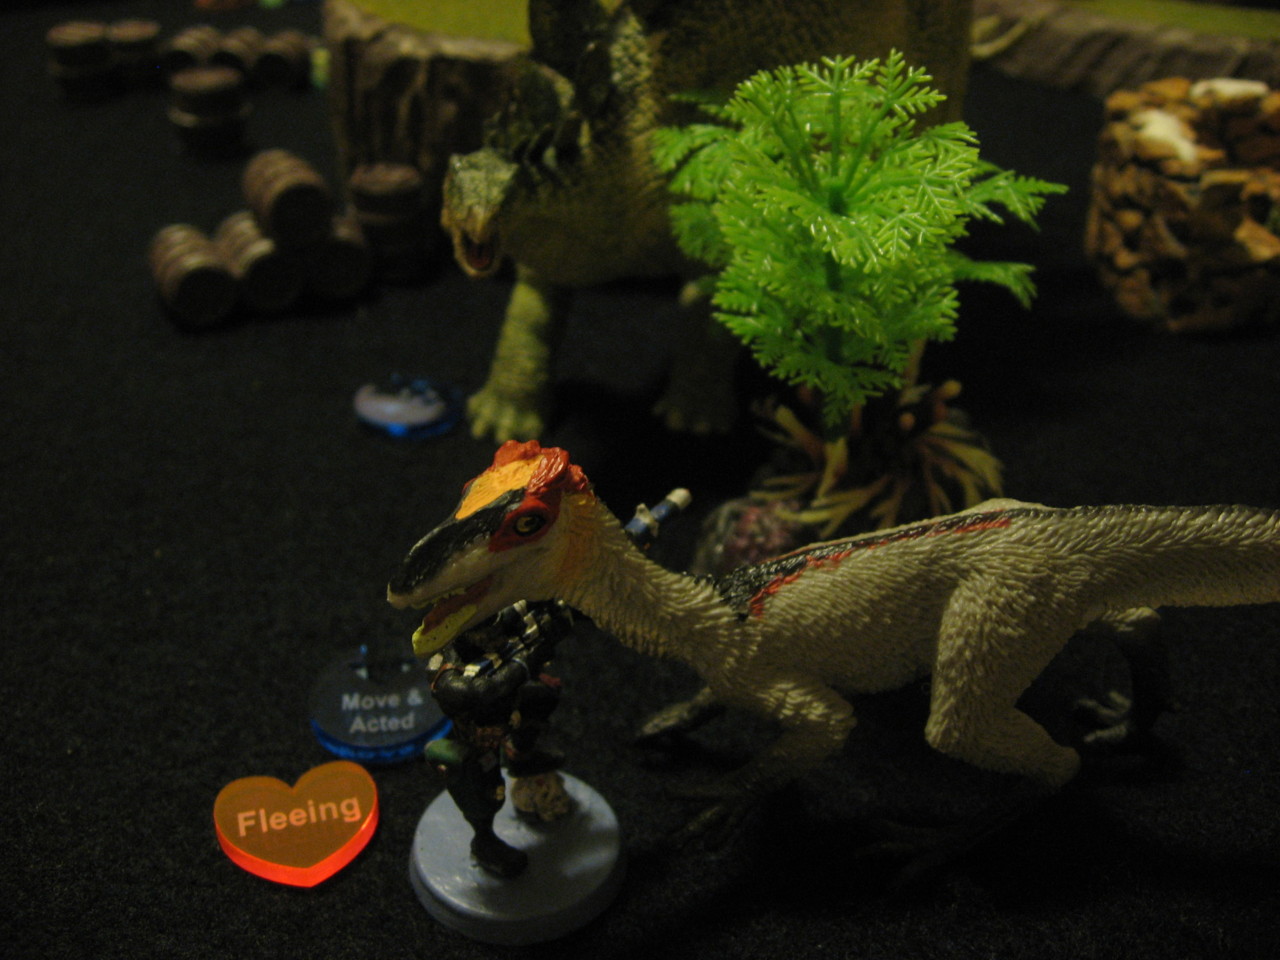
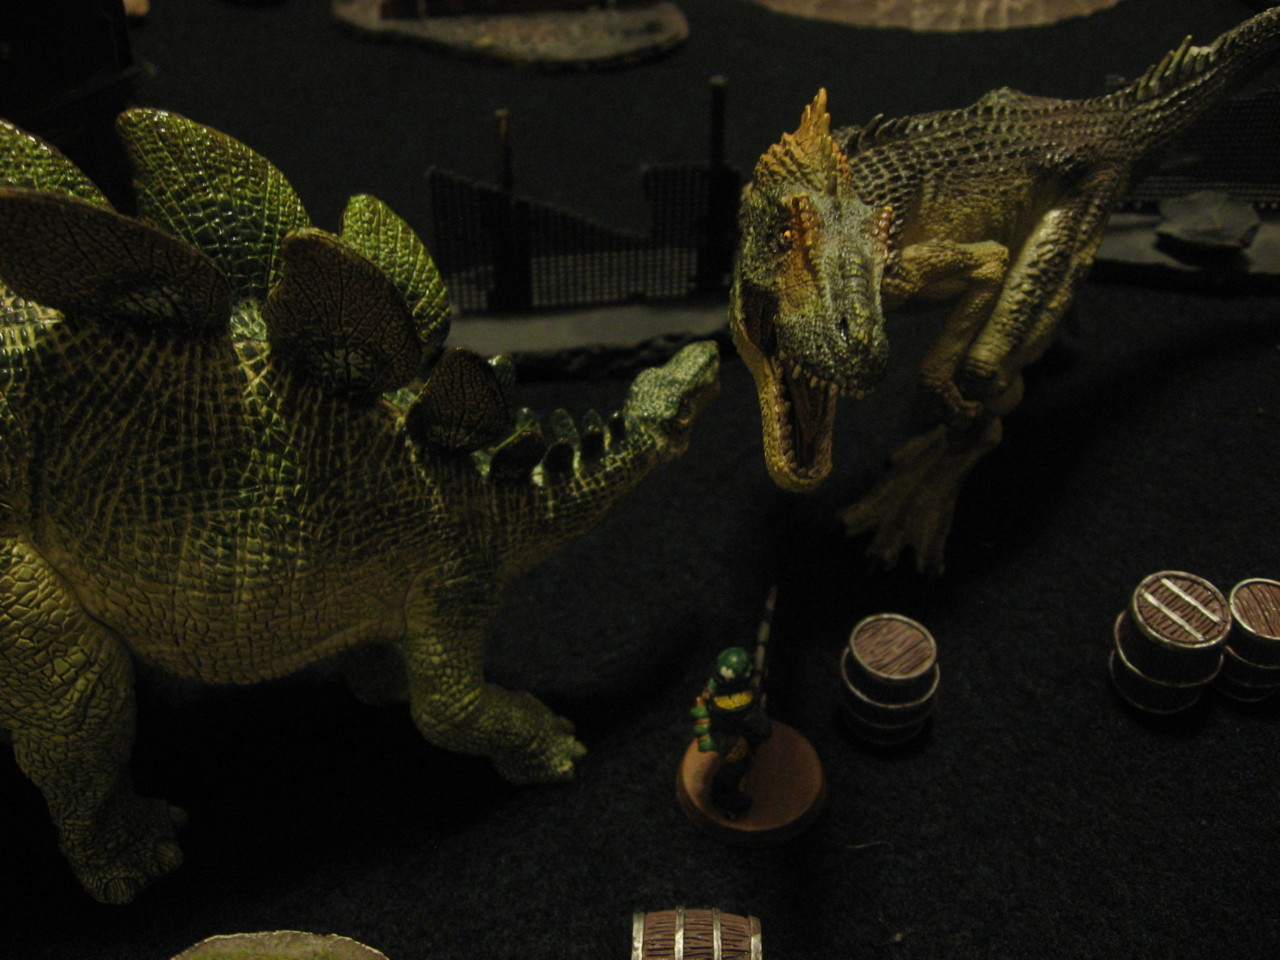
Both dinosaurs were in rough shape after being the focus of various attacks. Dominator rushed out from under the plane wing, used his Berserker trait for +2 Attacks, and managed a Charge against Iron Talon. The Cutlass did solid work, hitting for 9 damage, which left the surprised Iron Talon with a mere 1 Hitpoint. The dinosaur Panicked at this.

dc-operation-black-box-0068dc-operation-black-box-0069

dc-operation-black-box-0073
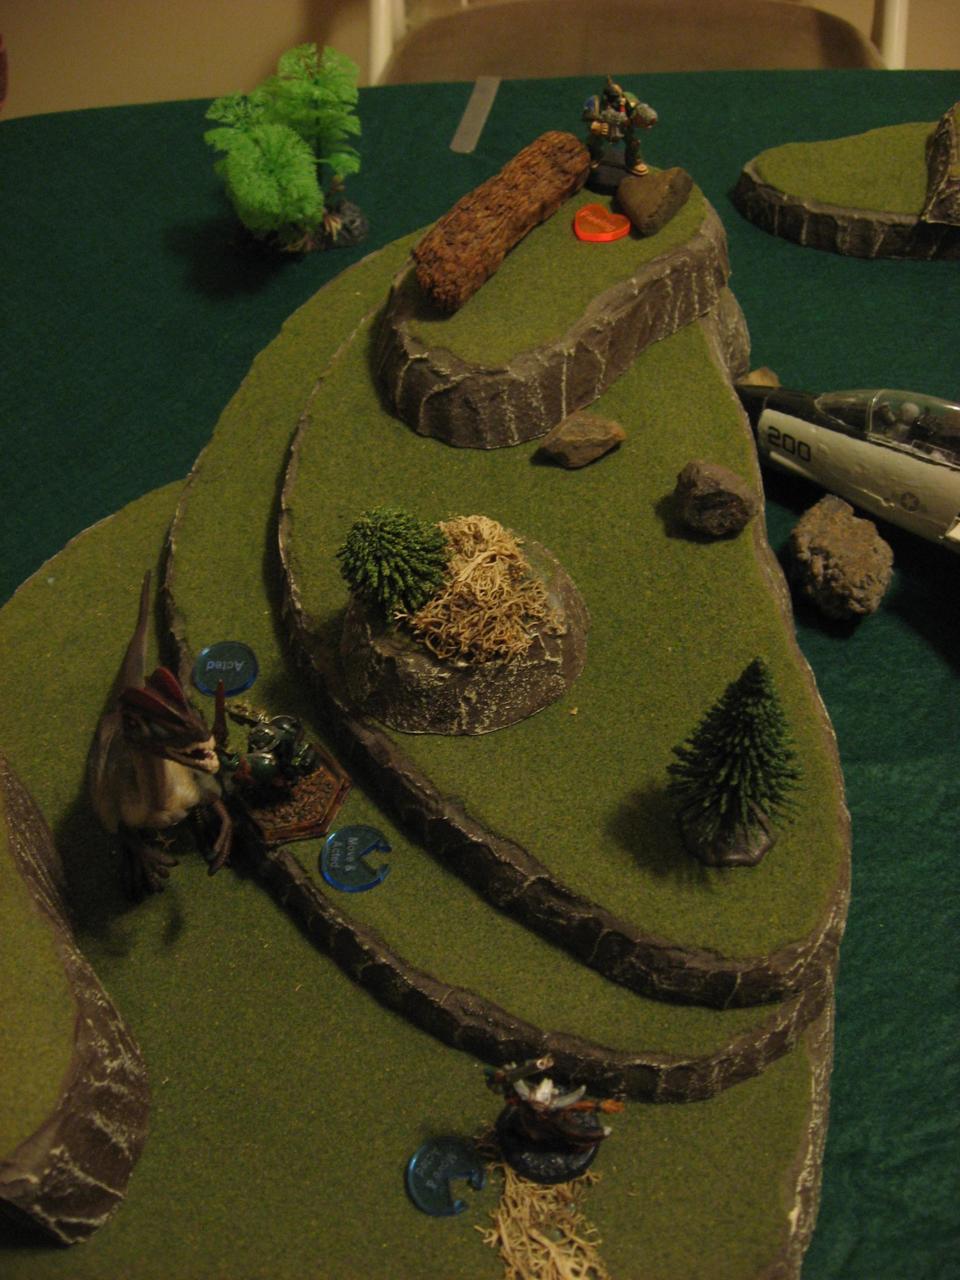
Unfortunately for the Delta Commando Squad player, Iron Talon had a 1A-5D claw, Eiger had 6 Hitpoints, but because Iron Talon had 1 Panic he suffered -1 Damage. Amazingly though the attack was a Critical hit, resulting in exactly 6 damage, so Iron Talon killed Eiger. But Sister Sara was quick to finish up Iron Talon, similarly killing the wounded beast.

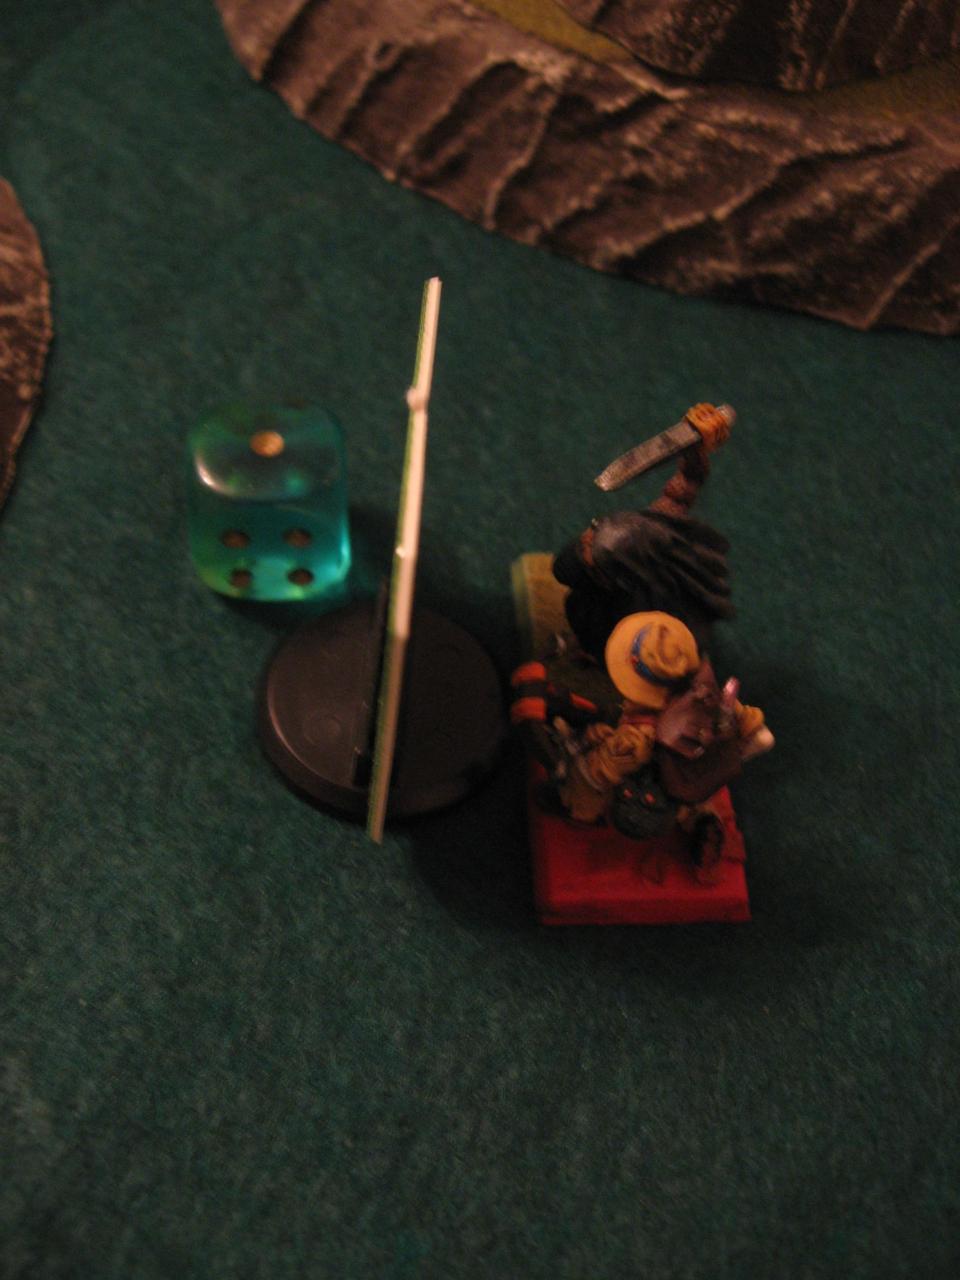
At this point Skull Basher successfully captured the black box objective by bringing it to the table edge. Hooray for them!

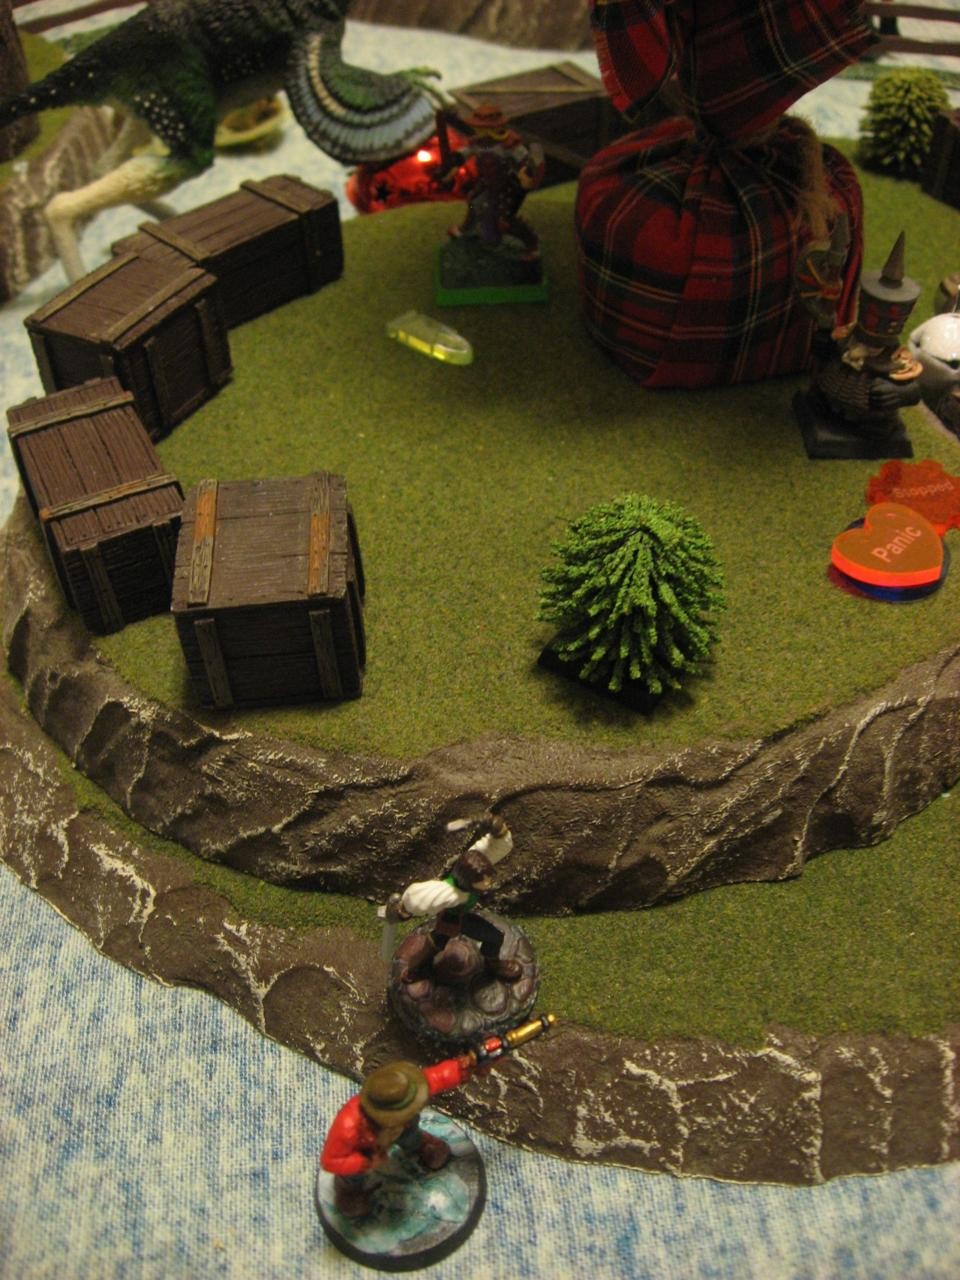
On the deadly hilltop, Powder Monkey hit Bloodthorn quite hard, making the commando Flee. In return Pale Rider takes a tiny shot from Vanguard, who then ducks off the exposed top of the airplane.

dc-operation-black-box-0077dc-operation-black-box-0079dc-operation-black-box-0083
dc-operation-black-box-0087

Turn 4
dc-operation-black-box-0094So far Dominator has been called a defector. But from the Delta Commando Squad point of view, he’s a stone cold traitor. The voodoo of dice agreed, as Bloodthorn lined up a pretty tough shot from his elevated perch. Then proceeded to 1-shot Dominator with an amazing roll. He hit for 10 damage, and Dominator only had 8 HP. So that was a surprising turn of events.

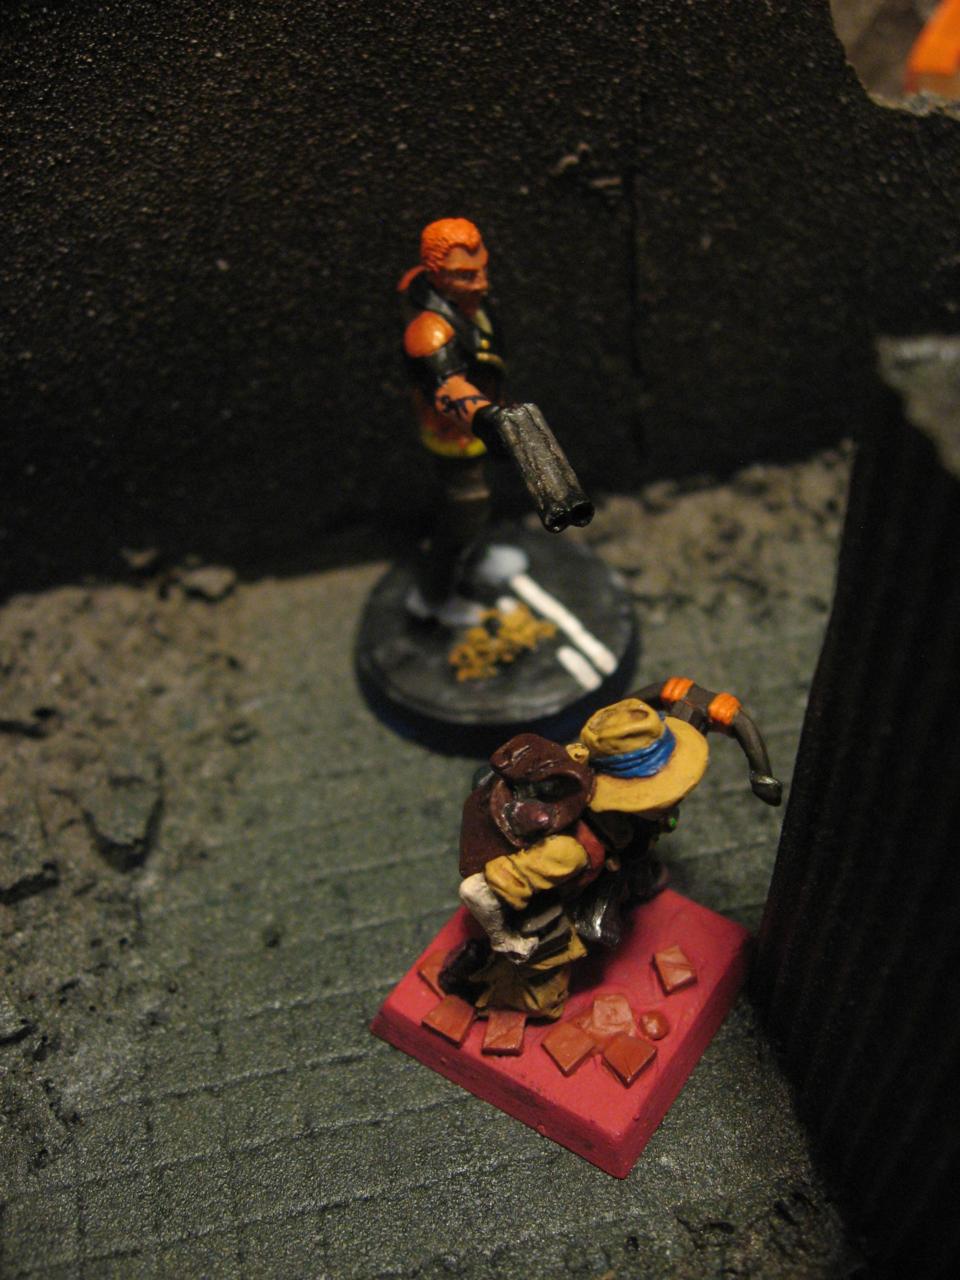
Unfortunately for Bloodthorn this was also his doom, as Powder Monkey returned fire and avenged Dominator’s death by killing the enemy commando. So far Powder Monkey’s Bronto Gun hasn’t been hugely needed, as he’s shooting DEF 0 or 1 targets.

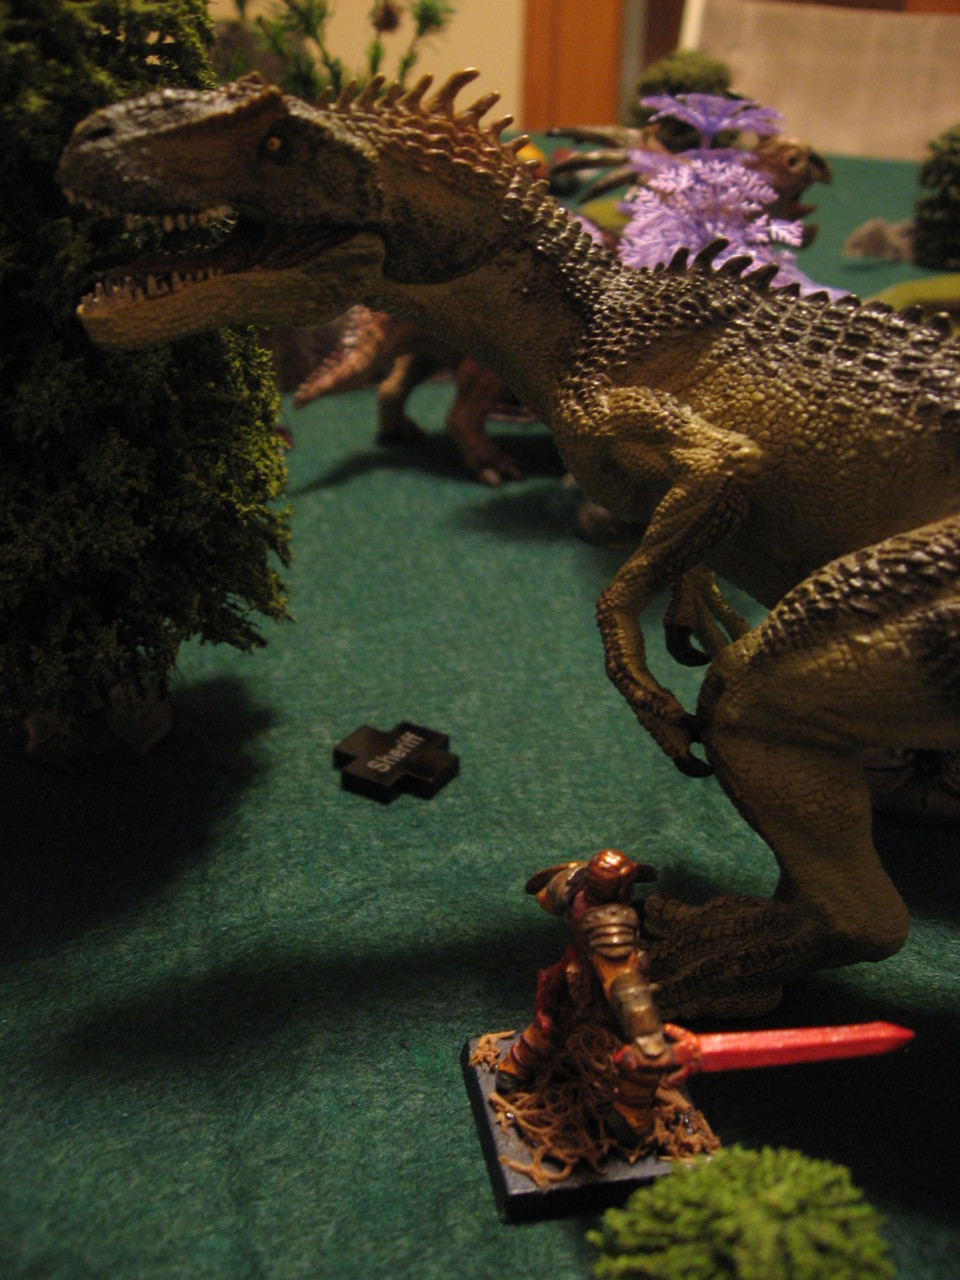
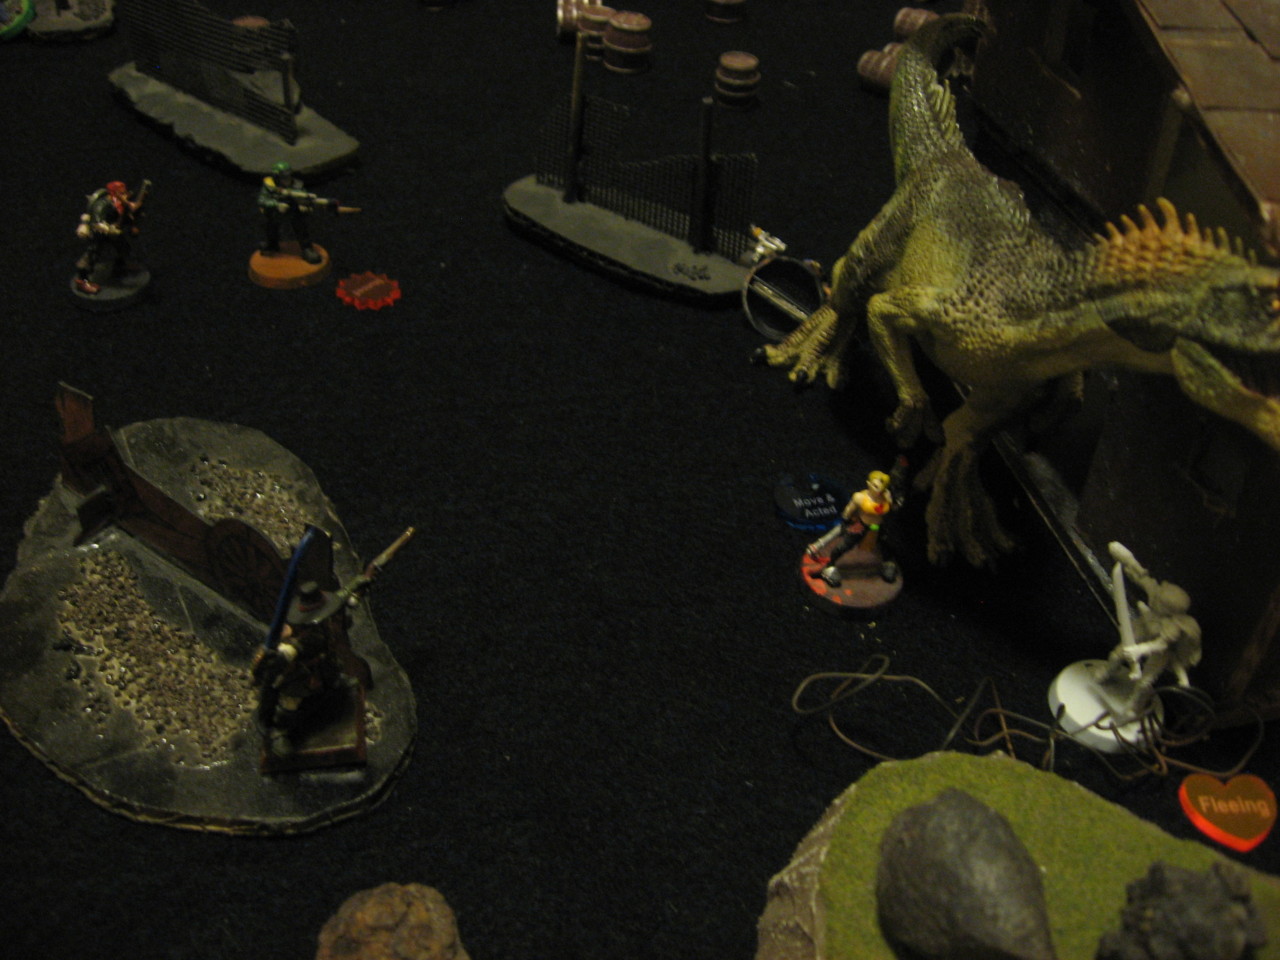
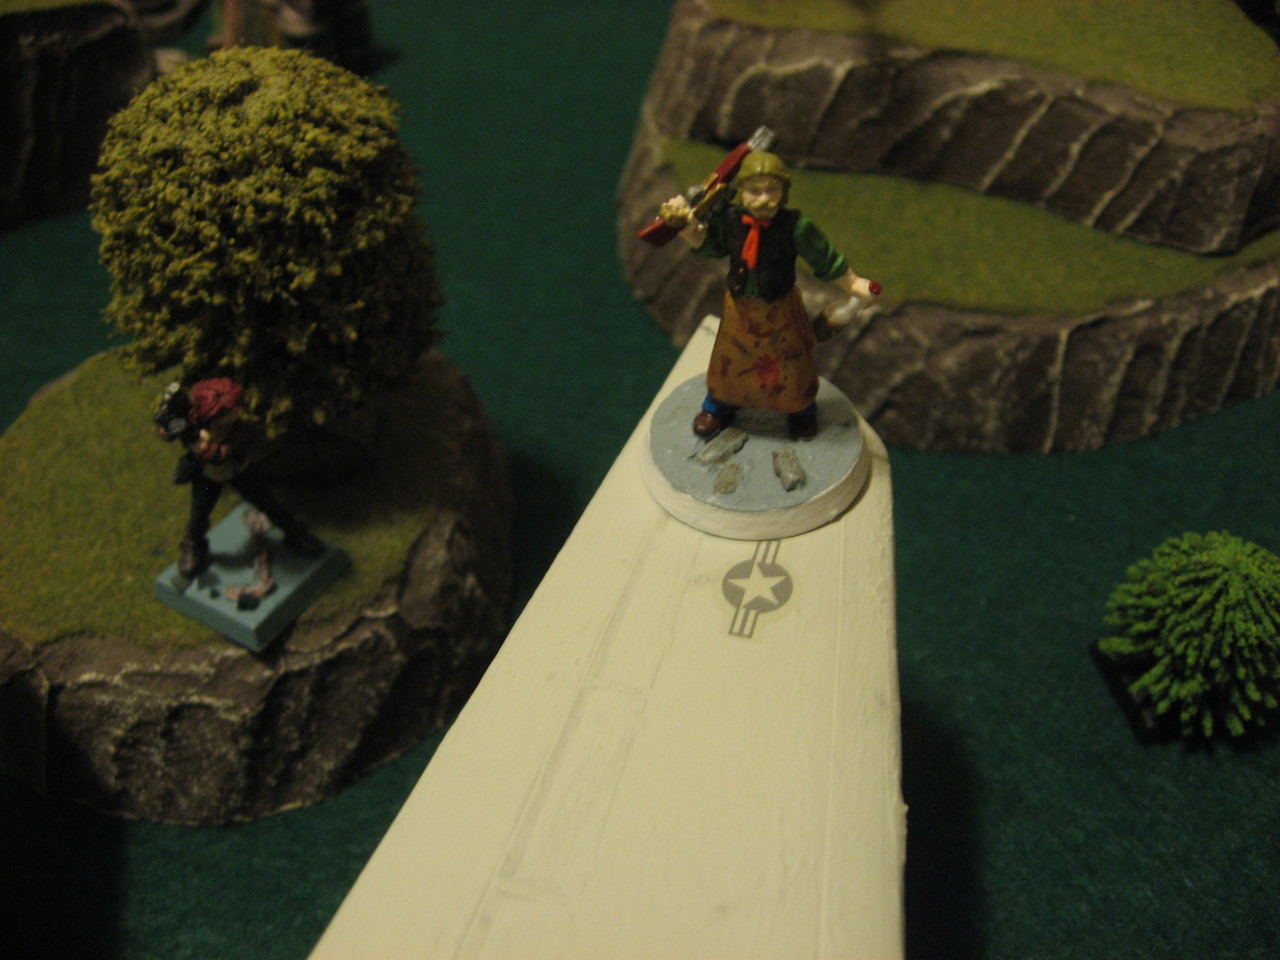
Meanwhile Pale Rider hugs the rear fin of the airplane, and not to be outdone, returns the 1-shot by outright killing Desolator. There was some concern for the Eastwood Rover player whether they’d ever be able to safely advance under the sniper fire of Desolator. But a solid roll with a Ranch Blaster sorted that problem out right quick.
dc-operation-black-box-0102
dc-operation-black-box-0107dc-operation-black-box-0104

In response to the unspoken leader-to-leader challenge, Vanguard boldly stepped onto the top of the airplane. He activated the Thick Skin trait, which gives +2 Defense until the start of his next activation. So total DEF 5…wow. Call the Bronto Gun pronto!

As if to demonstrate how feebly the enemy shots will be, Alexander Keith climbs up the airplane wing and tries to hit Vanguard with his Streetsweeper Shotgun…on a 13+. Needless to say he doesn’t have much luck with 2 Attacks.

dc-operation-black-box-0109dc-operation-black-box-0114dc-operation-black-box-0116

dc-operation-black-box-0112dc-operation-black-box-0119

Turn 5
The Delta Commando Squad started the turn with just Vanguard and Skull Basher left, whereas Eastwood Rovers still had four survivors.

The use of Thick Skin by Vanguard was interesting, since as mentioned the trait stays in effect until the start of his next Activation. Which means he wants to delay activating as long as possible, to tank as many shots as he can.

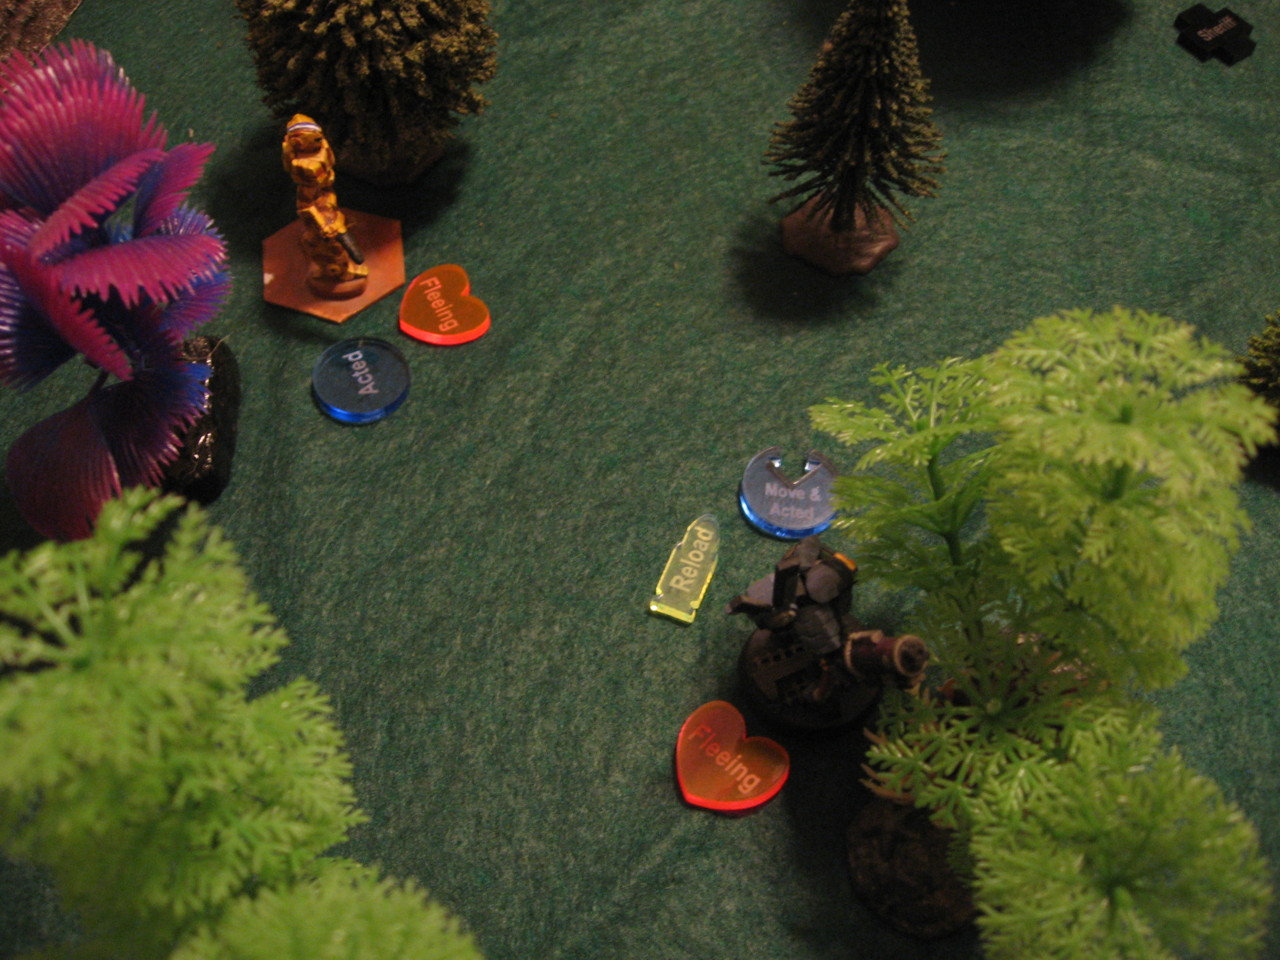
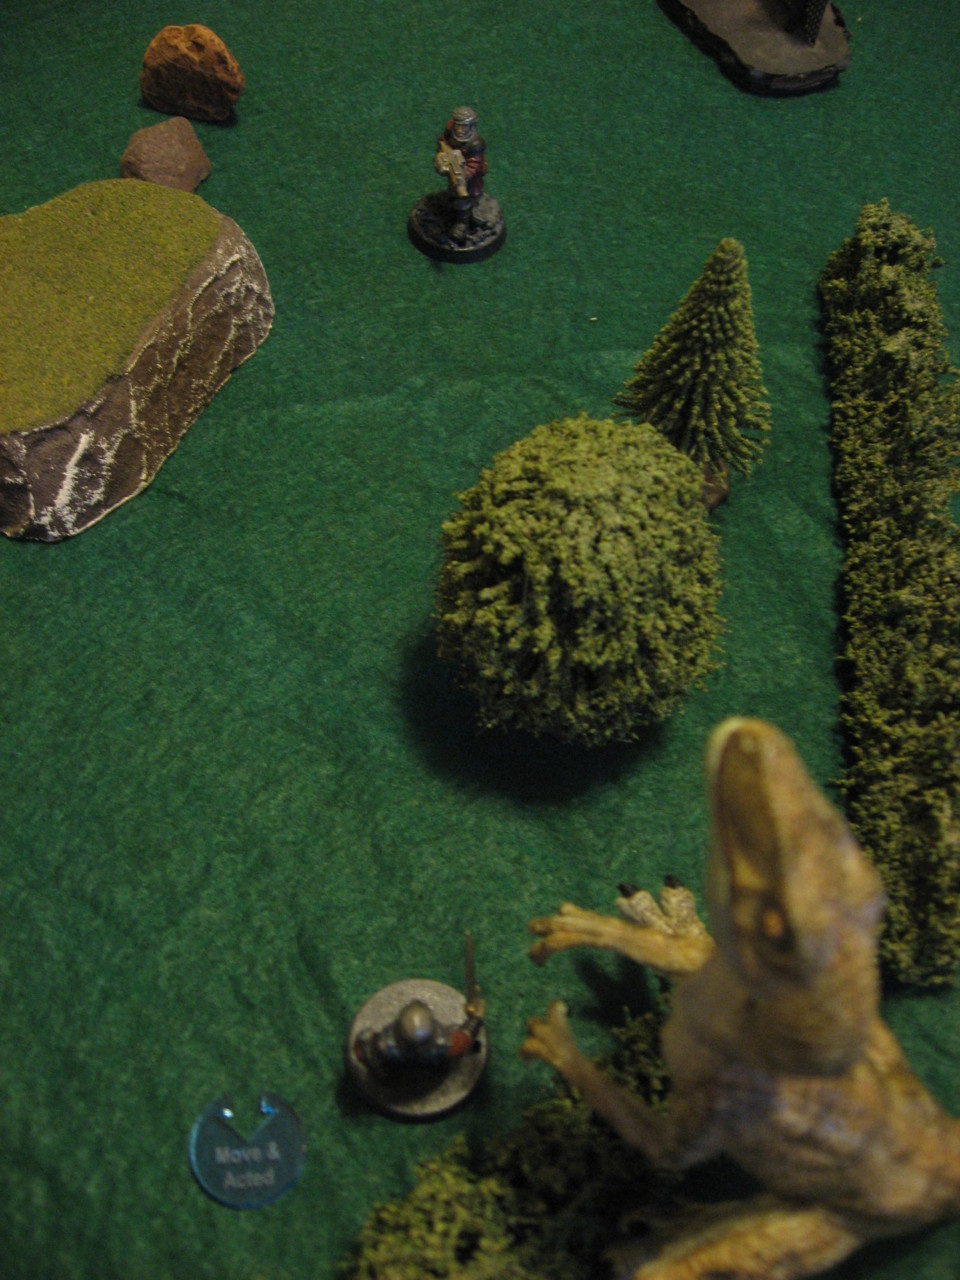
The turn starts well in that regard as the Eastwood Rovers win initiative and have to activate first. Powder Monkey moves to the edge of the stone hill and tries his Bronto Gun, needing a mere 8+ to hit. No luck, a miss!

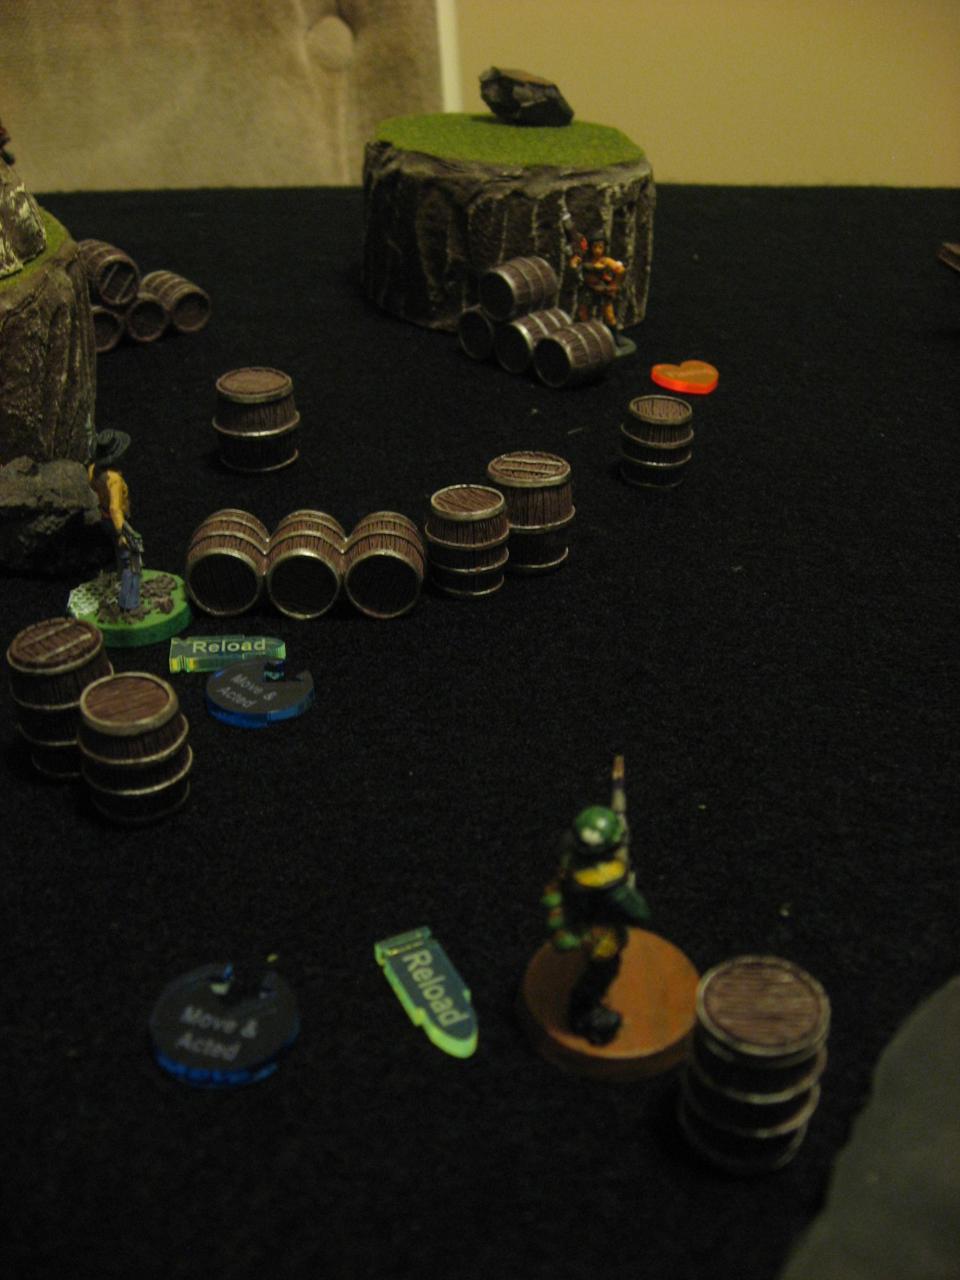
Pale Rider sees the armored beast of Vanguard, and decides to switch targets to Skull Basher instead. He moves to Short Distance, grips his Ranch Blaster, and uses Fan the Hammer for a brutal 6 damage hit that makes Skull Basher Flee.

dc-operation-black-box-0120

Vanguard is still trying to hold his activation, so Skull Basher runs away due to Fleeing, then tries to Hustle back. Certainly not the most effective posse member due to spending half the game herding an objective, then getting shot in the face when it’s time to chop things.

The Eastwood Rovers win the next initiative, so Vanguard gets possibly the best value out of Thick Skin ever as he maintained it through 4 enemy activations. However Alexander Keith and Sister Sara are focused and on a mission to roll some hot dice. Keith hits for 7 damage, even though he needs 11+, and this makes Vanguard Flee. Then Sister Sara hits for another 7 damage (at 10+ to hit) which outright kills Vanguard! And to add insult to injury Skull Basher fails his Bravery Test for having his leader taken out of action and is Fleeing.
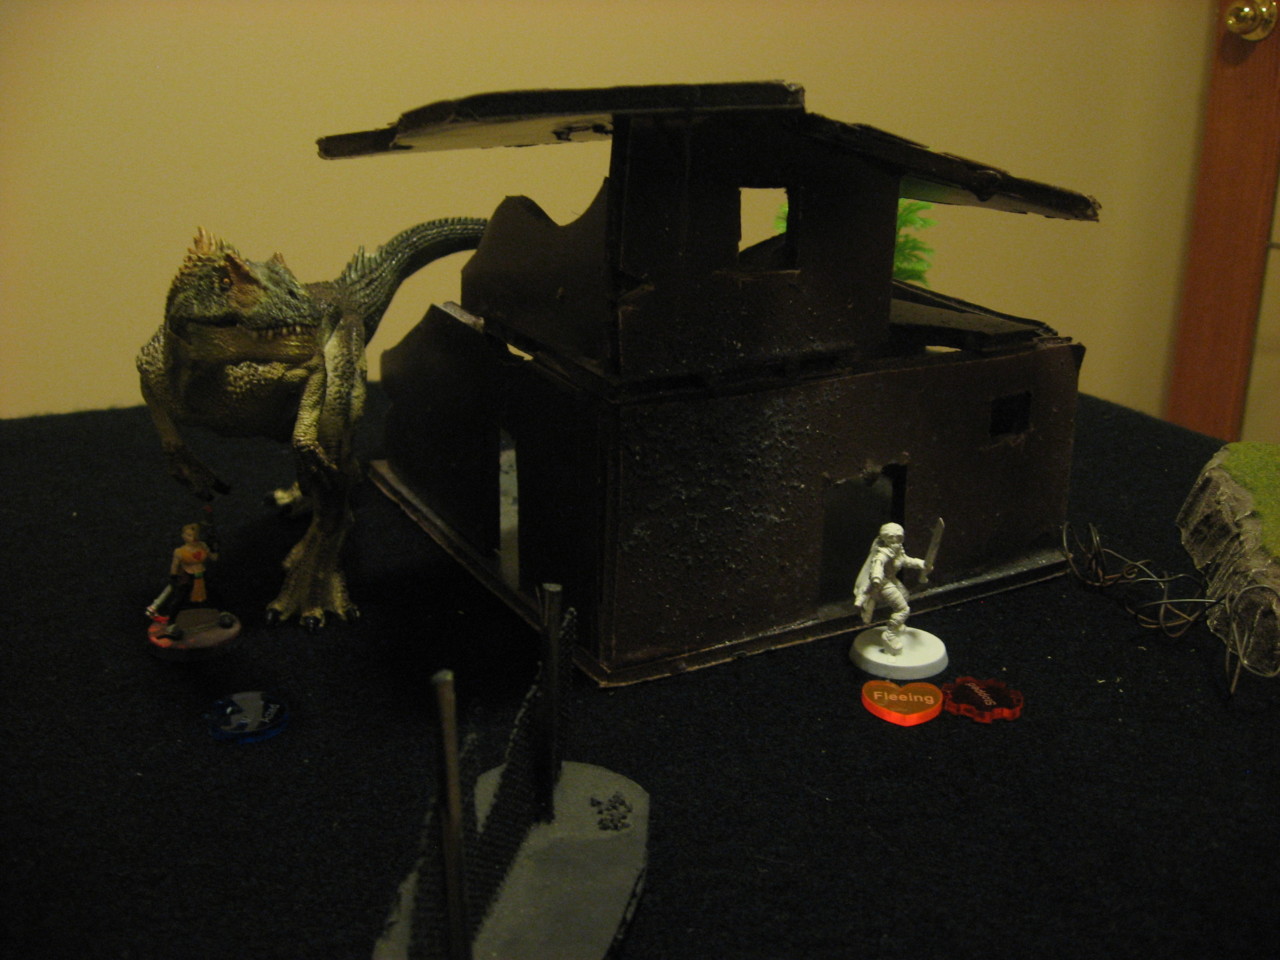
Turn 6
At this point the game was pretty much over, but the Eastwood Rovers player wanted to get a bit showy in how they kill Skull Basher. First they won initiative, and moved Alexander Keith to the Flare Gun mounted on the F-14 Tomcat. The intent was to get the Illuminate effect on Skull Basher, applying a -2 DEF penalty to make the rest of the posse hit a lot easier. But instead Keith got a Critical hit on the Flare Gun attack, resulting in 4 damage which killed Skull Basher!

So a win for Eastwood Rovers by both objective and posse wipe!

dc-operation-black-box-0127


Conclusion
Quite an interesting game. The F-14 Tomcat made a great centerpiece with lots of nooks and crannies to block line of sight in. The game certainly spiralled out of control for the Delta Commando Squad player. Pretty rough having Skull Basher moving the objective for a lot of it. And of course the luck of Keith and Sara both hitting such unlikely, highly damaging shots on Vanguard. Just goes to show as intimidating as high Defense is, eventually weight of fire can bring the target down.

Anyway hopefully you enjoyed the battle report! And maybe the black box will make another plot appearance in a future session…

Battle Report: Coastal Raid of New Iberia

Background
the-bayouIn the year 2285 the small Louisiana town of New Iberia is now coastal property, thanks to the floods after Eruption Day. The location is far enough east to avoid the wasteland temperatures of the desert, and surprisingly wealthy from pelt hunting of rare bayou dinosaurs. A ragtag group of ex-sailors and dino hunters have established themselves as the Coastal Defense Force. Their leader is Ronan Cioni, a descendant of the Cioni family who were the original post-Eruption reclaimers of the town.
Although their wealth is not advertised in a flashy or grandiose way, one eager and angry man knows all about it. Dash Cioni, the only brother of Ronan, was exiled from the Coastal Defense Force and the town of New Iberia after a messy situation deep in the swamp that resulted in the death of a travelling merchant and his family. The details are hazy and rumors are whispered behind Ronan’s back about the split.
But now Dash wants revenge, and he has used the promise of New Iberia’s riches to lure Captain Pellham and his Murkfoul Raiders, a rough band of pirates and poachers.

Table Setup
I decided for this battle to use my new naval ocean looking cloth from Sails of Glory to represent the watery swamp along the outer coast of New Iberia. I used the underside of this very same cloth for my last Christmas battle report. The downside is my camera gets a bit confused and tries to balance the colors to a yellow/orange tinge, which you’ll see in the pictures. Just think of it as the gross, unbearable humidity of the southeastern USA coast.

For the table setup I went with an open ocean on one edge, where the Murkfoul Raiders would have their small sailing ship. Then inland from that a series of shoals and sandy beaches. I setup an old iron cannon on a high cliff surrounded by sandbags, which ended up looking great. Then the rest of the map is scattered islands, old ruins, a mishmash of bridges, and eventually the Coastal Defense Force “clubhouse” that is a rundown, swampy looking shack.

I decided to start this battle after the Murkfoul Raiders had left their ship and successful taken the cliffside cannon. Meanwhile the Coastal Defense Force would be responding and further out from their bayou shack. This meant a slightly modified Deep Corner deploy, in that each posse could deploy up to HALF the table width. Which made for some immediate, deadly fights.
For Features the water is Populated Water (2A-2D CTN 7 attack if you end in it). This wouldn’t affect dinosaurs who are used to living in the swamp environment, but would somewhat dissuade characters from entering the depths.
To balance this and still allow mobility I did a houserule that if you could move from island to island (across the water) you could basically “jump” and ignore the Difficult Terrain. This meant all the middle islands were easily traversable as you could hop from landmass to landmass.
For Objective I considered something fancy, but went with a straight up Shoot Out (aka kill ’em all). There is a Turn Limit of 5 for this battle.
DC-Coastal-Battle-0021
DC-Coastal-Battle-0013DC-Coastal-Battle-0018DC-Coastal-Battle-0028
DC-Coastal-Battle-0024DC-Coastal-Battle-0015DC-Coastal-Battle-0019

Posses
The first thing you might notice with the two posses are they have a lot of money, to the tune of $3,000 each. The reason for this is to play the rarely utilized “top tier” dinosaurs of Titan and Longneck. The Titan would be represented by the old crocodile toy I bought for the Battle to Seattle campaign, and the Longneck would be the Papo Brachiosaurus from the same campaign.
I can imagine the Titan crocodile swimming alongside the Murkfoul Raiders skiff, then bursting from the depths to bite an enemy in half. Similarly the Longneck would be at home in the swampy terrain, with it’s long legs carrying passengers clear of the muck.

Posse: Coastal Defense Force (310 IP, $3,000)
Get the PDF Roster or View in the Saloon
DC-Coastal-Battle-0011As mentioned this posse is lead by Ronan Cioni. I wanted to get the “pelt hunter” feel so I went with my newish scale cloak wearing pistol and warhorn guy, in this case a Carbine and Totem.
Ronan’s two closest friends also happen to be brothers, just ones who are on better terms than Ronan and Dash. Arnold Bridgers is a sniper who is very far from his Neotechnoist home. In his travels south Arnold discovered a bit of a medical leaning, so he has Triage. The Try Again trait he also has fits pretty well with the “all or nothing” 1 Attack rifle. Luke Bridgers is the opposite of a sniper, preferring an Enforcer Shotgun and a bit more toughness. I could see the two of them having a storied past from their ~1,700 mile trek from New Haven. Also a note on miniatures, I LOVE the old Space Marine Scout sniper that I used for Arnold, he reminds me of a Ghost from Starcraft, and I’d really like to get and paint a new one. I can’t strip the old one because it has so many memories (playing cards on the shoulder because I was obsessed with 58th Wild Cards in Space Above and Beyond, kill markers on the gun barrel cause that was 1990s cool, bright green nightvision because what other color would I ever do, cliche camouflage cloak, etc.).
The next member is an old timer named Donato the Blue who is the one true sailor, having built and used his own ships for decades. His nickname is from his love of the ocean. He uses a decommissioned Rotary Rifle found in an abandoned silo, and keeps a Clark Airgun handy to push foes away if they get too close to him and the gun.
The final member is Ali Paek, an ambitious youngster from New Iberia with plenty to prove. He wields a hand-me-down Ultra Repeater and tends to be the happiest and most motivational of the group, thus the Get In There! trait.
For the dinosaur the Coastal Defense Force got a Longneck, rightly named Queen of Iberia. I could see this gentle beast covered in streamers and flowers while parading down main street. She’d be fiercely loyal and have many years of experience hunting smaller dinosaurs as part of the New Iberia pelt trade.
DC-Coastal-Battle-0007

Posse: Murkfoul Raiders (310 IP, $3,000)
Get the PDF Roster or View in the Saloon
The Murkfoul Raiders have a loose ship crew feel to them with various named ranks. Captain Pellham is the natural leader with a Rustler Revolver (a suitable pirate/bandit-y gun), and wears extremely sturdy armor as a sign of his station.
First Mate Quinn is older than the Captain, but still loyal and happy with his lot in life. He mirrors the Captain by using a powerful Stampede Pistol. Somehow after years raiding and pillaging and living in muck and swamps Quinn hasn’t died yet, so the Lucky trait fit well. Speed Reload seemed like a neat story point in the sense of a quiet, unsuspecting old man who can rapidly load a gun out of reflex from some past military service.
Quartermaster Hank is potentially more loyal to his Laserbow 80, lovingly named “Starfire” from some sci-fi book he found as a child. Hank is the prime poacher in the group, preferring to use Attack – Surprise and a single arrowbolt to kill a foe in one shot.
Officer Russell is a disgraced serviceman who is dour and unhappy as he drifts from one depressing raid to another. He uses a Superior Bronto Gun, wears a dark, grumpy cape and big Witch Hunter style hat.
The final member is Dash Cioni, who motivated the Murkfoul Raiders in the first place to attack New Iberia. Unlike his brother Dash focuses on melee with an aptly named Feudbreaker. He’s ripped the Harpoon Gun from the Murkfoul ship and plans to skewer the first enemy he sees. His combination of traits is set to work WONDERFULLY in the swamp, as cliffs will be no problem to climb, especially in combination with his faster-than-a-dinosaur base Speed of 8″.
And as mentioned the dinosaur is a Titan named The Deep One (very Cthulhu vibe), carrying a swarm of ravenous young on it’s back as it waits to feast on entire villages after the Murkfoul Raiders attack.
DC-Coastal-Battle-0004

Game Summary
Instead of turn-by-turn notes I wanted to highlight some fun parts and then show a bunch of pictures.

  • Like a cheesy horror movie the upbeat and hopeful whippersnapper died first. In this case Ali Paek got charged by The Deep One on the first turn and died in a single hit. Thematic as heck, but sad to be Ali!
  • Donato the Blue then had an ongoing battle against both The Deep One and Dash Cioni. Dash failed a 2″ Charge up a cliff, which was hilarious. Even more so when Dash was STILL trying to be greedy and Charge (1A-9D Feudbreaker to 2A is so tempting) and failed AGAIN. Basically Donato survived an extra turn or two thanks to Dash’s ineptitude. Eventually Donato did get cornered in melee with The Deep One and couldn’t use any of his guns (minimum on Rotary, and Push wouldn’t work on a dino in melee), so he tried to escape combat and died to a Snap Attack. Donato did at least mow down Dash first.
  • The middle of the map was a bit of a positional shoot out, with Ronan doing his best to fight there while still supporting his right flank. He was against a mix of Quartermaster Hank and Officer Russell (who also split his attention until The Deep One had the situation near the shack under control).
  • Quartermaster Hank missed his Attack – Surprise shot that could have done 12 damage, and died soon after from Ronan’s Carbine.
  • Since the big dinosaurs had deployed on opposite sides of the table they didn’t end up in a massive fight. Instead they did huge damage to the lowly humans. Both were more or less ignored for return fire and took less than 10 damage apiece.
  • Arnold Bridgers the sniper was the most sniper-y sniper I’ve seen in a while. He stayed planted on top of the hill he deployed to and consistently hit his Lever-Action shots. Near the end as The Deep One closed in (after killing the entire left flank) Arnold even busted out his shotgun. By that point BOTH his guns ended up needing a Reload, but that was right at the turn limit so he survived.
  • Luke Bridgers had less luck than his brother, taking an early shot from Captain Pellham and then scrambling the rest of the game to reload, heal, and survive. He didn’t get to use his Enforcer Shotgun to it’s full potential unfortunately, as the Murkfoul Raiders had such a commanding position to assault on the right flank.
  • Captain Pellham was fearless the whole game, moving forward TOWARDS a Longneck dinosaur to secure the kill on Luke Bridgers, then Fleeing melee after getting Trampled by the dino, only to heal using his Small IRP and survive a whole extra turn. Him Fleeing was especially beneficial as the Rustler Revolver has a minimum range of 1…always keep a way to shoot people in melee! Eventually the Captain was sniped by Arnold though as revenge for the death of his brother.
  • First Mate Quinn had the best use of Lucky I’ve ever seen, although he still did eventually go down. After being engaged by the Longneck the Quartermaster managed to turn a 1-hit kill into surviving with 1 Hitpoint thanks to Lucky. Quinn even managed to Flee and keep away well enough to survive (with 1 HP) until the end of the game.
  • As for the “special weapons”, the Harpoon Gun of Dash was never used (sadly), and Ronan’s Totem was but failed to hit enough to trigger Terrify. The Rotary Rifle (in combination with Attack – Dire) did a terrific job of consistent damage though. The Bronto Gun, even with the post-BTS-campaign nerfs, was excellent as always, especially in these higher level battles with more Defense.
  • The Populated Water resulted in the only damage Officer Russell suffered. The underwater dinosaurs also tried to bite Dash Cioni (after he failed to Charge up the cliff) but didn’t manage to hit him. Jumping between islands work wonderfully and meant the middle saw lots of movement and action.

DC-Coastal-Battle-0031DC-Coastal-Battle-0035DC-Coastal-Battle-0037DC-Coastal-Battle-0041DC-Coastal-Battle-0046DC-Coastal-Battle-0049DC-Coastal-Battle-0052DC-Coastal-Battle-0053DC-Coastal-Battle-0056DC-Coastal-Battle-0058DC-Coastal-Battle-0061DC-Coastal-Battle-0064DC-Coastal-Battle-0066DC-Coastal-Battle-0068DC-Coastal-Battle-0070DC-Coastal-Battle-0074DC-Coastal-Battle-0076DC-Coastal-Battle-0079

Conclusion
In the end the turn limit was reached before a decisive victory either way. The Coastal Defense Force was down to Arnold Bridgers (unwounded but with two empty guns) and the Queen of Iberia with 27/37 HP. The Murkfoul Raiders had First Mate Quinn on 1 Hitpoint, Officer Russell with 7 HP, and The Deep One relatively untouched at 28/32 HP.
So a technical win to the Murkfoul Raiders for having more survivors, or really to Quinn for escaping death that whole time. I think given another turn or two Arnold would have been eaten, Quinn would have been shot, and the dinosaurs would have ended up duking it out. That would have been an interesting fight, especially since both still had their Attack – Inspire left (they could eat/stomp a character with it and recover HP) and the Longneck’s lower damage profile was balanced by her Big Game Hunter trait.
Regardless the Murkfoul Raiders broke through the Coastal Defense Force just enough to grab a bit of loot and damage the clubhouse shack, but certainly not enough of a rout to completely pillage New Iberia.

Anyway the game was lots of fun and I liked the varied terrain and background story (amazing how much a little story adds to the tenseness and excitement of a situation). I had these posses built over the holidays and meant to play back-to-back with my Christmas report, but didn’t find the time. So I’m glad I got to the battle report pretty soon after.

v2.6 rules are feeling terrific, no glaring changes that I want to do. I might have finally tweaked and modified the game to it’s final state?! What does that mean for this blog? Well…an exciting announcement soon will shed some light on that.

Battle Report: Fight for the Tree (Merry Christmas!)

Merry Christmas and Happy New Year to everyone! I hope you had a great winter and a great year. I printed a bunch of posse rosters before my Christmas vacation, and intended to play a game of Dinosaurs Cowboys during that time. But family, friends, and general life got in the way, so I’m retroactively scheduling this report for Christmas day (when I really wrote it January 5th :) ).

Christmas-Vacation-TreeWhen you think of Christmas a lot probably comes to mind. If I mentioned Christmas movies the memories might narrow a bit, and definitely vary by person. For me Christmas Vacation is a classic (not quite as classic as the original Vacation, but that’s because they nailed family road trips so well). One of my favorite scenes is in fact the opening sequence of the Griswold family driving their car to chop down a Christmas tree, quoted from the movie as:
We’re kicking off our fun old fashion family Christmas by heading out into the country in the old front-wheel drive sleigh to embrace the frosty majesty of the winter landscape and select that most important of Christmas symbols.
I actually cut down my own Christmas tree annually with my family, because it’s a really fun tradition, and until I got a van it was hilarious fitting the tree on the roof of my subcompact. This years is pictured below to the left.

My-Actual-TreeSo translating this to Dinosaur Cowboys was a snap: the Objective would be Capturing a Christmas tree in the middle of the field. The four Griswold family members would be involved and their dinosaur would be blue and named the Front-Wheel Drive Sled.
Who to fight though? Surely not Santa, for his powers are too great (for some reason I could see Will Ferrell saying that line, haha). How about Santa’s Helpers? What about if they’re led by an old Battletech miniature renamed the Iron Arm of Santa? Maybe there can be some elves and a nutcracker?

Anyway I meant to do a Christmas report last year too, but really didn’t find the time. This year I was able to find a winter-y enough looking fabric sheet by flipping over my naval ocean mat. Why do I have naval stuff? Why for the terrific game pictured here called Sails of Glory. Then I used some small ornaments on my classic model trees, had a Christmas tree that fit well from a craft store, and put a few statues and bells out for cover.

Oh, and in case you’re still thinking of Christmas movies…there might be a Home Alone related surprise…(aka my favorite Christmas movie)

Anyway onto a battle report that turned out to be everything I hoped it would.


Festive Table Setup
I gotta admit, I’m super happy with how the table turned out. I took the leaf extender out of my games table to get back to the classic, homely, warm feeling of my traditional 4’x3′ kitchen table.
DC-Christmas-0001
DC-Christmas-0010DC-Christmas-0008DC-Christmas-0005DC-Christmas-0004

Posse – Griswold Family – $2,000 and 160 IP
Download the Griswold Family PDF roster or see it in The Saloon
Pretty hard to not cheer a little bit for these guys. Clark spared no expense for his O’Sullivan Sixer (one of my favorite pistol names as of v2.6), and has a motivational speech prepared with the “Get in There!” trait. And unlike the movie, this time he did remember a way to cut down the tree! A terrific Mountain Man Axe.
DC-Christmas-0011His loyal wife Ellen is one of the classic female minis for this game I often name Trista (in fact she was in the first official playtest report of the game). For some reason I can’t make her anything but a sniper, so a Bolt-Action Rifle it is. She similarly has a speech ready for her family, but it’s more calming and soothing (aka “Shake it Off”).
Then comes daughter Audrey with a bunch of gizmos and gadgets like a Flare Gun and Stun Grenades.
And finally Rusty, who has grown up enough to become a fine shot with the brutal sounding Streetsweeper Shotgun (yeah, it’s a nod to a Quake 2 mod I played ~17 years ago that had a minigun firing shotgun shells). In a pinch he can use the Flagstaff to Motivate and heal the rest of his family.
And like I said the dinosaur is named the Front-Wheel Drive Sled. I had bought a new feathery, crazy eyed dinosaur recently, so this gave me a chance to use him.

Posse – Santa’s Helpers – $2,000 and 160 IP
Download the Santa’s Helpers PDF roster or see it in The Saloon

First of all let me explain the mini used for the leader. As I mentioned it is a Battletech mini, a game I played a ton in high school and still own and would play again. The exact Mech is a Warhammer IIC (considered “unseen” due to lawsuit issues with FASA and an anime). I gave it as a present long ago to my Grandad, say when I was 12 or 13 years old. Then when I got back into Battletech when I was 18ish he was kind enough to give it back. I repainted it from the original winter camo (which would have actually been so suiting here) to a nice red/white color scheme with a bunch of dirt and ding marks.
DC-Christmas-0017And yeah, I basically love the mini, the sentimental value, and the actual stats in the game (more so the original 3025 Warhammer…WHM-6D for life). Anyway he would be the Iron Arm of Santa, with a Klondike 7000 (a pretty Christmas sounding weapon).
Then for my Christmas elves and helpers I went more to the fantasy shelf. Plum Appleseed is an old D&D RPG thief I used (he has red and purple coloring to match his name). Gaston the Cook is his pal, and the chicken topped staff the mini is holding is perfect for the rarely used Dinocatcher. I have a bunch of dwarves, but I dug up an old old old plastic single-pose Chaos Dwarf I painted when I was ~14, and this guy would represent the Nutcracker (with a suiting Greataxe). Then to wrap it up an Elf, which I hummed and hawed over for a while since I used to be hugely into elven archers/rangers for RPG games, so I had lots of options.
This posse would have a Triceratops for their dinosaur, because I actually really like his in-game stats.
Some detailed pictures of the various minis, since I don’t think I’ve used any of them before for this game. They sure do show their painting flaws up close though :)
DC-Christmas-0022DC-Christmas-0023DC-Christmas-0026

Objective and Deployment
I decided to go with no special Features for this game, just to keep it simple for the New Year.
As I mentioned the Objective is “Capture”, with the goal being the Christmas tree in the middle of the table. I decided on a “Corner” deployment (instead of the traditional “Edge”) for a bit of variety, and to encourage flanking/splitting up.

To fit with the movie the Griswold’s started mounted riding in their car…um…dinosaur. Which actually works well for the game because the ol’ sled has the Racer trait, which is arguably the best closing mechanism for melee focused entities (tied with “Climber”). Basically Racer doubles your Hustle speed, meaning the dinosaur could go 6″+5″ (ignoring Difficult Terrain of course as a dino). Not too shabby for a Raptor.
The intent was to launch forward, unload everyone, and quickly secure the objective so Santa’s Helpers almost have to assault the high ground, instead of the fight being on even footing.
DC-Christmas-0036DC-Christmas-0038DC-Christmas-0043
Also I’m happy to say the snowy base I painted for my red jacketed RCMP officer finally suits the table (far right picture above).

Santa’s Helpers deployed next, in the corner opposite the Griswolds. Plum started mounted on the Triceratops, to better utilize his Carbine (thanks v2.6!). The Iron Arm of Santa was out front, hoping to activate last and maybe sneak a shot in. The remaining members were organized in a flying-V behind a tall hill. Their plan was to edge around the cover, cross the nearby fence, and storm the objective.
DC-Christmas-0045DC-Christmas-0047DC-Christmas-0049

Turn 2 – Nutcracker Captures the Tree
Well, call it a day! Except there are still 5 turns to go. But thanks again to his Racer trait the Nutcracker managed to reach the base of the Christmas tree objective, well within the 4″ necessary to capture it.
DC-Christmas-0059Before Plum could activate Ellen fired on him, hoping to frighten the rider into Fleeing (and taking his dinosaur with him!). Although she hit very well, Plum managed to pass his Bravery Test.
The return fire was ironic as Ellen took enough damage from the Carbine of Plum to force a Bravery Test, which she promptly failed.
Meanwhile the posses broke into smaller teams. Clark and his daughter Audrey moved along the side hill near the Christmas tree. Across the field the Elf and Cook teamed up and reached the edge of their covering hill and advanced towards the fence beyond it.
The Iron Arm of Santa mechanically shuffled directly forward. Meanwhile the Front-Wheel Drive Sled boldly advanced around the side of the objective, hoping to reach the Elf and Cook and hold them up in melee before they could assist at the tree.
DC-Christmas-0062DC-Christmas-0063DC-Christmas-0067DC-Christmas-0069DC-Christmas-0071

Turn 2 end – Ahhhhhhhhhhhhhhhhh
As both posses were within capturing range of the objective, a special event triggered…
Kevin-Surprised
That’s right, Kevin McCallister is here to defend the tree. “This is it! Don’t get scared now!”

DC-Christmas-0031Kevin gave me the chance to make a ridiculous single character that cost $2,610 and 385 IP (hah) with 8 Defense (Hahaha) and 3 Ranged Target Number (HAHA!!!). How about a Grenade Launcher and Settler Defender and slew of useful traits (Awareness, Try Again, Escape).
In addition I could use the player character mini (a Scout named Dunhaus) from my recent D&D campaign named “Servants of Molagrath”. I custom painted this mini for the campaign (which ran for 6 months recently…basically the giant block of no blog posts here). His tunic even has the little evil red beetle cult symbol of his deity Molagrath. And craaaazy eyes.

Kevin McCallister had insanely good stats, and I had to do a bit of Saloon jigging to only have a single usable entity: Home Alone PDF roster or see it in The Saloon

DC-Christmas-0028

This changed the game drastically. Kevin would attack the nearest entity (regardless of posse) where it made sense. Both posses would completely gang up on him in an uneasy alliance. And before either gang could really chip away at him, he’d hop on a makeshift zip line and get away.
But until then he was going to rip everyone apart.
DC-Christmas-0073

DC-Christmas-0076Unfortunately for the Nutcracker, who had raced ahead to get adjacent to the objective, the little dwarf was the nearest target. I’m sure it’ll be fine…how much damage can a Settler Defender at Short Distance really do…with 3 RTN.
Needless to say the Nutcracker soon found himself clinging to life with 1 HP. In a way he was a hero though, as Kevin rolled 2 Crits but also that magical, hope granting result of 1, which meant the deadly shotgun needed to be reloaded.
DC-Christmas-0077

Turn 3 – Beat Up the Hero
Kevin would roll Initiative just like the other posses, but didn’t quite count for the number of activations. What this means is he would activate once, on the first initiative roll, then not again until the next turn. Which meant if the gangs could weather the initial storm they’d have a full, free turn to shoot at Kevin.

DC-Christmas-0080Luck was still with the Nutcracker, as Santa’s Helpers won the all important Initiative roll. Knowing his life was near an end, the brave dwarf roared to the god of thunder (oh wait wrong game) and moved into melee. He used the Turtle trait to desperately try to survive a counter attack. Then he feebly swung his Greataxe, but to no avail. 8 Defense basically meant everyone was hitting on 12+, so they couldn’t get Criticals, and could really only hit on a 1/12 chance per die.
The Nutcracker had a bit more luck when Kevin activated. Because his shotgun was empty, the kid needed to get outside the minimum range to use his Grenade Launcher. Which meant leaving combat with the Nutcracker. Shouldn’t be a problem, right? Actually the Nutcracker managed to hit the moving opponent with his Snap Attack, drawing first blood on the seemingly insurmountable target.

The Griswolds were still in shock from seeing the Grenade Launcher wielding kid appear. And before Clark and Audrey could separate Kevin finished his move away from the Nutcracker and lobbed a grenade at the clumped father and daughter.
DC-Christmas-0082ab
Yeah, that hit. And it hurt a bunch, leaving Clark at 2 Hitpoints and Audrey at 5.

Seeing the grenade explode amidst her family, Ellen dug deep inside to unknown anger. Going “full mama bear” she landed a terrific shot on Kevin, but also emptied her gun doing so.
DC-Christmas-0085

Inspired by the shot, the rest of the posses circled Kevin and tried to hit him with everything they had. As an added bonus everyone got closed to the tree Objective, haha.
The dinosaurs piled in as well in an attempt to hold Kevin in place and protect their masters. It’s not like the penalty to hit Kevin in melee with a gun would really matter when everyone was already at 12+.
DC-Christmas-0086DC-Christmas-0091

Turn 4 – Zip Line to Safety
Kevin activated once more, using his Power Glove (unfortunately not listed on the PDF roster since I had to technically break the equipment size limit rules to let him have a melee weapon). He straight up punched the Front-Wheel Drive Sled in the jaw (grill?) for a bit of damage. Then as quickly as he showed up, he zip lined to safety. Probably calling the police or going through a flooded basement.
So in game terms he was done and removed from the match after 3 activations of mayhem. In the end he had 21/35 Hitpoints left, so he took a measly 14 damage.
DC-Christmas-0093

Turn 5 – Objective? Ain’t Nobody Got Time For That
The first activation this turn was rather important. The Iron Arm of Santa had taken a bad shot from Clark, but hadn’t quite died. If Rusty could activate and blast the Leader apart the remaining enemies might Flee from the Objective.
And even though the Griswolds won the first activation, Rusty unfortunately seemed to forget how to shoot. Seriously the dude needed a single 9+ to kill the Iron Arm of Santa. And Yeehaw! had been used much earlier (I think on Ellen’s first shot when she tried to make Plum turn tail and Flee). And this was with Both Barrels being used on the Streetsweeper Shotgun!
DC-Christmas-0104

DC-Christmas-0106As the Iron Arm survived, he was able to move over and take Clark out of action. The Griswold family stood strong though and neither Rusty or Ellen failed their Bravery Test.
Meanwhile the Elf kept moving forward towards the Objective, his progress slowed slightly since he wasn’t full out Hustling and instead launched silver bolts of energy from his Laserbow. The Cook dove in near the brawling dinosaurs to assist the Triceratops. Honestly though the Front-Wheel Drive Sled (Raptor) was pretty badly hurt, and was clearly outmatched by the larger dinosaur. But the sooner the Triceratops could safely leave combat the sooner it could reach Ellen or Rusty.

Speaking of the dinosaur fight the Cook did manage to finish off the Griswold family vehicle/Raptor. Since the Cook had been untouched so far, Ellen focused her shot on him. She climbed up the slight hill nearby to get a better line, and landed a beautiful shot that forced the Cook to Flee. She also looked awesome doing so.
DC-Christmas-0112

Turn 6 – Approaching a Tense End
DC-Christmas-0116The turn started with one of my favorite subtle mechanics of Dinosaur Cowboys, and one that catches even experienced players sometimes. That is if a character cannot fully Flee, they are Stunned instead. So basically they lose their Action Phase instead of their Movement Phase.
And this is exactly what happened to the Cook. Because he couldn’t move his full 4″ due to Difficult Terrain crates and hills, he instead was Stunned. Which meant he could still advance towards Rusty. He just couldn’t attack once he saw him.

But Rusty had much, much bigger problems. About 9 tons of problems named The Hoof of Christmas. The Triceratops easily moved into melee with Rusty. And another subtle, often overlooked mechanic came into play. But the stout teen was unwounded, so a single attack wouldn’t drop him. So instead the dinosaur used his Beast attack “Trample”. Oh right, those Beast attacks! (I’m sure you’re saying)
In case you’re not familiar, for a 2 damage penalty a dinosaur can use Trample which has the special effect of 4″ Pushed. Best demonstrated with the pictures below: the peaceful tree and dinosaur before, and the super flung away Rusty after (including some minor Falling damage!)
DC-Christmas-0122DC-Christmas-0123

Turn 7 – Decision Time
This turn actually began with the last picture above, which might be obvious since all the Moved & Acted tokens are cleared. But it started with the Triceratops activating, moving back into the recently Pushed Rusty, and smashing him again with Trample for ANOTHER 4″ of Push.

DC-Christmas-0127There was no way Rusty would reach the Objective this activation. But by pursuing him the Triceratops had also placed itself outside the capture zone.
Which meant the Cook was the only person on the Objective. The Elf was close, but had failed his Bravery Test when the Iron Arm leader died, so he was still getting back to position.

So if Rusty and Ellen could kill the Cook they might have a chance of a tie game. After picking himself up from the Trample, Rusty moved slightly to get into the best distance bracket he could, and used Both Barrels on the Cook, leaving the halfling with a mere 3 Hitpoints.

All the pressure came down to Ellen’s shot…
DC-Christmas-0125
With her Bolt-Action Rifle and combat modifiers she needed a single 9+ on 3D12. Tense, very tense… aaaaand she managed it, killing the Cook.

The raging Triceratops remained, as did the Elf. But the turn limit was reached. There was only a single activation left, of that Sweet Little Elf and his Laserbow.

And with a Hustle he was just BARELY able to get within 4″ of the Christmas tree Objective. No one else was even close.

So Santa’s Helpers won! They were able to fend off the fanatical tree cutting quest of the Griswolds, as well as weather the storm of the McCallister kid.

Conclusion
Dinosaur-Christmas-Santa_Martin-DaveyGuess what? This match was fun. Not much else to say. The posses used a lot of neat weapons (although the Dinocatcher and Flare Gun missed the 1 or 2 attacks they tried). The Objective battle was very tense. I’m happy Trample got to shine. All in all there were a lot of tense moments and close calls. For example the Elf failed his Bravery Test from the leader dying because he rolled an 8 but had 9 BTN (default is 8). So because he gave up some BTN for a few Improvement Points he nearly didn’t reach the objective.

Anyway I hope you enjoyed the report. I know I haven’t been posting here a lot, but like I keep saying Dinosaur Cowboys is always on my mind and in my heart, and I’ll keep coming back to do battle reports when I can. They just take a bit of time (around 1 hour to play and photograph, and then 3 hours to write up and format).
I actually have another report setup, I just need to find the time and opponent to play. I’m going to flip the ocean fabric seen through this report to the blue side, then have a bunch of islands to represent the new coast of America. Basically some swamp land raiders against a coastal defense force.

Otherwise 2016 might be the first year since I first developed the game that I don’t release an updated rules version. v2.6 is in a great place, I’ve been enjoying it a ton. And like I’ve (naively) been saying since v1.0, at some point I need to stop tweaking the game.
Although it’s tempting to go back to my roots and release a set of “expansion” rules…maybe called Skies and Slums. Not that I have brainstorming notes on that very topic from March this year :).

Merry Christmas and see you in the New Year!

Battle Report: Pillaging the Old Exxon Station

DC-The-Old-Exxon-Station-0011My life has been pretty busy recently so I haven’t had a chance to sit down and play Dinosaur Cowboys really since the successful release of v2.6. Plus I generally like to take a bit of a break after each release. But a few new additions to the ol’ tabletop motivated me to find the time to sit down and play.
DC-The-Old-Exxon-Station-0007First of all I painted a new mini: Mad Max. If you already read that post you might notice some duplicate pictures here, but you’ll live.
Second of all I finally based my little Exxon gas station signs. And finally I finished spraypainting the ruined building I bought a while back. I also put some paint on my Dodge Challenger model (slightly out of scale) from 7-8 years ago (time goes so fast). Still not fully finished it (as I hate painting vehicles), but close enough to look good on the table.

For some background to the game I thought I’d break the Dinosaur Cowboys history a bit and have a fueled car for one of the posses. Also the gangs would be fighting over a few liters of precious gasoline from a ruined Exxon station.

The Table Setup
Right on the northern border of Texas before the boiling desert wastes of the south is a lone two pump Exxon station, ravaged by time and long forgotten by travellers. Except one, old Crazy Carl (Mad Max), who has heard rumors of the precious black juice to fuel his “Orange Lightning” car. The station is slightly east of Perryton and was expected to be empty. Little did Crazy Carl know but the Guzzoline Expedition from the madness filled and barely habitable town of Amarillo had also set out to search the nearby country roads for precious gasoline.
DC-The-Old-Exxon-Station-0032
DC-The-Old-Exxon-Station-0013DC-The-Old-Exxon-Station-0015DC-The-Old-Exxon-Station-0028DC-The-Old-Exxon-Station-0030DC-The-Old-Exxon-Station-0018

As you can see from the table I recreated the rough county road near the Exxon station. I used my new fences and cacti to create the stereotypical Texas feel. I also angled some of the fences and had them run into terrain to make it feel like sand and dirt had broken and mangled the once straight lines. The gas station itself has the skeletal remains of some giant feline beast, plus various crates and craters around the back. I used my half-painted propane tank model as well, which fits in perfectly. The Exxon signs really bring the whole scene to life, and are random purchases from a railroad set.

Objective and Deployment
I’m going to be honest, I meant to use the Capture objective (for the gas station itself, most people inside at the end of 7 turns = victory), but pretty much just did a standard Shoot Out instead, haha. For deployment the closest applicable type was “Corner”, since Crazy Carl’s Roadwarriors would setup along the northwest bend of the road and Guzzoline Expedition somewhat opposite them approaching the T-intersection.

Both posses had $1,500 and 150 IP and 4 traits.

Also the road itself was a “Road” feature, which meant anyone starting their move on it would get +1 Speed. This included Hustle and Charge as well, so you could really go far if you stuck to the pavement.

Posse – Crazy Carl’s Roadwarriors
DC-The-Old-Exxon-Station-0005First off Crazy Carl’s Roadwarriors. I envisioned the posse as a motley crew that Crazy Carl had assembled as he travelled the highways. The main focus would of course be “Orange Lightning”, the Dodge Challenger model I had. I toyed with the idea of some car-specific rules as a one-off, but decided to instead represent the car as a Horned Triceratops dinosaur. Big enough to fit everyone if needed, but bulky and powerful like a car. Crazy Carl got a Breach Gun, since a big shotgun is iconic to Mad Max. Vennie the Quick was a pretty standard midrange fighter with a Carbine in case she wanted to stay in the car and fire it. The Natural got the classic Low Burst Rifle with the Attack – Punishment trait to up the damage when necessary. Hadlock received a single big pistol. All in all a pretty standard v2.6 posse, especially when it came to stats (+1 DEF across the board, RTN of 6 or 7, etc.).
PDF of Crazy Carl’s Roadwarriors posse

Posse – Guzzoline Expedition
DC-The-Old-Exxon-Station-0025The Guzzoline Expedition was supposed to be Neotechnoist led from the extremely hot and crushingly depressing town of Amarillo. In the communal “heat craziness” of that outpost, the town leader decided to send Stefan “Blue” Stu, his best friend Hank Mardukas, and a slow-but-steady Plated dinosaur to scout to the furthest northern tip of Texas in search of gasoline. The town leader wanted the gas to power a generator for his icechest. Clearly the noblest of expeditions.
Along the way Stefan picked up an even more outlandish ally named Gary Gary Gary, who showed up in camp one day and kept saying “You’ll need my shotgun, trust me”. A dark and brooding priest named Father Richard completed the gang.
Stefan Stu would be long range focused with a Lever-Action Rifle and excellent RTN. His friend Hank would use a Blasterbow and be pretty generic. Gary Gary Gary main characteristic is his extreme toughness and Enforcer Shotgun (clearly this would be a “battle of the high end shotguns”). And Father Richard had an old Yannigan Pistol and some motivational words from his sermon days (via the “Get in There!” trait).
PDF of Guzzoline Expedition posse

Turn 1 to 3 – Posses Approach
The first few turns were surprisingly quiet. The posses started so far apart, and aside from Stefan’s Lever-Action Rifle there wasn’t much long range firepower. The Roadwarriors deployed entirely in the car (aka Mounted), mainly for flavor. The Guzzoline Expedition started in a line around their dinosaur, ready to advance up the road.

Both forces started to pull around their respective corners and take up position. Stefan ducked behind the far, far, FAR crates near the T-intersection (which would be a mistake as his 20″ range missed a lot of the initial fighting). Hank hung behind the gas station, while Gary dove right into the building to take up quite a defensive position. Father Richard started across the road to the north side of the battlefield, hoping for a flank for a few back shots.
DC-The-Old-Exxon-Station-0034DC-The-Old-Exxon-Station-0035
DC-The-Old-Exxon-Station-0037DC-The-Old-Exxon-Station-0038DC-The-Old-Exxon-Station-0041DC-The-Old-Exxon-Station-0039

Right near the end of the third turn Crazy Carl lived up to his name and gunned it in the Orange Lightning car. Basically he pulled a Dukes of Hazzard maneuver and drove straight towards the gas station. Vennie and The Natural had already shoulder rolled from the speeding vehicle (aka Dismounted) and after the car smashed through the fence Crazy Carl and Hadlock did the same.
DC-The-Old-Exxon-Station-0044
“Those crazy Duke boys are at it again”
DC-The-Old-Exxon-Station-0045

Turn 4 – The Exxon Standoff
DC-The-Old-Exxon-Station-0048This turn opened with The Natural rushing across the road, and with the speed boost reaching a cacti for cover. Vennie swung around the back of the car to try to cover the Exxon station. Meanwhile the Plated dinosaur from the Guzzoline Expedition did a Charge forward to reach Orange Lightning. Dinosaur vs car!
The real issue was around the Exxon station itself. Gary and Hank were able to support each other inside the station, behind the tall walls. Outside Crazy Carl and Hadlock waited. Neither side wanted to make the first move and get shot by the enemy support team. So for now the focus shifted to the dinosaur melee as both sides tried to burn Activations before needing to end the standoff. Like I said in the preliminary comments, this really turned out to be a “battle of the shotguns”. Gary with his Enforcer Shotgun and Crazy Carl with his Breach Gun.
DC-The-Old-Exxon-Station-0049DC-The-Old-Exxon-Station-0052

Eventually one side of the standoff had to move. Hadlock fired at Rodger the Dodger (the Plated dinosaur) and backed up behind the propane tank, which meant the 2vs2 had become a 2vs1. Hank responded by advancing to the cover of a crate and shooting at the orange car. Crazy Carl responded in kind with a bold move to the opposite side of the crate, and a point blank shotgun blast (in fact he used Both Barrels)! Similarly Gary jumped over the Exxon wall, careful to stay out of sight from Vennie, and unloaded into Hadlock (causing him to Flee), but also emptying his gun in the process. Quite a flurry of activity!
DC-The-Old-Exxon-Station-0056DC-The-Old-Exxon-Station-0059DC-The-Old-Exxon-Station-0060

Turn 5 – Crazy Driving
The Roadwarriors were in the nerve wracking situation of giving up the first kill. Hadlock was low on Hitpoints, Fleeing, and about to be gunned down by merciless Gary (after he reloaded). To stop this from happening Orange Lightning did some crazy driving right across the fence and into melee with Gary. The Plated dinosaur did a Snap Attack as the car moved, but the risk was worth it. The car now acted as a mobile wall of cover and a line-of-sight blocking shield for Hadlock. Plus it looked awesome!
DC-The-Old-Exxon-Station-0062DC-The-Old-Exxon-Station-0064DC-The-Old-Exxon-Station-0065DC-The-Old-Exxon-Station-0067

Left on his own the dangerously exposed Plated dinosaur settled for smashing into Vennie, causing her to Flee from the damage.
Across the battlefield the Expedition leader Stefan Stu had erroneously placed himself behind crates, but too far from the action. So he had been Hustling forward each turn trying to get a shot. His chance finally came and he could fire on the wounded Vennie, landing an amazing hit from his Lever-Action Rifle which took her out of action.
DC-The-Old-Exxon-Station-0068DC-The-Old-Exxon-Station-0069DC-The-Old-Exxon-Station-0074DC-The-Old-Exxon-Station-0076DC-The-Old-Exxon-Station-0071

Meanwhile Hadlock ducked behind the car to be safe for a turn. Crazy Carl swung back around the Exxon station and fired into the Plated dinosaur, landing a smashing hit that took the wounded creature out of action.
DC-The-Old-Exxon-Station-0078DC-The-Old-Exxon-Station-0080DC-The-Old-Exxon-Station-0083

Turn 6 – Clearing Room to Room
DC-The-Old-Exxon-Station-0085
Now that Gary was outside the Exxon station, Crazy Carl took the opportunity to hop the wall at the end of the last turn. This put him in a prime position to fire at Hank, if he could get around the corner in time.
Instead Hank activated first, edged to the rusted and crumbling store shelf, and fired around the corner at Crazy Carl. Although hit the damage wasn’t enough to take the Roadwarrior leader out, and swift retribution was lined up at the end of a Breach Gun.
DC-The-Old-Exxon-Station-0093DC-The-Old-Exxon-Station-0096DC-The-Old-Exxon-Station-0089

Across the street Father Richard and The Natural had been engaged in a back-and-forth game of chasing each other around a hill. But Father Richard turned his attention back to the main battle for a moment, aimed at the orange car, and fired again and again, leaving Orange Lightning a smoking ruin (and clearing a lot of the table!). This left Hadlock dangerously exposed, but Gary decided to move back into the Exxon station to take Crazy Carl head on.
He wouldn’t get the chance. Stefan Stu, ineffective for most of the battle, moved across the road to get a clear shot through the front doors of the Exxon station. Luck was with the Expedition leader as his shot hit and killed Crazy Carl.
DC-The-Old-Exxon-Station-0097DC-The-Old-Exxon-Station-0100DC-The-Old-Exxon-Station-0101

Turn 7 – Cleaning up the Streets
At hearing his leader die, Hadlock tried to Flee. But he was right at the edge of the table, so he got Stunned instead. The poor old cowboy stood shocked as Gary climbed out of the ruined Exxon station and fired a flurry of shotgun blasts. After all the fancy maneuvering from the Orange Lightning car, Hadlock still died.
Across the road Stefan could turn his attention to the last survivor of the Roadwarriors: The Natural. The Expedition still had Father Richard (a bit wounded), Stefan (slight graze), and Gary (who would heal back to his full impressive 13 HP thanks to his Large IRP). The situation was grim for the Roadwarriors.
There was a ray of hope as The Natural managed to kill Father Richard after the preacher emptied his gun at him from atop a hill. But the Roadwarriors were still in a 2vs1 situation.
DC-The-Old-Exxon-Station-0108DC-The-Old-Exxon-Station-0106DC-The-Old-Exxon-Station-0111

Turn 8 – The Noose Closes
Although The Natural managed one more shot at Stefan, eventually the noose of Gary and the Expedition leader closed and they shot down the last survivor of the Roadwarriors. Victory to the Guzzoline Expedition! (Also quite a few turns, but that’s mainly because the first 2 or 3 were getting setup around Exxon).
DC-The-Old-Exxon-Station-0114

Conclusion
So the Guzzoline Expedition got what they came for: gas! And Crazy Carl was sent back into the wasteland with a ruined car and beaten allies. The game was a lot of fun, and as usual the ruined building representing the Exxon station worked well, made for a tense standoff, and naturally became a focal point for the conflict.
Initially I had planned a third posse to join the fight, to represent the wild savages roaming the Mad Max world: The Bartertown Slaggers (PDF). My plan was to have them spill out from a basement trap door of the Exxon and just attack the nearest target. This would be especially effective considering how many people were within Charge range of the building. They were definitely built as a v2.6 melee posse, with some fun weapons like the Ion Blaster, Coup Stick, Feudbreaker, etc. But in the end I figured the fight between the Roadwarriors and Expedition was close enough that it didn’t need to be disrupted. Maybe in the future I can do a rematch!

Anyway I hope you enjoyed the game session report! Like I’ve said many times, I’ll always try to get battle reports up, even if I’m not actively working on the rules, or am busy with other projects. Certainly not the same volume or speed as other months, but at least you know you’ll have Dinosaur Cowboys fights to read about!

Battle Report: Purge the Hollowwood

I’ve been making v2.6 changes all day, mostly around Traits (which tediously require updating the Trait document, re-pasting it into the core rulebook, then updating and testing the Saloon list, then updating the Quickdraw rules, and updating existing posses including the example ones – what a horrible process but I don’t know how to improve it). So with that said I won’t have a ton of energy to post as many details of my most recent playtest. The game itself was enjoyable, and I think the pictures turned out well. Amazing what a different and unique table setup can do for fun.

Overview
I created two posses that utilize a lot of new features and weapons fresh in v2.6. The terrain setup I used represented an old crater that had filled in with lush jungle. I envisioned some of the trees having a tough wood (that is actually used for Wood Armor) that happens to be poisonous to dinosaurs. Two gangs are contracted by opposite firms to purge out the “bad seeds”. So in other words 5 tree markers and the Demolish objective (with a slight twist of no attacks on the trees from further than 6″, reasoned as the thick bark). The objective factored very little into the game itself though. Otherwise I used a Corner deployment. No turn limit, and the match ended up going to 9 turns as a result.

Posses
Here are the two posses. Don’t worry about the IP/ND not being even, I went for flavor and added things I wouldn’t normally (like one person carrying FOUR types of grenades).

General Williams Brigade (PDF)
Posse picture left to right (excluding the dinosaur): Bellgloan, Malius Blaze, General William, Tom West, Unit 4-15-3
DC-Hollowwood-26-Test-0008Lots of exciting features here. The leader (General William) is built for charging while mounted, pure and simple. Charger trait, Onslaught, and a top tier Plasma Lance. Lovely. Malius Blaze would test out the improved flamethrower weapons, specifically the Badlands Burner. Tom West was a Boxer, which meant his fists were lethal weapons capable of 2A-8D. The mini I used is an old D&D guy, the iconic representation of the 3.0 Fighter. I’d love to get a bare knuckle boxer type mini, if I could find one that isn’t some goofball straight from the ring. I guess I could just file/cut weapons off someone. Bellgloan was pretty basic, just testing the interaction of the high attack Klondike 7000 (or ‘K7K’) with the classic Rapid Fire and Go For the Eyes traits. Unit 4-15-3 has a special place in my heart (and not just because that was the name of my Doctor character in my recent Edge of the Empire campaign). I mentioned way, way back that I really like medics and support characters, so Unit 4-15-3 exemplifies this within the current rules. Quick Hands for an easy heal, Doctor because it’s one of the best designed passive traits, and Get Up for some remote healing. Then a SLEW of IRPs, just a ton. He will also test the Pushed capabilities of the Lewis Airgun. Dinosaur is pretty simple, except I’d be using the smaller Horned model I have for a change of pace.

Le’Dorfs Royal Force (PDF)
Posse picture left to right (excluding the dinosaur): Iara September, Madhat, Richard Le’Dorf, Glargamar, Corporal Luke Mossly (new mini)
DC-Hollowwood-26-Test-0002Lots more to test with these guys. The leader is taking out The Tombstone for a spin, so who knows how that’ll work. The idea is to use it with Clean Shot for a massive attack (basically 1A-11D with Armor Piercing). He also took one of my favorite named guns the O’Sullivan Sixer, the top tier Six-Shooter. Madhat was purely a grenade man and demolitions expert. With the Thrower traits he could reach 21″ with a Bundle of Dynamite…some arm on him! Glargamar would ride the dinosaur most likely and try to Pull targets in with the Dinocatcher. Iara was a pretty standard sniper with a focus on testing the higher end Frontier Twin Rifle and various traits. Corporal Luke Mossly was a similar support character to Unit 4-15-3 but he went with the unique approach of the Motivate weapons and the Lend a Hand trait. And the dinosaur is a T-Rex named Tiny, so that I have an excused to use the Allosaurus model (since I’ve been overusing my Papo T-Rex I feel).

Table and Deployment
DC-Hollowwood-26-Test-0012
DC-Hollowwood-26-Test-0015DC-Hollowwood-26-Test-0017

Early Moves
With a lengthier game like this I can’t recall the exact turn by turn details, and I barely took any notes. I’ll highlight some unique or especially exciting parts though. Otherwise just enjoy the pictures!
DC-Hollowwood-26-Test-0018DC-Hollowwood-26-Test-0020DC-Hollowwood-26-Test-0022

Awesome moment pictured below where Madhat put his super long range Bundle of Dynamite to good use. Everyone had just dismounted from the Horned dinosaur and spread out. Unfortunately they didn’t have much beyond a 3″ to 4″ movement, so they were quite clustered. Which meant Madhat could hit the dinosaur AND get the 4″ Explosion effect on everyone. In other words four targets for the price of one. I thought the game was gonna be over so quickly after this happened.
DC-Hollowwood-26-Test-0024

Closing the Gap
DC-Hollowwood-26-Test-0025DC-Hollowwood-26-Test-0026DC-Hollowwood-26-Test-0032DC-Hollowwood-26-Test-0035DC-Hollowwood-26-Test-0036

Nice usage of the Klondike 7000 pictured below. Bellgloan used his traits Rapid Fire (+2 Attacks) and Go For the Eyes (Crit on 10+) for a total of 9A-1D. But his roll was awesome and ended up doing 11 damage. So many bonus Criticals from the trait.
DC-Hollowwood-26-Test-0030

Blood Around the Big Tree
General William got his chance to fulfill his purpose of Charging (pictured below). While mounted on the Horned dinosaur he reached Glargamar (who was also mounted) with a big Charge right by the central tree. With the usage of Onslaught (+4 Attacks on Charge) and his great Plasma Lance (+1 Attack and +1 Damage on Charge) meant he was hitting for 7A-9D. You can imagine how Glargamar felt as he got one-shot killed.
DC-Hollowwood-26-Test-0041

Also Unit 4-15-3 got to really shine, even though he had been Stunned thanks to a long distance Dustbomb from Madhat (you can see the marker in the pictures below). The backline of General William’s posse wasn’t looking so great, but the doc turned it around. He used Get Up! (which doesn’t require an action, so he could do that while Stunned) to fix up the nearby Malius Blaze. Then he used Quick Hands on himself, which also got around the Stunned, and with the help of his Lifesaving IRP healed from 3 HP back to full.
DC-Hollowwood-26-Test-0047DC-Hollowwood-26-Test-0049DC-Hollowwood-26-Test-0050DC-Hollowwood-26-Test-0044

The Lines Push
General Williams did an awesome move forward to get into melee with the clumped backline of Le’Dorf’s Royal Force. Time to Whirlwind…oh yes, what a time it was. He did take a Snap Attack from the King dinosaur, but the trade off was worth it (T-Rex missed anyway). Also Tom West basically punched a T-Rex over and over in a glorious display of martial prowess. Eventually he’d lose the combat, thanks to supporting fire outside the combat (plus a lot of healing of the T-Rex, including a full stage two Get Up!), but it was still an impressive fight.
DC-Hollowwood-26-Test-0054

At this point the dinosaurs had basically pushed through to the opposite deployment zone. So all the “squishy” shooters in the back were suddenly panicking. One of the funner dinosaur usages I’ve seen in a while.
DC-Hollowwood-26-Test-0056DC-Hollowwood-26-Test-0061DC-Hollowwood-26-Test-0068DC-Hollowwood-26-Test-0063

Scramble to Survive
Hilariously enough on Turn 7 the leader Richard Le’Dorf actually got to use Clean Shot (normally it’s an early game opener) because the enemy doctor Unit 4-15-3 had healed himself back up to full. Also Madhat had basically burned himself out of grenades at this point, with nearly everything needing a Reload.
DC-Hollowwood-26-Test-0070DC-Hollowwood-26-Test-0072DC-Hollowwood-26-Test-0074DC-Hollowwood-26-Test-0076DC-Hollowwood-26-Test-0079DC-Hollowwood-26-Test-0083DC-Hollowwood-26-Test-0086DC-Hollowwood-26-Test-0089

Last Breaths
By this point Le’Dorf Royal Force consisted of Iara and Madhat, or who I commonly refer to as Trista and Khulan. These minis date WAY back to the original Dinosaur Cowboys skirmish tests, like 4 years ago. From the Bounty at Caldwell Lake you can see them fighting together, so it’s neat to have them trying to survive back to back now.
The picture below with the orange D6 rolling a 1 was for the Charge from the Horned dinosaur, which would have wrecked house. The Le’Dorf posse were definitely on their back foot, especially since Madhat had minimum ranges enough that he’d have to resort to unskilled Brawl attacks in melee. So the failed Charge really helped the situation.
Unit 4-15-3 was sustaining himself very well, and actually managed a pretty neat kill. He took a far shot at Iara, who had risked the Snap Attack to leave combat with the Horned dinosaur. Unit 4-15-3 hit on a roll of 12, and left Iara with 1 HP. But the weapon used was the new Lewis Airgun, so the 4″ Pushed actually sent her back into the impassable Horned dinosaur, which triggered the “Push Damage” rule, and she died from that! Basically she splattered against a dinosaur.
DC-Hollowwood-26-Test-0095DC-Hollowwood-26-Test-0096DC-Hollowwood-26-Test-0097DC-Hollowwood-26-Test-0103

All Done
In the end the General William Brigade posse won the day against Le’Dorf’s Royal Force. The game was really back and forth, and I thought it would be over many times before it actually was. What really demonstrates the back and forth are some of the total Hitpoint tallies I recorded. Unit 4-15-3 ended up going through 12, 5, 3, 12 (Lifesaving IRP), 3, 12 (Large IRP). Similarly the Horned dinosaur went 32, 24, 20, 14, 13, 8 (what a survivor). And finally the King T-Rex went 26, 15, 25 (Get Up! II), 14, 9, 19 (Lend a Hand), 15, 6, 3, -3.


What Did We Learn?
A few things, actually. Doctors are awesome, that’s for sure. I mentioned above the “Doctor” passive trait is one of the better designed ones. The reason I said that is because it’s very powerful but also very situational. It can be completely useless or completely game changing, depending on player skill and strategy. It also helps develop and utilize a more niche aspect of the game (some posses don’t even bother with healing). And it also takes some Neodollar investment to work well. But yeah, lots of fun having a “healer” on the battlefield to sustain everyone.
I also realized it’s time to bite the bullet and rename a lot of the Traits. As I look over the (somewhat overly long) list I notice some duplication. Why are Berserker and Rapid Fire a separate trait, when they both give +2 Attacks (just to different weapon types)? There is some attempt at consistency with Traits named “XYZ Shot”, like Knee Shot, Coward Shot, etc. But what I did now is renamed these to an ACTUALLY consistent “Attack – XYZ”, like Attack – Coward, Attack – Inspire, etc.
Balance seems good, and the new weapons are spot on. I tweaked Motivate a bit so you can heal other allies as well as yourself, to really fit the theme. I added a medium range to Lever-Actions to support their 1 Attack. Just minor stuff like that.

So at this point v2.6 is 95% ready to go. I need to do a final readthrough and edit, otherwise it’s just releasing it, updating the Saloon (and posses), posting info to Boardgamegeek, etc. I might get one or two more playtests in (not sure if I’ll record them here), but like I said before look for the rules before the end of April. Maybe a release next week (from the time of this post) in fact!

After that I want to do a battle report featuring my new painted Mad Max style figure, as well as a gas station, Exxon signs, and a propane tank. So that should be pure fun.

Quick recap of my weekend games

I played two games of Dinosaur Cowboys this past weekend with my friends, which were a lot of fun. Then we went on to play some local video games like Blizzard’s Heroes of the Storm for a gross amount of hours, but at least we got some tabletop gaming in too. As a point of interest the two friends involved were the same guys from the “Four Player Madness” report almost exactly 3 years ago. Back then we used wooden tokens and the v1.2 rules, whereas now we had nice jungle terrain, plastic tokens, and the upcoming v2.6 rules to play with.
We used the desert looking table with a standard 8″ Edge deployment along the long table edges. There were a few different posses (built around the upcoming v2.6 rules):

DC-Friend-Rematch-0002The first game had a raised jungle ruin surrounded by crates. Whoever had more entities on top of the hill by the end of turn 6 (with a possible turn 7) would win. There was also a nearby wagon that had a cannon in the back, facing the hill, and the weapon could be used by an adjacent character with the stats of 2A-7D, 20″ distance.
The posses involved were the Horizon Unimatics Company (me) agains the Nashkel Miners (my friend). There was a lot of positioning and clever range band usage this match. Eventually the Thickskull ended up in melee in the middle against the T-Rex (you can imagine how that went). Although Horizon got the first kill, they had a lot of damage spread around their own posse and eventually the focus fire started enough to kill almost everyone off. Having a person sitting by the wagon cannon the whole game didn’t help the situation in the middle (which really acted more like a deterrent than anything, since I think the cannon was fired only once or twice).
In the end the Nashkel Miners were able to win, both by kills and by objective.

DC-Friend-Rematch-0001The second game we lowered the raised ruin section and replaced it with a patch of crates. The objective this time was to collect a smattering of dinosaur eggs, although the focus ended up being more on killing each other.
This time the Deseret Raiders faced the Nashkel Miners. There was a lot of nervous ducking behind hills and almost getting pot shots at each other, but eventually the Nashkel Miners rushed their T-Rex forward to force the issue. The Deseret Raiders tried to respond (and if they had hit with the Riot Grenades the game might have gone differently), but eventually the T-Rex got stuck in, tore the Deseret leader apart, and eventually brought down the enemy Horned dinosaur as well. There was a lot of damage spread across the Nashkel posse, but not as many kills, and eventually the Deseret Raiders surrendered when they had a single entity left.

As I played with friends there weren’t as many pictures, just the few scattered through this text.

Battle Report: Thermopolis Outpost Raid with Lego!

DC-Lego-Battle-052
Boom, it happened, I finally sat down and played Dinosaur Cowboys with Lego Minifigs like I’ve been meaning too since September (jeez has it been that long?!?!). I’ve had all these Lego buildings sitting around just waiting to go. So last week I set everything up, scrounged up enough vaguely weaponized Lego pieces, wrote two full 5 man + 1 dino posses, and played (using v2.5 of the rules). Of course the town used here is different than the one I took pictures of in September, obviously because I’m not going to leave the first town setup for ~6 months haha. I have a few Lego fences and trees that also made an appearance in addition to my normal terrain.

I focused on playing, not taking notes, but I’ll recall the general story from memory as much as I can.

Location, Terrain, Objective, Deployment
First of all the location is Thermopolis, Wyoming, which is fairly close to the Old Faithful geyser (and subsequent volcano) as well as the heart of the Neotechnoist empire: Haven, inside The Wall.
So I thought I’d do a bit of a narrative reversal, where Neotechnoist colonists have expanded to the outpost, outside The Wall. And then Duster locals see this as an enroachment and raid the outpost to try to drive everyone off.
Side Note: Funny how Neotechnoists are “colonists” when Dusters would be “settlers” or “pioneers”, and I call it an “output” instead of “town” or “hamlet”. Just the language that fits each Allegiance.
DC-Lego-Battle-001DC-Lego-Battle-003DC-Lego-Battle-005DC-Lego-Battle-007DC-Lego-Battle-010
Panoramic view of the town from the road and horizontally (note the various vehicles are non-functional). The jungle area with the ruined motorcycle and semi-truck I saw as a kind of rusted junkyard. Then a cool little dinocart (no in-game effect), and a view of the jail building.

So Thermopolis Outpost would be the center of the conflict, with the “Good Ol Raiders” being a posse of Dusters doing the attacking, and the “Thermopolis Outpost Residents” defending. The Dusters would try to steal food crates in the hope of shutting down the town and driving everyone out, while the Neotechnoists would try to hold onto their supplies.

DC-Lego-Battle-011To achieve this I used a custom mix of the Objectives of “Capture” and “Smash and Grab”. There would be 5 food crates (pictured right) scattered around the table, each could be picked up in the Action Phase (and would be dropped on death). Whoever had the most food crates in their possession, or the most entities within 4″ of crates, at the end of Turn 6 would be the winner. To add another element I made the jail building an objective, since it represented a place of strength for the Neotechnoists, so again whoever had more entities within 4″ at the end would get the same value as 2 food crates.

To continue with the slightly custom rules, I decided to do a “Diagonal” deployment, which mean each posse could deploy in a table half made by drawing a line from corner to corner. This deployment will actually become official in v2.6 of the rules (more on that release later) in place of the current overly complex and overly pop-culture-y “Clever Girl”. Basically this:
DC-Lego-Battle-029

And to add to the Lego flavor I will be using yellow 2×2 Lego blocks to mark Moved & Acted instead of my usual tokens. If the Lego block is right side up (bumpy part up) then they Moved & Acted, if it’s flipped then they just Acted without moving. This also highlights that I REALLY need to rebuy my Litko tokens to say “Moved” instead of “Move”…bah grammar mistakes!
DC-Lego-Battle-027
Similarly I “based” each Minifig with a color coded 2×2 block to help them stand up.

Posse – Good Ol Raiders – 150 IP, $1,500 ND, 4 Traits – DOWNLOAD PDF or View in Saloon
We’re back to the classic text-names-on-posse-image era. Terrific looking group! No real plan or structure to the design, just picking a bunch of neat weapons and stuff that matches the Lego. Both Posses went for a cheap Dinosaur, and the classic approach of Neotechnoists taking herbivores (Runner) and others taking carnivores (Ripper). Also a lot of the names are not the most serious thing of all time…so a perfect fit for playing an already silly themed game with silly Lego :) You can hopefully tell I tried to put in some thought to the character of each Minifig, such as the “grumpy old man” Leader in Old Anderson. Similarly the rough bandit looking Gogocha and his “Lucky” trait since he seems like he’d survive rough patches. It’s a bit hard to see but Cool Kid has sunglasses on his face, and obviously a hip hat, and the “Inspiring Shot” trait to match his big ego. One Handed Bernard is one of my favorites, since obviously he’s missing a hand (pulled him outta the Lego box like that), but has clearly been scarred by the experience and now wears a helmet everywhere and carries only a shield to desperately protect himself from further harm (and in the game is the only one in the posse who wears Armor).
DC-Lego-Battle-018

Posse – Thermopolis Outpost Residents – 150 IP, $1,500 ND, 4 Traits – DOWNLOAD PDF or View in Saloon
Again no real plan, sort of just went with weapons that seemed to fit the character of each Minifig. Usual smattering of traits, and only a few noticeably lower Hitpoint members compared to the Duster posse. And the “SP” for the Leader Drapkin and his wife Antoinette I decided off the cuff to mean “Sergeant Primary”, which sounds like a very Neotechnoist outpost kinda rank. And yes, Mr. The Plague is a Hackers (1995) movie reference. Similarly Hank “Mars” is because that Lego chestpiece used to be the Mars faction back in the 90s. Similarly Frosty is from the ice faction. In true Neotechnoist fashion almost everyone is wearing a sci-fi helmet. I also made the Leader look more supporty (and have traits to match) by having a walkie-talkie and a “stick of command” (which is a Variable Pulse Rifle in the game, but I imagine it as sending out shocking waves or pulses from the stick).
DC-Lego-Battle-017

Starting Ugly!
So everyone deployed, with the Neotechnoists taking the “north” half of the Diagonal deployment, and the Dusters opposite that in the south. I think the Diagonal was a perfect choice for this terrain setup, because a lot of people could start right in the town in buildings, instead of having to trudge forward. I actually could see the Dusters coming into town peacefully, walking around a bit, and then BLAM just starting to shoot and sow chaos.
Here’s a bunch of pictures of how everyone setup:
DC-Lego-Battle-031DC-Lego-Battle-036DC-Lego-Battle-037DC-Lego-Battle-038DC-Lego-Battle-041DC-Lego-Battle-043
Clearly some initial setup right by objectives with the intent to secure a food crate early on. Also with the Diagonal there were a lot of nearby enemies which should make the first turn intense (spoiler alert: it did! :) ).


Turn 1 – Let’s Lego Party!
The Neotechnoists managed to get the first Initiative, so Frosty moved back to the safe cover of a hill and bonus support of Hank Mars. Bernard shifted forward behind a wall, likely figuring to hop the hill next turn and attack.
DC-Lego-Battle-046DC-Lego-Battle-048

On the opposite end of the table the Neotechnoist Leader Drapkin, astride his Runner mount “Eggy”, grabbed a food crate and moved far into town, behind the cover of a building. But guess who was waaaaaiting for him behind the building? Keel Greenpants and his massively oversized gun!
DC-Lego-Battle-050DC-Lego-Battle-052

Back to the west side and the “duel at the hills”, the Duster dinosaur crept forward and tried to Charge 3″ into Frosty. Which meant of course that I ended up rolling a 2 for distance and failing to reach combat. Nearby behind the jail building, Cool Kid did a bit better and made his Charge (funnily enough ended up being 3″ distance as well) and started Scything ol’ Frosty. Those chainsaw thingies look hugely menacing. Also ironic because the Lego set they came from was the same ice stuff as Frosty is built from.
DC-Lego-Battle-054DC-Lego-Battle-056

Meanwhile in the center of the town a duel was emerging between Gogocha for the Dusters and Antoinette for the Neotechnoists. What was really interesting is both had non-traditional weapons of a Laserbow 60 and Big Blasterbow respectively. Should be a good one! Antoinette didn’t want to be the first to leave Cover so the food crate right outside sat untouched for now. This shootout makes me REALLY want to build some roofless (or removable roof) buildings for traditional 28mm miniatures.
DC-Lego-Battle-059DC-Lego-Battle-064


Turn 2 – Outpost Firefight
This turn started with the first death of the game, and that was thanks to Cool Kid slashing Frosty down. Thanks to the deployment melee was quite viable this match. Since Cool Kid uses his Action to attack and take Frosty out, he could still Move right into his next target: Hank Mars
But Mr. The Plague, after grabbing a food crate last turn, had walked down from his hilltop perch and now had a clear shot at Cool Kid. He managed to hit and force a Bravery Test from Cool Kid, which he failed (the punk!). Bernard, having heard the muffled screams from the other side of the hill, and remembering his own horrible dismemberment, climbed up and fired down into Hank Mars.
DC-Lego-Battle-066DC-Lego-Battle-069DC-Lego-Battle-071DC-Lego-Battle-075

Meanwhile in the middle of the town the Neotechnoist Leader moved in. First he motivated his Antoinette with the “Get Up” trait, which restored her from 2 HP to 7 HP (that Laserbow 60 hurt). Then he fired at Gogocha to even the odds. But Keel Greenpants was still nearby, having fired and dropped back down from the building rooftop (otherwise he’d have a Shot in the Back at Drapkin). After grabbing a food crate the Duster Leader Old Anderson was slowly truddling his way to the fight, and actually was barely in range this turn to fire at the Neotechnoist Drapkin or his mount.
(Apologies for the wacky spacing and sizing on the images, I’m just lazily doing WordPress Medium size so horizontal vs vertical clearly doesn’t match)
DC-Lego-Battle-078DC-Lego-Battle-079DC-Lego-Battle-080DC-Lego-Battle-083DC-Lego-Battle-085DC-Lego-Battle-087

And finally the Duster dinosaur Tangy Fangy, a Ripper, figured that One Handed Bernard had Hank Mars handled (bad pun). But Mr. The Plague would keep raining fire down from a distance, so that’s who Tangy Fangy moved to engage instead.
DC-Lego-Battle-092DC-Lego-Battle-093


Turn 3 – Wait Weren’t There Objectives?
Speaking of One Handed Bernard, guess who opted to Activate first after the Dusters won Initiative? “Say Hank Mars, what’re your Hitpoints at? Hmm, ever been hit by a 3GJ Auto Shotgun at Short Distance?”
DC-Lego-Battle-095DC-Lego-Battle-098
After killing Hank Mars, Bernard was very close to a food crate (somewhat stained with melted Lego Minifig).

On the other side Eggy wasn’t looking so good, nor was his passenger Drapkin (who had taken the brunt of the Duster fire). But wanting to protect Mr. The Plague, the pair rode forward and unleashed on the Duster Ripper dinosaur. First Drapkin shot, then Mr. The Plague fired his backup 1GJ Pump Shotgun, and suddenly Tangy Fangy the dinosaur had two Panic tokens and a sliver of health.
DC-Lego-Battle-101DC-Lego-Battle-108

But like a well trained bloodhound, Keel Greenpants was still hot on the trail. From beneath the reins of the dinocart he took an almost-out-of-range shot at Mr. The Plague and brought down the sharpshooter.
DC-Lego-Battle-112DC-Lego-Battle-111

Back in the middle, Antoinette was wounded and alone. She had backed herself into a corner of the building (thankfully without windows), which meant Gogocha and Old Anderson had to advance out of cover to try to eventually reach her. Gogocha could still reach a fence at least (and look awesome behind it).
DC-Lego-Battle-117DC-Lego-Battle-115

Here’s the state of the table at the end of this turn:
DC-Lego-Battle-118


Turn 4 & 5 – The Noose Closes
First of all the Neotechnoist Leader Drapkin continued his western run and ended up in the junkyard, hoping to have one turn without getting shot. At this point he had basically traversed the long side of the table.
Also I thought I’d mention the awesome orange semi-truck is actually from a new Lego set (whereas everything else I have is from my childhood). My wife bought a pair of 3-in-1 Creator sets recently as something fun to do, so this one is from the Sunset Speeder box. Being a fan of Euro Truck Simulator 2 a semi was obviously what I’d keep the set as (the other option being a convertible sports car and an F1 racer car).
DC-Lego-Battle-119DC-Lego-Battle-122

Knowing that her turns were numbered, Antoinette decided to risk a shot at Gogocha, which meant leaving the safety of her building corner. The “Get Up!” heal from Drapkin meant she likely wouldn’t get one-shot killed at least.
The shot paid off, as Gogocha needed a Bravery Test and failed, so he’d be Fleeing.
Her husband was in an even more precarious position as One Handed Bernard, the seemingly unstoppable shield wielding, helmet wearing, disabled man fired super accurately at Drapkin.
DC-Lego-Battle-123DC-Lego-Battle-125

As expected, the much shot Drapkin finally died. With his death a ripple of panic spread through the tattered remains of the posse (which at this point was Antoinette and Eggy the dinosaur). Antoinette actually failed her Bravery Test (necessary when a Leader is taken out of action), which is super important because she’s in a building. In the case of a Fleeing character NOT being able to move their full distance, they are Stunned instead. So basically she couldn’t run backwards through the wall, so she’d lose her Action instead. More or less a death sentence, and also a lucky save for Gogocha who would have died after another shot.
DC-Lego-Battle-129DC-Lego-Battle-132DC-Lego-Battle-130


Turn 6 – Where Do We Stand?
With fewer entities left alive the turns were just flying by.

Keel Greenpants focused on taking out the Eggy dinosaur, who was trying to snatch up as many food crates as possible to try to win-by-objective. Unluckily for Keel, he missed his shot AND had to Reload.
DC-Lego-Battle-133DC-Lego-Battle-135

Meanwhile Gogocha, confident in Old Anderson to finish off the Stunned Antoinette, moved backwards to secure the jail.
DC-Lego-Battle-137DC-Lego-Battle-139

Old Anderson was also confident in Old Anderson (even if he’s a bit senile and talks in the third person), so he strode into the building and shot point blank at Antoinette. To add insult to injury he actually did “Fan the Hammer”, so +2 Attacks AND Antoinette would be 2″ Pushed. Since she had backed into the corner (again) this would result in additional damage. Even with all that Old Anderson still barely managed to kill her, but a kill is a kill.
(Actually this was a slight rules error on my behalf, and perhaps something I should clarify in the rules text. You take 1 damage per 1″ Pushed, BUT that’s if you actually go that distance. If you’re backed up against a wall you don’t take the damage. Which meant Antoinette technically should have lived. She wasn’t carrying crates so the overall game outcome would have been the same though.)
DC-Lego-Battle-142

Feebly Eggy moved to the nearest food crate (dropped a while back when Mr. The Plague died).
DC-Lego-Battle-144

Outcome
In total the Neotechnoist “Thermopolis Outpost Residents” had 2 food crates (thanks Eggy!). But with the jail firmly in Duster hands, plus 2 crates on Old Anderson and 1 on One Handed Bernard (how fitting), the Duster “Good Ol Raiders” won the day! So in the words of a Duster: “Go hide inside your Wall, ya sissy Volkies! This here is our land!”

Anyway hopefully you enjoyed the report and visuals. I certainly had fun using Lego Minifigs and terrain. I think the flexibility of building and arming your Minifigs really helps for a “what you see is what you get” match to your posse. Also it’s a terrific gateway for kids to wargaming, since 28mm minis can be a bit intimidating (especially with the owner fussing over fingerprints or damage to their little pewter soldiers).

I think this match also highlighted that objectives need to DO something immediately beneficial during a standalone game, since otherwise everyone just rushes for them in the last turn and focuses on killing the enemy the rest of the time. I mention this same issue in the rules themselves, and recommend applying a Feature bonus. So I probably should have made it that you could re-roll 1 Attack die per food crate you’re carrying, or maybe re-roll Bravery Tests, or just use a normal Feature like “Ammo Container”.

Battle Report: Birthday Bash

I had a pair of fun games of Dinosaur Cowboys around my birthday. The first was with my gaming group and the second was having my parents try the game.

First Match – Friends
DC-Birthday-Bash-Friends-0001The first match was a 4 person team game with 2 people per team. Each team had one new player, who got a melee based posse, and then another player who had taken part in the Battle to Seattle campaign.

We used a simple Edge deployment, and the objective was basically “Smash and Grab” but with 5 objectives (dinosaur eggs in this case) spread evenly across the table. Having a dinosaur egg in your possession meant you could re-roll 1 die per carrier activation. The game was set to last 6 turns with a possible extra 7 turn on a D12 roll of 7+ at the end of the 6th turn (which we ended up having). And finally the building in the middle was set to collapse one activation into turn 5 (which the players didn’t know in advance).

The posses involved were…
Team 1: Sundance Stompers and Sassy Slashers (new player)
Team 2: Death Snakes and Path of Rage (new player)

The game went well, Team 2 pushed forward early with their dinosaur and Path of Rage posse, and held back on their left flank with the Death Snakes. Team 1 had the Sundance Stompers in reserve on their right flank, and the Sassy Slashers were fairly outnumbered for the first bit of the game. In the end both teams had 2 eggs each, but the Sassy Slashers were able to dive their dinosaur into the garden to get the last egg. The dinosaur died, but the Sundance Stompers leader was right nearby to pick it up and run far enough out of range. So in the end 3 eggs and the victory for Team 1.
Since I was playing with friends I didn’t take a zillion photos, but the one above should give you an idea of how the table was setup.

Everyone seemed to enjoy the game, although one new player would have liked to roll more dice (like the fistfuls in Warhammer 40,000), so I’ll have to stick to 6 attack and up weapons for him in the future, haha.

Second Match – Family
This game was a couple of days later but I used a very similar table setup. I swapped the Mordheim inn building for my new resin structure (still need to paint it), and also a hill on the side for my old aquarium terrain that looks like an Indiana Jones ruin.

DC-Birthday-Bash-Family-01

Anyway like I said this game was between my parents, who haven’t really ever played a wargame. So I left out a few rules, mostly around Traits and Dinosaur Panic, and I didn’t list all the weapon special abilities until they were relevant. They both seemd to take to the rules well and enjoy the game. I took a few more pictures during a break.

The two posses were: Sarge’s Lost Platoon vs Meadowlarks

DC-Birthday-Bash-Family-15The setup was similar for this game, using the Edge deploy, but a single Capture objective instead of the Smash and Grab approach from the previous game. So whoever had the most living entities within the resin ruin or garden (anything inside the fences) at the end of turn 6 would win. No special rules or cases otherwise.

Both posses defensively manuevered for the first couple of turns, but eventually the Meadowlarks dinosaur leapt forward with a Charge into Jim Baker. The Lost Platoon decided to focus all fire on the Fin dinosaur, who was eventually brought down after a full turn and a bit of shooting. But Jim Baker had died as the first casualty. Inside the building Preacher Pike from the Meadowlarks was the first person in, but he was charged by the enemy Raptor and slowly brought down to 1 Hitpoint.
Near the end of the game the Meadowlarks were able to bring Alizzar and Sarah Love into the building, which meant they had 3 entities inside. The Lost Platoon moved The Red Stinger from his sniper perch on a far hill a bit too late, and he wasn’t able to reach the building in time. Their leader Sarge was also inside the building, but outnumbered and unable to kill enough targets. So in the end the Meadowlarks won!
The Lost Platoon was close though, as Preacher Pike had 1 HP left, and Samurai Jack (the Meadowlark leader) had 4 HP left, so one good shot on the leader could have made everyone in the ruin Flee away. But that was not to be.
DC-Birthday-Bash-Family-12

Lots of fun all around, and nice to get some new people to try out the game.

From here I’ll be focusing on getting v2.6 of the rules done (again I’ll post details about that in the future), and maybe painting a few miniatures (although I need to rework my painting table so it’s more comfortable, right now I’m way too hunched over).

Battle Report: The Mountie Chase of Samurai Jack

Cavalier_townWell this week is my 30th birthday (gulp) so what better way to celebrate than a battle report? I mean, there are definitely better ways than tediously formatting text and images, but you know what I mean :)

So the motivation for playing a game was simple: I had 3 new miniatures, I had new fences, and I love Dinosaur Cowboys.

Of course a little narrative goes a long way for giving a greater meaning to the conflict. So I took my usual approach of choosing a random small town in the USA, thinking about the posses involved and their motivation, and making a simple backstory from that.

Location
First of all, the place: Cavalier, North Dakota. You can see it on Google Maps here, and they actually have a nice little quaint town website. Apologies if that sounded condescending, I actually really like the traffic cam of their main street, looks like a nice mellow place. The town actually reminds me of the recent Arnie movie The Last Stand (I don’t care what the critics say, I enjoyed it). Plus, simply put, the name of the town is awesome.

The Villains
DC-Cavalier-Border-Battle-0017Obviously my new samurai-with-a-shotgun mini would be used. He looked like a bandit and highway robber straight up, especially when I dubbed him “Samurai Jack”. I could see him living up in Canada (the border of which Cavalier is very close to), hiding out in the wasteland of ashes, and raiding across into what’s left of the States.
But who was Samurai Jack? Just a dude with an awesome name and a yin yang on his chest? Probably. But I figured anyone crazy (and lonely?) to live alone in a desolate, ruined, ash covered country wouldn’t like human contact much. So his only other non-dinosaur Posse member would be a robotic servant (yeah yeah I know I don’t account much for robots and androids in the backstory of the game) named Sir Javier. And to truly strike fear in his victims Samurai Jack would need an intimidating dinosaur, so T-Rex obviously.
For armament and customization I knew Samurai Jack would need a shotgun (to match the mini), and the top tier 4GJ Auto Shotgun fit well. A backup 100kW Peacemaker would give him some range (16″) until he could get to 9″ and unload with the shotgun. And even though he wouldn’t have any improvement to CTN a Short Sword was necessary for flavor and to match the mini. Then some really good armor (Mesh Armor), buncha Hitpoints, and RTN improvements. No traits for Jack though, he doesn’t need gimmicks to raid caravans.
Sir Javier was purely meant as a support type character. I gave him a Variable Pulse Rifle because it’s nice and versatile, and Boom Grenades because you never know when you’re gonna need grenades. I think of him like a robotic butler for Samurai Jack, haha. Anyway his traits really supported his supporty-ness with “Get Up” and “Retreat”.
Finally the T-Rex, “Red Dragon”, who got the “Sprint” trait. What that meant was if Sir Javier used “Retreat” on the T-Rex who also used “Sprint” the dino would be hauling it 13″ + 6″ for a run, so a 19″ threat range ignoring Difficult Terrain. Kapow!
I called the posse “Jack’s Highway Terrors”, and you can download the PDF of it here: Jack’s Highway Terrors – Roster.

The Story
For every villain there is a hero, and in this case Francis Fitzgerald (named after a real Mountie of course) would wrangle in Samurai Jack.
Obviously the borders are a little looser in the year 2285, so Francis would actually be a lawman modelled after the RCMP (Royal Canadian Mounted Police, with officers called Mounties for short). But he lived in the US, in Cavalier, as part of the “perimeter force”. Samurai Jack had been a constant, uncatchable thorn to the town, and finally after a farm was burned to the ground Francis had enough.
Pooling almost all the resources of the town, Francis hired a Neotechnoist sharpshooter, took his second in command Sergeant Kolden, fired up the old cop car (well, Thickskull dinosaur) named Herschel, and headed north to bring Jack to justice.
Of course as most stories are, this one would be told from the “heroes” side.

The Heroes
DC-Cavalier-Border-Battle-0022So as I said, the leader of this posse is Francis Fitzgerald, and he’ll be represented by the new red jacket wearing Mountie mini. The pistol I painted just SCREAMS Volcanic (mainly because it has a glowing orange energy chamber), so a 400kW Volcanic Pistol would do. Yes yes I know Volcanic pistols were lever-action and have nothing to do with actual volcanoes or lava, but this isn’t 1887. Francis seemed like the type of guy who could shoot the dots off a playing card at 100 yards, so “Knee Shot” and 6 RTN would be his specialty.
Next up was Sergeant Kolden, the only other Mountie in the area. I was considering just calling him Deputee or Corporal, but I could also see Francis feeling bad for “the kid”, and wanting to give him a better title and higher standing. Maybe it also helps Kolden stomach the fact that his day-to-day is saving Raptors from trees and he hasn’t had a raise in two years. Kolden would be represented by my classic Ghengis Khan / Russian looking guy.
Finally the hired Neotechnoist, a by-the-book, tight lipped sharpshooter dubbed Winter Council. The name suited the mini I had in mind, since I used the newly painted Necromunda Van Saar with his “sparkling Crest blue” armor. His stats were as by-the-book as his attitude, with 6 RTN and a 200kW Twin-Rifle. “Piercing Shot” as a trait seemed like a good pick, since he’s a sharpshooter after all.
Herschel would be a Thickskull, because I somewhat associate civilized towns and “good guys” with non-carnivorous dinosaurs. Maybe because they seem a bit softer or something? He got “Bonus Speed” to round out his Hustle distance.
So with that the Cavalier Perimeter Force was created. Grab the PDF here: Cavalier Perimeter Force – Roster.

The Setting
New fencessssssssssss! *laser show and pumping music*
DC-Cavalier-Border-Battle-0012DC-Cavalier-Border-Battle-0008DC-Cavalier-Border-Battle-0006DC-Cavalier-Border-Battle-0005

And a nice little 3’x4′ chunk of land. Considering Samurai Jack has “Highway” in his posse name, a road down the middle seemed fitting (and the fences fit so perfectly against it). Then the usual smattering of terrain, plus some of the real world fossils I used in my last report.
And yeah, I played the game solo. Which always sounds a bit sad to be playing with toy dinosaurs and rolling dice alone, haha. But I actually enjoy it quite a bit, as I get a chance to play whenever I want, without any rule arguments or stress. And on the flipside by the time this post goes live I will have had a nice team game of Dinosaur Cowboys with my gaming group of four other people (two of who have never played it before, always exciting).
DC-Cavalier-Border-Battle-0001
DC-Cavalier-Border-Battle-0004DC-Cavalier-Border-Battle-0014

I didn’t take detailed notes for this game, so I’ll do a broad play-by-play from memory and pictures, like I did for the last battle report.

Deployment and Objective
The setup was nice and standard: Edge deploy (on the long 4′ edges) and play until one Posse is wiped out. Sometimes a nice old fashioned extermination is great, especially when there is enough of a backstory to add flavor.

The Perimeter Force deployed in tight formation, with the hope of using the tall hill in front of them to shoot down into the road as the enemies advanced. Herschel the dinosaur would likely end up a distraction and method of stalling the enemy approach. Meanwhile on the opposite flank across the road Kolden waited, hoping to swing in from the side as the enemy approached. So basically, lots of “do something deadly when Jack gets here”.
The Highway Terrors went for an opposite approach with Samurai Jack deployed far to their left flank, and Javier and the T-Rex on the right. The hope was to jump the T-Rex right into threatening range, while Javier hung back as support and Jack moved up to get into shotgun range (and minimums of Winter Council’s rifle).
DC-Cavalier-Border-Battle-0032DC-Cavalier-Border-Battle-0035


Samurai Jack is Found, Attack!
The Highway Terrors won first initiative, and Red Dragon the T-Rex was off to the races. Like I said base Speed + Retreat trait from Sir Javier + Sprint trait from the T-Rex himself meant he could Move and Hustle a total of 21″ (while ignoring all Difficult Terrain, as dinosaurs do). So basically a big green missile with teeth instead of explosives. You can see how awesome the dive was:
DC-Cavalier-Border-Battle-0040DC-Cavalier-Border-Battle-0044
And also how Red Dragon would pretty much catch Sergeant Kolden no matter where he went.

But the T-Rex was now unsupported and alone with a huge gap to the rest of the posse. And across the road trouble waited:
DC-Cavalier-Border-Battle-0047DC-Cavalier-Border-Battle-0046DC-Cavalier-Border-Battle-0055

I mean, still, it’s a 2 Defense beast with 24 Hitpoints and a 1A-8D attack:
DC-Cavalier-Border-Battle-0052
(And yeah the framed picture on the wall is totally the Dinosaur Cowboys cover art)

DC-Cavalier-Border-Battle-0060The Perimeter Force responded by moving over Herschel to hopefully tie up the T-Rex (and also likely become a light dinner in the process). Sergeant Kolden edged as far back across the road as possible. Then the three humans poured everything they had into the T-Rex, but the titan still stood. Meanwhile the rest of the Highway Terrors advanced without problem, since the good guys had bigger (literally) problems to worry about.

Time to Eat
As expected the T-Rex tore into the Perimeter Force. Herschel tried to ram the side of the T-Rex, and more shots were put into the beast, but none of it compared to the amazing bite attack Red Dragon got:
DC-Cavalier-Border-Battle-0064DC-Cavalier-Border-Battle-0066DC-Cavalier-Border-Battle-0069

In case you aren’t familiar with the mechanics of the game (although I assume every reader has read every battle report for 5 years), the T-Rex succeeded at a Charge to reach Sergeant Kolden. This meant he got +1 Attack, so his 1 Attack, 8 Damage chomp became 2A-8D. He then hit with both dice, AND got a Critical on one, for a total of 11 damage. Guess how many Hitpoints Sergeant Kolden had? 10…so…hooray one shot kill!
DC-Cavalier-Border-Battle-0071(Also I like the far left image so much I’ll likely use it somewhere in the upcoming 2.6 version of the rules)

However at this point Red Dragon the T-Rex was a mess. I think he had ~10 Hitpoints left. But Sir Javier had the “Get Up” trait, which restores 5 Hitpoints to an ally in 8″. Since Red Dragon had jumped so far ahead the initial measurement was just a scratch out of range. Thankfully Sir Javier could angle his move differently, and since the measurement is to the closest point on the ally (which in the case of a big T-Rex adds a few inches), Javier was eventually able to use Get Up on the T-Rex and heal some Hitpoints.

At the end of the turn the board looked like this:
DC-Cavalier-Border-Battle-0075

Fall of the Dragon
Even with Sir Javier healing the T-Rex, the sustained fire of 2-3 members of the Perimeter Force, plus the slamming attacks of Herschel the dinosaur, meant the T-Rex died almost immediately this turn.

Samurai Jack was getting quite close to the action now, and ducked behind a massive fossil left in the middle of the road. After the T-Rex had fallen Francis the Mountie moved back behind the tall hill to block line of sight to the Highway Terrors. Similarly Herschel had cut across the road and into Cover, with the hope of swinging around and taking out Javier. As for Javier himself he stood behind one of the new fences and hoped to get a shot or two on the Thickskull dinosaur before it pummelled him.
DC-Cavalier-Border-Battle-0077DC-Cavalier-Border-Battle-0083

Tensions Mount
Samurai Jack was behind the big fossil, Francis and Winter Council were likewise behind a tall hill, which meant the game settled into an uneasy tension of “who will pop out first!”. Because if Jack rushed forward he’d take two shots from the waiting Perimeter Force members. Likewise if one of the good guys hopped up the hill they’d get a shotgun to the face.
Meanwhile Sir Javier and Herschel had basically started their own deadly game on the other side of the road. Herschel needed to reach Javier, obviously, but with the versatility of the Variable Pulse Rifle (it has “Power Settings” which allow it to change the configuration of Attacks and Damage from say 5A-1D to 3A-3D) Javier could likely hit the dinosaur wherever he went.
DC-Cavalier-Border-Battle-0088DC-Cavalier-Border-Battle-0089

The next turn the tension ended and blood was spilled. Herschel managed to Charge Sir Javier and do quite a number on him. But this also exposed the dinosaur to Samurai Jack, who could simply pivot in place and pour fire into the Thickskull, all the while remaining safe behind his fossil from the rest of the Perimeter Force.
DC-Cavalier-Border-Battle-0096DC-Cavalier-Border-Battle-0093
(You can see in the right picture how invisible Jack was from the position of Francis and Winter Council, even if they had climbed the hill)

Standing Alone
The Perimeter Force managed to get the first Activation, which meant Herschel could attack Sir Javier again and destroy the poor robot. After that Herschel could still move (so nice to have rules that allow you to attack then move, instead of being forced to move and attack in a set order) so he went into close combat with Samurai Jack, in the hopes of doing a bit of damage, holding the villain in place, and potentially letting the rest of the good guys get into a spot to kill Jack.
DC-Cavalier-Border-Battle-0101

Keep in mind Samurai Jack has a 4GJ Auto Shotgun, which gets the “Open Choke” special ability of +1 Attack at Short Distance. So Jack was firing at 5A-4D on Herschel, who had already taken a bite from the T-Rex and a pair of shots from Sir Javier. So when Samurai Jack held down the trigger the Thickskull just evaporated into a pool of superheated plasma (Fallout 2 style! :) ).
Which meant Samurai Jack was now alone against two enemies: Francis and Winter Council. The pair had used Herschel’s attack as a distraction to climb the tall hill in front of them, so they now bore down on Jack and waited for him to move from behind the rock.
The following turn Francis actually moved down from the hill to the other side of the fossil. Again the tension returned in what amounted to a standoff. Who would move first from their unassailable cover?! I could also imagine Francis yelling out “Throw down your gun, we have you surrounded, come out with your hands up” and other such cliches. I love it when the game ends up playing out the natural progression of the backstory.
DC-Cavalier-Border-Battle-0103DC-Cavalier-Border-Battle-0105

The Final Firefight
Samurai Jack had killed dozens of people and raided and pillaged his way across the north. He wasn’t scared of an 8 Hitpoint Neotechnoist in a blue jump suit! So Samurai Jack broke the stalemate and edged around the fossil and simply UNLOADED into Winter Council.
And the Neotechnoist folded like a book. In other words, Samurai Jack 1-shot killed Winter Council.
DC-Cavalier-Border-Battle-0107

And so the battle came down to the classic protagonist vs antagonist match up. But the firefight wasn’t in the favor of the good guys this time! Francis could hit Jack on 10+, or 9+ if he managed to get into Short Distance, using a simple 5A-4D weapon. Whereas Samurai Jack was hitting back on 8+ (7+ at Short Distance) with a 4A-4D weapon (or 5A if he could again get to Short Distance). And Francis only had 12 Hitpoints while Jack had 14.
Having his whole Perimeter Force wiped out, and now facing the terror of the highways, outskilled and outgunned, Francis wasn’t in the best situation.
DC-Cavalier-Border-Battle-0110
(Keep in mind these are actual gameplay photos, not posed. So the game literally came down to a dual in the street between the main hero and villain)

Then an amazing miracle happened to save Francis’ life. He rolled AWESOME:
DC-Cavalier-Border-Battle-0113DC-Cavalier-Border-Battle-0115

Oh 9+ at Short Distance you say? Let me hit you 4/5 times for 8 damage says Francis! Samurai Jack did the complete opposite and actually had to Reload his Auto Shotgun (that’s why he has the Reload token in the second picture).
And if the first shot from Francis seemed good, look at that second one! Hit 5/5 with a Critical Hit for a total of 10 damage!

So on that cold morning on an empty street north of Cavalier, the lone Mountie Francis Fitzgerald found and dueled the notorious Samurai Jack and was victorious. Time to take the villain back to Cavalier to pay for his crimes!
DC-Cavalier-Border-Battle-0118

So Fun
That was fun! I said it above as well, but I’ll re-iterate it here (in case you just scroll through the pretty pictures, which is fair :) ). I really love it when game mechanics and the flow of a battle end up exactly how you hoped they would. In this case the backstory was a classic matchup of cop vs robber (more or less), and to come down to a duel in the street was too perfect. I remember one of my Windy River campaign games having a similar outcome, where I had setup a caravan raid (using the Line deploy) and it felt exactly like the frantic, chaotic mess getting attacked while spread out in the jungle would be.
I always take such gameplay-fits-narrative (or supports the narrative, however you want to word it) as a good sign for the state of the rules. I also am happy that, at the end of the day, I wrote and developed Dinosaur Cowboys to be the game I want to play. Sure I like suggestions and feedback, and enjoy hearing of other people playing the game, or showing to to friends, or whatever. But in the end my goal was to design my own favorite game, and so far it’s worked wonderfully. I mean, it took ~5 years of on-and-off work, but still!

Battle Report: Get to the Flapper!

ChoppaFirst of all, how has it been over 6 months since my last post?! Well, after the Battle to Seattle campaign and v2.5 release I took a bit of a breather from Dinosaur Cowboys. Then before you know it Christmas came around. And then here we are in 2015. Like I mentioned in my last post my wife and I had a kid, so that’s also been a big factor. Also getting into the computer game Euro Truck Simulator 2 (of all games?!) and back into Awesomenauts also took some time. Regardless my apologies for the lack of posts here.

But I finaaaaally took the time to sit down and play Dinosaur Cowboys yesterday, which I’ve been meaning to do for quite a while. I used a single 3’x4′ board covered with a lot of terrain, as well as some real-life fossils that I collected when I was a teenager. The Flapper area was designed to look like a small landing pad/airport with crates and a wagon nearby.

There aren’t a ton of pictures or notes because I ended up playing with my wife, so there was less time to catalog every turn.

Deployment and Objective
First of all for the sake of simplicity no Features were used. The Objective was “Escort”, where a Civilian has to basically traverse the board and escape. The Deployment was “Layered” to give the impression of fighting through a series of enemy lines (with the unspoken exception that the Civilian would be deployed in the further region from their escape area).
To add a bit of narrative flavor I figured the Civilian is an Archaeologist who found a rare fossil in South Dakota. Before he could return to the nearest city with his find the Black Hill Raiders descended on him and took him prisoner. Now the Raiders are trying to move him to a Flapper (aka the Arnold Schwarzenegger “Get to the chopper Flapper!”) to escape the area, return to their hideout, and ransom the fossil (and Civilian) to the highest bidder. Local homesteaders the Birkshire Family get wind of this plot and assemble to stop the kidnapping. So a fun little twist on what’s normally “good guys escorting through bad guys”. Remember that Flappers are Pterodactyl replacements for airplanes in Dinosaur Cowboys.

Posses
Now the posses involved might sound familiar, and that’s because they are pulled directly from the 9-page Quickdraw Rules. Both posses have $1,000 and 100 IP, so pretty standard. The Black Hill Raiders use a Raptor and focus on melee, so the Layered deployment really helped them. The Birkshire Family have quite a few powerful guns like an Ultra Repeater, 500kW Walker Revolver (when explained to my wife she said “That seems like it does a lot of hits”), etc. So the match up should be interesting. I played the Raiders and my wife played the Birkshire Family.

You can get the PDFs here:

Setup and A Few Pictures
The game lasted 5 turns.
The Layered deploy REALLY made a mess of everything. There were some possible “Shot in the Back” moments right from the get-go, due to later groups ending up behind enemies.

For the Black Hill Raiders, Betty One-Eye (Necromunda Escher Juve figure) and The Blade (Dark Sun Mul figure) deployed far to the north of the Flapper, with their Civilian nearby. The plan is to use the mix of melee and firepower to escort the Civilian and distract enemies as they went. Opposite them from the Birkshire Family is Brother Jerrid (preacher figure) and the trusty Ducky mount Drake.
The final deployment zone belonging to the Black Hill Raiders consisted of Maynard Dereus, the shotgun wielding leader (Necromunda Ratskin Shaman figure). Behind him is Malice, the Raptor dinosaur. I had wanted to use the Papo “alternate” paint scheme for this dinosaur, but I think it got bent in the storage bin as it wasn’t standing up properly.
And the last deployment zone for the Birkshire Family, which included the Flapper, had Mama Hanna (Warhammer 40,000 Schaeffer’s Last Chancers figure) with her Ultra Repeater on a hill, and nearby Papa Jonas (bartender figure) blocking the east flank.

Here you can see a few views of the deployment:
DC-Flapper-Escape-0002DC-Flapper-Escape-0004DC-Flapper-Escape-0006
From left to right: View from the southern Flapper end of the table, focus on the middle deployment zones, high level view looking west (you can see how everyone ended up pretty much on one flank).

I can’t speak for the Birkshire Family, but I know my plan with the Black Hill Raiders was to split my enemies up. So the Raptor would move south towards the Flapper zone to lock down and distract foes there (classic dinosaur move really), while Maynard would flank into the northern split of Birkshire Family. The Civilian would Hustle every turn in a desperate attempt to stay in cover and not get killed.

Here are a few more pictures of deployment, since like I said once the dice started rolling the photos stopped coming.
DC-Flapper-Escape-0012DC-Flapper-Escape-0020
On the left you can see the northern deploy, with the Civilian visible (he’s the Prospector looking fellow in the blue hat). Notice how close the Ducky is…could get ugly right away.
On the right is the Flapper “end zone”, with a few supply crates and a nearby wagon. For the purposes of this game the Flapper and wagon dinosaur are just scenery and not something you interact with.

If you’re into fossils, well, here are some zoomed in shots of a few. They make great, thematic terrain pieces, just a bit drab in color (maybe they need a gloss spray). In general they vary from nice cover pieces to full on line-of-sight blocking hunks o’ rock.
DC-Flapper-Escape-0015DC-Flapper-Escape-0023

And finally some cinematic shots, first of the Black Hill Raiders leader Maynard overlooking the battlefield from his perch. Then a shot of Mama Hanna awaiting her foes in the Flapper area.
DC-Flapper-Escape-0013
DC-Flapper-Escape-0019After Action Report
As for the game itself, Birkshire started by Charging the Ducky into melee with Betty One-Eye, thankfully avoiding the Civilian for now. The Blade counter-Charged into Brother Jerrid, who was nearby on the hill. Of course he then promptly got blasted backwards when Brother Jerrid did “Fan the Hammer” with his 500kW Walker Revolver, followed by a Speed Reload. Maynard had a terrific Saber weapon, so in the interest of utilizing that as soon as possible he climbed down the cliff and moved towards the Ducky. Meanwhile the Civilian ran forward as much as possible. On the backline the Raptor moved towards Papa Jonas but couldn’t quite reach him and didn’t want to risk a Charge. Mama Hanna fired at the Raptor to begin whittling down his Hitpoints.

Turn 2 saw the start of some long dinosaur combats. The Ducky did consistent, but LOW damage to Betty One-Eye, while she alternated between pistol fire and using her Flail depending on what the best odds were. Meanwhile the Raptor Charged at Papa Jonas, but ended up missing nearly all of his 1A-5D attacks through the course of the game. The fact that Mama Hanna used “Get Up!” on Papa Jonas meant he survived the initial Charge and then stayed in combat to futilely try to use his Scattergun.
First blood went to The Blade, who Charged in again and managed to kill Brother Jerrid before being shot down by Mama Hanna in turn. A worthwhile trade as the Civilian had a nearly unobstructed run to the Flapper now, with just Mama Hanna standing in the way.

Turn 3 was much of the same, with the Civilian taking a shot from Mama Hanna. But his substantial 14 HP pool meant more than a few Ultra Repeater hits would be needed. Eventually Maynard Charged into the back of the Ducky, and the pain started…like really, really started. The Saber hits at 3A-6D, with +1 Attack on Charge, so you can imagine how long the Ducky lasted. He basically never cleared Panic and took 11 HP of damage on the first Charge. Unfortunately the Black Hills Raider player (me, haha) didn’t use the “Berserker” Trait for a glorious 6A-6D attack (which likely would have one-shot the Ducky, combined with the existing damage from Betty One-Eye).

Turn 4 saw the Raptor and Papa again fail to hit each other. Papa unfortunately needed a Reload on his pistol fairly early on in the fight, otherwise he could do more reliably done damage that way instead of a risky 1A-5D Scattergun shot hitting on 8+. Luckily the Raptor is hitting on 8+ as well. The Civilian is within a turn of the Flapper now, but took another shot from Mama Hanna on the way and is down to 5 HP. As expected the Ducky didn’t last another turn against Maynard’s wrath, freeing up the two Black Hill characters to move towards the Flapper area.

Turn 5 wrapped up some of the attacks. After killing the Ducky last turn, Maynard had moved south, and this turn could move again and Charge at Mama Hanna. The successful Charge dropped her like a sack of bricks. This left Papa Jonas alive, and the Civilian one Activation away from the Flapper. Summoning his courage the Birkshire leader left combat with the Raptor (who failed to Snap Attack, which would have killed Papa), and angled his line of fire to get one last shot on the Civilian.
Annnnnnd promptly missed! Because he is the Leader he can’t “Yeehaw!” himself, so with that, the Civilian activated, moved to the Flapper, and the game was over. Victory to the Black Hill Raiders!
Here you can see the final, desperate shot of Papa Jonas as the Civilian rounds the hill towards the Flapper.
DC-Flapper-Escape-0028

What’s Next?
Great fun all around! With deployment and rules explaining the game still only took about an hour. As you know I’m so happy with the state of the Dinosaur Cowboy rules. I do have some very minor tweaks (this is literally one of my TODO items: – Fix capitalization in Quickdraw rules for “100kw” instead of “kW”), but otherwise it’s all good.
I won’t make any promises of getting another game in on this table, or doing the Lego town I mentioned in my last post. Instead I’ll just say hopefully I talk to you again soon!

Battle Report: Fight for Flaming Gorge

Encounter Overview
Flaming-Gorge-sceneryIt’s been a long while since a non-Windy River campaign report. But enough factors compounded that made me want to run a standalone game of Dinosaur Cowboys. First of all I just finished one of my 3’x4′ boards, of which I’ll eventually have two that join together to give me 6’x4′ of playing space, or two side-by-side games. I also bought the new Papo Dimetrodon (“Fin” in this game) and Papo Carnotaurus (could be a bunch, but I ran it as a Raptor to match the Fin cost). I finished painting up my Prospector from a while back, and hadn’t used my painted Bartender mini in a game yet. And finally I got some great looking pre-painted crates from Pegasus Hobbies (not the prettiest website, but certainly the prettiest crates!) that match my older pre-painted barrels.
So yeah, time to sit down with some beef jerky, turn on some music, and play some Dinosaur Cowboys. In this case the nearly complete v2.1 that will be released soon.

The backdrop I used for the game was the Flaming Gorge area in southern Wyoming. There was plenty of water around the area, and it is close enough to the volcano and Neotechnoist city that I could see them sending an expedition to determine if the water could be a useful supply to them. And of course there would already be old pioneer Dusters there who are quick to defend (what they see) any intrusion on their land.

DC-Fight-for-Flaming-Gorge-0033aPosse: Flaming Gorge Explorers PDF roster / Saloon link
The Neotechnoist gang of three, who also had the Fin dinosaur (seemed a bit friendlier than the Carnotaurus, even though Dimetrodon was technically a carnivore). Pretty simple gang since there was only $1,200 and 120 IP to work with. High Defense all around and lots of nice weapons like Auto Shotguns.
For Traits I decided to try something fun, which was to buff out Corey, who had the Scattergun. Since it’s an Explosion weapon I figured Rapid Fire and Strain Weapon would go well together, to give him a 3A-5D attack, +2 damage to initial target, and 5 damage to all nearby targets.
Like I said, pretty “by the books” Neotechnoists.

Posse: Flaming Gorge Explorers by Carlo (0/120 IP, 0/1200 ND, 0/3 Traits)

Aura (Neotechnoist Leader)
DEF 2, RTN 7, CTN 8, BTN 7, SPD 4, HP 10, Eagle Eye.
Auto Shotgun, Quilted Armor, Small IRP.

Ace Floren (Neotechnoist)
DEF 2, RTN 6, CTN 8, BTN 8, SPD 4, HP 10.
High Burst Rifle, Cloth Armor.

Corey Jervey (Neotechnoist)
DEF 2, RTN 6, CTN 8, BTN 8, SPD 4, HP 10, Rapid Fire, Strain Weapon.
Scattergun, 80kW Six-Shooter, Padded Armor, Small IRP.

Blazeback (Untrained Fin Dinosaur)
DEF 2, DIS 6, CTN 7, PANIC D6, SPD 5, HP 17.

DC-Fight-for-Flaming-Gorge-0010aPosse: Flaming Gorge Pioneers PDF roster / Saloon link
This would be the Duster posse that is homesteading at Flaming Gorge. Again I went for a pretty standard spread of characters. The Prospector Leader mostly went melee / close focused. I wanted to try out the “Doctor” Trait some more so I gave their priest, Father Claude, two Small IRPs. They got the Carnotaurus dinosaur (as a Raptor) who I gave Inspiring Shot since that’s a great (if situational) HP recovery mechanism.
It’s always a tough call to go with 3 or 4 initial members, especially in a non-campaign game. But I figured 4 less well equipped and trained members was a better fit for the Dusters, and three specialized members were better for the Neotechnoists.

Posse: Flaming Gorge Pioneers by Carlo (2/120 IP, 0/1200 ND, 0/3 Traits)

Prospector Wippert (Duster Leader)
DEF 2, RTN 8, CTN 6, BTN 7, SPD 3, HP 12, Berserker.
Club, 80kW Six-Shooter, Cloth Armor.

Chieko Barman (Bandit)
DEF 0, RTN 6, CTN 8, BTN 8, SPD 4, HP 10.
Light Repeater.

Winterberg (Duster)
DEF 0, RTN 7, CTN 8, BTN 8, SPD 4, HP 10.
Laserbow.

Father Claude (Duster)
DEF 1, RTN 7, CTN 8, BTN 8, SPD 3, HP 11, Doctor.
Double Barrel Shotgun, Small IRP, Small IRP.

Gorgon (Feral Raptor Dinosaur)
DEF 1, DIS 5, CTN 6, PANIC D6, SPD 6, HP 18, Inspiring Shot.

New Table and Crates
First of all, the new boaaaaaaaaard! Oh wait, it’s actually hard to photograph on it’s own because of the glare, haha.
DC-Fight-for-Flaming-Gorge-0002
The board is 4’x3′ particle board, which is heavy and stable so overhanging from the table isn’t a big deal. I was originally going to go with MDF but it’s super heavy, sometimes bows, and over-absorbs liquids. I drilled some wooden dowels onto one side so that I can securely join this board with the other half. Then I put the board down on a black non-slip mat.
As for painting there is a nice mottling effect from three colors of spray paint. I started with a base layer of dark green, then did some lighter highlights with a brighter green, and then finished the coloring off with a gentle dusting of brown to give it some dirt patches.
After that I spray painted my wooden edging a bright blue (the can said “Lagoon” which was appealing). The wooden edging is just pre-fabricated textured wood from a craft store. I glued the painted strips around the edges to protect the interior particles. Then I gave everything a solid double spray of protective clear coating. The board was ready to go!

The other newness are the pre-painted crates I got. I actually had to do a bit of touch up on them since the sharp corners tended to chip paint. After I touched up the corners I gave them a protective coat as well to prevent the problem in the future (hopefully). They’re a great size though, in scale with my existing barrels, and perfect for a wild west theme.
DC-Fight-for-Flaming-Gorge-0030

Deployment, Objective, Features
Now back to the game.

Since Flaming Gorge has a bunch of water, and that was a central focus to this encounter, I used my textured road pieces to represent the river. Yes, I’ll eventually get some simple blue cloth so it at least LOOKS like water :)
The river used two new Features from the upcoming v2.1: “Strong Current Water” and “Populated Water”. From the rulebook:
Strong Current Water: For every 1″ of Movement within the water, the entity is placed 2″ towards the nearest table edge.
Populated Water: Upon entering or Activating within the water, make a 2A­2D, CTN 7 attack against the entity from all the vicious dinosaurs lurking under the surface.
In other words a fast flowing river full of biting dinosaurs.

The alleviate the danger of crossing the river I used the crates and barrels like a bridge. The idea was they would be Difficult Terrain to climb up, but once on them you could cross at a normal pace. But then to make the crossing just as dangerous (in hindsight…perhaps TOO dangerous) I made the barrels have the Exploding feature (another new one from v2.1). Again from the rulebook:
Exploding Container: Can be attacked with statistics of 0 Defense and 4 HP. When taken Out of Action apply a D6″ Explosion that does 5 damage, and then remove this container from the table.

To make sure everyone was forced to suffer through this horrible river and deadly bridge, I put an objective marker on each crate bridge, for a total of 3, and made the overall Objective “Capture”.

For Deployment the type “Deep Edge” was used, going from the short table edges. This meant both sides would have a forward scout ahead of the rest of their Posse. I figured this fit with the theme since the Neotechnoists would be road wary and the Dusters might be out patrolling their land.

In this case the Duster Pioneers used Winterberg as their scout. The Neotechnoist Explorers used Aura as their scout. Also Prospector Wippert and Father Claude started mounted on Gorgon the Raptor.

The Dusters got the south side (nearest me) and the Neotechnoists got the opposite north side (near the skeleton). I really need to start putting a compass on my pictures.
DC-Fight-for-Flaming-Gorge-0007
DC-Fight-for-Flaming-Gorge-0039DC-Fight-for-Flaming-Gorge-0038DC-Fight-for-Flaming-Gorge-0036DC-Fight-for-Flaming-Gorge-0034

Game Start
I tried to keep some notes, but not as much as usual since I mainly wanted to enjoy my new scenery, minis, toys, and rules. And enjoy it I did:
DC-Fight-for-Flaming-Gorge-0041

Turn 1
As usual the first turn was basically “oh no I deployed like this but the enemy deployed like this, time to react!”. So mostly people just shuffled around and generally forward.
Gorgon stopped a bit short of the water since he couldn’t quite make it across with a Hustle. That would have meant TWO attacks from the Populated River, since he’d suffer one for entering and one for Activating inside (next Turn).
Winterberg crossed the far right bridge to try to get his Laserbow into range, and also lock down an objective.
On the other side Aura almost had a shot at Winterberg, but would have had to aggressively move forward to get in range. Instead he played it safe and moved behind the cover of a tree.
In general I tried to less cover this time to force some shots in the open, for a change of pace.
DC-Fight-for-Flaming-Gorge-0043DC-Fight-for-Flaming-Gorge-0044

Turn 2
And so the bloodbath begins.
The Neotechnoists won Initiative and Corey moved as far ahead as possible to barely be in range of the barrel by Winterberg. When I had moved Winterberg I actually forgot about the Exploding barrels, so he ended up awkwardly close to a dangerous barrel. Corey managed to hit the barrel which exploded glorious, doing 5 damage to Winterberg who failed his Bravery Test and was Fleeing. Normally this is just a minor setback, except Winterberg would be Fleeing backwards into a river full of hungry dinosaurs!
Meanwhile Gorgon aggressively moves across the river, but takes an unlucky Critical from the Populated River Feature for a total of 4 damage. This would be a theme for the poor dinosaur. The reason he moved up so recklessly was to get Father Claude (who was a passenger) adjacent to Winterberg. At that point Claude could use a Small IRP (plus his Doctor Trait) to heal Winterberg back to full HP.
When moving Aura I almost forgot about the OTHER river feature of Strong Current. He was trying to move to cross the river, compared to the crate bridge (after seeing the hazardous barrels explode), but then I realized the Strong Current would just push him into the barrels anyway. And even if he did get across he’s outranged by Chieko Barman. So instead Aura cut across towards Winterberg and the dinosaur to try to help there.
At this point Winterberg Fled backwards, into the river, taking 3 additional damage and getting pushed almost off the table!
DC-Fight-for-Flaming-Gorge-0046DC-Fight-for-Flaming-Gorge-0048DC-Fight-for-Flaming-Gorge-0049DC-Fight-for-Flaming-Gorge-0053

Turn 3
Forward they surge!
Gorgon starts by crossing the second river, taking another 3 damage in the process (ouch!). The intent was to flank the Neotechnoist dinosaur as well as Corey and eventually Aura. Unfortunately Father Claude had some bad luck shooting. He tried to use Both Barrels against Corey at a 10+, but missed with everything. The Prospector Leader riding nearby used his Yeehaw! ability but Claude STILL missed. So much for the opening shot.
In return Corey moves to Short Distance, uses both his Rapid Fire AND Strain Weapon Trait, and then blasts Gorgon. He hit for a Crit plus one, which with the Strain Weapon Trait resulted in 10 damage to Gorgon! Just as deadly was the Explosion ability of his weapon, which did a further 5 damage (each!) to the passengers. Explosion weapons are the bane of heavily loaded Dinosaurs, since all the passengers get hit when the mount does. To top it all off Father Claude is now Fleeing, which means he’ll steer Gorgon BACK across the river.
Before the river dinosaurs can gobble up Gorgon, Aura decides to try to finish off the clump of enemies. He moves forward to shoot the Prospector at 9+, misses ALL his shots, AND needs to Reload. Dangit Auto Shotgun :(
Meanwhile Ace moves to Long Distance against the Barman, hits easily for 5 damage, and makes him Flee.
And finally Blazeback tries to Charge to finish off Gorgon, but fails by a measly 1″. The lucky Gorgon dinosaur survived for another turn…but just barely.
DC-Fight-for-Flaming-Gorge-0055DC-Fight-for-Flaming-Gorge-0057DC-Fight-for-Flaming-Gorge-0060DC-Fight-for-Flaming-Gorge-0062

Turn 4
The Dusters are in a precarious position at this point. Their main push from the mounted Dinosaurs has basically crumbled. Even their long range support (Barman) is now Fleeing. And Winterberg is basically feeding himself to the river dinosaurs after having to cross it so many times.
The Neotechnoists win the first Initiative, which is brutal for the Dusters since they’ll get another shot at Gorgon before it can escape. And who better than Corey. He moves slightly around the side, this time shooting at Father Claude. He hits and kills Claude for 6 damage, and the Explosion also kills Gorgon (from the 5 damage) and leaves the Prospector Leader at 2 HP! I think the MVP for the Neotechnoists this game is: Explosion guns vs mounted dinosaurs!
Desperate to get revenge, Prospector Wippert moves next. He activates Berserker, Charges successfully at Corey, and hits him for 6 damage with his Club (well, Shovel :) ), which makes Corey Flee.
But there is plenty of support nearby, as Blazeback moves forward and bites Prospector Wippert in half. Seeing their Leader die makes BOTH the remaining Dusters Flee.
Winterberg is next, and after Fleeing backwards he shoots desperately at Blazeback, needing an 11+. A lucky 1 Attack Critical hits for a total of 7 damage. But it’s a mere shadow compared to the stomping the rest of the Duster posse received.

At this point the game was pretty much over, and with only 1 Turn until the Objective turn limit I decided to call the game in favor of the Neotechnoists. Talk about rebuffing a charge!
DC-Fight-for-Flaming-Gorge-0066DC-Fight-for-Flaming-Gorge-0067DC-Fight-for-Flaming-Gorge-0069DC-Fight-for-Flaming-Gorge-0071DC-Fight-for-Flaming-Gorge-0073DC-Fight-for-Flaming-Gorge-0075DC-Fight-for-Flaming-Gorge-0078

Game 2 Rematch!
Since the first game was so quick, and the night was so young, I decided to keep the terrain, rework the Features and Deployment, and have another game!

This time the Barrels AREN’T Exploding, and do nothing but provide Cover as normal.

The crates are fancier and use the Sturdy Container and Ammo Container Features new to v2.1:
Ammo Container: Adjacent characters can ignore a roll that necessitates a Reload.
Sturdy Container: Adjacent characters can attack with a ranged weapon with a +1 Attack bonus.
So in other words really good for ranged characters!

The water also got a change, to become a Noxious Stagnant river:
Stagnant Water: +1 Defense to any entity attacked within the water.
Noxious Water: Upon exiting the water the entity is Stunned.
So basically nice and defensive if you’re in the river, but a bit tricky to leave the river. I like combining Features like this.

For the Objective I kept the same objective markers and “Capture” Objective.

The deployment used was “Deep Corner”, from the long table edges. Because both Posses could deploy up to the middle, and because the crates and river combination were so awesome (basically +1 Defense, +1 Attack, no Reload) the middle ended up being a cluster of ranged characters eager to use the features.

I took basically no notes, aside from writing down that the game ran for 7 Turns. Here are all the pictures, then a brief recap from memory:
DC-Fight-for-Flaming-Gorge-0078DC-Fight-for-Flaming-Gorge-0081DC-Fight-for-Flaming-Gorge-0084DC-Fight-for-Flaming-Gorge-0101DC-Fight-for-Flaming-Gorge-0099DC-Fight-for-Flaming-Gorge-0097DC-Fight-for-Flaming-Gorge-0095DC-Fight-for-Flaming-Gorge-0094DC-Fight-for-Flaming-Gorge-0093DC-Fight-for-Flaming-Gorge-0091DC-Fight-for-Flaming-Gorge-0089DC-Fight-for-Flaming-Gorge-0086DC-Fight-for-Flaming-Gorge-0121DC-Fight-for-Flaming-Gorge-0118DC-Fight-for-Flaming-Gorge-0115DC-Fight-for-Flaming-Gorge-0111DC-Fight-for-Flaming-Gorge-0110DC-Fight-for-Flaming-Gorge-0107DC-Fight-for-Flaming-Gorge-0104DC-Fight-for-Flaming-Gorge-0103
Basically the Dusters played it a bit safer this game, trying to use the crates to snipe and not overcommitting early on. They did try to attack the crate “stronghold” the Neotechnoists had in the middle of the river, which went okay but also had a high casualty rate for the Dusters. The Neotechnoists couldn’t really effectively commit their dinosaur or Corey, which helped the Dusters survive longer. The combination of +2 DEF AND the +1 DEF from the river made shots hard for the Dusters though. In the end the game came down to some cat and mouse (thus why it went to 7 Turns) between Barman vs Ace and Blazeback. Ace basically sat back and let the dinosaur do the work though, since she was outranged by Barman (Heavy Repeater 14″ vs Light Repeater 16″). Barman desperately tried to take down the barely wounded Fin dinosaur, but a bad pair of shots meant the dinosaur reached melee. Then a bad loss of Initiative meant the dinosaur could KEEP in melee even after Barman Fled backwards.
In the end Ace survived with full HP, and Blazeback at a mere 3 HP. If the last Initiative roll had gone better, or even if Barman had been a bit luckier in his earlier shots, he probably could have brought down the dinosaur, and then maybe outranged Ace for the win.
But that’s not how it turned out, and the Neotechnoists took the game 2 rematch as well!

Search for the Antidote – Windy River Day 7

Well, it’s been a whiiiiile! The timestamp of the images for this battle report are from the middle of October! Then again I did have a grand total of 3 or 4 days free in all of December, so I’ve been a bit busy. Too much Mad Men, Robocraft, Simcity 4, family and friends, and gin. At least that’s the excuse I’m going to use :)

Anyway when we last left off the Drylands Expedition had helped defend Hyran Mine against Night Dagger raiders. During the fight Amparo was hit by a “Toxic Gun”, which infected him with a deadly poison. With barely a break to breathe, the posse immediately headed towards an outlying / forward post of the Night Dagger camp. Their intent was simple: get an antidote for Amp!
In addition a new member joined the posse, named Sarah Love, as talked about here. Since I last mentioned her I’ve painted 90% of the figure (mainly just need to finish the base and a few details), so hopefully I can wrap that up soon.

DC-Windy-River_Antidote-0006My notes for this battle are…sparse. As in not even a page. But the pictures speak volumes. I think the table looked really good this time, as I went for slightly lower hills, the black mat (to represent the dark hills around Hyran Mine), an old abandoned bus (which I always love), and best of all I got to use my new inexpensive roads! Brief sidenote, the roads are made by cutting out textured fabric from a local craft store. They look good (especially for the price) and the cobblestone really pops on them. I cut a few to be main roads and a few to be little side trails, so lots of variety. Now that I’ve (successfully) tested the roads I think I’ll try to get more fabric in the near future and make even more roads.

Table
I played on my usual gamesroom table, 4’x3′. I’m hoping to get two slabs of wood to make the table 6’x4′ at some point (so I can run two simultaneous Dinosaur Cowboys games) but for now it’s the classic size.
DC-Windy-River_Antidote-0002

Objective
The Night Daggers had to Destroy 4 casks of Anti-Toxins. If the Drylands Expedition could stop them from doing this, there would be enough antidote leftover to help Amp.

Deployment
The deployment used was “Quadrant”, although my rolls basically made it “Edge”, haha. Both halves of the Night Daggers deployed on the west side (with the bus) while the Drylands Expedition deployed opposite them. I was hoping for a true Quadrant battle, but like I said the deploy rolls didn’t end up that way.

Features
I had the Drylands Expedition start “Out of Supplies”, to represent their haste from running from Hyran Mine. That meant they would start with all weapons needing a Reload. So the first turn would be catching their breath and moving to better positions while reloading their weapons.
I also had the “Night” variant in effect, which would give some protection against Medium or Long range shots (basically a saving roll).
DC-Windy-River_Antidote-0003

Posses
Drylands Expedition – 1/179 IP, $2,000 – Posse PDF
Night Daggers Antidote Defense – 4/179 IP, $2,000 – Posse PDF
DC-Windy-River_Antidote-0009

Setup
The Drylands Expedition split Quidel with Rhodes and Sarah Love, and then Gibson, Amp, and Dwaal. The first half were in the south east quadrant, with the dino half were north of that (north east quadrant).
The Night Daggers split Lanecaster with Zeus to the south west quadrant, opposite Quidel and those fellows. Then Igel, Aletha, and Cobalt were in the north west quadrant opposite the Dryland’s dinosaur Dwaal.

General Report
In general the Night Daggers surged forward, trying to destroy as many antidote casks as they could. By the end of Turn 2 the newcomer Sarah Love was down, and both objectives near the Night Daggers side of the table had been destroyed. One of these was torn to shreds by their mighty dinosaur Zeus.
There was a great fight around the bus (as usual…that bus is awesome as a focal point), with plenty of moving and position for the best shot. Dwaal had rushed forward to try to slow the cask damage, so he proved to be a useful distraction.
On the south part of the table Quidel and Zeus duked it out around the third cask, with Quidel barely slaying the mighty dinosaur before the T-Rex could tear apart the cask.
Amp spent most of the game sniping from a building, but eventually no targets were in range so he advanced and had a bit of a long range duel with Igel.
Dwaal and Gibson eventually teamed up to do an aggressive flank and further draw the focus away from the fourth cask by Amp’s building. With Quidel and Amp closing from the other side the Night Daggers were in trouble.
However everyone was pretty beat up by this point so both sides had heavy losses in each of these late game turns.
Finally Amp engaged the Night Dagger leader Lanecaster, who had slightly hung back earlier due to her short range, and she was able to take Amp out before help arrived. But Quidel showed up soon after to finish off the enemy leader.
In the end the Drylands expedition were able to offensive defend the last two casks by pushing back the Night Daggers.

DC-Windy-River_Antidote-0011DC-Windy-River_Antidote-0013DC-Windy-River_Antidote-0015DC-Windy-River_Antidote-0018DC-Windy-River_Antidote-0021DC-Windy-River_Antidote-0023DC-Windy-River_Antidote-0025DC-Windy-River_Antidote-0028DC-Windy-River_Antidote-0029DC-Windy-River_Antidote-0034DC-Windy-River_Antidote-0035DC-Windy-River_Antidote-0039DC-Windy-River_Antidote-0041DC-Windy-River_Antidote-0043DC-Windy-River_Antidote-0046DC-Windy-River_Antidote-0047DC-Windy-River_Antidote-0050DC-Windy-River_Antidote-0054DC-Windy-River_Antidote-0056DC-Windy-River_Antidote-0060DC-Windy-River_Antidote-0063DC-Windy-River_Antidote-0066DC-Windy-River_Antidote-0069DC-Windy-River_Antidote-0072DC-Windy-River_Antidote-0076DC-Windy-River_Antidote-0078DC-Windy-River_Antidote-0079DC-Windy-River_Antidote-0081DC-Windy-River_Antidote-0083DC-Windy-River_Antidote-0085DC-Windy-River_Antidote-0093DC-Windy-River_Antidote-0094DC-Windy-River_Antidote-0097DC-Windy-River_Antidote-0101DC-Windy-River_Antidote-0102DC-Windy-River_Antidote-0114

End of Encounter Process
Drylands Expedition had everyone except Quidel taken out of action. Ouch! In total they had 5 kills for a total of +15 IP and $150 (plus the usual $30 for winning) and the IP boost gave them another Trait. Luckily 2 casks were undamaged enough that Amp could be healed of his toxic infection.

Like I said, light notes compared to the usual blow-by-blow account!

The Wound and Injuries results weren’t that great for the Drylands Expedition. Amp and Dwaal managed to avoid a Wound, and Quidel’s old “Broken Knee” Wound healed up. But Gibson, Rhodes, and Love all took a Wound, as rolled below.

Wounds:
Gibson Crawford – Cut Feet (W)
“Crazy” Rhodes – Broken Hip (W)
Sarah Love – Shaky Hand (W)

New Resources: 16/194 IP, 180/2180 ND, 5/6 Traits

Flush with cash I decided to rework the Armor setup of the posse a bit. Quidel handed down his Cloth Armor to Sarah Love (no cost), and then bought himself shiny new Bone Armor for $150, leaving the posse with $30. I decided to hold on to the leftover cash for now.
In terms of IP the characters are getting to the point where upgrades are pretty expensive. For example to go from RTN 6 to 5 is 22 IP (but also really awesome and tempting). Instead I gave Quidel another boost, and finally got his Speed up to 4 (from 3) for 10 IP. That left 6 IP, a convenient number considering that is the cost of +1 HP. So Crazy Rhodes got +1 HP, boosting him from 11 to 12 HP.
Traits were a bit tougher, mainly because there are so many I want to get, but I had to narrow it down to a single choice. I considered giving another Trait to Dwaal, perhaps even more HP or some Speed. I considered going for a second tier (II) Trait for someone, maybe Amp with “Inspiring Shot II”. Maybe “Eagle Eye” for Rhodes to push his range out a bit further. An Active Trait was the most appealing, maybe “Retreat!” for someone who normally is near Dwaal, so that the dinosaur could get Speed 14 for a turn! The flat damage Traits are always nice too, and come in handy in pretty much any situation (like Quidel’s “Knee Shot”). “Quick Hands” or “Rally”, “Speed Reload”, the list of things I want is endless. But time to decide (I’m literally sitting here with The Saloon open as I type this, trying to figure out a choice). And that decision is “Rapid Fire II” for Sarah Love, giving her the possibility of 6A-6D, which just might be enough for a one shot kill. Actually it’d be 7A-6D with the Dual Wield variant in play (which it is for this campaign).
I’ll need to boost up Gibson next time, I think, as he’s falling a bit behind.

Final Resources: 0/194 IP, 30/2180 ND, 0/6 Traits

Posse after updates: Saloon link or PDF link.

Next Up
After counter-raiding the outer Night Dagger camp and stealing the antidote the Drylands Expedition have their eyes set directly on the main Night Dagger camp. So the next campaign game will focus on a big attack through the layered defenses of the Night Daggers. I expect a lot of casualties and chaos.

Big Raid at Little Hyran Mine – Windy River Day 6

Another thrilling adventure in the Windy River test campaign. In this case the Drylands Expedition posse had just reached Hyran Mine, after facing some roving Savages mere hours ago.
The land had slowly been turning from lush jungle to blasted lava rock with looming hills and sparse vegetation. As the posse approached the mine they heard the roar of dinosaurs, blasts of weaponry, and shouts of command. Hyran Mine was under attack!

This was my second Dinosaur Cowboys game in my new games room, hooray! This was also one of the most…swingy? games I’ve played yet. Just when I thought one side was out of the running they’d make an impossible shot to come back. Definitely edge of the seat every turn. The game was also longer than normal because multiple posses were involved. As with any “natural deploy” scenarios I found this to be very thematic and fun, much like the older campaign game where a caravan was ambushed.

Encounter Overview
I wanted a large conflict at the mine representing a raid by the Night Dagger bandits (who camp across the mountains). So there would be two posses of Night Daggers involved. The first would be a complete and valid posse, aptly named Night Daggers Attack Force 1. The bandits would deploy on a random long table edge. They would be fighting Lynn and her gang named the Hyran Mine Defense Force, who deployed as if they were hauling ore and not expecting an attack.
At the start of turn 2 the Drylands Expedition would finally reach the table and deploy on the long table edge opposite the Night Dagger Attack Force 1 deployment zone.
Then at the start of turn 3 the Night Daggers Attack Force 2 would deploy from the short table edge furthest from the mine, to represent them being a second wave fresh from the bandit camp. Most importantly the Attack Force 2 would have “Toxic Guns” (same stats as the Auto Shotgun). The idea here is they are trying to capture a few Savages to be their own slaves. This second force didn’t have a Leader, and was just three people with the special guns.

Toxic Gun: Same statistics as “Auto Shotgun”. Anyone hit will receive a Wound (unless they get an antidote in 24 hours), and will automatically be considered Taken Out of Action at the end of the game (even if they were still alive).

Table Setup
I went for a thematic table setup, with stacks of terrain covering my aquarium volcano piece to sort of look like a mine. Then a long, loosely barricaded road leading from the mine to the foreman office (where Lynn lived). I put an orderly orchard in the corner that sort of ended up looking like an Italian vineyard. I also created a little supply area with tons of crates and barrels. Otherwise the terrain was pretty open with a few rocks and hills scattered here and there. As much as I love trees for scenery I tried to keep the total number down to represent the rocky nature of the mine. The actual mine was technically a “Gold Mine” Feature from the rulebook, but everyone was so busy fighting for their lives they didn’t have time to grab any extra Neodollars in raw ore.

General table overview
Hyran-Mine-1114

From left to right: Mine entrance, ore hauling road, crop orchard, supply cache
Hyran-Mine-1115Hyran-Mine-1116Hyran-Mine-1119Hyran-Mine-1121

Posses
Drylands Expedition (0/152 IP, 75/1700 ND): (PDF Roster) This posse should be familiar to anyone who’s been following the campaign. The latest upgrade was a Heavy Repeater for Gibson Crawford and a smattering of Hitpoint boosts.
Hyran-Mine-1122

Hyran Mine Defense Force (211 IP, 2160 ND): (PDF Roster) This posse would be treated as an ally of the Drylands Expedition, so they’d both use the same Initiative roll, could share Yeehaws!, apply beneficial Trait abilities to each other, etc. I went with a realistic mining force that was caught unaware compared to an optimized roster. Lynn Hyran is the leader so the “Rally” trait made a lot of sense for her. One of her guards is named Emmitt and he got a nice Double Barrel Shotgun for keeping the Savages in line. Then three indentured Savages, from those captured in a raid to others serving a crime sentence from the towns on the plains. Their names were somewhat stereotypical with Falls Hard, Cough of Thunder, and Many Stones. They had a variety of crude melee weapons and tools for mining (like a Bundle of Dynamite). The dinosaur for this posse is “Ore Hauler”, a Plated beast used to running massive bundles of raw stone from the mine.
Hyran-Mine-1124

Night Daggers Attack Force 1 (218 IP, 2470 ND) and 2 (141 IP, 1390 ND): (PDF Roster 1, PDF Roster 2) I wanted to go with a fairly optimized ranged gang for Attack Force 1 to really challenge the Drylands Expedition, since the last random encounter was so brutal for the melee opponents. The leader Classie has a solid Light Repeater and “Go For The Eyes”, which is a classic combination at this point. I went a different route for Frank by giving him TWO Double Barrel Shotguns so he can use “Both Barrels” on one and still have a duplicate weapon. In theory he could throw out 4A-5D twice in a row if he emptied both guns. Silverhorn has a crude Assault Rifle and Stun Grenades (with the “Thrower” Trait these are 3-15 distance). Luciano was meant to ride their dinosaur, so she was tough as nails with 4! Defense and 15 Hitpoints! A Whip seemed like a suitable weapon for a mounted cowgirl. Finally Viana was a dedicated sniper with the deadly 500kW Lever-Action Rifle and RTN 6. Finally the gang has a Terror dinosaur named “Hungry Cactus” with some bonus HP for a total of 27 HP.
Attack Force 2 had the simple goal of hitting as many people as possible with their Toxic Guns. All three members are pretty much duplicates of each other, with good Defense, a nice amount of Hitpoints, plenty of healing with the Large IRP medical device, and of course their Auto Shotgun that would stand-in as Toxic Guns.
Here’s the whole ugly mess of them:
Hyran-Mine-1128

Deployment
As was mentioned the Hyran Mine Defense Force deployed as if today was any other work day. That meant two Savages escorting Ore Hauler, Emmitt the guard overlooking the process, Lynn overseeing her mine from the door of her house, and another Savage further ahead of the convoy, perhaps to bring Lynn some news.
Hyran-Mine-1131

Then from the East (if North is towards the mine) the Night Daggers Attack Force 1 appears. They deploy up to 6″ in, and the table edge they rolled is actually the furthest away from the bulk of the Defense Force, which is a mixed blessing. However they were quite close to Lynn as she was further up the map. Everyone pretty much deployed in cover, with Luciano aboard Hungry Cactus who started right by the mining house.
Hyran-Mine-1134

Viana was over in the orchard and would have little trouble reaching most of the board with his shots.
Hyran-Mine-1135Hyran-Mine-1139

And here’s a washed out picture showing just how close Hungry Cactus was to Lynn. The black table cloth I used to represent the mountainous region made taking pictures a bit tough. They were naturally darker, but at least the miniatures tended to “pop out” from the table.
Hyran-Mine-1140

And with that the game began! Note that I didn’t focus on the nitty gritty details of every single Activation or movement, in the interest of time (and motivation :) ). So only the highlights are talked about.

Turn 1 – Scramble the Defenses!
Still caught by surprise, Luciano was able to swing a Rope Lasso around Lynn in a massive hit worth half her health. I’m definitely pleased with aligning Lasso attacks and damage with the dinosaur it’s used from. Anyway Lynn fails her Bravery Test. Since the Rope Lasso has the property “Stopped” Lynn would normally be Stunned when activating (since she can’t physically Flee). Instead she uses her “Rally” trait and risks using her Salve (1D12 HP restored, but at the start of her next Activation).
There was a slight hit on Cough of Thunder, but the Cover of the fence helped reduce the damage.
Everyone else pretty much shuffled forward. Ore Hauler was used intelligently as a movable wall to shield the advance of the Savages, since his massive flanks and short legs make the perfect line-of-sight blocker. For example Viana couldn’t draw a bead on either Many Stones or Falls Hard due to the imposing dinosaur.
Lynn’s lackluster start, the advancing lines of battle
Hyran-Mine-1145Hyran-Mine-1147

Many Stones hiding behind Ore Hauler, Frank drawing a bead on Cough of Thunder
Hyran-Mine-1148Hyran-Mine-1151

The table at the end of Turn 1
Hyran-Mine-1154

Turn 2 – Onwards Drylands!
Hearing the raging battle ahead of them, the Drylands Expedition deploy 6″ from the Western table edge, vaguely opposite the Night Daggers Attack Force 1. The core medium range elements of the posse deployed rather central, with Amp on their right flank and Gibson mounted on Dwaal on their left flank, by the mine. His cunning plan was to try to reach Viana in a massive 15″ Hustle at some point in the game.
Hyran-Mine-1155Hyran-Mine-1159Hyran-Mine-1161
Hyran-Mine-1170Meanwhile the Salve that Lynn used finally takes effect and restores her to full Hitpoints. She tries to feebly move away from Hungry Cactus but the Dinosaur manages to Charge her and hit for 8 damage! She fails her Bravery Test again. Good thing this match wasn’t centered around the “Assassination” objective!
Hyran-Mine-1172Frank moves right up beside Cough of Thunder and gives him “Both Barrels” WITH the “Eviscerate” trait (meaning his Bravery Test will take a penalty) for 8 damage. As predicted the fickle Savage fails his Bravery Test.
Many Stones tries to retaliate by throwing his Bundle of Dynamite at the distant Silverhorn. With an incredibly lucky Critical Hit the enemy takes 9 damage!
Hearing the report of a Double Barrel Shotgun, Emmitt brings his own shotgun to bear on Frank. Both combatants had to really push forward to get in range, but the damage so far has been worth the risk. In this case Emmitt hits Frank for 6 damage, but that’s still enough to cause the enemy to Flee.
Hyran-Mine-1163Hyran-Mine-1166
Classie tries to finish off Cough of Thunder but misses an 8+ roll on 6 Attacks! She desperately tries to use “Yeehaw!” but still misses. Note: This was actually an incorrect usage of Yeehaw! since the ability states “one other entity”, so a Leader cannot use Yeehaw! to inspire themselves. Luckily she missed anyway so the rules guffaw had no effect.
Hyran-Mine-1174Silverhorn ends up Fleeing down the hill he just managed to climb, and returns the grenade favor by lobbing a Stun Grenade at the exposed Emmitt. Due to the distance and movement he still needed a 10+ to hit, but manages it with a Critical for 2 damage, but more importantly Emmitt is now Stunned and won’t be able to perform his Action Phase.
Finally Viana shoots at the massive shape of Ore Hauler at 10+, hitting with two Criticals for 9 damage (which also adds a Panic token, and should slow the Defense advance).
Hyran-Mine-1178Hyran-Mine-1179

Turn 3 – Night Dagger Reinforcements
This turn started with an unexpected surprise…one of the Defense Force Savages was actually a spy and infiltrator for the Night Daggers! I rolled randomly between all unwounded Savages in the Defense Force (which at this point was Falls Hard and Many Stones) for who would be revealed as an attacker. I ended up rolling for Many Stones, who was promptly replaced with Vicky Carmine!
Hyran-Mine-1182Hyran-Mine-1184
As Robot Chicken and M. Night Shyamalan would say: what a twist! This also was quite a swing in terms of forces, because not only did the attacker get to deploy but the Defense Force lost an additional unhurt model.
The remaining two members of Attack Force 2 deployed 6″ from the Southern short table edge, opposite the mine, and right in the thick of all the combat. Barrier went for a flank on Amp, and Sleighter deployed near a fence facing two enemies and between a bunch more.
Hyran-Mine-1186Hyran-Mine-1188
Hyran-Mine-1190The turn started with a bang as the newly arrived Sleighter shot and killed Lynn! Of her posse only Falls Hard failed his Bravery Test for having a dead Leader. The other newly arrived Night Dagger named Barrier moved forward and tried to shoot Amp, but missed all 4 of his attacks (on 8+ no less!)
Hyran-Mine-1193The defenders try to return fire with Cough of Thunder firing his Sawed Off Shotgun towards Sleighter, but misses even at the short distance. The firing continued in earnest with Silverhorn barely hitting Cough of Thunder after the bandit slowly crept forward.
Hyran-Mine-1194Hearing Amp’s shout behind him, Quidel broke off his advance and clambered to the other side of the fence near him to shoot at Barrier. He needs a 10+ to hit, and risks the “Knee Shot” trait because of how exposed Amp is. With amazing luck he gets a Critical for 2+4+3 damage which outright kills Barrier!
Hyran-Mine-1196Hyran-Mine-1199
In retaliation Classie finally manages to put down Cough of Thunder, taking him out from long distance.
Rhodes steadily advanced to medium distance of Silverhorn and punches a dozen holes in the enemy (who only had 1 HP left to begin with) by getting 2 Criticals and 3 normal hits for a total of 10 damage.
Hyran-Mine-1201Hyran-Mine-1203
Vicky tries to shoot at Falls Hard at melee distance and gets another awesome roll of 2 Criticals and 1 normal hit for 10 damage, which outright single shot kills Falls Hard! In the process Vicky does need to Reload though.
Hyran-Mine-1209Hyran-Mine-1204Viana tries to keep Panic on Ore Hauler, but misses the important shot against the dinosaur.
Having waited long enough, Gibson spurs Dwaal into the mad dash across the mine, using the full 15″ movement to try to get into range of Viana, or better yet Charge and try to lock the sniper in place.
This turn was one of the bloodiest in memory. There was a total of 5 kills, 3 of which were in a single shot against a fresh enemy. Just goes to show the importance of Defense and Hitpoints! Absolute riot to play through though, especially since there are still so many entities on the table.

Turn 4 – Re-coup and Re-engage
Hyran-Mine-1217At this point 5 attackers remained compared to 6 defenders.
The turn started on the northern flank, with the important duel between Viana and Gibson. The attackers, having won Initiative, chose to have Viana shoot Gibson before he could reach the sniper. With a solid attack of 1 Critical and 1 normal hit (8 total damage) Gibson ends up Fleeing. This is very important since he’s still mounted on Dwaal, so he’ll back off a massive 10″.
Rhodes continues to press up the middle of the field. He reaches short distance from the traitor Vicky, and uses “Fan the Hammer” and his “Skilled Shooter” trait turning his attack into a 9+. He hits well for 7 damage which kills Vicky, and also had two 1s in the process (which don’t matter since he needed to Reload from “Fan the Hammer” already).
Meanwhile the harassment of Amp continues, as Sleighter moves to the side and fires his Toxic Gun at the man, hitting for 6 damage. More importantly Amp is now poisoned and will need an antidote as soon as possible. Instead of firing back Amp moves away and uses his Small IRP to recover 3 Hitpoints.
Hyran-Mine-1212Hyran-Mine-1213
Gibson finally Activates and would normally Flee 10″ from the nearest enemy. However that would put him off the table, so he’s Stunned instead.
Classie continues to use a nearby tall hill as cover. She edges around the corner to shoot at Rhodes using her “Go For the Eyes” Trait, hitting 1 Critical plus 2 normal hits for a total of 5 damage (thanks to Cover). Rhodes manages to pass his Bravery Test.
Compared to Turn 3 this was a quiet day at the park!
Hyran-Mine-1216Hyran-Mine-1221Hyran-Mine-1222
Hyran-Mine-1224

Turn 5 – Dinosaur Crash In
The attackers win the first Activation with a close 12 to 11 on the roll. This allows Viana to again get the drop on Gibson. Lining up another deadly shot the sniper hits Gibson for 7 total damage which takes Gibson out of action. But Viana is in rather dire straits with two dinosaurs getting dangerously close:
Hyran-Mine-1227
Meanwhile the tactical shootout to the south continues. Amp uses his “Inspiring Shot” Trait in a desperate bid to recover some Hitpoints, but misses Sleighter. Seeing the volume of fire coming his way, Sleighter backs off and uses his Large IRP which brings him back to full Hitpoints.
Hyran-Mine-1229
Rhodes continues his rampage in the center by advancing towards Classie and firing with his remaining pistol. After hitting for 5 damage she fails her Bravery Test and will Flee.
Roaring and stomping the ground, Ore Hauler the Plated dinosaur tries to Charge Viana, but fails the 2″ distance with a roll of 1!
Hyran-Mine-1231
On the other hand, Emmitt moves just into range of Classie, who is hiding behind a barrel scorched by laser blasts. Just to be safe and ensure the kill he uses “Both Barrels”, hitting and killing Classie. As she was the leader of Attack Force 1 they all roll Bravery Tests and perform miserably, with everyone but Sleighter Fleeing.
Hyran-Mine-1234Hyran-Mine-1236
Unlike Ore Hauler, Dwaal goes for the safe (but less deadly) approach of reaching melee and just moves into close combat with Viana. However the fast dinosaur misses all his attacks. On the upside the sniper is now in close combat and will have trouble keeping the dinosaurs out of the 4″ Minimum Range of his 500kW Lever-Action Rifle. Note Viana is Fleeing in the picture due to Classie being taken out of action.
Hyran-Mine-1237

Turn 6 – Toxic Gun Takedown
Hyran-Mine-1240Sleighter starts the turn by missing Quidel with his Toxic Gun, which is unfortunate for the Night Daggers as more poison would be great at this point.
Meanwhile Ore Hauler finally manages to Charge at Viana, hitting the sniper for 6 damage which leaves on 2 Hitpoints left. Amp levels his Lever-Action Rifle at the nearly dead Sleighter, hitting the man for 7 damage. Luckily for Sleighter his Cover reduces the damage to 6, which saves his life and leaves him with 1 Hitpoint.
Having been methodically advancing this whole time after battling Lynn, Hungry Cactus finally reaches melee by Charging Quidel and hitting for 7 damage! The Drylands leader is Fleeing as a result. He Flees backwards from the dinosaur but maintains his target priority by shooting and killing Sleighter. That means all Night Daggers carrying Toxic Guns have been taken out of action.
Hyran-Mine-1242Hyran-Mine-1244
Hyran-Mine-1245Vianna Flees away from the gaggle of dinosaurs approaching him. However after some deliberation he forgoes the use of the Large IRP and decides to shoots the deadly Rhodes in the back. That means he’ll get a Critical Hit on 10+ instead of 12+. This results in 2 Criticals and a total of 9 damage which kills the troublesome Rhodes. However Viana may have sacrificed his life to do so. The reasoning was healing with the Large IRP would just delay the inevitable, and the two dinosaurs could conceivably kill Viana even when he’s at full Hitpoints. Plus who can resist a chance to use “Shot in the Back”?!

Turn 7 – Melee Bloodbath
Well, bloodbath might be a bit strong, but the dinosaurs made a good showing this turn. Ore Hauler started by Charging Viana again and killing the deadly sniper finally. Hungry Cactus returned the favor two fold by Charging Quidel and killing the leader, which caused Amp to Flee.

Turn 8 – Never Tell me the Odds
Hyran-Mine-1249Hyran-Mine-1251At this point the attackers consisted of Hungry Cactus and his rider Luciano. The defenders still had 4 entities, two of which were dinosaurs.
To maximize the Action Phases the Night Daggers would have, Luciano dismounts from Hungry Cactus. She moves towards Amparo which Hungry Cactus moves towards Emmitt. The hope was to get enough attacks to even the odds. Dismounting is rather costly and when to do so is quite a judgment call. In this case the attackers sacrificed some immediate attacks for the promise of MORE attacks in the future. Plus Luciano was still at full Hitpoints and Hungry Cactus very nearly the same, so they could withstand a turn of punishment.
Meanwhile the defenders respond by having Dwaal rush across the board into melee with Luciano, to try to prevent her from reaching Amp. Speaking of Amp, instead of moving for his Fleeing status, he is Stunned instead since he was right at the table edge and had no where to go.
Hyran-Mine-1252

Turn 9 – Dinosaur Mop Up
The turn opens with Hungry Cactus succeeding with a Charge against Emmitt, who he hits for 7 damage, leaving the guard with only 1 Hitpoint. Emmitt is also Fleeing from the shock of the attack.
Amp tries to line up a shot against Luciano and barely hits her (her +4 Defense is rather tough, especially when she’s in melee) for 6 damage. He also continues to back away from Luciano so he can maximize the number of shots before she reaches him, assuming she kills Dwaal. Luciano ignores the man and instead brings her Whip to bear on Dwaal, hitting the dinosaur for 4 damage.
Ore Hauler moves in to help the struggling Emmitt against Hungry Cactus, hitting the enemy dinosaur for 4 damage.
Hyran-Mine-1257Hyran-Mine-1259Hyran-Mine-1261

Turn 10 – Bloody Pulp
Hungry Cactus opens the turn by trying to kill Emmitt. Although he has a powerful 1A-6D bite, the human only has 1 Hitpoint left. So instead the dinosaur opts to use the Beast attack “Trample”, which gives him 2 Attacks and a better chance of killing Emmitt. Hungry Cactus succeeds and Emmitt is paste under his massive feet. That leaves Ore Hauler and Hungry Cactus duking it out in the middle of the board.
Again Amp barely hits Luciano (he’s needing an 11+) for another 5 damage. Slowly she is being whittled down. Dwaal is in even worse shape as he needs a 12+, and misses.

Turn 11 – Lucky Third Shot
Hyran-Mine-1265Luciano tries to lash out at Dwaal again with her Whip, but fails the attack miserably (no hits on 5 Attacks!). Amp barely lands another hit on Luciano which is enough to finally take her out of action.
Having been freed from melee, Dwaal moves to the edge of the roiling fight in the middle. However the dinosaur doesn’t engage Hungry Cactus and instead lets Ore Hauler and the carnivore fight it out.
Both dinosaurs hit well with Ore Hauler doing 6 damage and Hungry Cactus doing 7. At this rate the herbivore will be dead first though.
Hyran-Mine-1267

Turn 12 – Snapping Jaws
Before Ore Hauler can react, Hungry Cactus gets the first Activation and kills the Plated dinosaur. He then moves into melee with Dwaal. Amp misses an important shot against Hungry Cactus. Dwaal however manages a lucky Critical Hit for 4 damage.
Hyran-Mine-1269

Turn 13 – Gun and Claw
With only three combatants left the turns were going fast and furious now. Amp manages to hit Hungry Cactus for 7 damage while Dwaal misses. The Terror responds by biting Dwaal for 6 damage, leaving the smaller dinosaur with only 2 Hitpoints.

Turn 14 – Breather
Haha, everyone misses this turn. Hungry Cactus really missed by rolling a 1!

Turn 15 – All Over
Finally Amp fires the final shot of the game and kills Hungry Cactus before the towering carnivore can react to finish off Dwaal.
Hyran-Mine-1270

Pile of Dead
I took a picture of the casualties because there were SO MANY! The only survivors were Dwaal (at 2 HP) and Amp (at 6 HP). And Amp was poisoned from the Toxic Gun so he was treated as Taken Out of Action for the sake of the End of Encounter Process.
This game was a lot of fun, and like I said very “swingy” where one side seemed to have the lead, then a surprising one-shot kill would turn the tide. Lots of blood and mayhem, and the varied deployment locations and timing meant movement and positioning were critical.
Anyway here are the honored dead:
Hyran-Mine-1273Hyran-Mine-1276

End of Encounter Process
So Amp was the only one hit by the Toxic Gun, which means he’s considered Taken Out of Action AND will receive an automatic Wound if he doesn’t get the antidote in 24 hours. Know what that means? That the Drylands Expedition are going to pick themselves up, dust themselves off, and rush off to raid the Night Dagger camp! They won’t even stop to talk to Lynn, or help with repairs at the mine, or anything like that. It’ll be a flat out race to find an antidote.

In total 9 enemies were killed (not all by the Drylands Expedition, but kills by their allies count too). So that’s another 27 IP and $270 (plus a bonus $30 for a win) for a total of $300. They will also receive another Trait. That puts them at 179 IP, an even $2,000, and 5 Traits!

I have no idea what they’ll buy, but I’ll eventually edit this sentence when I figure it out :)
EDIT: I ended up just talking about what I did with the posse in a new post.

Hope you enjoyed the report! I know I enjoyed playing through it!

Ambush in the Foothills – Windy River Day 5-6

DC-Foothills-0021Well after close to 5 months I’m finally back with a new battle report from my Windy River test campaign. As I mentioned before I’m pretty much just playing this campaign for fun now and not so much for testing. The injury tables seem good and I haven’t run into any major issues with all the stat changes and rulebook updates.

In case you forgot, the Drylands Expedition had just rescued Cecilia at the request of her husband Gordon Glenbrook. At the end of that encounter the posse had returned to Watterson from Matron’s Den, not found much else happening in the town, and decided to scout out the Hyran Mine to the north-east. I had left the last session having travelled for Day 5 and 6 to reach the Mine, but I didn’t roll for random encounters. Well I got one on Day 5, so I wrote up a posse to pit the Drylands Expedition against and had at it! This simpler random encounter helped ease me back into Dinosaur Cowboys. As with the last session I focused on playing the game instead of taking detailed notes, but I did still get a bunch of pictures.

As you might have read I’m in my new house now so this was the first Dinosaur Cowboys game in my new games room. From the pictures you can still just see my old kitchen table, but trust me it’s nice to have a dedicated gaming space!

Posses
DC-Foothills-0002DC-Foothills-0003
The Drylands Expedition have slowly been improving and are up to 137 IP, 1520 ND, and 4 Traits when they fought this encounter. Pretty snazzy. Amparo was “Feeling Weak” from his Wound before, so he’d be at -1 HP. On the upside Amparo’s previous “Broken Elbow” had healed up so he could get Critical Hits again. Dwaal had a “Soft Spot” which was -1 DEF, but he already had 0 DEF so no change there.
Anyway here is the PDF roster for Drylands Expedition that was used for this game.

Opposing them were “Tooth and Fang”, a ragtag group of roving Savages (classic random encounter material). I figured they could be escaped slaves from Hyran Mine, or perhaps disposed family members waiting to strike at the Mine itself. I broke the rules a biiiiiit for this posse by including, for the first time ever in print, two Raptor dinosaurs in the same posse! Pretty exciting. So the PDF roster doesn’t have the second dinosaur included, but you can see there are 400 ND to spare to buy it. So I just wrote in “Fang” as the second dinosaur on the roster before the game.
In general the posse is fully melee focused. Crusher and Blitz mount the dinosaurs and ride into combat, trying to use their Lassos to close and then dishing out big damage with their solid melee weapons. Lots of Defense and Hitpoints to go around, so hopefully they could make it across the field.
Here is the PDF roster for Tooth and Fang.

New Dice!
This was the first roll of my new Gamescience precision dice so I was excited to try them out. The idea is “normal” (ie: Chessex) dice are put in a rock tumbler to remove flash marks from the mould. This of course dulls the edges and corners, and introduces slight differences in how each individual dice will roll. Whereas the precision dice have sharp, crisp edges like casino dice, so they technically should roll more accurately. The downside is they come with the flash marks still on, so you have to manually cut or file the marks off (which I did). The round vs sharp edge is really noticeable when you compare the two types of dice though.
Plus let’s be honest, do I really need an excuse to get new dice?! They were an okay price and look neat and I was excited to try them out.
DC-Foothills-0005

Table and Terrain
I didn’t use the full kitchen table in my setup since I keep the extender leaf in permanently. So I think the board was still close to 4’x3′. Maybe 3.5’x3′.

I really wanted to translate the campaign map to the table since I liked the look of the jungle and hills on the map. I imagined the Drylands Expedition slogging through thick undergrowth, up steep black hills, their feet tenderized from the cracked lava flows of old. Mosquitoes as big as a plate engulf them and the roars of distant dinosaurs echo over the broken canyons.

windy-river-day5-6

I put a bunch of deciduous looking trees on the south of the table, which would be the flatland jungle trees. Then the opposite edge is rife with thick jungle trees and the beginnings of dark hills and broken rock.

DC-Foothills-0008

Deployment, Objective, Features, Variant Rules
Nothing too crazy this game. Just a standard “Edge” deployment (up to 8″ in) with the Drylands Expedition coming from the south and Tooth and Fang emerging from the north. I didn’t even use a fancy Objective, just a plain ol’ “Shoot Out”. No Features either (although I was tempted to have the volcanic rock piece actually be a Volcano feature!)
Remember that the Windy River campaign is using the “Last Man Standing” and “Dual Wield” Variant rules, because I like both of those and should consider moving them into core :)

Here are how the two posses deployed. Drylands Expedition recognized the melee focused nature of their opponents and went for a spread out approach to avoid having everyone stuck in hand to hand. Tooth and Fang kept both dinosaurs tight to the east flank, with Yuonne bringing up the west side.
DC-Foothills-0011DC-Foothills-0010

Game Begins – The Early Rush
Dwaal took the lead for the Drylands Expedition by using his full 15″ Hustle. The idea was to use him as a meat shield and keep the enemy force distracted and occupied while the ranged elements of Drylands eviscerate the opponents. Yuonne moved forward to meet Dwaal in combat, eventually getting a charge and hitting for 10 damage (and adding some Panic)!
DC-Foothills-0013DC-Foothills-0015

Second Wave Arrives
Crusher was the next one to enter combat, and before Quidel could cry out Dwaal was down to 1 HP! I found this rather funny since just last game the dinosaur had been trained to get +1 HP for $50. Who knew it’d make such a difference.
However Tooth and Fang took the worst of the exchange since Quidel, Gibson, and Rhodes could all pour fire indiscriminately into the melee. That’ll teach ’em for bringing a Spine Blade to a Six-Shooter fight!
Eventually Gibson brought down Yuonne with a lucky roll of his 200kW Six-Shooter. Already you could tell the game was turning against Tooth and Fang.
DC-Foothills-0016DC-Foothills-0017
Fear rippled across the surviving Tooth and Fang members after their leader died. Both Crusher and Blitz failed their Bravery Test which is quite a setback when they needed to cover as much ground as possible.

Closing the Gap
On the east flank Blitz kept pushing Fang towards Amp and Rhodes. But the Raptor could only Hustle 9″ and both Drylands members easily outdistanced their enemy. Both riders and dinosaurs took heavy fire, with Tooth in the center being the focus for the west flank and Blitz on the east being the target over there.
DC-Foothills-0022DC-Foothills-0024

Time to Reposition
In the interest of, well, staying alive, Dwaal moved as far as possible to the opposite corner of the table. Not like his 1 HP and feeble 2A-2D attack would do much at this point. Meanwhile Blitz and Fang closed on Amp, trying desperately to get into Lasso range so they could lock him down. In this case Blitz had a Wire Lasso with an 8″ range that would apply Stopped, which would set up Amp perfectly to get Charged.
DC-Foothills-0028DC-Foothills-0025

Unsaddled by Fire!
Finally Tooth succumbed to the volume of fire from Quidel, Gibson, and Rhodes. Between Gibson and Rhodes both using Fan the Hammer (for a massive 12 total attacks between them) to Quidel reliably throwing out 2A-4D hits, the Raptor just crumbled. Unfortunately the dinosaur was taken out after Crusher had Fled, so the rider was left quite far from the action. In the distance of the first picture you can see poor Crusher along amidst the rocks. The second picture is Rhodes complete disregard for ammunition conservation.
DC-Foothills-0030DC-Foothills-0031

The Pain Continues
Fang was the next to fall. Blitz did eventually get a single Lasso attack against Amparo, but missed since he needed an 11 with all the mods. The constant 400kW Lever-Action shots from Amp added up and after the dinosaur was dead Blitz soon followed.
There was a single highlight for the poor Tooth and Fang posse: Crusher actually reached melee! He got a lucky 6″ Charge onto Gibson, which almost made up for two failed Charges by his friends earlier. The angry Savage hit Gibson for 5 damage with his Spine Blade, which took the man down to half his health. Still not enough to seriously hurt the Drylands Expedition. Crusher was killed by gunfire soon after.
DC-Foothills-0032DC-Foothills-0034

Thoughts on the Encounter
From the Drylands Expedition point of view: easy! Having Savages run directly into our (considerable) firepower was great. Killing the Leader and having the other two Flee was even more perfect. Dwaal worked well as a shock trooper distraction, and still managed to barely survive to the end. The one hit Crusher got in did sort of expose the fragility of some members, since Gibson’s 10 HP bled away quickly once he was in melee.
Regardless I think that the next posse encountered needs to be as versatile and ranged focused as the Drylands gang are. Which should work well since the enemy will probably be bandits around Hyran Mine, and you know those guys are full of traps and tricks!
As far as game balance pure range dominating pure melee is exactly what I want, so no complaints there. After all should the guy charging down the street with a knife really win against the guy with the shotgun?

the_jurassic_west_by_24kevin-d59t1kkAwesome art by 24KevinEnd of Encounter Process
Pretty simple process since no one was Taken Out of Action for the Drylands Expedition.

Amp and Dwaal both had their old Wounds heal up.

The posse killed 5 entities so +15 IP, +$150 ND, and a bonus +$30 for winning the encounter (total $180). Including their existing funds and abilities puts them at 3/152 IP and 10/1700 ND.

To be honest there aren’t any easy choices for what to buy or upgrade next. The posse are in quite good shape for weapons, with the next step being a bigger jump (like 400kW Lever-Action to 600kW) than the incremental upgrades so far. It’s actually too bad they don’t have $200 instead of $190 since a lot of equipment breakpoints (like high end Grenades) are $200. I guess I could sell some old gear at half price to make up the difference.
I think that Gibson could use a better weapon. Maybe a high attack rifle like the classic Light Repeater. Too bad I don’t have $600 spare for a Gatling Gun. Everyone else is fine for weapons and armor at the moment.
I’m also a bit stumped on how to spend the IP. I think a smattering of Hitpoints is a safe bet as the gang has fallen a bit behind with that. They were hitting pretty consistently so I think the RTN values are fine for the moment.

New Gear and Stats
I think I’ll sell Gibson’s Laserbow for a $40 refund, which gives me $230. Then I’ll buy him a Heavy Repeater for $150, leaving me $80. I’ll keep that in the bank to save up for some Grenades or a bigger rifle for Amp.

Then +1 HP for Gibson, Amp, and Rhodes at 6 IP / HP for a total of 18 IP. So back down to 0 IP left. This brings them up to 11, 9, 11 HP respectively.

Currently The Saloon has a limitation where removing a weapon refunds it for full price, instead of selling it. So I’ll have to change that before I can get proper values.

Besides the equipment changes here is how the posse looks: Drylands Expedition (Saloon link).

Cecilia’s Rescue at Matron’s Den – Windy River Day 3-6

Cannibals-PotOverview
After the exciting conclusion to the hunting safari the lead man Gordon Glenbrook realized his wife had been kidnapped in the chaos of battle. Luckily the group were able to find a set of tracks leading south across the grassland. Unnervingly they also found traces of blood which they assumed to be from Cecilia.
This setup gave me a chance to use the Forced March rules. As the posse wanted to travel for another 2 hours (6 miles in this case) they would suffer -2 Initiative for the next encounter. The trail lead to Matron’s Den, a known brothel with questionable hiring practices.
Just in case you haven’t been following along, this session is for the Windy River test campaign (although at this point it’s pretty much just playing for fun and not testing).

windy-river-daynight3I wanted to play a shorter game this time, so I didn’t write any notes and only took a few (only 50) pictures. The upside is I can actually play the game instead of focusing on recording the details for a battle report. This cut down how long the match took and also, hopefully, means I won’t have to write this post for 3 hours.

I decided that during the night the porter Tendaji had enough of dinosaurs, savages, and forced marches and slipped away in the night. This was a common problem to early African explorers in the Victorian era so I figured it made sense here. Kwabena (who had stayed by Gordon’s side during the last fight) decided to remain with the group. Gordon armed the porter as well as himself, as this next hunt was not for sport but for the love of his life.

As a reminder their stats (and weapons they now carried) are:

Kwabena (Porter)
DEF 0, RTN 8, CTN 9, BTN 9, SPD 4, HP 10, Blunderbuss.

Gordon Glenbrook
DEF 1, RTN 6, CTN 8, BTN 7, SPD 4, HP 13, Double Barrel Shotgun, 100kW Six-Shooter.

DC-WR-Day4-Den-11Anyway upon arriving at Matron’s Den the expedition was confronted by a dingy, half ruined shack. They also saw the glow of tunnel entrances and heard the sounds of debauchery. I built a posse equal to the current Drylands Expedition stats (121 IP, 1270 ND, 3 Traits) called Matron’s Den Guards (PDF). I went for descriptive names instead of flavorful ones to help me keep track of the gang. Anyway each member is a bit of a glass cannon with a lot of offensive (and very impressive weaponry) but little in the way of survivability. I also had two Savages from the last game make a return (to help balance the Drylands addition of Gordon and Kwabena).

Features, Deployment, Objective, Terrain
I used the “Hidden Tunnel” Feature by scattering Space Hulk doors across the board. Any character could enter a tunnel and instantly exit at the other side (which would end their Movement Phase). I used colored dice to track which tunnel lead to which.

The deployment was “Center”, with the Matron’s Guards deploying within 12″ of the middle of the table, which also happened to be the Matron’s Den building, which ALSO happened to have Cecilia in the middle. She was locked in a cage while the guards (and unplaced patrons) jeered and yelled at her. The idea here was Matron Francince was not home, and so the newest working girl was being held until Francince returned.

Obviously the Objective for the Drylands posse was “Smash and Grab”. I went for this one because it meant having to move Cecilia off the table. However with the Center deployment the battle was likely to end up in a kill-em-all-and-rescue-later.

You might also notice the table is looking nice and jungle-y. This is thanks to a bunch of aquarium plants I recently purchased. Originally I had bought three of them, but the vegetation parts were way, way too tall and would flop all over the place. I found a happy solution of cutting the plants down so they are stable, and also have a more varied look to them. I was so happy with this result that I bought a couple more (including a purple one for that “neato jungle!” look). The best part is the trees are basically $2-3 each, so MUCH cheaper than similar terrain alternatives.

Anyway here is the table setup:
DC-WR-Day4-Den-02

Also another angle, and a closeup of my new jungle trees. Also note all the cool looking doors representing tunnels. As you can tell the door with the red die leads to the matching red die door. This creating a criss crossing network of tunnels that would mean everyone could quickly move around the battlefield.
DC-WR-Day4-Den-08DC-WR-Day4-Den-03

Deployment
The Matron’s Guards deployed first in the actual den building. In the middle you can see Cecilia, trapped and confused. Her fate wouldn’t be the cannibal’s pot (featured as an awesome figure above – I wish I owned that!) but instead forced prostitution. How ugly. But the dark swamps of Windy River are sometimes savage and vicious.
DC-WR-Day4-Den-13

And the Drylands posse (and friends) deployed to the east within 8″ of the edge.
DC-WR-Day4-Den-18

Crazy Rhodes, Gordon Glenbrook, and Kwabena all started right beside a tunnel entrance. They would leverage these access points to get in close to the Den building and hopefully rush Cecilia out.
DC-WR-Day4-Den-14DC-WR-Day4-Den-15

The Rescue Begins!
After an awesome dual pistol kill by Crazy Rhodes on Night Sniper (who only had 6 HP to begin with, but a 500kW Lever-Action Rifle – glass cannon like I said!) the man dove into the tunnel and appeared across the board. I had managed two Critical Hits on his pistol attack, which was as good of a start as I could hope for. Here is Crazy Rhodes after he emerges from the tunnel:
DC-WR-Day4-Den-20

Gordon recklessly went through his tunnel entrance. However the tunnel spewed him out right by the Den. The man only cared about getting Cecilia back and not how many enemy guns were waiting for him (the answer is “a lot”). Plus he lead the way from the tunnel with Both Barrels of his Double Barrel Shotgun.
DC-WR-Day4-Den-25DC-WR-Day4-Den-27

The loud sounds of gunfire stirred everyone to action. The Matron’s Den Guards figured they were dealing with rowdy customers instead of a dedicated raiding force.

The fight intensified near the Den as Kwabena also came through the tunnel. Carefully he aimed the deadly Blunderbuss at the purple hooded figure of a Savage, and fired.
DC-WR-Day4-Den-30DC-WR-Day4-Den-31

As you can see by the single D12 roll of 9, his daring attack had hit. The Blunderbuss has a special property of called 2″ Explosion, which meant everything within 2″ of the attack takes the Damage (5) of the weapon. So with one lucky shot Kwabena was able to wound three of the Guards!

In retaliation the purple hooded Savage moved into combat with Gordon, eager to stab and smash the enemy.
DC-WR-Day4-Den-34

Meanwhile across the board to the east a less close, but equally vicious shootout was taking place. Quidel and Gibson were trying to get into the fray, while Amp was pressured by the approaching menace of a Savage. Dwaal, although wounded, rushed in to stall the enemy.
DC-WR-Day4-Den-35

Eventually though Dwaal, after having been shot by Indigo Armor (one of the Guards), was pummeled to death by the Savage dubbed Gladiator. This left Amp exposed to his assault.
DC-WR-Day4-Den-39

Back at the Den the combat continued. The purple hooded Savage was dispatched before he could kill Gordon. Then Gordon, heedless of the enemies around him, rushed towards Cecilia.
DC-WR-Day4-Den-37DC-WR-Day4-Den-42

To try to stop the wounded maniac from stealing their latest prize, Green Armor moved in to block Gordon’s frantic advance.
DC-WR-Day4-Den-44

Before Gordon could be overwhelmed Quidel and Gibson (who had been badly deployed too far from a tunnel) arrived as reinforcements. Gibson fanned his six-shooter, emptying it into the armored Stormtroooper above him. Quidel managed to kill Green Armor. Suddenly the board looked a lot emptier. More importantly, Gordon had a clear path to Cecilia.
DC-WR-Day4-Den-46

Finally husband Glenbrook reached wife Glenbrook, and quickly shattered her cage and started to lead her to safety (heading south off the table).
DC-WR-Day4-Den-47

The defenders of Matron’s Den were down to a few wounded survivors. One of those was Gladiator, the Savage. After a great 5″ Charge (he seems to roll really well for those!) he reached Amparo and was able to take the man out of action.
DC-WR-Day4-Den-50

But the final, defiant kill was an act of futility in terms of victory. Gordon was able to Hustle his wife Cecilia off the southern table edge and claim victory for the Drylands posse.
DC-WR-Day4-Den-51

End of Encounter Process
As you can see the report isn’t as detailed as usual, but took half the time to write up and even less time to play.

Anyway after the encounter the kill tally was figured out. The Drylands Expedition posse had killed ALL 5 of the Matron’s Den Guards, plus 1 Savage henchman. This resulted in +16 IP and +160 ND. They also won the encounter, so a further $30 was awarded.
In terms of losses the posse had Amparo and Dwaal taken out of action. This is the second match Amparo was taken out, so hopefully his Broken Elbow doesn’t become a permanent Injury.

Both Amp and Dwaal failed their Wound Test and needed to roll for the Wound Effect. Funnily enough they both got 19 on 3D12, which for Amparo was a Torso Wound called “Feeling Weak” which would give him -1 Total HP. Luckily it wasn’t in the Arm location, since a second Wound in a single location means Injury! Anyway Dwaal was luckier and got “Soft Spot” which gave him -1 DEF (minimum 1). He was already at 0 DEF so this basically has no effect.

Before making any new purchases here are the totals for the Drylands posse: 25/137 IP, 194/1460 ND, 3/4 Traits.

Yes, that’s right, they had accumulated enough Improvement Points to warrant another Trait! Woo hoo.

This match showed that the Drylands Expedition has some solid offense. But it also demonstrated how going full glass cannon (as the Matron’s Den Guards did) can mean you don’t even get a chance to use the deadly weaponry. So for this round of upgrades and advancements I decided to go fully defensive.

Everyone who didn’t have Armor got a new suit of it! Quidel took Cloth (to match his robes on the figure), Gibson got Quilted, and Rhodes got Padded (he seems like the type of person to need a padded jacket). I also spent $10×4 to give everyone a Small IRP. Healing only 1D6 HP for the use of an Action isn’t the greatest option, but could be useful to save someone from being taken out of action. Or maybe they kill an enemy and have some time before engaging the next one. Either way, more defense!
Getting everyone to +2 DEF is great and will really help them avoid the pain and keep the pressure off their relatively small HP pools.

For IP changes I spent 10 IP to finally give +1 DEF to Amparo. Then a further 12 IP (6×2) on Gibson for +2 HP, bringing him to 10 HP.

I gave Crazy Rhodes the “Skilled Shooter” trait which would let him use a -2 RTN bonus for a single attack. Since he’s attacking at 5A-3D with his dual 300kW Six-Shooters I figured this was a good call. I had thought about giving the Trait to Amparo, but considering he was taken out the last two battles I’d rather spread the Trait wealth around a bit.

At the end of all these purchases the Drylands Expedition has 3 IP left and no money. They now look like this Drylands Expedition night 3 roster PDF.

Continued Travels
After rescuing Cecilia, the grateful couple decided they had enough of the jungle for now and wanted to head back to Watterson. Since the Drylands posse wanted to get paid from Grogan for leading the safari in his stead, they also headed back.

So Day 4 was spent travelling (uneventfully) to Watterson. Grogan had recovered from his malaria sickness, and much to Quidel’s dismay, had headed off on another expedition. Gordon was able to pay the posse a marginal sum for their efforts though. So another $60 was added to the Drylands coffers, which they immediately spent on training Dwaal to be tougher ($50 for +1 HP for a dinosaur, which brought him to 15 HP), leaving them with $10.

Feeling that their time and tasks in Watterson were complete, the posse cut east across the open grassland towards the imposing foothills and mountains around Hyran Mine. They travelled for a day (making it Day 5). They weren’t quite at the mine yet so they took another day (now Day 6) to get there.
I didn’t roll the Encounter Chance yet, but if that doesn’t result in a combat then the next report will be their time at the Hyran Mine. I’m going to use the black terrain cloth, more rocks, less trees, and lots of hills to represent any combat in the area.

Changes and Updates
The main change I want to make is to the Taken Out of Action Effect tables. Right now 3D12 is used, however that results in pretty average rolls in the center of the chart. What I want to do instead, to make the injuries more random, is switch to D6 + D12. You basically roll D6 and look on the table to see what the D12 result did. So the same range of numbers and effects will be available, except now the fringe cases will be seen more often.

Otherwise just a few editing and grammar fixes: Siege in Features needs a RTN, note about Knockback and hitting a solid surface, add water to Difficult Terrain list, note about transferring weapons after an encounter within a posse.