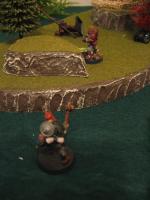
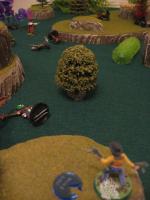
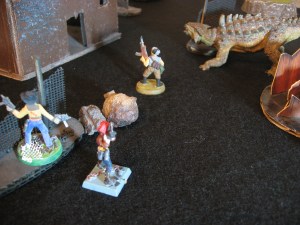
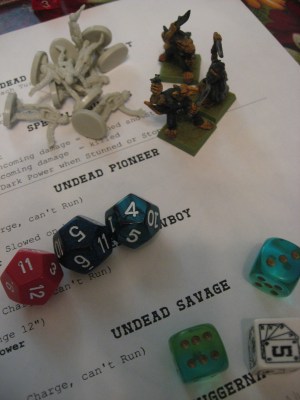
Intrepid Expeditions Jungle Hunt – Windy River Day 2-3

Overview
I was able to get another campaign game in recently, and am hoping to keep up a pretty steady pace going forward here (my schedule is a bit more clear now). So as you might remember I’ve been starting the Windy River test campaign featuring the Drylands Expedition (PDF).

Ewart-GroganPreviously they had visited Watterson and fought an escalated battle with the Etchglen Hunters, due to the drunk leader attacking Quidel in the bar after she misinterpreted a comment. The fight started in The Dusty Claw, a saloon owned by the Warner family. After victoriously overtaking their enemies, the Drylands Expedition was summarily kicked from the saloon for causing trouble, and found there way to the Eight of Diamonds hotel. The hotel is owned by Conrad and Ortiz, two brothers who don’t look kindly on the Warner family taking their business. After hearing about the bar fight the brothers offered a free room for the night.

The next day Quidel and friends happened to cross paths with a man named Grogan, who owned and operated the hunting outfit “Intrepid Expeditions”. Unfortunately he had fallen ill with malaria, and was confined to the hotel. Grogan was desperate to find a replacement crew that could take his most recent customers on a safari in the small patch of jungle south of Watterson. The two customers were aiming to depart the following morning.

Gibson wanted to continue to the mountains to the east and explore them, as surveying was still his primary goal. But Quidel, Amp, and Rhodes all voted for the easy payday taking some tourists on a safari would be. So they spent the day equipping the caravan and planning a route. After another restful night in the Eight of Diamonds they gathered everyone and headed south into the jungle (day 3).

The Hunting Safari
The guests were Gordon Glenbrook and his wife Cecilia Glenbrook. The young couple were fresh from The Wall and had taken a Flapper to the larger city of Cheyenne to the south east. Now they were flush with excitement at the thought of hunting a dinosaur. You might remember Gordon Glenbrook from The Great T-Rex Hunt, which was near the end of his impressive life. I thought I’d have the campaign be before those events, when him and his wife were just married and starting to hunt. Their stats, totally off the cuff, are:

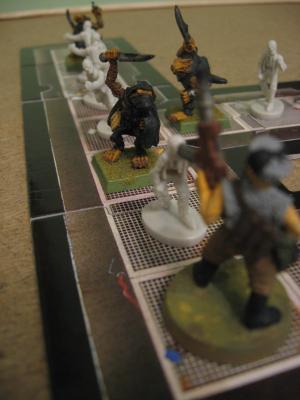
wr-d23_0872My newly painted safari figure that I used for Gordon

Gordon Glenbrook
DEF 1, RTN 6, CTN 8, BTN 7, SPD 4, HP 13

Cecilia Glenbrook
DEF 1, RTN 7, CTN 7, BTN 8, SPD 5, HP 12

windy-river-day2-3As you can see they don’t carry any weapons. The reason for this is, in true Victoria era style, they have hired porters from the local populace. The two porters follow:

Kwabena
DEF 0, RTN 10, CTN 10, BTN 9, SPD 4, HP 10
Bolt Action Rifle, Blunderbuss, Bola

Tendaji
DEF 0, RTN 10, CTN 10, BTN 9, SPD 4, HP 10
Double Barrel Shotgun, 100kW Six-Shooter, Riot Grenades

Original-Mauser-WaffenYou’ll notice throughout this report that I used a lot of off the cuff rules made up on the spot. Well, the porters were no exception. The both act under a single Activation, and cannot attack in any way. Their Action can be used to Reload weapons, or transfer equipment to or from an adjacent ally. The idea was Gordon or Cecilia would reach a porter and take the necessary rifles and other weapons from them, and hand them back when they needed to be Reloaded. This ended up working really well in the game, and gave a great thematic feel.

In terms of Overland Travel everyone headed south through the jungle. I missed my Light Jungle terrain roll so they could only go 2 hexes south from Watterson, as shown on the map. As they travelled riotous hooting and hollering were eventually heard to their eastern flank. Some kind of Savage bandits or raiders had found the caravan.

The Target Dinosaurs
Now for more seat-of-my-pants rules. I decided to use the Line Deployment to represent the safari being spread out in typical caravan style. I also randomly placed two dinosaurs (Horned and Terror), both weakened versions of their archetype to represent younger, less experienced beasts. Their stats are:

Horned Dinosaur (Young)
DEF 1, DIS 6, CTN 6, PANIC D4, SPD 4, HP 16, 4A-1D close

Terror Dinosaur (Young)
DEF 1, DIS 5, CTN 5, PANIC D6, SPD 5, HP 14, 1A-5D close

For the two “non-player” dinosaurs, I created a simple chart and set of rules to randomize their behaviour:

Passive Dinosaur Behaviour Table (D6, add +2 to the roll if the dinosaur was attacked in the last Turn)
1: Add 1 Panic Token
2: Do nothing (pass Activation)
3-4: Random Standard Move followed by random Hustle. If they come into contact with an enemy, attack.
5-6: Move to attack the nearest enemy.
- Passive Dinosaurs Activate at the end of the Turn, after everyone else

The Savage Horde
For the enemies I figured I’d use the lore of the Windy River area I created before, specifically the mystery surrounding the lone hut and brothel called Matron’s Den. I figured a Savage raiding party sent to capture female prisoners wasn’t outside the realm of possibilities. I wanted to follow in the Victorian theme I was going with so far, so I had a bunch of poorly armed, aggressive Savages attacking the caravan in waves. There were two types: Clubbers and Tomahawkers.

Clubber Savage
DEF 1, RTN 8, CTN 6, BTN 8, SPD 5, HP 8, Club (3A-3D close)

Tomahawker Savage
DEF 0, RTN 7, CTN 8, BTN 7, SPD 3, HP 8, Tomahawk (3A-2D, 1-6/7-10/11-13, 1x1R)

I went for a gentler implementation of the Tomahawk so the Savages didn’t have to Reload every throw. There would be 7 barbarians to start with (4 close, 3 ranged) and as they died there was a chance more Savages would enter the board.

At the start of each Turn, roll 1D12 for each dead Savage. If the result is 8+, redeploy the Savage (with full HP) in their original deployment zone

This would continue forever, so basically a massive wave of endless Savages.

wr-d23_0863Deployment, Objectives, Features
In terms of deployment the Savages ended up getting the left side of my kitchen table, which was from the East (which made even more sense in relation to Matron’s Den). I used a modified Objective that combined Defend and Escort. The Drylands posse had to keep Cecilia alive for 6 Turns, but they didn’t know that (as you’ll see when she aggressively engages the enemy), while the Savages either had to capture Cecilia or take her out of action. The reason for this goal will be evident later.

For the entire campaign I’ve been using two Variant Rules: Last Man Standing and Dual Wield.

For this specific battle I thought some bad weather was in order. There would be Gusting Winds (2″ Knockback from all ranged attacks) and a Light Fog (no Long Range attacks). So visualize a windswept jungle with fog blocking out the looming trees. The caravan quietly picks their way through the undergrowth while exotic birds chirp and squawk at their presence. The porters curse and mumble at their heavy loads, and Gordon often breaks the silence to talk to his wife or other members of the expedition. Then they hear drums, beating and pulsing in the mist. Just as Quidel is about to speak loud yelling echoes from the trees to the east, and a wave of rushing forms approach.

Some Initial Pictures
SO! After alllllll that I had an interesting and unique battle setup to play. This was also probably one of the larger and more complex matches of Dinosaur Cowboys I had played.

wr-d23_0859The initial table setup, with some older trees I chopped up to make more vegetation

Here is the caravan and the Savage attackers:
wr-d23_0865
wr-d23_0875

And finally a smattering of deployment pictures to give you an idea of how the scene was set:
wr-d23_0878wr-d23_0881wr-d23_0876wr-d23_0883wr-d23_0886
Quidel leading the caravan, the Line deployment, the Savages approach, Horned between the caravan and the Savages, Terror to the west in sight of Gordon

The Line deployment order was Quidel, Gibson, Amparo, Gordon, Cecilia (riding Dwaal), Tendaji, Kwabena, Crazy Rhodes. The Savages deployed from the top down with Gladiator, Pike, Bones, Hench, Redbeard, Purple, Pirate.

And with that we are off to the races!


Turn 1/6 – Barbarians in the Mist
Gordon had desired Cecilia was a comfortable as possible on the expedition, so she was riding Dwaal. Upon hearing the shouts and seeing enemies approach she spun the dinosaur towards Tendaji and ordered the porter to hand over the Blunderbuss (Note: I actually got the porters confused right off the bat, and accidentally mixed up the weapons each was carrying. That’s what I get for using similar looking Skaven figures!). Rhodes tried to draw a bead to the Pirate, but couldn’t quite line up the shot in the Light Fog (ie: target was at Long Range). Gibson had more success, swinging his weapon around to bear on Pike. After a flurry of shots the Savage was Fleeing. Quidel continued the solid shooting by hitting Gladiator. The lead members of the caravan, experienced from many days on the road, instantly reacted in unison and basically swung their line to face the oncoming horde. Amparo followed suit and fired at Hench, who was now also Fleeing from the pain. Gordon called to Kwabena, and the two moved towards one another so the man could arm himself.
The Savages yelled various bloodcurdling cries and moved forward as far as possible. With the fog and distance their Tomahawks were useless, so no return fire happened initially.
The Horned dinosaur, hearing the commotion and seeing the rapidly moving shapes, roll a 5 and would attack the nearest target (who was the Savage named Purple). Unfortunately he failed his Charge and couldn’t reach the target. The Terror also attacked nearest, which meant he Hustled towards Gordon but couldn’t quite reach the man.

wr-d23_0888wr-d23_0892wr-d23_0893wr-d23_0896wr-d23_0898
Cecilia moves quickly on Dwaal to grab the Blunderbuss from Tendaji, the Horned dinosaur fails to Charge Purple, already the Savage lines are breaking, Tendaji and Gordon try to meet up, another angle of the Turn

wr-d23_0890wr-d23_0897
The table near the end of Turn 1, Amp and Gibson easily adjust to pour fire into the oncoming threat


Turn 2/6 – The Whites of Their Eyes!
Cecilia again lead the Drylands turn by trying to fire at Pirate, but the massive Blunderbuss was unable to connect. Nearby Rhodes hit Purple with his dual pistols. The withering hail of fire continued at the head of the caravan, with Pike, Gladiator, and Hench all dying to the combined fire of Quidel, Amp, and Gibson. Unfortunately Gibson emptied his 200kW Six-Shooter in the process and would need to Reload. Luckily he had his backup Laserbow.
The return fire was somewhat feeble, however Amparo did take a Tomahawk to the face and is marked Fleeing. In the middle of the convoy the porters continued to distribute weapons. Kwabena gave the Bola to Rhodes, while Tendaji met up with Gordon and passed him all the weapons (Double Barrel Shotgun, 100kW Six-Shooter, Riot Grenades).
Seeing the mighty Terror looming in, Gordon hurled a Riot Grenade at the young dinosaur. With a lucky roll he hit and pushed the Terror back 4″ (2″ Knockback from Gusting Winds and a further 2″ from the 1D6 Riot Grenade hit).
The dinosaurs responded eagerly. The Horned dinosaur randomly moved directly into Purple! Confused and angry, the young dinosaurs trampled the hapless Savage to death! Terror had a bad Panic Speed roll of 2, so ended up Hustling towards the nearest porter.

wr-d23_0901wr-d23_0902wr-d23_0907wr-d23_0909wr-d23_0913wr-d23_0915wr-d23_0919
Cecilia lining up her shot at Pirate from the back of Dwaal, Rhodes incredible all-hit roll on Purple, Gibson and Pike face off, the Savages move in, the battle lines are drawn, Gibson needing a Reload on his pistol, the Horned randomly attacking and killing Purple
wr-d23_0904wr-d23_0921
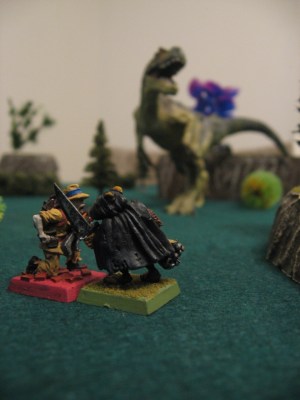
Gordon and Tendaji begin their hunt, the table at the end of Turn 2 (many dead Savages)


Turn 3/6 – More Are Drawn In
Of the dead Savages only Gladiator made his roll to return, and deployed opposite the end of the caravan and as close as possible to Cecilia
Running across the uneven jungle ground, Bones steadied himself for a throw at Amp. The Tomahawk sailed true and took the Drylands member out of action. Nearby Redbeard was inspired and moved forward to throw a far Tomahawk at Gordon’s back as the hunter busied himself shooting the Terror. The sailing weapon, using the Shot in the Back bonus, managed to hit for five damage.
Meanwhile Cecilia, noticing the leering faces of the Savages, spun Dwaal around and moved west, away from the advancing horde. The rest of the Drylands posse was generally ineffectual, and settled for adjusting their positions.
Focused in his own world Gordon drew his revolver and fired at the approaching Terror, hitting enough times that the dinosaur was already down to 5 Hitpoints. The man quickly holstered the weapon and instead shouldered the powerful Double Barrel Shotgun, although he was hesitant to shoot in the fog (really hard to get that weapon into Medium Range).
The Horned dinosaur stomped over the already dead body of Purple (table result was Do Nothing). The Terror moved forward and tried to Charge the porter Tendaji but failed to reach him!

wr-d23_0922wr-d23_0924wr-d23_0926wr-d23_0929wr-d23_0933
Another Savage (who looks exactly like Gladiator) returns to the table, Gibson preparing to miss his Laserbow shot on Bones, Gibson in the jungle, the mighty Tomahawk throw that took Amp out of action, the narrowing distance between hunter and hunted

wr-d23_0935wr-d23_0937
Gordon focuses on shooting the closing Terror, while Redbeard capitalizes on his distraction by throwing a Tomahawk at the hunter’s back

wr-d23_0943


Turn 4/6 – My Wife!
Of the dead Purple came back on the board, redeploying in a similar spot to Gladiator last Turn
The Savages seized the initiative and Gladiator moved and heroically (for a villain!) Charged 6″ to reach Cecilia! She had already been wounded by a Tomahawk, so Gladiator was able to hit for 1+3 and take her out of action. The Drylands posse had failed their objective of keeping Cecilia alive. Now to see if they could hold out for two more Turns.
A hill had blocked Gordon from seeing his wife fall, so he continued to focus on the Terror. He edged behind a nearby cliff covered in overhanging vines, and lined up his Double Barrel Shotgun. The Terror slavered and almost looked to be grinning as Gordon squeezed both triggers (using Both Barrels). The massive attack hit for 9 damage which brought down the dinosaur!
To the front of the convoy Gibson was nearly killed by another Tomahawk from Redbeard. Safely behind a tree Quidel took his time to line up his Heavy Pistol, and managed to kill Redbeard in response.
To the opposite end the Pirate ducked behind a hill and lined up a devastating shot against Rhodes. In response, having retrieved the Bolt Action Rifle from Kwabena, Rhodes fired and killed the Pirate.

wr-d23_0947wr-d23_0950wr-d23_0967wr-d23_0971wr-d23_0974wr-d23_0975
Quidel hangs out behind Cover to use the superior range of his Heavy Pistol, Gladiator before his Charge and the scene at the end of the caravan, Pirate lining up his attack, the phenomenal Tomahawk throw, Redbeard harassing Gibson, Redbeard being killed by Quidel

wr-d23_0955wr-d23_0956
Gladiator impressively reaching Cecilia with a 6″ Charge, the deadly Club blow is struck

wr-d23_0961wr-d23_0962
Gordon unloads Both Barrels on the Terror, the beast is down

wr-d23_0978


Turn 5/6 – Savagery Grows
Of the dead both Redbeard and Pirate come back, redeploying in the middle near Gibson
Seeing more Savages pour from the jungle fog, Gibson fires a bolt of energy at Redbeard, missing his shot. From behind the tree Quidel lets out an inspiring Yeehaw!, and the re-roll is a hit on Redbeard. Unfortunately the fresh Savage could withstand the 6 damage, and moves forward to throw a Tomahawk and Gibson. The weapon hits the wounded man and he crumples to the ground, not even the sturdy cover of the hill preventing his defeat. Quidel tries to finish off Redbeard but fails to hit from behind the tree.
Dwaal, now unsaddled, hits and kills Gladiator in a lucky roll against the fierce Savage. Then Dwaal moves towards the head of the convoy to try to lend a claw. Meanwhile Rhodes manages a kill, this time bringing the deadly Bolt Action Rifle to bear on Redbeard, who doesn’t seem the attack coming and dies.
The Horned dinosaur randomly moves again, and with another stroke of luck for the Drylands posse ends up in close combat with Bones. The fierce dinosaur hits the man for 3 damage, while Bones returns the favor with his Club doing 4 damage to the dinosaur.

wr-d23_0983wr-d23_0985wr-d23_0986wr-d23_0990wr-d23_0981
Pirate and Redbeard join the fight again, Gibson falls to a Tomahawk from Redbeard, Dwaal moves down the convoy with his bounding speed, Rhodes lines up a sniper shot on Pirate, Horned dinosaur and Bones locked in deadly combat


Turn 6/6 – Back Into the Mist
No Savages return to the board due to some incredibly bad rolling
Sensing that the Savages morale is about to break, the Drylands posse tries to push the advantage. Rhodes begins by firing his dual pistols at the Horned dinosaur, but only manages a single point of damage. He didn’t want to risk missing with the Bolt Action Rifle which is why he reverted to the pistols. Running high with adrenaline from his last dinosaur kill, Gordon tries to hit the Horned dinosaur with a Riot Grenade and knock it out of close combat (plus his Double Barrel Shotgun needed to be Reloaded). Unfortunately the grenade sailed wide without effect.
With deadly efficiency Quidel kills another Savage, this time downing the Pirate. Now the only living Savage left is Bones.
Dwaal swings around and easily Charges the Horned dinosaur, scratching desperately for 3 damage. In response the Horned dinosaur (randomly choosing a close combat target) stays on Bones and his for 4 more damage.
With a muffled scream Bones breaks from combat and runs into the jungle. Having lost interest in the battle, the Horned dinosaur also shambles off.
At the end Bones had 1 Hitpoint remaining while the Horned dinosaur had 5.

wr-d23_1003


Where’s Cecilia?!
Remember how at the start I mentioned the Savages goal was to capture or take Cecilia out of action? Well, they achieved it. And in the hustle and bustle of the battle no one noticed that her fallen body had been dragged off into the jungle…
wr-d23_1004wr-d23_1006

For what purpose? Well, given the reputation of Matron’s Den one can guess at the grisly reason.
After recovering and recuperating the Drylands posse and rest of the caravan manage to find Savage tracks heading south. Among them is a bloody trail that Gordon swears is from Cecilia. As the Drylands posse are still in his employ, they agree to help the man track down his wife. Besides, everyone liked Cecilia and wouldn’t wish her possible fate on anyone.

The Savages have a bit of a head start as they move Cecilia deeper into the jungle. The beauty of a campaign is the next battle will continue the story!
wr-d23_1007

End of Encounter Process
First of all are Wounds and Injuries. Both Amparo and Gibson were Taken Out of Action, unfortunately. I rolled 1D12 each, with a result of 7 for Amparo and 9 for Gibson. So Gibson is safe but Amparo will suffer a Wound! I rolled 3D12 next with a result of 8+7+1=16. Consulting the Taken Out of Action Effect I see that Amparo’s “Arm” location will be injured with a “Broken Elbow”. So he cannot get Critical Hits while the Wound lasts. Hopefully he can survive the next encounter and the Wound will heal up. At least it wasn’t too bad of a result though. If it does get upgraded to an Injury I could always return to Watterson and fix him up (after getting paid by Grogan for escorting Gordon, of course).

ShamanNext up are the rewards for taking enemies out of action and completing objectives. The Drylands Expedition and friends managed to kill 9 Savages and 1 Dinosaur. I didn’t feel that each Savage was worth +3 IP, so I settled for half. So 9 kills = 24/2 = 12 IP, +3 IP for the dinosaur. This +15 IP also worked out to +$150, and an additional +$30 for surviving the 6 Turns (unfortunately no additional Neodollars as Cecilia was taken out of action).
With the posse’s previous IP and ND and these new spoils they now have 24 IP (121 IP Total) and $210 ($1270 total).

As I mentioned last game I wanted to wait until I could buy really nice guns to re-equip Rhodes. Now was that time! So he got 2 new 300kW Six-Shooters ($80 each, $160 total). He gave one of his old 80kW Six-Shooters to Quidel (always good to have a backup weapon) and the other to Amparo (since he previously had nothing to do if someone got inside his minimum range).
This left the posse with $50, which they spent to buy Amparo (who had no Defense) a suit of Quilted Armor ($50, +1 DEF).

Quidel received an improvement using the 24 IP. By spending 15 IP his RTN was upgrading from 7 to 6.

The posse is left with 9 IP and $0. At the end of day three they look like this: Saloon Link.


So all in all that was a super fun game of Dinosaur Cowboys. Everything worked out really well in terms of the new rules and various mechanics I tried. Having a couple of Features really added to the feel of the game, and the Line Deployment fit in perfectly for what I visualized. Losing Cecilia was definitely a downside, but it does provide me with a good chance to continue the story (and probably end up raiding Matron’s Den).
The Drylands Expedition posse have worked well so far, and I’ve been happy with my choices. I’m glad I went for a fast dinosaur instead of a meatier one, since mobility matters a lot when you don’t know what the objective will be like. I could use a few more HP on everyone, but that might come after a bit more IP. In terms of equipment everyone is doing very well, and all I could see doing would be getting more versatility (maybe Grenades?).
Anyways you probably noticed I failed at doing a smaller write up :) This was still a lengthy process unfortunately. I’m going to hopefully play a game later tonight, or this weekend, and I might work on writing that one up smaller. Anyway, lots of fun with the v1.9 rules and still getting to see the posse grow. I should have enough IP next time to grant me a 4th Trait, and maybe +1 DEF to Amparo (and then I can shift his armor off to someone else). We’ll see though!
Brawl at Watterson – Windy River Day 1

DC-Windy-River_Game1-0005
Well I finally got some time to sit down and play my first game in the Windy River test campaign featuring the Drylands Expedition (PDF).

windy-river-day1The posse entered the map in the top left corner, simulating them continuing their south-east journey from Hope to the remote corner of Wyoming that contains Windy River. The scale of the map was 1 hex = 3 miles. Quidel had the slowest Movement of 3, which put them at 3mph overland speed, so 18 miles per day (or 6 hexes). Quite a range! Normally a larger map would have a scale of 1 hex = 1 mile, but for convenience sake (since Quidel has 3 MV) the 1 to 3 ratio was used for this campaign.
They walked along the broken and cracked pavement, stopping for a brief lunch outside of the town of Watterson. The flat plains around them didn’t affect movement at all, so the Drylands Expedition reached Watterson in the afternoon.
Quidel planned to head to the only saloon in town called The Dusty Claw. Gibson was in charge of Dwaal, so he went to the stables with the dinosaur. Crazy Rhodes took out a bottle of whiskey from his seemingly endless supply and headed to the jungle at the edge of town to drink. Eager to be “rebellious”, Amp also went with him.
Here is how the town of Watterson looks:
dc-windy-river_game1-0006
DC-Windy-River_Game1-0012Most townsfolk were still out hunting, patrolling the roads, gathering supplies, wrangling dinosaurs, etc. so the town was fairly empty. The barkeep (and part owner) Ortiz was available to talk to Quidel about the area. A stablehand helped Gibson with Dwaal. And a few rough looking characters were around town.
One named Pickaxe Pete was helping load barrels at the Warehouse. Although unknown to the Drylands Expedition, his friend and ally The Smecker was busy harassing a girl in the small house directly north of the stables. And the leader of their little gang was Ruth Storm, who had been drinking all day in The Dusty Claw after losing a new recruit to a rampaging Horned dinosaur.
You can imagine how this will go.


Campaign Variant Rules: Last Man Standing, Dual Wield
Local Variant Rules and Features: Clear Day, Town, Road, Out of Supplies (represents a loose no weapon policy in the town)
DC-Windy-River_Game1-0002
Pictured above are the Etchglen Hunters, a local posse that poach dinosaurs in the jungle south of the town. Download their PDF posse roster


Turn 1 – A Fight Breaks Out
DC-Windy-River_Game1-0013Inside The Dusty Claw, Ruth misinterprets a comment Quidel makes to Ortiz, which she reasons out to be an insult to the town. Smashing her half empty glass on the table, she starts yelling at Quidel. The debate turns heated, and unknown to the two posses outside, Ruth takes a swing at Quidel with the remnants of her glass.
The Etchglen leader misses the Drylands leader. Quidel is quick to react, but doesn’t want a big issue with the town, so he opts for a Brawl attack called Trip (which would apply Stop to Ruth). However he misses, and settles for moving out the front door of the saloon.
Here are the positions of everyone outside:
DC-Windy-River_Game1-0015DC-Windy-River_Game1-0016
DC-Windy-River_Game1-0019DC-Windy-River_Game1-0021
Left to Right: Jungle Fang, the Raptor of Etchglen, is just returning from hunting food outside of town (since the posse are too cheap to pay stable fees). Gibson talks to the stablehand with Dwaal nearby. Amp and Rhodes drink in the thin jungle near the edge of town. The Smecker in the house north of the stables, unknown to Gibson.

As Quidel emerges from the saloon, his brow furrowed in anger, Gibson notices from across the road and calls out to him. “Just a crazy drunk woman in there. Better round up everyone, she might have friends,” Quidel shouts back. His complaint is loud enough that Pickaxe Pete, at the nearby warehouse, hears the pair. The man is desperately defensive of Ruth Storm, and instantly drops the heavy barrel he was loading and tries a long 6″ Charge at Quidel. Unfortunately he didn’t roll high enough on the distance so is left aggressively posturing a few inches away.
DC-Windy-River_Game1-0025

Gibson sees the man approaching, and even though he isn’t too enamored with Quidel, he at least doesn’t want to see some local drive a pickaxe into the Duster Leader. Luckily the “Out of Supplies” Feature doesn’t affect Gibson since his Laserbow never has to be Reloaded. So he pulls back on the charging string and lets a blast of energy fly at Pickaxe Pete. Perhaps subconsciously wanting to avoid a lethal confrontation, Gibson misses his shot.
Following his friend’s lead, Dwaal snaps free of the stable harness and tries to Charge at Pickaxe Pete, but also fails his distance roll.
DC-Windy-River_Game1-0027DC-Windy-River_Game1-0029

Hearing the laser blast, The Smecker drops the girl he’s harassing and slams out the front door, loading charges into his double barrel shotgun as he approaches.
Meanwhile, stirred by a dinosaur aggressively moving towards it’s master, Jungle Fang boldly strides up the road and easily succeeds at Charging the unsuspecting Quidel. The Raptor lunges and lands on top of Quidel, clawing and tearing wildly. Quidel takes 7 damage from the attack and fails his Bravery Test!
DC-Windy-River_Game1-0035

Seeing a commotion further down the road, Rhodes and Amp put away the bottle of booze and advance across the pavement. Along the way both unholster and Reload their weapons in preparation for trouble. Meanwhile the stablehand dives for cover, and Ortiz hastily tries to kick the angry Ruth Storm out of his saloon.
That’s the end of turn 1. At this point I should mention the Objective, which is Strike Fear. Although this was a random roll the Objective seemed well suited since neither posse wants a bloodbath on their hands, and are really just trying to route and shoo away the other gang.
The first Posse to cause 4 Bravery Tests against the enemy wins. Note that taking an enemy out of action counts towards this goal. So you could cause three Bravery Tests then kill one of the people that took it, and that’d be enough to win.


Turn 2 – Conflict Escalation
DC-Windy-River_Game1-0038Pressured by Rhodes, Amp lines up a long distance shot (possible thanks to the “Clear Day” Feature) at Pickaxe Pete, who is clearly in line to attack Quidel. Amparo’s steady hand lets him land the impressive shot, hitting for 7 damage (2 hits, one of which was a Critical). Suddenly awash in searing pain from an unknown direction, Pickaxe Pete fails his Bravery Test and will Flee.
DC-Windy-River_Game1-0043Still growling and viciously snapping at Quidel, Jungle Fang continues his relentless assault. The dinosaur hits again for another 7 (that 1A-6D on RMC 6 is brutal!). Before Quidel can even react, he is taken out of action. Can you imagine leaving a saloon and having a Raptor leap on you and claw you nearly to death? Jungle Fang finishes his impressive Activation by moving towards his next victim: Gibson.
Since Quidel was the Leader and was taken out of action, every other character in the Posse needs to take a Bravery Test. And guess what? They ALL fail! Luckily Bravery Tests incurred by a Leader dying don’t count towards the number needed to win.
Hearing Quidel’s pained yells and seeing the blast of energy from Amp’s shot, The Smecker moves closer to the unsuspecting Gibson and unloads a single barrel of super heated plasma. The attack benefited from the “Shot in the Back” rule (10+ would Critical instead of just 12), but unfortunately the shot misses.
DC-Windy-River_Game1-0039

As he’s Fleeing away, Gibson sees the blast of energy from The Smecker fly over his shoulder. Quickly the man turns and fires his Laserbow at The Smecker, hitting with a Critical for 7 total damage, which causes the coward to Flee.

DC-Windy-River_Game1-0045Furious at seeing his friend hurt, Dwaal screeches and Charges at Pickaxe Pete, who was already marked Fleeing. Unfortunately the flailing, small dinosaur fails to connect with any claws.
Pickaxe Pete, disorientated and still Fleeing, heads his Movement of 6″ directly away from Dwaal. Desperately the man tries to Charge back in, but fails the distance roll and stays where he is.

Rhodes completes his mandatory Fleeing movement down the road, then reverses and Runs back towards the fight. Ruth Storm drops the rest of her glass and stumbles outside to see what the fuss is about. She nearly trips on the prone, bloodied body of Quidel. Shaking her head to try to sober up, the Etchglen Leader reloads massive batteries into her Handcannon.

At this point Quidel had failed a Bravery Test and was taken out, so Etchglen has a score of 2. Pickaxe Pete and The Smecker failed Bravery Tests so Drylands also has a score of 2.
Etchglen: 2
Drylands: 2


Turn 3 – Blood in the Streets
DC-Windy-River_Game1-0049Ruth Storm edges behind her loyal dinosaur Jungle Fang, using his tail both as cover and as support for her shot. Aiming she fires at Dwaal, who is exposed after Pickaxe Pete fled. The shot connects and wounds the dinosaur for 9 damage, which adds a Panic token.

DC-Windy-River_Game1-0048Further up the road Amparo, still Fleeing from Quidel being taken out, completes his mandatory movement then does an extreme distance shot at The Smecker, who is busy menacing Gibson. The shot hits for 8 damage and takes the man out of action. Amp has been consistently impressive so far this battle. Drylands now has a score of 3.

Having calmed slightly at having Ruth so close, Jungle Fang still knows what it must do. Moving forward from being The Dusty Claw, the carnivorous Raptor Charges Dwaal, hitting once for 7 damage which takes the smaller herbivore out of action. Now Etchglen also has a score of 3.

Gibson edges forward, keeping close behind a crater in the old pavement. Thanks to the “Clear Day” (+5″ Long range to any weapon) his Laserbow is able to reach Pickaxe Pete at long range. Steadying himself with two calm breaths, the Neotechnoist charges the bow and lets fly at Pickaxe Pete. The blast of energy hits the main square in the chest for 6 damage, which takes him out of action. This brings the Drylands Expedition score to 4, and wins the battle!

The remnants of Etchglen slink off into the fading light, hoping to avoid any further abuse.
Etchglen: 3
Drylands: 4


End of Encounter Process
So-Wild-WestSince this is a campaign, tracking IP, ND, and injuries is very important. The first step is to determine if any of the Drylands members suffered Wounds from being taken out of action. Quidel and Dwaal are the only two affected, so they have to roll 1D12. Luckily Leader’s get +2 to the roll and Dinosaurs get +1, and if they get 8+ on the roll they are unharmed. With crazy luck I rolled a 12+2 for Quidel and 11+1 for Dwaal, so there are no lasting effects from being mauled by a Raptor.
Next the posse receives rewards based on the encounter. In this case they took two enemies out of action (Pickaxe Pete and The Smecker) which gives +6 IP and +$60 ND. They also won the encounter so they receive an extra +$30 for a total of +$90. Since they had some leftover IP (3) they have 9 IP and $90 to use if they wish.

I considered getting 2x100kW Six-Shooters for Rhodes, since he’s leveraging the “Dual Wield” Variant Rule, but I think I’ll wait to upgrade him until I can go dual Handcannons (because that would be awesome) for 3A-6D. Instead $60 will be spent on a 200kW Six-Shooter for Gibson. His Laserbow is nice with never having to Reload, and against low armor targets the single attack isn’t too bad. But I got lucky with some rolls, like against The Smecker (who had AR 2) where Gibson needed 10+ to hit. In those cases I’d rather have a backup weapon, so a 4A-2D six-shooter sounds like a perfect alternative. Plus it’s technically similar damage to the Laserbow (1A-5D) so he can interchange them without any loss.
The remaining $30 will be saved.

As for the Improvement Points, all 9 will be saved for the time being. If I can get 10 IP then Quidel could have +1 MV, or I could give +1 AR to Amp.

So after their first victory, the Drylands Expedition looks like this (Saloon link).

Even though I’m only one game into the campaign, I’m already excited to see the growth and evolution of the posse. Hopefully I can get another game in this week (Wednesday), and then maybe next week. Not sure if I’ll be able to keep doing such fleshed out battle reports since they take close to 3 hours to write up :)

Changes and Notes From Play
– Change Saloon PDF export to not use decimal places for Neodollars
– Make “Strike Fear” objective not include Bravery Tests due to Leader death, since otherwise it becomes “Assassination”
– Note only 1 Panic token can be added per single attack (currently confusing with “multiple” wording)

Battle Report: Halloween at the Old Bunker

Halloween Supplement
Get the Dinosaur Cowboys Halloween Supplement here, which will allow you to pit your cowboys against a few deadly variants of Undead! Happy Halloween!

Encounter Overview
This game was really fun and light hearted to play. I set out my spookiest terrain yesterday night, grabbed a bundle of plastic figures from Zombies!!!, put my Undead brainstorming ideas to paper, and rocked a Halloween special event.
Why the human posse were by the old Bunker doesn’t matter. They could have been looting scrap or old world artifacts, just passing through, or investigating the strange reports of shambling creatures. Regardless the living dead started to spill from the old Bunker. Their goal was clear: get inside and destroy the point of origin (which turned out to be a trapdoor).
I started the game with the Halloween Hunters deployed in a rough circle by a giant pumpkin. Barrels scattered from blast impacts acted as a crude shelter, and a rusty Cannon emplacement was nearby. The Bunker was in sight, but a seemingly endless supply of Undead rose to block their advance.

Details
Posse Deployment: Deploy first within 10″ of Pumpkin
Undead Deployment: D6+4 Pioneers and D3 Savages start within 6″ of the Bunker on a random side. This ended up being 10 Pioneers and 2 Savages. Each Undead rolled a D4 on Spawning for the direction from the Bunker they started at, with 1=north, 2=east, 3=south, 4=west

Cannon Emplacement: Action Phase to fire. 12″ range, 1A-12D Fireline
Bunker: Objective Trapdoor had 4 HP. Entering the building blasted the entity through a portal and to a random start point (either north or south) inside the Bunker

Variant Rules: Dual Wield
Special Rules: Halloween Supplement: Double Tap (Shotguns have 1D6″ Knockback), Fear of Death (never take BRV or DIS, rise as Juggernaught if killed), I Will Survive (+2 HP to all), Planning (do not roll Initiative to Activate, just alternate Posse/Undead each Turn)

Table Setup
Terribly shaky or washed out images of the table. My camera really didn’t appreciate a dark cloth mat instead of the usual grass or sand look:

Posse: Halloween Hunters: 120 IP, 2150 ND, 3 Traits
I built this posse entirely based on the coolest and most suiting figures. Plus it was a perfect chance to get my new latest two figures onto the table. How suitable is a Priest and a character from Zombieland for this scenario, right?! I basically started picking fun weapons and gear and worrying about the cost later, which is why I ended up with such a high Neodollar value.
First of all was Ronald Gin. Gin is a funny last name. He was my Priest figure, so instantly his shotgun pistol became a Sawed Off Shotgun. I gave him a Hunting Knife and Cloth Armor and called it a day.
His daughter is Alson the Red, and again I tried to match the figure. So she got a Heavy Pistol and Boom Grenades (since the figure has a big pack of grenades on her hip). Plus she seemed like the motivational sort, so voila I assigned her the “Get Up!” Trait.
Then Carl “Coyote” Sternah, my Zombieland figure. Dual Stub Pistols (I realized I don’t have machine gun pistols :( ) were an obvious choice, especially with the Dual Wield variant rule being used. He looked like the Bandit-y type.
Vladizlov and Trista Camus are old classic figures to me, since I’ve used them for everything from post apocalyptic to zombie hunting (see, they are veterans in the field) to my very first Dinosaur Cowboy battle report! Vlad got his usual Assault Rifle, but also a pack of Riot Grenades to represent the demolition pack his figure has. Trista got her usual 400kW Lever-Action Rifle and a backup six-shooter. Bandit for Vlad, Neotechnoist for Trista (poor Trista never gets above 12 HP).
For a dinosaur I chose my favorite one: Ankylosaurus, or in this case “Armored”. He’d be named Mace Mate, and hopefully could stand up to some clawing Undead hands pretty well with his AR 4.
In terms of IP expenditures I went pretty basic. Some -1 RMC here and there, a few extra HP, some faster movement, etc. Nothing too wild and thus why I was fine with only 120 IP.
Here is the result (note that this is before the “I Will Survive” special rule took effect, so they all gained an extra +2 HP beyond what you see):

Ronald Gin (Duster Leader)
MV 3, AR 1, RMC 7, MMC 7, BRV 7, HP 12, Escape. Sawed Off Shotgun, Hunting Knife, Cloth Armor, Small IRP.

Carl "Coyote" Sternah (Bandit)
MV 4, AR 0, RMC 6, MMC 8, BRV 8, HP 8. Stub Pistol, Stub Pistol.

Vladizlov (Bandit)
MV 5, AR 0, RMC 6, MMC 8, BRV 8, HP 8, Knee Shot. Assault Rifle, Riot Grenades, Axe.

Trista Camus (Neotechnoist)
MV 4, AR 0, RMC 7, MMC 8, BRV 6, HP 6. 400kW Lever-Action Rifle, 80kW Six-Shooter.

Alson the Red (Duster)
MV 3, AR 0, RMC 7, MMC 8, BRV 6, HP 10, Get Up!. Heavy Pistol, Boom Grenades, Shank.

Mace Mate (Untrained Armored Dinosaur)
MV 3, PMV D4, AR 4, MMC 7, DIS 5, HP 20.


The Undead Menace
Here are the details on how the Undead played, as well as a picture showing who is who (and yes, that is a 2nd edition Warhammer 40,000 Plague Marine). The only difference in statistics between my game and the Halloween Supplement is my Juggernaughts only had D8 Dark Power.

Special Rules
Dark Power
– Roll when hit
– Roll >= incoming damage = Stunned and Stopped
– Roll < incoming damage = killed
– Cannot use Dark Power when Stunned or Stopped
Relentless
– Ignore Difficult Terrain
– Never take Bravery Test
Shambling Horde
– When being attack never benefit from the Movement penalty
– Can’t Run
– Can Charge

Undead Pioneer
MV 5, MMC 5
Melee 2A-5D (Slowed on hit)
D6 Dark Power

Undead Cowboy
MV 4, RMC 7
Range 3A-2D (range 12″)
D6 Dark Power

Undead Savage
MV 6, MMC 5
Melee 4A-1D
D6 Dark Power

Undead Juggernaught
MV 4, MMC 5
Melee 1A-7D (1D6″ Knockback on hit)
D12 Dark Power


(Left) The mass of Undead waiting to be used plus an early version of the Halloween Supplement
(Right) A cool ruined vehicle left on the table from years and years ago

Blurry Deployment
Curse you camera!


(Left) The Halloween Hunters deployment. Gin on the Cannon, Trista in the back, Vlad in the middle, Coyote and Alson on the frontline, and Mace ready to distract up top
(Middle) The initial Undead sprawled around the Bunker, 10 Pioneers and 2 Savages! Some were already in range of the posse
(Right) The Cannon actually looks really cool up close, and in focus

Fright Night Begins!
T1: Having seen the shambling Undead arise from the Bunker the various members of the posse grit their teeth and await the onslaught. These are no amateur dinohands though, and four Pioneers drop from the combined fire of everything but Gin (who was out of range). Of those kills only a single Pioneer even got to roll their Dark Power (which they failed), since the rest of the damage was far above 6. Coyote especially impressed me, as he would the rest of the match, with a powerful opening salvo of two Criticals and two high hits.
After dropping their targets everyone moved forward…well, except for Gin. He hung back on the Cannon, just in case a quick retreat was needed. Mace Mate lumbered forward, his slow 4″ Run getting him ever closer to crushing Undead flesh.
Undead: +1 Pioneer, deploys west

T2: The firing continues in earnest. Coyote and Vlad kill a Savage each, easing some of the pressure of impending melee. Alson and Trista keep up without any problem, both killing a Pioneer. Gin feels left out so he leaves the Cannon emplacement and Runs forward. Mace continues his Run, stopping just past a wall.
Undead: +4 Pioneer, 3 deploy north, 1 deploys east


T3: Seeing the advancing horde of Undead Pioneers so foolishly clumped together Alson knew her best course of action. Grabbing a heavy Boom Grenade from her belt she flipped the ignition switch and threw it into the center of the crowd of walking dead.

BOOM! The grenades live up to their name as 4 Pioneers are shredded. Coyote looks on, jealously, then sets his own weapons to work. Along with Vlad and Trista they kill 3 Pioneers total. Gin and Mace continue their trek forward, both Running to keep up with the rest of the posse. The rest of the Halloween Hunters just shift their position slightly, with Alson moving north and Trista edging forward closer to cover. Vlad boldly moves towards to the cleared Bunker door, hoping to get inside and put a permanent end to the Undead horde.
Undead: +1 Juggernaught, deploys south

(Left) The first Juggernaught arrives
(Right) Vlad is almost to the front door

T4: The ground shakes as Mace finally reaches a witless Pioneer. Spinning furiously the Armored dinosaur smashes the Undead into pulp. Guns roar around him as Gin shotguns another Pioneer, while Alson edges into the cover of the rocks and downs a third Pioneer. Coyote levels both Stub Pistols and riddles the lone Juggernaught full of holes for 8 damage. Trista takes some time to reposition, Running forward to get into her optimal range.

Meanwhile Vlad finally reaches the Bunker door and enters. Instantly he is blasted by cold and disoriented, and when his vision clears he’s deep in an underground complex, appearing from the south entrance.
Undead: At this point the Undead in the Bunker were Spawned with three rolls on the Undead Generation Chart. The result was 9 Pioneers and 3 Savages, who were deployed throughout the tunnels.

In addition since the Bunker was breached the Undead started Spawning frantically. Now the Undead got TWO rolls on the Undead Generation Chart at the end of each Turn, instead of just one. This resulted in +4 Pioneers (2 deploy east, 1 deploys north, 1 deploys south) and +1 Juggernaught (deploys east).

Meanwhile the situation outside…

T5: Alson suddenly feels overly exposed, even in the cover of half a fence and a pile of rocks. She misses her shot on the nearest Pioneer and decides to move backwards. Gin on the other hand bravely moves forward, killing the only Juggernaught on his way towards the Bunker (7 damage vs a 4 Dark Power roll). Trista and Coyote both earn their pay, with the woman killing a Pioneer to the right and the man killing a Pioneer to the south. Mace continues his advance forward, killing the last Pioneer east of the bunker (4 damage vs Dark Power 2 roll). The Bunker door is clear once more, and Gin is very close to entering it.
Inside the bunker Vlad knows his situation is desperate. He’s not wounded yet, but the stench of death surrounds him. Easily, almost casually, he kills the first Pioneer in a long row of Undead, and advances around the corner to face the remaining horde.

Undead: The Pioneer nearest to Vlad growls and slashes dirty fingernails at the Bandit. The attack hits for 7 damage, which leaves Vlad with a deadly wound at 3 HP. The Spawn is +1 Cowboy, deploys west and +5 Pioneers, 2 deploy south, and 1 to each other direction.

T6: Gin continues his march forward, ending up right outside the Bunker door. Next Turn he can enter the sordid pit of death. On the way he kills another Pioneer, but empties his Sawed Off Shotgun in the process and needs to Reload! Coyote and Trista continue to methodically murder the already-dead, almost if they were competing for number of kills. Each bag a Pioneer this Turn.
Seeing the effectiveness of her last Boom Grenade and know the Undead tended to bunch up, Alson focuses on Reloading her grenade. Mace is much less reserved, Charging around the corner of the Bunker (since he can’t fit in the door) and trampling the first Pioneer he sees.
Inside the Bunker, Vlad kills the Pioneer that just wounded him and continues to advance. He knows the next foe may be his killer.
Undead: As the Pioneers on the surface advance, the Cowboy rounds the corner and fires his rusty revolver at the first warm target he sees: Coyote. The shot is true and the human takes 4 damage. The Savage facing Vlad easily hits him for 3 damage, which kills the poor soul. The Bunker remains in Undead hands. The Spawn roll was +4 Pioneers, 1 deploying in each direction, and the second Spawn roll was nothing.


(Left) Mace Mate continues to hold his own against the horde of Undead streaming from the bunker.
(Right) The mighty Vlad falls to the blade of a Savage

T7: Shaken by the horrible screams emanating from the Bunker, Trista fluffs her shot and misses the Pioneer in front of Gin (with 3 attacks on 7+ no less). Alson moves closer to Short range and kills the very same Pioneer, keeping her father safe and providing a clear route into the Bunker. Coyote and Mace kill one Pioneer apiece, with Mace’s method being a bit more brutal and gory compared to bullets.
Unwavering in his dedication to sunder the Undead home, Gin enters the Bunker. The entry portal puts him opposite where Vlad died, so he appears in the northern corridor. The leader hasn’t had time to Reload his shotgun so he draws his Hunting Knife and severs the head of the first Savage he sees. His eyes widen in horror though as the Savage merely falls rolling to the ground, hurt and stunned but certainly still thrashing (5 damage vs a Dark Power roll of 5!).

Undead: Even with multiple pairs of claws scratching at Mace’s hide, the Undead fail to hit him at all. The Undead Cowboy is luckier and strikes Coyote for another 3 damage. The first Spawn roll is nothing, but the second is a big improvement with +6 Pioneers (3 deploy north, 2 deploy south, 1 deploys west).

T8: Seeing Coyote pouring blood from two bullet holes, Alson desperately cheers him on with “Get Up!”. Her inspiring words restore 5 HP to the Bandit, and he’s now back to 8 HP. Ignoring the pain he focuses on the Cowboy while the Undead fumbles with his pistol. A loud crack echoes across the blackened land and the Cowboy falls dead(er). Trista regains her composure and shoots a Pioneer who was getting close enough to rush Alson and Coyote, but a lucky Dark Power roll saves the Undead (5 damage vs 6 Dark Power roll). Mace continues his relentless assault on the Undead, his strong muscles and heavy tail never tiring. Another Pioneer falls to his attack.
Inside the Bunker, Gin stabs down at the writhing, headless form of the Savage and kills it. He advances forward to face the next Undead menace.
Undead: Three Pioneers scratch, claw, and stab at Mace, but only one hits for 7 damage. The Pioneer in the Bunker facing Gin misses the dauntless Priest. And with the worse luck for the forces of darkness BOTH Spawn rolls result in nothing!

Both Spawn rolls come up with a 1-2 result of Nothing!

T9: The Turn starts encouragingly with Mace slaying another Undead Pioneer. Trista tries to support the mighty dinosaur by firing at one of his adversaries, but she misses the long range shot.
The spotlight again settles on Alson as she heaves another Boom Grenade at the closest clump of Pioneers. With a perfect roll of 12 on the single attack this…

…turns to this…

Seeing an opening Coyote nods to Alson and Runs through the nearby Bunker door. The entry portal is fickle and the Bandit winds up opposite Gin in the southern corridor. The leader hears his comrade’s feet clattering on the metal floor, and is inspired to stab another Pioneer to death, followed by a slight advance to the next Undead.

Undead: The Undead start strong with a Pioneer hitting Mace for 6 damage, and an underground Undead hitting Gin for 7 damage. The nearest Savage rounds the tunnel corner and lashes out at Coyote for 3 damage. The rest of the Undead in the Bunker shamble forward, eagerly awaiting their turn to rip warm flesh apart. This lucky streak of damage turns to frustration as BOTH Spawn rolls come up with nothing (again!).

(Left) The deadly fight in the Bunker continues, but the Undead numbers are dwindling
(Right) Another terribly unlucky set of Spawn rolls!

T10: Wanting to stand by her father in the fight against evil, Alson Reloads her Boom Grenade and moves towards the Bunker door. Covering her from the cover of a wood blockade, Trista kills the Pioneer blocking the young girl’s path. To the north of the Bunker the Armored dinosaurs tears another Pioneer in half, leaving only a single Undead creature facing him.
Underground in the Bunker both men kill another Undead, with Coyote getting a Savage and Gin getting a Pioneer. Both of them advance another square towards the trapdoor objective, but many Undead still block the way.

Undead: The Bunker forces perform well for mindless minions, with one Pioneer hitting Gin for 6 damage and on the opposite end of the Bunker another Pioneer kills Coyote! One of the Spawn rolls is nothing, but the other is +6 Pioneers (3 deploy north, 2 deploy south, 1 deploys east).

T11: Trista continues to cover Alson, taking aim and killing the recently risen Undead blocking Alson’s path to the Bunker. Alson sees her chance and dives through the entryway. The portal is finally on humanity’s side and she arrives behind Gin in the northern section. Immediately she makes her presence felt by shooting the nearest Pioneer with her Heavy Pistol. The shot hits for 5 damage but the Dark Power roll is 6, so the Undead Pioneer merely drops to the ground. Taking advantage of the opening Gin sheathes his knife and Reloads his Sawed Off Shotgun.
Above ground, the dinosaur wearily misses his attack on the nearest Pioneer.
Undead: One of the many Pioneers clumping around Mace hits the dinosaur for 7 more damage. Mace Mate is down to 2 HP from a towering 22 at the start of the game. All the Undead in the Bunker shift closer to the humans. The Spawn rolls result in +1 Savage (deploys south) and nothing.

T12: Lowering his freshly reloaded shotgun into the face of the knocked down Pioneer, Gin puts the sorry excuse for a life form out of it’s misery. He quickly steps back from the junction after hearing Alson’s hurried command over his shoulder. Just as he gets clear a spinning grenade flies over his shoulder. Alson has thrown another Boom Grenade, this time aiming for the t-intersection. The grenade looks to be sailing short (roll of 4 to hit) but Gin gleefully shouts “Yeehaw!” and the path ends up being true. The re-roll is an 11 and the Boom Grenade decimates the 4 Undead clumped around the intersection. Only 1 Pioneer remains in the Bunker, blocking the path to the trapdoor.

Above ground Trista kills another Savage at long range, while Mace fails to hit any of the four Pioneers around him.
Undead: With a horrible gurgling sound Mace finally drops to the ground, dead. Pioneers crawl all over the falling body, tearing chunks of dinoflesh from the corpse. The first Pioneer had hit for 5 damage which finished off the dinosaur. In total 6 Pioneers mindlessly shuffle towards Trista, who is all alone on the surface now. The Spawn roll results in +4 Pioneers (2 deploy south, 1 deploys east, 1 deploys west).

T13: The lone Pioneer standing between the survivors of the posse and the Bunker trapdoor is cut in half by Gin’s shotgun blast. He moves as far forward as he can, eager to finish his task and destroy the origin of the Undead. Alson Runs to right behind Gin. Above ground Trista kills another Pioneer and starts falling back to the Cannon emplacement. The powerful weapon can send a massive shot rolling right through the ranks of the advancing horde. And it truly is a horde, with at least a dozen Pioneers chasing Trista.

Undead: Massive Spawn roll of +10 Pioneers (deployed evenly on each side)

T14: Trista Runs and leaps over the old sandbags and grabs the elevation wheel of the Cannon, ready to put it to deadly use until the final Undead creature has been slain. In the Bunker, Gin lines up the most important shot of his life. The Sawed Off Shotgun masterfully blasts the trapdoor for 7 damage, destroying the feeble hinges and dropping the iron gate on the dark tunnel below. The new west is safe…for now…

Battle Report: Hills and Passes

Encounter Overview
Background: I had two goals when I setup this game: use a lot of hills, and use my new cacti models. So I placed terrain and road sections to make the table look like an abandoned stretch of dusty highway. Think “The Loneliest Road in America” Highway 50 in Nevada as it cuts through a pass.
There were some secondary goals around this game as well. I wanted to try a couple Variant Rules, since normally I play vanilla Dinosaur Cowboys. I also wanted to use higher IP and ND values to make more powerful posses.
The posses I ended up with are a travelling group of performers, artists, and vagabonds named Maudlin Travelling Band. They would be wandering the road scavenging for supplies and looking for towns to entertain. The other posse was the exact opposite, a tough gang of bandits and raiders who generally go to towns to kill and steal. They were called, aptly enough, The Dirty Dogs.
This battle report was using the v1.3 rules, so Neotechnoists got a bit of a buff with their new Allegiance benefit.
Also I’ve tried trimming down the level of detail I go into for each turn. So no more specifics on who rolled what, instead I’ll try to give a general summary of each turn. One of these days I’d really like to get a battle report map going.

Posse Resources: Each posse had 2,000 Neodollars and 200 Improvement Points and 6 Traits to allocate.
Variant Rules: Dual Wield and Last Man Standing.
Special Rules: +1 MV if a move starts on the road. This bonus applies for BOTH Standard Move and Running or Charging, so it’s possible to get +2 MV just by Standard Move + Run on your turn.

Posse: Maudlin Travelling Band: 1/2000 IP, 0/2000 ND, 6/6 Traits
I figured the Maudlin Travelling Band would hail from an imaginary small town called Maudlin, and be lead by a father and daughter. They would be general survivors and drifters so the Bandit allegiance worked best. Along the way they picked up Thurn, a Duster, who is a rougher cattle hand who grew tired of life on the ranch and now is training up his gimmicks and tricks for the road. Markus is another Duster, and happens to be in love with Ozie. Her father Gerg pretends to not notice, but there is definitely friction as a result. The Savage Wildgrass is sort of a novelty item in some smaller, backwater towns, so he completes the troupe. And Tarnation is their Ripper dinosaur, because what travelling act wouldn’t have a dinosaur?!
Now that I had some general background I needed to fill in their stats and equipment. With $2,000 and 200 IP there was plenty of high end gear to go around. Ozie got a Handcannon (terrific short range pistol) and Kaboom Grenades, mainly since I don’t use grenades nearly enough. Gerg was the melee man with a Twin Lance, and he would start the game mounted on Tarnation to complete the “knight in the wild west” image he portrays on stage. Thurn and Markus got a pretty standard set of gear with some pistols and a Light Repeater. It’s hard to not match Wildgrass’ classic Necromunda figure so I had to give him a Double Barrel Shotgun. A Flail completed his gear, and the Savage Allegiance movement boost meant he could try to advance alongside Gerg and Tarnation.
I was aiming for a denied flank setup. Markus would hold down one side of the road alone, since his gun had good range. The other side would have everyone else in a big clump. Ozie and Thurn would try to advance together since their weapons had similar range. Wildgrass would parallel Gerg but also provide some melee support in the middle if needed. He could leverage the road to boost his speed to try to pace Tarnation. And Gerg would go for the long side flank, rushing ahead on Tarnation as fast as possible to shut down any backline shooters.

Ozie Tumaneng (Bandit Leader)
MV 4, AR 0, RMC 5, MMC 8, BRV 7, HP 12, Speed Reload, Bonus RMC. Kaboom Grenades, Handcannon, Small IRP.

Gerg Tumaneng (Bandit)
MV 5, AR 2, RMC 8, MMC 7, BRV 6, HP 12, Inspiring Shot. 80kW Six-Shooter, Twin Lance, Wood Armor.

Thurn (Duster)
MV 3, AR 0, RMC 6, MMC 8, BRV 6, HP 15, Bonus HP. Heavy Pistol, 100kW Six-Shooter.

Markus (Duster)
MV 3, AR 1, RMC 6, MMC 8, BRV 6, HP 12, Go For the Eyes. Light Repeater, Small IRP.

Wildgrass (Savage)
MV 5, AR 2, RMC 8, MMC 7, BRV 6, HP 10, Get Up!. Double Barrel Shotgun, Flail, Wood Armor.

Tarnation (Untrained Ripper Dinosaur)
MV 7, PMV D8, AR 0, MMC 7, DIS 5, HP 12.

Posse: The Dirty Dogs: 3/200 IP, 0/2000 ND, 6/6 Traits
I opted for a big, expensive dinosaur at the core of the posse. Something about the King (T-Rex) dinosaur always seems perfect for a marauding gang of raiders. I can just imagine the fear it would strike into villagers and mere peasants. So yeah, Kalgin the King dinosaur was chosen. A slew of Traits helped ensure he could survive the long trek across the table. I hesitated mounting anyone on him since his towering height makes a rider an easy target.
Anyways in terms of backstory for the human members I went with the tried and true “corrupted Neotechnoists”. Ruger and Ximenez would both be fallen Neotechnoists, perhaps dabbling in drug running and other nefarious pursuits. Two silent henchmen completed the posse, in this case Falcon Hand (sounds like a cheesy 80s super villain) who was a Duster, and The Gray Shadow who was a sniper Bandit.
In terms of gear a crude Assault Rifle seemed perfect for Ruger. It matched the figure very well and I like the juxtaposition (woa getting fancy) of an advanced civilization still using gunpowder based firearms. Ximenez went for a Sawed Off Shotgun to continue the “brutal weapons” trend.
Since one of the Variant Rules we’re using is Dual Wielding (+1A when using 2 small weapons of the same type) and Falcon Hand’s figure had two pistols, I decided he’d naturally have two 200kW Six-Shooters, hitting at 5A-2D. The Gray Shadow got a Twin Rifle for sniping and a simple 80kW Six-Shooter sidearm for enemies inside the minimum range. The “Both Barrels” feature of the Twin Rifle is nice, especially for early shots to make enemies dive for cover. A few Traits and some scraps of armor completed the posse.
My strategy was simple and mostly dictated by the terrain. The road looked to be a death zone of crossfire and no cover, so I’d split my force and advance through the hills on either side. Kalgin, Ximenez, and Falcon Hand would go on one side since they were slightly shorter ranged and could support the dinosaur well. Ruger and The Gray Shadow would be on the other. I figured Ruger might eventually cross the road while The Gray Shadow hung back in support, but we’ll see. Hopefully Kalgin could make it to melee and tear up some foes.

Ruger (Neotechnoist Leader)
MV 4, AR 3, RMC 6, MMC 8, BRV 7, HP 10, Neck Shot. Assault Rifle, Clay Armor, Medium IRP.

Ximenez (Neotechnoist)
MV 4, AR 2, RMC 7, MMC 8, BRV 6, HP 12. Sawed Off Shotgun, 80kW Six-Shooter, Cloth Armor, Medium IRP.

Falcon Hand (Duster)
MV 4, AR 3, RMC 6, MMC 8, BRV 6, HP 10, Inspiring Shot. 200kW Six-Shooter, 200kW Six-Shooter, Bone Armor, Medium IRP.

The Gray Shadow (Bandit)
MV 4, AR 1, RMC 5, MMC 8, BRV 6, HP 10, Try Again. 200kW Twin Rifle, 80kW Six-Shooter.

Kalgin (Feral King Dinosaur)
MV 6, PMV D6, AR 2, MMC 4, DIS 8, HP 27, Bonus HP, Runner, Turtle.

The Table and Deployment

Deployment: Up to 8″ from the narrow table edge. The Dirty Dogs deployed first towards the kitchen (left side of the table) followed by Maudlin Travelling Band on the right.

The Dirty Dogs: Looking from my table edge Kalgin is to the right opposite Markus. Falcon Hand and Ximenez beside, with Ruger and The Gray Shadow to the left.
Maudlin Travelling Band: Looking from my table edge Markus is on the left all alone. Everyone else is piled on the hill to the right. Gerg started mounted on Tarnation.


Turn 1 – Forward, March!
As usual Turn 1 was fairly simple with everyone advancing and re-positioning after the deployment. No guns were in range yet but soon would be. Some folks Ran, some just walked. The only real surprises were Wildgrass moving onto the road behind a pile of rocks and a cactus. Ruger matched him except couldn’t find any cover, and didn’t quite make it to the cracked pavement. Gerg and Tarnation flanked to their right, and Kalgin ran along his right, both trying to stay in the cover of the hills. The road would be faster, but good luck blocking line of sight on that highway of death.


Turn 2 – Open Fire!
Kalgin powered ahead, his long strides and useful Runner trait bringing him closer and closer to Markus. Seeing this Wildgrass continued down across the road and into some rubble to bring some fire (and his flail) onto Kalgin. Ozie dropped from the hill and followed in Wildgrass’ footsteps, basically swinging the Maudlin Travelling Band’s focus from their right flank to their left. Thurn continued up the hilltop, cresting and giving him a commanding view of the upcoming firefight. Gerg also continued his flank, reaching the valley between the hill his friends occupied and the menacing mound manned by The Gray Shadow. Ruger and Ximenez simply marched up the road, confident in the lacking range of their enemies. Falcon Hand started hand-over-hand climbing the towering hill in front of him, hoping to get a shot on Gerg or Tarnation.
With a shouted command and eager pointing, Ruger ordered The Gray Shadow to open fire on Gerg. His Twin Rifle blasted the approaching enemy for 4 damage. Markus’ weapon chattered to life as bolts of energy peppered the T-Rexes hide. Kalgin took 3 damage from the assault and Markus repositioned himself higher up the hill, trying to get out of reach of the incoming dinosaur.


Turn 3 – This Way and That Way
The Dirty Dogs won the first Activation, and immediately rushed Kalgin towards Wildgrass. The mighty dinosaurs fell just short by an inch or so from getting into melee. Markus uses his “Go For the Eyes” trait and unloads point blank onto Kalgin for 8 damage, which adds a Panic token. The fire continues to pour into the dinosaur, this time Ozie with her Handcannon. Her shot goes wide and she has to Reload, but activates Yeehaw! to allow a re-roll. The shot still misses but isn’t a 1, so at least she doesn’t have to Reload anymore.
Across the field The Gray Shadow uses the “Both Barrels” feature of his rifle on Gerg, since the mounted dinosaur is rapidly approaching. The hit is deadly and does 8 damage to Gerg which kills him! The downside of unloading his gun in one massive blast is The Gray Shadow now needs to Reload. Ruger continues up the road, finally getting into range of a foe. He fires at the exposed form of Wildgrass and hits for a measly 2 damage. Wildgrass keeps his attention locked on the T-Rex, and uses “Both Barrels” of his shotgun for a brutal 8 damage. This adds another Panic token, so Kalgin certainly won’t be rushing anywhere soon. The final attack is from Thurn who blasts Ruger through a tree for 4 damage.
Quite the turn!


Turn 4 – Torn to Shreds
Markus starts the turn with another powerful shot at Kalgin, this time hitting for 6 from his mountainous perch. The dinosaur responds by trying to reach Ozie. The Panic Movement roll is 3″, so the T-Rex has to settle for Running to reach Ozie. It activates the Turtle trait which should spare him for another turn.
Ximenez moves directly up the middle of the road, firing shell after shell into Wildgrass as he advances. The Savage is hit for 7 damage but doesn’t Flee. Instead he moves into melee with Kalgin, but his wildly swinging Flail misses the hunkered down dinosaur.
Seeing his sniper pressed by the Ripper, Ruger spins and fires at Tarnation, hitting for 7 damage which adds a Panic token.
Ozie holsters her Handcannon and grabs a Kaboom Grenade. Flipping the switch she hurls the massive bomb at Ximenez. The weapon connects and hits the poor Neotechnoist for 8 damage. The big Explosion (4″ radius) showers the nearby Kalgin with hot shrapnel for an additional 7 damage. A terrific attack since the radius damage didn’t have to roll against Kalgin’s impressive Armor (due to the Turtle Trait). After all this Ximenez fails his Bravery test and is Fleeing, naturally.
Seeing the enemy starting to break Thurn keeps the pressure on. He fires at Ximenez and hits for 6 damage which kills the man just as he is about to run away. Return fire echoes from the distant hill as The Gray Shadow unloads into Tarnation with his revolver, hitting for 4 damage which brings the Ripper down to 1 HP left! The dinosaur slowly chugs forward and almost reaches the devastating sniper.


Turn 5 – Down With Dinosaurs
This turned out to be a deadly turn for any non-humans on the board. Wildgrass started the butchering by smashing Kalgin with his Flail for 5 damage, which killed the limping beast. The Gray Shadow responded in kind by firing his Six-Shooter into Tarnation again, doing 2 damage which killed the Ripper. Unlike the Flail though his revolver needed to Reload after the fusillade of shots. The Gray Shadow was now holding two empty weapons.
The grand shootout in the middle continued, and now without the dinosaurs it had become a straight up street fight. Markus fired at Falcon Hand from the edge of the cliff, hitting for 4 damage. Falcon Hand moved forward and returned fire hitting Markus for 7 damage which caused the upstart to Flee.
Ruger continued pumping shots into Wildgrass until the Savage was dead. Thurn tried to bring down the enemy leader but missed all his shots against Ruger. Ozie had more luck. Using her Speed Reload trait to quickly grab another grenade she lobbed the ticking bomb at Ruger, hitting him for 6 damage which killed the leader. This caused both Falcon Hand and The Gray Shadow to Flee.

At this point with two wounded and Fleeing humans left against three enemies, The Dirty Dogs resigned the field. End of game with a Maudlin Travelling Band victory!

After Action Report
The Dirty Dogs: So like true “dogs” we ran from the fight with our tails between our legs. Losing Kalgin right at the start of Turn 5 really sealed the deal. He didn’t even get to snap anyone in half :( At least their dinosaur was equally futile. Deploying along the narrow table edges so the melee folks have EXTRA far to run sure hurts sometimes. Anyways having both my survivors Flee after Ruger bit the dust soon after really hurt a ton. I maybe could have done some damage with The Gray Shadow as the enemy approached to kill him, but with all the hills and only a few inches of range superiority that advantage wouldn’t have lasted long. Still a terrific game!

Maudlin Travelling Band: Victory through surrender, my favorite kind for my hippie travellin’ gang. The game went pretty well overall, although half of it was just pouring fire into Kalgin, staying out of his reach, and hoping for the best. My flank to The Gray Shadow didn’t work quite as well as I hoped, although it did succeed in locking him down and emptying both his weapons. Some great surviving (aka luck) by Wildgrass in the middle. Ozie was a champ with her Kaboom Grenade trick to start the focus fire that killed Ximenez. All in all no one stood out as too weak or useless to me, aside from maybe Thurn who could have been a bit more focused and a bit less committed to his high ground position.

Complete Turn Log
Read the rest of this entry »

Battle Report: Cabin Raid

Encounter Overview
For this game I wanted to build a scenario around the table I setup, which included new barrels, a cabin, and the first use of my new Litko tokens (pictured to the right. They turned out great!). But specifically the focus would be the new wooden cabin I had bought and spraypainted. And of course what better use for a cabin than a raid or siege! I took a note of Ruby Ridge and Waco Texas and specifically the movie Arlington Road which drew heavily from both. To that end I wanted a group of Neotechnoists to assault a Duster farmstead.
Now I just needed a motivation for such a raid. In the Victorian era a popular idea was that of “going native”, where some troops or citizens might discard their duties to join the local population or take part in local traditions. Since the Neotechnoist/Wall idea are slightly influenced by Victorian era Britain I thought I could craft a story around this idea.
To that end Private Verhust was created. He’s a lifelong Neotechnoist sent to check on the possibility of weapon stockpiling by the Macreegin family. He instead finds a warm and welcoming household representing a life he never had (orphan childhood). Instead of completing his duties Verhust decides to stay with the Macreegin family.
After learning he didn’t return from his patrol and assigned weapons confiscation, the local Neotechnoist station at Rexburg, Idaho sends a small scouting party. The scouting party finds Verhust but mistakes his optional stay with the family for confinement. After returning with the incorrect information the 52nd Rexburg Platoon is assembled and sent to the cabin to “rescue” Verhust.
This game was quite fun to play as a bit of backstory and some special rules really added to the excitement and tension of the match. First of all the Posses involved were the 52nd Rexburg Platoon (pdf) and the Macreegin Family (pdf). As you can see I opted for higher IP and ND values for a change of pace.
Unfortunately I must have been out of practice with battle reports because I forgot to take a picture of each assembled posse!
This game session used the v1.2 version of the Dinosaur Cowboys rules.

The Scenario

The table is setup around the central cabin, which is raised on a slight hill and fortified with barrels, sandbags, and barb wire. Private Verhust got wind of the platoons mobilization and warned the family. He also offered to flee, but the Macreegin’s would have nothing of it, and instead dug their heels in to help fight for Verhust.
In the interest of keeping the game from degenerating into a flat out “charge forward assault”, I decided that Papa Jonas (father of the Macreegin family) would be out foraging and hunting on the family dinosaur (named Bluepatch). At the start of each Turn the family would roll a D12, and on a roll of 8+ papa and the dino would return from a random table edge.
The rest of the family would deploy either inside the cabin or on the hill, but not any further out. The platoon would deploy from the south edge (facing the cabin door) and advance along the brick lined walkway and surrounding vegetation.

As a twist I used old Advanced Heroquest game tiles to represent the interior of the cabin (since the roof of the model doesn’t come off), which allows for a new dimension to the game. As you can see from the picture I mirrored the outside of the cabin, so the door and both windows are marked. I didn’t have much interior furniture but I did put a table along the edge as a sort of barricade, and a chest in the corner for flair. The game tile I used is 10 squares by 5 squares, and I played as if each square was 1 inch to help ease managing movement inside the cabin.

Posse: 52nd Rexburg Platoon: 1/150 IP, 0/1500 ND, 4/4 Traits
My general idea for this posse is a high tech, hard hitting, military based unit. I knew I’d be assaulting a cabin, so some of my weapon choices reflected that. I also knew I didn’t want to involve a dinosaur as having characters only would give the posse a unique feel. Plus the savings would give me tons of money for weapons! Everyone would be the Neotechnoist allegiance, of course.
First of all I made my leader, Captain Toma. I based his equipment choices mostly on his figure, and ended up with a 200kW Six-Shooter and Long Sword. A few stat improvements here and there and he is set to go.
Scatterman is my next character, and he is built around the lethal Auto Shotgun. It has pretty good range (for a shotgun) and terrific stopping power with 4A-5D. I figured he’d take some heavy fire so I gave him the “Lucky” trait which would force an enemy to re-roll their attack.
Tenpas Terako is my sniper, so I could keep him at a lower Hitpoint amount. He’d find a hill or tree with a good field of view of the main cabin door and then try to pick anyone off who poked their head up from behind a window. Because he had the Twin Rifle (which can use the “Both Barrels” special ability) I gave him the “Speed Reload” trait to quickly get back in the game.
These first three characters had figures that looked armored, so I gave them all +1 AR at 10 IP each. But I also wanted some “lighter”, conscript style troops. Maybe friends of Private Verhust, or just angry citizens.
So I created Corporal Grove and Homer. Grove choose the solid Heavy Repeater and would be a second wave behind Toma and Scatterman. Homer had two weapons with the Explosion special property; a Blunderbuss and Kaboom Grenades. These can be devastating weapons as anyone within 2″ of the initial hit take the Damage of the weapon (in this case 5 and 7 respectively). In a cramped cabin they seemed like the perfect weapon. With the “Speed Reload” trait Homer would be able to throw two grenades in rapid succession without taking an Action Phase to reload.
My general plan is to move Toma and Scatterman forward on one flank, with Homer on the other. They would hopefully pace each other and reach the cabin at the same time. Grove would hang back a bit behind Homer and could readjust his position to any changes on the battlefield. And Tenpas Terako would sit just at long range and snipe at the cabin’s occupants.

Captain Toma (Neotechnoist Leader)
MV 4, AR 1, RMC 7, MMC 8, BRV 7, HP 13, Bonus HP I. 200kW Six-Shooter, Long Sword.

Scatterman (Neotechnoist)
MV 4, AR 1, RMC 7, MMC 8, BRV 6, HP 10, Lucky. Auto Shotgun, Small IRP.

Tenpas Terako (Neotechnoist)
MV 3, AR 1, RMC 6, MMC 8, BRV 6, HP 8, Speed Reload. 200kW Twin-Rifle.

Corporal Grove (Neotechnoist)
MV 4, AR 0, RMC 6, MMC 8, BRV 5, HP 8. Heavy Repeater, Small IRP.

Homer (Neotechnoist)
MV 4, AR 0, RMC 7, MMC 8, BRV 6, HP 12, Speed Reload. Kaboom Grenades, Blunderbuss, Small IRP.

Posse: Macreegin Family: 1/150 IP, 0/1500 ND, 4/4 Traits
The important idea I needed to keep in mind when building the Macreegin Family is to make them realistic. I wanted a basic nuclear Duster family with pretty simply farmer weapons. They would have a friendly, herbivore dinosaur that is used for heavy lifting around the farm. Besides Private Verhust they would all be the Duster allegiance.
The family is made up of four members: Papa Jonas, Mama Hanna, Sis Shiela, and Brother Jerrid. I tried to think of a distinct personality for each as I find that helps inspire certain playstyles once the game starts.
In this case Papa Jonas is a simple, quiet man. Slow to anger, fine with hard work and long days, but generally not enthused or passionate about anything. He has a 200kW Six-Shooter which was a hand-me-down from his own father. I gave him the “Crippling Shot” trait since it seemed like something a hunter might use to bring down larger game. At time of deploy he’d be off the table on the dinosaur.
Mama Hanna is the definition of a “mama bear”, in the sense that she is fiercely protective of her children and home. To reflect this she has terrific RMC (6) from hours training with the family 400kW Lever-Action Rifle. The rifle comes from Brother Jerrid, and according to him he earned it wrangling Triceratops down south. In truth he stole it in Arizona before running back home to avoid the law. Regardless it is a powerful weapon. Mama Hanna also has a basic 80kW Six-Shooter in case enemies get inside her minimum range. She also has the “Get Up!” trait since I could see her motivating her children to continue the fight.
Sis Shiela is quite the popular lady around town, but isn’t much for guns or fighting, so she has a basic Derringer that seemed like a suitable weapon. She looks up to her Mama a lot and would probably deploy close by.
Brother Jerrid is a hot head with a short temper, and therefore has trouble relating to his Papa. He carries the epitome of farmer weapons: a Double Barrel Shotgun. In his view the world steps all over his family and a person has to take what they want to be successful, so the “Underdog Shot” trait is perfect. Brother Jerrid looks up to Private Verhust, even though they are a similar age, and often corners Verhust and makes him retell stories of inside The Wall.
The last character is Private Verhust, a basic Neotechnoist citizen who has a Light Pistol instead of the traditional Duster revolver. Since he has some training I thought the “Retreat!” trait is perfect, as I could see him taking control of the situation once the lasers start flying.
And finally there is Bluepatch, a Thickskull dinosaur named by Sis Shiela when she was very young. The dinosaur is extremely loyal but has slowed down mentally with age.
My plan is to have Mama Hanna and Sis Shiela inside the cabin, alternating being visible at the window after shooting. Brother Jerrid and Private Verhust would situate themselves outside in cover and hopefully slow the Neotechnoist advance before retreating inside. When Papa Jonas and Bluepatch appear I’ll just have to see what table edge they get and act accordingly. I think “charge into the enemy flank” will be the strategy I end up with for them.

Papa Jonas (Duster Leader)
MV 3, AR 1, RMC 7, MMC 8, BRV 7, HP 14, Crippling Shot. 200kW Six-Shooter.

Mama Hanna (Duster)
MV 3, AR 1, RMC 6, MMC 8, BRV 6, HP 11, Get Up! 400kW Lever-Action Rifle, 80kW Six-Shooter.

Sis Shiela (Duster)
MV 4, AR 0, RMC 7, MMC 8, BRV 6, HP 10. Derringer.

Brother Jerrid (Duster)
MV 4, AR 0, RMC 7, MMC 8, BRV 6, HP 12, Underdog Shot. Double Barrel Shotgun.

Private Verhust (Neotechnoist)
MV 4, AR 1, RMC 7, MMC 8, BRV 6, HP 10, Retreat! Light Pistol.

Bluepatch (Untrained Thickskull Dinosaur)
MV 8, PMV D8, AR 1, MMC 6, DIS 6, HP 21

Deployment
Rexburg: Captain Toma on the right flank with Scatterman directly behind him and Homer to the right across a hill. Tenpas Terako on the left flank in an elevated shooting position with Captain Grove slightly forward on the ground below him.

Family: Mama Hanna and Sis Shiela inside the cabin, with Mama at the left (west) window. Brother Jerrid behind the west bundle of barrels opposite Private Verhust. Papa Jonas and Bluepatch off table foraging and hunting.


Turn 1 – Opening Shots
Macreegin Family deployed first, as per the scenario. Papa Jonas does not roll to appear until Turn 2+.
1a. Family wins Activation
Family: Going first in a new turn is great for getting the drop on enemies. Once targets have started moving around that +1 Miss Chance can add up, plus it’s easier for people to get into cover. Mama Hanna had a few good shots available with her impressive 21″ range, but she settled on trying to bring down Corporal Grove. Firing at long range she hits for 7 damage, which causes Corporal Grove to Flee. Hooray a chance to use my new tokens right off the bat. After her great shot Mama moves out of the window and into the corner of the cabin, which will keep her free from return fire for a turn.
Rexburg: Having a Fleeing character isn’t the best start, but at least it looks like Corporal Grove has enough ground to retreat to that he won’t be Stunned instead. Anyways I won’t waste an early Activation on him regardless. I thought I’d return the sniping favor and use Tenpas against Brother Jerrid. Tenpas had to move to the edge of his cliff to get his target right in long range. With some lucky rolling I hit with 4 Attacks (1 of which was a Critical Hit) for a total of 7 damage. How’s that for tit-for-tat! As an added bonus Brother Jerrid doesn’t Flee so he won’t get a free push back towards the cabin.
1b. Rexburg wins Activation
Rexburg: Nice, right back to me. Those steady Neotechnoists holding onto the initiative like that. I wanted to keep the pressure on the defenders and hopefully drive them into the cabin so I could take my time surrounding it and destroying the occupants. I moved Homer 2″ closer to the cabin to get the traitorous Private Verhust into long range. Homer had hoped to rescue Verhust, but the Private is clearly allied with the Dusters and must be exterminated. Homer fired his Blunderbuss needing a 9+ to hit, but missed Verhust. He’s safe for now…
Family: I could tell Private Verhust was going to be a hot target, so I backed him off from his forward position to try to get a bit of range on the enemy. Drawing a bead with his Light Pistol the Private fired at Captain Toma but misses.
1c. Family wins Activation
Family: Having nearly died Brother Jerrid was in no mood for heroics. Plus Mama Hanna was screaming at him from inside the cabin to get inside. So he Ran towards the cabin door, and nearly made it into the interior but just fell short. At this point I’m wishing Mama Hanna hadn’t Activated already since she could have used “Get Up!” on Brother Jerrid, as that is the only source of HP restoration the Macreegin Family has.
Rexburg: Captain Toma took offense at Private Verhust’s fire, so he stepped forward and blasted his six-shooter back at the man. I edged Captain Toma to his left to get behind the brick wall and shield him a bit from shots from the cabin. Unfortunately he missed the long range shot at Private Verhust.
1d. Rexburg wins Activation
Rexburg: My foe only had one more Activation to go so I had to handle both of my characters this Activation. That meant Scatterman and Corporal Grove. Simple enough though; Scatterman Ran forward to in front of the Captain, and Corporal Grove Fled backwards and then Ran behind the tall hill that Tenpas is on. I wanted to bring Scatterman closer to the cabin to get his deadly shotgun into play. And cowering with Grove was a necessity after that big shot from Mama. I figured I could either ease him around the flank (west side of the hill) or, if the Macreegin’s switch targets, just go back to his original path of advance.
Family: Sis Shiela was still at the east window and had a good view of the advancing Neotechnoists. She decided to fire at the closest one, who is Scatterman. With some lucky rolling Shiela hit once for 4 damage. I thought a bit about ducking her into the cabin corner (similar to what Mama Hanna did) but decided against it. Since we’re at the end of the Turn I might get an early Activation and be able to fire with her and then move out of sight. So Sis Shiela stayed at the window.


Turn 2 – The First Death
Papa Jonas rolled his D12 to try to come back from foraging but failed to get an 8+, so he won’t appear this Turn.
2a. Rexburg wins Activation
Rexburg: I was happy to get the first Activation for this turn as it meant I can try to kill Brother Jerrid before he reaches the inside of the cabin. The best man for the job was Tenpas Terako, as 5A and 6 RMC against an unmoving target was my kind of shot. First I had to have Tenpas climb down his hill to keep Brother Jerrid in range. Then just to be safe I decided to use the “Both Barrels” feature of his Twin Rifle which would give me +2 Attacks. Now I was rolling 7 Attacks at 7+ to hit. The dice weren’t hugely with me and I only hit 2 times (1 was a Critical) for 5 damage. It’s still exactly enough to kill Brother Jerrid though! Tenpas would have to Reload from using the special ability, but that should be easy with his Speed Reload trait.
Family: Hearing her son shot down outside, Mama instantly reacts. She moves back into the window and blazes away at Tenpas. Her shots were a little too wild though and she misses all of them. So much for sweet revenge.

2b. Family wins Activation
Family: Another Activation and another chance to get revenge. Private Verhust had liked Brother Jerrid’s eagerness to hear stories of inside The Wall, so he also wanted revenge. But in his case it was blind revenge, so all he did was shoot at Scatterman. Some bad rolling meant I missed all the shots AND had to Reload. I finished up by moving Private Verhust towards the cabin door, but still right behind the nice tree outside.
Rexburg: Time for Scatterman to show the traitor what real shooting is. I moved Scatterman his full 4″ forward which put Private Verhust into long range. The massive Auto Shotgun barked to life and hit 2 times (1 was a Critical) but also a 1 was rolled so a Reload will be needed. Captain Toma is right by Scatterman though so he uses “Yeehaw!” to let Scatterman re-roll his Reload roll of a 1. The re-roll is still a miss but at least his Auto Shotgun will be ready for next turn. Anyways in total Scatterman did 7 damage (8 – 1 for Cover) to Private Verhust, who is now Fleeing.
After this Homer also moved to put Private Verhust into range, and firing at 10+ on his single Blunderbuss attack. Amazing Homer hits and does 5 damage which kills Private Verhust! The traitor is dead, and although the 52nd Rexburg Platoon are sad to kill one of their own they can’t have soldiers deserting and abandoning their missions. (Note: I’m not sure how Homer got to Activate right after Scatterman did but that’s what my notes say happened, so…yeah)
2c. Family wins Activation
Family: Sis Shiela was still at the window and had survived unscathed, although she saw the withering firepower cut down Private Verhust right before her eyes. She snaps off a shot at Scatterman, hoping to repeat her luck last Turn, but unfortunately misses. The death of Verhust fresh in her mind she eagerly ducks out of sight into the corner of the cabin.
Rexburg: I still have some maneuvering to do, so Captain Toma Ran forward and just reached the edge of the hill the cabin is on. Soon his brutal Long Sword will come to grips with the Duster family inside. Corporal Grove headed east from behind the hill and applied his Small IRP to recover +3 HP, bringing his total back to 6 HP.


Turn 3 – Papa is Back
Papa rolled his D12 and got a 12, so he was back to the homestead with a vengeance. After rolling a random table edge he ended up on the west side, and chooses to line up directly with Tenpas and Corporal Grove.
3a. Family wins Activation
Family: Hooray Papa and Bluepatch are back. They’ll be angry to see what has happened to the family so far. Although I was eager to move them, I thought shooting with Mama was more important, especially since I could move her out of sight afterwards and spare the full fury of the Neotechnoist return fire. So Mama Hanna funneled all her anger at Scatterman and lined up a shot at medium range. She fires and hits for 2, but Scatterman uses the “Lucky” Trait to force a re-roll. The re-roll is even better with 2 hits (but 1 is a Critical, so 3 hits total!) for 7 damage which kills Scatterman! Finally some blood on their side. After this Mama moves out of the window and back into the cabin. Instead of going to the south west (bottom left) corner she heads to the north west (top left) corner, furthest from the door and with a good line of sight at anyone entering the home.
Rexburg: Tenpas heard the roar of the angry Thickskull and quickly spun to see Papa and Bluepatch rustling out of the jungle. Using Speed Reload he quickly pushed new batteries into the Twin Rifle and took aim at Papa Jonas. Tenpas hit 3 times for 6 damage (5 + 1 for Elevation). Due to Papa Jonas’ massive HP pool he didn’t even need to make a Bravery Test for such high damage.
3b. Rexburg wins Activation
Rexburg: My left flank of Tenpas and Corporal Grove would be a good buffer between the raging dinosaur and the main attack on the cabin. I committed to that idea by moving Corporal Grove to the smaller hill below Tenpas and shooting at Papa Jonas. Grove rolled well and hit for 3 damage, which definitely means Papa Jonas is being whittled down.
Family: Time to get Bluepatch into the thick of melee. His impressive 8″ Movement definitely helps! I moved Bluepatch (with Papa Jonas mounted) directly towards Tenpas and Grove, and then I tried to Charge with him into melee. Bluepatch was clearly mad as heck since he rolled a 6 on the D6 Charge distance, which brought him into close combat with BOTH Tenpas and Grove. That’s handy! His fury having run its course, Bluepatch was only able to hit Grove for 2 damage.

3c. Rexburg wins Activation
Rexburg: The appearance of Papa Jonas was inevitable, and I didn’t want it to stall my main advance to the cabin. So Homer didn’t even glance to the left, instead he just blindly Ran forward towards the cabin, reaching the edge of the fence. Captain Toma hesitated a bit more, as I knew the Long Sword would help a lot against the dinosaur. But I could imagine Mama Hanna shooting my Leader to pieces as he marched towards the dinosaur, so instead I kept my eye on the prize of the ol’ cabin. I Ran Captain Toma directly forward and he could reach behind the tree right outside the cabin door. With some good Charge rolling I should be able to reach Sis next turn.
Family: Sis Shiela can hear the heavy footsteps on the porch, and knew that the Neotechnoists were closing in. She took a deep breath and moved back to the window and unloaded on the Captain at short range. Her desperate blaze missed entirely and in fact she even needs to Reload after some extra bad rolling.


Turn 4 – Knock Knock!
4a. Rexburg wins Activation
Rexburg: Getting the first Activation was key since it means I can (hopefully!) get the Captain into melee with Sis Shiela and start avoiding those shots from Mama Hanna. I moved Captain Toma to the cabin door and measured the Charge distance, which was 3″.

I rolled my Charge attempt and made the distance! Captain Toma lunged into the cabin, sped around the corner, and swung his heavy Long Sword at Sis Shiela. I managed to hit 2 times for 6 damage, which was enough pain to cause Shiela to Flee.
Family: Now the bad men really are knockin’ down my door. Mama Hanna saw her daughter embroiled in melee with Captain Toma and was furious. Mama uses her “Get Up!” trait on Sis Shiela to heal +5 HP which brings her daughter back to 9 HP. Then she fires at Captain Toma with her Lever-Action Rifle (still not quite at minimum range) and hits 1 time for 5 damage. Mama Hanna stays where she is in the corner, waiting for more intruders.

4b. Family wins Activation
Family: Time to see what is happening on the outside of the cabin. Papa Jonas was in the middle of close combat with Tenpas and Corporal Grove. I figured that I could empty his gun into one of them and let Bluepatch do the attacking afterwards without bothering to Reload. To that end Papa Jonas uses his “Crippling Shot” trait and also “Fan the Hammer” on his six-shooter. His target is Corporal Grove. I rolled really well and hit 4 times for 6 damage which kills Corporal Grove! Of course I have to mark Papa Jonas with a Reload token since he just fanned his entire cylinder of laser blasts in one go.
Rexburg: After the Captain’s daring charge Homer is lagging behind a bit, but I don’t want to risk lobbing a grenade through the window since it would hit the Captain as well as Sis Shiela. So instead Homer Run’s up the cabin hill with the intention of closing in on Mama Hanna and shutting down her powerful rifle.
4c. Family wins Activation
Family: My last Activation was Sis Shiela, who was Fleeing. This brought up an interesting rules question though, as a direct line backwards from the nearest enemy (Captain Toma) would run her into the cabin wall. She was 2″ from the cabin wall but needed to Flee 4″, and as the rules state for Impossible to Flee: “…or any other situation where Fleeing is impossible…, they are Stunned instead”. So Sis Shiela is Stunned and can’t do anything but move. Of course she doesn’t want to do that an provoke a Snap Attack from the Captain, so she just stays where she is.
Rexburg: Tenpas is in a rough situation. Bluepatch is right in his face and well inside the minimum range of his Twin Rifle. I don’t have a secondary weapon for Tenpas, and as much fun as punching the dinosaur seems I think I’ll move him instead. I move Tenpas out of melee with Bluepatch which means the dinosaur can make a Snap Attack. He does and hits 4 times (2 of which were Criticals!) for 7 damage. Ouch, that was unexpected. Tenpas doesn’t Flee at least, and he is now outside of the minimum range and can shoot normally. With Corporal Grove dead I don’t expect Tenpas to be in the game much longer, so I use “Both Barrels” while I can against Papa Jonas. I hit 2 times (1 was a Critical) for 5 damage which kills Papa Jonas! Now to face down a Thickskull dinosaur alone. Oh and everyone managed to pass their Bravery Tests for having a Leader die. Alas.


Turn 5 – Mess in the Cabin
5a. Rexburg wins Activation
Rexburg: Although Captain Toma is in melee, he also isn’t that great with his Long Sword (8 MMC) compared to just shooting (7 MMC + 1 for In Melee penalty). So I figured he’d sheathe the sword and unload his pistol from the hip. Captain Toma uses “Fan the Hammer” against Sis Shiela and hits 2 times (1 was a Critical) for 5 damage, which makes Sis Shiela Flee again!
Note: I forgot the 2″ Knockback on Fan the Hammer (again!) which would have knocked Shiela out of melee.
Family: Mama Hanna is still eagerly trying to kill the Captain that is hurting her daughter, so she fires again at an 8+ to hit. Her 1 hit was a Critical which totals 6 damage. Captain Toma grits his teeth and doesn’t Flee though.
5b. Family wins Activation
Family: Bluepatch wants to hurt the man who killed his rider and master, so the dinosaur hungrily moves up the hill and back into melee with Tenpas. I didn’t want to risk a Charge at this point so I just settled for flat out moving in to combat. Anyways Bluepatch bit and rammed well and hit 3 times for 4 damage which kills Tenpas. Now only the Captain and Homer remain.
I had to finish my other Activation which was Sis Shiela. She’s again in a rough situation where Fleeing is impossible so she is Stunned again and chooses to stay where she is.
Rexburg: Time to get some grenades going! Homer moves closer to the cabin door and into line of sight with Mama Hanna and chucks a Kaboom Grenade at her. The grenade bounces around inside but fails to hit the intended target. Homer has to Reload the Kaboom Grenades (aka grab another one from his vest), but that should be easily achieved with his Speed Reload Trait next turn.


Turn 6 – Cat and Mouse in the Cabin
6a. Rexburg wins Activation
Rexburg: My first priority is killing Sis Shiela and getting Captain Toma into melee with Mama Hanna. He holsters the drained and empty pistol and draws his Long Sword to swing at Sis Shiela. Captain Toma manages to hit 1 time for 5 damage which finally kills the youngest Macreegin. After this I moved the Captain directly behind the table that separates him from Mama Hanna. Most importantly he is now inside the minimum range of her rifle, so she’ll have to use the less powerful revolver.

Family: Mama Hanna is blind with rage after seeing the crumpled body of her daughter drop to the floor. She draws her 80kW Six-Shooter (too bad it isn’t more wattage so I could Fan the Hammer with it!) and fires at Captain Toma at short range, hitting him 2 times for 2 damage which kills the Captain! The last survivor of the Neotechnoists (Homer) passes his Bravery Test for having a dead Leader.
6b. Rexburg wins Activation
Rexburg: I want to avoid the dinosaur as much as possible, so I move Homer into the cabin. I plop him down behind the table (woo hoo cover) and use Speed Reload to get his Kaboom Grenades ready to throw again. I fail to hit Mama Hanna again though!
Family: With all his enemies taken out of action outside, Bluepatch Runs towards the cabin and the remaining commotion in the house.


Turn 7 – Quick and the Dead
7a. Rexburg wins Activation
Rexburg: Simple turn this time. Homer shoots his Blunderbuss at Mama Hanna at short range and finally hits for 6 damage. Mama Hanna doesn’t Flee though. Then I move Homer to the opposite edge of the cabins table, just inside minimum range for Mama Hanna.
Family: Back to the six-shooter it seems. Mama Hanna fires at Homer with the pistol and hits for 1 damage, but the Cover of the table negates the damage. Bluepatch continues his Run towards the cabin door.


Turn 8 – Behind You!
8a. Family wins Activation
Family: Mama Hanna sees an opportunity to get the drop on her opponent. Homer is busy facing the corner, but she sprints past him and snaps off a shot at his back! Because Mama Hanna is behind Homer she gets the Surprise Hit rules, which means a Critical Hit happens on 10+ instead of 12+. And this is exactly what she needed as her 1 hit was a roll of 10, which totals 2 damage. Unfortunately her other rolls had a 1 in it so she needs to Reload. Outside Bluepatch gets to the door but can’t fit inside. He starts slamming his thick skull against the frame though.
Rexburg: Yelping at the pain in his back Homer spins and unleashes the Blunderbuss on Mama Hanna, but fails to hit.


Turn 9 – Something is Outside…
9a. Family wins Activation
Family: Mama Hanna continued her move away from Homer and is able to get outside the minimum range of her rifle. Just in time too since her pistol is empty! I rolled terribly though and missed with all my attacks. Bluepatch continued his assault of the cabin doorframe, hoping to snap enough timbers to widen an entry.
Rexburg: Jamming another handful of shrapnel into his Blunderbuss, Homer fires the crude weapon at Mama Hanna. The shot blasts through her torso for 6 damage which kills the mother of the Macreegin family.

At this point the game concluded. We hadn’t decided on rules for dinosaurs getting into the cabin, so we weren’t sure if Bluepatch would be able to reach Homer. I think that Homer would likely throw a grenade and it would scare of Bluepatch, since no humans were around to direct the dinosaur. All in all both players decided it was a draw.

After Action Report
Well the game was a draw, but only thanks to the cabin walls keeping Homer safe from Bluepatch. In a straight up fight, at their remaining Hitpoints and armament, I think everyone agreed Bluepatch would probably win. But the safety of the cabin certainly is a factor, as is the fact that the Thickskull dinosaur was on his own and may have been easily frightened away by the grenades.
The Litko tokens I had made were really great and lent a very professional feel to the game. I do have one regret and that was making a set with the text “Move & Acted” on it instead of “Moved & Acted” (both past tense). Minor grammatical error but now that I’m noticed it I can’t unsee it, haha. But yeah the different colors and shapes worked well for easily seeing status on a character, and upgraded the game from the real homebrew feel my old wooden tokens gave.
Anyways a bit from each player:

Rexburg: I think I played that about as well as I could have hoped. Assaulting a dug in, fortified enemy is never easy. Having Papa Jonas and the dinosaur deployed later in the game was both a blessing and a curse. One the one hand I didn’t have to worry about him right away, but also couldn’t start to whittle down the bigger dinosaur Hitpoint pool. Plus he sure deployed a lot closer compared to having to march across the whole field…I mean getting into melee with two of my troops in his first Activation was impressive. Also my mistake for keeping Tenpas and Grove so close together.
Captain Toma was my MVP I think. He survived the march up to the cabin, he tore inside and caused havoc, and generally did exactly what I hoped he would. Homer was a bit of a let down due to constant misses with his grenades and Blunderbuss, but he redeemed himself by killing Mama at the end. And being the only surviving member of the posse, of course.

Family: Well I guess this is my punishment for housing a Neotechnoist soldier who should still be on active duty. I had a rough start with the early loss of Brother Jerrid and Private Verhust, but I think I was able to get some momentum back, and the later game appearance of Papa sure helped. My weapons felt a little futile compared to the Neotechnoist raiders, but then again I had a full posse WITH a dinosaur whereas they just had humans and a bunch of fancy equipment.
Having Sis Shiela stuck in combat like that was a bit frustrating, but I didn’t want to risk a Snap Attack by breaking free. Either way Captain Toma died, but it took a lot more firepower than I would have liked. An enclosed space like that is tough for Fleeing though, but also pretty fun to bust out the old Advanced Heroquest tiles.
When Private Verhust recovers I might have to kick him out of the Macreegin homestead though…

Rule Questions
A couple of questions came up during the game around v1.2 of the rules. Here is a Q/A approach to those issues as well as the changes that have been taken in the upcoming v1.3 to fix or clarify them:
Q: Can Snap Attacks be performed in melee with a ranged weapon?
A: No. The rules have been clarified to say “…any opponent with a melee weapon…”

Q: Can an entity change Facing after winning a melee? If not what Facing should it have?
A: No, an entity must keep their current Facing. The rules don’t explicitly say what to do, but the Facing section does say it can only be changed in the Maneuver Phase and once decided it remains set. So completing a melee (Action Phase) would keep the same Facing until the next Manuever Phase when the entity could change their Facing as desired.

Q: Also on the topic of Facing can an entity that just Activated shoot a way it isn’t Facing and then move, or does it have to move/change Facing first?
A: The entity must use their Manuever Phase to change Facing (and do any movement they like) before shooting, since otherwise the target isn’t in their arc.

Q: Fleeing when inside the cabin where the Fleeing entity only has 2″ of space but needs to move 4″ backward. What happens?
A: This is covered under the “Impossible to Flee” section of the rulebook, which states “…or any other situation where Fleeing is impossible…, they are Stunned instead…”. So the entity would be Stunned if they can’t Flee normally.

Complete Turn Log
Read the rest of this entry »

Battle Report: Four Player Madness

Encounter Overview and Posses
Well the four player game yesterday went really well and was tons of fun. I had previously shown the table layout, but it looked even more prehistoric once my friend brought over some extra jungle trees. This was using the v1.2 rules (especially the dinosaur changes) and we played from 8:30pm or so until 10:45pm, mainly thanks to the usual socializing and time spent considering moves.
Everyone chose Posses and we rolled for setup position. The Posses involved were Hope’s Wardens in the top left, The Death Snakes (but with a Terror instead of a King) in the top right by the cabin, Drylands United Cattle Company (but with a Ripper instead of a Runner) in the bottom left (played by me), and Tribe of the Blood Pact in the bottom right. We all setup within 4″ of our deploy location, and the locations were evenly spaced from each other.

Objectives
The two objectives were a Laser Tower (middle left) with 5A-1D and a max range of 19″, and a Cannon (middle right) with 1A-5D 2″ Explosion and a min range of 4″ and max range of 14″. Whoever had the most characters (dinosaurs didn’t count) within 6″ of either weapon could fire it as their Action Phase. Multiple people could fire it, and if the number of characters was tied both teams could fire it. The Cannon ended up getting a ton of use (but not a ton of hits…) whereas the left side mostly had better equipped characters shooting at each other. Also whoever “captured” more objectives would technically win the game by the end. Really though the weapons were placed to try to stop people from hunkering down and avoiding combat.

Skirmish Pictures
Here are a slew of pictures from the game!:

General Recap
Anyways the Drylands Posse split their forces with their dinosaur and Dallas going left, and Quidel and Trista going right. Hope’s Warden kept Glowstar with his Autoshotgun mounted on their Ducky dinosaur and they flanked to meet Drylands dinosaur, while the other members edged towards the gun. The Death Snakes held back their sniper Ice and sent everyone else forward, tending to shoot the Cannon more than their actual guns. Their dinosaur got into melee combat early on with Tribe of the Blood Pact. Speaking of the Tribe of the Blood Pact posse they focused mostly on the Death Snakes, except for sending their Pike armed Illit’taex member left to meet up with the Spear armed Quidel in a fight to the death.
Eventually the Hope’s Wardens player had to head home a bit early (after killing the Drylands dinosaur and losing one of their own number). So we just removed their forces. Then the game became more of a “pick on Tribe of the Blood Pact’s freaking brutal Armored dinosaur”. Basically just pouring fire from Ice and Trista into the Armored dinosaur until it dropped dead.
After Tribe of the Blood Pact was eliminated we called the game. Quidel for Drylands was technically the closest to the turret, but The Death Snakes might have had Drylands if the fight went on. They hadn’t been hurt at all (besides losing their dinosaur) and were in pretty good shape still. Trista and Dallas for Drylands were fine, but Quidel was down to 2 HP so it likely would have ended as a 3vs2 fight, and perhaps eventual victory for The Death Snakes.

The game was lots of fun and everyone seemed to enjoy themselves. The rotating activation still worked well with 4 players, as did the bonus +4 HP (+2 HP per player beyond two) since it meant characters could actually reach combat and fight a bit.

The Question of the “Armored” Dinosaur
So as with the last battle using the Armored dinosaur, the feeling came up of “Is 4 AR too powerful?”. There were two characters in the whole match with RMC 6, and even then it was base 10+ to hit. Throw on In Melee and Moved penalties and you’re needing 12s to hit. On top of that the Armored dinosaur was the Feral Breed so his HP was at +2, with an additional +4 for the four player game. But even with all of that the dinosaur wasn’t smashingly effective. Sure the 3A-3D attack hurt a bit and it locked down a few people in melee, but not any more so than the Terror (or even the Ducky).
As it stands (with v1.2) the Armored statistics have been nerfed and look like:

Armored (Large Herbivore): MV 3, PMV D4, AR 4, MMC 7, DIS 5, HP 22, 3A-3D, $500

I want to avoid the Armored being the best and only choice for the $500 dinosaurs, and at the same time I don’t want to nerf it so badly that no one will ever use it. As a ponderously slow tank it is terrific, since it draws (and survives) a lot of fire, slowly wanders around the field, and generally just distracts the enemy from the rest of your team.
But at the same time it’s a bit…dull to fight against? Missing with most of your shots is terribly annoying and frustrating, and moods rapidly change from “Wow he’s a tough one!” to “Ugh won’t he just die already?”.
If I drop the DIS from 5 to 4 the dinosaur is basically stuck going D4″ an Activation because it will be fairly easy to Panic. I could raise the price slightly, especially when you consider an AR 4 suit for humans is $500 on it’s own. I might end up doing that, and also creating or changing a carnivore dinosaur to be in the $600 range as well.

Anyways that was the only real question to come out of the game. That and trying to indicate special abilities of a weapon somewhere on the Posse roster. I might just put a star (*) beside weapons that do something cool, and then that will hint to players to check the rulebook for what feature it has. I had thought about adding a “Special Ability” column to the weapon statline, but there really isn’t space (plus I don’t want to touch the sheet after this much time).

Battle Report: Across the Street

Encounter Overview
Well this battle report took a while to get written up. The game took place back near the end of December, but I was tired of formatting these and hassling with the pictures so I let them sit for a while. Anyways it’s here now! The match was quite a bit of fun because of how much the central road changed the flow of combat.

I stuck to the smaller table, this time using a 3 foot square of terrain with 5″ deployment zones in the wilderness opposite the central road. I put up some blocking terrain near the middle to help give a “trench” feel of one posse having to charge out of cover and across the big gap.
The deadly posses involved were The Sunset Riders, which used a dedicated mounted member on a super fast Plains Runner (MV 12). The other posse were The Death Snakes, a smaller but extensively equipped posse with a deadly assassin leader. Who would win?

Note on images, all of them are clickable and will open the image at the full size. Apologies for any blurriness, my old camera is still having some issues.

Posse: The Death Snakes: 1/100 IP, 0/1000 ND, 2/3 Traits (not sure what happened there!)
My goal for the posse was to have a team of hard hitting, vicious combatants who could fight on their own. No weak links here. The Neotechnoist Leader named Ice (reminiscing of the TV show Gladiators) exemplified this with good AR and HP, deadly RMC, and a terrific 400kW Lever-Action rifle for sniping. I gave him the Knee Shot trait since enemies will undoubtedly move, and the +3 Damage from it would mean at least 8 damage if the rifle hit, and upwards of 10 before factoring in criticals. That’s good news for single shotting some basic enemies. Next up was Kallas who used a Double Barrel Shotgun and the Speed Reload trait to hopefully fire Both Barrels in a row with deadly effect. He’d be a bit shorter range, but again AR 1 and HP 12 should see him across the street. Jordana was next (you can thank the TV show Chuck for that one, since it had Jordana Brewster on it for a bit). I gave her a heavy 300kW Six-Shooter, which does a respectable 4A-3D and would be deadly if she used Fan the Hammer. Similar stats for her as Kallas, since I had IP to spare with only 3 humans. My dinosaur choice was made simply because I hadn’t tried the Allosaurus out in combat yet, and it’s such a dynamic toy that I wanted to give it a shot. So I made a Plains King Dinosaur named Klahr, who continued the “deadly weapon” idea with his 1A-7D Bite.
For strategy I imagined Kallas riding Klahr to bring his shotgun into combat faster. Jordana would head up the center, and Ice would snipe from the side. I didn’t expect Jordana to hold the entire enemy force by herself, but if I could focus fire all my attacks on a single target I had lots of confidence I would make one enemy drop per turn.

Ice (Neotechnoist Leader)
MV 4, AR 1, RMC 6, MMC 8, BRV 7, HP 10, Knee Shot I. 400kW Lever-Action Rifle.

Kallas (Duster)
MV 3, AR 1, RMC 7, MMC 8, BRV 6, HP 12, Speed Reload. Double Barrel Shotgun, Whiskey Drop.

Jordana (Duster)
MV 3, AR 1, RMC 7, MMC 8, BRV 5, HP 12. 300kW Six-Shooter, Whiskey Drop.

Klahr (Plains King Dinosaur)
MV 6, PMV D6, AR 2, MMC 6, DIS 7, HP 24.

Posse: The Sunset Riders: 1/100 IP, 0/1000 ND, 3/3 Traits
The focus of my posse was a lightning fast dinosaur with a deadly close combat rider, then a basic sniper leader and two cheap members that would form a simple firebase. First up was “Old Jim”, my Neotechnoist Leader who uses a deadly 400kW Lever-Action rifle. I also gave him the Rapid Fire trait to help make sure that 4D from the rifle lands on target. With an RMC of 6 he’d basically hang to one side and shoot at enemies crossing the road. Next up was my dinosaur and rider, named Limefly (after an old fast Battletech mech) and The Man in Black respectively. I tried a new approach of reducing the rider’s Movement to 1, which gave me some bonus IP to play with but would also mean he’d never dismount the dinosaur. Let’s just hope the ride never gets shot out from under him! I beefed up his HP and gave him a Motor Blade which is a nice versatile close combat weapon. His goal would be to hang on the flank opposite Old Jim and counter charge anyone coming across the road. Then came the twins, who were cheap members with cheap 100kW Six-Shooters. They’d bulk up the center and either defensively hold ground or advance across the road, depending on how the enemies looked. I used ancient Warhammer 40,000 Sisters of Battle figures for them, and then had tons of trouble remembering who was who once the bullets starting flying, haha.

Old Jim (Neotechnoist Leader)
MV 4, AR 0, RMC 6, MMC 8, BRV 7, HP 8, Rapid Fire I. 400kW Lever-Action Rifle, Small IRP.

The Man in Black (Duster)
MV 1, AR 1, RMC 8, MMC 6, BRV 6, HP 13, Bonus HP I. Motor Blade.

Cardella (Bandit)
MV 4, AR 1, RMC 7, MMC 8, BRV 6, HP 10. 100kW Six-Shooter

Kina (Bandit)
MV 4, AR 1, RMC 7, MMC 8, BRV 5, HP 10. 100kW Six-Shooter

Limefly (Plains Runner Dinosaur)
MV 12, PMV D10, AR 0, MMC 9, DIS 4, HP 10, Bonus MV I.

Deployment
For the roll off to decide table edges The Sunset Riders got the right side (west) and The Death Snakes got the left side (east). The Death Snakes had to setup first. As mentioned the deployment zone was 5″ from each table edge. There was no objective for the game, since the street would inspire enough strategy without artificial goals.

Death: My setup didn’t have a lot of depth or trickery to it, so I wasn’t worried about going first. As planned I put Jordana right in the middle behind the tall, line of sight blocking hill. She’d either advance with Klahr or summit the hill and provide covering fire. Speaking of Klahr I put Kallas on his back and the two of them were slightly north of Jordana, just beside the tall hill. They would be my spearhead, and what better weapon to break the enemy lines than a shotgun? Heck if it’s savage enough to make World War 1 Germans protest about it, it’s probably still fine for rushing an enemy position. Finally Ice hung out on the right side, just to provide some support for that flank in case The Sunset Riders aimed that way. His long range would mean basically full coverage of the street.

Sunset: Seeing a fresh, unhurt and unhurried force arrayed before me is always intimidating. Luckily I outnumbered The Death Snakes, but they sure sounded better equipped. First of all I placed Old Jim, and I decided to put him to the north (my right flank), since I honestly didn’t want to get into a shooting match with Ice (he had better AR and HP). Plus I could start laying down a withering hail of fire against Klahr, since I figured the dinosaur would be quick to advance. Unlike my little Limefly he couldn’t hide behind any hill on the board, so I imagine he’d be deep into the road in no time. Anyways then the twins were put in front of the thin, tall hill slightly back from the main hill adjacent to the road. Sorry for the poor description, but I thought it was necessary since the pictures don’t have much context. I put the Man in Black and Limefly behind that same thin hill, since I wanted to hop him cover to cover and then hopefully charge a flank or counter charge Klahr.


Turn 1 – Snipers and Streets
1a. Death wins Activation
Death: I wanted to get my simple, no brainer moves out of the way and save Ice until the end to react to the enemy if necessary. So I just bumped Jordana 3″ forward to the base of the stepping hill in front of her. She was still blocked from line of sight, but I could move her up soon if necessary.
Sunset: I matched The Death Snakes opening move by pushing Kina forward to the base of my own tall hill that was adjacent to the road. Looks like they might get into a shooting match soon, but I was outmatched by two hundred kilowatts of six-shooter firepower.
1b. Sunset wins Activation
Sunset: Cardella mirrored Kina’s move and placed herself at the base of the same hill. Two 100kW Six-Shooters against Jordana’s single 300kW revolver should be interesting.
Death: Time to move in the spearhead forward! Kallas spurred his mount Klahr forward behind the tall hill. It provided some cover from the middle of The Sunset Rider’s forces, but Old Jim had a pretty clear shot (unfortunately). Not much I can do to prevent that with such a massive dinosaur.
1c. Sunset wins Activation
Sunset: I have two Activations left since I outnumbered the enemy 2:1. First of all I had the Man in Black move Limefly 12″ forward to the cover of the second large hill, right beside the twins. He was in a perfect position to charge Klahr if needed. Then I had Old Jim duck into cover and fire at 10+ at Klahr. His 3A weapon paid off and I hit with 1 critical for 6 damage. Not bad for a ranging shot!
Death: Unlike Old Jim and his cowardly, hiding posse, I didn’t have range to anyone with Ice. I moved him forward and behind a tree on his same hill, hoping to close the gap a bit.


Turn 2 – Snipers and Shuffling
2a. Death wins Activation
Death: First of all I continued my slow advance with Jordana. She stepped up the slope leading to the tall hill, but didn’t summit yet as that would require a Run. I didn’t want to Run her into the open and not get a shot off. Instead I figured she’d safely wait in cover and move and shoot next turn.
Sunset: I was a bit worried that Cardella would be outranged by Ice if the flank came to a shootout, so I moved her to the right to add some extra cover between the two.
2b. Death wins Activation
Death: Klahr was shot already, so I wanted to get him across the road as soon as possible. No more skulking behind cover. I Ran him directly forward, with only a crater and some open turf between him and a tasty meal of Cardella.
Sunset: I wanted to keep Old Jim firing at Klahr. I moved him to the right up a slight hill, which afforded a tiny scrap of cover, but more importantly put Klahr into medium range. I shot and again got 1 critical hit for 6 more damage. Still not enough to Panic Klahr, but hey, he’s down to half HP already!
2c. Sunset wins Activation
Sunset: I had a tough choice to make in terms of what Limefly would do. He could try to hold off Klahr in close combat, or try to swing around and reach Ice in close combat. I decided the twins and Old Jim’s firepower could handle Klahr, so I moved Limefly to the left so that he was behind cover at the southern tip of the hill. Next turn he will be able to Run a massive 12+6″ and reach Ice in melee! I finished my turn by moving Kina to the base of the tall hill, since she had to climb up the stepping stone along the way. I was at medium range of Klahr, so I snapped off a shot. Another lucky roll with 1 critical for 3 measly damage.
Death: Klahr was getting pounded, but hopefully could survive another turn and reach the relative safety of melee. Plus Kallas was safe so far, and certainly wouldn’t have survived the trip across the street, so Klahr is serving his purpose. Anyways with Ice I could just barely see Limefly’s head peaking out from behind the hill. The dinosaur was small, but not THAT small. Ice only needed 8+ to hit (so nice when the target doesn’t have Armor), so I decided to activate Knee Shot to hopefully pour on some more damage. I hit with 1 critical for a total of 9 damage, which put Limefly down to 1 HP and caused him to Panic (slowing his massive 12″ Movement to D10!). If only I had hit with just one more attack I could have killed the dinosaur and effectively stranded The Man in Black. As it stands I don’t think the pair will be effective in rushing Ice anytime soon.


Turn 3 – Fangs and Terror
3a. Sunset wins Activation
Sunset: Phew I lucked out winning Activation, since it meant I could have Limefly dive for cover before Ice got another shot off. I rolled for Limefly’s PMV and got a 2! So he basically went from 12″ MV to 2″ :( Anyways I shuffled him around until I was sure Ice couldn’t see him, or move to see him. The Panic was cleared after this, but I didn’t know what to do with the gravely wounded dinosaur now.
Death: With the cowardly Limefly burrowing even further behind the hill I left Ice for now and focused on getting Klahr into melee before he had to weather another round of fire. I moved him directly forward towards Cardella, then rolled to Charge the 3″ to reach her. I rolled enough movement and could reach Cardella, and Klahr viciously went to work on her, hitting with his 1 attack for 8 damage. Cardella passed her Bravery test, goodness knows how!
3b. Death wins Activation
Death: It was time for Jordana to stop hiding and start contributing. She moved into the open on top of the tall hill and fired at 9+ at Kina. The kick from her gun must have been too much as not a single shot hit!
Sunset: Kina couldn’t handle Jordana (and maybe Ice, depending on how he moved) alone, so she ducked back down the hill to the stepping stone. This put her into a Crossfire with Klahr, who was also at short range. She grabbed her revolver and held the trigger and Fanned the Hammer, which gave her a total of 6+2 attacks (thanks Crossfire!) at 9+. She only hit 3 times for a total of 4 damage. The upside is it knocked Khalr 2″ backwards (well, sideways), although he was still in melee with Cardella. Kina will need to Reload though since Fan the Hammer empties the gun (plus I rolled a 1, so it was worth Fanning the Hammer!).
3c. Death wins Activation
Death: Hmm if Klahr can hold out a bit longer he should be able to gobble up Cardella and then lock down Old Jim. I’d love to get Ice in to support, but was waffling on compromising his position or over-extending. As much as I hated to do it, I left Ice where he was, out of range.
Sunset: With Ice far out of range and Jordana blocked from the main fighting by a lot of terrain, I was in a pretty good position to continue my focus fire on Klahr. Cardella was part of the Crossfire against Klahr, and she didn’t have long to live. I decided to Fan the Hammer with her as well. She hit 3 times (2 of which were criticals!) for a total of 6 damage. More importantly the ability has Knockback 2″, so Klahr got pushed out of melee with her! I mean, I guess he could re-Charge next turn, but at least it removes the Melee penalty for Old Jim. Speaking of which the leader moved into a fresh Crossfire position with Klahr, at medium range. I decided to use Rapid Fire for a total of 7 Attacks. And then…I missed with all of them! I could have put down the dinosaur, but Old Jim had a bad case of the shakes or something!


Turn 4 – Titans and Reloads
4a. Death wins Activation
Death: I knew Klahr didn’t have much time left, so I handled him first. Instead of Charging I took a longer move route into combat with Cardella to get out of the numerous Crossfires. Then of course I had to miss with his attack on Cardella. At least it was just 1 Attack compared to Old Jim’s 7 that he missed, haha.
Sunset: Old Jim continued to pour fire into Klahr. He wasn’t in a Crossfire this time, but he still hit twice for 6 damage. Getting close to bringing down the dinosaur now.
4b. Sunset wins Activation
Sunset: I wanted to save Limefly as my trump card, so I got a few housekeeping issues out of the way with this activation. Namely Reloading with Kina, who stayed where she was.
Death: Seeing the swirling melee and mess of laser blasts Jordana Ran down her hill to close the gap, and be a bit less exposed to future return fire.
4c. Sunset wins Activation
Sunset: I had Cardella Reload, yep yep. Then The Man in Black swung Limefly into Klahr’s flank (man oh man 12″ is a long distance and really allows some surprises as opponents often underestimate the reach). Swinging his Motor Blade the rider hit 3 times (2 of which were criticals!) for a big 8 damage, which kills Klahr!
Death: Well that was bound to happen eventually, so I can’t say I’m surprised. In fact I was really impressed with Klahr’s survivability in general. After the first two critical hits when he crossed the street I was nervous, but he really soaked up those Crossfires and still got a hit in there. Plus Kallas is alive and well and at optimum shotgun range! Anyways I moved Ice to the edge of the hill, since he was starting to get a bit of a denied flank going on. Plus with Limefly moved over there wasn’t much that could hurt Ice (yet!).


Turn 5 – Shotguns and Fear
5a. Sunset wins Activation
Sunset: Well with Klahr dead I had a new problem: Kallas! There’d be two barrels of hot plasma blasting all over the place pretty soon. Cardella was in melee with him, just because of where he dismounted, so she fired first. Bad rolling though, as I missed with everything and rolled a 1, so she’d have to Reload!
Death: I didn’t expect Kallas to last long that close to so many enemy troops, so he got busy killin’. I used Both Barrels at medium range against Old Jim, rolling 4 Attacks. Kallas hit with 3 (2 of which were criticals) for a massive 10 damage, which killed Old Jim outright! Now that’s an entrance. The Man in Black and Kina both Flee as a result of their Leader being killed.
5b. Death wins Activation
Death: Jordana continued to march across the street, firing as she went. She shot at medium range at 10+, trying to hit Cardella for the kill. Luck was with Jordana as she got 2 hits (1 of which was a critical) for 6 damage, which kills Cardella!
Sunset: Well, that was a terrible turn of events. Cardella was bound to die, but to have Old Jim EXPLODE to unexpectedly definitely hurt. Anyways Limefly had to Flee since his rider was a mess, so he headed very far from anything important. I wanted to keep him in cover at least, so I Ran him behind a large hill in the hopes of surviving another turn.
5c. Death wins Activation
Death: Unlike Old Jim, Ice was still alive, but he certainly wasn’t doing much. What started as not wanting to over-extend has now become a definite lack of shooting from him. To this end I Ran him towards the combat, trying to get into range for a few deadly potshots.
Sunset: Kina had to Flee after seeing Old Jim die, so she headed away from Kallas up a large hill. I fired at medium range at Kallas, his shotgun still smoking, but only hit once on 8+ for 2 damage.


Turn 6 – Firing and Revenge
6a. Death wins Activation
Death: Well it’s time to use Kallas’ trick. He activated Speed Reload to bring his Double Barrel Shotgun back online, then moved over to sight in on Limefly. The shot was at long range but he only needed an 8+ on 4 Attacks to kill. Kallas missed them all! I was really hoping for a double kill with him.
Sunset: Kina backed down the hill to get out of line of sight from Jordana and Ice, then fired at medium range against Kallas, hitting 2 times for 3 damage. I miss the bonuses of Crossfire and Fan the Hammer, haha.
6b. Sunset wins Activation
Sunset: After barely surviving Kallas’ attack The Man in Black wanted to put an end to the deadly shotgun threat. He swung Limefly around and moved into melee with Kallas, hitting 3 times (1 was a critical) for 7 damage, which kills Kallas! Revenge, woo hoo.
Death: That was abrupt…perhaps not quite as abrupt as Old Jim, but still I expected at least another turn from Kallas. Anyways Jordana edged around the nearest crater and fired long range at Limefly. She missed with two 1s (haha). Ice was nearby so he used Yeehaw! to allow a single re-roll, which turned into a critical for a total of 5 damage against Limefly! The dinosaur crumpled to the ground. Jordana would still need to Reload due to her other bad roll of 1. Finally Ice could shoot (for once!) at close to his maximum range (21″ in this case) at 9+ against the now unmounted Man in Black, hitting once for 5 damage.


Turn 7 – Cat and Mouse
7a. Sunset wins Activation
Sunset: With most of the big movers and shakers dead the game would tend towards cleanup at this point. The Man in Black was slow as heck now that he was dismounted, but still feebly Ran 2″ towards the nearest hill.
Death: Ice advanced his full 4″ and gets Man in Black in his sights, shooting at long range at 9+. He missed all his shots, which was just delaying the kill on his incredibly slow opponent.
7b. Death wins Activation
Death: Jordana also moved forward which put the Man in Black in long range for her pistol. She outdid Ice in her shooting though, hitting 2 times (1 was a critical) for 5 damage, which had been reduced a bit because the Man in Black was in a scrap of cover.
Sunset: Kina spun around the edge of the cliff to shoot short range at Jordana. I didn’t want to have her needing to reload from using Fan the Hammer, so I stuck with a normal attack. It didn’t matter anyways as I missed with everything.


Turn 8 – Cleanup and Kills
8a. Death wins Activation
Death: Ice continued his barrage against the Man in Black, again at long range. He had better luck this time with 2 hits (1 of which was a critical) for a total of 7 damage, which kills Man in Black. Only Kina remains!
Sunset: Well there isn’t much left of my shattered posse. Kina and her trusty 100kw Six-Shooter might not do much, but hopefully they can at least kill Jordana. I fired at short range against Jordana, hitting once for 2 damage. After this Kina moved up the tall hill into the cover of the tree, since a commanding position might help a bit.
Death: Jordana spun and fired at short range against Kina, hitting 2 times for 4 damage as the vegetation absorbed some of the shot. Jordana moved to the bottom of the hill but didn’t have enough Movement to reach the top…yet.

Turn 9 – Not Over Yet
9a. Death wins Activation
Death: Calmly Ice lifted his rifle to kill Kina, needing only a 7+ to hit. Maybe the wind changed, or maybe a solar flare interfered with his vision, but he missed with everything! Looks like this is going to overtime, haha. Next Jordana Ran up the tall hill to be face to face with Kina, although not quite in melee combat.
Sunset: Intent on showing the cocky Jordana what happened to the last person at short range, Kina Fanned the Hammer for 4 hits (1 of which was a critical) for 6 damage, which causes Jordana to Flee! Kina moved back down the hill to deny Ice his shot.
NOTE: I forgot about the 2″ Knockback with Fan the Hammer, which would have sent Jordana sailing off the cliff

This is a textbook case of old vs new paintjob. I must have been 16 when I painted Kina (left) whereas I just painted Jordana (right).

Turn 10 – Stunning and Surviving
10a. Death wins Activation
Death: Jordana is Fleeing, but is technically too slow to Flee backwards down the tall hill. The hill is 2″ high so she’d need MV 4, but she only has 3. So instead she is Stunned! She decides to just stay where she is. Kina had ducked behind the hill so Ice no longer had a shot. He Ran forward to try to get into line of sight.
Sunset: Kina is a real trooper, and I wish with all my heart she had Old Jim’s 400kW rifle instead of her measly pistol! Anyways she needs to Reload, but instead of doing that Kina moves up the tall hill into melee with Jordana! She uses the Natural Weapon “Push”, which hits for 1 damage, and ALSO applies a 2″ Knockback that sends Jordana off the cliff! She takes a further 2 damage from the fall and is down to 1 HP. The downside is Kina is all alone in Ice’s line of sight now.


Turn 11 – Gotcha!
11a. Sunset wins Activation (with a roll of 11 to 1!)
Sunset: Winning Activation is great since it means I can (hopefully) get into cover. I moved Kina back down the hill and Reloaded her revolver.
Death: I moved Jordana forward to the base of the hill and had her take her Whiskey Drop, which recovered 2 HP so she’s at 3 HP. Ice moves around the hill into line of sight with Kina…no hiding from the inevitable! He fires and hits 2 times for 6 damage, which finally kills Kina!

After Action Report
Death: Pulled out a victory! That was such a tense back and forth battle. When Klahr died I’ll admit I had my doubts, but then Kallas swung it back by killing Old Jim, and subsequently dying soon after in melee with Limefly, but then his killer died, and so on. Definitely could have gone either way at a lot of points. During the game I felt that I didn’t use Ice nearly enough. I was too nervous to move him closer, but as soon as Old Jim was dead I could have been owning the long distances. Instead I had to spend (waste!) turns running him forward. Otherwise everything worked okay. Klahr did well in bringing Kallas into combat, and doing a bit of damage to boot. It’s always a toss up between being the aggressor and just playing defensive. I did take more fire than I would have just sitting in my “hill bunker” as The Sunset Riders did, but at the same time I got to dictate the flow of the game whereas my opponent just had to react to my moves. Anyways all in all I felt the Posse did a solid job, and the high cost weapons paid off very well. I can only imagine what would have happened if Kina didn’t have a cheap knockaround gun but a REAL weapon.

Sunset: Ugh how could I forget the 2″ Knockback on Kina’s Fan the Hammer against Jordana near the end there?! Not saying that was my biggest mistake, but it certainly is the freshest. I think wimping out with Limefly hurt me. He did okay in the backlines once Klahr arrived, but that was more due to The Death Snakes inability to kill Limefly than my own tactical genius. If I had committed him earlier I might have slowed Klahr before he (and Kallas!) really reached my lines. I guess I can’t be too much to blame since he Fled after taking a shot from Ice, so I had to react to that. Anyways everyone did okay. I would have liked Old Jim to survive longer, but who could have foreseen that much damage at once? I’m waffling on whether the twins were a worthwhile investment, since their 100kW Six-Shooters were hitting reliably (and Fan the Hammer + Crossfire rocked!) but they didn’t do a ton of damage, and certainly seemed like an easy “threat” to ignore.

Complete Turn Log
Read the rest of this entry »

Fan Battle Report: Keep to the Left

I have a terrific fan battle report here from Ross on the Post Apocalyptic Wargames Forum. He has a ton of awesome ruined terrain which I showed a bit of before. Anyways on to his writeup and pictures of “Keep to the Left”:


The Claynation Syndicate (me) – Jefferson, Eustas, Toppy, Megs, in front of Fluffy

Lords of the Wasteland (her) – George, Frances, Buckley, Don, in front of Spot

The Lords of the Wasteland call out to the Claynation Syndicate, telling them to get off the road.

The Syndicate’s response is in the negative and contained words not repeatable here.

The Syndicate march forward menacingly.

The Lords break formation and approach, Spot rushes towards Fluffy intent on a big meal!

Spot charges in taking a big chunk from Fluffy. From cover of ruined and rusted cars Megs unloads his shotgun critically hitting the T-Rex for 15pts of damage.
George shoots at long range and misses while Frances criticaly hits Toppy for a whole 2pts of damage!
Fluffy bumps Spot for 6pts of damage.

Fluffy and Spot score wounds on each other while Megs unloads his shotgun into Spot, again criticaly hitting it, this time finishing it off!!
Frances barely scratches Fluffy while Eustas steps forward Fanning the Hammer killing Frances. Beside him Jefferson Fans the Hammer at Don only clipping him for minimum damage. Toppy makes the trio of Syndicate men but only fires normaly at Don, clipping him once and jamming his weapon in the process.
The leader of the Lords steps in with murderous intentions Fanning the Hammer critically hitting and killing Toppy.

Buckley shoots at Fluffy at long range but can’t get past the wounded dino’s armour.
Megs pegs George for 10pts of damage causing him to break while Don Fans the Hammer at Eustas missing. The others hop from foot to foot busily reloading.

Fluffy charges Buckley, Buckley receives 6pts of damage from the Onslaught.
Smuggly, Megs walks upto Don, and from point blank range… misses! Calmly standing there amid the hail of bullets, Don Fans the Hammer at Megs blowing him away. Jefferson walks forward Fanning the Hammer shooting George in the back taking him out.
Eustas wildliy Fans the Hammer at Don for a small amount of damage.

Buckley fires at Fluffy but just jams his gun as Fluffy bounds forward again to minimumly wound Buckley.
The other all hastily reload their weapons.

Jefferson activates first, shooting and killing Don.
In an act of defiance, Buckley punches Fluffy in the nose critically hitting for 2pts of damage.
Stunned by the hit on the nose Fluffy manages to miss with his attackes.
From the side, Eustas picks off Buckley finishing the fight.


Many thanks to Ross for trying the game out. He had two questions afterwards that I thought I’d re-post here:

Q: With the Move RMC penaltity, does the model count as having moved if its movement was the last round or the current round?
A: The Move RMC penalty should only apply in the CURRENT turn. The idea was it forces a person to choose their Activations wisely, since you can “get the drop” on a tough target and Activate before it moves and have an easier time hitting it.

Q: Charging, is the charge range 1d6″ or Movement + 1d6″?
A: For Charging you can perform a normal Move in your Movement Phase, then the Charge itself in the Action Phase. The Charge is just D6″, so you were playing it correctly. Remember you can only Charge from 2-6″ away, so it’s meant to be a gamble and tradeoff of risking not reaching combat or getting the bonus Attack.

Battle Report: Fight for the Cannon

Encounter Overview
I had a ton of fun playing this game because of the smaller table and central objective. I used a 35″ by 35″ section of my table with a 5″ deployment zone, so there wasn’t a “long” side like when I play 4x3ft. This made melee deadlier and also meant everyone could get stuck in early on. To add to the chaos I put a Cannon in the middle of the table as an objective. This report used v1.1 of the rules, so it was all the latest and greatest.
The two posses involved were Hope’s Wardens and Tribe of the Blood Pact. I originally created them for the v0.91 rules, so you can see some of the thought behind the posses in an earlier post. Both posses ended up with 3 members and 1 dinosaur even after the update to v1.1, and mostly just had better equipment with some of the extra money from recruiting the first Member for free.

Note on images, all of them are clickable and will open the image at the full 1280×960 size. Apologies for any blurriness, I think my old camera is having issues focusing.

The Cannon
The smallest objective and totally change the feel of a game session, and adding a Cannon into the middle of the map certainly proved this. The little metal Cannon figure is actually from San Juan off Puerto Rico, and I bought it at an old Spanish fort down there on my cruise holiday. Dinosaur Cowboys is always on my mind and it was the perfect size for the game, so I’m happy with how it looked in this game.
Bit of a tangent here, but plain “capture the flag” objectives can be tough in skirmish games. For one thing you don’t have a lot of troops to throw at the objective, and certainly can’t hope to spread thin and cover multiple objectives. And with a single objective and no turn limit the question comes up of “Why even go for the objective?” since it might be easier to hold back and kill the enemy.
To alleviate this concern I think that objectives should do something beneficial. In Guild Wars MMORPG capturing the flag gives you a +10% boost to stats, for example, so that’s a huge motivation to go for it.
In this game the Cannon could actually be controlled and fired if a human was close to it. Basically whoever had the most humans (dinosaurs don’t count) within 4″ of the Cannon could spend the Action Phase of any of those humans (max of 1 per Turn) to fire the Cannon. It has similar stats to a Field Gun, except the damage is less crazy since these were fresh Posses.

The Cannon: 1A-5D 2″ Explosion, range 1-6/7-15/16-21, no Reload

Posse: Hope’s Wardens: 3/110 IP, 10/1000 ND, 3/3 Traits
My posse representing a high tech Neotechnoist party that is new to the world outside The Wall. They were well equipped and had plenty of Armor to compensate for their low HP. Generally good shooting scores would help. The one limiting factor was range, as the furthest weapon as Limeskull with 16″ max on his Light Repeater. I figured Nedevan and Red Dove would advance together, then dismount and try to cause disarray by getting into melee with separate targets. Limeskull’s purpose was to grab cover up high (for the elevation bonus) and fire forever. Glowstar would be midrange support, probably moving a step or two behind Red Dove.

Limeskull (Neotechnoist Leader)
MV 5, AR 2, RMC 7, MMC 8, BRV 7, HP 10. Light Repeater, Padded Armor.

Red Dove (Bandit)
MV 4, AR 1, RMC 7, MMC 7, BRV 6, HP 9, Whirlwind. 100kW Six-Shooter, Motor Blade.

Glowstar (Neotechnoist)
MV 4, AR 2, RMC 6, MMC 8, BRV 6, HP 8, Neck Shot. Auto Shotgun, Padded Armor.

Nedevan (Trained Ducky Dinosaur)
MV 6, PMV D6, AR 0, MMC 7, DIS 4, HP 18, Bonus HP I.

Posse: Tribe of the Blood Pact: 0/110 IP, 0/1000 ND, 3/3 Traits
The idea of this posse was to get into melee and make things ugly for the enemy. Everyone had high Movement and a ton of Hitpoints which would facilitate them living long enough to reach close combat. The inexpensive melee weapons and low cost ranged options meant I could go for a higher priced Armored dinosaur, which is ridiculously terrific at low IP since it’s AR 4 is very tough for people to hit. Having a ton of HP meant The Crimson Terror could soak up a bunch of damage too. I figured he’d remain unmounted, although if anyone was going to ride the dinosaur it would be Sendar as she had the lowest MV. Otherwise the posse would stick together and advance using as much cover as possible, and most likely sacrifice shooting to Run each turn.

Bloodscar (Savage Leader)
MV 6, AR 2, RMC 9, MMC 7, BRV 7, HP 13, Retreat! I. Pickaxe, 100kW Six-Shooter, Quilted Armor.

Illit'taex (Savage)
MV 5, AR 1, RMC 9, MMC 7, BRV 5, HP 13, Bonus HP I. Pike, 80kW Six-Shooter.

Sendar (Duster)
MV 4, AR 0, RMC 8, MMC 7, BRV 6, HP 12. Staff, 80kW Six-Shooter, Small IRP.

The Crimson Terror (Feral Armored Dinosaur)
MV 4, PMV D4, AR 4, MMC 7, DIS 4, HP 28, Runner.

Deployment
In the roll off for table edge Hope’s Wardens got the west side (towards the kitchen) and Tribe of the Blood Pact got the east side. Hope’s Wardens had to setup first. Each posse could deploy up to 5″ from their respective table edge.

Hope: Setting up first is always rough as you don’t get to see what the enemy is planning. Looking at the terrain I tried to anticipate how Blood would deploy. I knew the tall terrain near the south would be tempting, so I positioned Limeskull opposite it near the high hill with a tree. This would give him a bit of cover but more importantly force melee combatants to waste Movement trying to climb the hill. It also left me at long range of the central Cannon, so I could provide supporting fire. Let’s just hope Blood doesn’t go for a denied flank and deploy way in the north out of my range.
I mounted Glowstar and Red Dove on Nedevan and plopped him in the middle. The fast MV 6 (9″ effective Run) would put him very close to the Cannon early on, so I could hopefully dominate any incoming groups.

Blood: I had a bunch of deadly warriors at my disposable, and enough terrain that I figured most of them could reach the combat alive. I knew they’d be faster on foot so I left The Crimson Terror unmounted and put him in the northern corner behind a hill. Even with the Runner trait he was ponderously slow (7″ effective Run), but he had a ton of HP and super high Armor so I hoped to hold the middle with him until the rest of my melee group could work their way through cover. Advancing directly across the open would mean his slow speed would balance with the faster humans who would be dodging hill to hill.
I put all my human members in a clump in the south. No one could get to the Cannon in the first Turn so I was safe keeping them clustered. I planned to flank one of them (probably Illit’taex) towards Limeskull on the hill. Bloodscar and Sendar would approach the middle and hopefully control the Cannon to bombard anything left alive, or at least contest it from Glowstar and Red Dove enough to prevent them firing.


Turn 1 – To the Cannon!
1a. Blood wins Activation
Blood: Since two of Hope’s members were mounted they technically only had 2 entities to Activate, so I outnumbered them 2:1 and needed to Activate two of my figures as a result. I decided The Crimson Terror would Run 7″ directly towards the Cannon, as planned. Bloodscar also Ran (9″) forward, but didn’t expose himself to Limeskull and stayed behind the tall hill. Blocking line of sight is such a lifesaver for a melee focused group such as mine.
Hope: I wanted to keep Limeskull in reserve until the rest of the enemy posse had moved, so I activated Nedevan and Ran him forward. His massive 9″ Run meant I would be a the Cannon next turn, which was great.
1b. Blood wins Activation
Blood: Time to Run some more. Illit’taex Ran in a straight line west, and would be in the cover of the hills approaching Limeskull soon. Sendar followed Bloodscar’s approach with a Run.
Hope: Limeskull was out of range and out of sight of everyone so he Ran up the tall hill he had deployed by, which gave him a commanding view of the field.


Turn 2 – Enemy Sighted
2a. Blood wins Activation (again!)
Blood: Time to keep on moving up. I Ran Illit’taex down the flank of Limeskull. Next turn he’d make the deadly approach across the open terrain, but hopefully I could distract Limeskull with more tempting targets until Illit’taex was closer. Sendar also Ran, but couldn’t quite make it out of line of sight. Unfortunately she was inside the long range of Limeskull, but maybe the modifiers would save her.
Hope: Tribe of the Blood Pact had made a bit of a mistake in leaving Sendar exposed, but I didn’t need to waste an early activation to take advantage of it. Instead I had Red Dove and Glowstar dismount Nedevan, which used all of their Action Phases. It left them all with a Movement Phase though, so both humans moved right up to the Cannon (close enough to fire it now!) while Ducky headed south towards Sendar, hoping to slow down her and Bloodscar before they reached the center.
2b. Hope wins Activation (for once)
Hope: Time to start the shootin’. Limeskull lined up on the distant Sendar who was basically at maximum range. She was in Cover (-1 Damage) but Limeskull was at a high Elevation (+1 Damage), so no mods from that. He managed to hit 4 times, one of which was a Critical. In total he did 6 damage and Sendar failed her Bravery Test and is Fleeing.
Blood: Sendar will have to waste some time Fleeing backwards and then moving right back in, so that’ll be annoying. I snapped off a shot with Bloodscar at the Ducky dinosaur, but I missed on 10+. Bloodscar moved forward and behind a tree, hoping to survive any early activations next turn. Finally The Crimson Terror moved closer to the Cannon and Glowstar and Red Dove. They were quite far away but I figured I might be able to reach them with a Charge. Unfortunately I failed the roll (needed 5+) so The Crimson Terror stayed where he was.


Turn 3 – Into the Barbwire
3a. Hope wins Activation
Hope: Hmm kind of a tough call who to activate first. On the one hand I could shoot with Limeskull at Sendar again before she Flees and maybe even kill her. But The Crimson Terror is going to get into melee range and it’d be great to shoot him before the -1 Melee modifier (plus he hasn’t Moved yet, so that’s another -1 avoided), since his AR 4 is enough of a problem already. In the end I decided to shoot at The Crimson Terror as it’s not like Sendar won’t be a target again in the future. To that end Glowstar aimed his Auto Shotgun at 9+, hitting 3 times for 8 damage, but unfortunately also rolling a 1 and requiring a Reload. A Panic token was added to The Crimson Terror from the damage, which should slow him down a bit. Glowstar then moved back outside the barbwire (which was counted as Difficult Terrain) but was sure to still be within 4″ of the Cannon.
Blood: Now that The Crimson Terror had Panic on him I wasn’t convinced of his ability to reach melee. Plus he could handle Red Dove’s firing if it came to that. So I left the dinosaur as is and instead moved Bloodscar into the barbwire cage. He Charged 4″ into melee with Red Dove, then savagely hit with both attacks with a double roll of 11 for a total of 8 damage. Red Dove is down to 1 HP and failed his Bravery Test and is Fleeing. Too bad I couldn’t finish the job!
3b. Blood wins Activation
Blood: Time to keep the hits rolling. I rolled for The Crimson Terror’s Panic Movement (D4 in his case) and unfortunately got a 1. So after moving and Running through the barbwire he was still 1″ short of melee with Red Dove, but at least close enough to deny a Charge. Glowstar having to Reload would mean The Crimson Terror would be a bit safer for another turn until he could get into combat.
Hope: I aimed to counter the increasing melee presence in the middle. Since Sendar was less of a threat I decided to swing Nedevan around and move into melee with Bloodscar. I hit 1 time for 3 damage. Not a ton, but Nedevan’s big pool of HP should keep the Savage Leader busy for a while.

3c. Hope wins Activation
Hope: When I look at the middle I see a giant clump of enemy just BEGGING for a cannonball. Red Dove was thankfully Fleeing which meant I could easily escape combat with Bloodscar. I fled him backwards, then fired the Cannon at Bloodscar! Yar! I hit him for 6 damage and the 2″ Explosion clipped The Crimson Terror for 5 damage, and unfortunately also Nedevan for the same. Like a true coward Bloodscar is Fleeing, and both dinosaurs have a Panic token added.
Blood: Well that was ugly, but at least Red Dove hit their Ducky dinosaur with some friendly fire. Bloodscar has seen better days though. Anyways I Fled Sendar away from the closest enemy (Nedevan), then she turned and shot at the dinosaur, hitting 3 times (with 2 Criticals!) for 5 damage, which added a Panic token to Ducky.
3d. Hope wins Activation (by one!)
Hope: Limeskull had no chance to hit The Crimson Terror at such long range, but Bloodscar was perfectly placed to get shot. I needed an 11+ to hit but managed to hit once (6A is so nice) for 3 damage (thanks Elevation!), which put Bloodscar down to 1 HP!
Blood: I finished the turn by moving Illit’taex along his hillside flank. After a big Run he was at the base of Limeskull’s hill. If he could weather downward fire for a turn I could get into melee with the Neotechnoist Leader.


Turn 4 – Roar of the Cannon
4a. Blood wins Activation
Blood: Bloodscar was in a tenuous position with 1 HP and enemy guns all around. There wasn’t any cover nearby, so I decided to make some! Bloodscar used his Retreat! Trait to move The Crimson Terror 4″ into melee with Red Dove (who only had 1 HP), but also angled the dinosaurs body to try to block line of sight to Limeskull. After that Bloodscar Fled away from Nedevan, then Ran back in behind the hill that was The Crimson Terror.

Hope: I guess Bloodscar didn’t learn his lesson that I have no problem using the Cannon on my own people if it benefits me…I guess that’s more of a Savage thing than a Neotechnoist, but I guess it could be a cold calculated call which might fit the technologically advanced people well. Regardless I fired the Cannon with Glowstar at The Crimson Terror at 10+ to hit. I was just within 12″ of Limeskull in case I needed the Yeehaw! re-roll, but thankfully the shot hit without aid. The Crimson Terror took 6 damage, and both Red Dove and Bloodscar took 5 damage from the 2″ Explosion, which killed them both! After their leader was slain Illit’taex and Sendar BOTH failed their Bravery Tests and were Fleeing, hah! Glowstar finished his epic turn by moving away from The Crimson Terror towards Nedevan.
4b. Hope wins Activation
Hope: Having Illit’taex Fleeing gives Limeskull a bit of breathing space, but I knew the persistent bugger would be back soon. So I moved Limeskull to the edge of the cliff and fired down at Illit’taex, hitting for 4 (one of which as a Critical) for 7 damage. He still has 6 HP left though, unfortunately.
Blood: The Crimson Terror still has two Panic tokens, so I had to roll for his PMV again. I lucked out and got a 4, so I was able to move and then Charge 2″ into melee with Glowstar. I rolled well and hit for 5 damage, but Glowstar managed to pass his Bravery Test. After recovering his wits the dinosaur still had 1 Panic token left.
4c. Blood wins Activation
Blood: Time to move my last two entities for the turn. Most of it would be Fleeing after Bloodscar’s untimely death. Illit’taex Fled back, almost to the table edge in fact, and then reversed and Ran towards Limeskull’s hill. If he managed to survive another turn I’d get into melee with the leader. Then Sendar also Fled away, but used her Action Phase to apply the Small IRP for +2 HP (could have been a better roll, alas).
Hope: By getting into melee with Glowstar it turned out The Crimson Terror was also in combat with Nedevan. The Ducky turned and tried to smash the dinosaur with it’s crest, but missed both attacks on a rather challenging 11+.


Turn 5 – Cleanup Crew
5a. Hope wins Activation
Hope: My ideal plan for this activation was to use Glowstar’s Neck Shot Trait on The Crimson Terror, which would have given +4 damage and meant I could possibly kill the dinosaur. But Glowstar still hadn’t had a chance to Reload from way back, so his Auto Shotgun was pretty much useless. I didn’t want to risk a Cannon shot directly into the crowd again since it’d hit Glowstar himself and the Ducky. So instead, with luck, I could get the bullet sink of Illit’taex out of the way. Limeskull aimed down the cliff again and fired, but only hit 3/6 times for 5 damage, which left Illit’taex with 1 HP! Plus he passed his Bravery Test, which meant he might be able to reach Limeskull and dish out some hurt with that Pike.
Blood: The Crimson Terror lived up to his name by stomping and goring Glowstar, who was unluckily stuck between two towering dinosaurs. I hit for 5 damage which killed the human. Also I got to remove my last Panic token…not that it mattered since it looked like a straight up brawl to the death between the dinosaurs.
5b. Blood wins Activation
Blood: Yeesh Illit’taex is really running on fumes. I moved him to the base of Limeskull’s cliff, but failed to Charge the measly 4″ needed to reach the Leader. So much for my awesome flank. Anyways after that failure I moved Sendar closer to the center and fired at Nedevan. She didn’t let me down with 2 hits (1 of which was a Critical) for 3 damage. I really wish she had something besides an 80kw Six-Shooter as 0D is painfully useless. Anyways Nedevan is down to 5 HP at least!
Hope: The titan brawl continued in the middle, but Nedevan again failed to do anything to the Armored enemy. Having a base MMC of 7 against AR 4 is really painful, especially with only 2 Attacks.


Turn 6 – Last Man Standing
6a. Hope wins Activation
Hope: Illit’taex has snuck behind Limeskull enough that I had to waste my Movement Phase turning around to face him. I unleashed another salvo, expecting a kill, but terrible dice meant NOTHING hit and Illit’taex survived!
Blood: Illit’taex was able to survive with 1 HP against 6 point blank Attacks, probably by praying to some Savage pagan god. Eagerly he moved up the hill and stabbed at Limeskull, but after ALL that running and dodging and pain he only hit 1 time for 4 damage!
6b. Hope wins Activation (again)
Hope: Looks like that hill is bad luck for both of us or something. Anyways speaking of bad luck Nedevan failed to hit The Crimson Terror again (what is that, three times in a row?). Yep, short activation.
Blood: The Crimson Terror really was dawdling too long with that simple herbivore. Somehow I missed all attacks even though I only needed 7+ (rolled a terrible 6, 6, and 4). So it’s up to the humans to carry the team. Sendar moved in behind the hill and Charged 2″ into Ducky’s flank, hitting a solid 4 out of 4 times for 8 damage which totally killed Nedevan. That’s how it’s done.


Turn 7 – Desperate Cat and Mouse (Dino and Human?)
7a. Hope wins Activation. Only Limeskull remains against Illit’taex, Sendar, and The Crimson Terror
Hope: Eh could be a tough one. The good news is I rolled better than absolute GARBAGE (aka last turn) so Limeskull was able to easily kill Illit’taex. I was afraid that Sendar might hop on the uncontested Cannon and outrange my feeble Light Repeater, so I dropped Limeskull down out of line of sight behind the tall hill.
Blood: A dinosaur and villainous vixen against a wounded Neotechnoist Leader? I think I can win this one! I Ran both Sendar and The Crimson Terror towards Limeskull’s hiding place. He’d be out of options very soon.


Turn 8 – Gonna Take You With Me
8a. Hope wins Activation (by one)
Hope: Definitely hanging by a thread here. I moved Limeskull back down the hill and to medium range with Sendar. Too bad I shot terribly and only hit for 3 damage with him! Better than no hits I guess, but still I had kind of hoped he’d finish her off and then maybe survive the dinosaur somehow.
Blood: Sendar returned fire after moving to her medium range, but missed all the shots on a 10+. The Crimson Terror did what dinosaurs do best, and that is Ran forward towards his prey. The noose was closing.


Turn 9 – Bring Her Down
9a. Hope wins Activation (again!)
Hope: I think winning initiative has saved me so far, but The Crimson Terror can basically reach melee regardless of where I go. Ugh I should have stayed on the tall hill but I got so caught in thinking I could outrun the inevitable. Anyways since I was already trapped I just moved Limeskull into line of sight of Sendar and fired. Again I rolled badly and only did another 3 damage, which left her with 2 HP. That was actually the 2 HP the Small IRP had healed earlier, so there ya go.
Blood: Again Sendar returned fire, but this time hit with 1 Critical for 2 damage, but also rolled a 1 and needs to Reload! Good thing her Staff doesn’t need ammo…Oh and of course The Crimson Terror moved into melee with Limeskull.


Turn 10 – All Over
10a. Blood wins Activation
Blood: If dinosaurs could speak I’m sure The Crimson Terror would quip something like “Hey Limeskull, check this out!” before dealing 6 damage. I guess I’ll just have to settle for hitting 3 of 3 times and killing Limeskull, which wins me the game!

After Action Report
Hope: You know I honestly though I had this one in the bag. I guess I underestimated The Crimson Terror’s survivability, and also got a little over committed with Glowstar and Red Dove in the middle. Oh and my total inability to kill Sendar at the end was kind of annoying. But I also was able to deny Tribe of the Blood Pact access to the Cannon for basically the entire game, and ALMOST killed all their humans. I’d say I was a little overequipped, especially Red Dove who didn’t get to use much of anything the whole game. Having high AR helped as it meant more misses and less damage, although it’s a tough call whether high AR is better than high HP. But yeah, very close game and I just wish I had played the end a bit differently (like going back up the tall hill instead of taking to the ground). And I don’t want to be petty but the slightly smaller table really didn’t help matters, as it meant my turns of free shooting on the melee based posse was cut down by 12″ or so.

Blood: Ah the delicious taste of victory. It always feels extra satisfying to win with a bunch of Savages armed with polearms, especially against high tech Neotechnoists. My most valuable asset was definitely The Crimson Terror, his AR 4 is pretty tough to crack with 100 IP and the related RMCs. Bloodscar did pretty well in the middle, although he took a lot of firepower and died earlier than I would have liked. Sendar was terrible at the start but redeemed herself by only missing a single shot all game (with base RMC too!) and by finishing off Nedevan. Illit’taex was great in theory, but yeah, that was a loooooooong haul to Limeskull, and he sort of let me down when I got to grips by only hitting once. Oh well, I still won and plundered.

Complete Turn Log
Read the rest of this entry »

Battle Report: The Great T-Rex Hunt

Encounter Overview
This battle report chronicles the mighty struggle of Glenbrook’s Desert Triumphateers against a single mighty Tyrannosaurus Rex. The daring (yet aging) posse had one final hunt in them, and so old friends re-united and set off in search of a great t-rex south of their farm in Perico, Texas. Would five brave souls be able to overcome the raw ferocity of a veteran t-rex?
This scenario used v0.9 of the rules, so this was before the recent changes around dinosaur breed.
Although I’ve detailed the parties involved in the past let me refresh you on their statistics and equipment. This game was pretty simple to play (since the t-rex didn’t have a lot of strategy to it) but I took a bunch of cool pictures and the backstory of the posse made it feel more dramatic and cinematic.

Note on images, all of them are clickable and will open the image at the full 1280×960 size. Apologies for the fuzziness, I must be getting worse at taking photos. They do improve as the game goes on though.

Posse: Glenbrook’s Desert Triumphateers – 100 IP, $2,185, 3 Traits
Gordon Glenbrook – Gordon was once a Neotechnoist but found the adventurous lure of the outside world too much for him. He left the jungle when he was barely an adult, and slowly built up a fortune through trading, leading expeditions, farming, etc. He met Cecilia while driving some triceratops through Colorado, and they were married soon after. Now he’s getting older and a bit slower, and has settled down on a ranch in the one remaining hospitable part of Texas. The t-rex hunt is mainly a chance to relive some of his old glories and feel a little more useful around the ranch.
20 IP, $170. MV 3, AR 0, RMC 6, MMC 8, BRV 4, HP 12, Big Game Hunter. Bolt Action Rifle, 80kW Six-Shooter, S-IRP

Cecilia Glenbrook – Cecilia may seem a strange match for Gordon. She was raised in a rich family near the coast, and never really knew hardship. She married Gordon at the height of his power and influence, when he was most attractive as a suitor. Now in his older years she sometimes has doubts about their suitability, especially with how taken Gordon has been with hunting. In the interest of maintaining their marriage she has started to learn to handle a gun, ride, rope, and sleep under the stars.
20 IP, $225. MV 3, AR 0, RMC 6, MMC 8, BRV 4, HP 10. Stun Gun, Derringer, Medpack

Sir Quinton Masglou – Quinton is much younger than Gordon, and learned about the man while reading historical records inside the Neotechnoist compound. They eventually exchanged letters and met a few times for hunting expeditions. Quinton looks up to Gordon, but also finds him a bit stuffy (mainly because of their age gap). Gordon treats Quinton like the son he never had, and is very eager to entertain the youth and give him the best advantages in life. Quinton was exploring north of Haven and the Neotechnoist jungle, but flew all the way south for the chance to hunt a t-rex and see his old mentor, perhaps for the last time.
32 IP, $320. MV 4, AR 2, RMC 6, MMC 8, BRV 4, HP 8. Blunderbuss, Stick of Dynamite, Padded Armor

Walter Thunder – Walter has seen it all as a guide, and is very worldly as a result. He’s competent with a wide variety of weapons and is terrific at hunting, trapping, tracking, and getting out of trouble. His dashing good looks lead to a brief affair with Cecilia (of which Gordon never found out), so there is a tension between the two as a result. Gordon, blissfully unaware, considers Walter an upstanding young man, and sometimes compares his younger self to the life Walter has lead. Walter puts up with it in good humor because of the solid, steady pay Gordon offers. He feels the t-rex hunt will give him a lot of fame and further his reputation in the south.
8 IP, $160. MV 4, AR 0, RMC 7, MMC 8, BRV 5, HP 8, Retreat! 400kW Six Shooter, Saber

Allen – Allen is the strong silent type, and has acted as a bodyguard for Gordon in the past. Early in Gordon and Cecilia’s marriage a rival rancher tried to use violence and intimidation to get Gordon to give up some land in the west. Allen cleaned up the problem quickly and quietly, and Cecilia was never the wiser that her husband had hired such a mercenary. Allen does not have the best attitude or morals, but he is extremely competent and a legend in a duel. Gordon has kept in contact through the years for certain difficult situations where a rough hand might be needed. Allen has a strong, yet unspoken sense of loyalty to Gordon which is his main motivation for coming on the hunt.
20 IP, $510. MV 3, AR 1, RMC 6, MMC 8, BRV 4, HP 10, Speed Reload. Handcannon, Snub Pistol, Tangle Grenades, Cloth Armor

The T-Rex – 100 IP, $1,000, 3 Traits
100 IP, $1,000. MV 8, AR 3, MMC 4, BRV 3, HP 36, A-D 10-1, Runner, Inspiring Shot, Turtle.

Table Setup
Ye olde kitchen table was once again transformed into a wicked looking stretch of hilly desert. I had just reorganized my terrain box so I dug up a lot more trees and greenery than I normally have access to. All in all I’m really happy with how the table turned out, especially with the little volcano and the rock field surrounding it. Note that to stop the match from being the t-rex slogging across the entire map I cut the playable area down to 3′ by 3′.

Deployment
Both sides could deploy up to 4″ in from each short table edge. Glenbrook had to deploy first and chose the east side, followed by the t-rex on the west side.

Glenbrook: “We have travelled south for two days before finding the trail. Cecilia was complaining about the heat and I felt quite bothered myself. After consulting our map our guide Walter informed me that we had but twelve miles to go before the temperatures would be dangerous. As we set down for the night – perhaps our last night – morale was low around the campfire.
But I write now with a glad heart for Allen saw signs of our quarry when he arose this morning. Eagerly we checked our rifles and followed the trail east. Eventually the ground hardened into cracked lava rock and we saw a volcano in the distant, quiet in it’s repose. With luck the fiendish t-rex will have nested at the base of the volcano.
I advance with Cecilia at my side and Allen not far from her. To my right noble Sir Quinton and Walter cut through the bushes and keep a wary eye open for movement. By splitting our line I hope to encircle the t-rex and fire at it from all sides.”
*Gordon looks up from his travel log as Allen signals him*
Whispering softly, Allen motions ahead, “Gordon…I hear something.”

T-Rex: Rooooooooar! (Translation: I deployed on the south west side since there was more cover for my massive bulk. The gigantic prehistoric tree helped cut down line of sight too. Also the men and women hunting me were clumped closely on the hill ahead, so if I could reach them I could eat my fill).


Turn 1 – There It Is!

Glenbrook and his allies ran forward, taking up defensive positions amidst the hills and sparse shrubs. Walter swung closer to Gordon, grabbing tree trunks and loose dirt as he scrambled up a nearby hill. Unfortunately their array of high powered rifles were out of range of the beast. But they could see the menacing T-Rex in the distance; tall and intimidating as it loped towards them. The T-Rex ran into the rubble near the volcano, it’s massive strides powering it forward. Nervously they glanced at each other and mumbled prayers.

- Glenbrook wins Initiative. Everyone Runs forward except Walter who cut up a hill towards Gordon. All out of range.
- T-Rex Runs 8"+5" forward, ends right near volcano.

Turn 2 – Shoot Her! Shoot Her!

The T-Rex continued it’s steady advance, apparently uncaring about the weapons prepared against it. With scraping claws crushing rocks underfoot the T-Rex cleared the rubble near the volcano and was at the edge of the incline the humans were hiding on. At this point all hell broke loose. Gordon let out a triumphant Yeehaw! as Allen heaved a Tangle Grenade at the T-Rex before retreating slightly. The cannister exploded in midair, raining toxic chemicals onto the advancing dinosaur. The green globs starting to dry as soon as they were exposed to the air, and soon the T-Rex was trapped in a stringy cage of hardened chemicals. Seeing the beast was Stopped, Cecilia recovered her wits and drew the Derringer and aimed exactly how Gordon had shown her on the farm. She exuberantly yanked the trigger until the weapon let out an empty wheeze. The wild barrage of shots went wide as Cecilia backed up and fumbled for a recharge pack. Comfortably raising his rifle Gordon fired a single high powered blast of energy. With a brilliant flash the beam flew past the T-Rex. Gordon’s cursing only increased as a thin trail of smoke bled from the side of the rifle. He hastily moved backwards and tried to fix the weapon. Finally Walter crept towards a clump of overgrowth and lined up his shot which flew true and struck the T-Rex in the side. Momentary excitement turned to anger as the attack simply glanced off the tough hide leaving the T-Rex unhurt. Hearing gunfire Quinton shouldered his weapon and Ran down the steep incline to try to get into range.

- T-Rex wins Initiative. Runs 6" through Difficult Terrain of the rocks. Now only 8" from nearest human.
- Allen throws Tangle Grenade, needs 10+ to hit, miss with 7. Gordon uses Yeehaw! and the re-roll is a 10. T-Rex takes 1 damage and is Stopped. Then Allen moves 3" back.
- Cecilia fires Derringer at medium range, misses (with a 1 and 3). Needs to Reload. Moves back 3".
- Gordon shoots rifle at Short Range, needs 9+ to hit but misses with a 1 and needs to Reload. Moves back.
- Walter edges forward to hedge and shoots at Long Range, misses
- Quinton out of range so Runs around hill

Turn 3 – Quick Breather

Ripping and tearing at the strands the enraged T-Rex could still not free itself. Roaring it hunkered down and prepared to receive the onslaught. Unfortunately for the humans, most of their weapons were empty or jammed. Allen and Cecilia continued to move backwards before quickly Reloading their weapons. Gordon stood where he was and poked and prodded the rifle and finally getting the ready light to flick to green. Walter stayed behind the hedge and doubted if his weapon would even hurt the towering titan. Quinton finally reached the action and instantly snapped off an eager shot which sailed wide of the T-Rex. As the humans watched in horror the Tangle Grenade strands started to break down and decompose, freeing the T-Rex.

- T-Rex wins Initiative, but is Stopped from Tangle Grenade. Uses "Turtle" Trait, boosting AR from 3 to 6.
- Allen, Cecilia, Gordon all Reload. Allen and Cecilia move backwards
- Walter stays and doesn't shoot (too hard to hit)
- Quinton moves up, misses at 12+

Turn 4 – Dynamite!

With a cold eye Quinton drew a Stick of Dynamite and rapidly lit the fuse in a single fluid motion. Many hunts allowed him to judge the distance well and the thrown projectile landed right at the foot of the T-Rex before exploding. The force of the blow bruised the dinosaur’s ribcage and cracked long gashes in it’s hide. Quinton gave a satisfied nod to Gordon before moving up the nearest hill. Not to be outdone, the guide Walter stood up from behind the row of thirsty desert plants and fired. Although he was far away the shot was again true, and this time it blasted through the T-Rex’s thick skin. Pleased with himself he stayed in cover. After finally unjamming his gun Gordon tucked the weapon against his cheek for another shot, but his bad luck continued and the blast barely grazed the T-Rex. From further back Allen and Cecilia both fired. Cecilia again emptied her weapon in a rapid blaze, but succeeded only in hitting the intervening tree instead of the T-Rex. Allen had more luck as his Stub Pistol cracked off a shot in a cloud of smoke. The bullet struck the T-Rex in the neck, easily ripping apart the skin and fragmenting inside. Shaking free of the last tangling strands the T-Rex Ran through the rest of the rocks and got close enough to nearly charge the humans.

- Glenbrook wins Initiative
- Quinton throws Dynamite, hits with a 10 on 9+ for 8 damage. Moves up hill.
- Walter fires long range, hits 1 on 11+ for 5 damage. Stays.
- Gordon shoots and misses on 9+. Stays.
- Allen shoots Stub Pistol at long range at 10+, hits 1 crit for 6 damage. Stays.
- Cecilia shoots Derringer just at medium range through cover. Misses (one 1), needs to Reload. Stays.
- T-Rex Runs forward and clear of rocks

Turn 5 – Taking a Bite

Smelling blood the T-Rex hungrily lunged forward before anyone could react. It reached Allen and Cecilia and starting biting and snapping at them. With a mighty swing of it’s tail the T-Rex crushed Cecilia to her knees. Bones splintered in her arms from the force of the blow and she coughed a great gout of blood. Desperately she looked for somewhere to escape to but was backed by thick jungle. Instead she stayed crumpled on the ground, dazed and Stunned. With Cecilia so close Allen didn’t dare use his grenades, so instead he fired with the Stub Gun and again struck the T-Rex in the neck. Crying out for his wife Gordon recklessly fired and missed. The old hunter felt helpless against such a beast. Walter also fired but his luck had run out and the long shot went astray. Quinton clambered down the hill and unrolled another bundle of dynamite in preparation for using it.

- T-Rex wins Initiative, is in Charge range now. Moves into melee combat with Allen and Cecilia. Attacks Cecilia at 4+, hits 8 times for 8 damage, she has 1 HP left. She Flees, but can't flee off the board, so will be Stunned.
- Cecilia is Stunned. Stays.
- Allen at minimum range for Tangle Grenade, uses Stub Gun instead for 1 crit and 6 damage.
- Gordon shoots and misses.
- Walter shoots and misses.
- Quinton Reloads his Stick of Dynamite and drops hill down.

Turn 6 – Blood Frenzy

Now that the T-Rex had reached the human line chaos reigned. The hunters became disorganized in their panic while the T-Rex busied itself with killing and feasting. Ignoring the wounded Cecilia the dinosaur grabbed Allen in it’s jaws and bit down, snapping his spine and rupturing his internal organs. With a strangled groan Allen blacked out from the pain before being swallowed whole. Opening it’s blood flecked jaws the T-Rex roared victoriously, and to the humans eyes seemed to gain strength from the kill. Meanwhile Cecilia limply pulled a Medpack from her waist pouch and started applying the various bandages and salves to her shattered frame. After tying off the worst wounds she tried to crawl away from the towering T-Rex, hoping to clear the way for her friends to shoot. Although the T-Rex appeared distracted, it’s predatory instincts meant it instantly stomped one heavy foot down on Cecilia as she crawled. When the clawed foot was raised her dead body was barely recognizable. Again crying his wife’s name Gordon fired at the T-Rex, but his aim was hopelessly spoiled by his anger. Quinton lit the Stick of Dynamite he had prepared and threw it towards the beast, but it detonated early and harmlessly showered the ground with shrapnel. Thinking he might have better luck if he got closer, Quinton advanced towards the slaughterhouse of the hill. Finally Walter squinted at Long Range and fired, but missed as his hands shook upon seeing Cecilia’s crumpled body.

- T-Rex wins Initiative. Uses Inspiring Shot, and goes for Allen instead of Cecilia. Hits 3 crits plus 4 normal for 11 damage. Kills Allen outright and gains 7 HP.
- Cecilia uses Medpack on herself. Tries to move out of combat so everyone can hit without modifiers. Snap Attack from T-Rex hits her 8 times, she is dead.
- Gordon shoots and misses at 8+ with a 7. Can't move down cliff (not enough MV).
- Quinton moves forward and throws Stick of Dynamite, misses.
- Walter stays and shoots Long Range, misses all.

Turn 7 – Victory
From his elevated position Gordon was practically looking the T-Rex in the eye. Filled with despair at his dead wife Gordon raised his rifle in steady, tired hands. Firing he struck the dinosaur directly in the eye, scorching the beast and causing it to reel in agony. Taking heart from his friends efforts Quinton moved to the edge of the volcanic rocks and fired his Blunderbuss upwards at the T-Rex. Shards and scraps pelted the dinosaur, opening numerous small lacerations. Still behind the hedge Walter fired again, this time his shot struck home and tore open the T-Rex’s small arm. Bleeding and broken the T-Rex looked ready to slump to the ground, but defiantly surged forward and tore at Gordon. The jagged teeth sank into his arms and shoulder, but the T-Rex was too weak to hold the bite so he escaped with his life. Defeated and broken, the dinosaur slumped to the ground.

- Glenbrook wins Initiative
- Gordon shoots Short Range hits with crit for 8 damage, moves to the left.
- Quinton moves to edge of the rocks, shoots Blunderbuss and hits on 9+ for 6.
- Walter stays and shoots Long Range, hit 1 crit for 6 damage
- T-Rex is technically dead
- Still attacks Gordon, hits 2 crits and 6 normal for 11 damage, fails to kill

And with that, victory for the hunters…but at such a high cost.

Battle Report: Modoc Forest Dinoegg Heist

Encounter Overview
Deep in the Modoc Forest lies plenty of riches for those daring enough to risk their lives. Scattered amidst the thick trees and forgotten marshes are hundreds of dinosaur eggs. If a posse is hardy enough to compete with Oviraptors and other explorers they can make quite an income.
For this battle I used two previous Posses from the Keyes, Oklahoma Street Fight. In this case they had forsaken their dinosaurs to pursue rare and valuable dinoeggs. I continued their stories from the last battle, including awarding IP and ND based on the kills from before. This meant I could further test the Advancing a Posse rules.
Speaking of rules this was another v0.9 based game, which was solid enough that I didn’t even need to make any rule changes after the game. I played through the Dinoegg Heist scenario, modifying and improving it as I went. For the table I went for a big central peak that represented an area heavy with dinoeggs. Since this was deep in the forest I avoided any buildings or signs of civilization except an old set of fences (probably from a once scenic national park).
Onwards to the advancement and improvements each posse made…

Note on images, all of them are clickable and will open the image at the full 1280×960 size. Apologies for the fuzziness, I wasn’t having much luck with photos this game.

Posse: The Dusk Stalkers (previously Duskhelm Posse) – 4/196 IP, $0/1960, 6 Traits
My first order of business was to refund my Dinosaur, a plated beast named Thunderfoot. The scenario calls for foot units only, and normally I would be stuck just not bringing my dino. But in this case my opponent agreed that we could straight up sell our Dinosaurs for their original cost (including recovering any used Traits) which meant I had a bunch of dough to retool my gang with. Thunderfoot was $500, so already my bank was looking better!
In the last battle I had 2 kills which gave me a further 6 IP and $60. Not that great, but I hoped for better this round!
My purchases came first. I bought Tangle Grenades for Duskhelm, the hope being I could tie up melee focused units (or retreating enemies) and give Mitis’Heq a chance to shoot at them (with a bonus of not having any movement penalties). My next purchase was obvious, and that was a beefy 700kW Lever-Action Rifle for Redbeard The Terrible. Last match he truly was terrible, but I think his Musket was partially to blame. At 2A-7D with a max range of 25″ (with his Eagle Eye trait) I had high hopes for a few one shot kills. Survivability was a concern on my end, so two suits of armor were next. I bought Padded Armor for Duskhelm, boosting his AR to 2 (he had spent IP before to get to 1). Then Hasheen, my trust midliner, got a suit of Cloth Armor (which suited the figurine perfectly). Finally I spent the last of my Neodollars on a single SIRP for Duskhelm, since he seemed like the kind of guy to hoard the single piece of healing for himself.
As for IP, I continued the trend of greedy Duskhelm, this time spending all 6 IP to give him +1 HP, boosting him to a total of 10 HP. What’s really nice about going from 9 to 10 HP is your “half damage” value (that you need to make a Bravery Test at) goes from 4 to 5 HP, which can be a big difference on how often you have a chance to flee.
My plan for this fight was simple: win! Okay, well, mainly I wanted to try to hurt Coleman a bunch while still slinking off with a few eggs. I knew that we’d probably get in close and ugly, at which his melee monster Stone Axe excels. But Duskhelm and Mitis’Heq were becoming quite formidable, and I hoped that their firepower combined with Redbeard’s new rifle would spell disaster for anyone foolish enough to rush me. I wasn’t too worried about Oviraptors, since their “default” behaviour was simple enough to outsmart. Besides if they picked up a few eggs THEN I killed them, well, more IP for me!

Anyways my Posse looks like:
Duskhelm - Neotechnoist Leader
MV 4, AR 2, RMC 5, MMC 8, BRV 7, HP 10, Go For The Eyes, Rapid Fire
Heavy Repeater, Tangle Grenades, Padded Armor, SIRP

Mitis'Heq - Neotechnoist Member
MV 4, AR 2, RMC 6, MMC 8, BRV 6, HP 8, Go For The Eyes, Get Up!
Light Repeater

Redbeard The Terrible - Duster Member
MV 3, AR 0, RMC 6, MMC 8, BRV 6, HP 10, Crippling Shot, Eagle Eye
Musket, 700kW Lever-Action Rifle

Hasheen - Bandit Member
MV 6, AR 0, RMC 7, MMC 8, BRV 6, HP 9
Double Barrel Shotgun, Cloth Armor

Burt - Bandit Member
MV 5, AR 0, RMC 7, MMC 8, BRV 6, HP 9
Laserbow

Coleman’s Raiders – 0/208 IP, $0/2080, 6 Traits
No offense to Duskhelm, but last fight I destroyed him. I mean come on now, I ended up with 6 kills! That’s practically enough to get another Trait slot. But yeah, from the murderin’ I dished out I got 18 IP and $180. Plus I refunded Zira (hopefully to a nice, friendly caravan) for $700 and 1 more Trait slot (since she had taken Bonus HP I).
Flush with wealth I thought the first thing to do was recruit someone new. To that end I hired “Skull” (who would be represented by my old, hilariously 1990s painted Eldar scout [I mean come on, flames on his robe?!]). That was a cool $250 for his Neotechnoist help. I was hoping to make him into a semi-sniper…certainly not on par with Redbeard, but good enough to give me a bit of range beyond Handcannons and Dinoprods.
Next I wanted to use some of my new IP, so I spent a full 18 IP to give +3 HP to Skull. Honestly I’m not entirely pleased with this choice, but wandering around with anything less than 8 HP is a recipe for disaster. Hopefully his default Neotechnoist improvement to RMC would help ensure he hit…plus I could always give him a high attack weapon. I went for the “Knee Shot I” Trait, which gives a solid +3 damage boost if the target already moved (easy enough to find that situation!).
Besides recruitment I wanted some new goodies for my posse. First I spent more money on Skull, this time for a Twin Rifle (5A-2D with a nice 18″ range makes it a solid choice. Having the “Both Barrels” special ability just makes it all the sweeter). Stone Axe is already pretty survivable with his 3 AR, but heck for a handful of Neodollars I went ahead and upgraded him to Dinohide Armor, for a total AR of 4. Crazy! Plus he matches his Dark Sun figurine even more now. His old Bone Armor was handed off to Coleman who’s AR ended up as 2. I thought Shadow needed a little something extra besides a plain pistol, so I bought him Glue Grenades. Slowing on hit is super handy, either for Stone Axe to catch someone or to just slow one of Duskhelm’s villains as they retreat with an egg! Finally Coleman got another SIRP, since his was used last match and it’s definitely a handy choice (I mean until you roll +1 HP instead of the max of 6).
I figured my posse is pretty well matched to Duskhelm, and the close in nature of the scenario should help get to grips with his slightly longer ranged members. Heck with luck I’ll get a first turn Charge with Stone Axe. Dinoeggs are still going to be my main focus, and Coleman, Newt, and Shadow will probably be my goto people for that. Skull would be a great egg carrier since he’ll probably hang back, so hopefully I’m lucky and end up near an egg.

My bigger Posse now looks like:
Coleman - Bandit Leader
MV 4, AR 2, RMC 6, MMC 8, BRV 7, HP 12, Rapid Fire
Handcannon, Bone Armor, SIRP

Shadow - Duster Member
MV 3, AR 1, RMC 7, MMC 8, BRV 6, HP 11
300KW Six-Shooter, Glue Grenades, SIRP

Stone Axe - Savage Member
MV 7, AR 3, RMC 9, MMV 7, BRV 6, HP 13, Charger, Inspiring Shot
Dino Prod, 80KW Six-Shooter, Dinohide Armor, SIRP

Newt One-Eye - Bandit Member
MV 5, AR 1, RMC 7, MMC 8, BRV 6, HP 10, Clear Sight, Knockback Shot
Stun Gun

Skull - Neotechnoist Member
MV 4, AR 0, RMC 7, MMV 8, BRV 6, HP 9, Knee Shot I
200kW Twin Rifle

Table Setup
Let us sally forth to the kitchen table! Except this time we’d be playing from the long table edges instead of the short table edges. That and the giant mountain in the middle should make for an interesting game. The table was 4 feet long and 3 feet wide, and aside from the mountain in the middle I placed a bunch of hills and trees around.

I had three dinosaurs ready to join the battle due to the scenarios Oviraptor rules. As a refresher the stats for Oviraptors are:

Oviraptor
Size S, MV 6, AR 1, MMC 7, BRV 6, HP 8, 2-2 A-D
Note: Can carry 2 Dinoeggs at once

One of the beasts will join the game on a roll of 8+ (done at the start of each turn), at which point they deploy randomly and start trying to steal eggs (either from the ground or from those foolish enough to hold dinoeggs near them!).

Deployment
Duskhelm got the north long edge while Coleman got the south edge. Both had to deploy two members within 4″ of the center of the table (aka the top of the mountain) while the rest deployed within 6″ of their table edge. Coleman had to setup first, so he got right to it. After that Dinoeggs were placed throughout the board, and a fast, fun, and vicious game began…

Coleman: Well shucks, first deployment eh. Normally I don’t mind, but this time I have to have two “forward scouts” on the main mountain. To balance their unlucky position they each started with a Dinoegg, so that was handy. I figured Stone Axe would be the best choice, but I wanted him to live through the first turn so he started up the hill a bit and in cover. His massive 7″ movement and +1″ Charge range would help get to grips with any enemies. I had considered putting Coleman up there as well, but Shadow with his Glue Grenades seemed like a better choice. Plus having Coleman in danger too early would kind of suck. So yeah, Shadow kind of in the open central part of the hill and Stone Axe up a bit from him.
Then I put Coleman and Newt One-Eye down below, as far forward as I could so they were in range to support their mates as soon as possible. Skull was off on the right flank on a hill. The elevation would give a nice damage boost, and he should be in good enough range for shots at people on the mountain. Now fingers crossed for good Dinoegg distribution!

Duskhelm: Hmm well deploying second is nice because I can basically mirror my opponent. I wanted to keep my team of Duskhelm and Mitis’Heq together, since they can throw out 12 attacks at 14″, or 16 attacks if they both Rapid Fire. That’s deadly! Plus with Duskhelm’s new Tangle Grenades I figured he’d be a great help to keep Stone Axe locked down. My real mimic was putting Hasheen and Burt in the center, side by side, so they are opposite Coleman and Newt. They would be my second wave towards the middle, or around the flanks depending on how the Dinoeggs ended up. Redbeard was off on his own in the hills, since honestly if he can’t outsnipe Skull then he really deserves his nickname “The Terrible”.

Dinoeggs: Aside from the 4 Dinoeggs in play (held by each of the members on the mountain) I rolled D6 for the additional Dinoeggs. My result was 6! So plenty of mini-objectives to go after. Unfortunately my earlier plan of using Mini Eggs chocolates to represent the dinoeggs didn’t work, so I was back to my usual glass tokens. Stupid heat melting the chocolate all over the table :(
Anyways I rolled a scatter dice and 2D12 to represent inches, and got a pretty south heavy distribution, which seems to favor Coleman.


Turn 1 – Blood on the Slopes
Unlike a lot of stand up fights in Dinosaur Cowboys, the close deploy of this scenario meant violence was imminent.
Coleman: Normally getting the first Activation on the first turn doesn’t matter a ton, but heck when I’m like six inches from the enemy’s leader I care a bit more! I put my Glue Grenades investment to good use by hurling one from Shadow to Duskhelm. The fast acting chemical struck him for 1 damage and also meant Duskhelm was Slowed (half Movement, no Run). After that I edged Shadow down the hill, since the further from short range I was the better!
Duskhelm: Glue and yellow belly runnin’? Seems par for the course for Coleman. I advanced Mitis’Heq into short range of Shadow, then opted to activate my “Go For the Eyes” Trait. As you recall this means critical hits are on 10+ instead of 12+. Definitely a smart move as I hit with 2 criticals for 5 total damage. Plus Shadow really WAS a yellow bellied dog as he failed the Bravery Test and was Fleeing.
I lucked out and won the next Activation, which meant I could keep pouring the fire on. Duskhelm was my natural choice, so he also activated his “Go For the Eyes” Trait and ALSO Rapid Fire. 8 attacks with 5 RMC base…sweet. I couldn’t quite get him to short range with Shadow because Duskhelm was Slowed, so I shot first instead. I only needed 7+ to hit, and in total I hit 4 times (including 2 criticals) for 8 damage, which killed Shadow. Woo hoo first blood. Anyways I moved Duskhelm 2″ forward after this, mainly to get closer to dinoeggs.
Coleman: Ouch a death already. Definitely a brutal pit fight up on that mountain. And who better to pit fight than Stone Axe? I moved him 7″ and then Charged 3″ more to Mitis’Heq. I got to roll 9 attacks thanks to the Charge and awesomeness of the Dino Prod, of which I hit for 4 damage. Mitis’Heq actually failed his Bravery Test and was Fleeing from this, haha.
Duskhelm: Time to get my sniper going, now that the obvious center moves are done. Redbeard edged over a bit so that he was at long range of Skull (with my new 700kW Lever-Action Rifle). Time to get my Neodollar’s worth! I hit with 1 attack but that was for 8 damage, so alllllmost a one-shot kill. Skull somehow passed his Bravery Test. And of course, since it’s Redbeard, my other attack was a roll of 1, so he needed to Reload. Even when I get him a better weapon than the Musket he STILL only shoots every other turn.
Coleman: Hey remember when I was like “I bought Skull to give me some range and maybe take on Redbeard?”. Yeah…NO! I Ran him downhill from his perch towards the nearest Dinoegg, which hopefully he could sneak off the board before another Redbeard shot whizzes in.
Duskhelm: The upside of the big mountain in the middle meant a lot of the avenues of fire were blocked. So Hasheen could safely Run towards the furthest west Dinoegg. May as well try to stay focused on the big bonus IP they provide (taking one off the board is basically like killing 3 people in terms of IP awarded).
Coleman: I moved Newt 4″ forward to the edge of the hill in the vain hopes of killing Mitis’Heq before he fled away and out of line of sight. I needed an 11+ to hit, which sucks, but I tried anyways. I got a 2 and 1 on my rolls…go me. I decided to use Coleman’s “Yeehaw!” ability to let her re-roll the 1 (so at least she wouldn’t have to Reload), but I still only managed a 6.
Coleman however had some better luck. I moved him 4″ forward which put Mitis’Heq into medium range which never hurts. I hit him with 1 critical for 8 total damage, which killed Mitis’Heq. Looks like we’re one for one now.
Duskhelm: My last Activation was for Burt. I moved him as far forward as I could, and then scoffed at my total inability to hit Stone Axe. That’s right, I needed 13+ with all the modifiers (mainly his brutally high 4 AR). So I Ran him to the edge of the hill instead.


Turn 2 – A Roar in the Distance
Oviraptor: I rolled a 9 for the Oviraptor chance to appear, so one hurried onto the board looking for dinoeggs.

The dinosaur deployed from the west table end (nearest Hasheen and the dinoegg he was approaching), 14″ down and 6″ inwards.
Duskhelm: I lucked out and got the first Activation, which probably saved me from being charged by Stone Axe. I started with Duskhelm throwing a Tangle Grenade at Stone Axe, which hit him (for 1 damage) and Stopped the melee monster. Looks like the crew around the mountain was safe for a turn! After the throw I moved him back 4″, since the further from Stone Axe the better.
Coleman: Hmm with Stone Axe frozen in the middle I thought I’d try to save Skull for one of my early Activations instead. I moved him towards the nearest Dinoegg and picked it up. He was still pretty exposed, but hopefully Stone Axe would be priority number one this turn for them. Plus I just had to keep him alive with his Dinoegg to get a bunch of sweet rewards at the end.
Duskhelm: Should I start whittling down Stone Axe or try to kill the super weakened Skull? Option two here we go! I might have considered shooting Stone Axe but Redbeard was down to his Musket, so it wasn’t worth the effort even if I did hit. Plus after moving him I could get Skull into medium range, and I only needed a 7+ to hit. I hit with a roll of 11 which killed Skull. Redbeard you’re redeeming yourself for last match (did I jinx him now?).
Next Burt moved towards a Dinoegg near the hill edge. My modifiers were slightly better against Stone Axe since I only needed an 11+ to hit. Unfortunately I missed with his Laserbow with a roll of 10. Almost!
Coleman: Time to get my reserve force in, especially since the battle seemed to be moving away from my deployment zone. Newt moved up towards the Dinoegg that Shadow had dropped, then spent a Run to reach it. I couldn’t quite pick it up yet though unfortunately.
Next Coleman moved into long range with Burt, who he could barely see around the edge of the mountain. I fired and hit for 7 damage…the Handcannon continues to impress. Burt failed his Bravery Test and was Fleeing, so that’s a bonus!
Duskhelm: I just had Hasheen left to Activate, and I was a bit stumped on what to do. I decided to try one shot against the Oviraptor, since if I could kill it I’d have free reign on the nearest Dinoegg. I moved him into medium range and then opted to use the “Both Barrels” feature of my Double Barrel Shotgun. I only needed 8+ to hit, so why not! I hit with an 8, 10, and 12 for 9 total damage, which killed the Oviraptor! That was totally some hunting safari skill right there.
Coleman: Well, better the Oviraptor than me, I guess. Stone Axe didn’t have much to do since he was Stopped, so I fired his wimpy 80kW Six-Shooter at Duskhelm at 12+ to hit. Naturally I missed.


Turn 3 – Here They Come!
Oviraptor: At this rate the Oviraptors will sweep the game…well, once they stop being killed in a single shot. I rolled for another Oviraptor to appear and had one pop up, this time from the east. 15″ down and 6″ in towards the dinoegg Burt was moving towards.
Coleman: Stone Axe is freeee! Before anymore dirty tricks could slow or stop him, I moved and then Charged him down the hill into Duskhelm. I hit for 5 damage, and Duskhelm was Fleeing (after rolling a horrible 12 for his Bravery Test).
Duskhelm: Looks like this turn will be “kill Stone Axe”. But first of all I moved Hasheen over and picked up the Dinoegg (that he so totally rightfully won after destroying that Oviraptor).
Coleman: Before Burt could Flee away I wanted to try my luck with Coleman again. I opened fire at even better mods this time and hit for 9 damage! Burt was dead as a vampire (or something?!). After that Coleman moved back towards the nearest Dinoegg, since it felt like the time to retreat might be soon.
Duskhelm: Redbeard took the turn off to Reload, first moving to the left and then getting his 700kW Lever-Action Rifle ready to rock again.
Next up Duskhelm Flees down the hill away from Stone Axe, which honestly was not too bad of an outcome since it got me out of melee. I knew I couldn’t kill Stone Axe in a single attack, so I opted to use Duskhelm’s SIRP instead. Totally worth it as I rolled a 6 for how many HP he recovered, which put him from 4 HP back to his full 10 HP.
Coleman: I kept with my plan to fallback gracefully, so Newt, dinoegg in hand, Ran back down the hill, still out of sight of anything dangerous.
Oviraptor: The Oviraptor moved towards the nearest Dinoegg, which was right near where Burt died. The beast was able to scoop up the egg, but was still on the prowl for more!


Turn 4 – Into the Sunset
Oviraptor: For once there wasn’t an Oviraptor that deployed. So just the one already on the board to wander around and steal eggs.
Duskhelm: Okay, since last turn ended up being a failure at even SHOOTING Stone Axe, I’ll do my very best to make up for it this time. My best bet at hitting him would be Duskhelm (with his 5 RMC), so that’s who I started with. I was at short range and didn’t want to make the counter-Charge any easier, so I stayed and fired. I hit 3+2+2 for 7 damage, which made Stone Axe Flee! Terrific news. Coleman had already used (wasted?) his Yeehaw! ability so he couldn’t even give a re-reroll. Anyways Duskhelm kept moving back towards his board edge, since more distance from melee never hurt.
Coleman: Well that’s too bad, since I really hoped to pin Duskhelm down this turn. Instead I Fled Stone Axe backwards, which left me without any real options. I didn’t have enough movement to Run all the way down the cliff to the safety of blocking terrain, so instead I Ran him into the cover of a little hill. Hopefully this would outdistance Redbeard or at least reduce the pain.
Next up was Coleman, who flat our Ran towards the edge of the table. That’s a good Bandit right there; got his loot and now he’s hitting the road.
Duskhelm: It seemed like we were both kind of retreating, which meant I probably only have a few more shots before the end of the game. Time to make them count! Redbeard didn’t have a Dinoegg at all, so I focused on getting him into a good firing position against Stone Axe. I moved down the slope and into 14″ on Stone Axe, but also still in 12″ range of Duskhelm (I figured Yeehaw! might be necessary to get this done). I activated Crippling Shot to hopefully slow down Stone Axe if I hit. I needed 11+, and Redbeard let me down by missing both! That’s why Yeehaw! range was important, which I totally used now to re-roll into a hit! That meant 8 damage which outright killed Stone Axe (and Slowed him, but corpses are already pretty slow).
Hasheen Ran with his Dinoegg towards my board edge, and that was about it.
Coleman: Grr that 700kW is a beast. Anyways I Ran Newt towards my own table edge for my last Activation. Into the sunset we go…
Oviraptor: The Oviraptor moved up the hillside towards a Dinoegg there.

At this point the game ended. Both Posses wanted to run their Dinoeggs off without fighting, so they did. In terms of victory The Dusk Stalkers technically won.

After Action Report
A short and savage game! The objective really meant both players were eager to keep their spoils safe instead of risk further fighting, so it ended after only 4 turns. The haul of Dinoeggs was the same for each side: 2. Coleman and Newt both escaped with one, and Duskhelm and Hasheen got one each as well. Redbeard was the other survivor but basically killed Stone Axe instead of focusing on getting a dinoegg. All the survivors were unhurt, which is a bit different than normal.
The game ran a little under an hour in length, but that was mostly because I kept taking breaks to tweak the scenario.
For 2 Dinoeggs the scenario gave 12 IP and $60. Let’s look at how each Posse did overall:

Duskhelm: 4 kills (3 Posse and 1 Oviraptor) = 9 IP, $90 + Dinoeggs = 24 IP, $180, +1 Trait.
Coleman: 2 kills (2 Posse) = 6 IP, $60 + Dinoeggs = 18 IP, $120, +1 Trait.

Game Ideas
A few minor issues that cropped up during the game and might need to be addressed:

  • Make Slowed not allow Charge (instead of just Run)
  • Armor Movement penalties start sooner? 4 AR is really tough to hit
  • Need a way to track Traits, both total and when the next one is given
  • Possible make Fleeing close combat provide a Snap Attack?

Complete Turn Log
Turn 1:
– Shadow hits Duskhelm with Glue Grenade, 1 damage and Slowed. Moves down the hill.
– Mitis’Heq moves to short range of Shadow, uses Go For The Eyes, shoots and hits for 2 crit for 5 damage. Shadow Fleeing.
– Duskhelm uses Go For the Eyes and Rapid Fire. Can’t get to short range of Shadow because he’s Slowed. Shoots 8 Attacks at medium range, 7+ to hit. Hits 4 (2 crit) for 8 damage, killing Shadow. Moves forward 2″.
– Stone Axe Charges 10″ down hill at Mitis’Heq. Hits 4 times out of 9. Mitis’Heq is Fleeing.
– Redbeard edges over into long range of Skull with 700kW Lever-Action Rifle. Hits 1 for 8 damage. Skull passes Bravery Test. Other attack roll is a 1, so Redbeard needs to Reload.
– Skull Runs down hill towards Dinoegg.
– Hasheen Runs towards Dinoegg to the west.
– Newt moves 4″ forward to hill edge, shoots at Mitis’Heq at 11+. Misses with 2 and 1. Coleman uses Yeehaw! to allow re-roll, turn 1 into a 6, still misses.
– Coleman moves 4″ forward, puts Mitis’Heq at medium range. Shoots and hits 1 crit for 8 damage, killing Mitis’Heq.
– Burt moves forward, can’t hit Stone Axe (needed 13+). Runs instead to base of hill.

Turn 2:
– Oviraptor is in! West table end, 14″ down, 6″ in towards western Dinoegg Hasheen was going for.
– Duskhelm hits Stone Axe with Tangle Grenade. 1 damage and Stopped. Then moves backwards 4″.
– Skull moves to Dinoegg and picks it up.
– Redbeard moves to medium range with Skull, shoots Musket at 7+. Hits with 11, killing Skull.
– Burt moves towards Dinoegg around the hill edge, shoots 11+ at Stone Axe, misses with 10.
– Newt moves up hill towards Shadow’s dropped Dinoegg, then Runs to reach it.
– Coleman moves over to long range with Burt, shoots and hits once for 7 damage. Burt is Fleeing.
– Hasheen moves into medium range with Oviraptor, uses Both Barrels at 8+ to hit. Hits 8, 10, 12 for 9 damage, killing Oviraptor!
– Stone Axe can’t move (Tangle Grenade), instead shoots at Duskhelm at 12+. Misses.

Turn 3:
– Oviraptor again! From east edge, 15″ down, 6″ in towards egg Burt is moving for.
– Stone Axe moves and Charges Duskhelm. Hits 5 damage, Duskhelm Fleeing (rolled a 12).
– Hasheen moves and picks up Dinoegg to the west.
– Coleman shoots at Burt again, hits 1+2+6 for 9 damage, killing Burt. Moves backwards to Dinoegg.
– Redbeard moves left, reloads 700kW Lever-Action Rifle.
– Duskhelm Flees down hill, uses SIRP for 6 HP from 4 to full 10 HP.
– Newt Runs backwards downhill with Dinoegg.
– Oviraptor moves forward and picks up Dinoegg.

Turn 4:
– No Oviraptor this turn.
– Duskhelm shoots short range at Stone Axe, hits 3+2+2 for 7 damage. Stone Axe is Fleeing. Coleman already used Yeehaw! so he can’t re-roll. Duskhelm moves backwards towards board edge.
– Stone Axe Flees backwards. Doesn’t have enough movement to Run down the cliff so he Runs into cover of the hill to try to outdistance Redbeard.
– Coleman Runs towards table edge.
– Redbeard moves down slope into 14″ range of Stone Axe, and still 12″ of Duskhelm (for Yeehaw!). Uses Crippling Shot and shoots Stone Axe at 11+. Misses both shots. Yeehaw! re-roll hits! 8 damage and Slowed, which doesn’t matter because Stone Axe is dead.
– Hasheen Runs back to table edge.
– Newt Runs back to table edge.
– Oviraptor moves up slope towards Dinoegg.

Battle Report: Keyes, Oklahoma Street Fight

Encounter Overview
This playtest was using v0.8 with a mix of v0.9 (mainly around the removal of Levels), and was fought between two Posses in the small town of Keyes, Oklahoma. Situated on the edge of the vast southern desert, this hopeless town had been reduced to overgrown ruins by time and the forces of nature. The two Posses involved had their own reasons for visiting the forsaken place, but met and fought and died on the single worn road through the town.

This battle was unique because I used a Dinosaur on each team, which was a refreshing change. Also I went for a pretty high level of IP and ND, 190 and $1,900 and 6 Traits in fact. This is equivalent to around Level 3 or 3 1/2 in the old rules, so definitely a lot of power on each side. The fact that I used expensive dinosaurs certainly toned down the equipment involved, but there was still plenty of exotic weapons. Also I took a ton of pictures since the game was pretty long and I found both Posses looked great when photographed in different combat situations.

As before I did a standard pitched battle with the goal of wiping out the other team. The difference was the central terrain feature, an old town bus pitted by vegetation, could actually be fired upon until it exploded. The rules for this are below under the Table Setup. Plus I used mainly buildings on the table, so it was a change of pace from the usual hills and trees.

Onwards to the Posses involved…

Note on images, all of them are clickable and will open the image at the full 1280×960 size.

Posse: Duskhelm Posse – 190 IP, $1,900, 6 Traits
I wanted my Posse to reflect a high powered Neotechnoist expedition. Their leader, Duskhelm, was cold and calculating, and had decided to leave his life of comfort inside The Wall behind. The outside world was harsh to him, and in turn he hardened his heart and became a vicious ruler of his gang. Currently they were preparing to trek into the southern wastes for their own nefarious purposes.
His second-in-command Mitis’Heq was once a loyal and trusted advisor, but now schemes behind Duskhelm’s back and tries to undermine his leadership.
During their travels they fought a tough Duster in a dingy saloon, and were so impressed with his martial ability that they recruited him. So Redbeard The Terrible joined and has eagerly been plundering his way across the continent since.
Hasheen is a stoic bandit who is unfailingly loyal to Duskhelm after swearing a blood oath to protect him. Duskhelm saved the wounded man from a pack of Rippers, and Hasheen has followed him like a lapdog since.
Burt is a little slow, and a little old, but he’s quite content with the small pleasures in life. The feeling of a solid energy bow in his hands, for example.
Finally is Thunderfoot, the Plated dinosaur that accompanies the Posse.

I had a ton of material to work with, since 190 IP means I can get some really mean characters going. My Dinosaur took a large chunk of money, as did recruiting 4 members, but I still managed a few Repeaters and other solid midrange weapons. 6 Traits meant I had lots of choice, and actually ended up mirroring Duskhelm and Mitis’Heq a bit in this regard (they both got “Go For The Eyes” as one selection). I left Hasheen and Burt trait-less; they’d basically rely on their stats to fight and stay alive.

My general plan was to keep Duskhelm and Mitis’Heq together as a pair, and Hasheen and Burt as another. Redbeard would snipe from the back. Thunderfoot would remain unmounted, and mainly would act as a big damage sponge. His insane AR 3 and 28 HP made him perfect for this role, as did his intimidating size.

The Posse looks like:

Duskhelm - Neotechnoist Leader
MV 4, AR 1, RMC 5, MMC 8, BRV 7, HP 9, Go For The Eyes, Rapid Fire
Heavy Repeater

Mitis'Heq - Neotechnoist Member
MV 4, AR 2, RMC 6, MMC 8, BRV 6, HP 8, Go For The Eyes, Get Up!
Light Repeater

Redbeard The Terrible - Duster Member
MV 3, AR 0, RMC 6, MMC 8, BRV 6, HP 10, Crippling Shot, Eagle Eye
Musket

Hasheen - Bandit Member
MV 6, AR 0, RMC 7, MMC 8, BRV 6, HP 9
Double Barrel Shotgun

Burt - Bandit Member
MV 5, AR 0, RMC 7, MMC 8, BRV 6, HP 9
Laserbow

Thunderfoot - Plated Dinosaur
MV 4, AR 3, RMC -, MMV 7, BRV 5, HP 28
Slam attack

Posse: Coleman’s Raiders – 190 IP, $1,900, 6 Traits
I had used the general character of Coleman before, but as a medieval highwayman in Dungeons and Dragons. I figured his previous life would work just as well in Dinosaur Cowboys, so I aimed to build a mixed bag bandit Posse around that idea. Coleman is a jolly fellow, good natured but quick to anger, and he planned and lead the Posse’s daring caravan robberies.
Shadow was his flank man, solid with a gun and known for sneaking where he ought not sneak.
Stone Axe was the muscle of the group, and I spent plenty of IP and ND to make him into a true beast. Terrific movement (7″) and very high Armor (3) and HP (13) meant he could tear around the field. I visualized him and Coleman playing the “good-cop, bad-cop” routine on uncooperative caravans.
Finally Newt One-Eye, a young lass Coleman had taken under his wing and kept because he had a soft spot for the poor orphan. She was learning the highwayman trade, and when Coleman wasn’t rip roaring drunk he was sure to teach her how to handle a gun. Also her name was from a Necromunda battle report from way, way back in White Dwarf, so I figured that was a fun nod.
And for my Dinosaur I went with a Horned type, named Zira. Sometimes a mount, and sometimes used just to intimidate merchants with her sheer mass.

As I said most of my money went to Stone Axe. I thought I’d try out the Dino Prod because I love the stats (8A-0D). Speaking of trying out new guns, I gave Coleman a Handcannon, since 2A-6D could hurt a ton, even with the slight minimum range. For my final weapon to test I went with a Stun Gun for Newt One Eye. It seemed like a nice semi-lethal option for her, plus Slowing an enemy is great. The range is sort of terrible though (tops out at 12″ with her Clear Sight trait). In fact I didn’t have a ton of long range firepower, which meant I’d have to get in and hit hard.

My plan was to pile everyone but Stone Axe onto the Dinosaur, and move her forward. Then everyone would unload and stick together in a tight formation while Stone Axe caused havoc on a flank, or carried on with Zira, or counter-charged anyone who got too close to the core group.

The Posse ended up looking like:

Coleman - Bandit Leader
MV 4, AR 0, RMC 6, MMC 8, BRV 7, HP 12, Rapid Fire
Handcannon, S-IRP

Shadow - Duster Member
MV 3, AR 1, RMC 7, MMC 8, BRV 6, HP 11
300KW Six-Shooter, S-IRP

Stone Axe - Savage Member
MV 7, AR 3, RMC 9, MMV 7, BRV 6, HP 13, Charger, Inspiring Shot
Dino Prod, 80KW Six-Shooter, S-IRP, Bone Armor

Newt One-Eye - Bandit Member
MV 5, AR 1, RMC 7, MMC 8, BRV 6, HP 10, Clear Sight, Knockback Shot
Stun Gun

Zira - Horned Dinosaur
MV 6, AR 2, RMC -, MMV 6, BRV 7, HP 25, Bonus HP I
Slam attack

Table Setup
My kitchen table was the battlefield again, 4 feet long and 3 feet wide. Instead of my usual mishmash of hills and trees I went for a town look. The buildings are pulled from Mordheim and a few foamboard creations from my youth. The roads are more recent and I actually made them for Car Wars. They fit in with the theme well. The bus was an some old Greyhound toy, but the scale was mostly right. The bus could be attacked and explode and was treated as:

Bus
AR 2, HP 12, 6″ Explosion 5D, if destroyed remove model at end of the turn

Anyways in addition to the asphalt road I tried to create a pathway feel to the town that crisscrossed the main strip. Some hills and trees were outside this, but I figured most of the action would be in the center with some firing happening from the side buildings.

Deployment
I rolled randomly for setup, with Duskhelm getting north (towards my kitchen) and Coleman getting south (towards my door). Both Posses could deploy up to 8″ in from their respective short table edge. Duskhelm had to set up first, followed by Coleman, followed by the start of one of my favorite games of Dinosaur Cowboys to date…

Duskhelm: Like I said I wanted to keep organized teams. This meant Duskhelm and Mitis’Heq stuck together on the left flank. I planned to get them into a good position in the house ahead where they could overlook the main road. Thunderfoot was next and took the middle, his purpose being to run to the bus and keep the enemy locked down. Snap Attacks help! Redbeard was aiming to snipe. Although his inexpensive Musket was Auto reload (so he could only fire every other turn) it still had a 28″ long range (with his Eagle Eye trait) and was Scoped (ignore Cover), so it could definitely sting. Finally Burt and Hasheen stuck together on the right flank, likely moving to the next building and potentially getting into a solid crossfire with Duskhelm and Mitis’Heq. At least that’s the plan…

Coleman: Well, here comes the easiest deploy ever. Zira was in the middle with Coleman, Shadow, and Newt One-Eye mounted. Stone Axe was far, far to the right inside a building. That’s it really. I hoped to close Stone Axe towards the opposing Leader and lock down that severe firepower. The bus was situated pretty well in the center, so I aimed to get everyone behind that and then maybe use Zira to harass their sniper, if she could get there. The core team of Coleman, Shadow, and Newt had a pretty good balance of firepower and range, so I had high hopes for their killing power.


Turn 1 – Forward!
As with most first turns of Dinosaur Cowboys, everyone pretty much advanced and shuffled into a better position than their deployment provided.
Coleman: I started by Running my melee monster Stone Axe forward. He stayed inside the house and behind cover, but would be ready to reach the nearest hill next.
Duskhelm: Most of Coleman’s team was mounted (and therefore treated as a single Activation) and I won a few Activation rolls so I ended up moving all of my team at once. Duskhelm, Mitis’Heq, Burt, and Hasheen all advanced forward. The former two used a Standard Move, the latter two Ran. Thunderfoot crept up the middle, ending up behind a tree that scarely covered his bulk. Finally Redbeard stood where he was, as I measured the distance and figured Coleman’s gang would get into range soon enough.
Coleman: My last Activation was to move Zira forward with a Run. Another move and I should be at the bus.


Turn 2 – We’re Not Alone on These Streets…
Duskhelm: I had two obvious Activations to get out of the way. First was moving Thunderfoot another 4″ forward, so he was almost at the bus. The next was having Redbeard shoot at Newt One-Eye. I rolled pretty well and hit for 6 total damage, which was better because his Musket was Scoped (so I ignored Cover) and I was at a higher Elevation. Newt passed her Bravery Test though. Next I Ran Burt forward until he was right at the edge of the building, and could pop around the corner and fire at the blob of people on Zira once they moved in a bit more.
Coleman: As I mentioned Zira could reach the bus this turn, so she moved up and all three passengers dismounted to her right flank, which helped because I could use her body as cover. Stone Axe stayed where he was inside the house, as I didn’t want to advance and give Mitis’Heq a chance to shoot me. I hoped the group by the bus could cause enough havoc to give me a chance to slip him forward.
Duskhelm: I’d love to get a shot at Stone Axe with Mitis’Heq, just to start chipping away at his impressive defensives, but he cowered out of sight. I moved Mitis’Heq forward though to keep the pressure on, and maybe be at medium range if Stone Axe ever did emerge. Next up was Duskhelm, who split from Mitis’Heq a bit and went behind a little wooden wall. I’d need to get him closer though since the Repeater doesn’t have the best range.


Turn 3 – Shooting Starts in Earnest
Duskhelm: Well it’s time for Thunderfoot to earn his keep as distraction, one way or another. I moved him forward and was JUST within the maximum 6″ distance I could try to Charge. Thankfully I rolled a 6 and could reach Shadow. Thunderfoot stomped and smashed and did 4 damage.
Charging has changed for v0.9. Now it’s done in the Action Phase when you’re a distance of 2-6″ from an enemy. You roll a D6 (as inches) and if you could reach the enemy you get a bonus attack on your first round of melee, otherwise you can’t do anything. Definitely adds an element of uncertainty and excitement.
Coleman: Pssh, like some dinosaur running in is going to scare my crew. Stone Axe leapt from the house and counter Charged at Thunderfoot (an easier feat thanks to his “Charger” Trait) and hit for 6 damage with his Dino Prod. Putting the weapon to good use!
Duskhelm: I didn’t want to have Duskhelm sitting around forever, so I moved him from one patch of cover to another, this time behind a ruined chimney of a house. He fired at long range against Zira, hitting 5/6 times for 6 total damage. Still a ton of HP to chip away.
Coleman: I activated “Rapid Fire” with Coleman (+2 Attacks) since Thunderfoot was close enough to warrant a big attack. Too bad I rolled horribly! That Plated AR of 3 really hurts. But yeah, not only did I miss with every shot but I rolled enough 1s to require a Reload for Coleman.
Duskhelm: Mitis’Heq moved forward so he was at long range against Stone Axe, then he fired at a horrible 11+ to hit. High armor, distance, and movement meant it was a tough shot, and unfortunately I missed with all my rolls.
Coleman: I saw a perfect opportunity to clear Thunderfoot out of there so that I could move the rest of my team without suffering Snap Attacks. This opportunity was realized by activating Newt’s “Knockback Shot I”, then shooting short range at Thunderfoot. I needed an 11+ to hit, but I still hit once and did 3 damage. More importantly Thunderfoot was moved backwards 2″ (thanks Knockback), and Slowed (due to the Stun Gun). Plus Stone Axe had charged into the dinosaur’s flank, so he was still in melee with her.
Duskhelm: Huh, that’s too bad about Thunderfoot being pushed out of his distraction role. Oh well, next turn I can get him stuck in again. Anyways this Activation was used to have Redbeard Reload his Musket, since it’s “Auto” so I can only fire every other turn with him. At least it was inexpensive and has other nice features.
Coleman: Now that Shadow was free from Thunderfoot, I could shoot without penalty at the dinosaur, and also move if I wanted. I opted to stand and shoot, and hit for a big 8 damage. That higher powered Six-Shooter is nice. Anyways Zira moved away from the bus, trusting in the humans to take care of Thunderfoot. She headed across the road towards Hasheen who was moving up the flank by the building. Too bad I rolled a 1 on my Charge and failed to reach him.
Duskhelm: Zira’s failed Charge basically gave me one free turn to escape her grasp. I moved Hasheen to the second floor of the building, mainly to get Elevation bonuses but also to put himself further from the dinosaur. I used the “Both Barrels” special feature of the Double Barrel Shotgun (+2 Attacks but need Reload), but missed all 4 attacks (at 10+ to hit). Finally Burt fired at Zira from his position around the building corner, but also missed with all his shots. Grr. He moved back to the edge of the house, again to try to distance myself and postphone the melee.


(Told you there were a lot of pictures!)


Turn 4 – Chaos Continues
Coleman: Well that was a busy turn, and with enough firepower I should be able to bring down Thunderfoot. Then again I could roll horribly, as I did when Stone Axe attacked Thunderfoot during my first Activation, since I only hit for 1 damage (on 8 dice!).
Duskhelm: I activated “Crippling Shot” on Redbeard (which would apply Slowed to the target) and fired at Zira (to try to help the rest of my team escape her). Too bad Redbeard started to roll horribly and missed again. He only needed 8+, but I rolled a 1! Back to Reloading for a turn. Next up was Hasheen, who Reloaded, dropped from the second floor of the building and moved backwards 2″.
Coleman: I moved Coleman into the cover of the bus and used his Small IRP on Newt, which I rolled really well for and healed her for 6 HP, which actually put her back to her full 10 HP. Newt also moved behind the bus and shot at Thunderfoot at short range, hitting 2/2 times (with double 11s, almost awesome!). This did 4 damage and re-applied Slowed to Thunderfoot.
Duskhelm: I climbed Burt onto the second floor of the building Hasheen had just left, which also put him dangerously close to Zira. I hit once (needed 10+ to hit) against Zira for 6 damage. Elevation from the second floor certainly helped. Next Thunderfoot tried to use his Natural Weapon of “Trample”, which does minimal damage but has 4″ Knockback, which would push Stone Axe out of the way and let me move Thunderfoot closer to the rest of the team to try to get Snap Attacks. Of course this was all hypothetical, and I totally missed 0/2 attacks on Stone Axe. Bummer.
Coleman: Zira didn’t really have enough HP to suffer another full turn of firing in the open, so instead of risking the Charge I just moved and then Ran her into close combat with Hasheen. This would at least mean she is hit at a -1 “In Melee” penalty, and could Snap Attack at Hasheen if he tried to move away.
Duskhelm: My west flank was looking ugly with Zira tearing around, even if she hadn’t actually attacked yet. I had Duskhelm fire at her back (unfortunately no bonus Surprise Hit effect since she was in melee) and he hit for 7 damage. Next was Mitis’Heq, who moved into line of sight with Stone Axe (he keeps hiding behind my own dinosaur), and fired at 10+ to hit (even at medium range). I hit 4/6 times though. Unlike my previous games I remembered to use the Leader’s “Yeehaw” ability, which I did to let Mitis’Heq re-roll one dice (which had been a miss). He re-rolled a hit, so in total I did 5 damage. If only I had used “Go For The Eyes” as every hit was 10+, which would have meant they would be criticals and it would be 10 damage instead of 5. Oh well, 5 is still nothing to sneeze at.
“Yeehaw” is the renamed version (for flavor) of Leadership. The ability allows one ally in 12″ of the Leader to re-roll a single dice (D6 or D12, it doesn’t matter) once per encounter.
Coleman: I moved Shadow around a bit, still behind the bus, and fired at short range against Thunderfoot, hitting for 5 damage. The dinosaur was now down to 8 HP!


Turn 5 – Dinosaurs Die and Live
Duskhelm: Although I had missed when I first tried “Both Barrels” with Hasheen, I thought I’d use the ability again against Zira. It seemed like a big game hunter technique where they just let go with the shotgun against their target. I had better luck this time and hit once for 6 damage, which killed Zira! I then moved Hasheen closer to the back of the bus, but he needed to Reload.
Coleman: Aw poor Zira. Duskhelm’s dinosaur was still tearing up around my bus, but the rest of my team hadn’t been hit much. I used Shadow to shoot at short range against Thunderfoot, and he hit and did 4 damage. Only 4 HP to go. Next up was Coleman who Reloaded and moved further behind the bus to block the stay clear of the advancing Hasheen.
Duskhelm: Burt tried to keep up with Hasheen towards the bus, but he had to drop down from the building so his progress was slower. My stroke of genius this turn was to activate “Get Up!” that Mitis’Heq had on Thunderfoot, which restored 5 HP (so he was back up to 9 HP). After this I moved Mitis’Heq behind the hill to try to get cover. I had also activated his “Go For The Eyes” trait (since I regretted not doing so last turn), and fired again at Stone Axe. My luck held and I got 3 hits (all of which were Criticals on 10+), so 6 damage total. Stone Axe actually failed his Bravery Test and will have to Flee!
Coleman: Well that was stupid on my part…instead of having Coleman Reload I should have activated Stone Axe or Newt and tried to kill Thunderfoot before he could be healed. Oh well. In fact though when I tried attacking with Newt this Activation she missed with all her short range attacks, so maybe it didn’t matter. Stone Axe had to Flee, so he moved off from the bus, and I used his Action Phase to Run behind a tree so he’d at least be in cover.
Duskhelm: With Zira dead and the flank safe again, Duskhelm moved to focus his attention on the fight around the bus. I needed to get him into a better position so I Ran him onto the second floor of the building he had been hiding behind. Oh and Redbeard Reloaded, since that’s his favorite.


Turn 6 – The Titan Falls
Duskhelm: Well Redbeard was all reloaded, so it was time to shoot with him again. I fired at Stone Axe, but missed. Redbeard is truly living up to his nickname “the Terrible”.
Coleman: Although Mitis’Heq healed Thunderfoot, I still wanted to bring the dinosaur down this turn. Coleman moved back out of minimum range with Thunderfoot and then fired, hitting once and rolling 1 with the other attack (needs to Reload again, haha). Anyways he did 7 damage. I’m beginning to come around to the Handcannon with it’s base of 6D.
Duskhelm: I hoped to get one more attack out of Thunderfoot before his HP was used up. I went to Charge Newt, but unluckily rolled a 1 and failed to reach her, so I settled for moving into melee with Newt and Shadow.
Coleman: Although he had Fled, Stone Axe was back and ready for a fight. I activated his “Inspiring Shot” (restore 7 HP if next attack takes someone out of action), since Thunderfoot was at 2 HP so I planned on bringing him down. I didn’t want to risk failing a Charge, so I just moved him into melee with Thunderfoot. I only hit once, ONCE! out of 8 rolls, which left Thunderfoot with 1 HP. Thankfully Coleman was nearby so I could use Yeehaw and re-roll a miss, which turned into a Critical instead and killed Thunderfoot! The bonus 7 HP from “Inspiring Shot” brought Stone Axe back to full HP. That could have gone a lot worse.
Duskhelm: That Stone Axe is one tough customer (must be his wicked Dark Sun miniature of a Mul). Anyways Burt moved into the edge of the building and fired at medium range against Coleman. This was into his back, so I could potentially get a Surprise Hit. Too bad I rolled a 2, so I missed. Hasheen continued his advance towards the back of the bus. I intended him to move around the left of the bus and tie everyone on the other side up once the rest of my team was in a better position. His Action was to Reload (which was needed due to “Both Barrels” last turn).
Coleman: Shadow moved through Coleman to cover his back, and then fired at Burt at short range. Shadow seems like a pretty consistent hitter, and I did 6 damage to Burt. Burt passed his Bravery Test though. Newt moved into long range of Mitis’Heq (it would have been out of range if not for her “Clear Sight” trait) and fired, hitting him for 3 damage and also applying Slowed, which was handy if he was going to try any fancy moves.
Duskhelm: Mitis’Heq moved up 2″ to be in medium range of Newt, and then fired and hit her for 4 damage. Next Duskhelm continued across the second floor of the building to get a clear long range shot at Stone Axe. He fired and hit for 4 damage (woot Elevation).


Turn 7 – “Target the Vehicle!”
Duskhelm: I felt Burt was a little exposed on the ground floor, so I moved him back to the second floor of his building which should help give Elevation damage. I shot at Shadow and missed though, so that was wasted effort.
Coleman: Shadow again proved his reliability by shooting back at Burt and hitting for 5 damage which took the archer out of combat.
Duskhelm: Aside from my dinosaur Burt was my first loss, so I’m still okay. Intent on equally their kills, I moved Mitis’Heq to medium range with Newt and fired, hitting her for 3 damage. Hasheen had advanced up the left side of the bus and now I swung him around the front. Next turn he could pop out and give Both Barrels to some hapless target.
Coleman: I Reloaded Coleman and moved him behind Newt, just to keep out of line of sight of everyone. Newt also moved back and used her Small IRP to heal 3 HP. I figured taking a turn to recover was worth it, since Hasheen will be nearby in no time.
Duskhelm: Guess what Redbeard did? Yep, Reloaded. I did move him towards the edge of the second floor in case I wanted to drop him down and advance to a better position, since right now he couldn’t see anyone. Changing floors is painful with MV 3 though (since it takes 4″ to climb down 2″ of a building). Duskhelm also had no target due to Coleman’s cowardly hiding behind the bus. So I double checked how tough the bus was…not tough, so it became my target. I fired and hit for 6 damage, which was half the HP of the bus. One more shot like that and the whole thing will explode and do 5 damage to all those Coleman wimps hiding by it.


Turn 8 – Kaboom!
Coleman: I won the first Activation so I decided to get the drop on Hasheen before he could move around the corner and shoot Newt or Coleman. I moved Stone Axe into melee with Hasheen and savaged the poor sod with the Dino Prod. I only needed 7+ to hit, so all 8 dice hit (8 damage total)! This left Hasheen with 1 HP. Naturally Hasheen failed his Bravery Test, but who wouldn’t!
Duskhelm: Well now if I blow up the bus it’ll kill Hasheen, but if you want to make an omelette you have to break some eggs. First though I fired Duskhelm at the now exposed Stone Axe. I activated “Rapid Fire” and “Go For The Eyes” in the hopes of doing some serious damage. Of my 8 attacks (that needed 9+ to hit) I only hit with 1 (which was a Critical) for 4 damage. Ouch, horrible rolls. Mitis’Heq saw his boss drop the ball and decided to show him up and win favor with the gang by firing at the bus. He hit the vehicle with 2 Criticals and 1 normal hit for exactly 6 damage, so kaboom bye-bye bus! The explosion killed Hasheen, but also put Newt and Stone Axe down to 1 HP. Plus Newt AND Shadow both failed their resulting Bravery Tests. Definitely worth it, and I really should have shot the bus way earlier. I guess in my mind it would take longer to destroy, or maybe I was too focused on Zira. Anyways Mitis’Heq moved out of line of sight by going behind the hill.
Coleman: First I thought I’d get my Fleeing people out of the way. Newt fled into the open road, as did Shadow. After the mandatory move I Ran them both towards the nearest building, which was handily towards Redbeard (about time I close with him).
Duskhelm: Redbeard saw the two enemies approaching and tried to shoot Shadow. All he needed to do was hit and it would kill the member as he had 1 HP left. Instead I miiiiiiissed, blargh! I moved Redbeard back towards the wall of his second floor to increase the range and hopefully stop their return fire for a turn.
Coleman: I moved Coleman around the burning bus (it would be removed at the end of this turn) and fired at Duskhelm in his second floor perch. The shot was at long range but I hit once and did 7 damage (Handcannon hooray). Duskhelm didn’t flinch and easily passed his Bravery Test.


Turn 9 – Chipping the Stone
Duskhelm: Even though my massive trait attack didn’t kill Stone Axe, he only had 2 HP left so I should be able to bring him down this turn. To that end Duskhelm opened up and hit for 5 damage, which killed the tough little axe man. After this I moved Duskhelm back from the edge of the second floor, hopefully staying out of sight of the attackers below.
Coleman: I moved Coleman over a tiny bit which succeeded in putting Duskhelm at short range and also opening his line of sight since I could see my target through the window. I fired but missed both my attacks, even though I only needed a 7+ to hit! Next Shadow edged over 3″ to put Duskhelm into long range, and he had more luck. I hit for 3 damage (at 10+ to hit, good old consistent Shadow). This killed Duskhelm and forced a Bravery Test from all surviving members. Only Mitis’Heq failed it though.
Duskhelm: Huzzah Redbeard Reloads. He hasn’t hit anything since the first turn, in case you were keeping track of his horrible rolls.
Coleman: I moved Newt to the building Hasheen and Burt were behind a while back. Now it stood empty and quiet, and would be a perfect spot for her to stay out of line of sight of Redbeard.
Duskhelm: Mitis’Heq was fleeing due to Duskhelm’s death, but since he was at the edge of the table he couldn’t technically flee off the board. So instead he was Stunned, which left me with a Movement Phase. I moved him to the top of the hill he had been hiding behind, and that was it.


Turn 10 – “They’re All Dead!”
Coleman: Coleman was intent on taking out Mitis’Heq to make the game a 3vs1 affair, so I moved him forward and shot at long range, hitting for 6 damage to kill Mitis’Heq. That’s the kind of clean plan-and-kill I like.
Duskhelm: Time for Redbeard to stop sucking on his rolls and actually kill someone. Except…not. I shot at Shadow, needing only a 7+ to hit and kill, but I only a rolled 4. You can imagine the angry smoke pouring from my ears by this point.
Coleman: Well it was 3 against 1 now, with just Redbeard left on their team. I’d say this game was in the bag, except that Shadow and Newt both have 1 HP. At least Redbeard has to Reload each turn after firing, otherwise I doubt I could get into range alive. For now Shadow Ran forward, but was still barely out of range. I left Newt in cover in the hopes of keeping her alive in case I needed to change strategies later.


Turn 11 – Closing, Closing, Closing
Duskhelm: Go Redbeard, do your thrilling Reload so you can miss again! This time I moved him to the building ledge, since the enemies were going to get close enough to shoot anyways, but at least I wouldn’t be cornered anymore.
Coleman: First of all I moved Shadow up to try to kill Redbeard. I only needed 7+ to hit, but I missed with ALL 4 attacks. So much for Shadow being consistent, he must have been watching Redbeard’s technique, haha. Newt stayed behind the building, and Coleman (who had the most HP left of my gang) Ran forward from the side.


Turn 12 – Trying Again
Duskhelm: Okay Redbeard, we only need a 7+ on a single dice to kill someone. You can do this, you can do–he rolled a 2! Can’t I at least take one of these scumbags with me?!
Coleman: Unlike Redbeard, Shadow had just missed once. This turn he moved closer and fired again, hitting for 5 damage. To add insult (a big one) to injury, Redbeard failed his Bravery Test with a roll of 12. Looks like he can’t roll high unless it’s to Flee! Figuring Newt was pretty safe at this point (with only a Fleeing enemy who needs to Reload left) she Ran forward from cover. Coleman continued his advance by Running towards the building again.


Turn 13 – Finally
Coleman: Although Shadow had been doing all the heavy lifting, I figured for my first Activation I’d let Newt try to kill Redbeard. Plus it’d be funny if was Slowed when Fleeing. Anyways she hit once normally and once with a critical for 5 total damage, which killed Redbeard.
Duskhelm: *throws figure of Redbeard The Terrible into the garbage disposal*

After Action Report
Victory for Coleman’s Raiders, after some fun dice rolls and tricks on both sides. The dynamics of the battle were great, and the explodable bus added a lot. Both Posse’s having dinosaurs was fun too. This was the longest game yet at 2 hours and 15 minutes playtime. I took a ton of pictures and had to record 13 turns action-by-action, but yeah, still a long one. I guess the stronger Posse’s take a while since there are more HP to chew through. Anyways in the end Shadow had 2 HP, Newt had 1 HP, and Coleman had 7 HP. Now some thoughts from the players:

Duskhelm: Redbeard. Reeeeeeeeeeedbeard! *screams and runs away in anger* Phew, okay, now that I have that out of the way…the game went well and I really thought after the bus exploded that I could win it. I really couldn’t close the deal against all those 1 HP targets though. I guess in hindsight firing Duskhelm at some of the weaker members instead of focusing on Stone Axe would have been a solid idea. I’m actually surprised at how quickly him and Mitis’Heq died once they were focused on. I guess Thunderfoot spoiled me with his survivability. Anyways my plan mostly worked, and I imagine I could beat those pansy bandits if given the chance again.

Coleman: How ’bout those dice? I like how Shadow hit all but once (I think), and Redbeard missed all but once. I enjoyed the mini-fortress I built around the bus (well, until it blew up and nearly killed everyone), and it really helped me avoid the worst of Duskhelm’s fire. Zira was a great distraction for the west flank, even if she gave her life doing so. Some slightly longer ranged weapons would have helped me, as I basically had to march across the open against Redbeard for 3 turns. If he had a passable gun (besides a Musket) things could have gone a lot different. Anyways I feel obligated to critique since my main star (Stone Axe) was built so well. I liked the part where he healed back to full with Inspiring Shot, haha. Actually healing in general (with the Small IRPs) helped a bunch to ease initial damage and give my team a second wind of sorts.

Thanks for reading the battle report, it was quite the long haul to write, and I’m sure the 6,000 words were a lot to chew through as well. As usual if you like the sound of the game grab the latest rules, although you’ll probably want the preview of v0.9 instead, since that’s closer to what was used for this report.

Complete Turn Log
Turn 1:
– Stone Axe Runs forward along flank behind cover
– Duskhelm, Mitis’Heq, Burt, Hasheen all advance, latter two Run
– Thunderfoot moves up middle
– Redbeard stands still, waiting for enemy to move into range
– Zira moves forward with Run

Turn 2:
– Thunderfoot moves 4″ in
– Redbeard shoots at Newt, hits for 6 damage (ignoring Cover and at a higher Elevation), passes BRV
– Burt Runs to building edge
– Zira moves behind bus, all passengers dismount
– Stone Axe stays, doesn’t want to advance into Mitis’ fire
– Mitis continues forward towards Stone Axe on the flank
– Duskhelm goes behind wall, but is out of range

Turn 3:
– Thunderfoot moves up, tries to Charge Shadow at 6″, rolls 6! Charges in, hits for 4 damage
– Stone Axe counter Charges, hits Thunderfoot for 6 damage
– Duskhelm moves up, still in Cover, shoots at Zira at long range, hit 5/6 for 6 damage
– Coleman uses Rapid Fire, shoots at Thunderfoot, misses horribly and needs to Reload
– Mitis moves into long range of Stone Axe, shoots at 11+ but with no hits
– Newt uses Knockback Shot, hits Thunderfoot once on 11+ for 3 damage
– Redbeard reloads
– Shadow, now out of melee thanks to knockback, hits for 8 damage
– Zira moves towards Hasheen on flank, fails Charge on a roll of 1
– Hasheen climbs building, misses all 4 attacks of Double Barrel Shotgun at 10+
– Burt shoots around corner, misses and moves back to edge of house

Turn 4:
– Stone Axe hits Thunderfoot for 1
– Redbeard uses Crippling Shot, shoots medium range at Zira, misses an 8+ with a roll of 1
– Hasheen reloads, drops from building and backs up 2″
– Coleman moves over, uses his S-IRP on Newt for 6 HP, restores her to full 10 HP
– Newt moves behind bus, shoots Thunderfoot at short range, hits 2/2 with double 11s, does 4 damage and Slowed
– Burt climbs bulding Hasheen just left, hits 1 on 10+ vs Zira, does 6 damage (including Elevation)
– Thunderfoot tries to Trample Stone Axe, misses 0/2
– Zira moves and Runs into combat with Hasheen, doesn’t risk Charge
– Duskhelm shoots at Zira’s back (no bonus Surprise Hit since she’s in melee), hits for 7 damage
– Mitis’Heq moves into line of sight with Stone Axe, shoots 10+ at medium range, hits 4/6, Duskhelm uses Yeehaw to re-roll a miss into a hit. Should have used Go For The Eyes since all hits were 10+.
– Shadow moves behind bus and shoots Thunderfoot at short range for 5 damage, Thunderfoot down to 8 HP

Turn 5:
– Hasheen uses Both Barrels in melee with Zira, hits 1 for 6, kills Zira then moves closer to bus
– Shadow shoots short range at Thunderfoot, hits for 4 damage, Thunderfoot down to 4 HP
– Coleman Reloads and moves behind bus
– Burt moves towards back of bus with Hasheen
– Mitish’Heq uses Get Up! on Thunderfoot, restores 5 HP (to 9 HP), moves behind hill and uses Go For the Eyes then shoots Stone Axe for 3 hits (all were 10+ Criticals) for 6 damage. Stone Axe fails BRV and Flees
– Newt shoots at Thunderfoot, short range, misses all
– Stone Axe Flees then goes behind tree with Run
– Redbeard Reloads
– Duskhelm Runs onto building second floor

Turn 6:
– Redbeard shoots long range at Stone Axe, misses
– Coleman moves back out of minimum range of Thunderfoot, shoots and hits with 1, rolls 1 with other (needs Reload), does 7 damage though
– Thunderfoot tries to Charge Newt, fails with a 1, moves into both her and Shadow instead
– Stone Axe moves into melee with Thunderfoot, only hits 1 which leaves Thunderfoot with 1 HP. Coleman calls for re-roll with Yeehaw, gets a Critical instead, kills Thunderfoot. Stone Axe uses Inspiring Shot to get 7 HP back due to kill, so back to full HP
– Burt moves into building, shoots Medium range at Coleman’s back, misses with a roll of 2
– Hasheen moves behind left side of bus, Reloads
– Shadow moves behind Coleman, shoots Burt at short range, hits 6 damage, Burt passes BRV
– Newt moves into long range (thanks to Clear Sight) of Mitis’Heq and shoots for 3 damage and Slowed
– Mitis’Heq moves 2″ forward to medium range against Newt, shoots her for 4 damage
– Duskhelm moves to edge of building for clear long range shot at Stone Axe, hits for 1+2+1

Turn 7:
– Burt moves to second floor of building, shoots at Shadow and misses
– Shadow shoots back, hits 2+3, kills Burt
– Mitis’Heq moves back to medium range on Newt and shoots, hits 2+1
– Hasheen moves to the front of the bus
– Coleman Reloads, moves behind Newt
– Newt moves back and uses her S-IRP for 3 HP
– Redbeard Reloads and moves towards edge of floor
– Duskhelm has no targets so he shoots the bus for 3+2+1 damage, bus has 6 HP left

Turn 8:
– Stone Axe moves into melee with Hasheen, hits 8 times on 7+, puts Hasheen to 1 HP, Hasheen fails BRV
– Duskhelm opens it all up, 9+ to hit Stone Axe. Uses Rapid Fire and Go For The Eyes, only hits 1 critical for 4 damage
– Mitis’Heq shoots the bus, hits for 2 criticals and 1 normal for exactly 6 damage, blows up bus. Explosion kills Hasheen. Newt and Stone Axe are down to 1 HP. Newt and Shadow fail BRV. Mitis’Heq moves behind the hill
– Newt flees into road, then Runs towards nearest building
– Shadow also flees into the open and Runs towards the same building
– Redbeard tries to hit Shadow (to kill), but misses. Moves back to wall of building to increase range
– Coleman edges around the burning bus, shoots Duskhelm at long range, hits 1+6, he passes BRV

Turn 9:
– Duskhelm opens up on Stone Axe, hits and kills (he had 2 HP left) with 5 damage, moves back out of sight of Coleman
– Coleman can still see Duskhelm through the window, shoots at Duskhelm after moving up to short range, misses 0/2 on 7+
– Shadow moves 3″ towards Duskhelm, shoots at long range, hits 1+3-1 at 10+ to kill. All pass BRV except Mitis’Heq who fails
– Redbeard Reloads
– Newt moves behind cover out of sight of Redbeard
– Mitis’Heq would Flee off the table, but is Stunned instead. Moves to the top of the cliff

Turn 10:
– Coleman moves forward and shoots at Mitis’Heq at long range, hits 1+6-1 to kill Mitis’Heq
– Redbeard shoots at Shadow with 1A, only needed 7+ but missed with a 4
– Shadow Runs up, still out of range (barely)
– Newt stays in cover

Turn 11:
– Redbeard Reloads and moves to building ledge
– Shadow shoots at Redbeard at long range, misses all 4 on 7+
– Newt stays in cover
– Coleman Runs up side

Turn 12:
– Redbeard misses Shadow AGAIN on 7+ with a 2
– Shadow moves up to medium range and hits 2+3 on Redbeard. Redbeard fails BRV with a roll of 12
– Newt Runs forward from cover
– Coleman Runs towards Redbeard’s building

Turn 13
– Newt moves into medium range, hits 3 times (1 critical, 1 normal) + 2 damage (5 total) to kill Redbeard

Battle Report: The Bounty at Caldwell Lake

After the Drylands United Cattle Company thrashed Kirk Peterson’s Hunting Expedition in a recent playtest game, I thought I’d continue the storyline.

Kirk retreated north closer to the big Neotechnoist towns, and eventually put a bounty on the Drylands gang. Desperate to escape The Wall in the shortest amount of time, the Drylands crew headed directly south. After escaping over The Wall they figured safety was theirs. Their surprise was complete when a ragged platoon of bounty hunters fell upon them near Caldwell Lake, Wyoming. Resting near a ruined lakehouse, the two posses collided violently.

I levelled up the Drylands Posse, which gave them an extra 30 IP. I figured the hired hunters of The Lost Platoon would have a bit more money, so I settled on $1,500 total. This meant Drylands had $500 additional, which is $200 extra than a standard level up.

Keep in mind this game was played using v0.7 of the rules, with a few tests for v0.8 (mainly around the Initiative system). So ideas like Levels, some of the weapons, etc. will be dated compared to the current version.

Note on images, all of them are clickable and will open the image in a new window/tab as a 1280×960 image. You can also view the images on my Flickr set.

Posse: Drylands United Cattle Company – 130 IP, $1,500
This was the first Posse I created, and so far they had a 1-0 record. Level 2 gave me some more IP and a bunch of Neodollars to spend on goodies.
My goal was to use the new income to expand my Posse a little bit, as well as ensure my equipment stayed up to date. To this end I recruited a new character named Tunher, who was really a Space Marine Scout figure with a shotgun that I had. I bought him a Pump Shotgun and Padded Armor to suit the model. Otherwise I sold Trista’s old 400kW Lever-Action Rifle and bought the ridiculously sweet 600kW version instead.
As for IP most of it went to Tunher. First of all I created him as a Duster, so he started with -1 MV and +2 HP, which would work okay with his shorter ranged weapon. I hoped to supplement his Padded Armor with a further boost, so I spent another 10 IP to give him +1 AR. Finally he got -1 RMC so he could actually hit something.
My remaining IP was spent giving Trista and Tunher +1 HP each (boosting Trista to 8 and Tunher to 11).
For my new Trait I opted for “Clear Sight” for Khulan, which boosted his Assault Rifle’s long range to 20″ and meant he could snipe alongside Trista if needed. Her style was different since her 3A-6D weapon rolled less to hit, but could technically do more damage. Khulan’s trusty Assault Rifle was 6A-1D, but his higher RMC meant such a weapon was well suited to help his aim.
My plan was to use Trista to hold a flank on her own, and maybe swing to the center if she needed to cover somewhere else. Khulan would cover the other flank, with Trask and Tunher advancing as a team and Quidel in as support. Trask’s higher movement meant he’d likely reach combat first, but perhaps he could take some pressure off Quidel and Tunher as they trudged in.
All said and done the Posse looked like:

Quidel - Duster Leader
MV 3, AR 0, RMC 8, MMC 7, BRV 7, HP 13, Berserker
Spear, 80kW Six-Shooter, Whiskey Drop

Khulan - Duster Member
MV 3, AR 1, RMC 7, MMC 8, BRV 6, HP 9, Clear Sight
Assault Rifle, Whiskey Drop

Trista - Neotechnoist Member
MV 4, AR 0, RMC 6, MMC 8, BRV 6, HP 8, Try Again
600kW Lever-Action Rifle

Trask - Bandit Member
MV 5, AR 0, RMC 8, MMV 6, BRV 6, HP 9, Sprint
Club, 80kW Six-Shooter

Tunher - Duster Member
MV 3, AR 2, RMC 7, MMV 8, BRV 6, HP 11
Pump Shotgun, Machete, Padded Armor

Posse: The Lost Platoon – 130 IP, $1,500
I outlined the detail and thought process around this Posse a while back. They are a knockaround ex-military outfit whose members are slowly going insane. Good times. I was interested to see how the Thickskull dinosaur would perform, since he doesn’t have a ton of hitpoints, but his 8″ Movement is almost the fastest of the dinosaurs. 5A-1D in melee doesn’t hurt either.

My plan was to mount Captain Gunfire and Colonel Higgins on The Ram and push them forward, hoping to get to grips with their melee weapons. I was excited to see the Shudder Lance in action, since the Knockback could be rather handy. Otherwise Private Jacobs would act as a second hand and backup man to The Phoenix. The Phoenix had some serious killing power, and if I could get his Light Repeater into range with enemies that were tied up with my melee troops I hoped to do some real damage. And of course once The Ram unloaded his two passengers I planned to throw him forward and lock up any backline shooters, or just cause havoc in general.

As I outlined before, the Posse looks like:

Captain Gunfire - Bandit Leader
MV 4, AR 1, RMC 8, MMC 6, BRV 7, HP 11, Quick Hands
80kW Six-Shooter, Shudder Lance, S-IRP

Colonel Higgins - Bandit Member
MV 4, AR 1, RMC 8, MMC 6, BRV 6, HP 9, Strain Weapon
80kW Six-Shooter, Long Sword, S-IRP

Private Jacobs - Bandit Member
MV 4, AR 1, RMC 7, MMC 8, BRV 6, HP 8
Light Pistol

The Phoenix - Neotechnoist Member
MV 3, AR 1, RMC 5, MMC 8, BRV 6, HP 7, Go For the Eyes, Bonus RMC I
Light Repeater

The Ram - Thickskull Dinosaur
MV 8, AR 1, RMC -, MMC 7, BRV 7, HP 18, Bonus MV I

Table Setup
I used my usual kitchen table for the battle, which is 4 feet long and 3 feet wide with an 8″ deployment zone on either short end. I covered the map with a bunch of hills, mostly just one inch high. The central terrain feature was an old Mordheim building that represented the ruined Lakehouse. It provided solid cover and the second floor would hopefully give some bonus Elevation damage.

Deployment
During my random deployment side roll the Drylands posse got south (doorwards) and the Platoon got north (kitchenwards). The Drylands team had to set up first, followed by the Platoon, then the real fun could begin.

Drylands: I couldn’t resist the central building, and hoped by aiming most of my forces there I could make The Lost Platoon meet me in a big ball of war on that side. To that end Trask and Quidel setup very far to the right with a bunch of blocking terrain in front of them. Khulan and Tunher setup across the nearest hill to the west. I hoped to get Khulan into a commanding firing position and cut the Platoon to pieces as they advanced. Tunher would scamper up and take the left side of the Lakehouse, and his matching movement speed with Quidel would mean they could do a divide and conquer attack. Trista went for the far left (west) flank all on her own. Her big powerful rifle could bring the pain from 21″ away, so with luck I could shoot by the second or third turn.

Platoon: As I figured the Drylands crew pointed towards the big building. I thought I’d match them, except I’d ignore their sniper with a denied flank tactic. Denied flank basically means you try to avoid playing into the opponent’s hand by totally ignoring a section of his forces. In this case if I kept the building between my troops and the sniper Trista I’d basically stop her from having any impact on the game. As I mentioned the Captain and Colonel hopped aboard The Ram, whereas Jacobs and The Phoenix were up on a hill right by them.


Turn 1 – Closing to Range
Note that since I was testing the new Initiative rules I’d roll at the start of each Activation, so instead of seeing a global “X won Initiative” by each turn you’ll just see who Activated and in what order.
Drylands: Trask started my advance up the field by breaking into a dead Run forward.
Platoon: Neither of us were even remotely in range, so I knew this turn would mostly be moving in. To this end I Ran Phoenix down the hill he was on.
Drylands: Next up was Tunher, who also Ran. He aimed for the window in the closest wall of the building, but wasn’t nearly close enough and settled for being in the open.
Platoon: I figured Private Jacobs would try to maintain his role as Phoenix’s buddy, so he Ran down the hill and hung behind the next closest cliff.
Drylands: Quidel edged forward after Trask, but his 3″ Movement was laughable compared to Trask’s 5″. Better to get into cover before the Platoon closes in too far though. I knew eventually they’d arrive, and to that end I decided to reposition my main shooters instead of running them forward and wasting their distance advantage. Trista stayed on her flank, and Khulan climbed the hill by him to get a better vantage point and some bonus Elevation damage (+1).


Turn 2 – Tension Builds
What I like about Dinosaur Cowboys is you aren’t normally in shooting range on the first turn. What that means is everyone gets a turn to shuffle into position and react to the enemy’s advance. This also helps build tension because sometimes you can FEEL the storm of combat brewing.
Platoon: Figuring Khulan had the right idea, Private Jacobs mirrored his approach and climbed the hill he was taking cover behind. The Light Pistol is a handy weapon because it outranges the Six-Shooter, and I figured he was safe enough from Drylands big guns.
Drylands: Tunher continued his forward movement, ending up right at the window of the building. This looked awesome, but also meant he was a bit exposed. The cost of style I guess. Khulan also moved a bit, just to the very edge of the hill to maximize his range and hopefully get someone inside his 20″ killing zone.
Platoon: Time to start the shooting! I positioned Phoenix behind the fence in front of him, and this handily put Tunher into long range. I figured “no time like the present” and activated his “Go For the Eyes” Active Trait (Critical on 10+ instead of 12). With his RMC of 5 I only needed a 9+ to hit, and I smoked Tunher with 4/6 hits. Two of them were Criticals (thanks Trait!). All said and done his Cover reduced the damage by 1, but in total I hit for 6. Tunher promptly failed his Bravery test and was Fleeing. Looks like Drylands newest recruit isn’t working so well, heh.
Drylands: Having a Fleeing character is always annoying, especially in Tunher’s case where he needs every inch of the Pump Shotgun’s 9″ reach. Anyways I thought I’d move the more important stuff first, so Trask Ran forward into the building, and jumped up onto the second floor by the walkway. This gave him a great angle on the advancing Dinosaur.
Platoon: The Ram moved forward, his 8″ Movement being a great help. Then I dismounted Higgins and Gunfire into cover, but foolishly forgot to Face them very well, so their backs were exposed.
Drylands: Well the Dinosaur was dismounted, which meant next turn would be a crazy one. Lots of people were in range, and I suspected I might even sneak some melee in. Anyways Quidel moved forward and shot at Higgins through the window. This happened to be into his back, and a Surprise Hit always helps (Critical on 10+ instead of 12). I hit with 1 Critical, but Cover reduced the cheap and flimsy 80kW Six-Shooter damage to 1. Every bit helps I guess. With the Dinosaur further to the right than I liked it meant Trista was basically useless and out of range, so I Ran her forward.


Turn 3 – Crazy Shootout at the Lakehouse
Now that everyone had closed the gap, this turn would certainly be a blood bath.
Drylands: I won the first Activation, so I figured I’d best make a surprise attack of some sort. Trask used his “Sprint” Active Trait and flew across the walkway and into an elevated, back shot angle of Captain Gunfire and his associates. I hit 3/4 attacks with a total of 6 damage against Captain Gunfire. Regrettably he passed his Bravery test, which is too bad because I love when Leaders flee.
Platoon: Although daring, Trask’s rush forward had exposed him to Phoenix. I moved him up to the fence to ensure he was in cover. Then it was time to put that wonderful 5 RMC to use again. I hit 3/6 of times, but this only did 3 total damage (Trask had Cover).
Drylands: Although Phoenix was a better shot, Trista had a superior gun capable of doing 9 damage compared to his 7. I moved up her full 3″ which just brought Private Jacobs into range. He was exposed on the hill, so I had an easy roll of 7+ to hit. Still, I wanted to be sure, so I activated her trait “Try Again” (optionally re-roll one set of attacks). My first attack only hit once, so I re-rolled with a VAST improvement of 2 Criticals instead! 4 Hits plus 6 base damage meant 10 total damage, so Trista one-shot-killed Private Jacob!
Platoon: Um wow, ouch. I swung Captain Gunfire around the building to get a short range shot at Quidel. I hit and did 3 damage, which wasn’t too bad. I used his trait “Quick Hands” to instantly apply the Small IRP from his pack, but it only restored 2 HP (on a D6).
Drylands: Time for my other big hitter to warm up. Khulan continued creeping along the hill to get a solid shot, in this case putting Captain Gunfire into medium range. I rolled REALLY well, hitting 4/6 times (2 of which were Criticals) for 7 damage, which outright killed Captain Gunfire! Ah, the sweet taste of dead Leader. The rest of The Lost Platoon (except The Ram) passed their Bravery tests…I guess they knew their crazy captain would bite it eventually.
Platoon: Two characters down in one turn, not good. I guess that’s why people don’t move into range of Lever-Action Rifles and Assault Rifles, heh. Anyways I did the mandatory Fleeing move with The Ram, then Ran him forward to try to recapture some lost distance.
Drylands: Quidel continued into the Lakehouse, but couldn’t reach the second floor. He shot Higgins in the back through the window, getting 1 Surprise Hit Critical (he rolled an 11) for 2 damage.
Platoon: With all the deadly firepower going around I thought I should use as many Active Traits as I could, before the characters with them died. So Colonel Higgins activated “Strain Weapon” (more damage on attack), hopped around the corner and moved into melee with Quidel. I only hit 1/2 attacks, but this was still 1+4+2 damage. Quidel failed his Bravery test from the rockin’ damage, the cowardly dog.
Drylands: My last Activation was to Flee Tunher back, which actually helped because I could draw a line on Higgins. I fired at super duper long range (honestly it was ALMOST out of range) and hit with 1 Critical. The Pump Shotgun is nice because it has a high base damage, so all said and done I did 7 damage which killed Higgins!


Turn 4 – Shattered Recovery
After so many decisive kills it was up to The Lost Platoon to try to recover ground. The Ram hadn’t been the focus very much, so he might still get into combat. Plus The Phoenix was still prowling at the back, and even though he was outranged by 5 or 6″ he could hit pretty much anything.
Platoon: I thought I should try to even the odds, and the nearest and juiciest meal to do that with was Trask. The Ram agreed, and Charged up to the second floor and into melee with Trask. I rolled well and hit him 5/6 times which killed Trask.

Drylands: Well I was due to have someone die, and I’d prefer Trask over any of the real ranged hitters. One of these days he’ll get to Club someone to death though. Anyways it was time to focus on The Ram and try to bring it down before it reached the rest of my Posse. To this end Trista moved into short range and fired, hitting 2/3 times for 7 damage (good old Cover) against The Ram. Khulan followed suit, but at medium range, and only hit 3/6 for 3 damage. The Ram was now at 8 HP. Almost there!
Platoon: The Phoenix had to be careful in his movement, since I didn’t want to expose him to another one-hit-kill like poor Private Jacobs. So I played it a bit safer and stood and fired at Quidel through the window of the house. I hit 4/6 times for 4 damage which killed the Drylands Leader, woot. Khulan failed his Bravery test, but the rest passed.
Drylands: Well I guess Quidel couldn’t survive forever. At least my whole Posse didn’t run away as a result of his death. Anyways Tunher fired on The Ram, but needed 10+ to hit (7 base, +1 range, +1 AR, +1 target moved…yeah :( ). Anyways he still hit 1/3 times for 5 damage, so The Ram was down to 3 HP.


Turn 5 – Rampaging Beasts
Platoon: The Ram tried to continue his rampage, but with 3 HP I didn’t expect him to last the turn. Anyways I Ran him into close combat with Tunher. Even though the guy had a Machete, I figured Trista and Khulan hitting at -1 (the In Melee penalty) would be worth it. Plus if Tunher tried to move away I could get a Snap Attack in there.
Drylands: Time to do some big game hunting! Except my dice didn’t agree. Tunher missed entirely with his Machete against The Ram. Khulan Fled backwards, but was still in short range. He fired at The Ram but missed with EVERY FREAKING SHOT. Not only that but he rolled THREE 1s, so his gun was out of ammo and needed to be reloaded.
Platoon: Heh, looks like Khulan’s barbaric powder based rifle finally failed. To show him up I thought The Phoenix would give a demonstration of his laser based Light Repeater. He squeezed the trigger and sent a hail of laser blasts at Tunher, hitting 3 times (including 1 Critical) for 5 total damage, which killed Tunher. That’ll teach him to botch his Machete work. It did however leave The Ram exposed.
Drylands: Trista aimed down the barrel of her powerful rifle, but she must have been unaccustomed to the 600kW version as I MISSED with ALL 3 shots. I only needed 6+! Ugh, anyways I moved her back 4″ to keep out of Run/Charge range of The Ram. Guess I should have saved “Try Again”, but then I wouldn’t have one-shot Jacobs.


Turn 6 – Better Luck?
Platoon: Denied his tasty Tunher meal, The Ram Charged Khulan and hit 2/5 with a bad roll (not as bad as Drylands last turn, heh) for 3 damage. Khulan was down to 6 HP at this point.
Drylands: Khulan had his fill of being bitten by a Dinosaur so I decided he’d risk leaving combat. This meant The Ram got a free Snap Attack against Khulan, but it also cleared the shot for Trista. Too bad The Ram rolled well on his attack and hit Khulan with 2 Criticals and 1 normal hit for 4 total damage. Khulan at least passed his Bravery test. Anyways I moved him to the other side of the cliff and Reloaded his weapon.
Platoon: The 16″ max range of the Light Repeater was painful at this point as I had to Run the Phoenix across the fence and into the Lakehouse courtyard to try to get into range.
Drylands: Surely my dice can’t fail too miserably too often. I moved Trista into short range to be sure and she fired at The Ram, hitting twice for a total of 8 damage which killed the Dinosaur.


Turn 7 – Tightening the Noose
With an unfavorable 2vs1, the situation is looking grim for The Lost Platoon.
Drylands: I won Activation, and since it was a 2:1 ratio I had to handle both my characters. Trista moved closer to The Phoenix, but still was prudent enough to get behind the cover of a small hill. Khulan moved forward into line of sight with The Phoenix and fired at long range (actually at his max 20″ range – thanks to Clear Sight). He hit with 1 Critical (needed a 9+ to hit) for 2 total damage.
Platoon: The Drylands team weren’t looking too great, but neither was I. If I could just get one solid shot in I might take Khulan out. For now I tried to get out of line of sight and I used the Small IRP to heal The Phoenix back to 7 HP. Hopefully it wasn’t just delaying the inevitable.


Turn 8 – Another Notch
Drylands: I won Activation again, which helped since I could hopefully kill The Phoenix before he even got to act. Khulan backed away from the hill, mainly to protect himself. Then Trista maneuvered until she had a clear shot at The Phoenix through a window. Firing at long range she hit 2/3 times for 7 total damage which was just enough to kill The Phoenix and win the game.
Platoon: Nothing because they’re all deaaaaaaad.


After Action Report
The Drylands United Cattle Company was triumphant (again), this time against the bounty hunter mercenaries of The Lost Platoon. I imagine the motley Drylands crew is far enough away from Neotechnoist territory that they can safely blend back into the Duster towns. Anyways the game ran 8 turns and 1 1/2 hours (mostly due to taking the ~50 photos and writing a turn-by-turn report). Some thoughts from the players below:

Drylands: Another win for me. Or should I say for Trista and Khulan, because they pretty much carried the team. Trask acted as solid bait, drawing a lot of fire and distracting the main force of the Platoon. Quidel dying so early was unfortunate, but I guess The Phoenix in the backline was a taste of my own medicine. Tunher worked okay, but I think a smaller, cramped map would be more to his liking (especially with a 9″ range Pump Shotgun). I had some pretty solid dice rolls, but regardless Turn 5 was probably the worst I’ve rolled in a while (in any game, haha). To not be able to bring down The Ram when he only had 3 HP! Sad. Anyways good times, although we basically fought just around the Lakehouse and didn’t really exploit the rest of the map.

Platoon: Well I ALMOST had my hopes up near the end that I could pull a win out. Then Trista killed The Phoenix, and it was kind of like “Oh…well then”. The early one-shot-kill of Private Jacobs certainly didn’t help. I didn’t even get to use Captain Gunfire’s Shudder Lance because he dawdled around and got himself shot a turn before melee. At least I got Quidel back eventually. That 600kW Lever-Action Rifle Trista had sure was a beast and made The Phoenix’s Light Repeater look like a toy. Then again it costs about three times as much, heh.

Complete Turn Log
Turn 1:
– Trask Runs forward
– Phoenix Runs down hill
– Tunher Runs up middle, behind hill
– Jacobs Runs behind next closest hill
– Quidel slowly follows Trask
– Ram runs big 12″ to cover behind the building
– Khulan climbs hill for better vantage
– Trista stays

Turn 2:
– Jacob climbs hill
– Tunher walks to window
– Khulan moves forward on hill to the edge
– Phoenix forward near the fence, shoots Tunher through the window. Activates “Go For the Eyes”, hit 4/6 (at 9+), 2 are criticals, 7-1 (Cover) = 6 damage, Tunher fails BRV
– Trask Runs into the house, onto second floor
– Ram forward to near Trask, Higgins and Gunfire dismount
– Quidel walks, shoots through window at Higgins, 1 crit at 9+ to hit, 1 damage total (target in Cover)
– Trista Runs closer to get in range

Turn 3:
– Trask uses Sprint, moves along second floor to flank. Hits 3/4 on Captain, Surprise Hit, 5+1 (Elevation) damage to Gunfire, he passes BRV
– Phoenix moves behind fence, shoots Trask at medium range, only 3/6 hit into Cover, so 3 damage to Trask
– Trista moves forward full 3″ to get Jacob in range, activates “Try Again”, hitting 7+. Only 1 hit, so uses re-roll from trait, hits with 2 Criticals instead. 4+6=10 damage, one shot kill on Jacob!
– Gunfire circles building, shoots Quidel at short range, 3 hits. Uses “Quick Hands” to use S-IRP on self for 2 HP
– Khulan inches forward, shoots medium range against Gunfire, hits 4/6, 2 Criticals for 7 damage, killing Gunfire. All members pass BRV test except The Ram.
– Ram Flees back then Runs forward.
– Quidel moves into bottom house floor, shoots Higgins in the back, 1 Surprise Hit Critical (roll 11), for 2 damage
– Higgins uses “Strain Weapon”, moves around corner into melee with Quidel, hit 1/2 but for 1+4+2 damage. Quidel fails BRV
– Tunher flees back, then shoots Higgins in melee at long range (almost out of range), 1 crit for 7 damage, kills Higgins

Turn 4:
– Ram Charges up onto second floor into Trask, hits 5/6 and kills Trask
– Trista moves to short range, hits 2/3 for 8-1 damage vs Ram
– Khulan shoots medium range against Ram, hits 3/6 for 4-1, Ram down to 8 HP
– Phoenix shoots Quidel through window at medium range, hits 4/6 for 5-1 damage, kills Quidel. Khulan fails BRV, all else pass
– Tunher shoots Ram through window at 10 (7 +1 range +1 AR +1 move), hits 1/3 for 6-1, Ram now at 3 HP

Turn 5:
– Ram Runs into close combat with Tunher
– Tunher misses Ram with Machete in melee
– Khulan Flees back, shoots short range at Ram, misses all and rolls 3×1 so needs Reload
– Phoenix stands and shoots at Tunher, his 3 (1 Critical) for 5, kills Tunher
– Trista shoot at Ram, misses 3 times on 6+. Moves back 4″ to keep out of Ram’s range.

Turn 6:
– Ram Charges Khulan, hits 2/5 (bad roll) for 3, Khulan down to 6 HP
– Khulan tries to leave combat to clear the shot for Trista, gets hit 2 Criticals and 1 normal for 4 damage by Snap Attack, passes BRV, moves back and Reloads
– Phoenix crosses fence with a Run
– Trista moves up slope to short range, shoots Ram and his for 2 shots (1 Critical) + 6 damage for 9-1, kills Ram

Turn 7:
– Trista moves up behind hill
– Khulan edges into line of sight of Phoenix, shoots at long 20″ range, hit 1 Critical on 9+, 2 total damage
– Phoenix moves 3″ forward, uses building to block line of sight. Uses S-IRP on self to heal back to 7 HP

Turn 8:
– Khulan backs to the edge of the hill
– Trista moves into line of sight through the window against Phoenix, shoots at long range, hits 2/3 for 7 total to kill Phoenix

Instant Replay
I felt that the game was so close and could have swung either way that I wanted a rematch. I ran through it again, and The Lost Platoon rolled over Drylands with a vengeance, so I guess that Posse is just good when in the spotlight. Although I imagine improving target priority helped a bunch, as did knowing how deadly each member could (or couldn’t!) be.
The map was the same, but the setups were reversed. The Lost Platoon had some solid early turns, basically wiping out everyone but Trista and Khulan. In a sweet twist of fate Private Jacobs actually got into a running shooting match with Trista, and WON! The minimum range on her rifle hurt since she had to keep moving to get into a firing position, and eventually Jacob’s Light Pistol overcame her and won the game for The Lost Platoon. There were a few close calls for sure though! I found it interesting how a second match can change the flow of the game. Plus I could run the game without worrying about too many pictures or writing, so it finished in 30 minutes instead of 1 1/2 hours like the battle report version.
Like I said I didn’t do a turn by turn report for it, but I did take a few pictures:

Battle Report: Encounter at Bosler, Wyoming

Encounter Overview
This playtest encounter was between the two posses described below, spanning 6 turns and 1 hour of playtime (including taking 50+ photos and logging every action by hand, so actual playtime was probably 20-30 minutes), using version 0.7 of the Dinosaur Cowboys skirmish game.

It took place in a stretch of jungle inside The Wall near Bosler, Wyoming. The Drylands Posse was looking to rest and find work at the town, while Kirk’s Expedition were focused on big game hunting the Ankylosaurus common in the surrounding vegetation. The groups stumbled across each other as the sun was setting, and a firefight ensued.

Note on images, all of them are clickable and will open the image in a new window/tab as a 1280×960 image. You can also view the images on my Flickr set.

Posse: Drylands United Cattle Company – 100 IP, $1,000
Drylands: This rough and tumble gang was meant to represent a pretty standard group of adventurers, mostly Dusters. Their leader, Quidel, was focused on close combat with his trusty Spear and higher than usual hitpoints. Khulan was his loyal companion from years back, and the two had been knocking around the desert for quite some time. This was their tenth excursion inside The Wall, and unfortunately ended in violence much like the previous ventures. He prefers an old fashioned Assault Rifle, even with it’s potential ammo problems. Trista was a recent addition to the group, a Neotechnoist they met on an earlier trip. Her and Khulan get along splendidly, and are quite protective of one another. She’s terrific at picking off distant targets with her high tech lever-action rifle. Trask is a necessary evil of the group, for he helps them get inside The Wall, and insisted on accompanying them this trip. He’s a crude, barbaric fighter using a Club and rusty pistol to get the job done.

The plan was the form a solid firebase with Trista the furthest back and Khulan near the middle. Quidel would wait to counter charge, and Trask would either also wait or would try to charge forward and slow any advancing melee enemies.

Quidel - Duster Leader
MV 3 AR 0 RMC 8 MMC 7 BRV 7 HP 13/6, Berserker
Spear & 80KW Six-Shooter, Whiskey Drop

Khulan - Duster Member
MV 3, AR 1, RMC 7, MMC 8, BRV 6, HP 9/4
Assault Rifle, Whiskey Drop

Trista - Neotechnoist Member
MV 4, AR 0, RMC 6, MMC 8, BRV 6, HP 7/3, Try Again
400KW Lever-Action Rifle, Whiskey Drop

Trask - Bandit Member
MV 5, AR 0, RMC 8, MMC 6, BRV 6, HP 9/4, Sprint
Club & 80KW Six-Shooter, Whiskey Drop

Posse: Kirk Peterson’s Hunting Expedition – 100 IP, $1,000
Hunters: This group of hunters represented a fairly standard Neotechnoist journey into the jungle. Affluent and pompous, Kirk and his fiance Mary hired a mount (Blood Claw) and a Savage guide (Four Feather) to take them on a hunting trip, similar to how the old Victorian-era British colonials would act. Kirk is a fair shot with his father’s high end pistol, and loves exposure to controlled, limited danger that he can talk about with his friends later. Mary decided to come along to support her husband-to-be, although she dislikes the heat and struggle of travel by ground. Four Feather is a silent, grim guide who knows the jungle and it’s inhabitants well. Originally from the southern deserts, he slowly migrated towards the supervolcano, scrounging work and goods along the way. He favors the effective stopping power of a plasma powered Double Barreled Shotgun. Finally there is Blood Claw, a fine Raptor steed from Kirk’s estate. He will act as their mount (both Kirk and Mary can comfortably fit on his saddle harnesses), and also as a type of bloodhound to track any wounded dinosaurs. Able to absorb almost as much damage as the rest of the team combined, he’ll be a survivable threat.

The plan was to keep Kirk and Mary mounted on Blood Claw and move that blob of damage forward. Four Feather was built to match Blood Claw’s Movement statistic (6″), so he can parallel their advance to get his shotgun into range. Once close Kirk and Mary will dismount and find some cover, while Blood Claw continues in and hopefully locks some of the big hitters into melee.

Kirk Peterson - Neotechnoist Leader
MV 4, AR 1, RMC 7, MMC 8, BRV 7, HP 11/5, Get Up!
100KW Six-Shooter

Four Feather - Savage Member
MV 6, AR 1, RMC 8, MMC 8, BRV 6, HP 10/5, Lucky
Double Barrel Shotgun

Mary O'Toole - Neotechnoist Member
MV 4, AR 0, RMC 7, MMC 8, BRV 6, HP 9/4
Light Pistol

Blood Claw - Raptor Dinosaur
MV 6, AR 1, RMC -, MMC 6, BRV 6, HP 16/9, Bonus HP I
Claw

Table Setup
The table was 4 feet long and 3 feet wide, and covered with a variety of terrain to represent the slopes and valleys of the jungle. Both Posses deployed up to 8″ in from their respective table edges, to represent wandering on unsuspecting of the trouble ahead. Then the game began…

Deployment
I rolled randomly for table edges with Drylands getting the north table end (towards my kitchen) and the Hunters to the south (towards my door). I rolled again for deployment and Drylands had to set up first, followed by the Hunters.

Drylands: I had planned to form a solid line of firing, and the terrain lent itself well to this idea. I had a fairly well covered central hill with some open spots on either side to expose any advances. I decided to put Trista to my right (west), down on ground level. She would hop in and out of cover depending on the situation and range needed. Her 400KW Lever-Action Rifle topped out at 21″, and I wanted to start shooting it as soon as possible. The remaining three members I clumped together. Khulan was the farthest west, hopefully eventually ending up on the hilltop. Trask was beside him and would act as a buffer between any melee characters. Quidel hung out on the ground level, ready to counter charge if necessary (especially if Trask got stuck in and needed help).

Hunters: Looks like I get the unfortunate task of rushing pretty superior firepower. I decided heading in from the left (west) would be a solid idea, as I had a hill in between me and the Drylands Posse, and I eventually could use the central fences as cover. I kept Kirk and Mary mounted on Blood Claw so they could benefit from his 6″ move (9″ total if he Runs). Four Feather was off to their flank slightly, out of sight behind a hill. He would parallel their advance, and hopefully get a few shots on Trista once he got closer. Hopefully Blood Claw’s superior HP (16 total) would see me across the board.


Turn 1: Something Rustling Ahead… (Drylands win Initiative)

Drylands: My opening moves were pretty simple, considering pretty much everyone was out of range. First off was to Activate Quidel, then Standard Move him forward, followed by a Run (additional half Movement), so he edged forward a total of 4″.
Hunters: Wanting to get to grips with my longer ranged foe meant a lot of advancing. Four Feather started by Running dead ahead, which put him squarely behind the next hill. Hopping cover to cover seemed to work so far.
Drylands: Four Feather had moved just a tiny bit too close and put him exactly at Trista’s long range of 21″, after she moved up another 4″. She fired and lucked out with a single Critical hit (counts as 2 hits), +4 base damage of her rifle. Four Feather was in Cover which reduced the damage slightly, but he still took a solid 5 damage, leaving him at 5/10 HP. Since this was over half his starting HP in a single attack he needed to make a Bravery Test, which he passed.
Hunters: Getting shot so early wasn’t exactly in my plan. Nothing for it but foot slogging in! Blood Claw went for the full 9″ run towards the central fences, hoping to keep himself and his riders in cover.
Drylands: Khulan crept forward to barely get Blood Claw inside his 16″ range, shooting and hitting Mary for 1 damage. The turn ended with my last Activation, which was to Run Trask forward to eventually get his pistol and club in range.


Turn 2: Let’s Get Crackin’ (Drylands win Initiative)

Drylands: Woot, Initiative again. I figured the closing Raptor and his mounted Neotechnoists were a bigger threat than the shotgun wielding Four Feather, so I changed targets with Trista. She opened up on Mary, hitting for another massive 5 damage. Luckily for me, Mary failed her Bravery Test and fled off Blood Claw! After this I edged Trista back down the hill, since the enemies were well within her range now. Khulan fired next, hitting Kirk for a mere 3 damage and then moving towards the big tall (2″ tall, in fact) hill in the center of the firebase.
Hunters: Really Mary? With the running away? I guess it suits her character to flee like that. Anyways I Activated her and performed the mandatory Standard Move directly away from the nearest enemy, aka 4″ backwards from where she needed to be. Still on Blood Claw, Kirk wheeled around and headed back 2″ and used his Active Trait “Get Up!” to heal Mary for 5 HP (which he can do once per encounter, as per Active Trait rules, but in this case it’s +5 HP to an Ally in 2″, thus why he had to move back). Looks like he was helping out his fiance. He continued his move by swinging back around and heading 4″ towards the front lines, putting him squarely in the fences. Trask was close enough for a long range attack, so Kirk went for it, hitting (including a Critical!) for 4 damage. Trask passed his Bravery Test though…apparently his life of banditry made him braver than soft Mary.
Drylands: Looks like the Hunters are starting to get in range of me. Trask was armed with a slightly weaker pistol than Kirk, but the range was the same, so he started his Activation by firing back at Kirk. Unfortunately he only hit 1 time, and the 80KW Six-Shooter gives no additional bonus, so his damage ended up being negated by Cover (which provides -1 Damage). Figuring I’d have better luck with the Club, I used his “Sprint” Active Trait (to get +3″ Movement once per encounter) and covered the open ground to get right behind the fence.
Hunters: Wow Trask really overextended, perhaps a turn too soon. I wanted to capitalize on this, so I edged Four Feather a little bit more eastward and a little bit more exposed than I would have liked. But it did put Trask inside the 9″ maximum range of his Double Barreled Shotgun. The shotgun only had 2 Attacks, but thankfully one of them hit so I could get the sick +5 Damage from the gun. The total of 6 damage took Trask out of action. First blood!
Drylands: Ouch, down a member. I guess I got a bit eager with the Club. Then again I could see a shady bandit like Trask not thinking his moves through too much…so maybe I can blame it on that. Anyways Quidel moved up the slope and into the trees, not wanting to make the same mistake of exposing his position that Trask did. I tried a long range pistol shot at Kirk, but missed horribly (I spent most of my Improvement Points on his Melee Miss Chance instead of Ranged, so he only had a slim chance to hit).


Turn 3: The Advance Continues (Drylands win Initiative)
Drylands: I really can’t complain with this continued streak of Initiative winning. Anyways Trista was my girl for reaping vengeance on Four Feather for taking Trask out. She moved back up the hill and fired at Four Feather, hitting him once for 5 damage, which cleanly took him out of action. The Hunters player had decided to risk not activating “Lucky” in his turn, which is too bad since it probably would have saved Four Feather’s life (basically it makes one enemy re-roll one entire set of attacks). Now the kill count is tied up.
Hunters: Time to slog Mary forward, although her 4″ Movement is so much more painful compared to Blood Claw’s 6. Anyways she did a full Run forward into the fencing.
Drylands: I was considering opening fire with Khulan, but decided to plan ahead a bit and spend his Action Phase Running up the steep hill. It was Difficult Terrain, and would require 4″ of Movement to get up. Unfortunately he only has 3″, so a Run it was. Hopefully I can use this position to stop Blood Claw from instantly charging him, since the slope will act in my favor in that case. Firing from a higher elevation certainly doesn’t hurt either (+1 Damage).
Hunters: Kirk and his mount continued forward, reaching the last fence before the final stretch to the Drylands hill. He opened fire on the exposed Khulan, hitting him for 3 damage (thanks Critical!). I immediately regretted the shot as I should have focus fired instead, but I was just too tempted by how exposed he was.
Drylands: My last Activation was Quidel, who was finally close enough to hit at medium range. This was really helpful as the long range penalty (+1 Ranged Miss Chance) was hurting his already lackluster abilities. Anyways I rolled really well, hitting 3 of 4 attacks (even at 8+), so Kirk took another 3 damage.


Turn 4: Rip ‘Em to Shreds (Hunters win Initiative)
Hunters: Hooray, finally Initiative for once. Maybe the dice knew I was getting close to melee and favored me. Anyways Mary continued her march through the fence compound, getting into medium range with her Light Pistol. She fired at the exposed silhouette of Khulan, but missed horribly.
Drylands: Okay, time to pour fire into Blood Claw and hope he drops. My remaining three members all targetted the Raptor, who was close enough that they were at medium range. Khulan fired first, hitting for 4 damage. Trista was next, but rolled terribly and missed every shot. I used her “Try Again” Active Trait to get a single re-roll, and it was totally worth it as I hit for 6 damage! Finally Quidel shot, and unfortunately followed Trista’s example and missed with all the attacks. No fancy re-roll for him I’m afraid.
Hunters: Phew, weathered the storm. Time to charge! In hindsight I should have Dismounted Kirk before running Blood Claw forward, but after rushing across the map for 4 turns all I was seeing was red. Kill, kill, kill! Except I was 1 1/2 inches short of reaching Quidel with Blood Claw, so instead of an awesome Charge bonus I had to spend his Action Phase to Run, just to reach Quidel. Awkward. Stupid fence took a bit more than I expected to cross. Oh well, at least I’m finally in melee combat!


Turn 5: Raptor Time! (Hunters win Initiative)
Hunters: Hey look at that, Initiative again. Not that I have any thrilling strategies I need to hide. I do get to bite and claw and stomp with Blood Claw though. I hit Quidel with all my attacks, totalling 6 damage. Too bad he passed his Bravery Test, since I would have loved their leader to flee. Anyways that used up Kirk’s Action Phase as well since he was still mounted. Really feeling stupid for not Dismounting him at the fence a turn ago.
Drylands: I guess on the bright side the Raptor is in melee with my close combat character instead of a softy like Trista. To prove his mettle Quidel used his “Berserker” Active Trait (+2 Attacks) and hit Blood Claw with 4 of his 6 attacks, totalling 7 damage and taking Blood Claw down to 2 HP. Still not enough to force a Bravery Test, but that 9 HP threshold is tough to break. Anyways Khulan turned to face the Raptor from his elevated perch, and held the trigger and turned the dinosaur into a splattered mess. Seriously crazy rolls of 3 Critical hits! 7 total damage took Blood Claw out of the game, huzzah. Last up was Trista who edged forward to medium range on Mary and fired, hitting for 5 damage and taking Mary to 3 HP left. She passed her Bravery Test (this time at least, haha), and would have been dead if it wasn’t for Kirk’s earlier “Get Up!” usage.
Hunters: That was a lot of damage, but at least it was mostly on Blood Claw and not anyone else. My last Activation was having Mary fire back at Trista, hitting once for 4 damage. Trista’s their weakest character with only 7 HP to start (good old Neotechnoists), so this caused a Bravery Test. She passed it though, alas.


Turn 6: It’s All Over (Hunters win Initiative)
Hunters: Not liking my odds now that Blood Claw is down and everyone else is nearly dead. Totally kicking myself for some dumb moves and lack of focus firing. That and having to charge 4 guns, haha. Anyways Mary started my turn by shooting at Trista. I caught some luck and hit for 4 damage which took Trista out of action. Too bad Trista did a ton of damage in all the other turns.
Drylands: Khulan spun and opened up on Mary, furious that she had taken Trista down. He hit two times for 3 total damage which was enough to take Mary out. I bet he felt pretty pleased with that. Quidel was my last Activation, and he speared the hell out of Kirk. My rolling was awesome again with 2 Criticals and 1 normal hit, plus the Spear’s base damage for a whopping 8 total damage. Goodbye Kirk, hello victory!


After Action Report
Well the Drylands United Cattle Company won against Kirk Peterson’s Hunting Expedition. At least it will give Kirk a story to tell back in the safety of his villa. Quidel and Khulan were the only two who remained in the game, with 7 and 6 HP respectively. Some thoughts from the players below:

Drylands: Victory for meeeeeee. I can’t take too much credit as the Hunters really played to my strengths. Trista got to fire basically every turn, and the expensive cost of her 400KW rifle turned into a solid investment. Khulan also did well with his Assault Rifle and didn’t even need a reload. In fact no one needed to reload the whole game, which kept the rate of fire up for sure. Quidel earned his keep by holding the Raptor and Kirk. Trask was a bit of a waste, I guess I shouldn’t have gotten so eager with him. That Double Barrel Shotgun (2 attacks, 5 damage) is one tough customer, and voluntarily moving into it’s range was silly. Still, great game.

Hunters: Alas, defeat. I feel that a couple of different decisions could have really changed things for me. I actually want to revisit my Posse from the ground up, as they are themed great but really feel lacking in terms of equipment. Blood Claw the Raptor was $400 (of my $1,000), and the mandatory two human members were a further $400 ($200 each), so that meant I only had $200 to spend on guns and armor, whereas the Drylands posse had $400 (since their human member was $200 cheaper than my Raptor). It was fun to field a dinosaur though, and that’s what counts. Anyways I really liked the Double Barrel Shotgun kill, and was impressed with how much of a difference a few inches of range makes (like Mary’s pistol compared to Kirk’s). I think using my Improvement Points to boost everyone’s Armor was a good choice, since Neotechnoists are naturally better shots to begin with so they don’t need a ton of improvement there. Definitely felt their low HP values. Good game though!

Complete Turn Log
Turn 1: Drylands win Initiative
– Quidel forward Run
– Four Feather forward Run
– Trista shoots long range vs Four Feather – crit hit, 2+4-1 (cover) = 5 damage. Passes BRV
– Blood Claw forward 9″ Run
– Khulan shoots at Blood Claw, 1 damage vs Mary
– Trask forward Run

Turn 2: Drylands win Initiative again
– Trista hits Mary for 5, fails BRV. Trista finishes by moving back down hill
– Khulan hit Kirk for 3, moves towards tall hill
– Mary flees off Blood Claw
– Kirk drops back 2″, uses “Get Up!” Active Trait to put Mary back to 8 HP, then forward 4″ and shoots Trask at long range. Hit and crit for 4 damage, Trask passes BRV
– Trask shoots long range against Kirk, 1 hit which Cover negates. Moves forward to fence with Sprint
– Four Feather moves up hill and barely in long range to hit Trask. Hits for 1+5, takes Trask out of action
– Quidel moves into trees, shoots long range at Kirk but misses

Turn 3: Drylands win Initiative again
– Trista moves up hill and shoots Four Feather, hits 1+4 and takes him out of action
– Mary runs forward after Blood Claw
– Khulan climbs hill using Run
– Kirk moves behind last fence and shoots Khulan, crit for a total of 3 damage
– Quidel shoots medium range vs Kirk, 3 hits at 8+

Turn 4: Hunters win Initiative for once
– Mary moves into fence compound, shoots medium range at Khulan but misses
– Khulan shoots Blood Claw, hits for 4 at medium range
– Trista shoots Blood Claw, misses all, but uses “Try Again” Active Trait, re-rolls for 2+4 damage
– Quidel shoots Blood Claw, misses all
– Blood Claw forward Run into melee with Quidel after Charge Move fell short

Turn 5: Hunters win Initiative again
– Blood Claw hits Quidel for 2+4 damage, passes BRV
– Quidel uses “Berserker” Active Trait, hits 4 of 6 attacks for 7 damage, Blood Claw down to 2 HP
– Khulan destroys Blood Claw with 3 Criticals, 7 damage total
– Trista moves to medium range, hits Mary for 2+3, passes BRV but at 3 HP
– Mary fires back, hits 1+3, passes BRV

Turn 6: Hunters win Initiative again
– Mary shoots Trista, hits for 4 which takes Trista out of action
– Khulan returns fire, hits 2+1 to kill Mary
– Quidel uses Spear in melee on Kirk for 8 damage, takes him out of action

Playtesting Results
This game was a ton of fun to play through. I learned a few new rule exceptions…funny how often those pop up once a person actually plays the game, even if the rules seem foolproof during writing. I made a few mistakes while playing, namely:

  • Forgot to factor in Movement modifier for shooting. This would have helped the Hunters survive the cross board trek.
  • Forgot to use either leader’s Leadership ability (grants one single re-roll). This might have helped turn a miss or two into a hit, but little else.
  • Made some tactical mistakes, mainly on the Hunters side. Failing to use Four Feather’s “Lucky” trait meant he died. Not Dismounting Kirk before charging Blood Claw in was also dumb. In fact charging Quidel at all, who had a Spear and wanted to get into close combat…I should have probably gone for Trista instead and torn her to pieces. That and a lack of focus firing, but that was on both sides.

Definitely want to give these Posses another go, since I think a few tactical changes could have really changed how it went down. Maybe I’ll level them up and try again soon.

Anyways I hope you enjoyed the report, it was a bit of a hassle to format into this blog. Taking pictures and recording an action-by-action log was interesting though and I think added to the detail and completeness of the battle report. If you like what you read and want to give the game a shot, feel free to download version 0.7 of the rules.