Drylands Expedition reworked to v2.5 – Windy River

Drylands-Expedition_textAs you know I’ve been working on some new weapons for the upcoming v2.5 release.

Although the live Saloon version is still using v2.3 (at the time of this post), I’ve been testing internally with building posses using a v2.5 instance of Saloon.

What that means is I got to tweak the Drylands Expedition from my Windy River test campaign to use v2.5. I tried to keep the overall flavor of each member, but was happy to be able to use some new weapons too. For example Quidel changed from a Heavy Pistol (which no longer exists) to a LeDuc Revolver and cheap Break Action Shotgun. Gibson dropped his aging Laserbow to try out a Variable Pulse Rifle. I even used some minor changes like Salve being the same price as Small IRP to buy one of those for Crazy Rhodes instead of his old approach. With all the new pistols available Sarah Love was finally able to get started on a brace of different types. So she has a Volcanic Pistol for up close and a Peacemaker for slightly longer shots. Her old dual Handcannons went to Crazy Rhodes, who has a better RTN anyway, and his figure matches the dual wield look well.
And so on and so forth.

Anyway here is the PDF roster of the v2.5 Drylands Expedition. I just thought it was neat to see such an “established” posse being updated to the latest weapons.

What I hope to do at some point in the future is revisit this campaign. Maybe not to play it for many more games, but one big finale would be great. Maybe the fight at the Night Dagger camp itself is the finale. That’ll be after the Battle to Seattle campaign wraps up of course. So nice to have all this Dinosaur Cowboys gaming going on.

Also I’m away this weekend so no Battle to Seattle game or other posts this week. Back at it with a fun fight at Lake Tahoe on March 6th though!

Search for the Antidote – Windy River Day 7

Well, it’s been a whiiiiile! The timestamp of the images for this battle report are from the middle of October! Then again I did have a grand total of 3 or 4 days free in all of December, so I’ve been a bit busy. Too much Mad Men, Robocraft, Simcity 4, family and friends, and gin. At least that’s the excuse I’m going to use :)

Anyway when we last left off the Drylands Expedition had helped defend Hyran Mine against Night Dagger raiders. During the fight Amparo was hit by a “Toxic Gun”, which infected him with a deadly poison. With barely a break to breathe, the posse immediately headed towards an outlying / forward post of the Night Dagger camp. Their intent was simple: get an antidote for Amp!
In addition a new member joined the posse, named Sarah Love, as talked about here. Since I last mentioned her I’ve painted 90% of the figure (mainly just need to finish the base and a few details), so hopefully I can wrap that up soon.

DC-Windy-River_Antidote-0006My notes for this battle are…sparse. As in not even a page. But the pictures speak volumes. I think the table looked really good this time, as I went for slightly lower hills, the black mat (to represent the dark hills around Hyran Mine), an old abandoned bus (which I always love), and best of all I got to use my new inexpensive roads! Brief sidenote, the roads are made by cutting out textured fabric from a local craft store. They look good (especially for the price) and the cobblestone really pops on them. I cut a few to be main roads and a few to be little side trails, so lots of variety. Now that I’ve (successfully) tested the roads I think I’ll try to get more fabric in the near future and make even more roads.

Table
I played on my usual gamesroom table, 4’x3′. I’m hoping to get two slabs of wood to make the table 6’x4′ at some point (so I can run two simultaneous Dinosaur Cowboys games) but for now it’s the classic size.
DC-Windy-River_Antidote-0002

Objective
The Night Daggers had to Destroy 4 casks of Anti-Toxins. If the Drylands Expedition could stop them from doing this, there would be enough antidote leftover to help Amp.

Deployment
The deployment used was “Quadrant”, although my rolls basically made it “Edge”, haha. Both halves of the Night Daggers deployed on the west side (with the bus) while the Drylands Expedition deployed opposite them. I was hoping for a true Quadrant battle, but like I said the deploy rolls didn’t end up that way.

Features
I had the Drylands Expedition start “Out of Supplies”, to represent their haste from running from Hyran Mine. That meant they would start with all weapons needing a Reload. So the first turn would be catching their breath and moving to better positions while reloading their weapons.
I also had the “Night” variant in effect, which would give some protection against Medium or Long range shots (basically a saving roll).
DC-Windy-River_Antidote-0003

Posses
Drylands Expedition – 1/179 IP, $2,000 – Posse PDF
Night Daggers Antidote Defense – 4/179 IP, $2,000 – Posse PDF
DC-Windy-River_Antidote-0009

Setup
The Drylands Expedition split Quidel with Rhodes and Sarah Love, and then Gibson, Amp, and Dwaal. The first half were in the south east quadrant, with the dino half were north of that (north east quadrant).
The Night Daggers split Lanecaster with Zeus to the south west quadrant, opposite Quidel and those fellows. Then Igel, Aletha, and Cobalt were in the north west quadrant opposite the Dryland’s dinosaur Dwaal.

General Report
In general the Night Daggers surged forward, trying to destroy as many antidote casks as they could. By the end of Turn 2 the newcomer Sarah Love was down, and both objectives near the Night Daggers side of the table had been destroyed. One of these was torn to shreds by their mighty dinosaur Zeus.
There was a great fight around the bus (as usual…that bus is awesome as a focal point), with plenty of moving and position for the best shot. Dwaal had rushed forward to try to slow the cask damage, so he proved to be a useful distraction.
On the south part of the table Quidel and Zeus duked it out around the third cask, with Quidel barely slaying the mighty dinosaur before the T-Rex could tear apart the cask.
Amp spent most of the game sniping from a building, but eventually no targets were in range so he advanced and had a bit of a long range duel with Igel.
Dwaal and Gibson eventually teamed up to do an aggressive flank and further draw the focus away from the fourth cask by Amp’s building. With Quidel and Amp closing from the other side the Night Daggers were in trouble.
However everyone was pretty beat up by this point so both sides had heavy losses in each of these late game turns.
Finally Amp engaged the Night Dagger leader Lanecaster, who had slightly hung back earlier due to her short range, and she was able to take Amp out before help arrived. But Quidel showed up soon after to finish off the enemy leader.
In the end the Drylands expedition were able to offensive defend the last two casks by pushing back the Night Daggers.

DC-Windy-River_Antidote-0011DC-Windy-River_Antidote-0013DC-Windy-River_Antidote-0015DC-Windy-River_Antidote-0018DC-Windy-River_Antidote-0021DC-Windy-River_Antidote-0023DC-Windy-River_Antidote-0025DC-Windy-River_Antidote-0028DC-Windy-River_Antidote-0029DC-Windy-River_Antidote-0034DC-Windy-River_Antidote-0035DC-Windy-River_Antidote-0039DC-Windy-River_Antidote-0041DC-Windy-River_Antidote-0043DC-Windy-River_Antidote-0046DC-Windy-River_Antidote-0047DC-Windy-River_Antidote-0050DC-Windy-River_Antidote-0054DC-Windy-River_Antidote-0056DC-Windy-River_Antidote-0060DC-Windy-River_Antidote-0063DC-Windy-River_Antidote-0066DC-Windy-River_Antidote-0069DC-Windy-River_Antidote-0072DC-Windy-River_Antidote-0076DC-Windy-River_Antidote-0078DC-Windy-River_Antidote-0079DC-Windy-River_Antidote-0081DC-Windy-River_Antidote-0083DC-Windy-River_Antidote-0085DC-Windy-River_Antidote-0093DC-Windy-River_Antidote-0094DC-Windy-River_Antidote-0097DC-Windy-River_Antidote-0101DC-Windy-River_Antidote-0102DC-Windy-River_Antidote-0114

End of Encounter Process
Drylands Expedition had everyone except Quidel taken out of action. Ouch! In total they had 5 kills for a total of +15 IP and $150 (plus the usual $30 for winning) and the IP boost gave them another Trait. Luckily 2 casks were undamaged enough that Amp could be healed of his toxic infection.

Like I said, light notes compared to the usual blow-by-blow account!

The Wound and Injuries results weren’t that great for the Drylands Expedition. Amp and Dwaal managed to avoid a Wound, and Quidel’s old “Broken Knee” Wound healed up. But Gibson, Rhodes, and Love all took a Wound, as rolled below.

Wounds:
Gibson Crawford – Cut Feet (W)
“Crazy” Rhodes – Broken Hip (W)
Sarah Love – Shaky Hand (W)

New Resources: 16/194 IP, 180/2180 ND, 5/6 Traits

Flush with cash I decided to rework the Armor setup of the posse a bit. Quidel handed down his Cloth Armor to Sarah Love (no cost), and then bought himself shiny new Bone Armor for $150, leaving the posse with $30. I decided to hold on to the leftover cash for now.
In terms of IP the characters are getting to the point where upgrades are pretty expensive. For example to go from RTN 6 to 5 is 22 IP (but also really awesome and tempting). Instead I gave Quidel another boost, and finally got his Speed up to 4 (from 3) for 10 IP. That left 6 IP, a convenient number considering that is the cost of +1 HP. So Crazy Rhodes got +1 HP, boosting him from 11 to 12 HP.
Traits were a bit tougher, mainly because there are so many I want to get, but I had to narrow it down to a single choice. I considered giving another Trait to Dwaal, perhaps even more HP or some Speed. I considered going for a second tier (II) Trait for someone, maybe Amp with “Inspiring Shot II”. Maybe “Eagle Eye” for Rhodes to push his range out a bit further. An Active Trait was the most appealing, maybe “Retreat!” for someone who normally is near Dwaal, so that the dinosaur could get Speed 14 for a turn! The flat damage Traits are always nice too, and come in handy in pretty much any situation (like Quidel’s “Knee Shot”). “Quick Hands” or “Rally”, “Speed Reload”, the list of things I want is endless. But time to decide (I’m literally sitting here with The Saloon open as I type this, trying to figure out a choice). And that decision is “Rapid Fire II” for Sarah Love, giving her the possibility of 6A-6D, which just might be enough for a one shot kill. Actually it’d be 7A-6D with the Dual Wield variant in play (which it is for this campaign).
I’ll need to boost up Gibson next time, I think, as he’s falling a bit behind.

Final Resources: 0/194 IP, 30/2180 ND, 0/6 Traits

Posse after updates: Saloon link or PDF link.

Next Up
After counter-raiding the outer Night Dagger camp and stealing the antidote the Drylands Expedition have their eyes set directly on the main Night Dagger camp. So the next campaign game will focus on a big attack through the layered defenses of the Night Daggers. I expect a lot of casualties and chaos.

Big Raid at Little Hyran Mine – Windy River Day 6

Another thrilling adventure in the Windy River test campaign. In this case the Drylands Expedition posse had just reached Hyran Mine, after facing some roving Savages mere hours ago.
The land had slowly been turning from lush jungle to blasted lava rock with looming hills and sparse vegetation. As the posse approached the mine they heard the roar of dinosaurs, blasts of weaponry, and shouts of command. Hyran Mine was under attack!

This was my second Dinosaur Cowboys game in my new games room, hooray! This was also one of the most…swingy? games I’ve played yet. Just when I thought one side was out of the running they’d make an impossible shot to come back. Definitely edge of the seat every turn. The game was also longer than normal because multiple posses were involved. As with any “natural deploy” scenarios I found this to be very thematic and fun, much like the older campaign game where a caravan was ambushed.

Encounter Overview
I wanted a large conflict at the mine representing a raid by the Night Dagger bandits (who camp across the mountains). So there would be two posses of Night Daggers involved. The first would be a complete and valid posse, aptly named Night Daggers Attack Force 1. The bandits would deploy on a random long table edge. They would be fighting Lynn and her gang named the Hyran Mine Defense Force, who deployed as if they were hauling ore and not expecting an attack.
At the start of turn 2 the Drylands Expedition would finally reach the table and deploy on the long table edge opposite the Night Dagger Attack Force 1 deployment zone.
Then at the start of turn 3 the Night Daggers Attack Force 2 would deploy from the short table edge furthest from the mine, to represent them being a second wave fresh from the bandit camp. Most importantly the Attack Force 2 would have “Toxic Guns” (same stats as the Auto Shotgun). The idea here is they are trying to capture a few Savages to be their own slaves. This second force didn’t have a Leader, and was just three people with the special guns.

Toxic Gun: Same statistics as “Auto Shotgun”. Anyone hit will receive a Wound (unless they get an antidote in 24 hours), and will automatically be considered Taken Out of Action at the end of the game (even if they were still alive).

Table Setup
I went for a thematic table setup, with stacks of terrain covering my aquarium volcano piece to sort of look like a mine. Then a long, loosely barricaded road leading from the mine to the foreman office (where Lynn lived). I put an orderly orchard in the corner that sort of ended up looking like an Italian vineyard. I also created a little supply area with tons of crates and barrels. Otherwise the terrain was pretty open with a few rocks and hills scattered here and there. As much as I love trees for scenery I tried to keep the total number down to represent the rocky nature of the mine. The actual mine was technically a “Gold Mine” Feature from the rulebook, but everyone was so busy fighting for their lives they didn’t have time to grab any extra Neodollars in raw ore.

General table overview
Hyran-Mine-1114

From left to right: Mine entrance, ore hauling road, crop orchard, supply cache
Hyran-Mine-1115Hyran-Mine-1116Hyran-Mine-1119Hyran-Mine-1121

Posses
Drylands Expedition (0/152 IP, 75/1700 ND): (PDF Roster) This posse should be familiar to anyone who’s been following the campaign. The latest upgrade was a Heavy Repeater for Gibson Crawford and a smattering of Hitpoint boosts.
Hyran-Mine-1122

Hyran Mine Defense Force (211 IP, 2160 ND): (PDF Roster) This posse would be treated as an ally of the Drylands Expedition, so they’d both use the same Initiative roll, could share Yeehaws!, apply beneficial Trait abilities to each other, etc. I went with a realistic mining force that was caught unaware compared to an optimized roster. Lynn Hyran is the leader so the “Rally” trait made a lot of sense for her. One of her guards is named Emmitt and he got a nice Double Barrel Shotgun for keeping the Savages in line. Then three indentured Savages, from those captured in a raid to others serving a crime sentence from the towns on the plains. Their names were somewhat stereotypical with Falls Hard, Cough of Thunder, and Many Stones. They had a variety of crude melee weapons and tools for mining (like a Bundle of Dynamite). The dinosaur for this posse is “Ore Hauler”, a Plated beast used to running massive bundles of raw stone from the mine.
Hyran-Mine-1124

Night Daggers Attack Force 1 (218 IP, 2470 ND) and 2 (141 IP, 1390 ND): (PDF Roster 1, PDF Roster 2) I wanted to go with a fairly optimized ranged gang for Attack Force 1 to really challenge the Drylands Expedition, since the last random encounter was so brutal for the melee opponents. The leader Classie has a solid Light Repeater and “Go For The Eyes”, which is a classic combination at this point. I went a different route for Frank by giving him TWO Double Barrel Shotguns so he can use “Both Barrels” on one and still have a duplicate weapon. In theory he could throw out 4A-5D twice in a row if he emptied both guns. Silverhorn has a crude Assault Rifle and Stun Grenades (with the “Thrower” Trait these are 3-15 distance). Luciano was meant to ride their dinosaur, so she was tough as nails with 4! Defense and 15 Hitpoints! A Whip seemed like a suitable weapon for a mounted cowgirl. Finally Viana was a dedicated sniper with the deadly 500kW Lever-Action Rifle and RTN 6. Finally the gang has a Terror dinosaur named “Hungry Cactus” with some bonus HP for a total of 27 HP.
Attack Force 2 had the simple goal of hitting as many people as possible with their Toxic Guns. All three members are pretty much duplicates of each other, with good Defense, a nice amount of Hitpoints, plenty of healing with the Large IRP medical device, and of course their Auto Shotgun that would stand-in as Toxic Guns.
Here’s the whole ugly mess of them:
Hyran-Mine-1128

Deployment
As was mentioned the Hyran Mine Defense Force deployed as if today was any other work day. That meant two Savages escorting Ore Hauler, Emmitt the guard overlooking the process, Lynn overseeing her mine from the door of her house, and another Savage further ahead of the convoy, perhaps to bring Lynn some news.
Hyran-Mine-1131

Then from the East (if North is towards the mine) the Night Daggers Attack Force 1 appears. They deploy up to 6″ in, and the table edge they rolled is actually the furthest away from the bulk of the Defense Force, which is a mixed blessing. However they were quite close to Lynn as she was further up the map. Everyone pretty much deployed in cover, with Luciano aboard Hungry Cactus who started right by the mining house.
Hyran-Mine-1134

Viana was over in the orchard and would have little trouble reaching most of the board with his shots.
Hyran-Mine-1135Hyran-Mine-1139

And here’s a washed out picture showing just how close Hungry Cactus was to Lynn. The black table cloth I used to represent the mountainous region made taking pictures a bit tough. They were naturally darker, but at least the miniatures tended to “pop out” from the table.
Hyran-Mine-1140

And with that the game began! Note that I didn’t focus on the nitty gritty details of every single Activation or movement, in the interest of time (and motivation :) ). So only the highlights are talked about.

Turn 1 – Scramble the Defenses!
Still caught by surprise, Luciano was able to swing a Rope Lasso around Lynn in a massive hit worth half her health. I’m definitely pleased with aligning Lasso attacks and damage with the dinosaur it’s used from. Anyway Lynn fails her Bravery Test. Since the Rope Lasso has the property “Stopped” Lynn would normally be Stunned when activating (since she can’t physically Flee). Instead she uses her “Rally” trait and risks using her Salve (1D12 HP restored, but at the start of her next Activation).
There was a slight hit on Cough of Thunder, but the Cover of the fence helped reduce the damage.
Everyone else pretty much shuffled forward. Ore Hauler was used intelligently as a movable wall to shield the advance of the Savages, since his massive flanks and short legs make the perfect line-of-sight blocker. For example Viana couldn’t draw a bead on either Many Stones or Falls Hard due to the imposing dinosaur.
Lynn’s lackluster start, the advancing lines of battle
Hyran-Mine-1145Hyran-Mine-1147

Many Stones hiding behind Ore Hauler, Frank drawing a bead on Cough of Thunder
Hyran-Mine-1148Hyran-Mine-1151

The table at the end of Turn 1
Hyran-Mine-1154

Turn 2 – Onwards Drylands!
Hearing the raging battle ahead of them, the Drylands Expedition deploy 6″ from the Western table edge, vaguely opposite the Night Daggers Attack Force 1. The core medium range elements of the posse deployed rather central, with Amp on their right flank and Gibson mounted on Dwaal on their left flank, by the mine. His cunning plan was to try to reach Viana in a massive 15″ Hustle at some point in the game.
Hyran-Mine-1155Hyran-Mine-1159Hyran-Mine-1161
Hyran-Mine-1170Meanwhile the Salve that Lynn used finally takes effect and restores her to full Hitpoints. She tries to feebly move away from Hungry Cactus but the Dinosaur manages to Charge her and hit for 8 damage! She fails her Bravery Test again. Good thing this match wasn’t centered around the “Assassination” objective!
Hyran-Mine-1172Frank moves right up beside Cough of Thunder and gives him “Both Barrels” WITH the “Eviscerate” trait (meaning his Bravery Test will take a penalty) for 8 damage. As predicted the fickle Savage fails his Bravery Test.
Many Stones tries to retaliate by throwing his Bundle of Dynamite at the distant Silverhorn. With an incredibly lucky Critical Hit the enemy takes 9 damage!
Hearing the report of a Double Barrel Shotgun, Emmitt brings his own shotgun to bear on Frank. Both combatants had to really push forward to get in range, but the damage so far has been worth the risk. In this case Emmitt hits Frank for 6 damage, but that’s still enough to cause the enemy to Flee.
Hyran-Mine-1163Hyran-Mine-1166
Classie tries to finish off Cough of Thunder but misses an 8+ roll on 6 Attacks! She desperately tries to use “Yeehaw!” but still misses. Note: This was actually an incorrect usage of Yeehaw! since the ability states “one other entity”, so a Leader cannot use Yeehaw! to inspire themselves. Luckily she missed anyway so the rules guffaw had no effect.
Hyran-Mine-1174Silverhorn ends up Fleeing down the hill he just managed to climb, and returns the grenade favor by lobbing a Stun Grenade at the exposed Emmitt. Due to the distance and movement he still needed a 10+ to hit, but manages it with a Critical for 2 damage, but more importantly Emmitt is now Stunned and won’t be able to perform his Action Phase.
Finally Viana shoots at the massive shape of Ore Hauler at 10+, hitting with two Criticals for 9 damage (which also adds a Panic token, and should slow the Defense advance).
Hyran-Mine-1178Hyran-Mine-1179

Turn 3 – Night Dagger Reinforcements
This turn started with an unexpected surprise…one of the Defense Force Savages was actually a spy and infiltrator for the Night Daggers! I rolled randomly between all unwounded Savages in the Defense Force (which at this point was Falls Hard and Many Stones) for who would be revealed as an attacker. I ended up rolling for Many Stones, who was promptly replaced with Vicky Carmine!
Hyran-Mine-1182Hyran-Mine-1184
As Robot Chicken and M. Night Shyamalan would say: what a twist! This also was quite a swing in terms of forces, because not only did the attacker get to deploy but the Defense Force lost an additional unhurt model.
The remaining two members of Attack Force 2 deployed 6″ from the Southern short table edge, opposite the mine, and right in the thick of all the combat. Barrier went for a flank on Amp, and Sleighter deployed near a fence facing two enemies and between a bunch more.
Hyran-Mine-1186Hyran-Mine-1188
Hyran-Mine-1190The turn started with a bang as the newly arrived Sleighter shot and killed Lynn! Of her posse only Falls Hard failed his Bravery Test for having a dead Leader. The other newly arrived Night Dagger named Barrier moved forward and tried to shoot Amp, but missed all 4 of his attacks (on 8+ no less!)
Hyran-Mine-1193The defenders try to return fire with Cough of Thunder firing his Sawed Off Shotgun towards Sleighter, but misses even at the short distance. The firing continued in earnest with Silverhorn barely hitting Cough of Thunder after the bandit slowly crept forward.
Hyran-Mine-1194Hearing Amp’s shout behind him, Quidel broke off his advance and clambered to the other side of the fence near him to shoot at Barrier. He needs a 10+ to hit, and risks the “Knee Shot” trait because of how exposed Amp is. With amazing luck he gets a Critical for 2+4+3 damage which outright kills Barrier!
Hyran-Mine-1196Hyran-Mine-1199
In retaliation Classie finally manages to put down Cough of Thunder, taking him out from long distance.
Rhodes steadily advanced to medium distance of Silverhorn and punches a dozen holes in the enemy (who only had 1 HP left to begin with) by getting 2 Criticals and 3 normal hits for a total of 10 damage.
Hyran-Mine-1201Hyran-Mine-1203
Vicky tries to shoot at Falls Hard at melee distance and gets another awesome roll of 2 Criticals and 1 normal hit for 10 damage, which outright single shot kills Falls Hard! In the process Vicky does need to Reload though.
Hyran-Mine-1209Hyran-Mine-1204Viana tries to keep Panic on Ore Hauler, but misses the important shot against the dinosaur.
Having waited long enough, Gibson spurs Dwaal into the mad dash across the mine, using the full 15″ movement to try to get into range of Viana, or better yet Charge and try to lock the sniper in place.
This turn was one of the bloodiest in memory. There was a total of 5 kills, 3 of which were in a single shot against a fresh enemy. Just goes to show the importance of Defense and Hitpoints! Absolute riot to play through though, especially since there are still so many entities on the table.

Turn 4 – Re-coup and Re-engage
Hyran-Mine-1217At this point 5 attackers remained compared to 6 defenders.
The turn started on the northern flank, with the important duel between Viana and Gibson. The attackers, having won Initiative, chose to have Viana shoot Gibson before he could reach the sniper. With a solid attack of 1 Critical and 1 normal hit (8 total damage) Gibson ends up Fleeing. This is very important since he’s still mounted on Dwaal, so he’ll back off a massive 10″.
Rhodes continues to press up the middle of the field. He reaches short distance from the traitor Vicky, and uses “Fan the Hammer” and his “Skilled Shooter” trait turning his attack into a 9+. He hits well for 7 damage which kills Vicky, and also had two 1s in the process (which don’t matter since he needed to Reload from “Fan the Hammer” already).
Meanwhile the harassment of Amp continues, as Sleighter moves to the side and fires his Toxic Gun at the man, hitting for 6 damage. More importantly Amp is now poisoned and will need an antidote as soon as possible. Instead of firing back Amp moves away and uses his Small IRP to recover 3 Hitpoints.
Hyran-Mine-1212Hyran-Mine-1213
Gibson finally Activates and would normally Flee 10″ from the nearest enemy. However that would put him off the table, so he’s Stunned instead.
Classie continues to use a nearby tall hill as cover. She edges around the corner to shoot at Rhodes using her “Go For the Eyes” Trait, hitting 1 Critical plus 2 normal hits for a total of 5 damage (thanks to Cover). Rhodes manages to pass his Bravery Test.
Compared to Turn 3 this was a quiet day at the park!
Hyran-Mine-1216Hyran-Mine-1221Hyran-Mine-1222
Hyran-Mine-1224

Turn 5 – Dinosaur Crash In
The attackers win the first Activation with a close 12 to 11 on the roll. This allows Viana to again get the drop on Gibson. Lining up another deadly shot the sniper hits Gibson for 7 total damage which takes Gibson out of action. But Viana is in rather dire straits with two dinosaurs getting dangerously close:
Hyran-Mine-1227
Meanwhile the tactical shootout to the south continues. Amp uses his “Inspiring Shot” Trait in a desperate bid to recover some Hitpoints, but misses Sleighter. Seeing the volume of fire coming his way, Sleighter backs off and uses his Large IRP which brings him back to full Hitpoints.
Hyran-Mine-1229
Rhodes continues his rampage in the center by advancing towards Classie and firing with his remaining pistol. After hitting for 5 damage she fails her Bravery Test and will Flee.
Roaring and stomping the ground, Ore Hauler the Plated dinosaur tries to Charge Viana, but fails the 2″ distance with a roll of 1!
Hyran-Mine-1231
On the other hand, Emmitt moves just into range of Classie, who is hiding behind a barrel scorched by laser blasts. Just to be safe and ensure the kill he uses “Both Barrels”, hitting and killing Classie. As she was the leader of Attack Force 1 they all roll Bravery Tests and perform miserably, with everyone but Sleighter Fleeing.
Hyran-Mine-1234Hyran-Mine-1236
Unlike Ore Hauler, Dwaal goes for the safe (but less deadly) approach of reaching melee and just moves into close combat with Viana. However the fast dinosaur misses all his attacks. On the upside the sniper is now in close combat and will have trouble keeping the dinosaurs out of the 4″ Minimum Range of his 500kW Lever-Action Rifle. Note Viana is Fleeing in the picture due to Classie being taken out of action.
Hyran-Mine-1237

Turn 6 – Toxic Gun Takedown
Hyran-Mine-1240Sleighter starts the turn by missing Quidel with his Toxic Gun, which is unfortunate for the Night Daggers as more poison would be great at this point.
Meanwhile Ore Hauler finally manages to Charge at Viana, hitting the sniper for 6 damage which leaves on 2 Hitpoints left. Amp levels his Lever-Action Rifle at the nearly dead Sleighter, hitting the man for 7 damage. Luckily for Sleighter his Cover reduces the damage to 6, which saves his life and leaves him with 1 Hitpoint.
Having been methodically advancing this whole time after battling Lynn, Hungry Cactus finally reaches melee by Charging Quidel and hitting for 7 damage! The Drylands leader is Fleeing as a result. He Flees backwards from the dinosaur but maintains his target priority by shooting and killing Sleighter. That means all Night Daggers carrying Toxic Guns have been taken out of action.
Hyran-Mine-1242Hyran-Mine-1244
Hyran-Mine-1245Vianna Flees away from the gaggle of dinosaurs approaching him. However after some deliberation he forgoes the use of the Large IRP and decides to shoots the deadly Rhodes in the back. That means he’ll get a Critical Hit on 10+ instead of 12+. This results in 2 Criticals and a total of 9 damage which kills the troublesome Rhodes. However Viana may have sacrificed his life to do so. The reasoning was healing with the Large IRP would just delay the inevitable, and the two dinosaurs could conceivably kill Viana even when he’s at full Hitpoints. Plus who can resist a chance to use “Shot in the Back”?!

Turn 7 – Melee Bloodbath
Well, bloodbath might be a bit strong, but the dinosaurs made a good showing this turn. Ore Hauler started by Charging Viana again and killing the deadly sniper finally. Hungry Cactus returned the favor two fold by Charging Quidel and killing the leader, which caused Amp to Flee.

Turn 8 – Never Tell me the Odds
Hyran-Mine-1249Hyran-Mine-1251At this point the attackers consisted of Hungry Cactus and his rider Luciano. The defenders still had 4 entities, two of which were dinosaurs.
To maximize the Action Phases the Night Daggers would have, Luciano dismounts from Hungry Cactus. She moves towards Amparo which Hungry Cactus moves towards Emmitt. The hope was to get enough attacks to even the odds. Dismounting is rather costly and when to do so is quite a judgment call. In this case the attackers sacrificed some immediate attacks for the promise of MORE attacks in the future. Plus Luciano was still at full Hitpoints and Hungry Cactus very nearly the same, so they could withstand a turn of punishment.
Meanwhile the defenders respond by having Dwaal rush across the board into melee with Luciano, to try to prevent her from reaching Amp. Speaking of Amp, instead of moving for his Fleeing status, he is Stunned instead since he was right at the table edge and had no where to go.
Hyran-Mine-1252

Turn 9 – Dinosaur Mop Up
The turn opens with Hungry Cactus succeeding with a Charge against Emmitt, who he hits for 7 damage, leaving the guard with only 1 Hitpoint. Emmitt is also Fleeing from the shock of the attack.
Amp tries to line up a shot against Luciano and barely hits her (her +4 Defense is rather tough, especially when she’s in melee) for 6 damage. He also continues to back away from Luciano so he can maximize the number of shots before she reaches him, assuming she kills Dwaal. Luciano ignores the man and instead brings her Whip to bear on Dwaal, hitting the dinosaur for 4 damage.
Ore Hauler moves in to help the struggling Emmitt against Hungry Cactus, hitting the enemy dinosaur for 4 damage.
Hyran-Mine-1257Hyran-Mine-1259Hyran-Mine-1261

Turn 10 – Bloody Pulp
Hungry Cactus opens the turn by trying to kill Emmitt. Although he has a powerful 1A-6D bite, the human only has 1 Hitpoint left. So instead the dinosaur opts to use the Beast attack “Trample”, which gives him 2 Attacks and a better chance of killing Emmitt. Hungry Cactus succeeds and Emmitt is paste under his massive feet. That leaves Ore Hauler and Hungry Cactus duking it out in the middle of the board.
Again Amp barely hits Luciano (he’s needing an 11+) for another 5 damage. Slowly she is being whittled down. Dwaal is in even worse shape as he needs a 12+, and misses.

Turn 11 – Lucky Third Shot
Hyran-Mine-1265Luciano tries to lash out at Dwaal again with her Whip, but fails the attack miserably (no hits on 5 Attacks!). Amp barely lands another hit on Luciano which is enough to finally take her out of action.
Having been freed from melee, Dwaal moves to the edge of the roiling fight in the middle. However the dinosaur doesn’t engage Hungry Cactus and instead lets Ore Hauler and the carnivore fight it out.
Both dinosaurs hit well with Ore Hauler doing 6 damage and Hungry Cactus doing 7. At this rate the herbivore will be dead first though.
Hyran-Mine-1267

Turn 12 – Snapping Jaws
Before Ore Hauler can react, Hungry Cactus gets the first Activation and kills the Plated dinosaur. He then moves into melee with Dwaal. Amp misses an important shot against Hungry Cactus. Dwaal however manages a lucky Critical Hit for 4 damage.
Hyran-Mine-1269

Turn 13 – Gun and Claw
With only three combatants left the turns were going fast and furious now. Amp manages to hit Hungry Cactus for 7 damage while Dwaal misses. The Terror responds by biting Dwaal for 6 damage, leaving the smaller dinosaur with only 2 Hitpoints.

Turn 14 – Breather
Haha, everyone misses this turn. Hungry Cactus really missed by rolling a 1!

Turn 15 – All Over
Finally Amp fires the final shot of the game and kills Hungry Cactus before the towering carnivore can react to finish off Dwaal.
Hyran-Mine-1270

Pile of Dead
I took a picture of the casualties because there were SO MANY! The only survivors were Dwaal (at 2 HP) and Amp (at 6 HP). And Amp was poisoned from the Toxic Gun so he was treated as Taken Out of Action for the sake of the End of Encounter Process.
This game was a lot of fun, and like I said very “swingy” where one side seemed to have the lead, then a surprising one-shot kill would turn the tide. Lots of blood and mayhem, and the varied deployment locations and timing meant movement and positioning were critical.
Anyway here are the honored dead:
Hyran-Mine-1273Hyran-Mine-1276

End of Encounter Process
So Amp was the only one hit by the Toxic Gun, which means he’s considered Taken Out of Action AND will receive an automatic Wound if he doesn’t get the antidote in 24 hours. Know what that means? That the Drylands Expedition are going to pick themselves up, dust themselves off, and rush off to raid the Night Dagger camp! They won’t even stop to talk to Lynn, or help with repairs at the mine, or anything like that. It’ll be a flat out race to find an antidote.

In total 9 enemies were killed (not all by the Drylands Expedition, but kills by their allies count too). So that’s another 27 IP and $270 (plus a bonus $30 for a win) for a total of $300. They will also receive another Trait. That puts them at 179 IP, an even $2,000, and 5 Traits!

I have no idea what they’ll buy, but I’ll eventually edit this sentence when I figure it out :)
EDIT: I ended up just talking about what I did with the posse in a new post.

Hope you enjoyed the report! I know I enjoyed playing through it!

Ambush in the Foothills – Windy River Day 5-6

DC-Foothills-0021Well after close to 5 months I’m finally back with a new battle report from my Windy River test campaign. As I mentioned before I’m pretty much just playing this campaign for fun now and not so much for testing. The injury tables seem good and I haven’t run into any major issues with all the stat changes and rulebook updates.

In case you forgot, the Drylands Expedition had just rescued Cecilia at the request of her husband Gordon Glenbrook. At the end of that encounter the posse had returned to Watterson from Matron’s Den, not found much else happening in the town, and decided to scout out the Hyran Mine to the north-east. I had left the last session having travelled for Day 5 and 6 to reach the Mine, but I didn’t roll for random encounters. Well I got one on Day 5, so I wrote up a posse to pit the Drylands Expedition against and had at it! This simpler random encounter helped ease me back into Dinosaur Cowboys. As with the last session I focused on playing the game instead of taking detailed notes, but I did still get a bunch of pictures.

As you might have read I’m in my new house now so this was the first Dinosaur Cowboys game in my new games room. From the pictures you can still just see my old kitchen table, but trust me it’s nice to have a dedicated gaming space!

Posses
DC-Foothills-0002DC-Foothills-0003
The Drylands Expedition have slowly been improving and are up to 137 IP, 1520 ND, and 4 Traits when they fought this encounter. Pretty snazzy. Amparo was “Feeling Weak” from his Wound before, so he’d be at -1 HP. On the upside Amparo’s previous “Broken Elbow” had healed up so he could get Critical Hits again. Dwaal had a “Soft Spot” which was -1 DEF, but he already had 0 DEF so no change there.
Anyway here is the PDF roster for Drylands Expedition that was used for this game.

Opposing them were “Tooth and Fang”, a ragtag group of roving Savages (classic random encounter material). I figured they could be escaped slaves from Hyran Mine, or perhaps disposed family members waiting to strike at the Mine itself. I broke the rules a biiiiiit for this posse by including, for the first time ever in print, two Raptor dinosaurs in the same posse! Pretty exciting. So the PDF roster doesn’t have the second dinosaur included, but you can see there are 400 ND to spare to buy it. So I just wrote in “Fang” as the second dinosaur on the roster before the game.
In general the posse is fully melee focused. Crusher and Blitz mount the dinosaurs and ride into combat, trying to use their Lassos to close and then dishing out big damage with their solid melee weapons. Lots of Defense and Hitpoints to go around, so hopefully they could make it across the field.
Here is the PDF roster for Tooth and Fang.

New Dice!
This was the first roll of my new Gamescience precision dice so I was excited to try them out. The idea is “normal” (ie: Chessex) dice are put in a rock tumbler to remove flash marks from the mould. This of course dulls the edges and corners, and introduces slight differences in how each individual dice will roll. Whereas the precision dice have sharp, crisp edges like casino dice, so they technically should roll more accurately. The downside is they come with the flash marks still on, so you have to manually cut or file the marks off (which I did). The round vs sharp edge is really noticeable when you compare the two types of dice though.
Plus let’s be honest, do I really need an excuse to get new dice?! They were an okay price and look neat and I was excited to try them out.
DC-Foothills-0005

Table and Terrain
I didn’t use the full kitchen table in my setup since I keep the extender leaf in permanently. So I think the board was still close to 4’x3′. Maybe 3.5’x3′.

I really wanted to translate the campaign map to the table since I liked the look of the jungle and hills on the map. I imagined the Drylands Expedition slogging through thick undergrowth, up steep black hills, their feet tenderized from the cracked lava flows of old. Mosquitoes as big as a plate engulf them and the roars of distant dinosaurs echo over the broken canyons.

windy-river-day5-6

I put a bunch of deciduous looking trees on the south of the table, which would be the flatland jungle trees. Then the opposite edge is rife with thick jungle trees and the beginnings of dark hills and broken rock.

DC-Foothills-0008

Deployment, Objective, Features, Variant Rules
Nothing too crazy this game. Just a standard “Edge” deployment (up to 8″ in) with the Drylands Expedition coming from the south and Tooth and Fang emerging from the north. I didn’t even use a fancy Objective, just a plain ol’ “Shoot Out”. No Features either (although I was tempted to have the volcanic rock piece actually be a Volcano feature!)
Remember that the Windy River campaign is using the “Last Man Standing” and “Dual Wield” Variant rules, because I like both of those and should consider moving them into core :)

Here are how the two posses deployed. Drylands Expedition recognized the melee focused nature of their opponents and went for a spread out approach to avoid having everyone stuck in hand to hand. Tooth and Fang kept both dinosaurs tight to the east flank, with Yuonne bringing up the west side.
DC-Foothills-0011DC-Foothills-0010

Game Begins – The Early Rush
Dwaal took the lead for the Drylands Expedition by using his full 15″ Hustle. The idea was to use him as a meat shield and keep the enemy force distracted and occupied while the ranged elements of Drylands eviscerate the opponents. Yuonne moved forward to meet Dwaal in combat, eventually getting a charge and hitting for 10 damage (and adding some Panic)!
DC-Foothills-0013DC-Foothills-0015

Second Wave Arrives
Crusher was the next one to enter combat, and before Quidel could cry out Dwaal was down to 1 HP! I found this rather funny since just last game the dinosaur had been trained to get +1 HP for $50. Who knew it’d make such a difference.
However Tooth and Fang took the worst of the exchange since Quidel, Gibson, and Rhodes could all pour fire indiscriminately into the melee. That’ll teach ’em for bringing a Spine Blade to a Six-Shooter fight!
Eventually Gibson brought down Yuonne with a lucky roll of his 200kW Six-Shooter. Already you could tell the game was turning against Tooth and Fang.
DC-Foothills-0016DC-Foothills-0017
Fear rippled across the surviving Tooth and Fang members after their leader died. Both Crusher and Blitz failed their Bravery Test which is quite a setback when they needed to cover as much ground as possible.

Closing the Gap
On the east flank Blitz kept pushing Fang towards Amp and Rhodes. But the Raptor could only Hustle 9″ and both Drylands members easily outdistanced their enemy. Both riders and dinosaurs took heavy fire, with Tooth in the center being the focus for the west flank and Blitz on the east being the target over there.
DC-Foothills-0022DC-Foothills-0024

Time to Reposition
In the interest of, well, staying alive, Dwaal moved as far as possible to the opposite corner of the table. Not like his 1 HP and feeble 2A-2D attack would do much at this point. Meanwhile Blitz and Fang closed on Amp, trying desperately to get into Lasso range so they could lock him down. In this case Blitz had a Wire Lasso with an 8″ range that would apply Stopped, which would set up Amp perfectly to get Charged.
DC-Foothills-0028DC-Foothills-0025

Unsaddled by Fire!
Finally Tooth succumbed to the volume of fire from Quidel, Gibson, and Rhodes. Between Gibson and Rhodes both using Fan the Hammer (for a massive 12 total attacks between them) to Quidel reliably throwing out 2A-4D hits, the Raptor just crumbled. Unfortunately the dinosaur was taken out after Crusher had Fled, so the rider was left quite far from the action. In the distance of the first picture you can see poor Crusher along amidst the rocks. The second picture is Rhodes complete disregard for ammunition conservation.
DC-Foothills-0030DC-Foothills-0031

The Pain Continues
Fang was the next to fall. Blitz did eventually get a single Lasso attack against Amparo, but missed since he needed an 11 with all the mods. The constant 400kW Lever-Action shots from Amp added up and after the dinosaur was dead Blitz soon followed.
There was a single highlight for the poor Tooth and Fang posse: Crusher actually reached melee! He got a lucky 6″ Charge onto Gibson, which almost made up for two failed Charges by his friends earlier. The angry Savage hit Gibson for 5 damage with his Spine Blade, which took the man down to half his health. Still not enough to seriously hurt the Drylands Expedition. Crusher was killed by gunfire soon after.
DC-Foothills-0032DC-Foothills-0034

Thoughts on the Encounter
From the Drylands Expedition point of view: easy! Having Savages run directly into our (considerable) firepower was great. Killing the Leader and having the other two Flee was even more perfect. Dwaal worked well as a shock trooper distraction, and still managed to barely survive to the end. The one hit Crusher got in did sort of expose the fragility of some members, since Gibson’s 10 HP bled away quickly once he was in melee.
Regardless I think that the next posse encountered needs to be as versatile and ranged focused as the Drylands gang are. Which should work well since the enemy will probably be bandits around Hyran Mine, and you know those guys are full of traps and tricks!
As far as game balance pure range dominating pure melee is exactly what I want, so no complaints there. After all should the guy charging down the street with a knife really win against the guy with the shotgun?

the_jurassic_west_by_24kevin-d59t1kkAwesome art by 24KevinEnd of Encounter Process
Pretty simple process since no one was Taken Out of Action for the Drylands Expedition.

Amp and Dwaal both had their old Wounds heal up.

The posse killed 5 entities so +15 IP, +$150 ND, and a bonus +$30 for winning the encounter (total $180). Including their existing funds and abilities puts them at 3/152 IP and 10/1700 ND.

To be honest there aren’t any easy choices for what to buy or upgrade next. The posse are in quite good shape for weapons, with the next step being a bigger jump (like 400kW Lever-Action to 600kW) than the incremental upgrades so far. It’s actually too bad they don’t have $200 instead of $190 since a lot of equipment breakpoints (like high end Grenades) are $200. I guess I could sell some old gear at half price to make up the difference.
I think that Gibson could use a better weapon. Maybe a high attack rifle like the classic Light Repeater. Too bad I don’t have $600 spare for a Gatling Gun. Everyone else is fine for weapons and armor at the moment.
I’m also a bit stumped on how to spend the IP. I think a smattering of Hitpoints is a safe bet as the gang has fallen a bit behind with that. They were hitting pretty consistently so I think the RTN values are fine for the moment.

New Gear and Stats
I think I’ll sell Gibson’s Laserbow for a $40 refund, which gives me $230. Then I’ll buy him a Heavy Repeater for $150, leaving me $80. I’ll keep that in the bank to save up for some Grenades or a bigger rifle for Amp.

Then +1 HP for Gibson, Amp, and Rhodes at 6 IP / HP for a total of 18 IP. So back down to 0 IP left. This brings them up to 11, 9, 11 HP respectively.

Currently The Saloon has a limitation where removing a weapon refunds it for full price, instead of selling it. So I’ll have to change that before I can get proper values.

Besides the equipment changes here is how the posse looks: Drylands Expedition (Saloon link).

Cecilia’s Rescue at Matron’s Den – Windy River Day 3-6

Cannibals-PotOverview
After the exciting conclusion to the hunting safari the lead man Gordon Glenbrook realized his wife had been kidnapped in the chaos of battle. Luckily the group were able to find a set of tracks leading south across the grassland. Unnervingly they also found traces of blood which they assumed to be from Cecilia.
This setup gave me a chance to use the Forced March rules. As the posse wanted to travel for another 2 hours (6 miles in this case) they would suffer -2 Initiative for the next encounter. The trail lead to Matron’s Den, a known brothel with questionable hiring practices.
Just in case you haven’t been following along, this session is for the Windy River test campaign (although at this point it’s pretty much just playing for fun and not testing).

windy-river-daynight3I wanted to play a shorter game this time, so I didn’t write any notes and only took a few (only 50) pictures. The upside is I can actually play the game instead of focusing on recording the details for a battle report. This cut down how long the match took and also, hopefully, means I won’t have to write this post for 3 hours.

I decided that during the night the porter Tendaji had enough of dinosaurs, savages, and forced marches and slipped away in the night. This was a common problem to early African explorers in the Victorian era so I figured it made sense here. Kwabena (who had stayed by Gordon’s side during the last fight) decided to remain with the group. Gordon armed the porter as well as himself, as this next hunt was not for sport but for the love of his life.

As a reminder their stats (and weapons they now carried) are:

Kwabena (Porter)
DEF 0, RTN 8, CTN 9, BTN 9, SPD 4, HP 10, Blunderbuss.

Gordon Glenbrook
DEF 1, RTN 6, CTN 8, BTN 7, SPD 4, HP 13, Double Barrel Shotgun, 100kW Six-Shooter.

DC-WR-Day4-Den-11Anyway upon arriving at Matron’s Den the expedition was confronted by a dingy, half ruined shack. They also saw the glow of tunnel entrances and heard the sounds of debauchery. I built a posse equal to the current Drylands Expedition stats (121 IP, 1270 ND, 3 Traits) called Matron’s Den Guards (PDF). I went for descriptive names instead of flavorful ones to help me keep track of the gang. Anyway each member is a bit of a glass cannon with a lot of offensive (and very impressive weaponry) but little in the way of survivability. I also had two Savages from the last game make a return (to help balance the Drylands addition of Gordon and Kwabena).

Features, Deployment, Objective, Terrain
I used the “Hidden Tunnel” Feature by scattering Space Hulk doors across the board. Any character could enter a tunnel and instantly exit at the other side (which would end their Movement Phase). I used colored dice to track which tunnel lead to which.

The deployment was “Center”, with the Matron’s Guards deploying within 12″ of the middle of the table, which also happened to be the Matron’s Den building, which ALSO happened to have Cecilia in the middle. She was locked in a cage while the guards (and unplaced patrons) jeered and yelled at her. The idea here was Matron Francince was not home, and so the newest working girl was being held until Francince returned.

Obviously the Objective for the Drylands posse was “Smash and Grab”. I went for this one because it meant having to move Cecilia off the table. However with the Center deployment the battle was likely to end up in a kill-em-all-and-rescue-later.

You might also notice the table is looking nice and jungle-y. This is thanks to a bunch of aquarium plants I recently purchased. Originally I had bought three of them, but the vegetation parts were way, way too tall and would flop all over the place. I found a happy solution of cutting the plants down so they are stable, and also have a more varied look to them. I was so happy with this result that I bought a couple more (including a purple one for that “neato jungle!” look). The best part is the trees are basically $2-3 each, so MUCH cheaper than similar terrain alternatives.

Anyway here is the table setup:
DC-WR-Day4-Den-02

Also another angle, and a closeup of my new jungle trees. Also note all the cool looking doors representing tunnels. As you can tell the door with the red die leads to the matching red die door. This creating a criss crossing network of tunnels that would mean everyone could quickly move around the battlefield.
DC-WR-Day4-Den-08DC-WR-Day4-Den-03

Deployment
The Matron’s Guards deployed first in the actual den building. In the middle you can see Cecilia, trapped and confused. Her fate wouldn’t be the cannibal’s pot (featured as an awesome figure above – I wish I owned that!) but instead forced prostitution. How ugly. But the dark swamps of Windy River are sometimes savage and vicious.
DC-WR-Day4-Den-13

And the Drylands posse (and friends) deployed to the east within 8″ of the edge.
DC-WR-Day4-Den-18

Crazy Rhodes, Gordon Glenbrook, and Kwabena all started right beside a tunnel entrance. They would leverage these access points to get in close to the Den building and hopefully rush Cecilia out.
DC-WR-Day4-Den-14DC-WR-Day4-Den-15

The Rescue Begins!
After an awesome dual pistol kill by Crazy Rhodes on Night Sniper (who only had 6 HP to begin with, but a 500kW Lever-Action Rifle – glass cannon like I said!) the man dove into the tunnel and appeared across the board. I had managed two Critical Hits on his pistol attack, which was as good of a start as I could hope for. Here is Crazy Rhodes after he emerges from the tunnel:
DC-WR-Day4-Den-20

Gordon recklessly went through his tunnel entrance. However the tunnel spewed him out right by the Den. The man only cared about getting Cecilia back and not how many enemy guns were waiting for him (the answer is “a lot”). Plus he lead the way from the tunnel with Both Barrels of his Double Barrel Shotgun.
DC-WR-Day4-Den-25DC-WR-Day4-Den-27

The loud sounds of gunfire stirred everyone to action. The Matron’s Den Guards figured they were dealing with rowdy customers instead of a dedicated raiding force.

The fight intensified near the Den as Kwabena also came through the tunnel. Carefully he aimed the deadly Blunderbuss at the purple hooded figure of a Savage, and fired.
DC-WR-Day4-Den-30DC-WR-Day4-Den-31

As you can see by the single D12 roll of 9, his daring attack had hit. The Blunderbuss has a special property of called 2″ Explosion, which meant everything within 2″ of the attack takes the Damage (5) of the weapon. So with one lucky shot Kwabena was able to wound three of the Guards!

In retaliation the purple hooded Savage moved into combat with Gordon, eager to stab and smash the enemy.
DC-WR-Day4-Den-34

Meanwhile across the board to the east a less close, but equally vicious shootout was taking place. Quidel and Gibson were trying to get into the fray, while Amp was pressured by the approaching menace of a Savage. Dwaal, although wounded, rushed in to stall the enemy.
DC-WR-Day4-Den-35

Eventually though Dwaal, after having been shot by Indigo Armor (one of the Guards), was pummeled to death by the Savage dubbed Gladiator. This left Amp exposed to his assault.
DC-WR-Day4-Den-39

Back at the Den the combat continued. The purple hooded Savage was dispatched before he could kill Gordon. Then Gordon, heedless of the enemies around him, rushed towards Cecilia.
DC-WR-Day4-Den-37DC-WR-Day4-Den-42

To try to stop the wounded maniac from stealing their latest prize, Green Armor moved in to block Gordon’s frantic advance.
DC-WR-Day4-Den-44

Before Gordon could be overwhelmed Quidel and Gibson (who had been badly deployed too far from a tunnel) arrived as reinforcements. Gibson fanned his six-shooter, emptying it into the armored Stormtroooper above him. Quidel managed to kill Green Armor. Suddenly the board looked a lot emptier. More importantly, Gordon had a clear path to Cecilia.
DC-WR-Day4-Den-46

Finally husband Glenbrook reached wife Glenbrook, and quickly shattered her cage and started to lead her to safety (heading south off the table).
DC-WR-Day4-Den-47

The defenders of Matron’s Den were down to a few wounded survivors. One of those was Gladiator, the Savage. After a great 5″ Charge (he seems to roll really well for those!) he reached Amparo and was able to take the man out of action.
DC-WR-Day4-Den-50

But the final, defiant kill was an act of futility in terms of victory. Gordon was able to Hustle his wife Cecilia off the southern table edge and claim victory for the Drylands posse.
DC-WR-Day4-Den-51

End of Encounter Process
As you can see the report isn’t as detailed as usual, but took half the time to write up and even less time to play.

Anyway after the encounter the kill tally was figured out. The Drylands Expedition posse had killed ALL 5 of the Matron’s Den Guards, plus 1 Savage henchman. This resulted in +16 IP and +160 ND. They also won the encounter, so a further $30 was awarded.
In terms of losses the posse had Amparo and Dwaal taken out of action. This is the second match Amparo was taken out, so hopefully his Broken Elbow doesn’t become a permanent Injury.

Both Amp and Dwaal failed their Wound Test and needed to roll for the Wound Effect. Funnily enough they both got 19 on 3D12, which for Amparo was a Torso Wound called “Feeling Weak” which would give him -1 Total HP. Luckily it wasn’t in the Arm location, since a second Wound in a single location means Injury! Anyway Dwaal was luckier and got “Soft Spot” which gave him -1 DEF (minimum 1). He was already at 0 DEF so this basically has no effect.

Before making any new purchases here are the totals for the Drylands posse: 25/137 IP, 194/1460 ND, 3/4 Traits.

Yes, that’s right, they had accumulated enough Improvement Points to warrant another Trait! Woo hoo.

This match showed that the Drylands Expedition has some solid offense. But it also demonstrated how going full glass cannon (as the Matron’s Den Guards did) can mean you don’t even get a chance to use the deadly weaponry. So for this round of upgrades and advancements I decided to go fully defensive.

Everyone who didn’t have Armor got a new suit of it! Quidel took Cloth (to match his robes on the figure), Gibson got Quilted, and Rhodes got Padded (he seems like the type of person to need a padded jacket). I also spent $10×4 to give everyone a Small IRP. Healing only 1D6 HP for the use of an Action isn’t the greatest option, but could be useful to save someone from being taken out of action. Or maybe they kill an enemy and have some time before engaging the next one. Either way, more defense!
Getting everyone to +2 DEF is great and will really help them avoid the pain and keep the pressure off their relatively small HP pools.

For IP changes I spent 10 IP to finally give +1 DEF to Amparo. Then a further 12 IP (6×2) on Gibson for +2 HP, bringing him to 10 HP.

I gave Crazy Rhodes the “Skilled Shooter” trait which would let him use a -2 RTN bonus for a single attack. Since he’s attacking at 5A-3D with his dual 300kW Six-Shooters I figured this was a good call. I had thought about giving the Trait to Amparo, but considering he was taken out the last two battles I’d rather spread the Trait wealth around a bit.

At the end of all these purchases the Drylands Expedition has 3 IP left and no money. They now look like this Drylands Expedition night 3 roster PDF.

Continued Travels
After rescuing Cecilia, the grateful couple decided they had enough of the jungle for now and wanted to head back to Watterson. Since the Drylands posse wanted to get paid from Grogan for leading the safari in his stead, they also headed back.

So Day 4 was spent travelling (uneventfully) to Watterson. Grogan had recovered from his malaria sickness, and much to Quidel’s dismay, had headed off on another expedition. Gordon was able to pay the posse a marginal sum for their efforts though. So another $60 was added to the Drylands coffers, which they immediately spent on training Dwaal to be tougher ($50 for +1 HP for a dinosaur, which brought him to 15 HP), leaving them with $10.

Feeling that their time and tasks in Watterson were complete, the posse cut east across the open grassland towards the imposing foothills and mountains around Hyran Mine. They travelled for a day (making it Day 5). They weren’t quite at the mine yet so they took another day (now Day 6) to get there.
I didn’t roll the Encounter Chance yet, but if that doesn’t result in a combat then the next report will be their time at the Hyran Mine. I’m going to use the black terrain cloth, more rocks, less trees, and lots of hills to represent any combat in the area.

Changes and Updates
The main change I want to make is to the Taken Out of Action Effect tables. Right now 3D12 is used, however that results in pretty average rolls in the center of the chart. What I want to do instead, to make the injuries more random, is switch to D6 + D12. You basically roll D6 and look on the table to see what the D12 result did. So the same range of numbers and effects will be available, except now the fringe cases will be seen more often.

Otherwise just a few editing and grammar fixes: Siege in Features needs a RTN, note about Knockback and hitting a solid surface, add water to Difficult Terrain list, note about transferring weapons after an encounter within a posse.

Intrepid Expeditions Jungle Hunt – Windy River Day 2-3

Overview
I was able to get another campaign game in recently, and am hoping to keep up a pretty steady pace going forward here (my schedule is a bit more clear now). So as you might remember I’ve been starting the Windy River test campaign featuring the Drylands Expedition (PDF).

Ewart-GroganPreviously they had visited Watterson and fought an escalated battle with the Etchglen Hunters, due to the drunk leader attacking Quidel in the bar after she misinterpreted a comment. The fight started in The Dusty Claw, a saloon owned by the Warner family. After victoriously overtaking their enemies, the Drylands Expedition was summarily kicked from the saloon for causing trouble, and found there way to the Eight of Diamonds hotel. The hotel is owned by Conrad and Ortiz, two brothers who don’t look kindly on the Warner family taking their business. After hearing about the bar fight the brothers offered a free room for the night.

The next day Quidel and friends happened to cross paths with a man named Grogan, who owned and operated the hunting outfit “Intrepid Expeditions”. Unfortunately he had fallen ill with malaria, and was confined to the hotel. Grogan was desperate to find a replacement crew that could take his most recent customers on a safari in the small patch of jungle south of Watterson. The two customers were aiming to depart the following morning.

Gibson wanted to continue to the mountains to the east and explore them, as surveying was still his primary goal. But Quidel, Amp, and Rhodes all voted for the easy payday taking some tourists on a safari would be. So they spent the day equipping the caravan and planning a route. After another restful night in the Eight of Diamonds they gathered everyone and headed south into the jungle (day 3).

The Hunting Safari
The guests were Gordon Glenbrook and his wife Cecilia Glenbrook. The young couple were fresh from The Wall and had taken a Flapper to the larger city of Cheyenne to the south east. Now they were flush with excitement at the thought of hunting a dinosaur. You might remember Gordon Glenbrook from The Great T-Rex Hunt, which was near the end of his impressive life. I thought I’d have the campaign be before those events, when him and his wife were just married and starting to hunt. Their stats, totally off the cuff, are:

wr-d23_0872
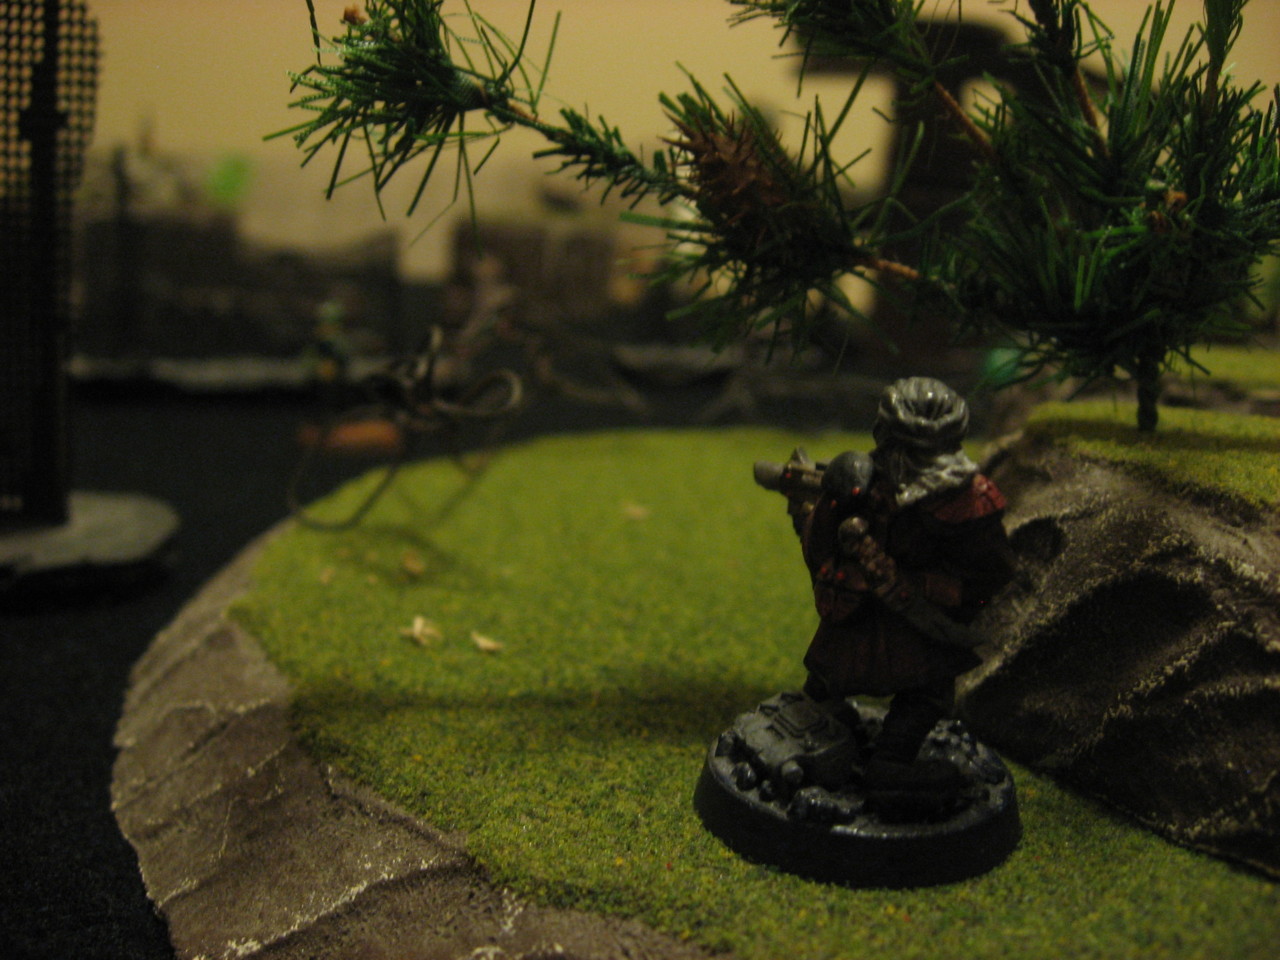
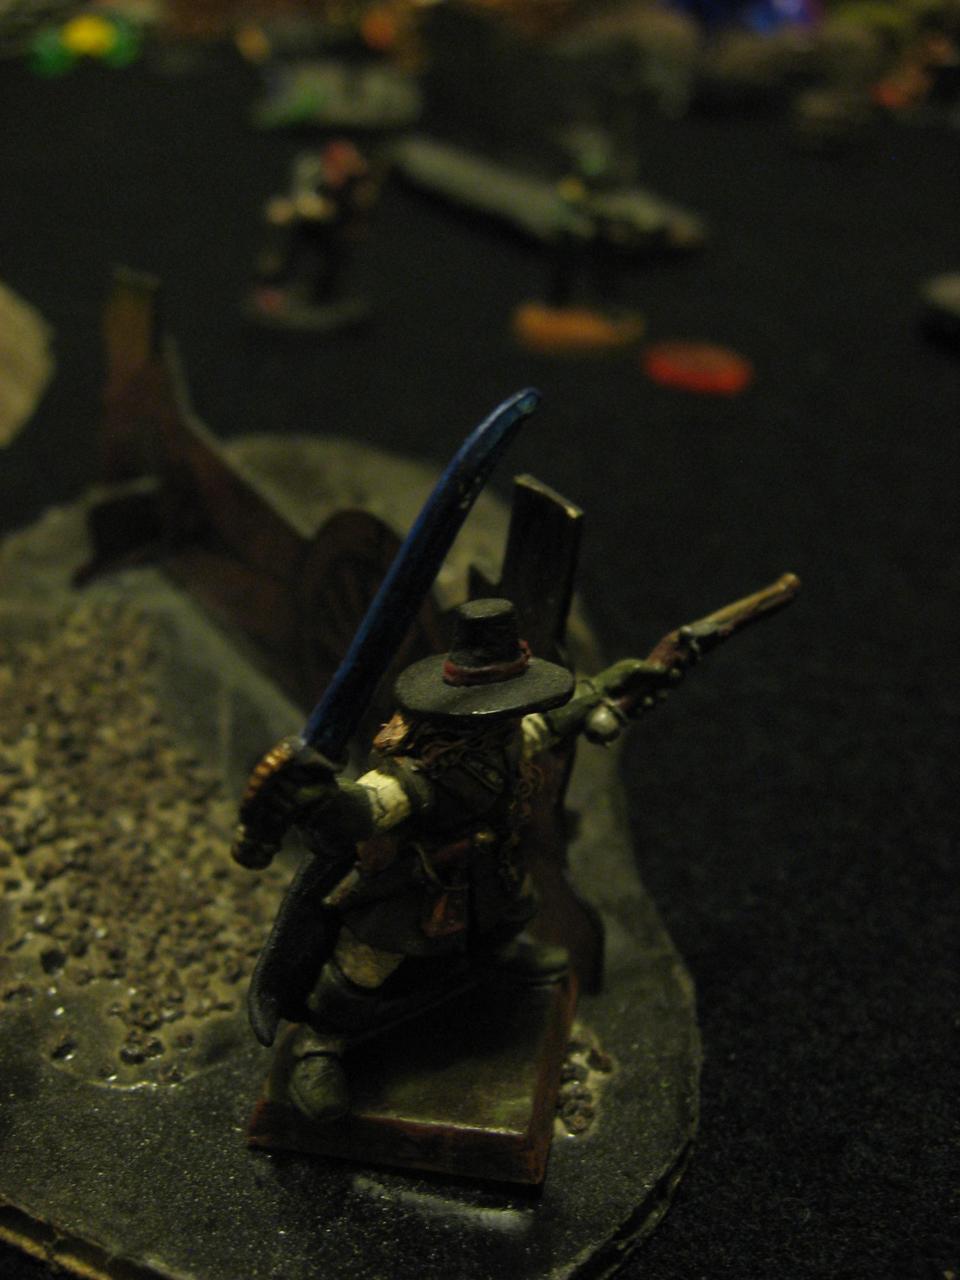
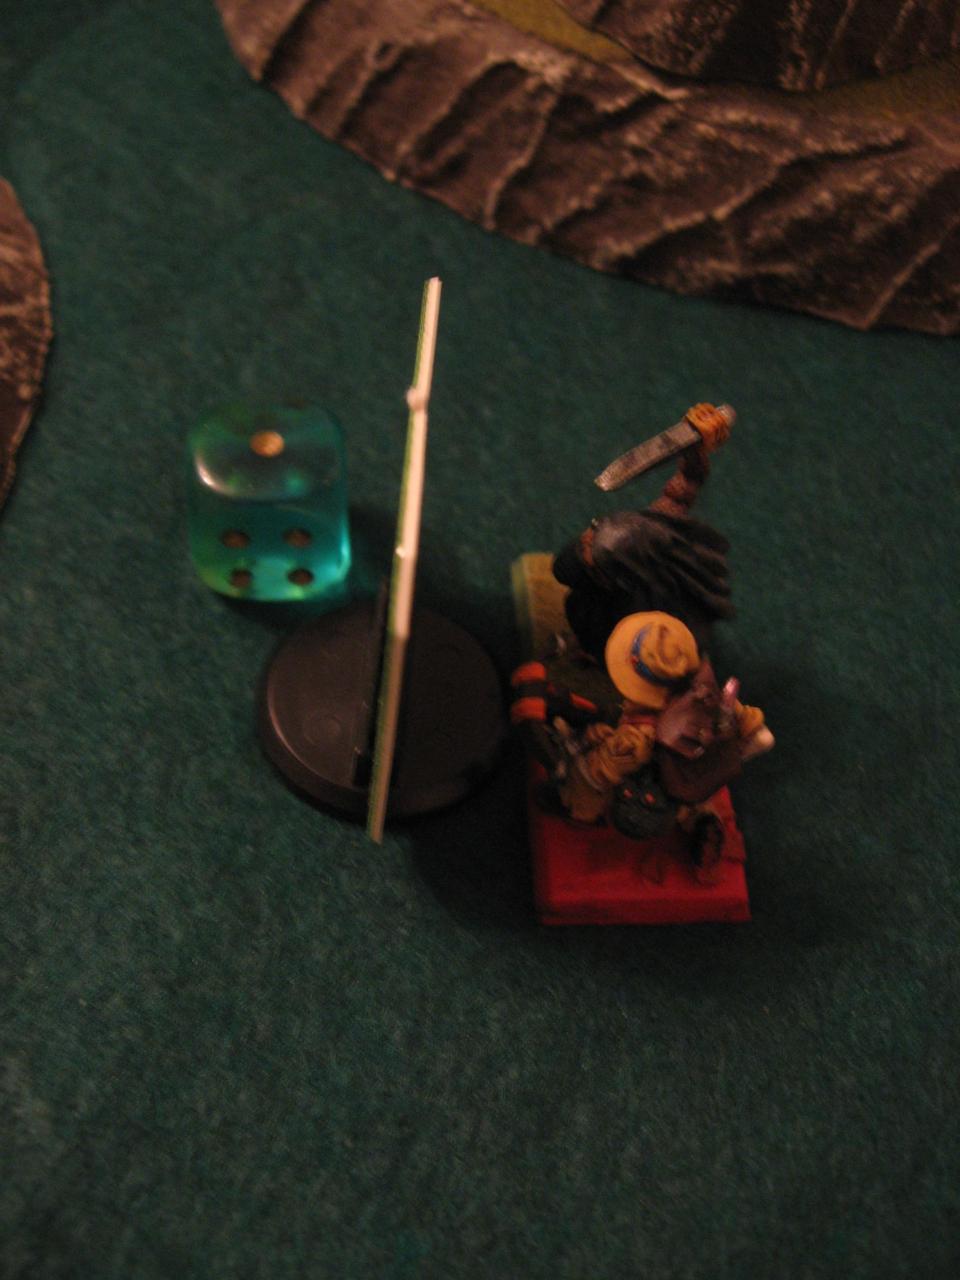
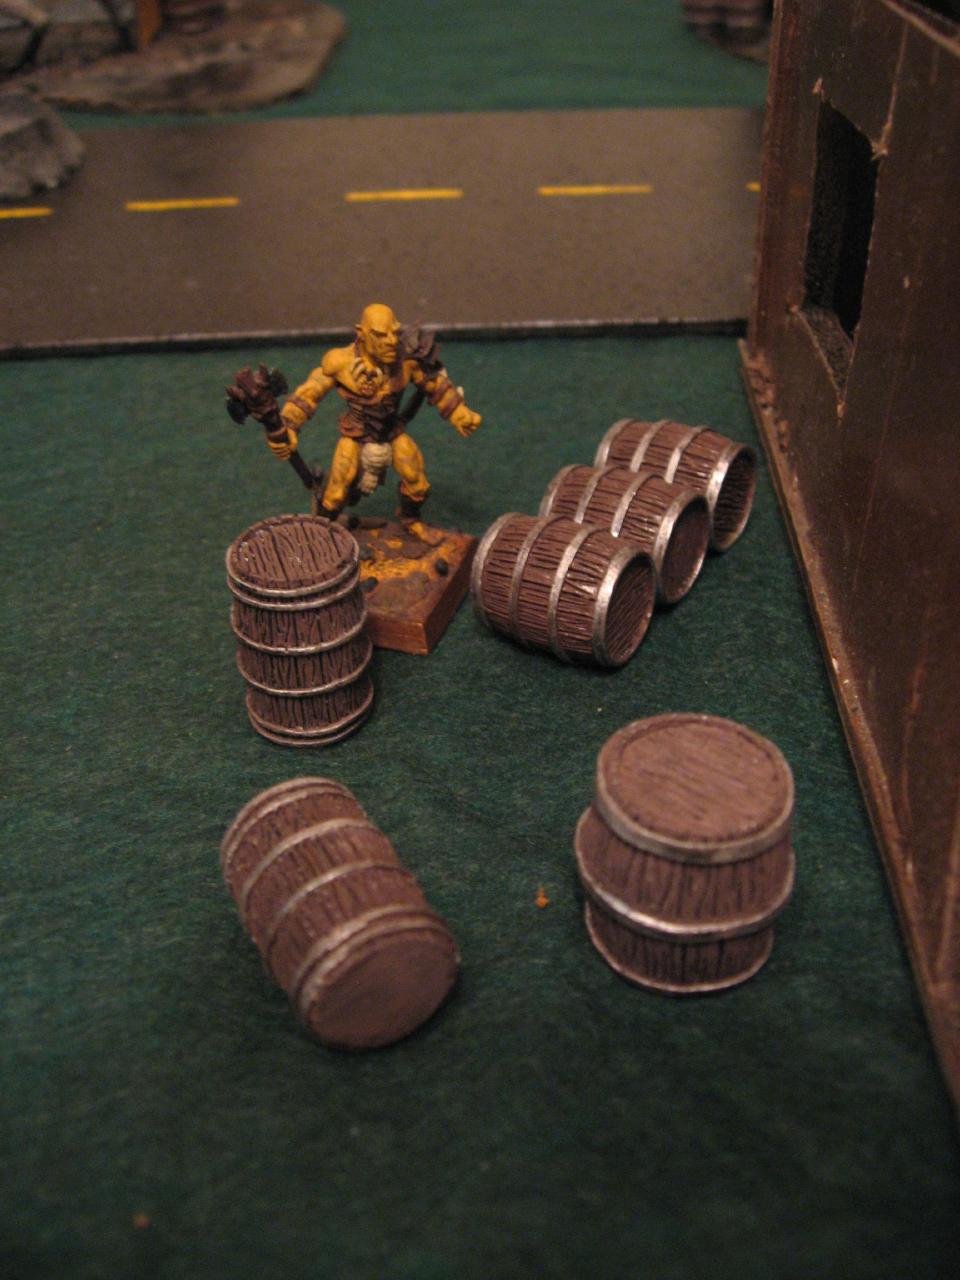
My newly painted safari figure that I used for Gordon

Gordon Glenbrook
DEF 1, RTN 6, CTN 8, BTN 7, SPD 4, HP 13

Cecilia Glenbrook
DEF 1, RTN 7, CTN 7, BTN 8, SPD 5, HP 12

windy-river-day2-3As you can see they don’t carry any weapons. The reason for this is, in true Victoria era style, they have hired porters from the local populace. The two porters follow:

Kwabena
DEF 0, RTN 10, CTN 10, BTN 9, SPD 4, HP 10
Bolt Action Rifle, Blunderbuss, Bola

Tendaji
DEF 0, RTN 10, CTN 10, BTN 9, SPD 4, HP 10
Double Barrel Shotgun, 100kW Six-Shooter, Riot Grenades

Original-Mauser-WaffenYou’ll notice throughout this report that I used a lot of off the cuff rules made up on the spot. Well, the porters were no exception. The both act under a single Activation, and cannot attack in any way. Their Action can be used to Reload weapons, or transfer equipment to or from an adjacent ally. The idea was Gordon or Cecilia would reach a porter and take the necessary rifles and other weapons from them, and hand them back when they needed to be Reloaded. This ended up working really well in the game, and gave a great thematic feel.

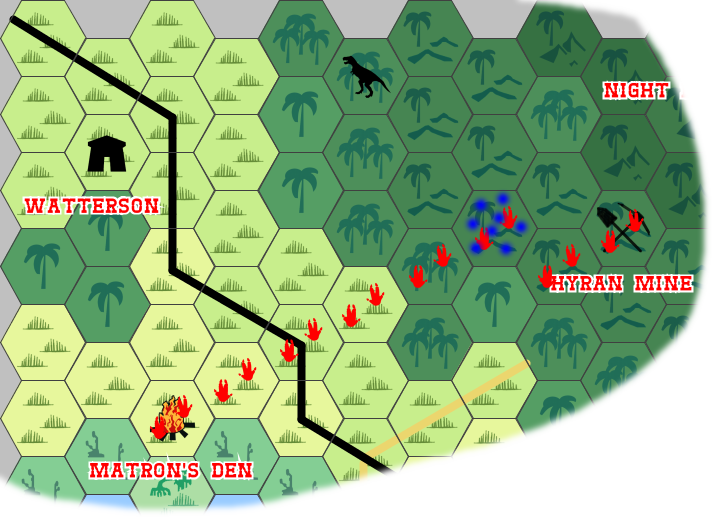
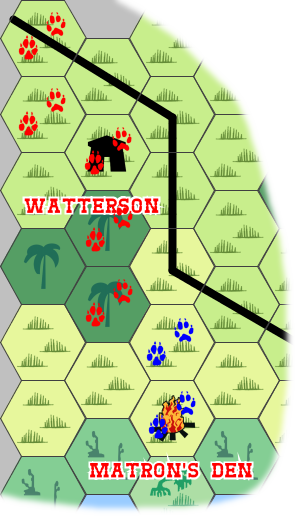
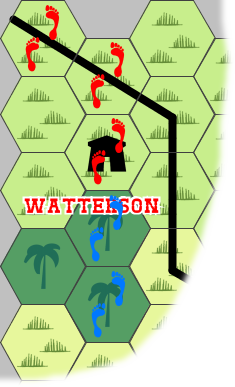
In terms of Overland Travel everyone headed south through the jungle. I missed my Light Jungle terrain roll so they could only go 2 hexes south from Watterson, as shown on the map. As they travelled riotous hooting and hollering were eventually heard to their eastern flank. Some kind of Savage bandits or raiders had found the caravan.

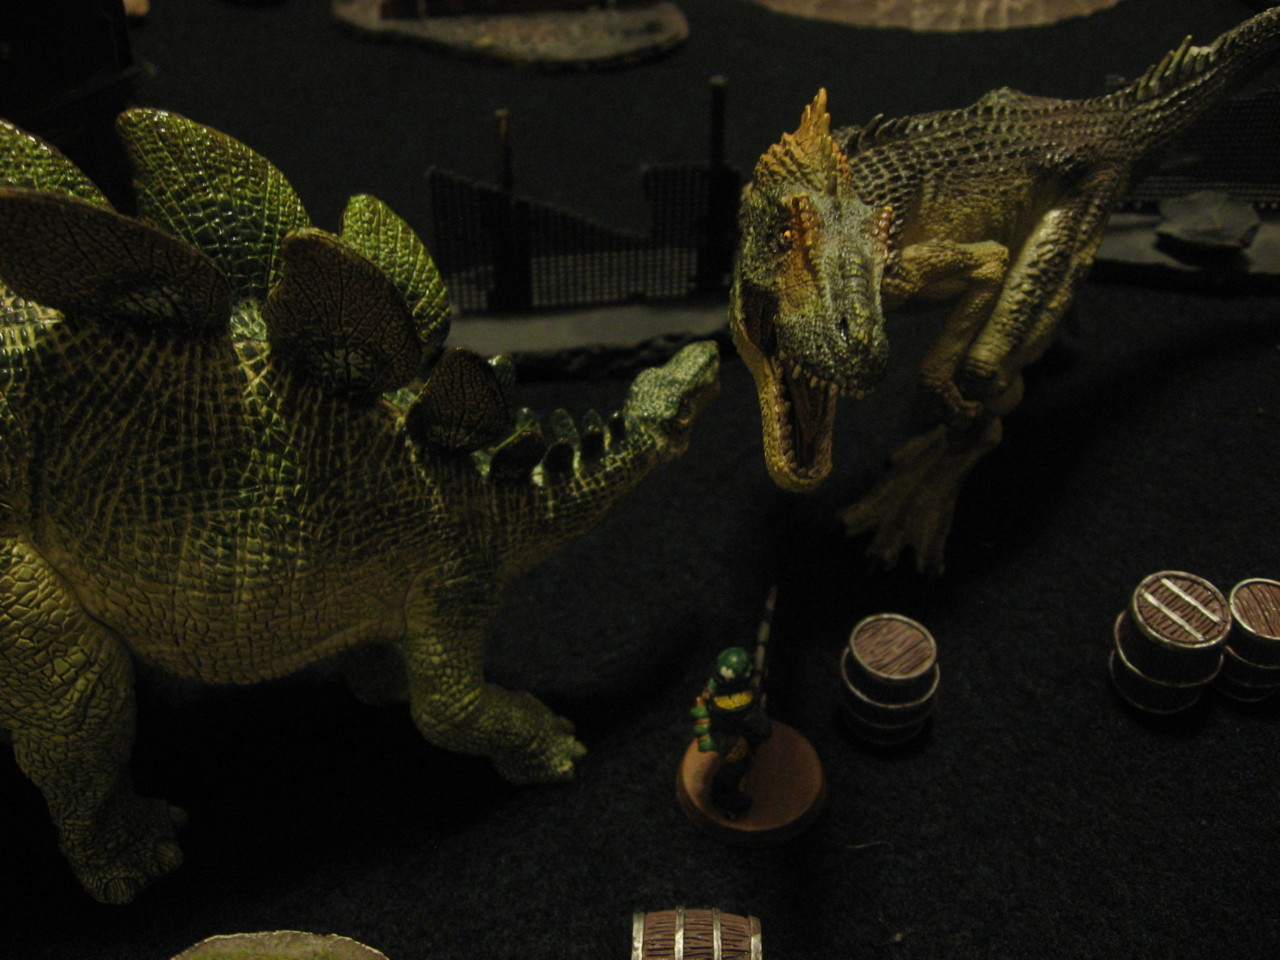
The Target Dinosaurs
Now for more seat-of-my-pants rules. I decided to use the Line Deployment to represent the safari being spread out in typical caravan style. I also randomly placed two dinosaurs (Horned and Terror), both weakened versions of their archetype to represent younger, less experienced beasts. Their stats are:

Horned Dinosaur (Young)
DEF 1, DIS 6, CTN 6, PANIC D4, SPD 4, HP 16, 4A-1D close

Terror Dinosaur (Young)
DEF 1, DIS 5, CTN 5, PANIC D6, SPD 5, HP 14, 1A-5D close

For the two “non-player” dinosaurs, I created a simple chart and set of rules to randomize their behaviour:

Passive Dinosaur Behaviour Table (D6, add +2 to the roll if the dinosaur was attacked in the last Turn)
1: Add 1 Panic Token
2: Do nothing (pass Activation)
3-4: Random Standard Move followed by random Hustle. If they come into contact with an enemy, attack.
5-6: Move to attack the nearest enemy.
- Passive Dinosaurs Activate at the end of the Turn, after everyone else
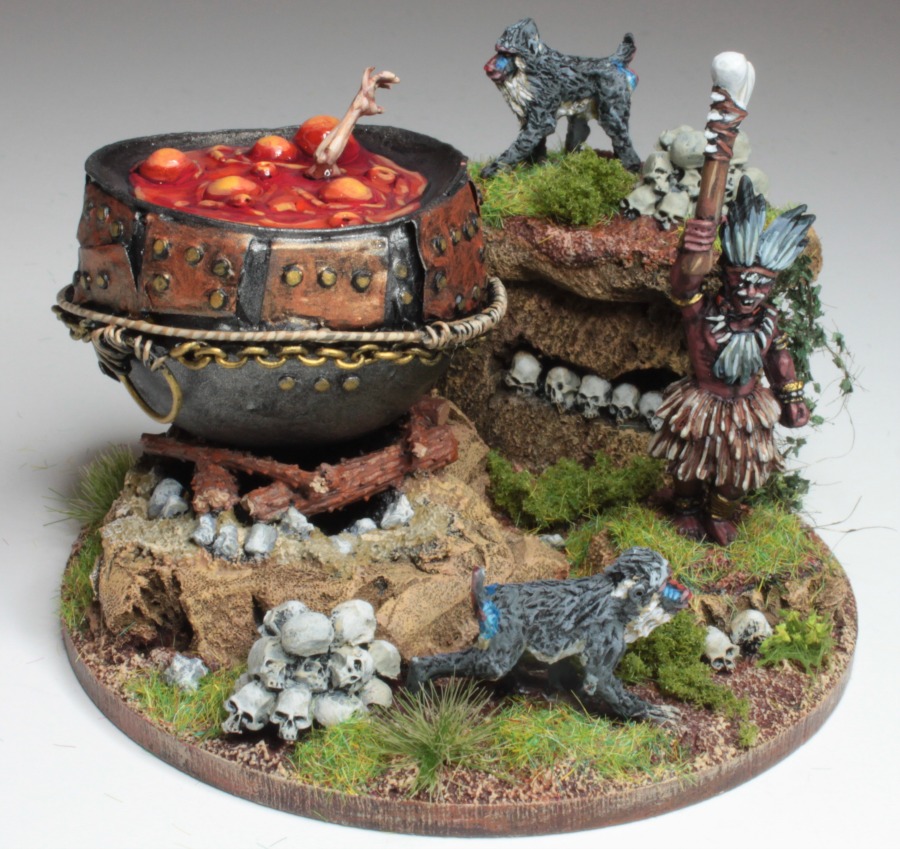
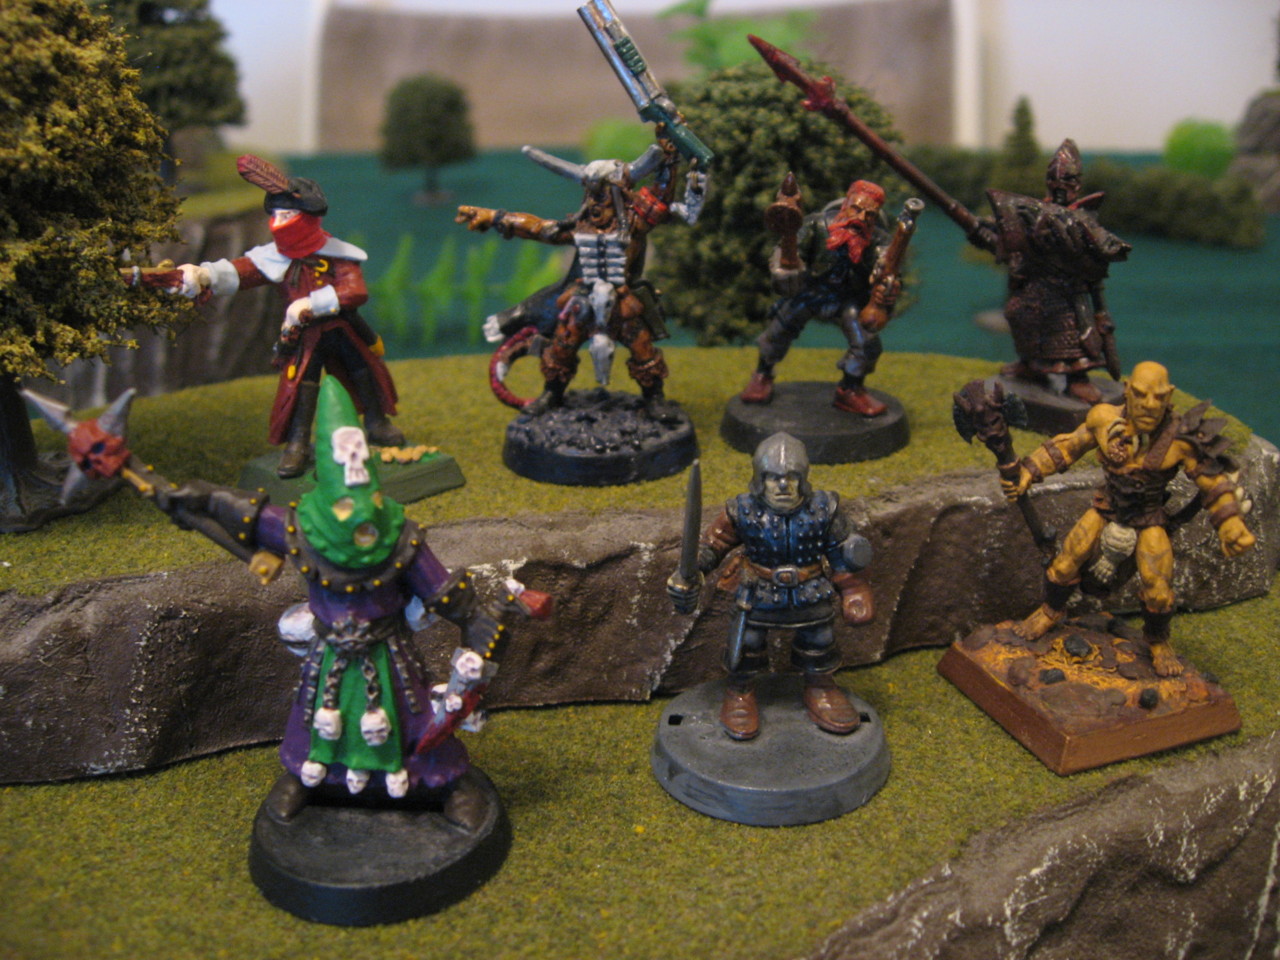
The Savage Horde
For the enemies I figured I’d use the lore of the Windy River area I created before, specifically the mystery surrounding the lone hut and brothel called Matron’s Den. I figured a Savage raiding party sent to capture female prisoners wasn’t outside the realm of possibilities. I wanted to follow in the Victorian theme I was going with so far, so I had a bunch of poorly armed, aggressive Savages attacking the caravan in waves. There were two types: Clubbers and Tomahawkers.

Clubber Savage
DEF 1, RTN 8, CTN 6, BTN 8, SPD 5, HP 8, Club (3A-3D close)

Tomahawker Savage
DEF 0, RTN 7, CTN 8, BTN 7, SPD 3, HP 8, Tomahawk (3A-2D, 1-6/7-10/11-13, 1x1R)

I went for a gentler implementation of the Tomahawk so the Savages didn’t have to Reload every throw. There would be 7 barbarians to start with (4 close, 3 ranged) and as they died there was a chance more Savages would enter the board.

At the start of each Turn, roll 1D12 for each dead Savage. If the result is 8+, redeploy the Savage (with full HP) in their original deployment zone

This would continue forever, so basically a massive wave of endless Savages.

wr-d23_0863Deployment, Objectives, Features
In terms of deployment the Savages ended up getting the left side of my kitchen table, which was from the East (which made even more sense in relation to Matron’s Den). I used a modified Objective that combined Defend and Escort. The Drylands posse had to keep Cecilia alive for 6 Turns, but they didn’t know that (as you’ll see when she aggressively engages the enemy), while the Savages either had to capture Cecilia or take her out of action. The reason for this goal will be evident later.

For the entire campaign I’ve been using two Variant Rules: Last Man Standing and Dual Wield.

For this specific battle I thought some bad weather was in order. There would be Gusting Winds (2″ Knockback from all ranged attacks) and a Light Fog (no Long Range attacks). So visualize a windswept jungle with fog blocking out the looming trees. The caravan quietly picks their way through the undergrowth while exotic birds chirp and squawk at their presence. The porters curse and mumble at their heavy loads, and Gordon often breaks the silence to talk to his wife or other members of the expedition. Then they hear drums, beating and pulsing in the mist. Just as Quidel is about to speak loud yelling echoes from the trees to the east, and a wave of rushing forms approach.

Some Initial Pictures
SO! After alllllll that I had an interesting and unique battle setup to play. This was also probably one of the larger and more complex matches of Dinosaur Cowboys I had played.

wr-d23_0859
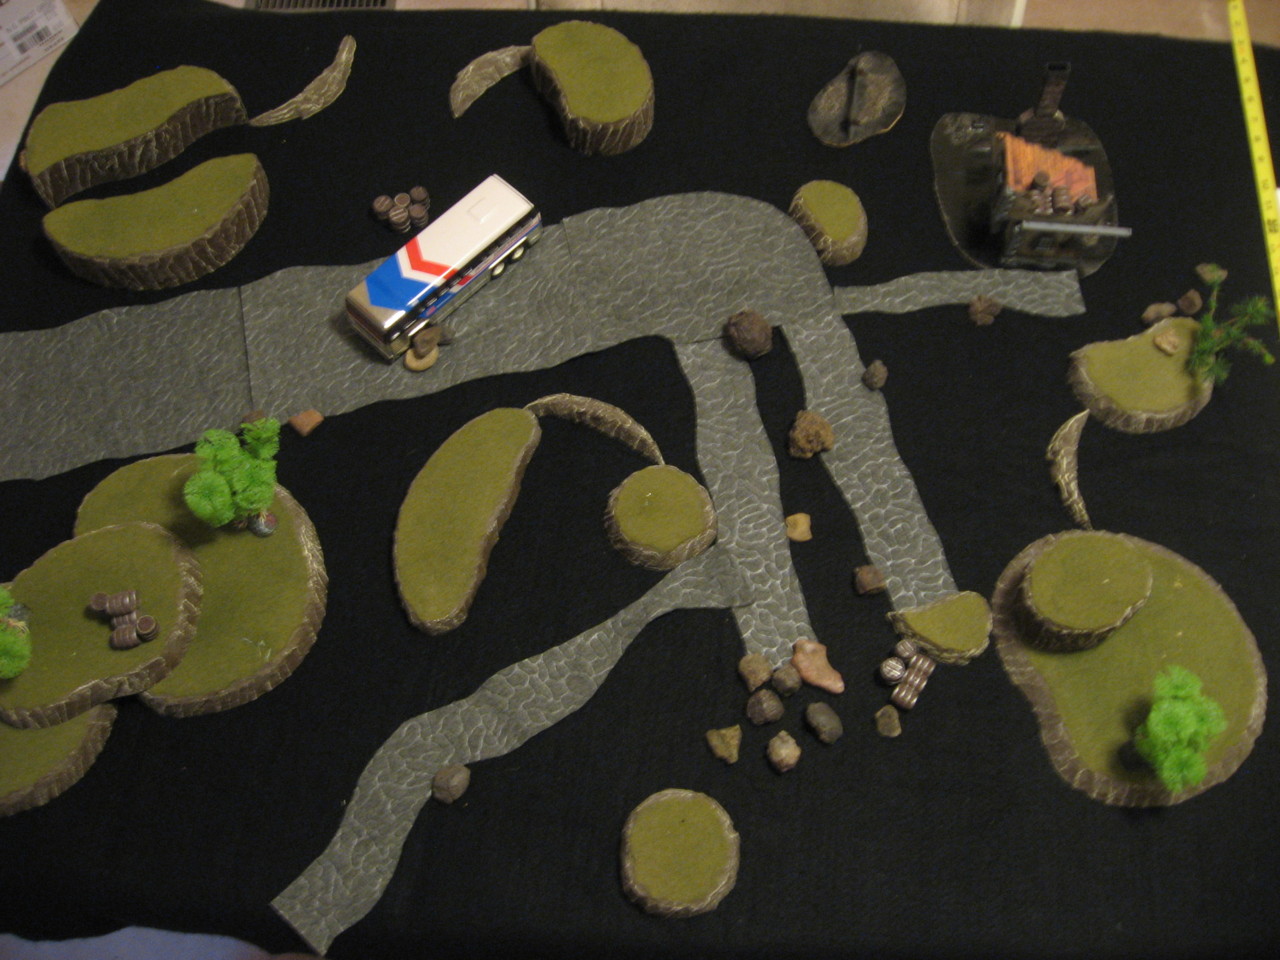
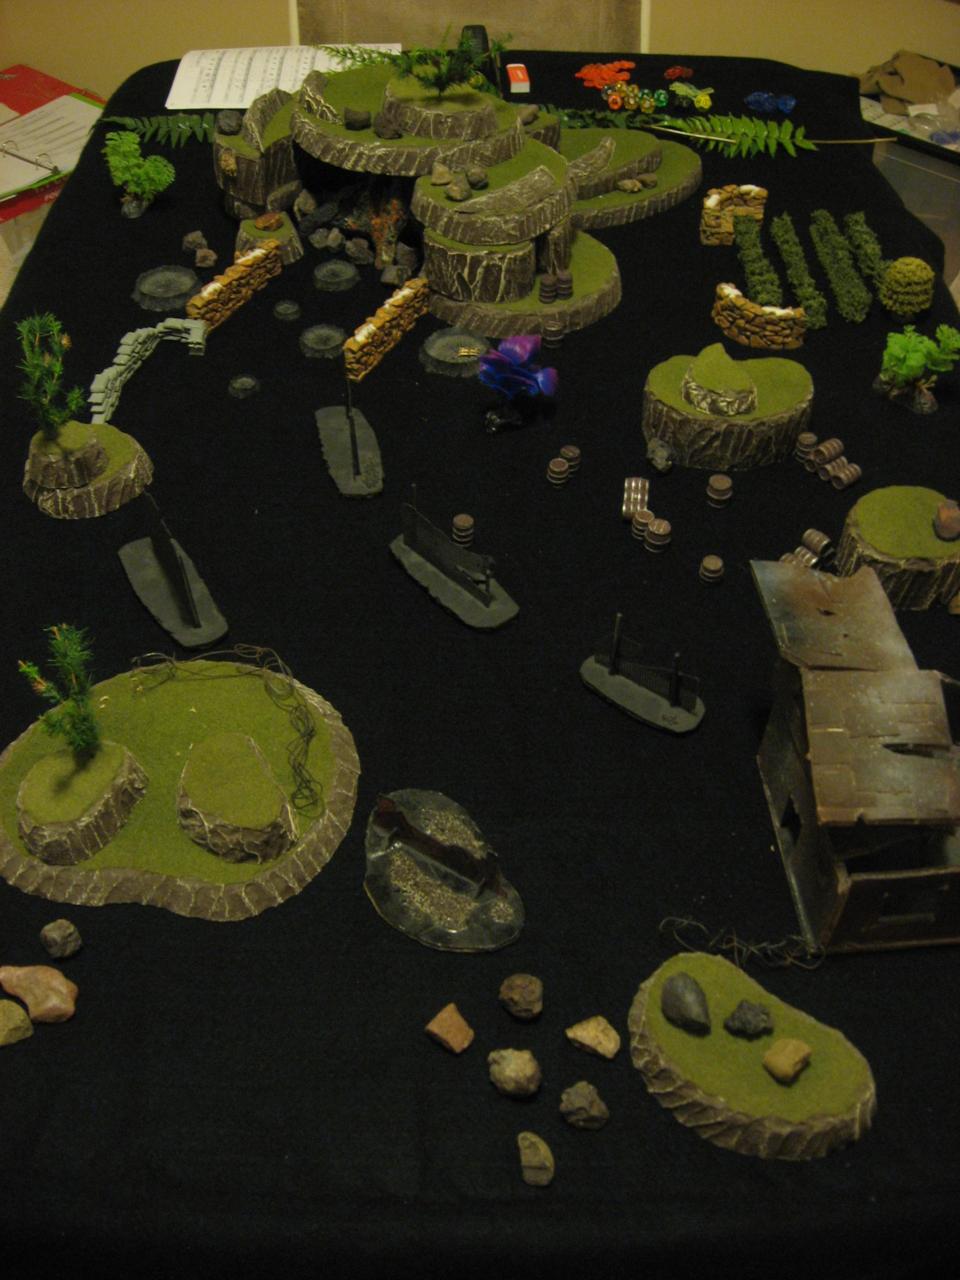
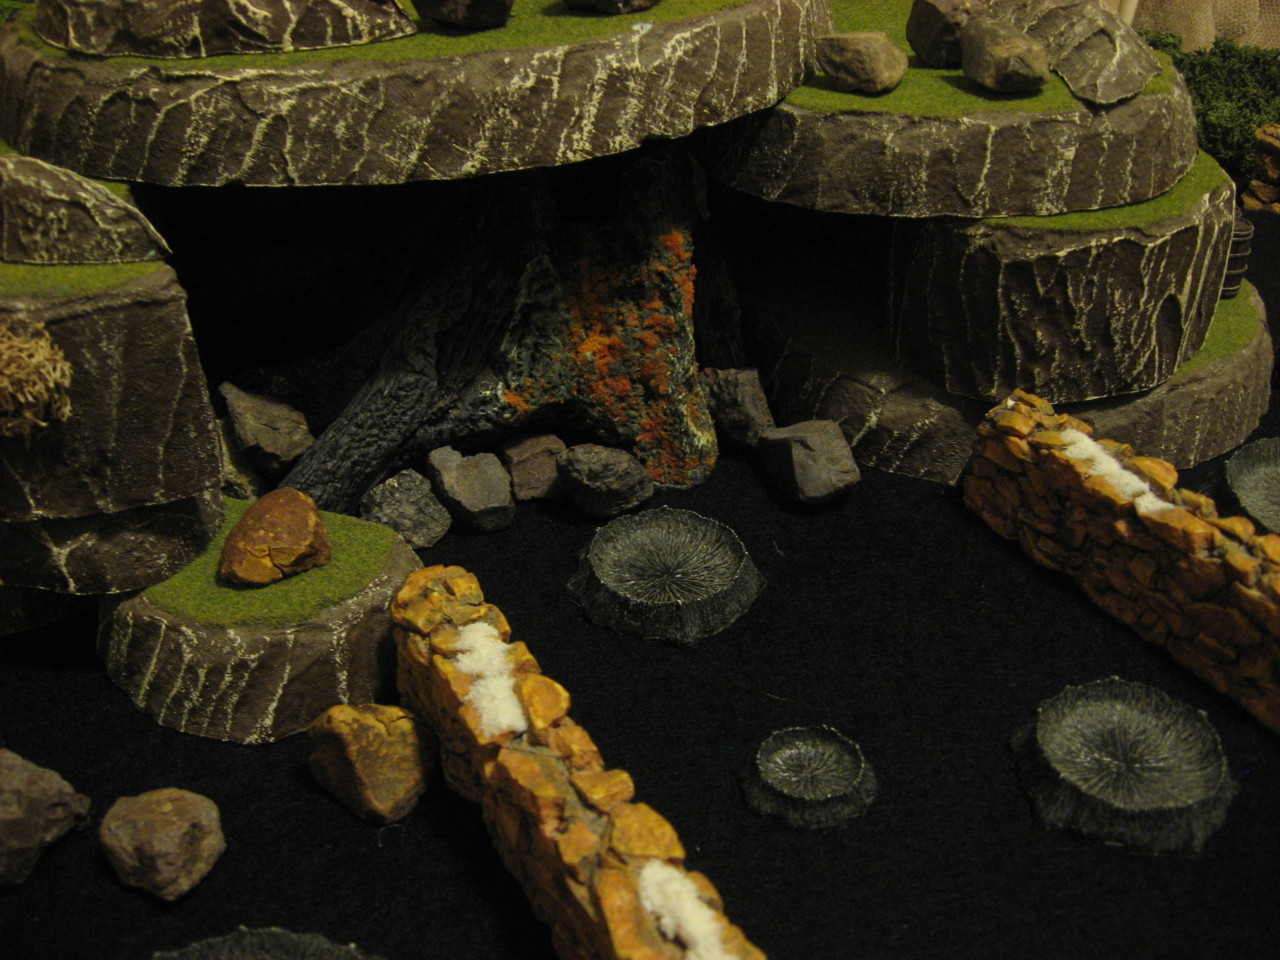
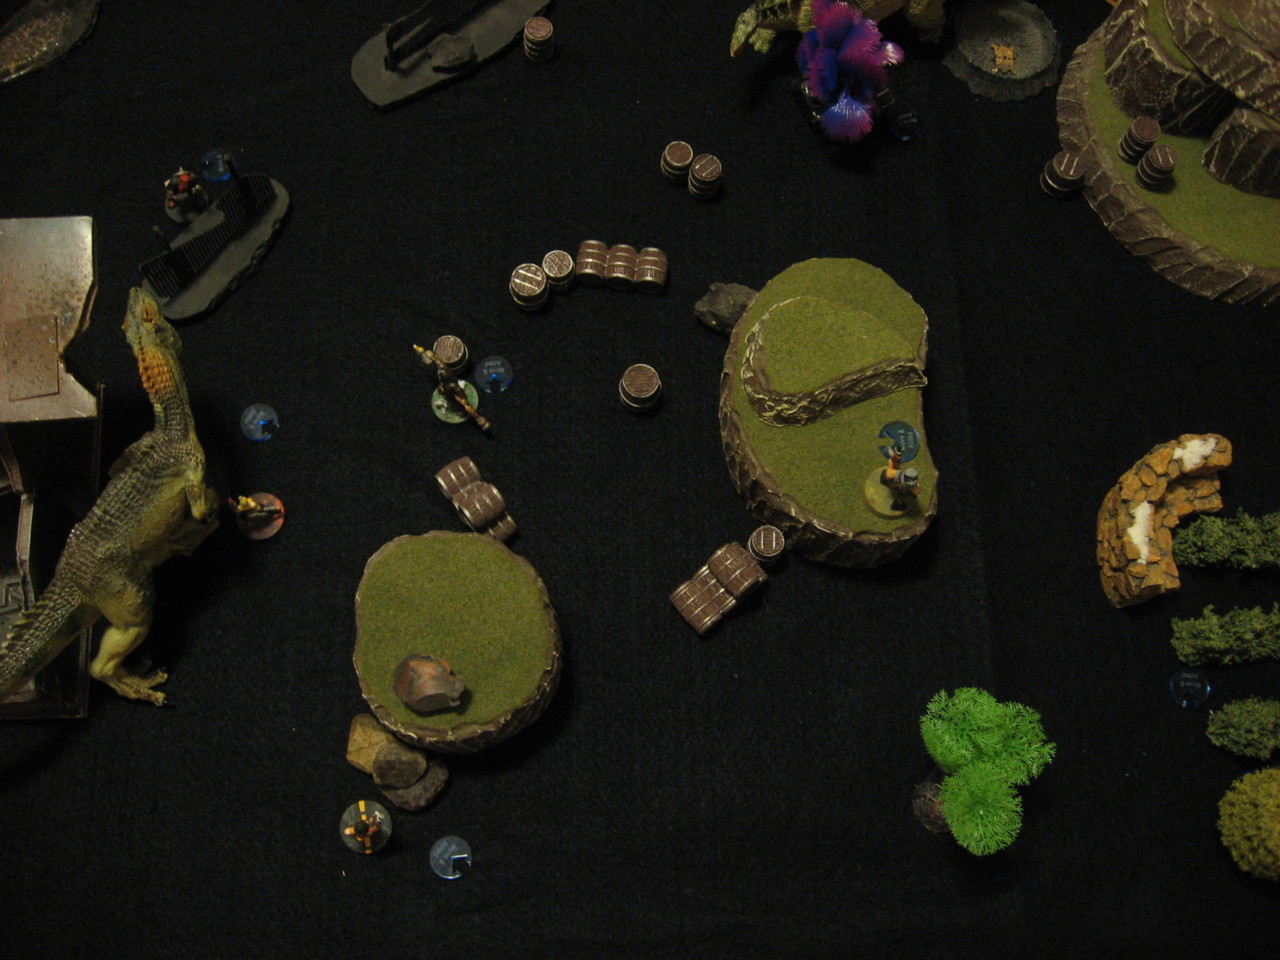
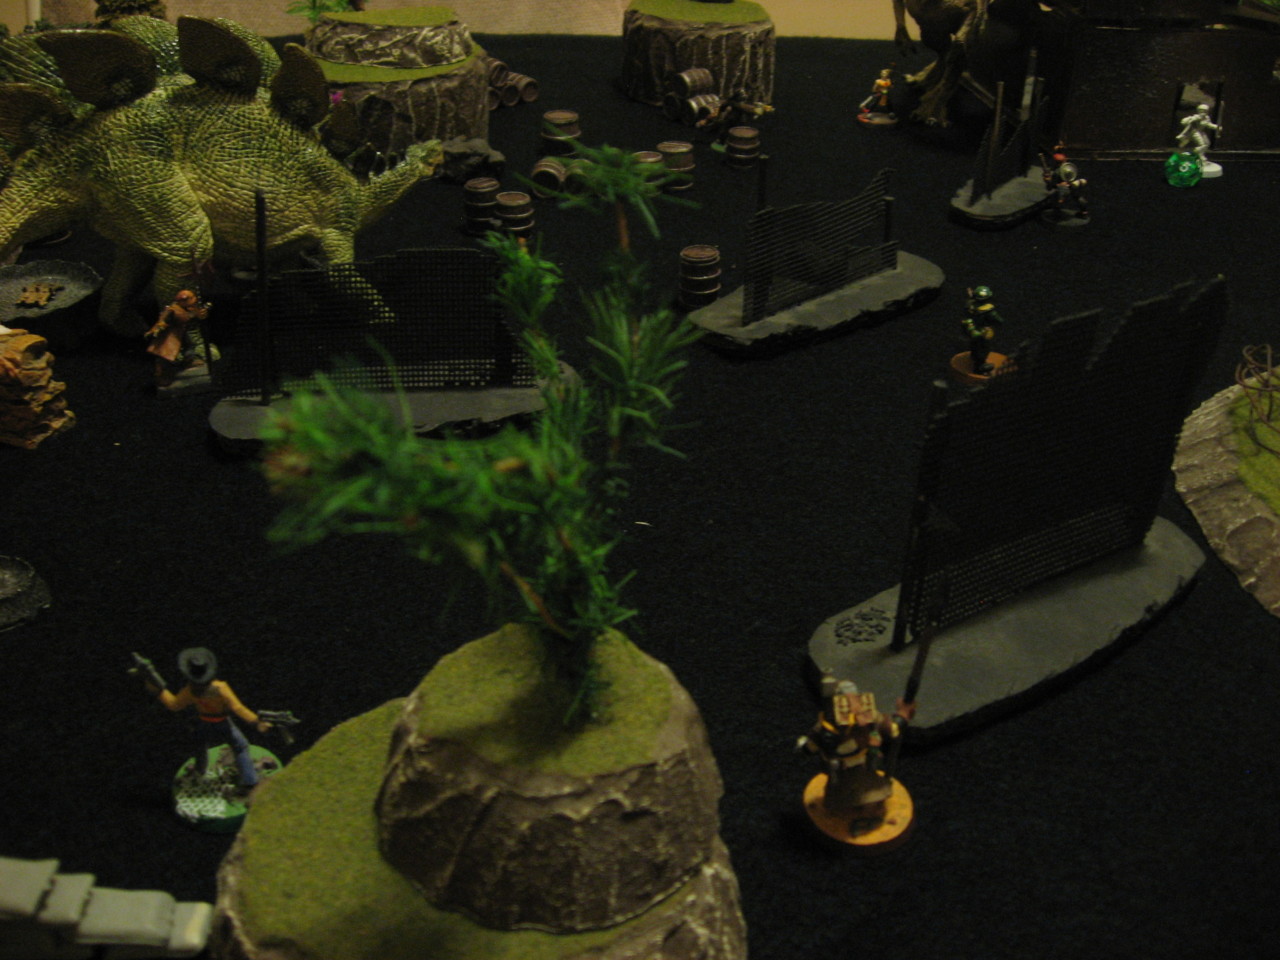
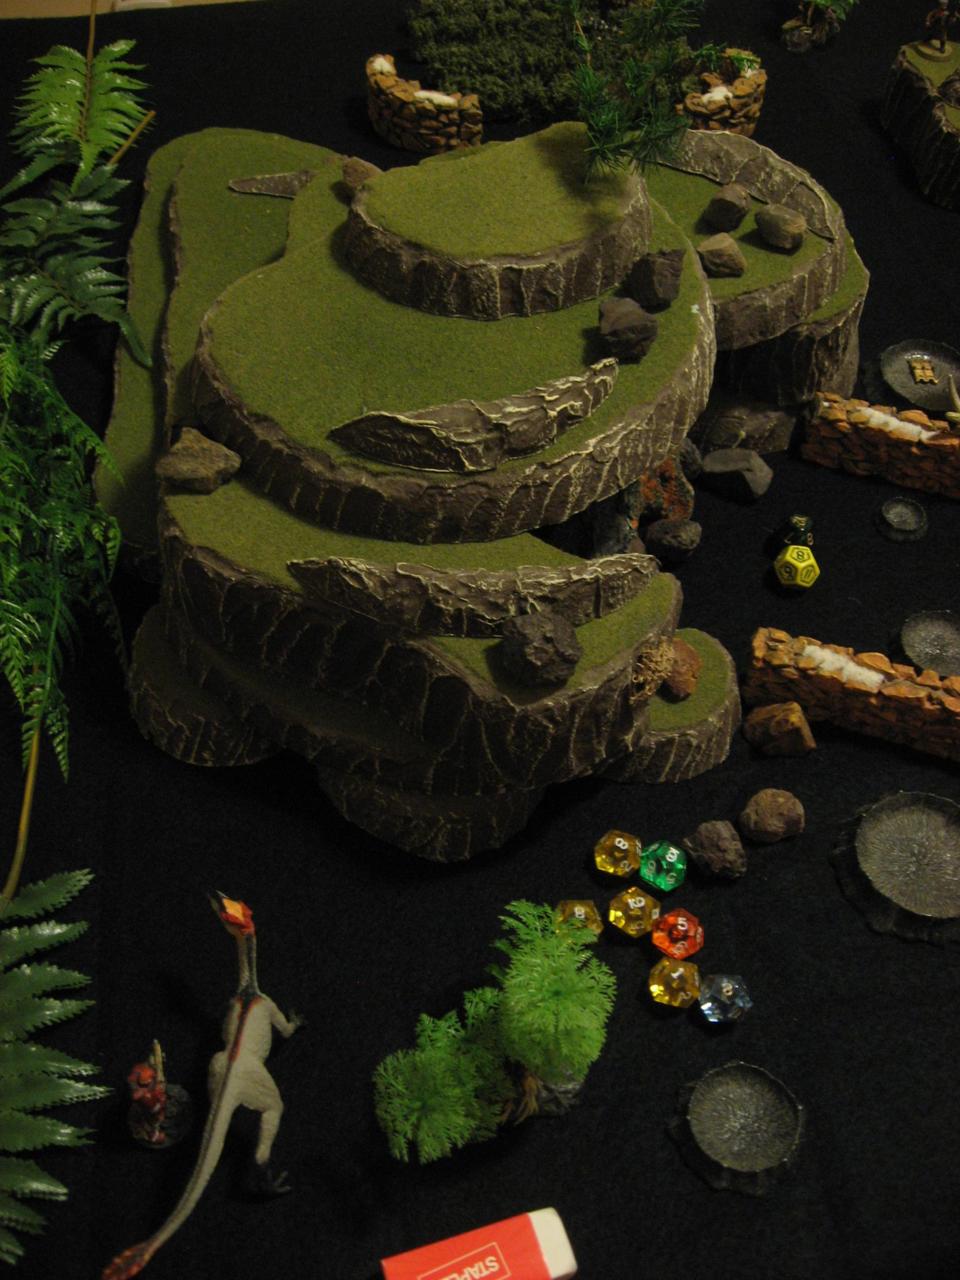
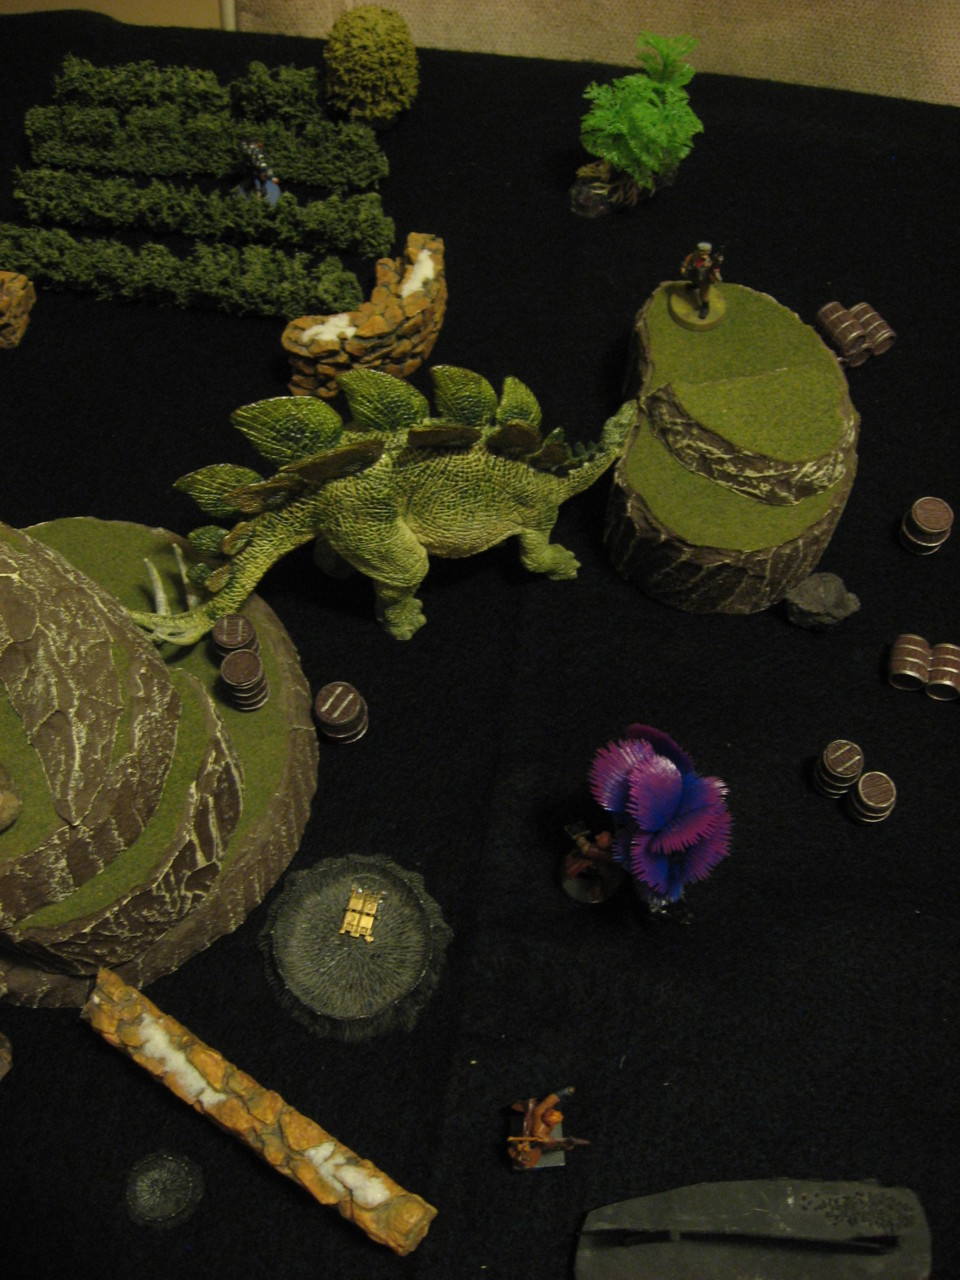
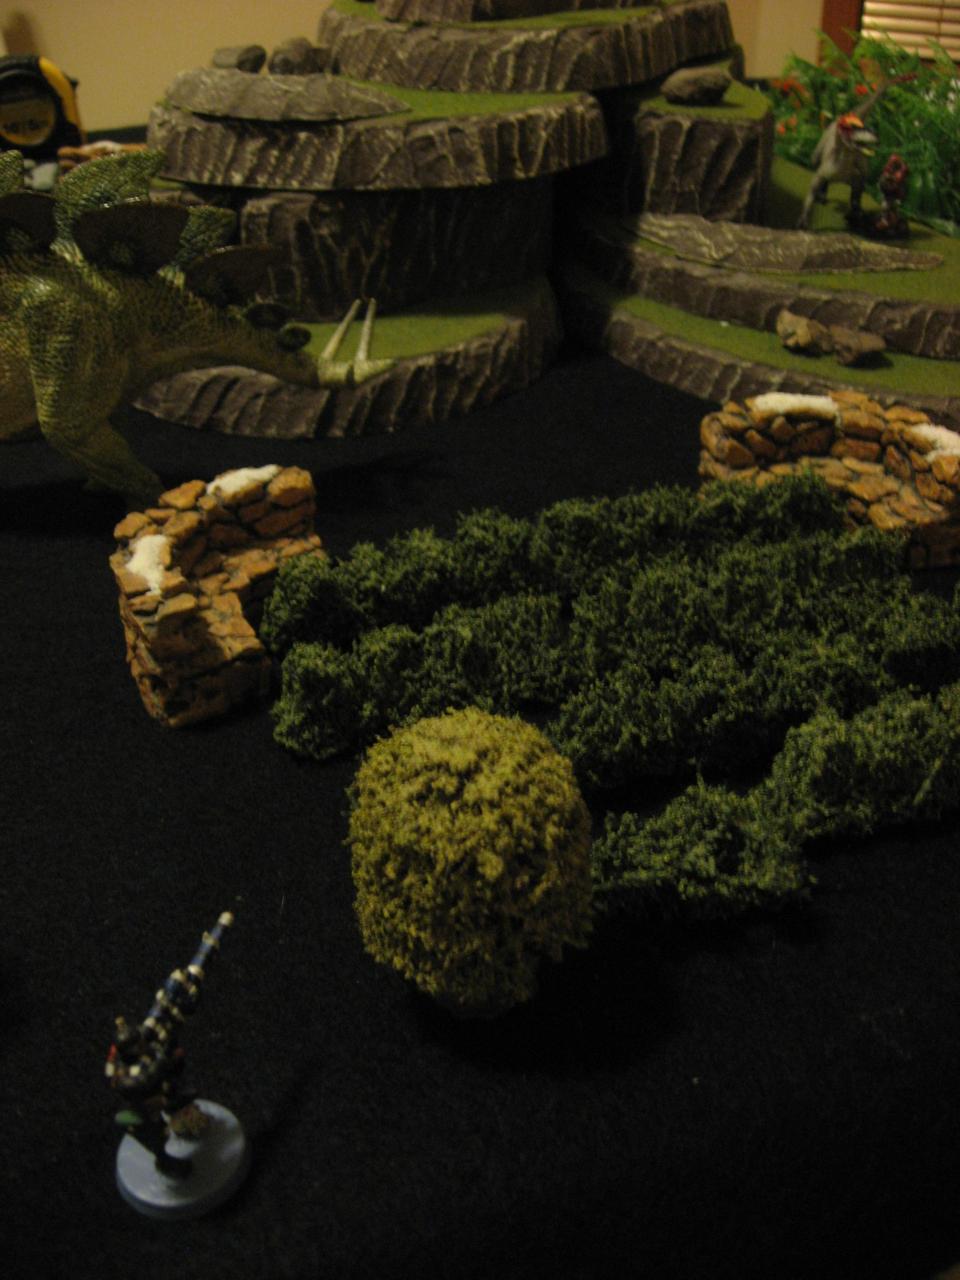
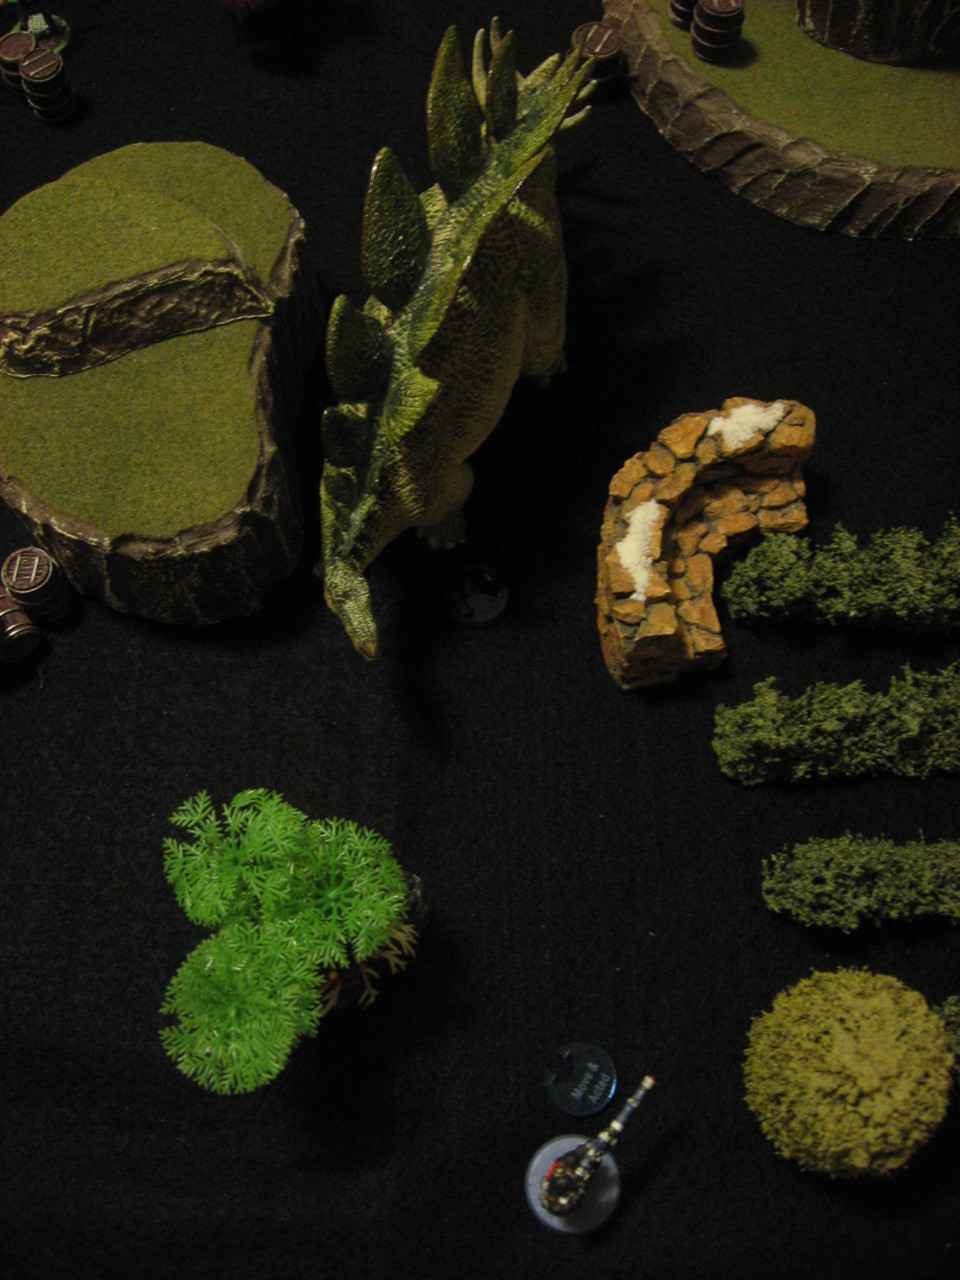
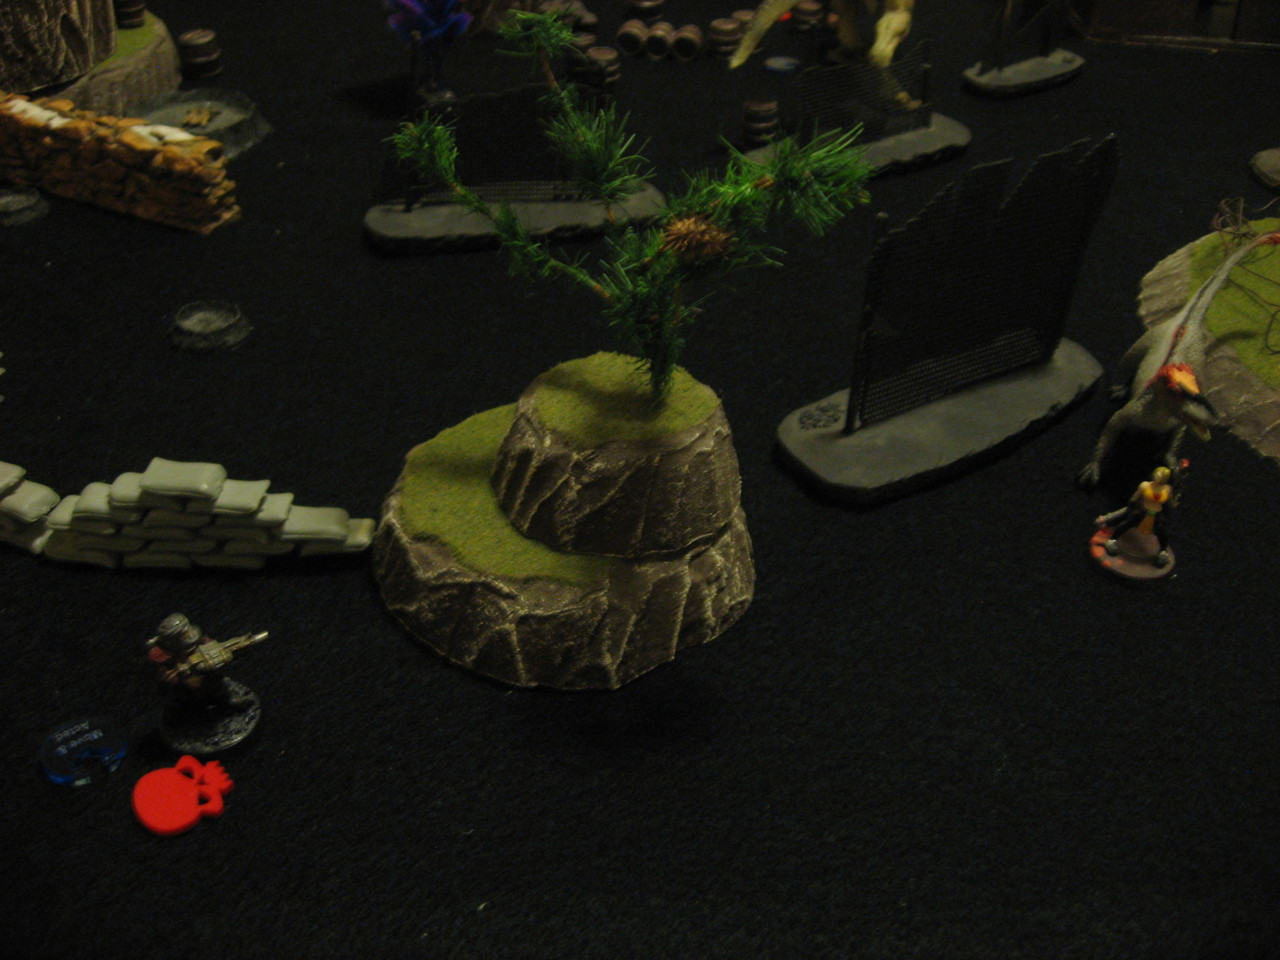
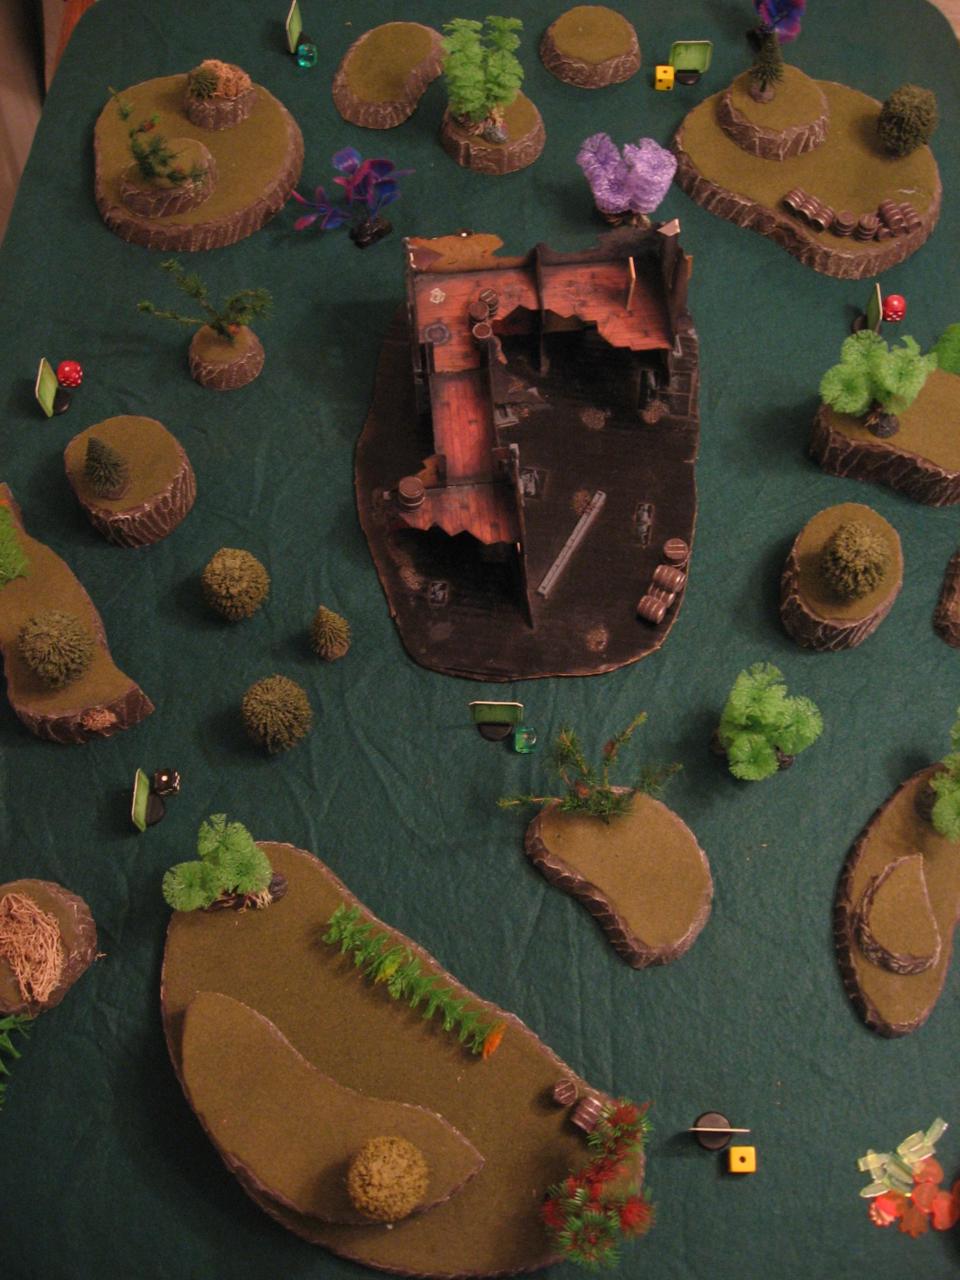
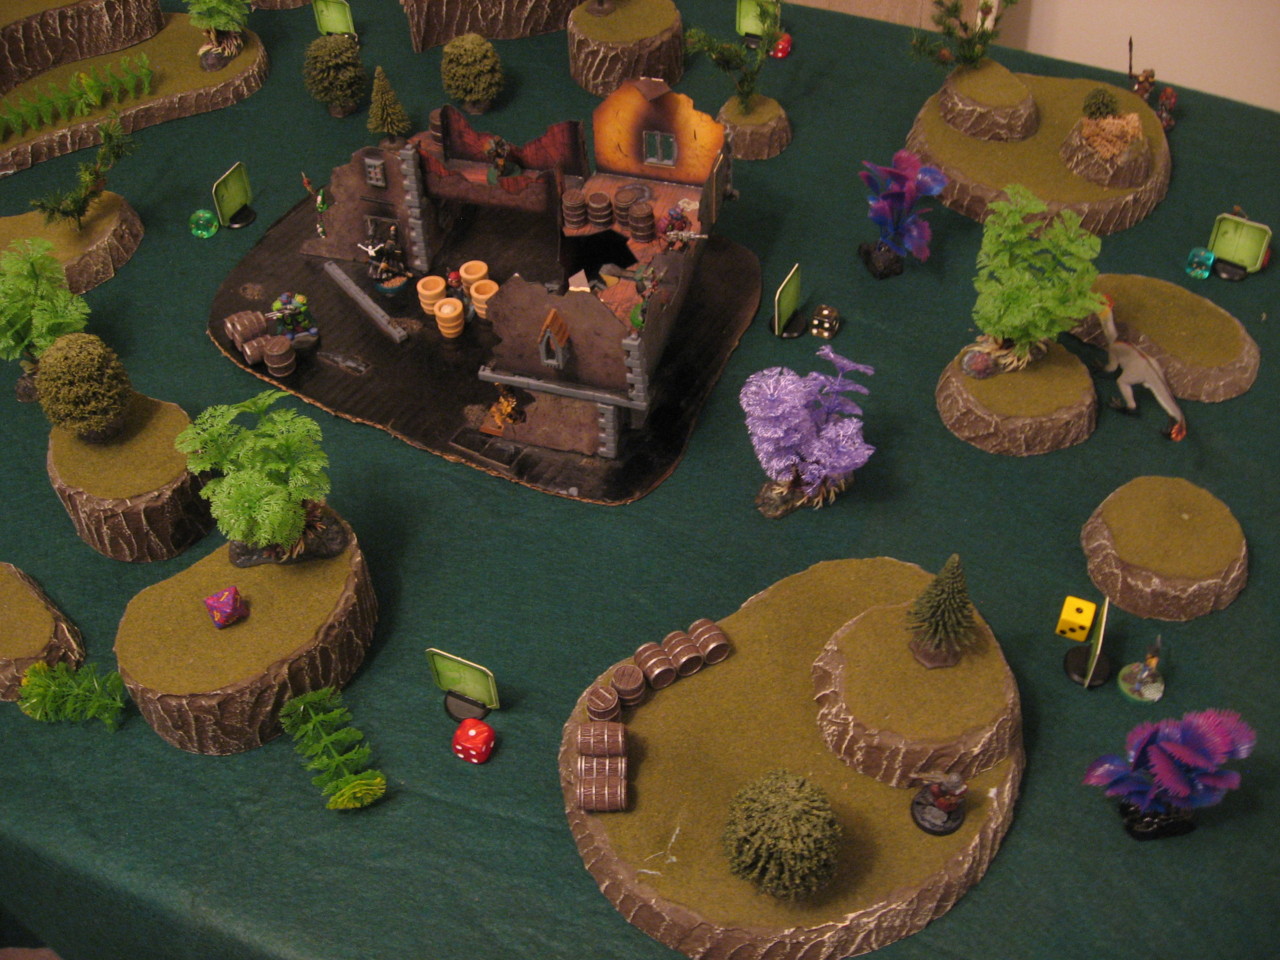
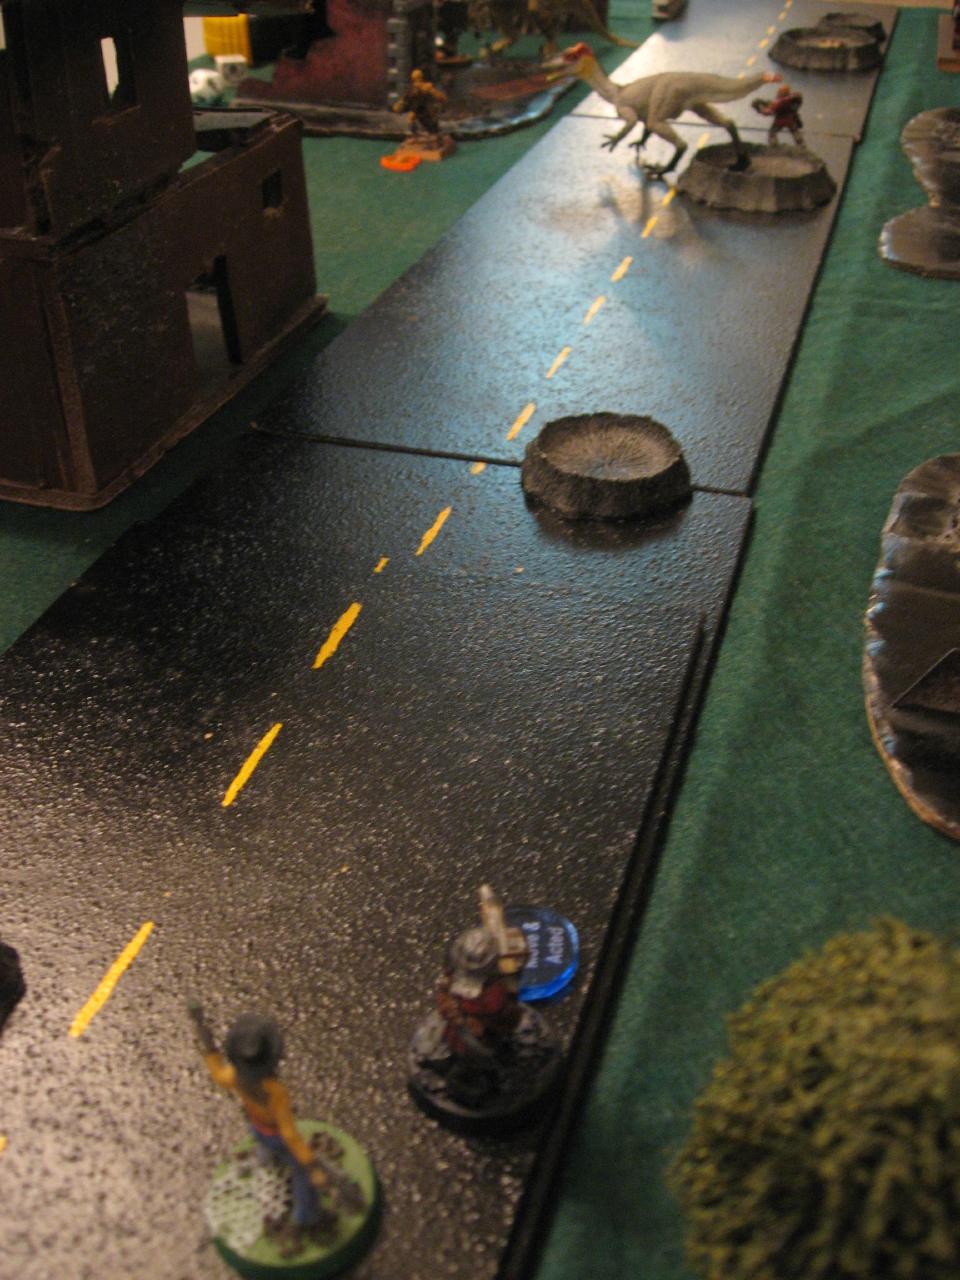
The initial table setup, with some older trees I chopped up to make more vegetation

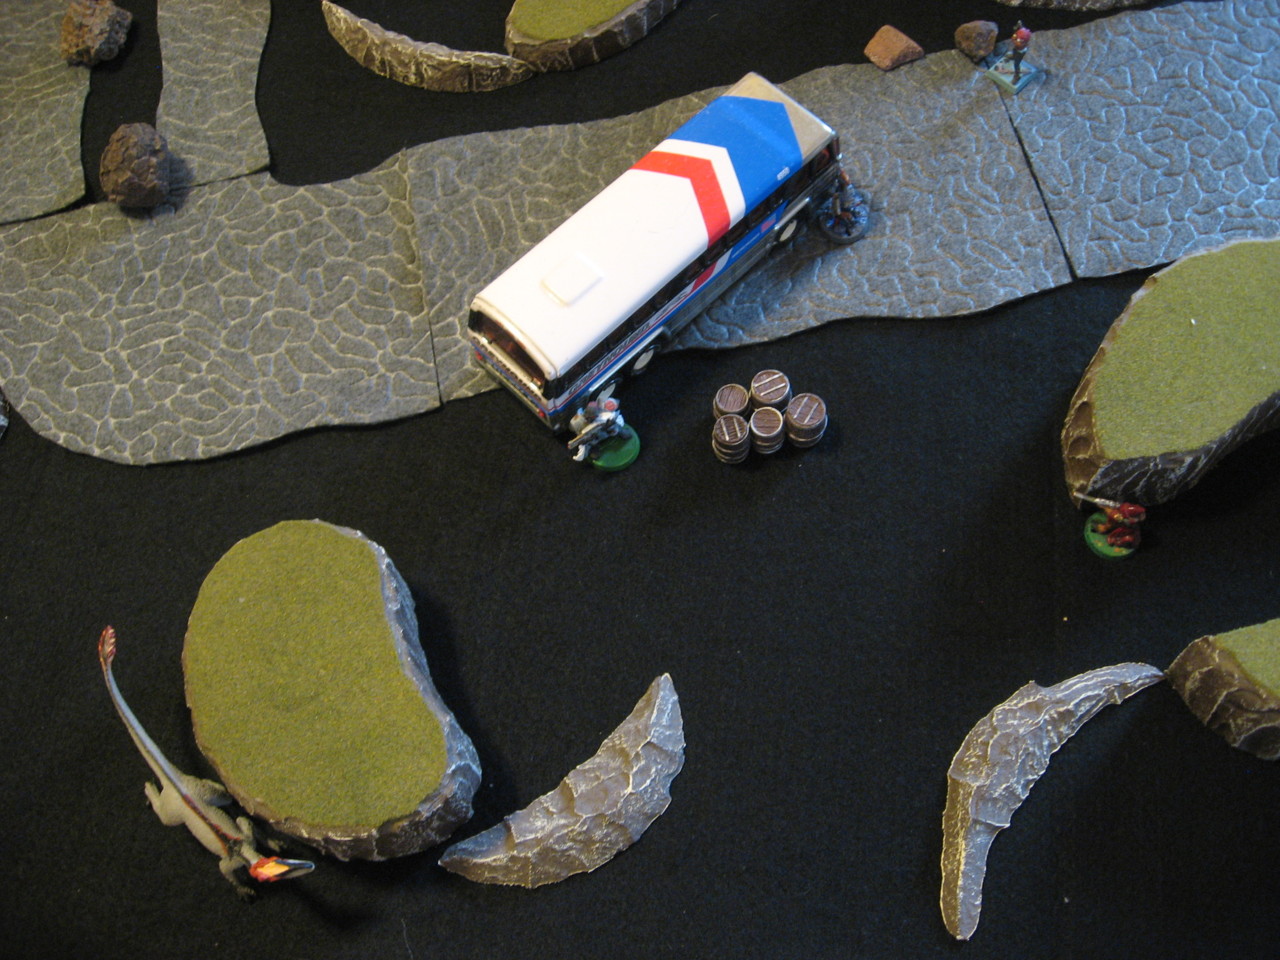
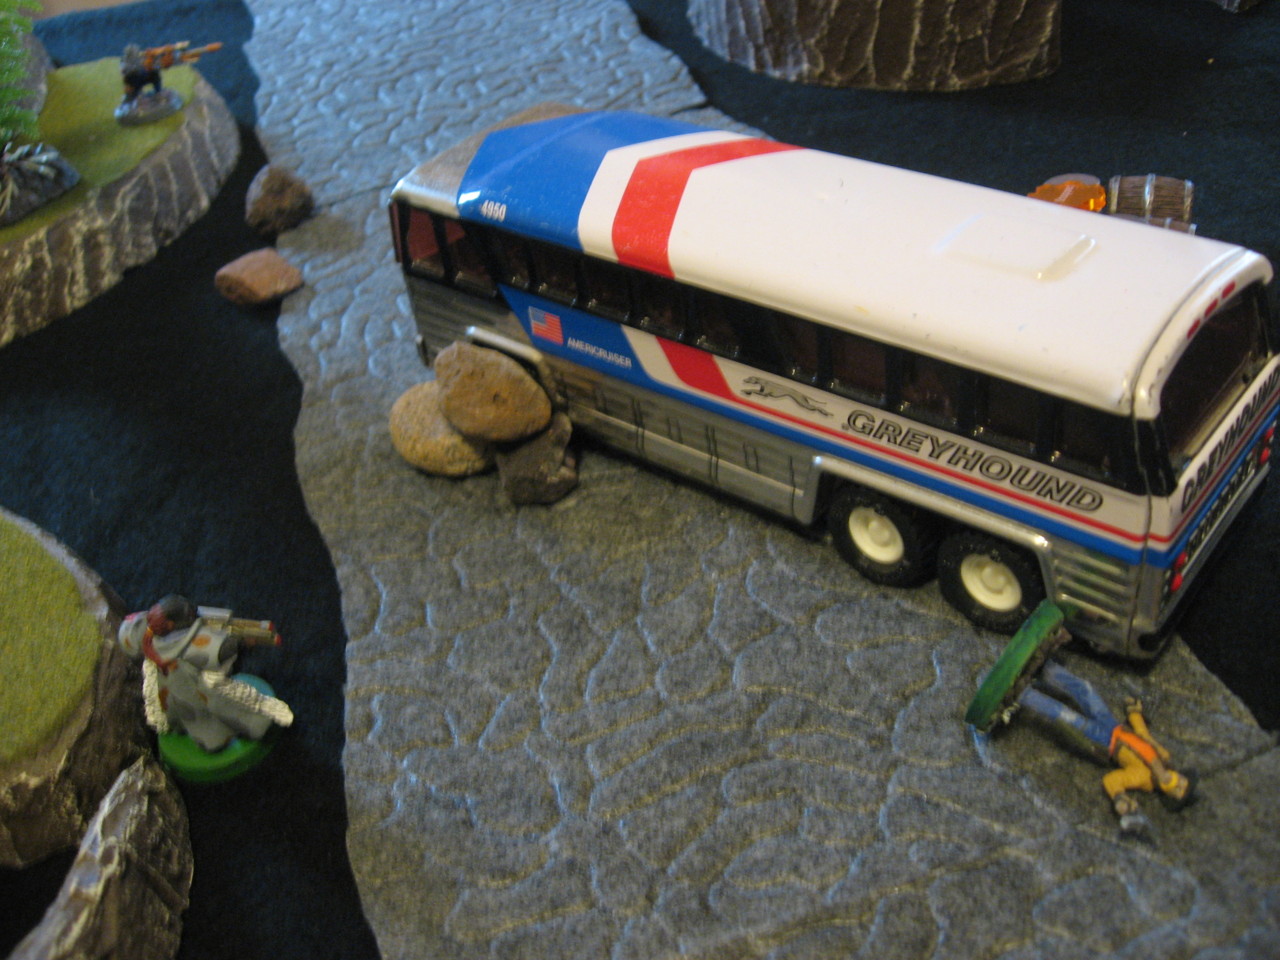
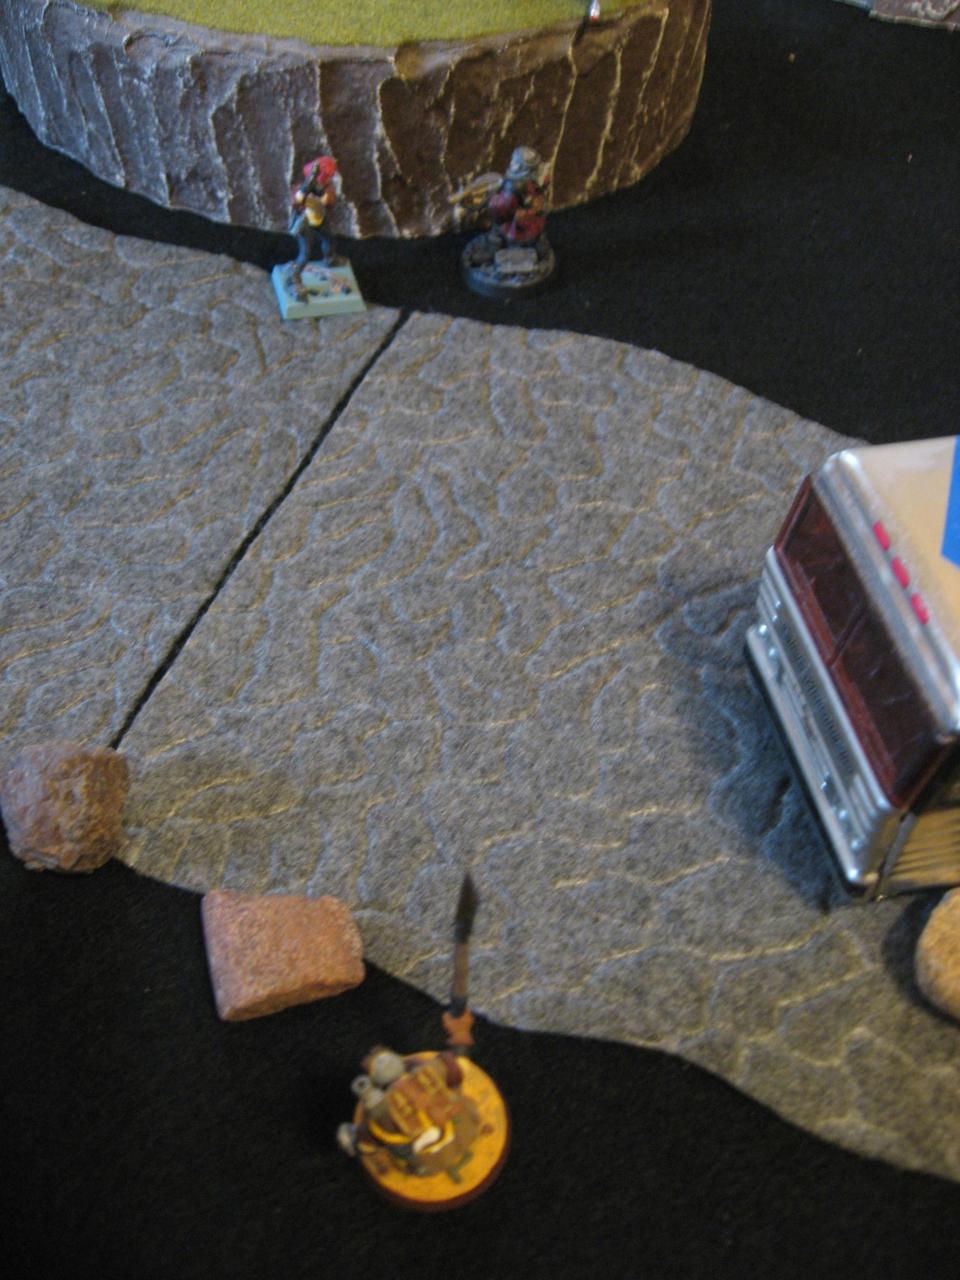
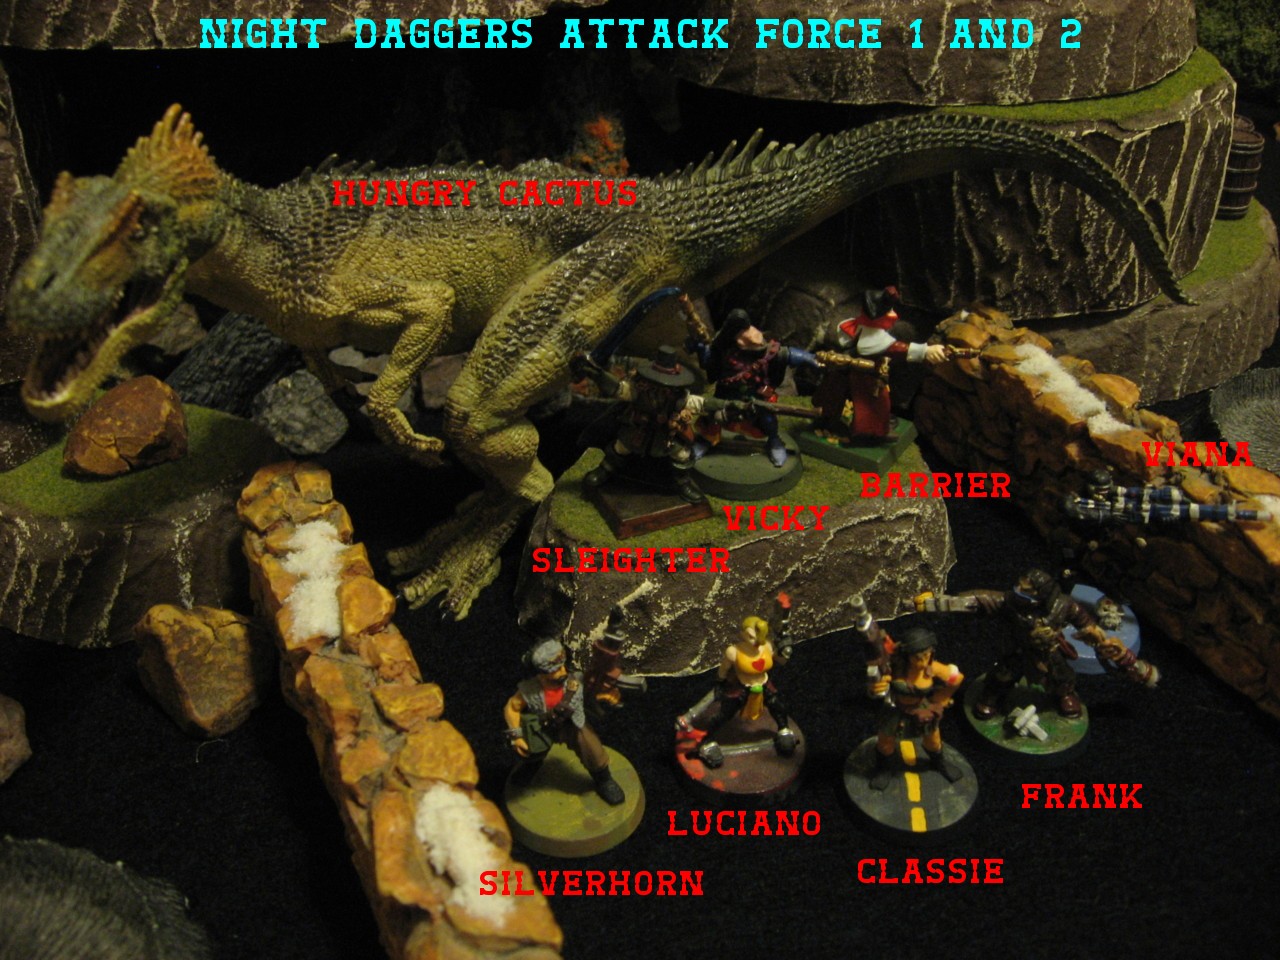
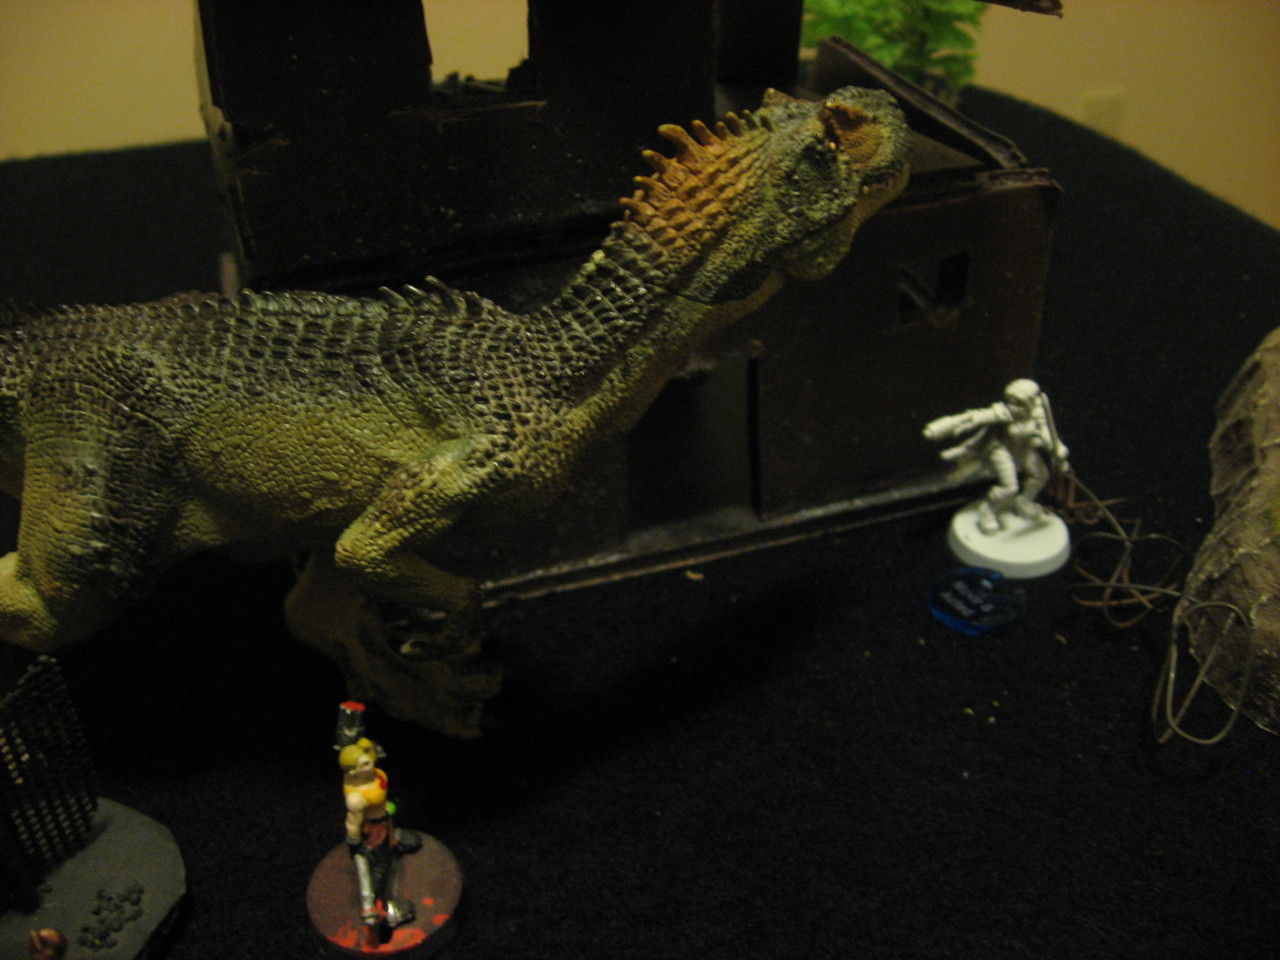
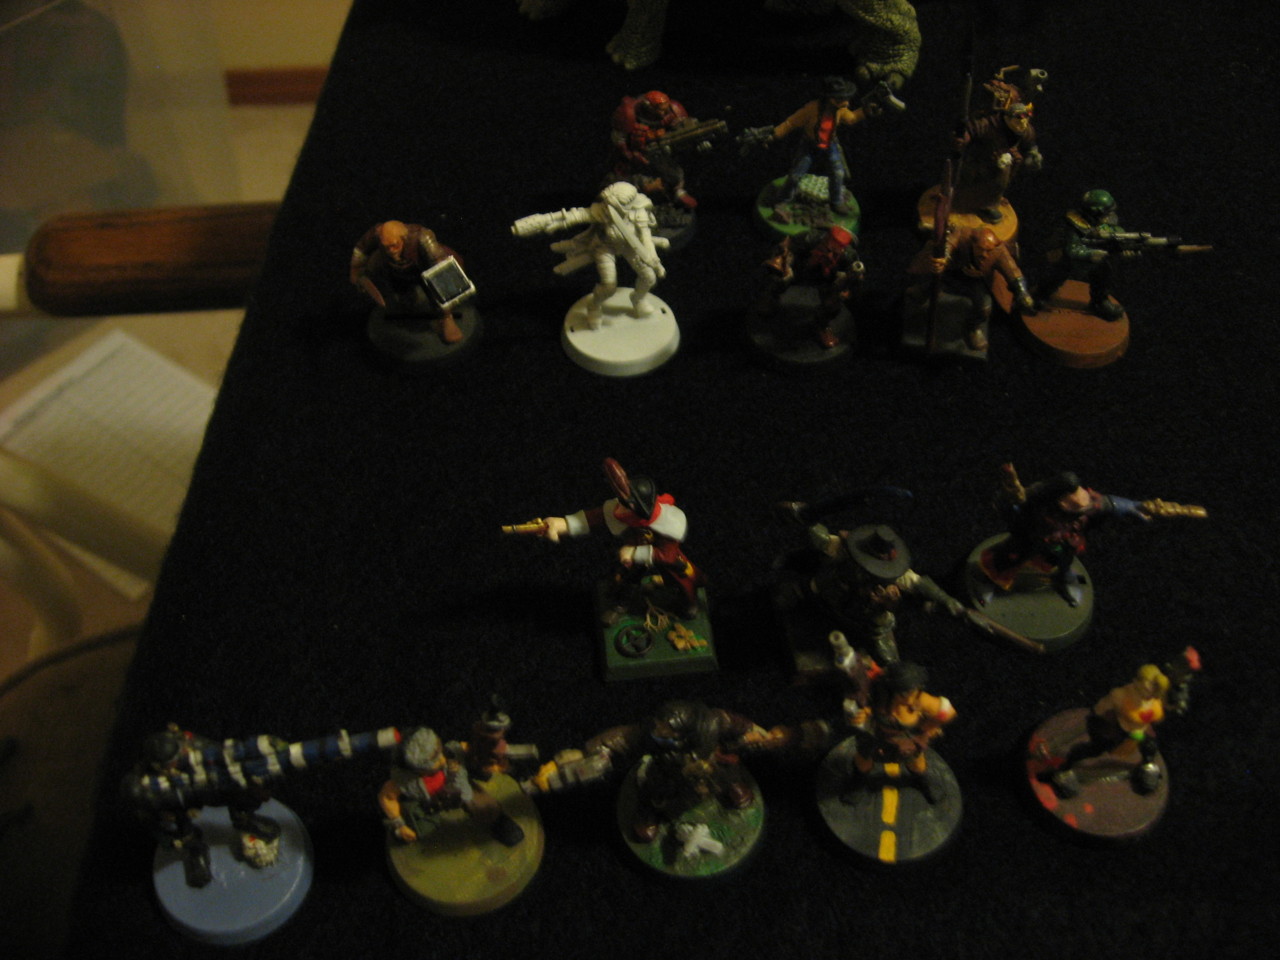
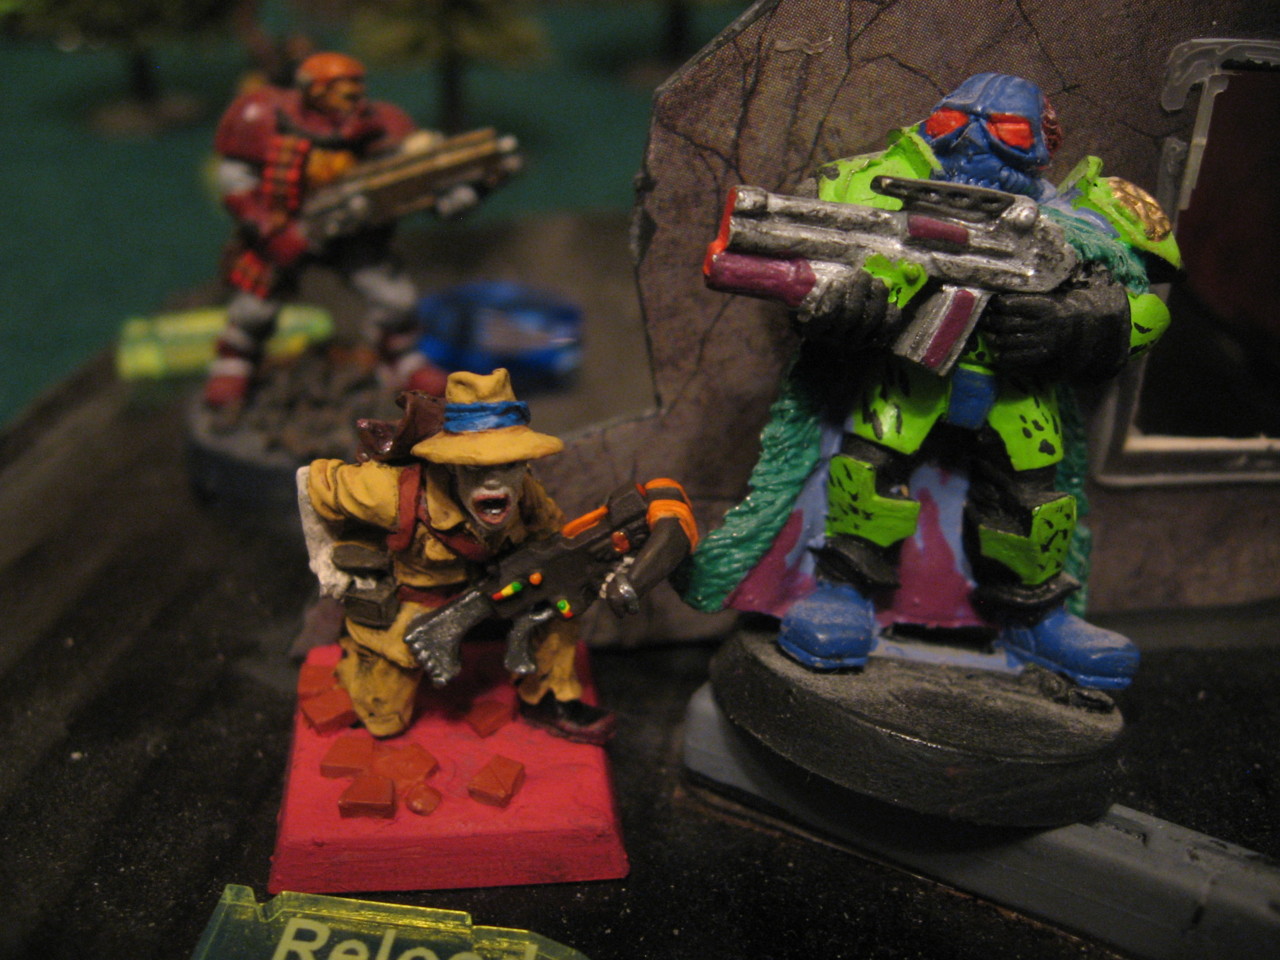
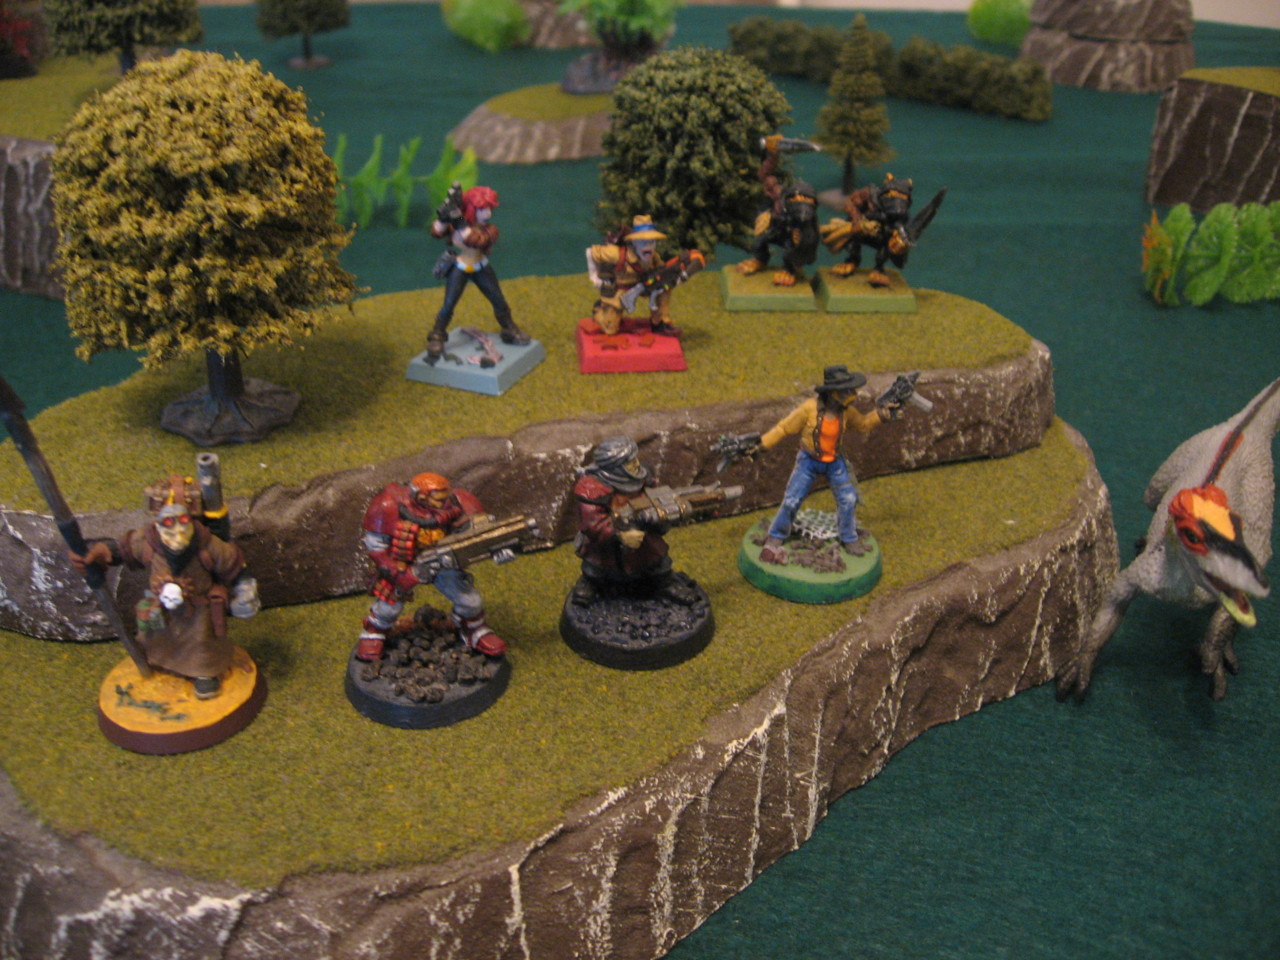
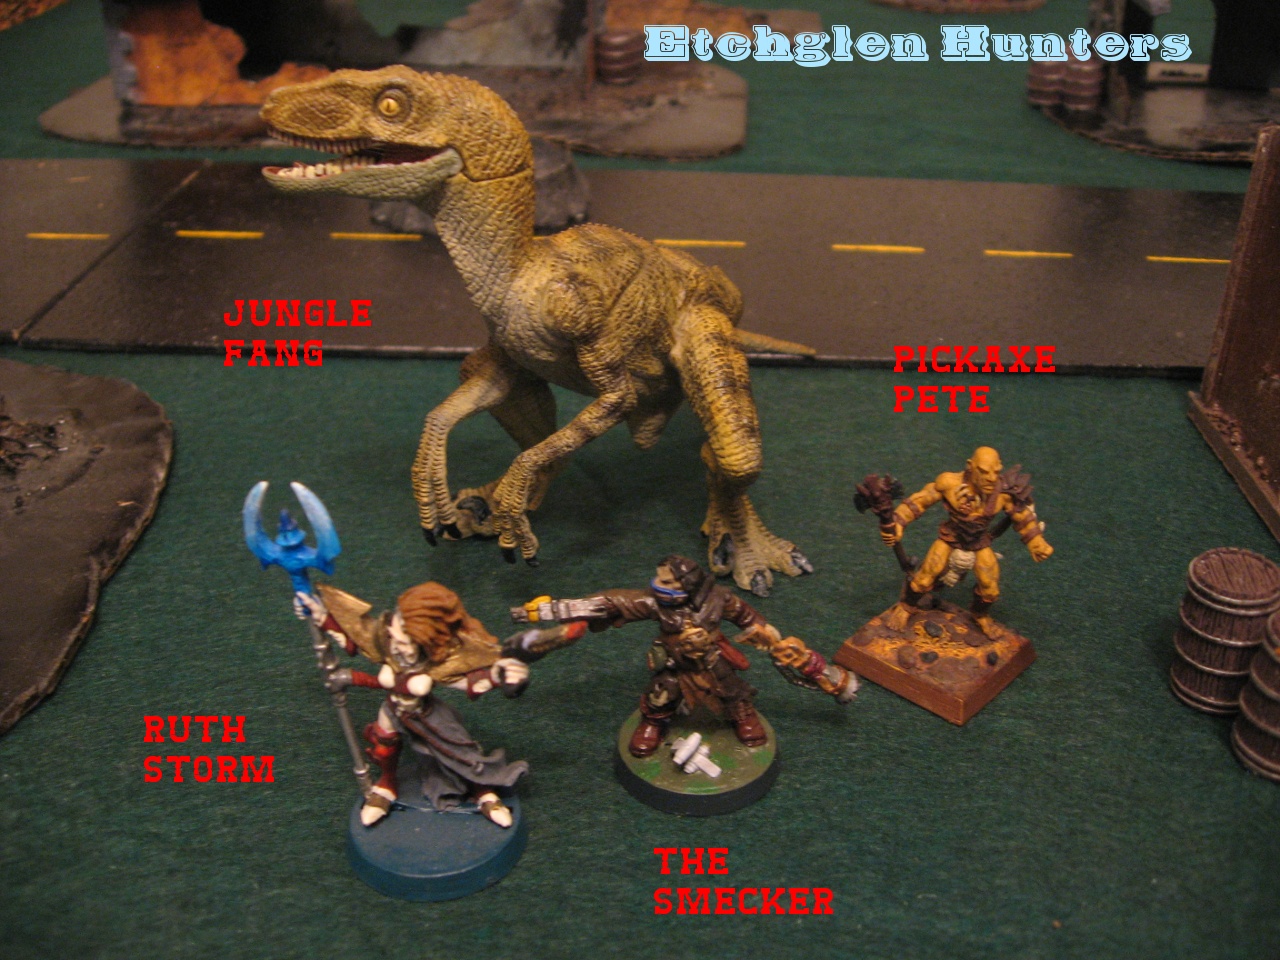
Here is the caravan and the Savage attackers:
wr-d23_0865
wr-d23_0875

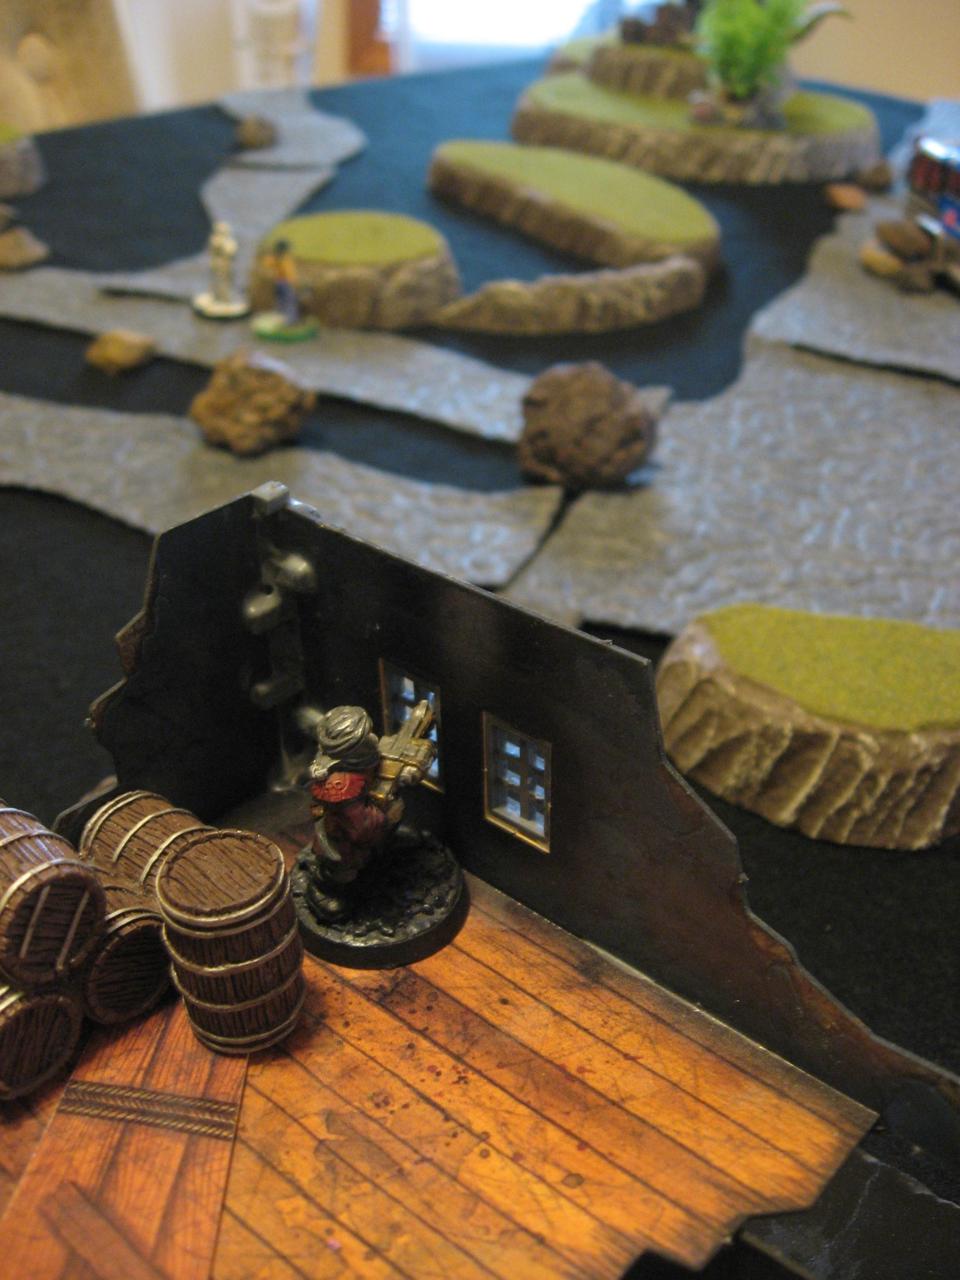
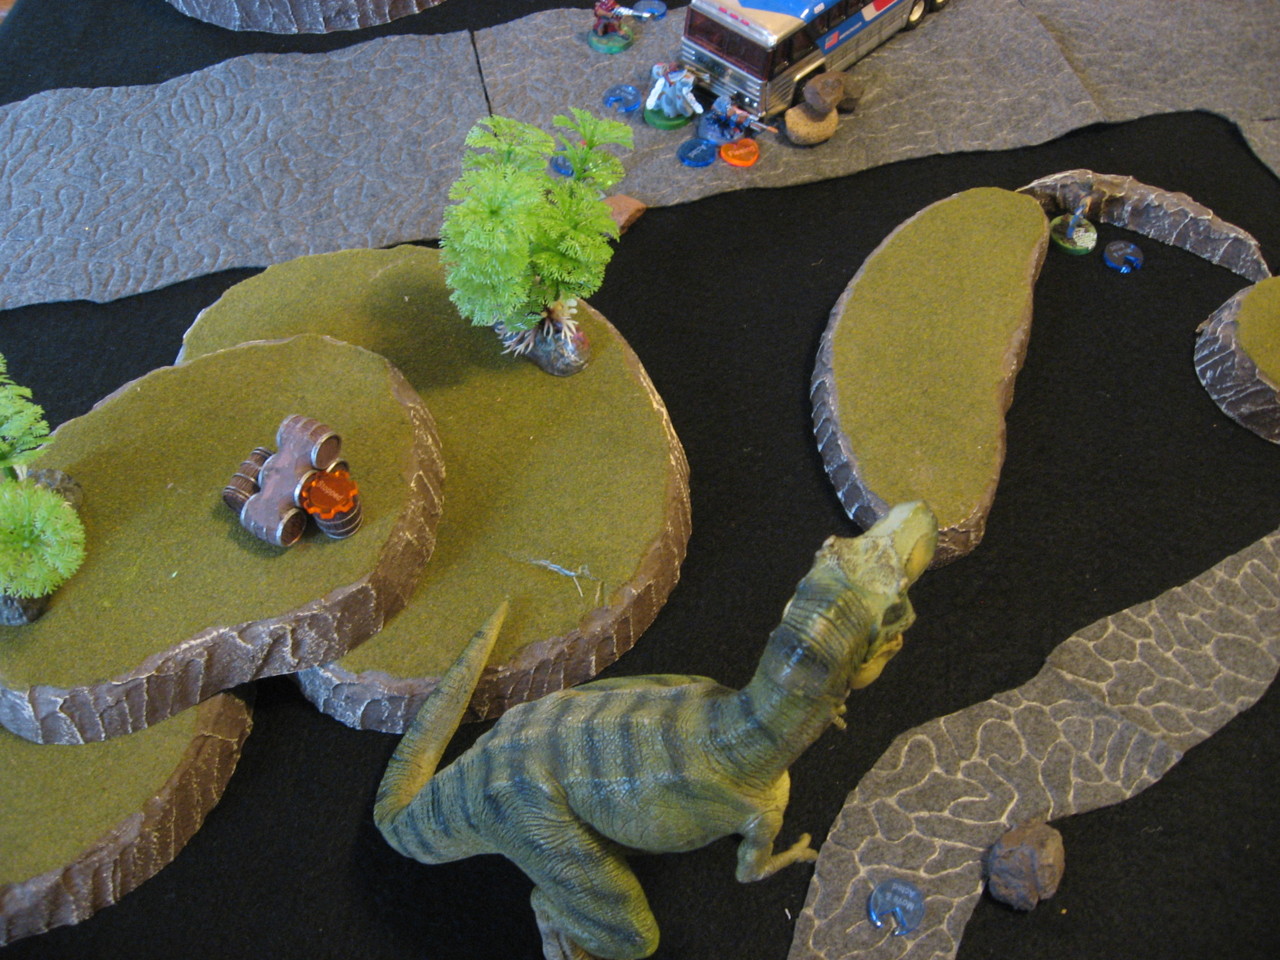
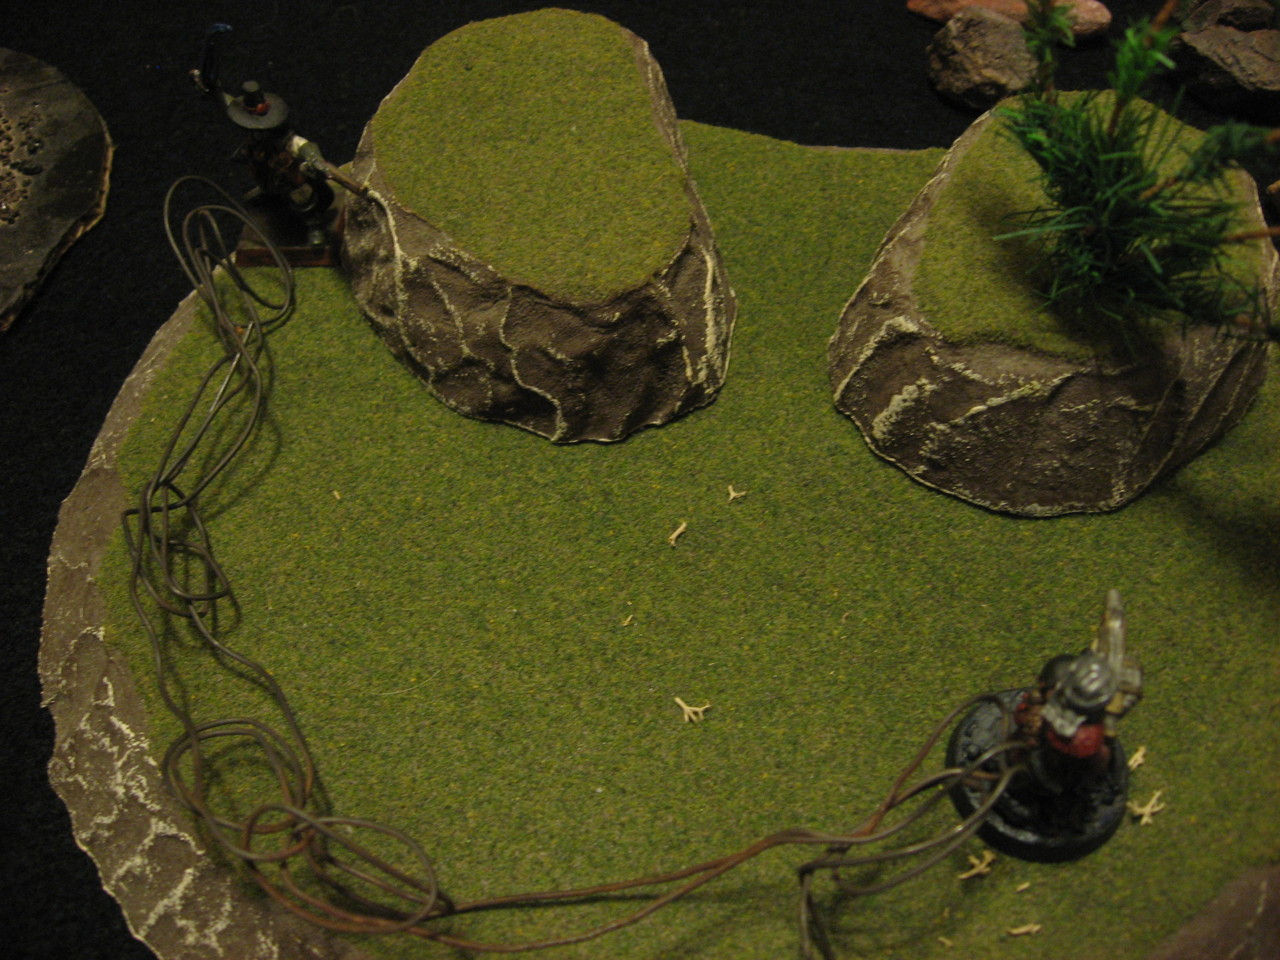
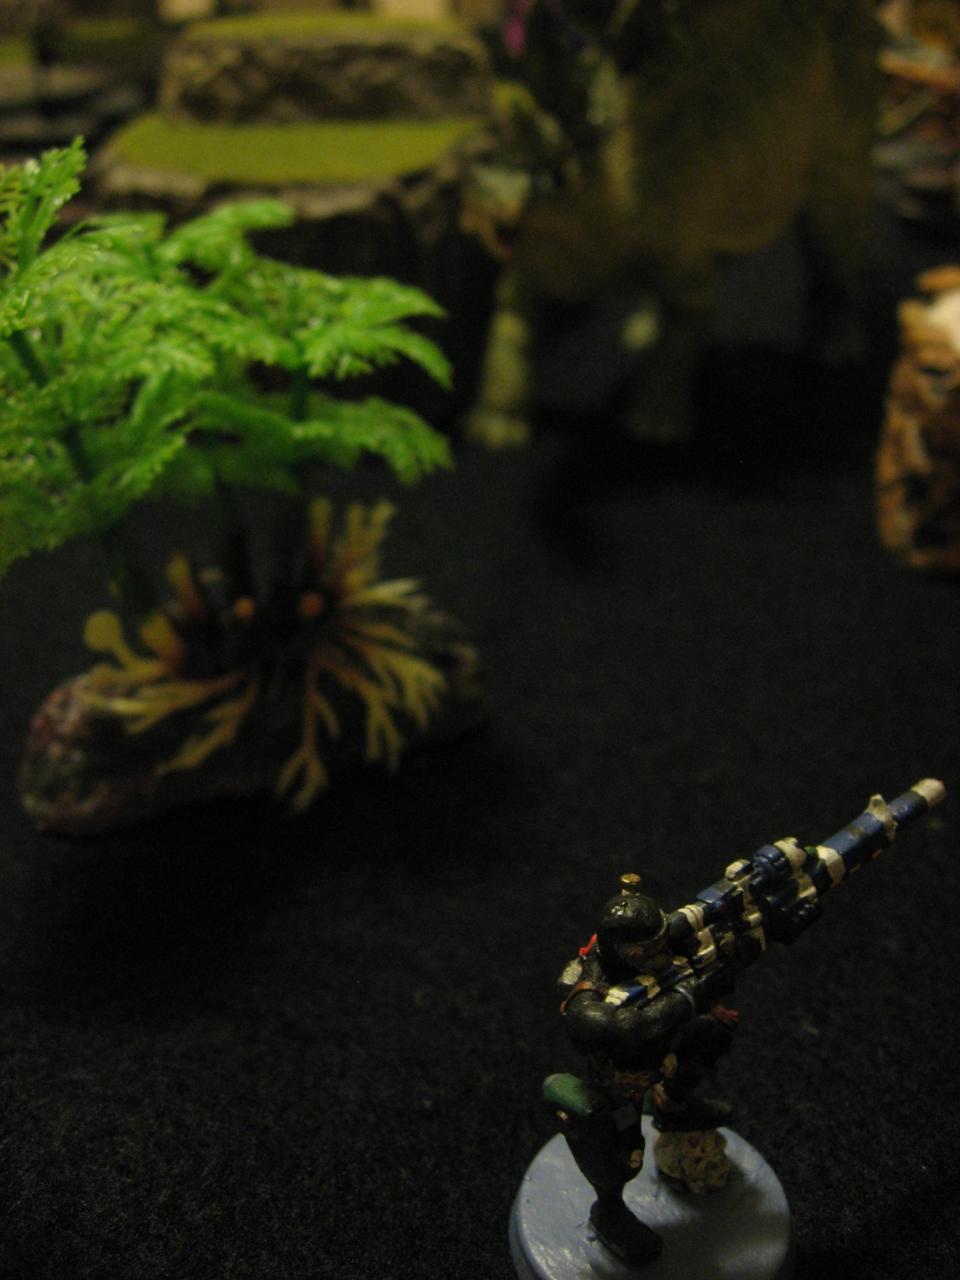
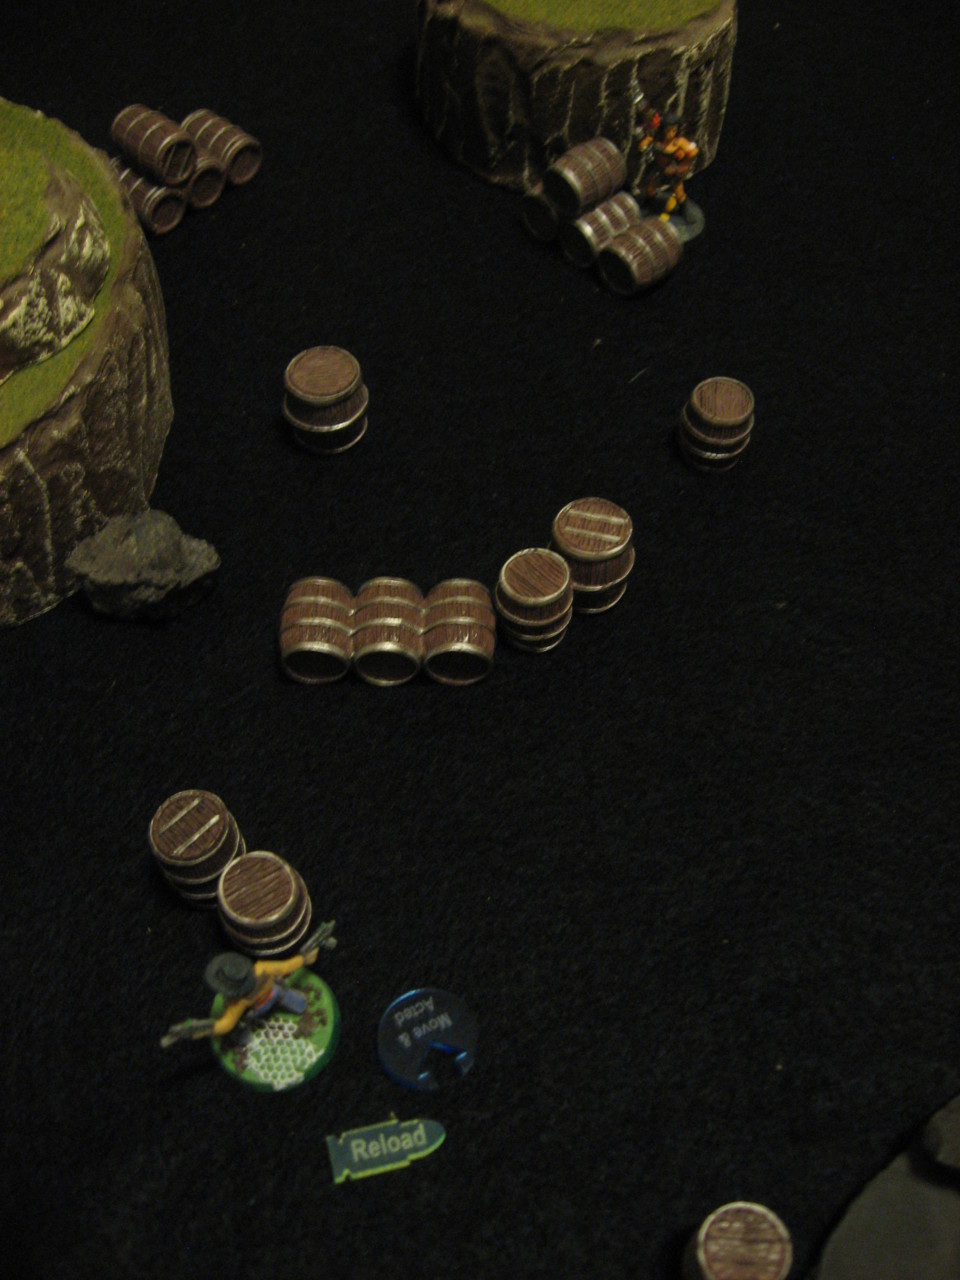
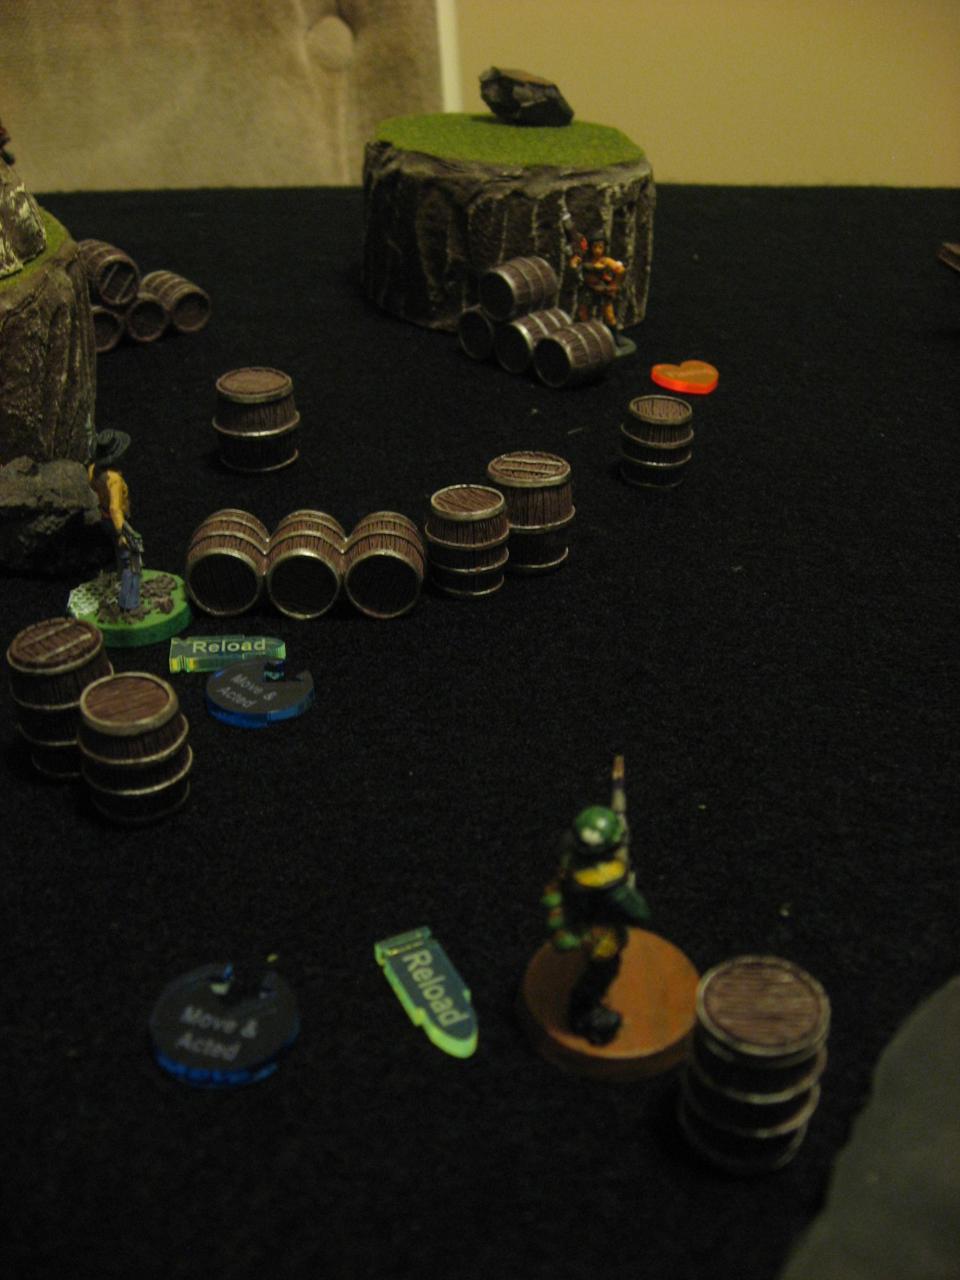
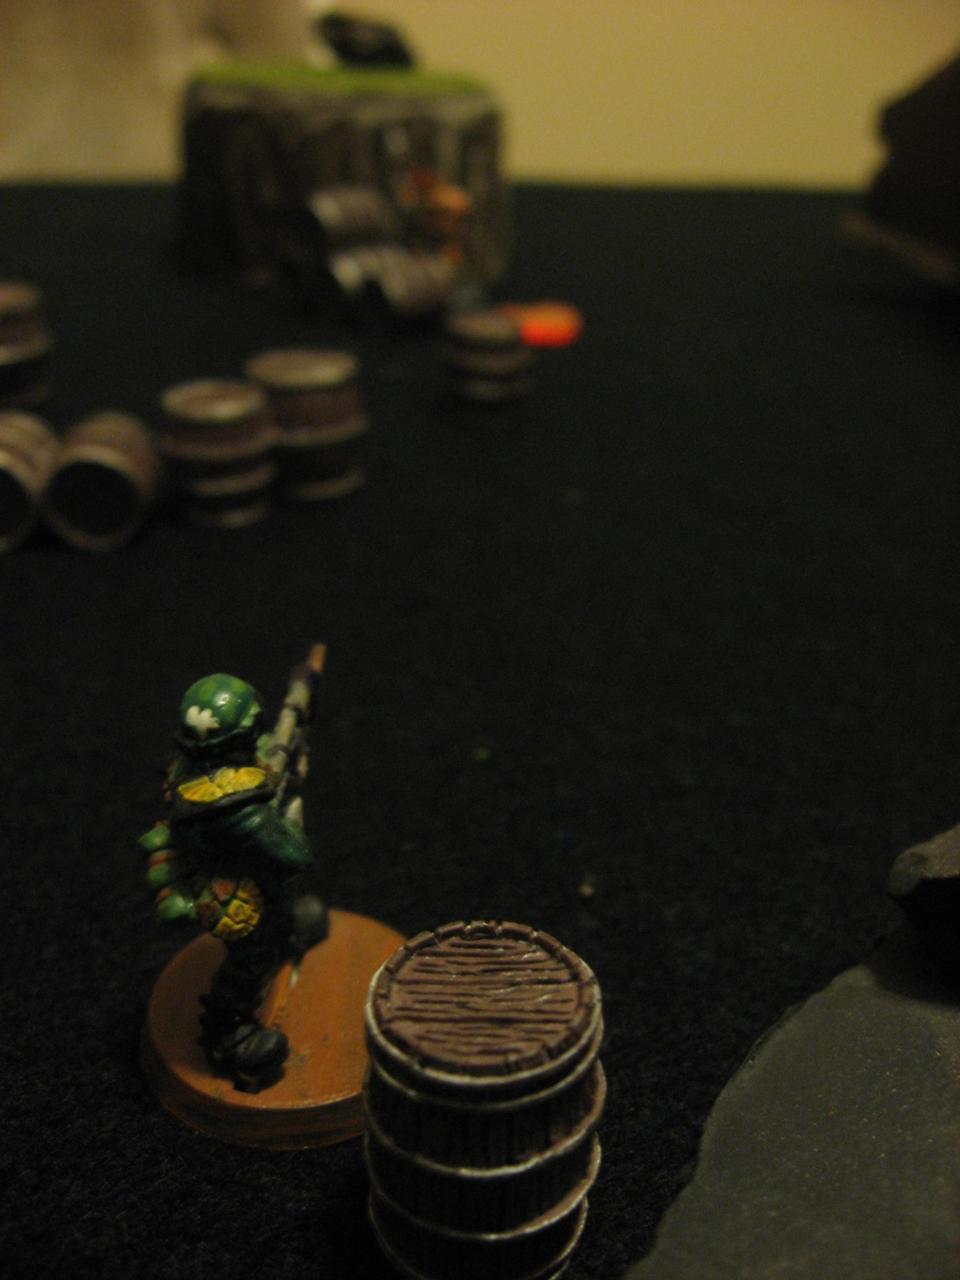
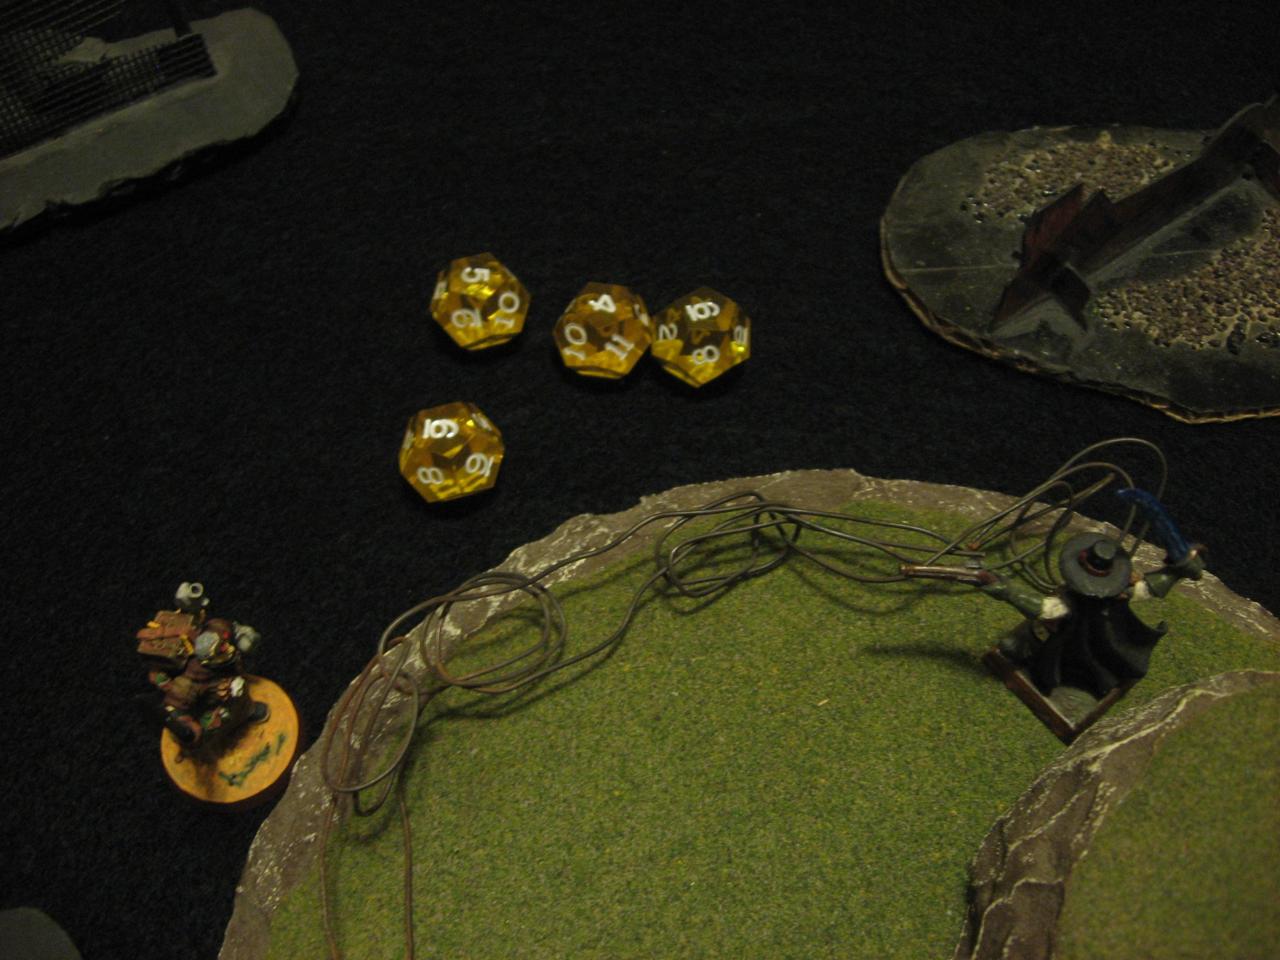
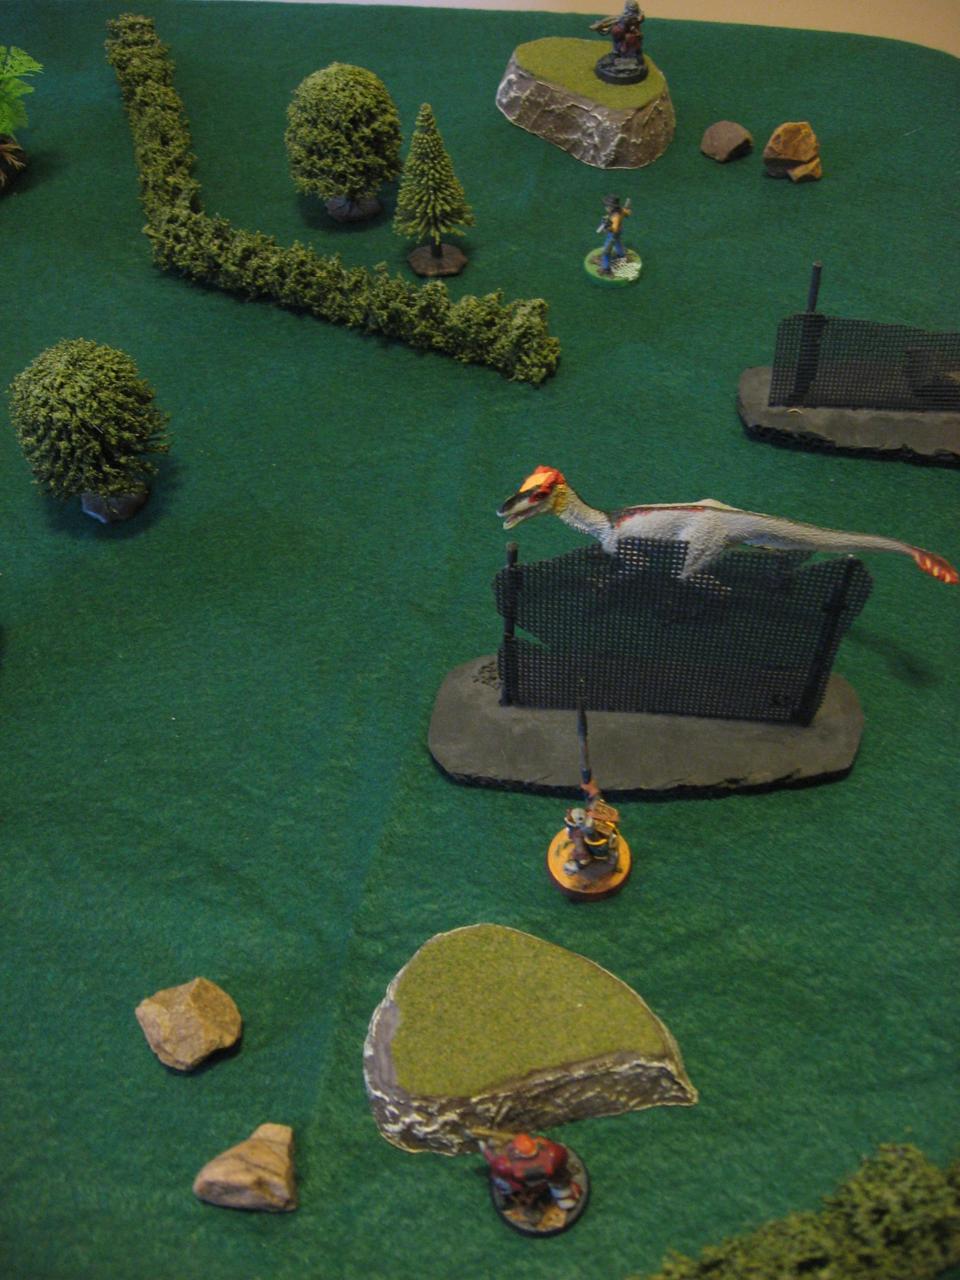
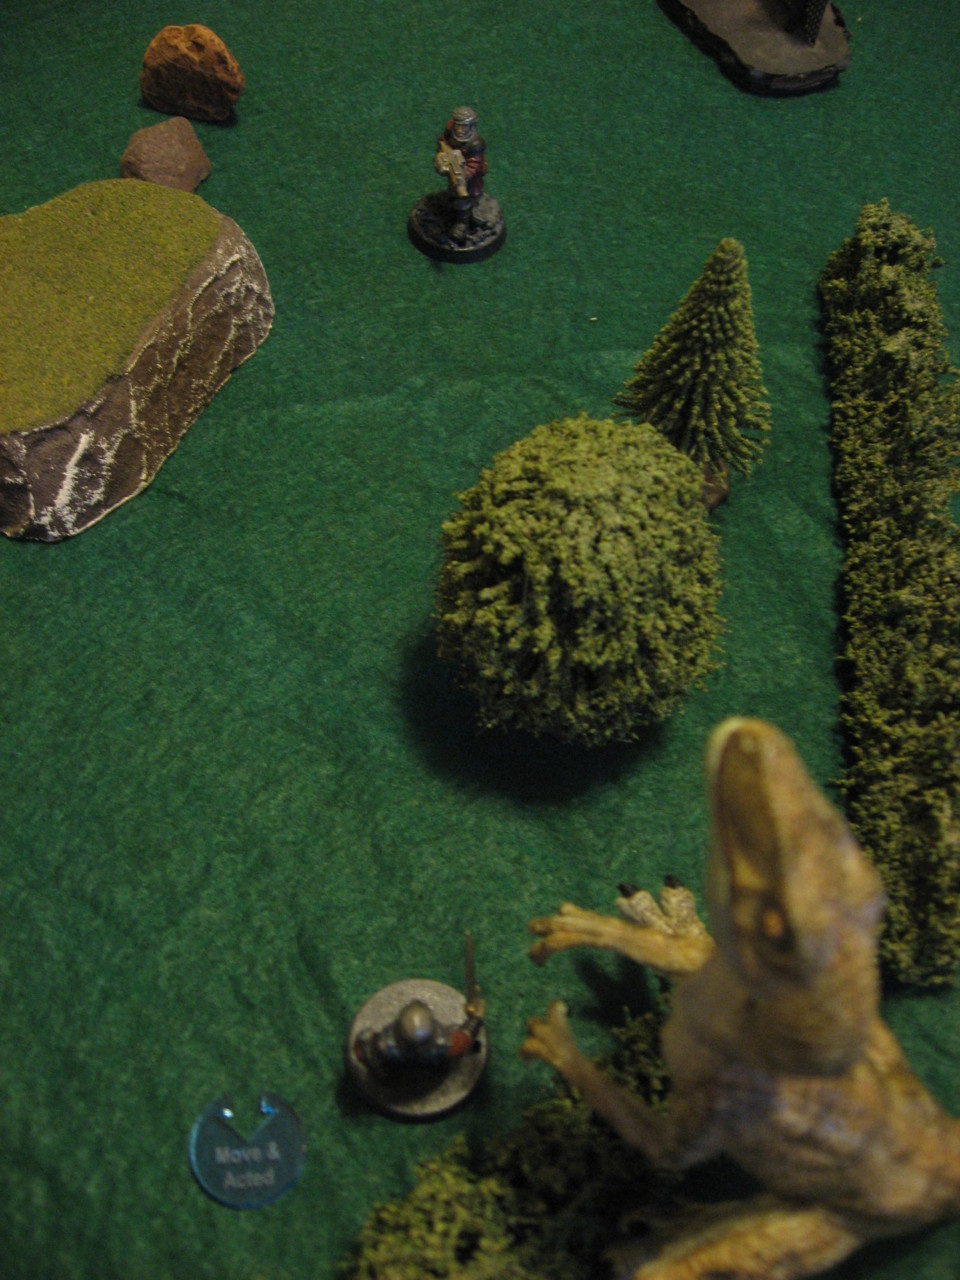
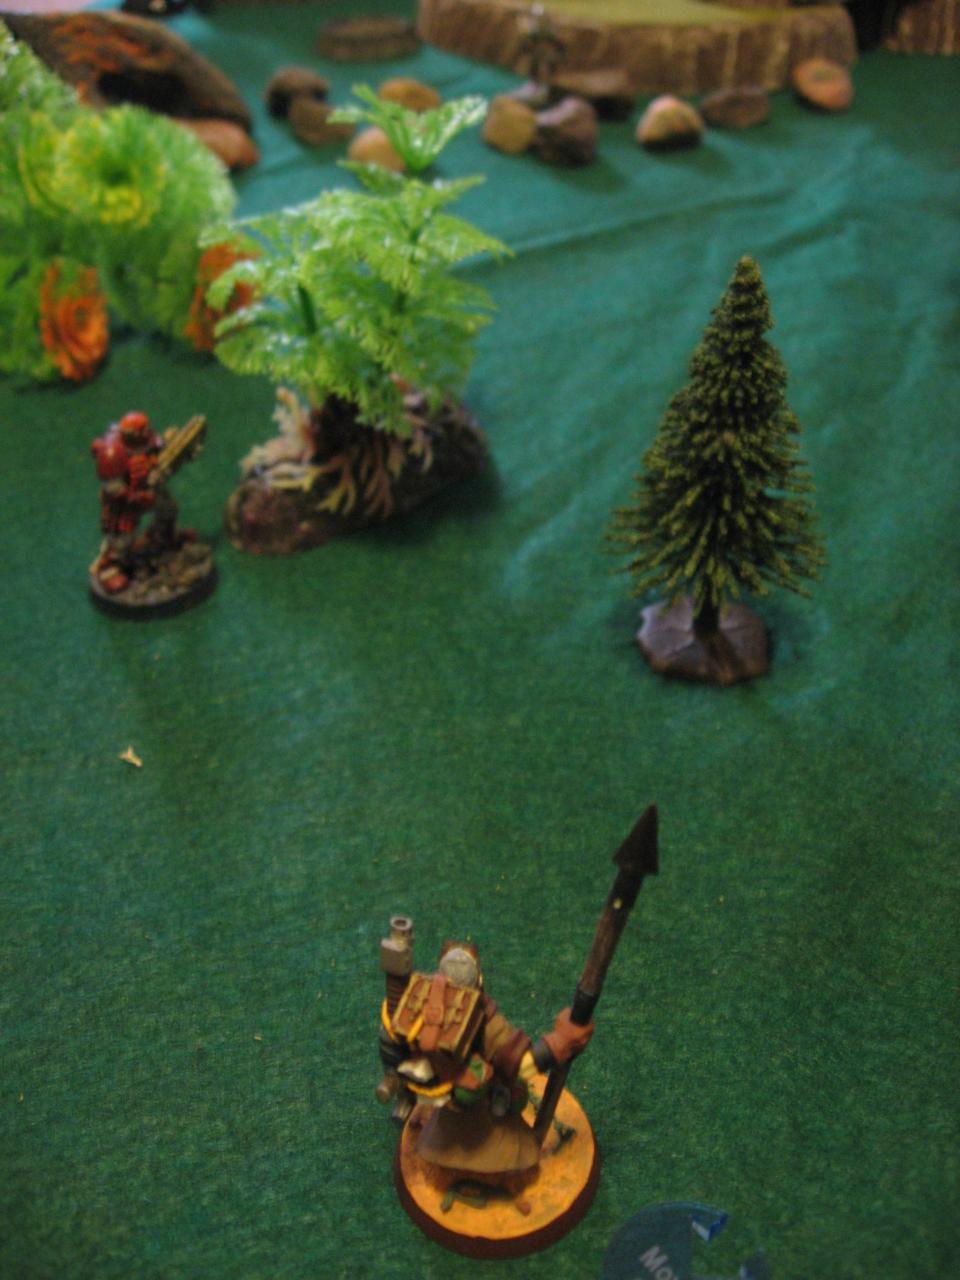
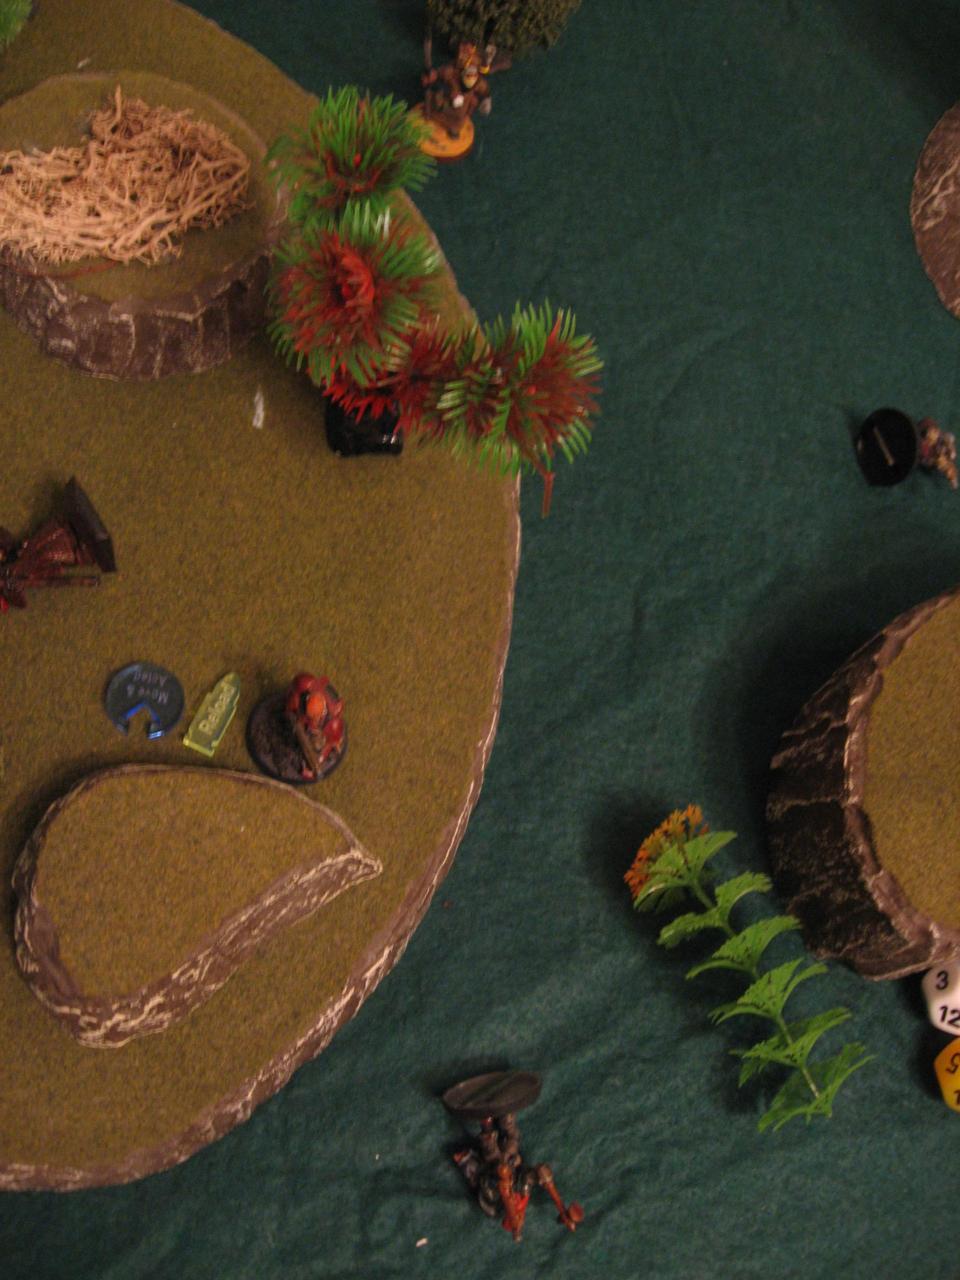
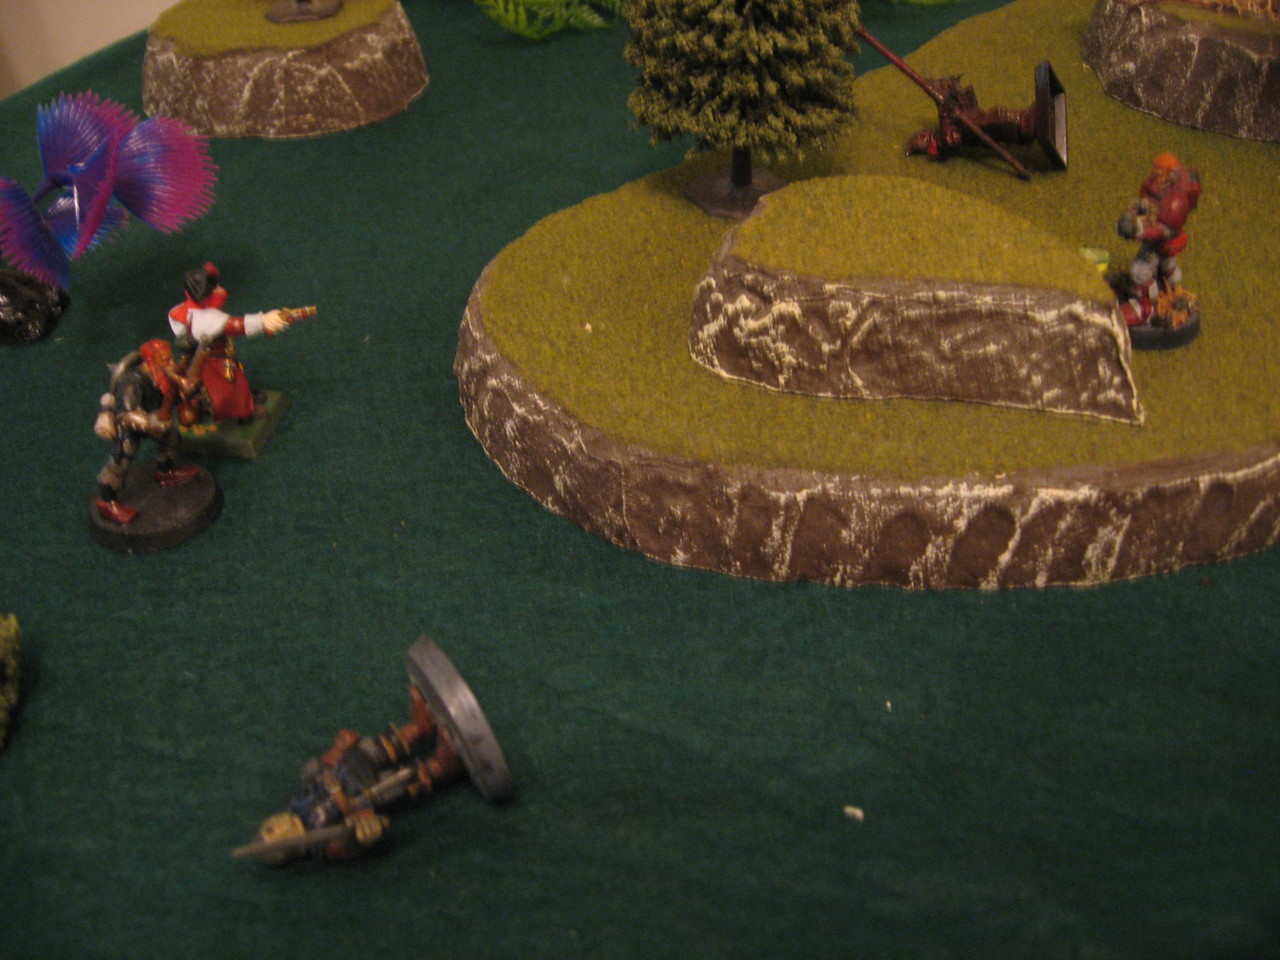
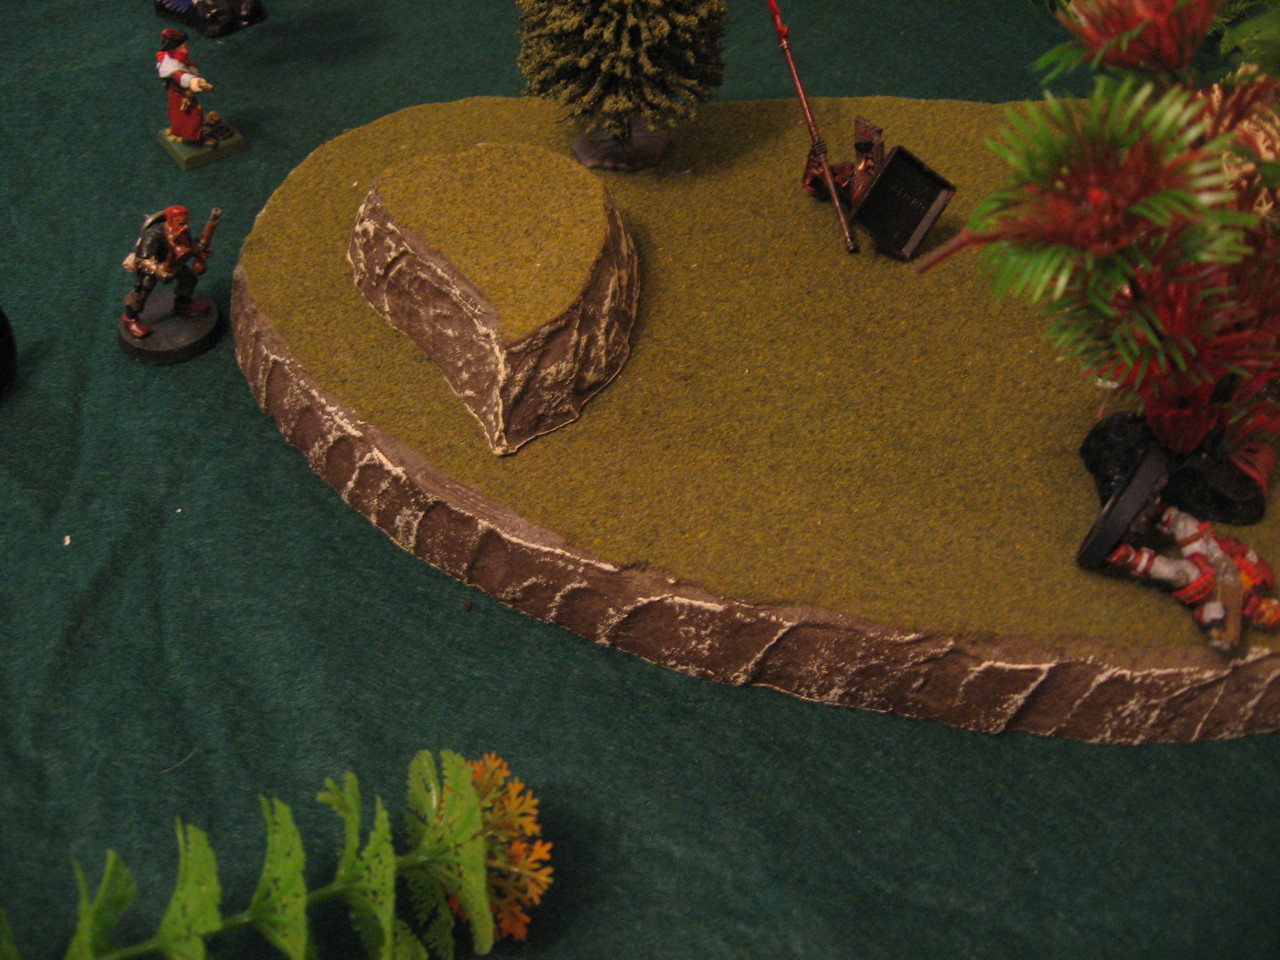
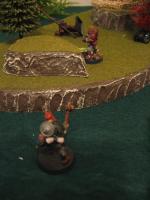
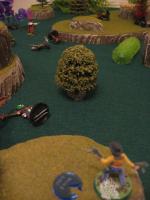
And finally a smattering of deployment pictures to give you an idea of how the scene was set:
wr-d23_0878wr-d23_0881wr-d23_0876wr-d23_0883wr-d23_0886
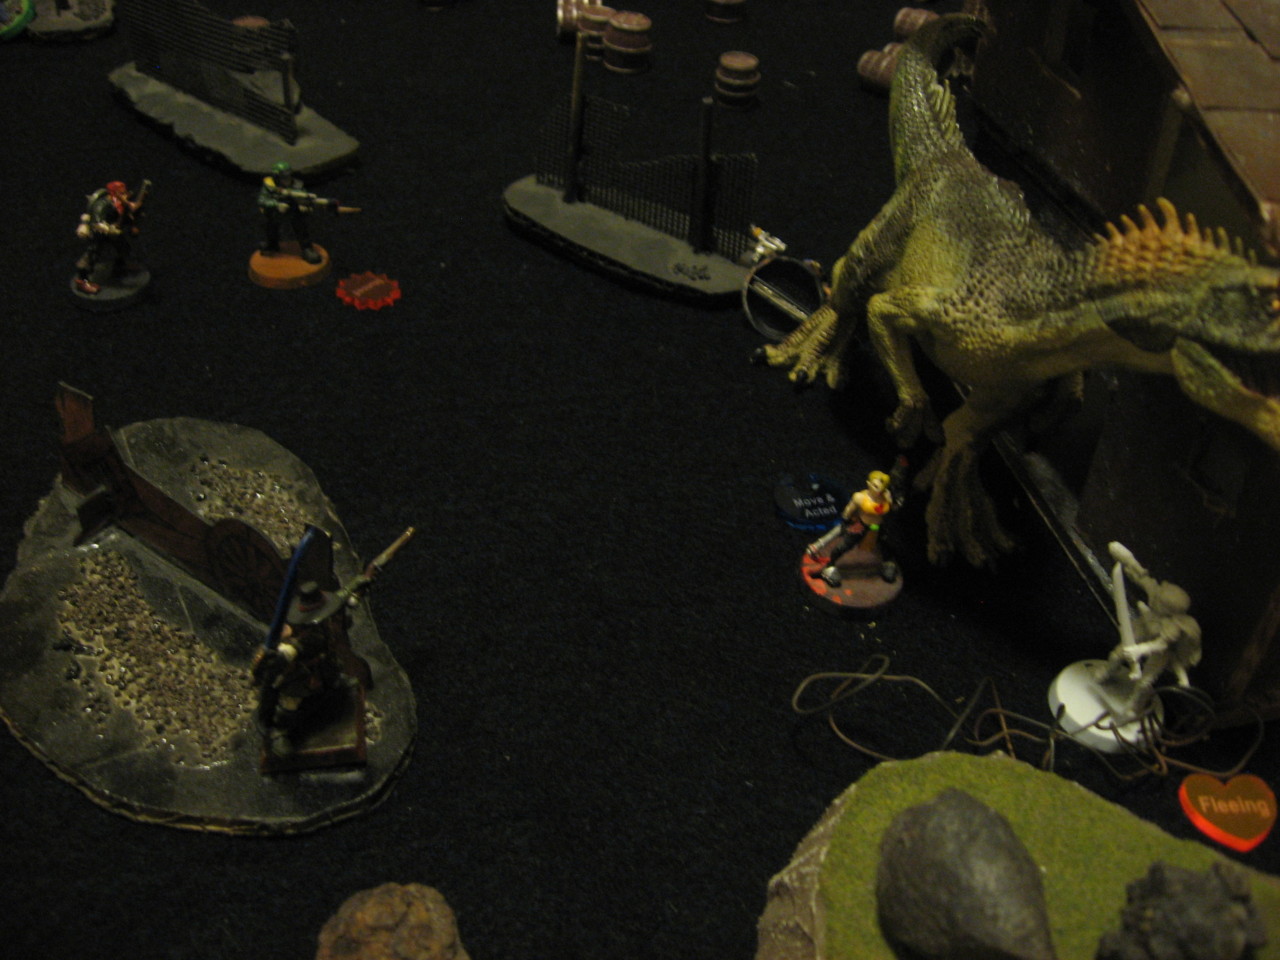
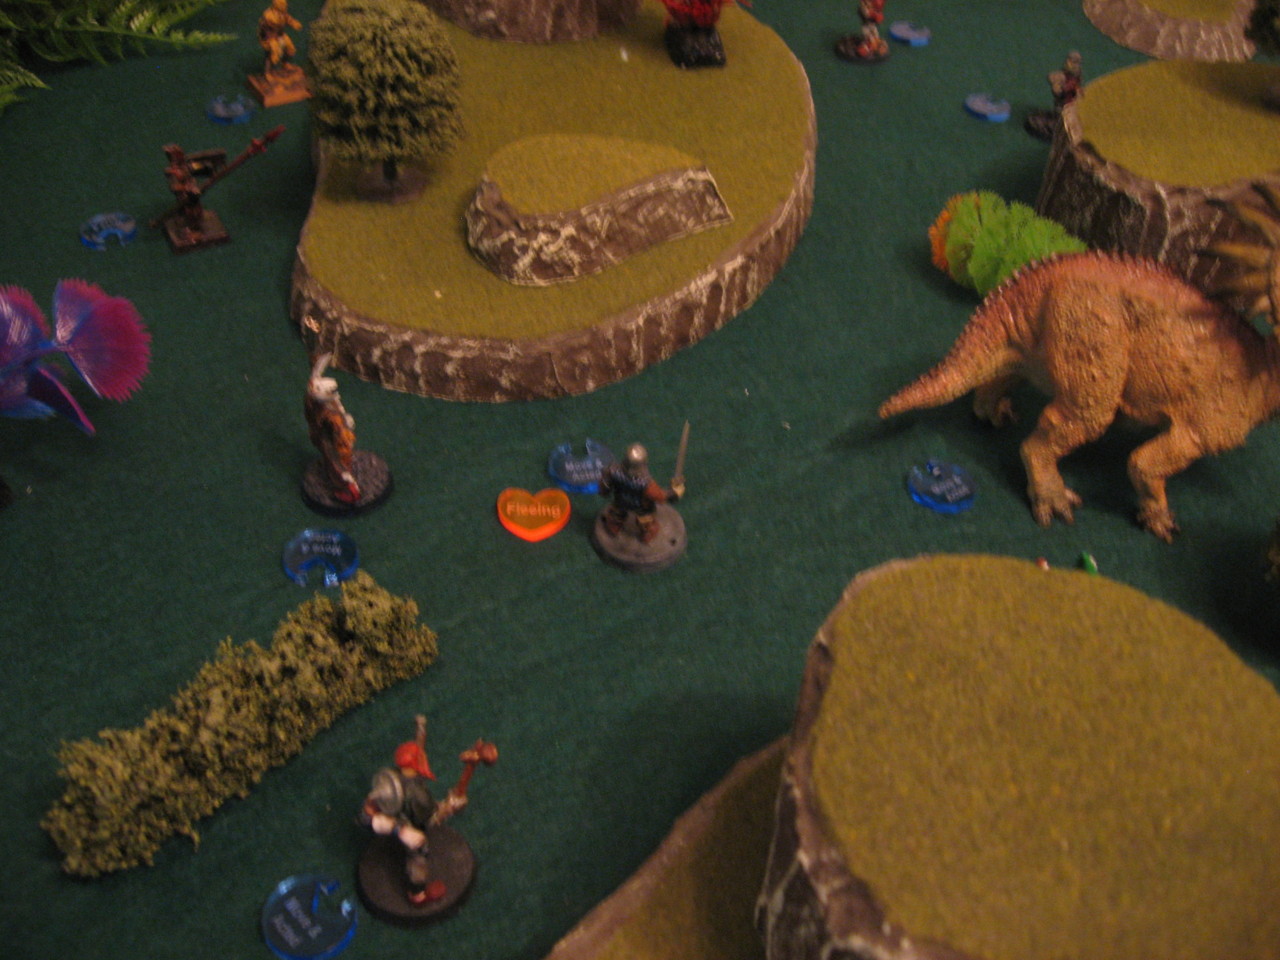
Quidel leading the caravan, the Line deployment, the Savages approach, Horned between the caravan and the Savages, Terror to the west in sight of Gordon

The Line deployment order was Quidel, Gibson, Amparo, Gordon, Cecilia (riding Dwaal), Tendaji, Kwabena, Crazy Rhodes. The Savages deployed from the top down with Gladiator, Pike, Bones, Hench, Redbeard, Purple, Pirate.

And with that we are off to the races!


Turn 1/6 – Barbarians in the Mist
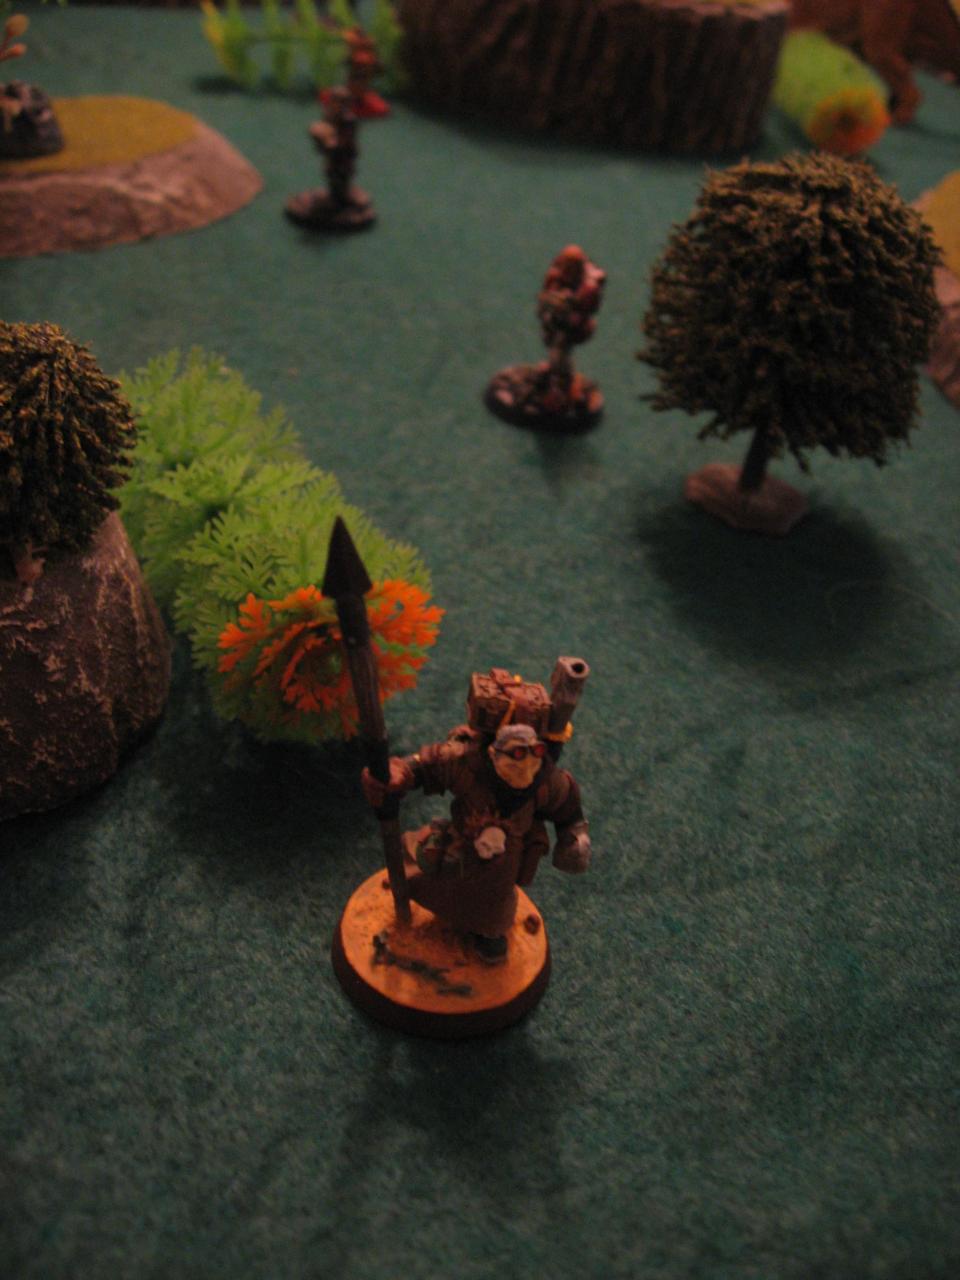
Gordon had desired Cecilia was a comfortable as possible on the expedition, so she was riding Dwaal. Upon hearing the shouts and seeing enemies approach she spun the dinosaur towards Tendaji and ordered the porter to hand over the Blunderbuss (Note: I actually got the porters confused right off the bat, and accidentally mixed up the weapons each was carrying. That’s what I get for using similar looking Skaven figures!). Rhodes tried to draw a bead to the Pirate, but couldn’t quite line up the shot in the Light Fog (ie: target was at Long Range). Gibson had more success, swinging his weapon around to bear on Pike. After a flurry of shots the Savage was Fleeing. Quidel continued the solid shooting by hitting Gladiator. The lead members of the caravan, experienced from many days on the road, instantly reacted in unison and basically swung their line to face the oncoming horde. Amparo followed suit and fired at Hench, who was now also Fleeing from the pain. Gordon called to Kwabena, and the two moved towards one another so the man could arm himself.
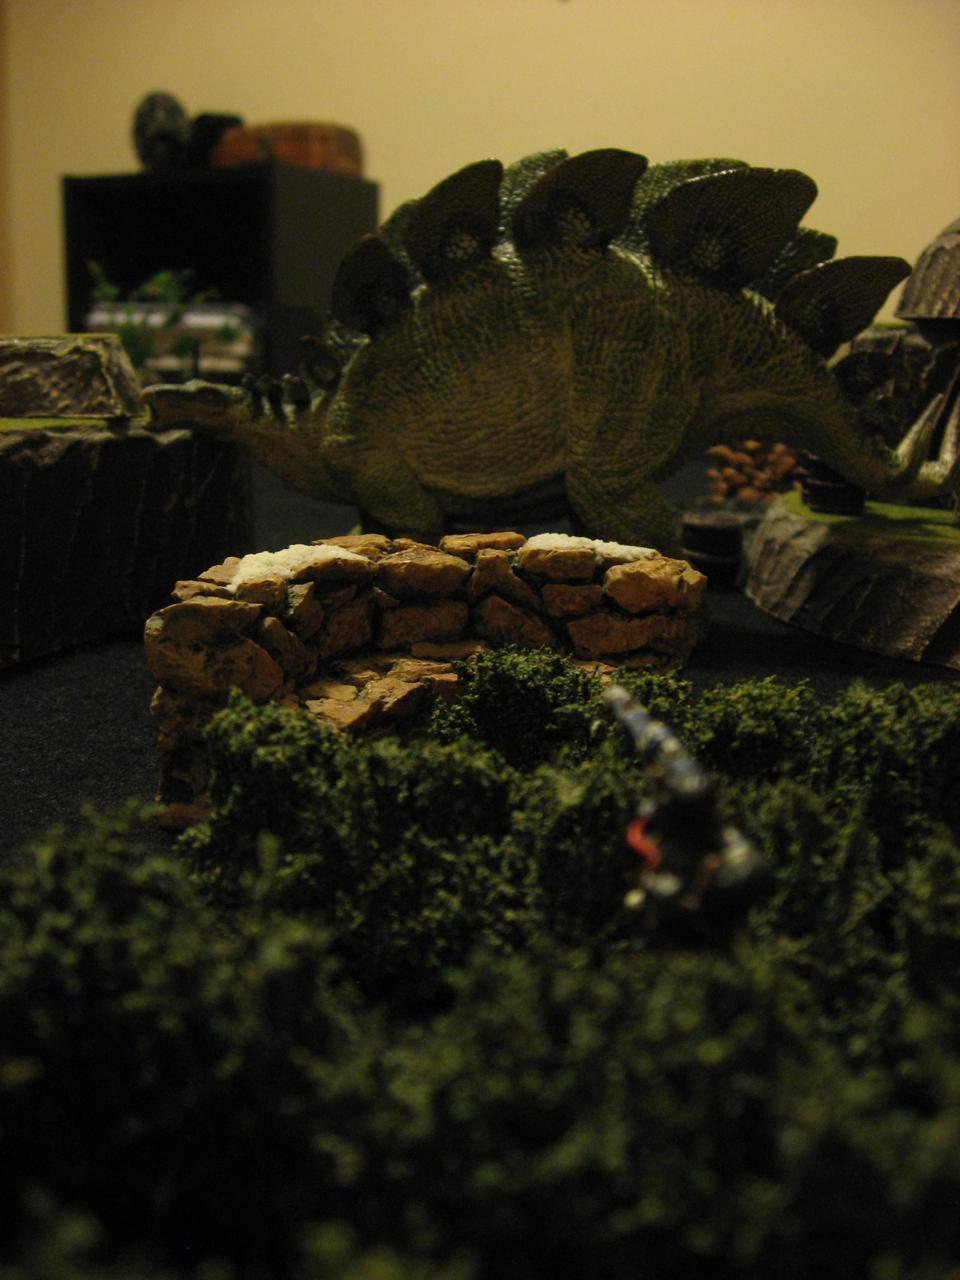
The Savages yelled various bloodcurdling cries and moved forward as far as possible. With the fog and distance their Tomahawks were useless, so no return fire happened initially.
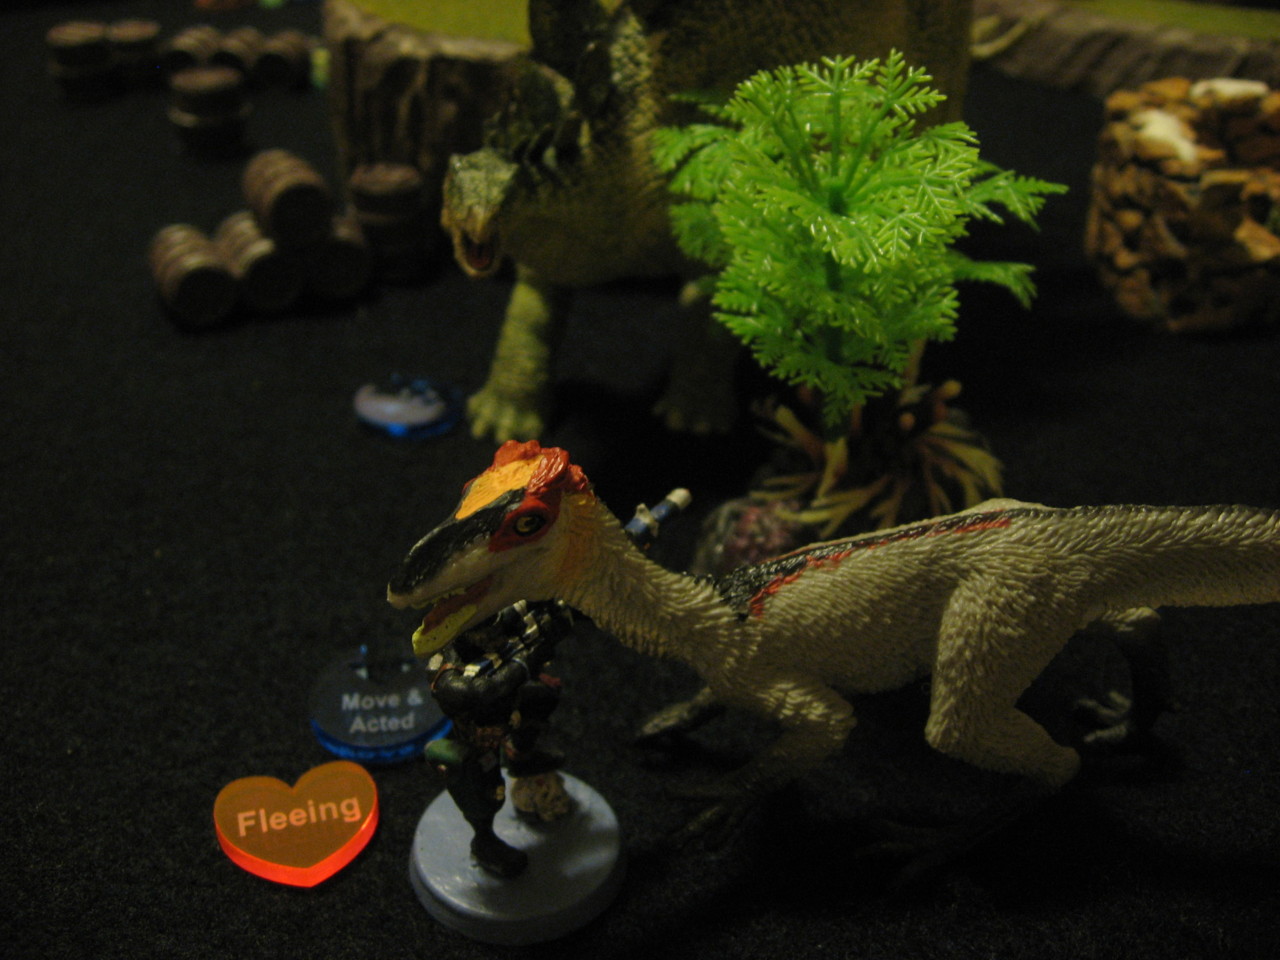
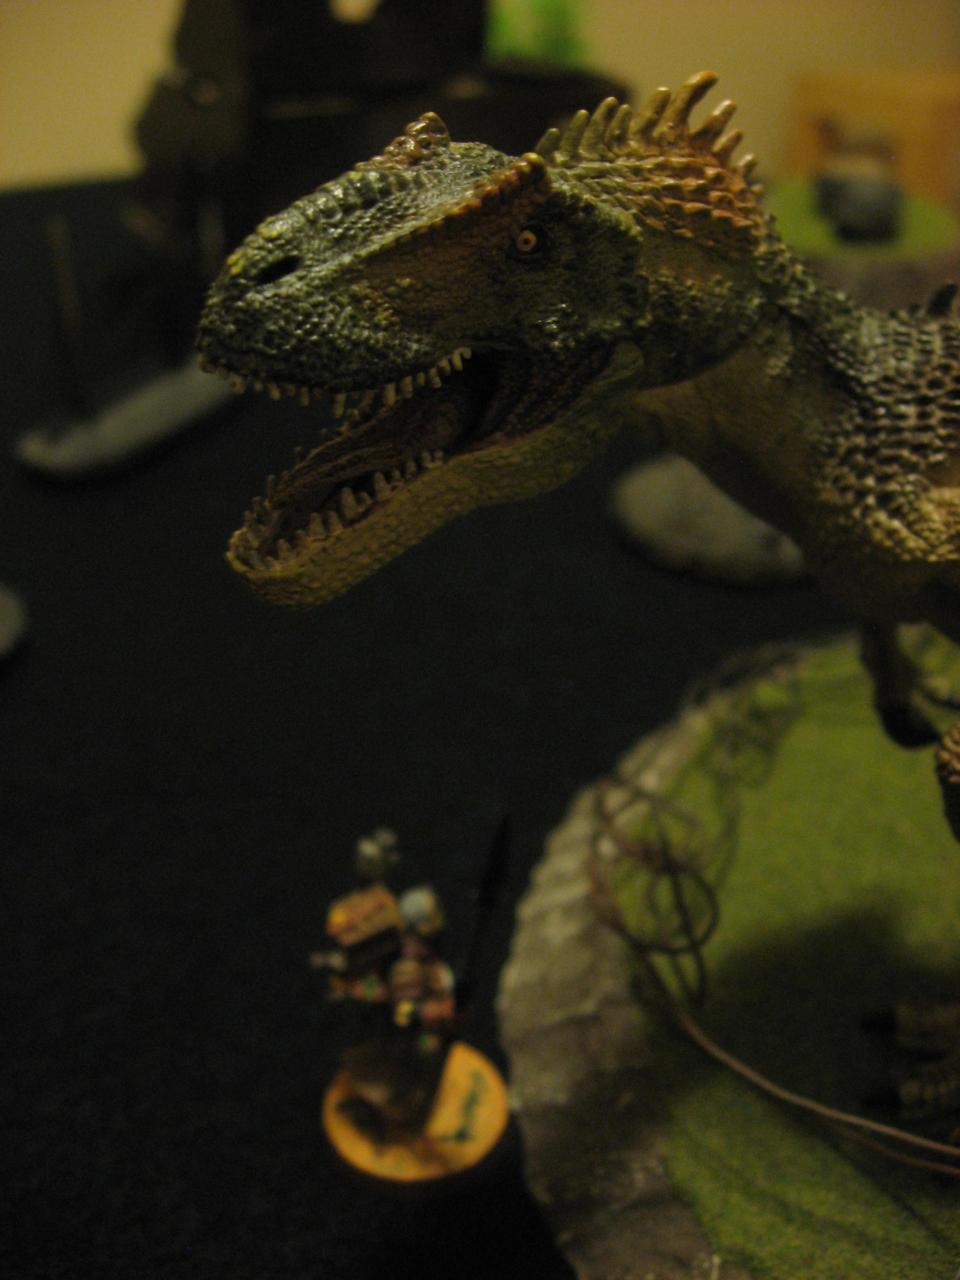
The Horned dinosaur, hearing the commotion and seeing the rapidly moving shapes, roll a 5 and would attack the nearest target (who was the Savage named Purple). Unfortunately he failed his Charge and couldn’t reach the target. The Terror also attacked nearest, which meant he Hustled towards Gordon but couldn’t quite reach the man.

wr-d23_0888wr-d23_0892wr-d23_0893wr-d23_0896wr-d23_0898
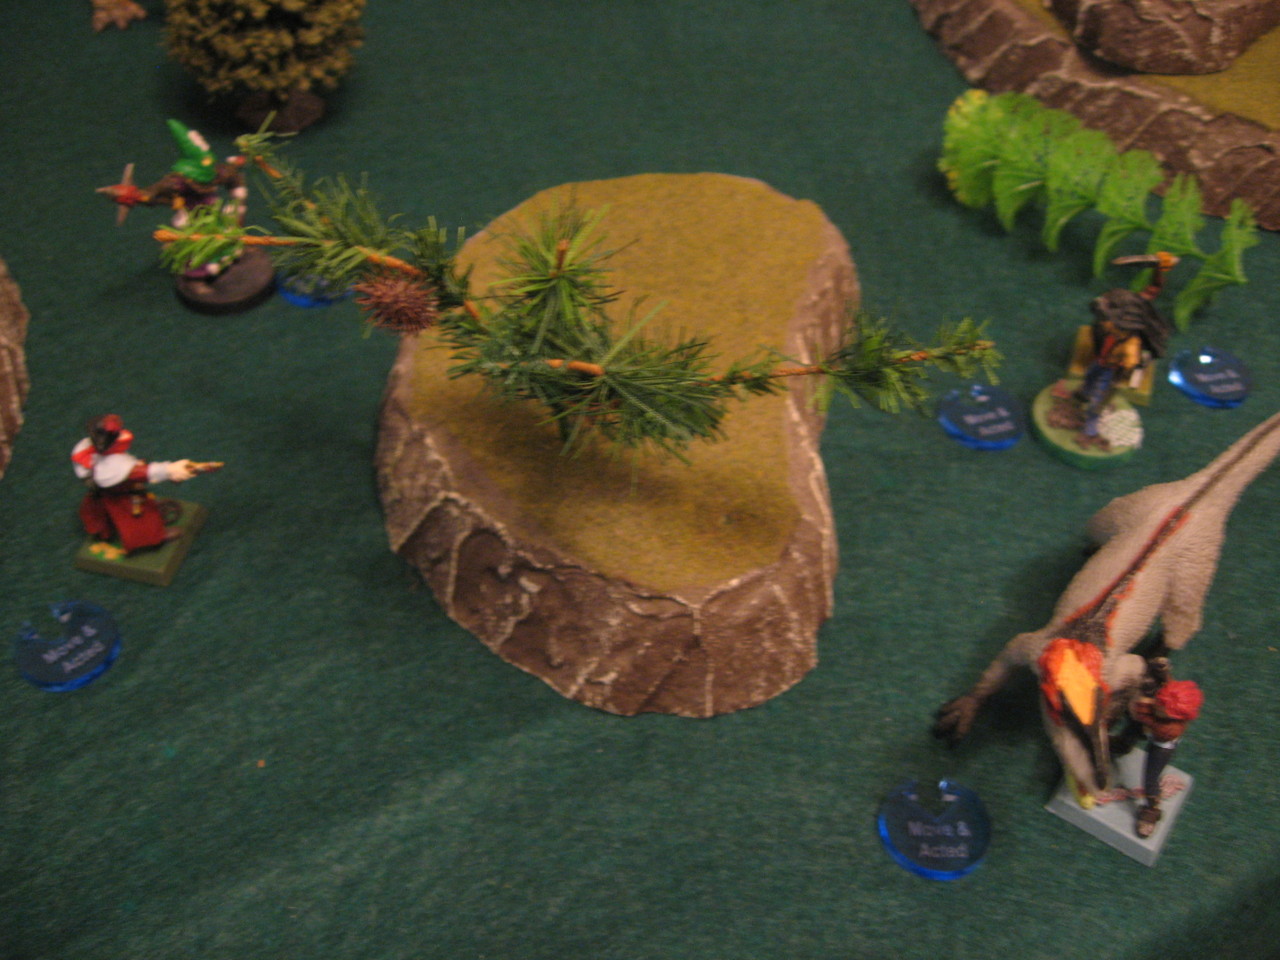
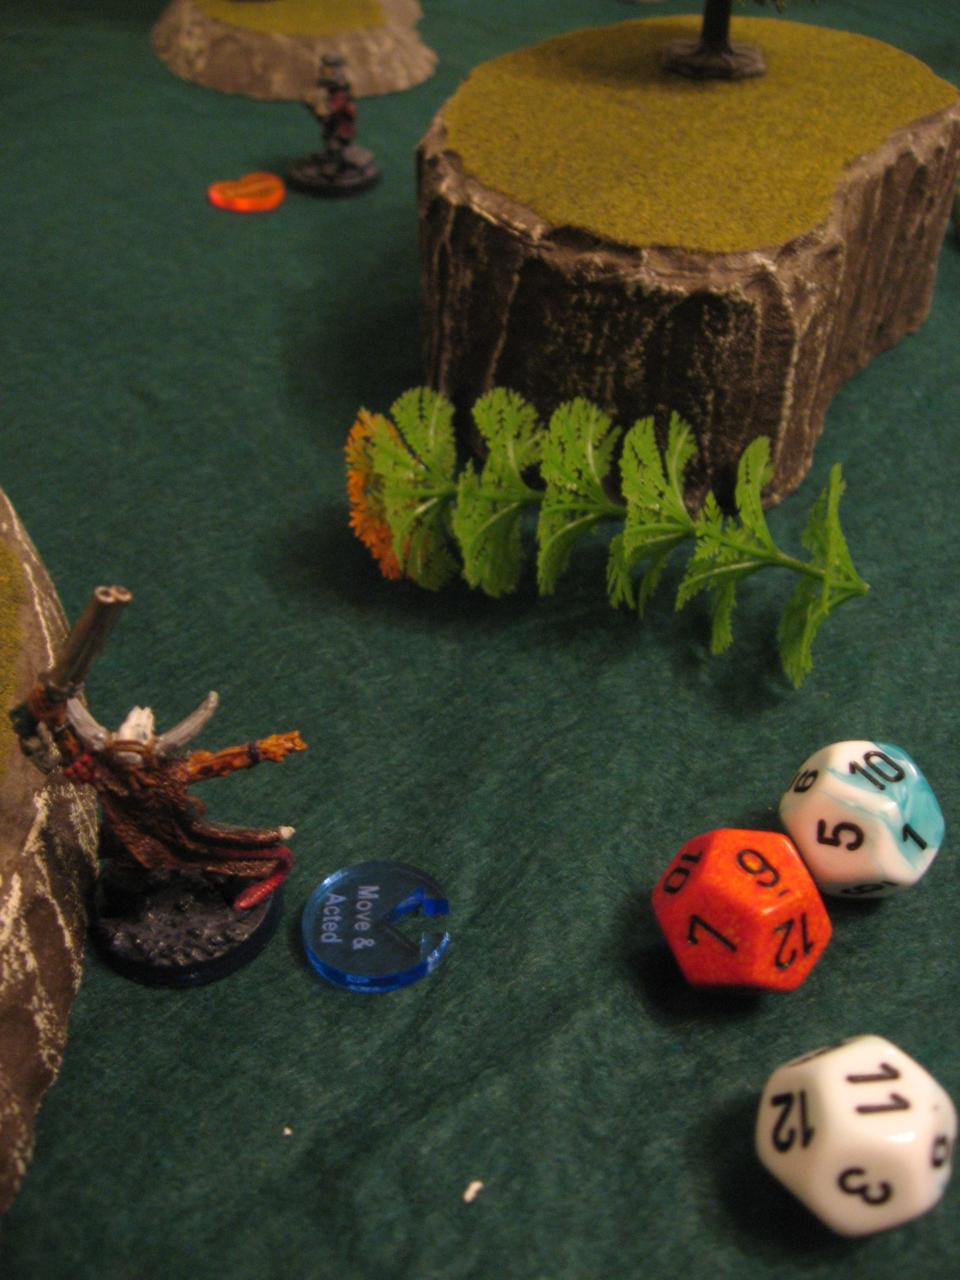
Cecilia moves quickly on Dwaal to grab the Blunderbuss from Tendaji, the Horned dinosaur fails to Charge Purple, already the Savage lines are breaking, Tendaji and Gordon try to meet up, another angle of the Turn

wr-d23_0890wr-d23_0897
The table near the end of Turn 1, Amp and Gibson easily adjust to pour fire into the oncoming threat


Turn 2/6 – The Whites of Their Eyes!
Cecilia again lead the Drylands turn by trying to fire at Pirate, but the massive Blunderbuss was unable to connect. Nearby Rhodes hit Purple with his dual pistols. The withering hail of fire continued at the head of the caravan, with Pike, Gladiator, and Hench all dying to the combined fire of Quidel, Amp, and Gibson. Unfortunately Gibson emptied his 200kW Six-Shooter in the process and would need to Reload. Luckily he had his backup Laserbow.
The return fire was somewhat feeble, however Amparo did take a Tomahawk to the face and is marked Fleeing. In the middle of the convoy the porters continued to distribute weapons. Kwabena gave the Bola to Rhodes, while Tendaji met up with Gordon and passed him all the weapons (Double Barrel Shotgun, 100kW Six-Shooter, Riot Grenades).
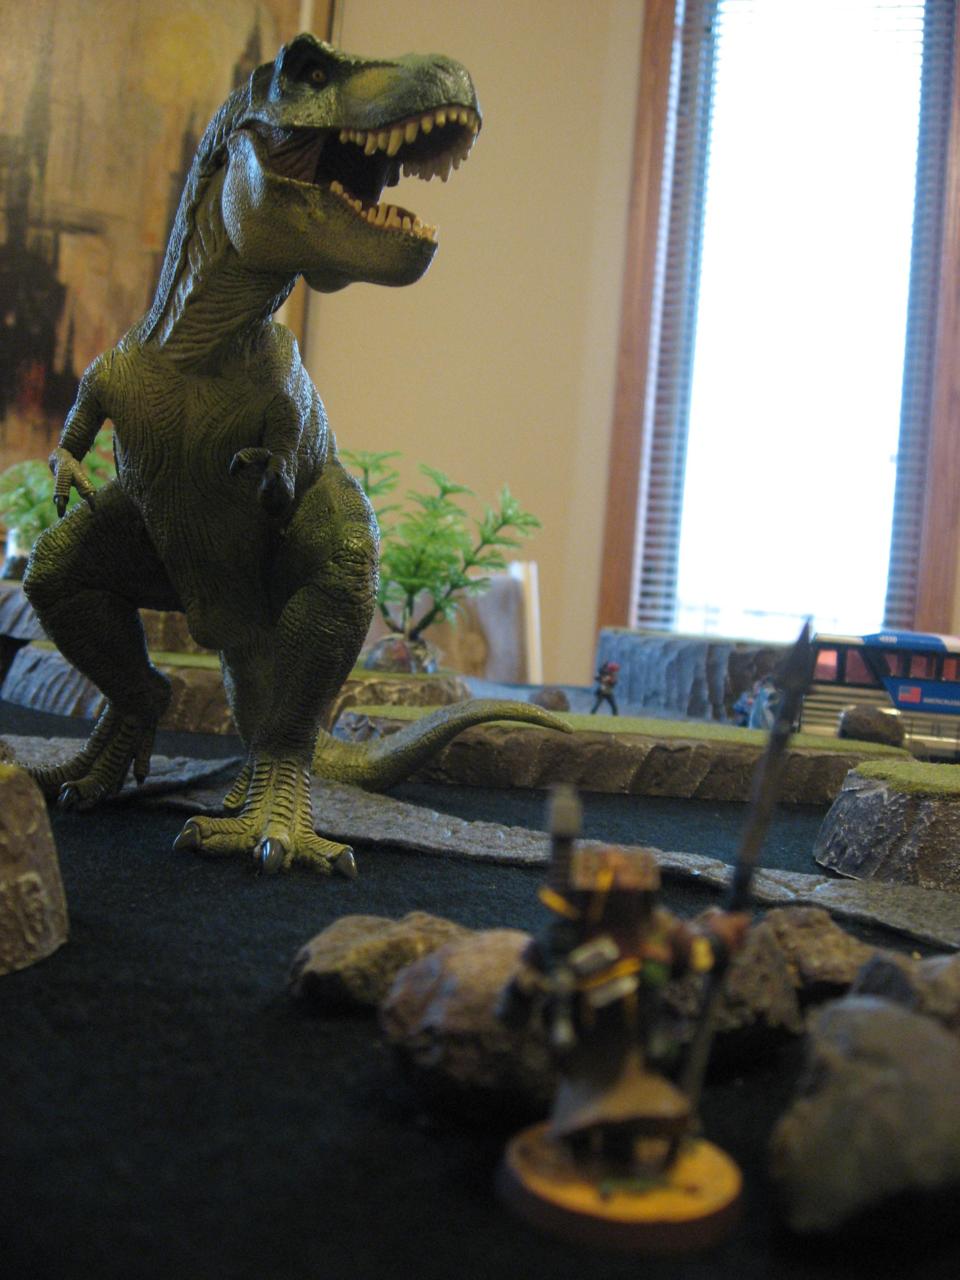
Seeing the mighty Terror looming in, Gordon hurled a Riot Grenade at the young dinosaur. With a lucky roll he hit and pushed the Terror back 4″ (2″ Knockback from Gusting Winds and a further 2″ from the 1D6 Riot Grenade hit).
The dinosaurs responded eagerly. The Horned dinosaur randomly moved directly into Purple! Confused and angry, the young dinosaurs trampled the hapless Savage to death! Terror had a bad Panic Speed roll of 2, so ended up Hustling towards the nearest porter.

wr-d23_0901wr-d23_0902wr-d23_0907wr-d23_0909wr-d23_0913wr-d23_0915wr-d23_0919
Cecilia lining up her shot at Pirate from the back of Dwaal, Rhodes incredible all-hit roll on Purple, Gibson and Pike face off, the Savages move in, the battle lines are drawn, Gibson needing a Reload on his pistol, the Horned randomly attacking and killing Purple

wr-d23_0904wr-d23_0921
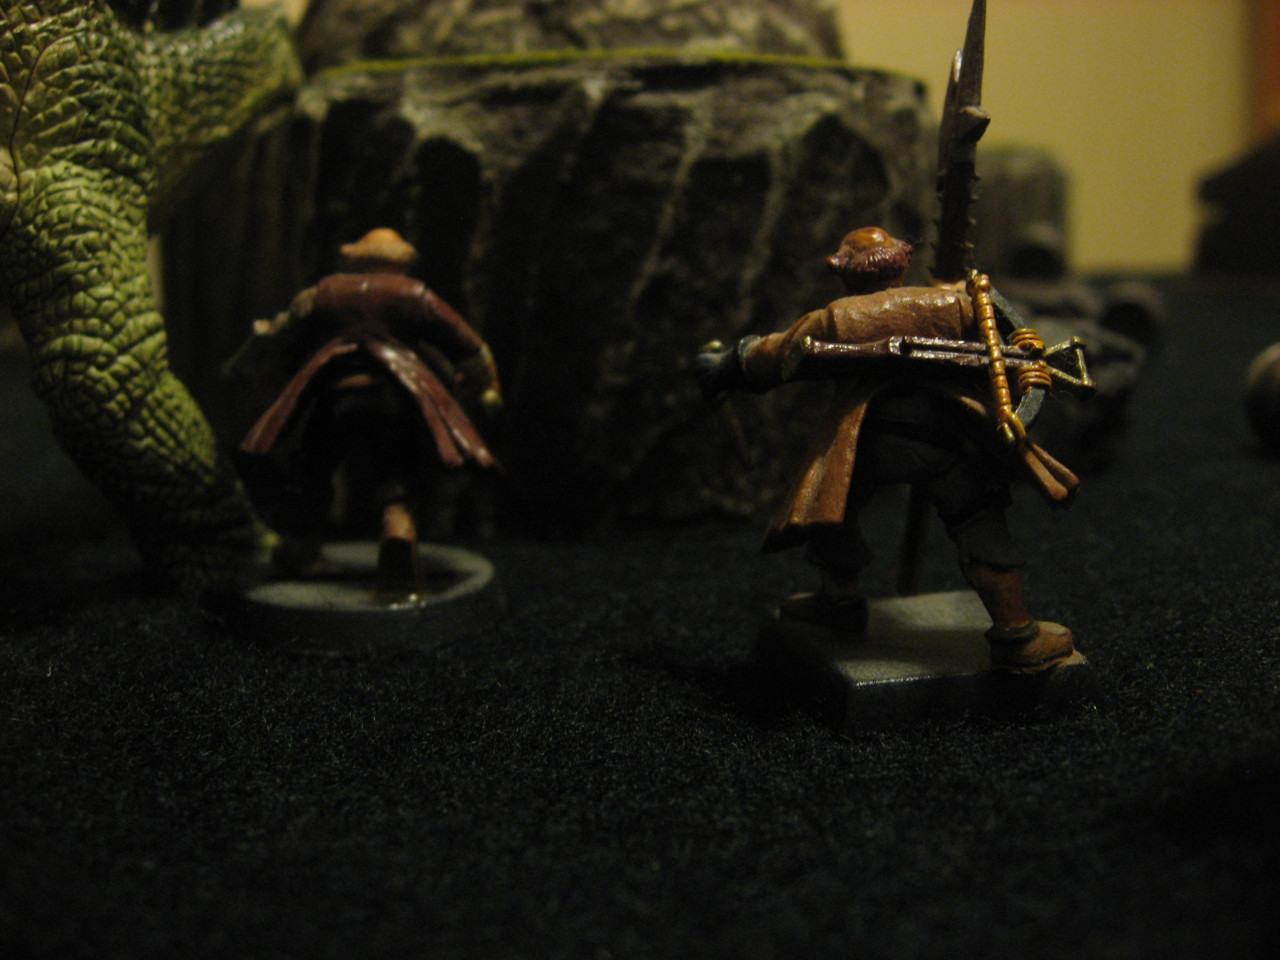
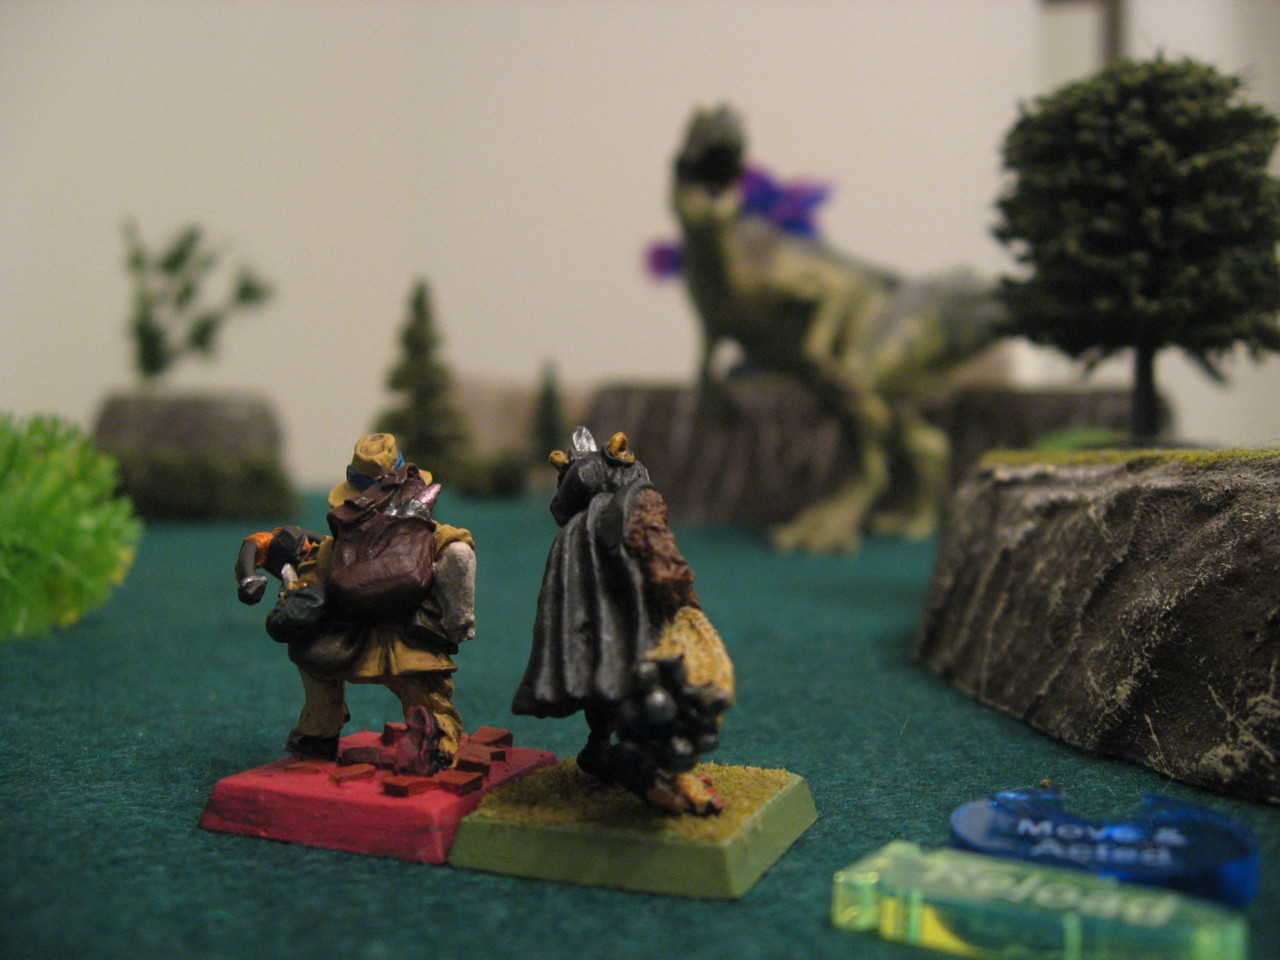
Gordon and Tendaji begin their hunt, the table at the end of Turn 2 (many dead Savages)


Turn 3/6 – More Are Drawn In
Of the dead Savages only Gladiator made his roll to return, and deployed opposite the end of the caravan and as close as possible to Cecilia
Running across the uneven jungle ground, Bones steadied himself for a throw at Amp. The Tomahawk sailed true and took the Drylands member out of action. Nearby Redbeard was inspired and moved forward to throw a far Tomahawk at Gordon’s back as the hunter busied himself shooting the Terror. The sailing weapon, using the Shot in the Back bonus, managed to hit for five damage.
Meanwhile Cecilia, noticing the leering faces of the Savages, spun Dwaal around and moved west, away from the advancing horde. The rest of the Drylands posse was generally ineffectual, and settled for adjusting their positions.
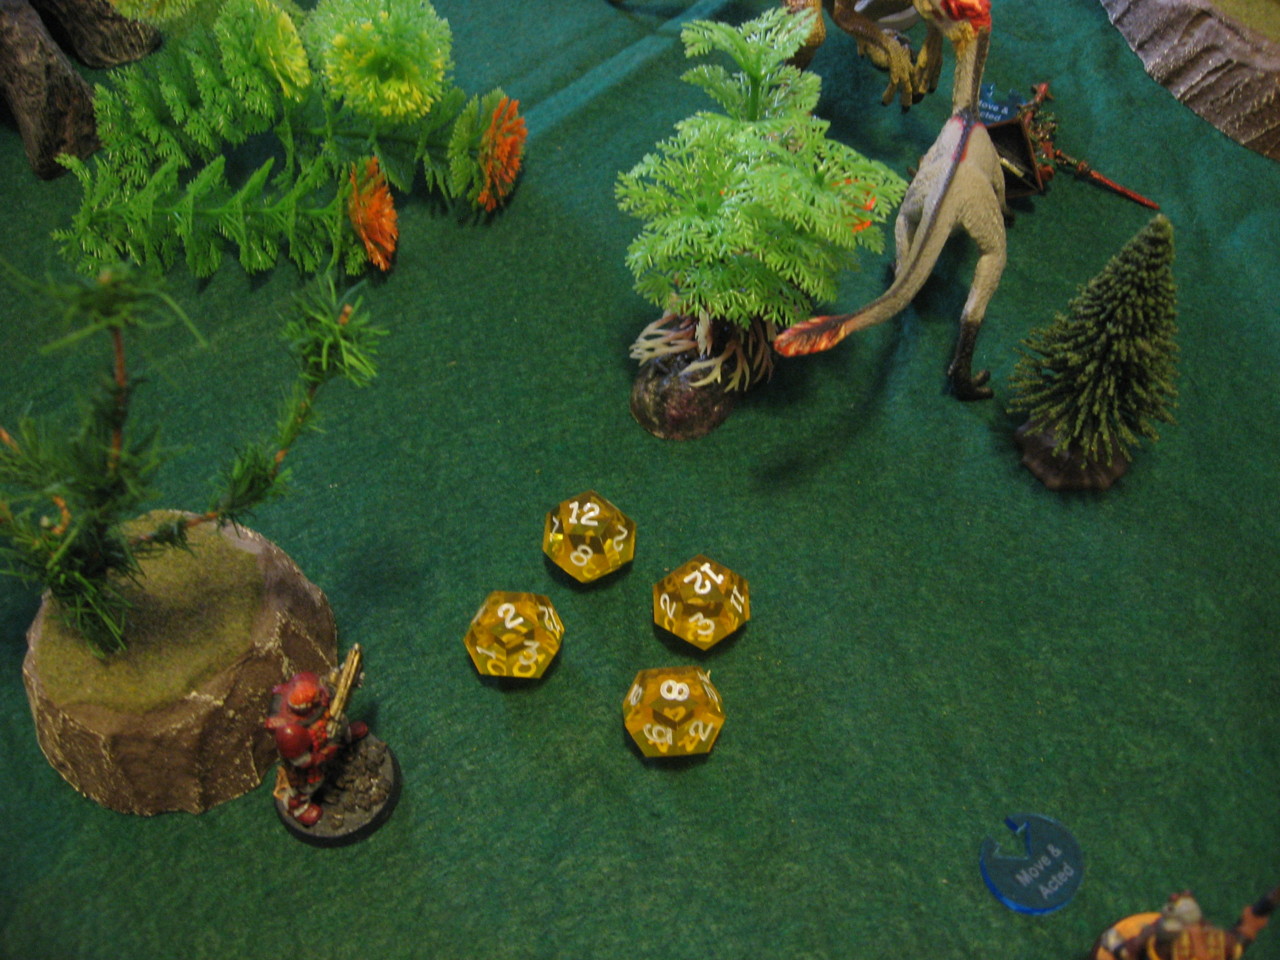
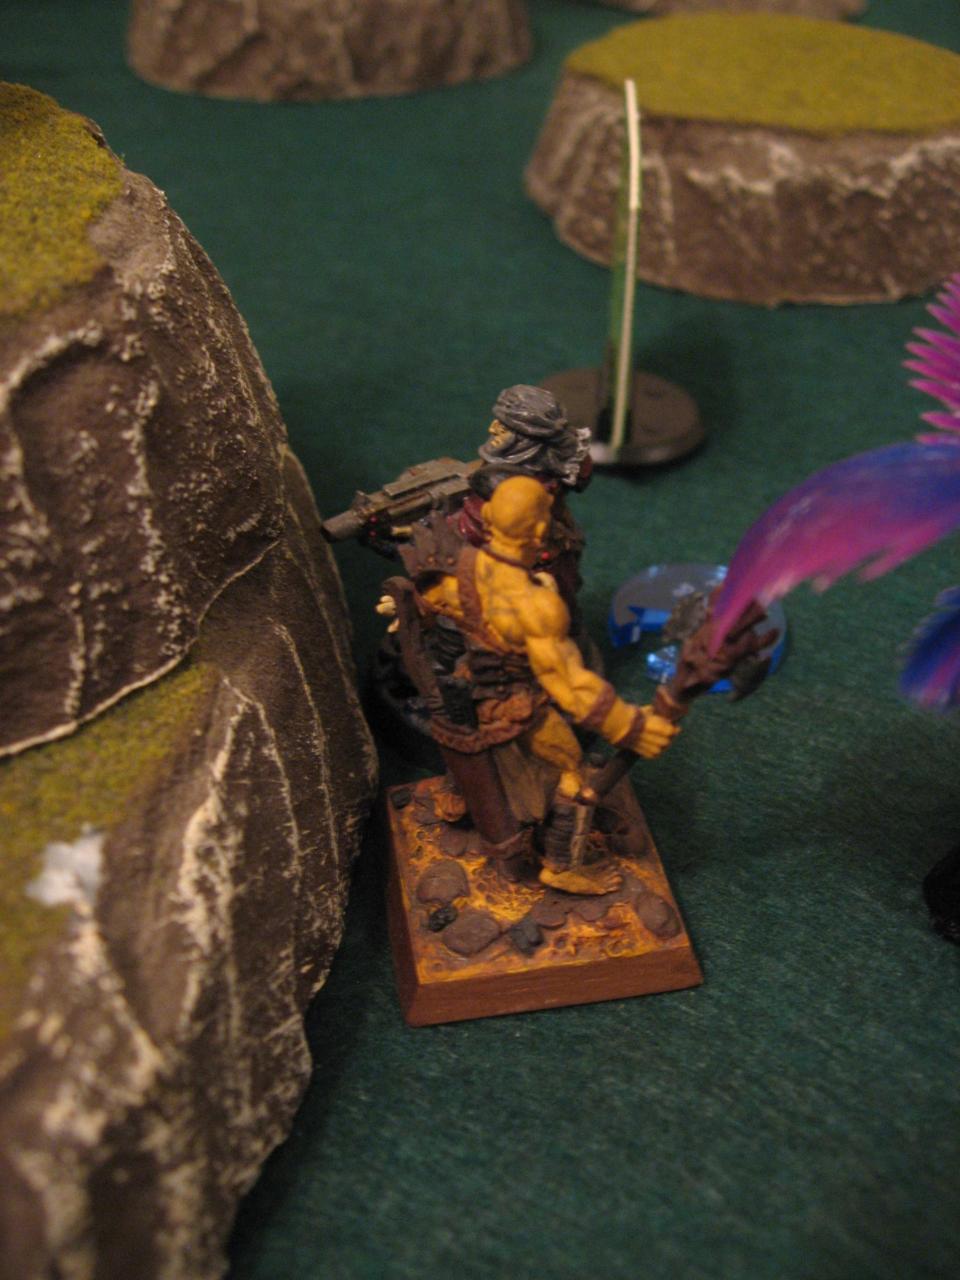
Focused in his own world Gordon drew his revolver and fired at the approaching Terror, hitting enough times that the dinosaur was already down to 5 Hitpoints. The man quickly holstered the weapon and instead shouldered the powerful Double Barrel Shotgun, although he was hesitant to shoot in the fog (really hard to get that weapon into Medium Range).
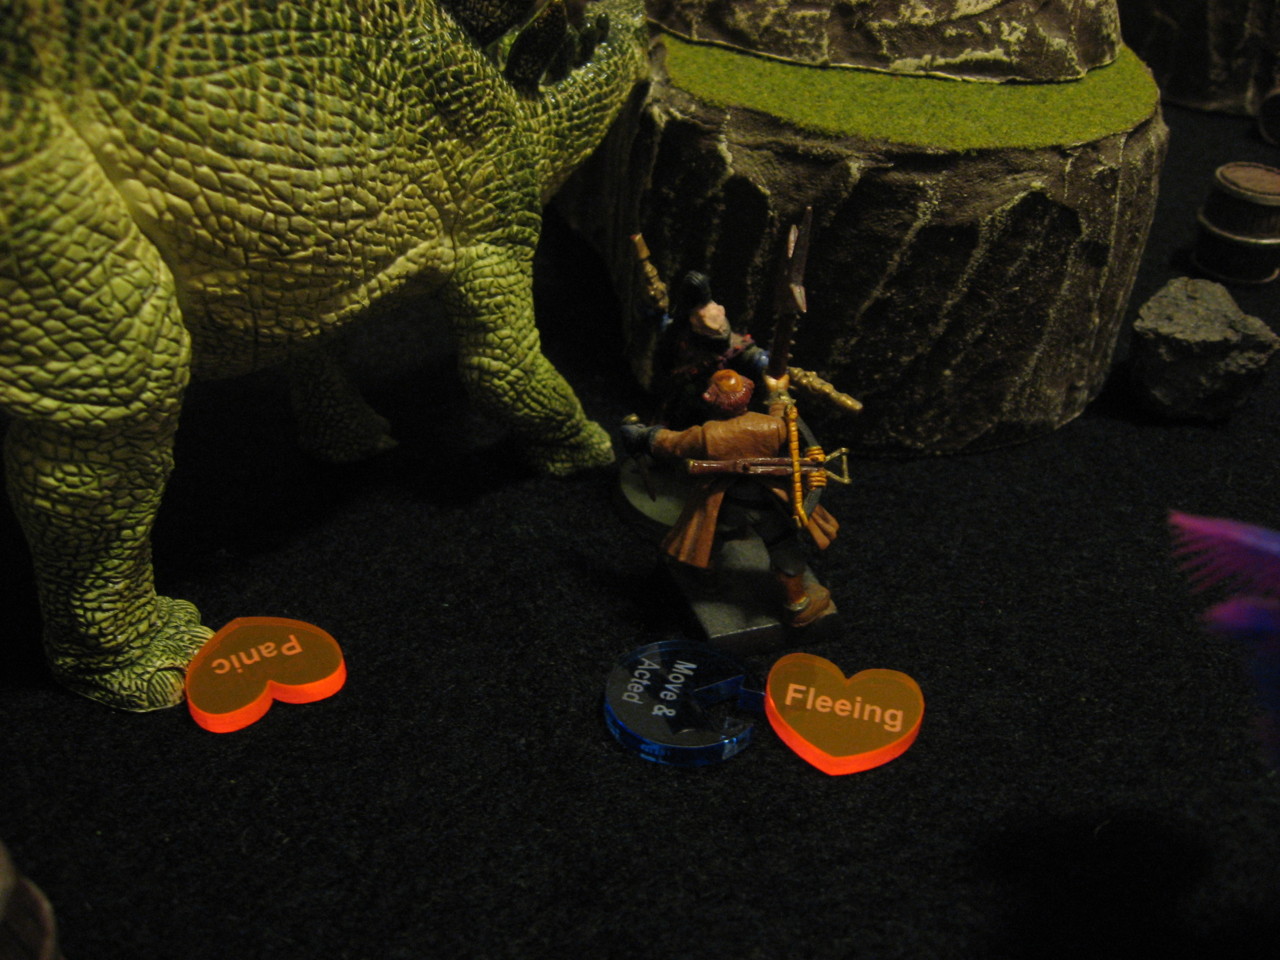
The Horned dinosaur stomped over the already dead body of Purple (table result was Do Nothing). The Terror moved forward and tried to Charge the porter Tendaji but failed to reach him!

wr-d23_0922wr-d23_0924wr-d23_0926wr-d23_0929wr-d23_0933
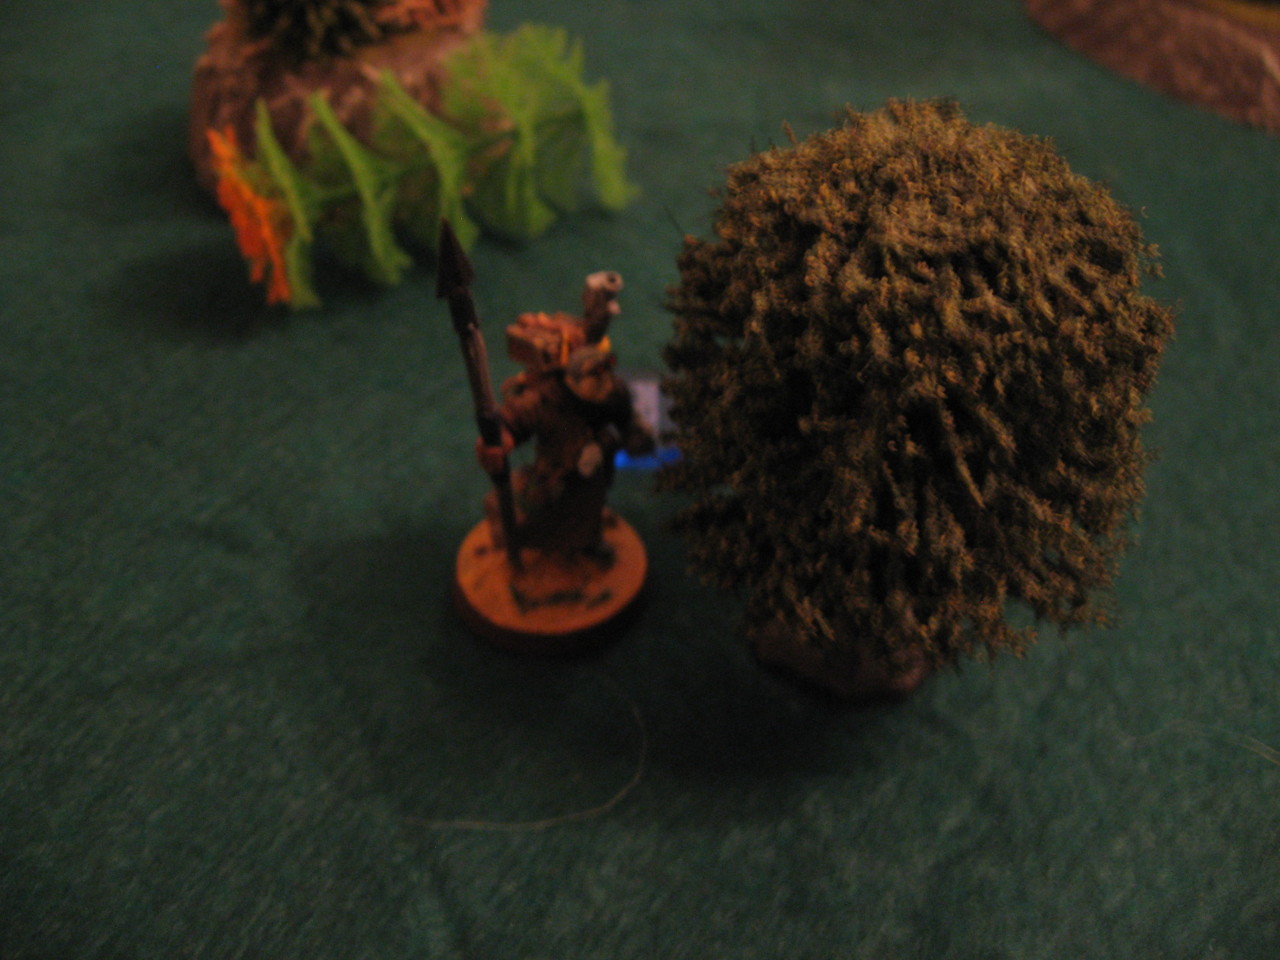
Another Savage (who looks exactly like Gladiator) returns to the table, Gibson preparing to miss his Laserbow shot on Bones, Gibson in the jungle, the mighty Tomahawk throw that took Amp out of action, the narrowing distance between hunter and hunted

wr-d23_0935wr-d23_0937
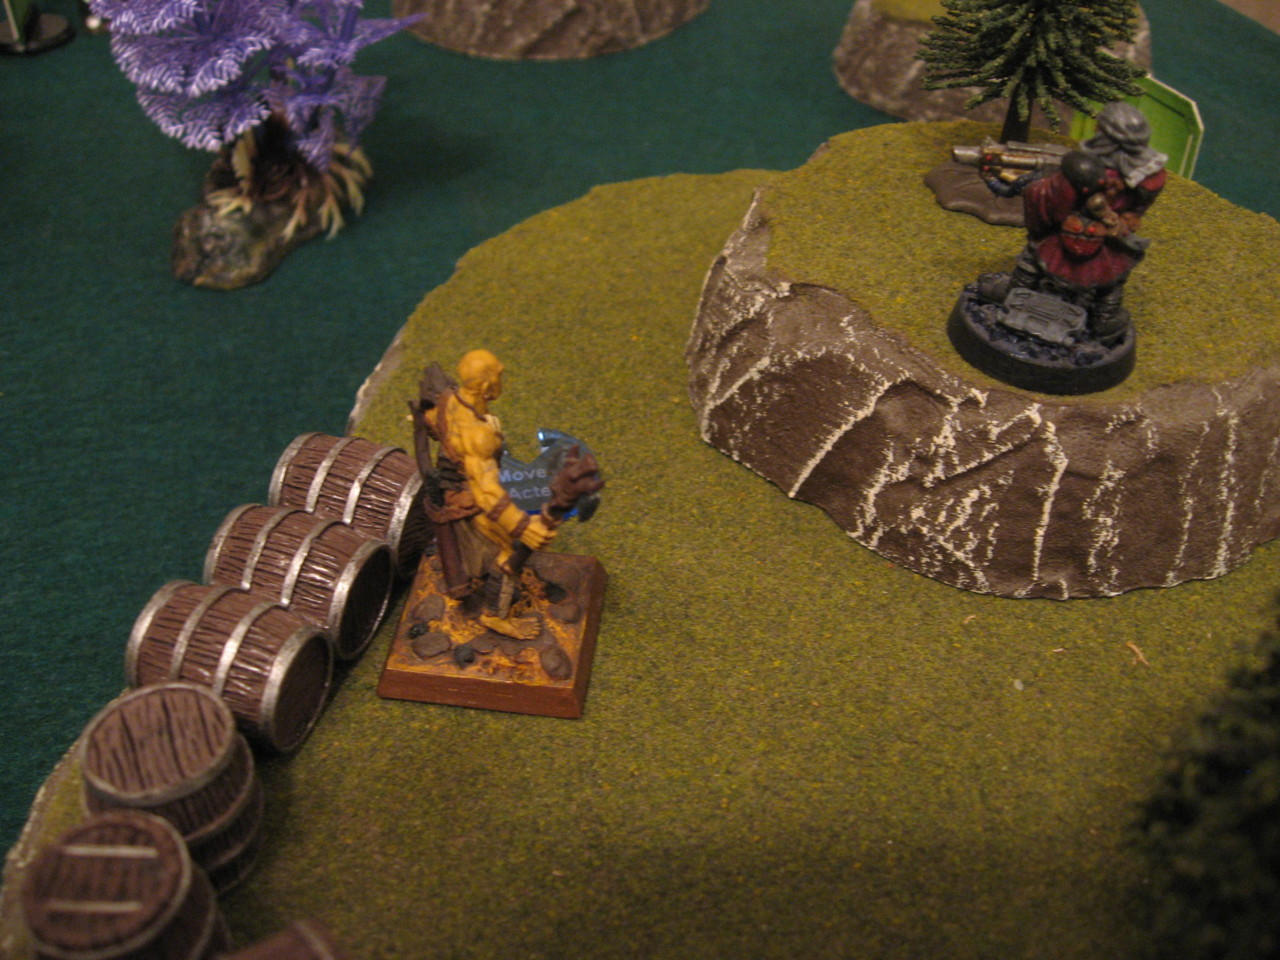
Gordon focuses on shooting the closing Terror, while Redbeard capitalizes on his distraction by throwing a Tomahawk at the hunter’s back
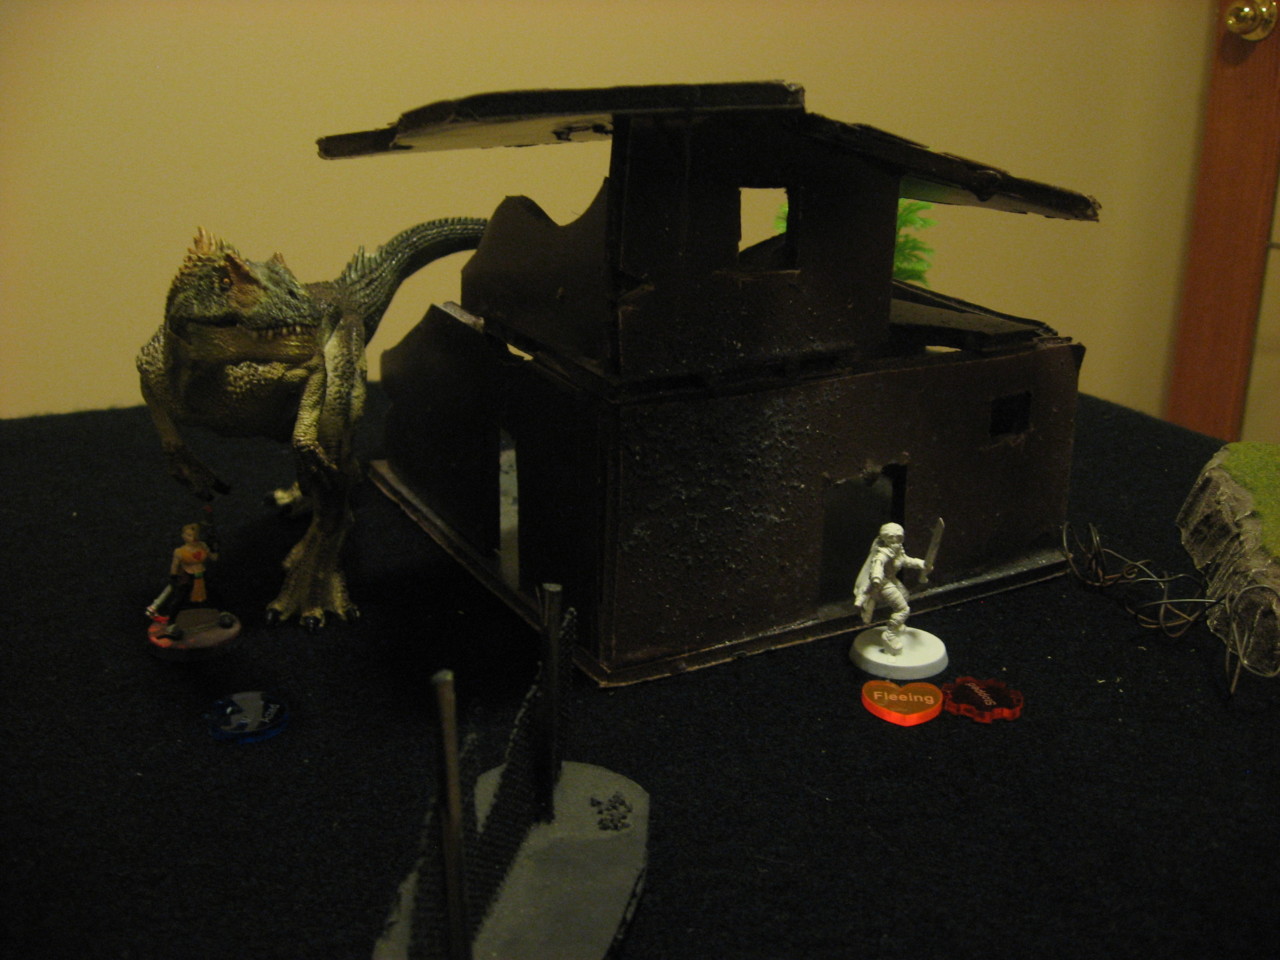
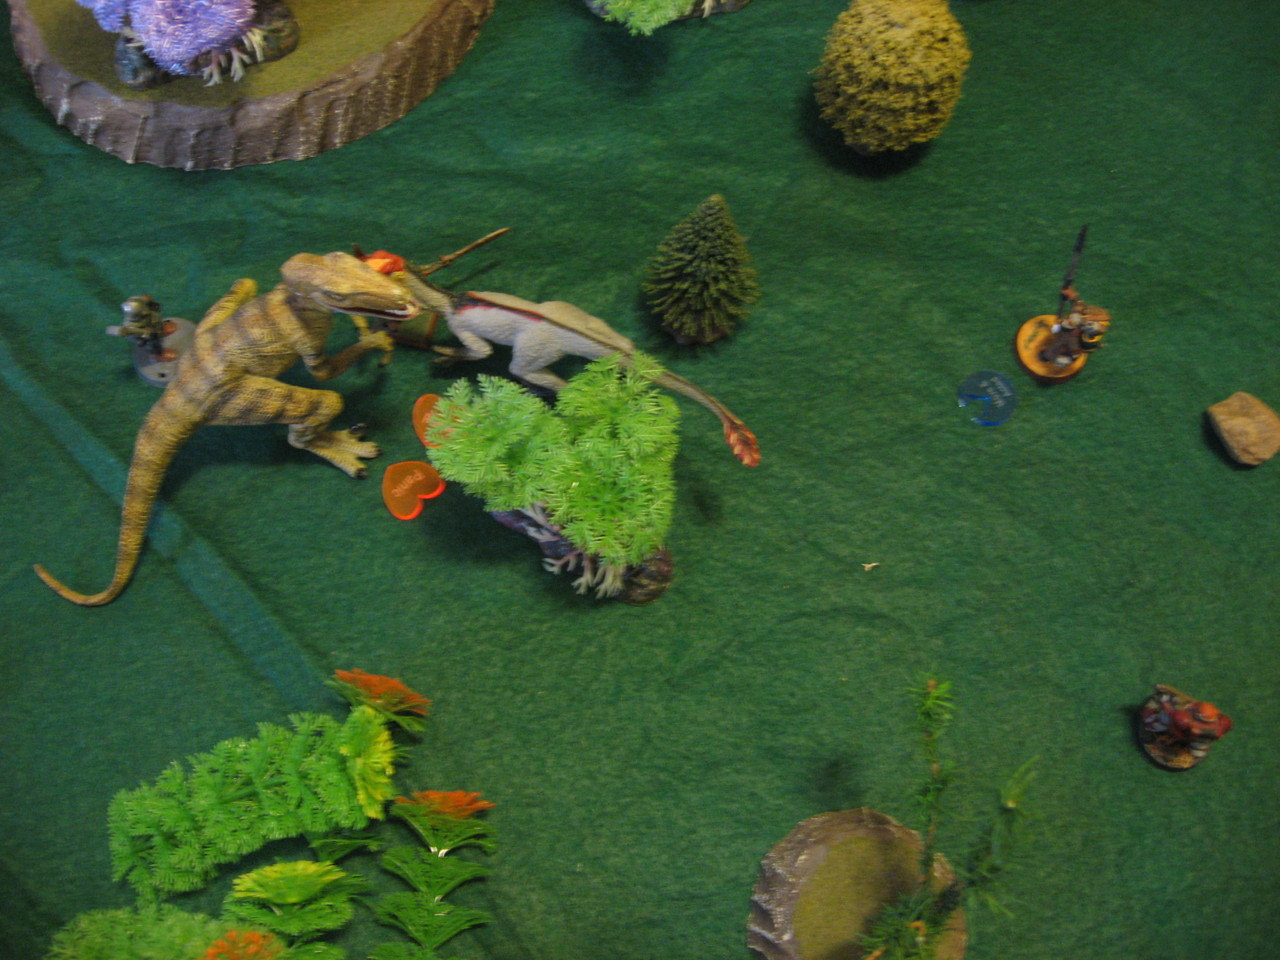
wr-d23_0943


Turn 4/6 – My Wife!
Of the dead Purple came back on the board, redeploying in a similar spot to Gladiator last Turn
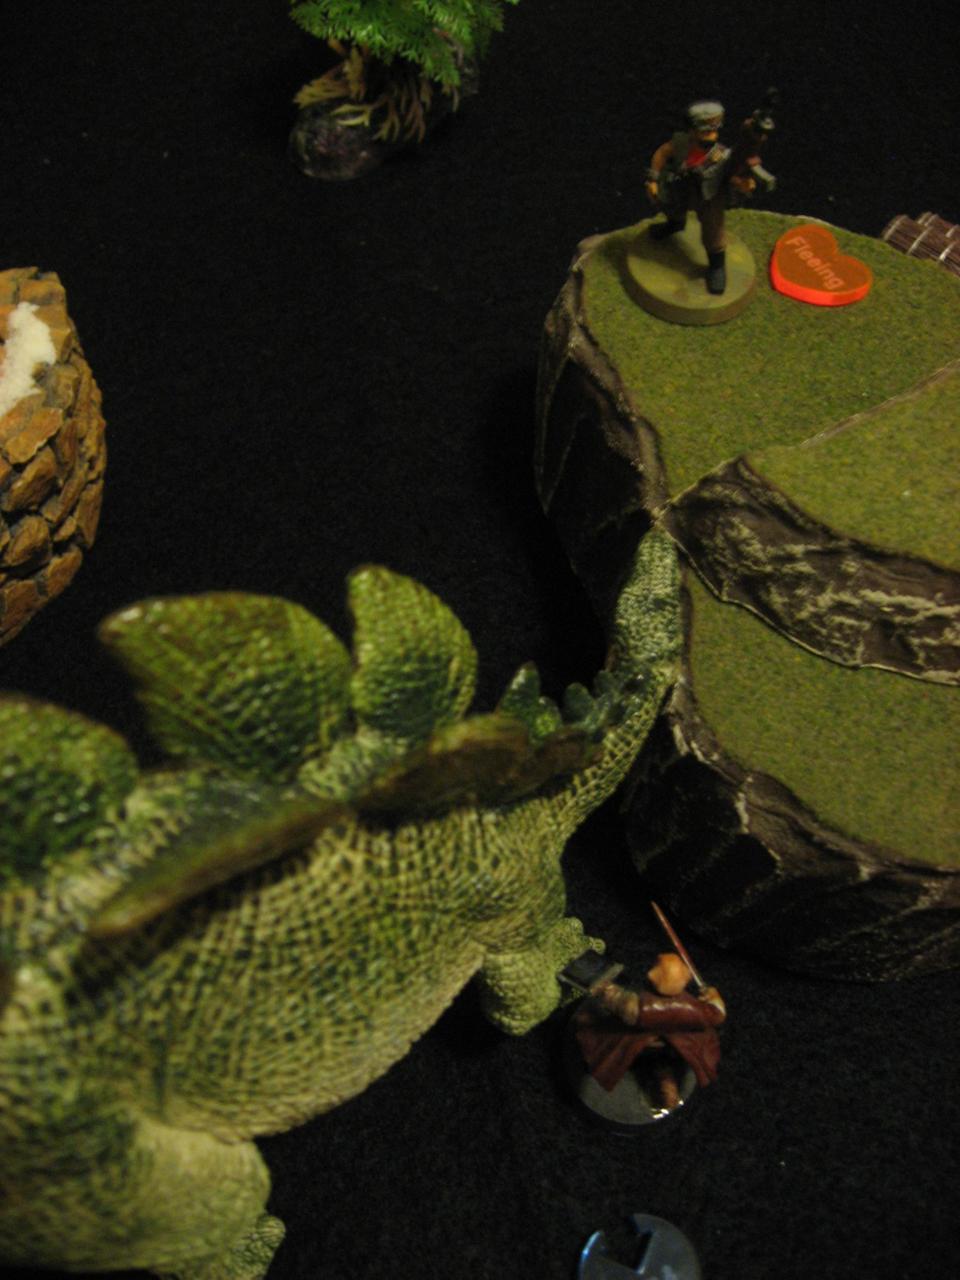
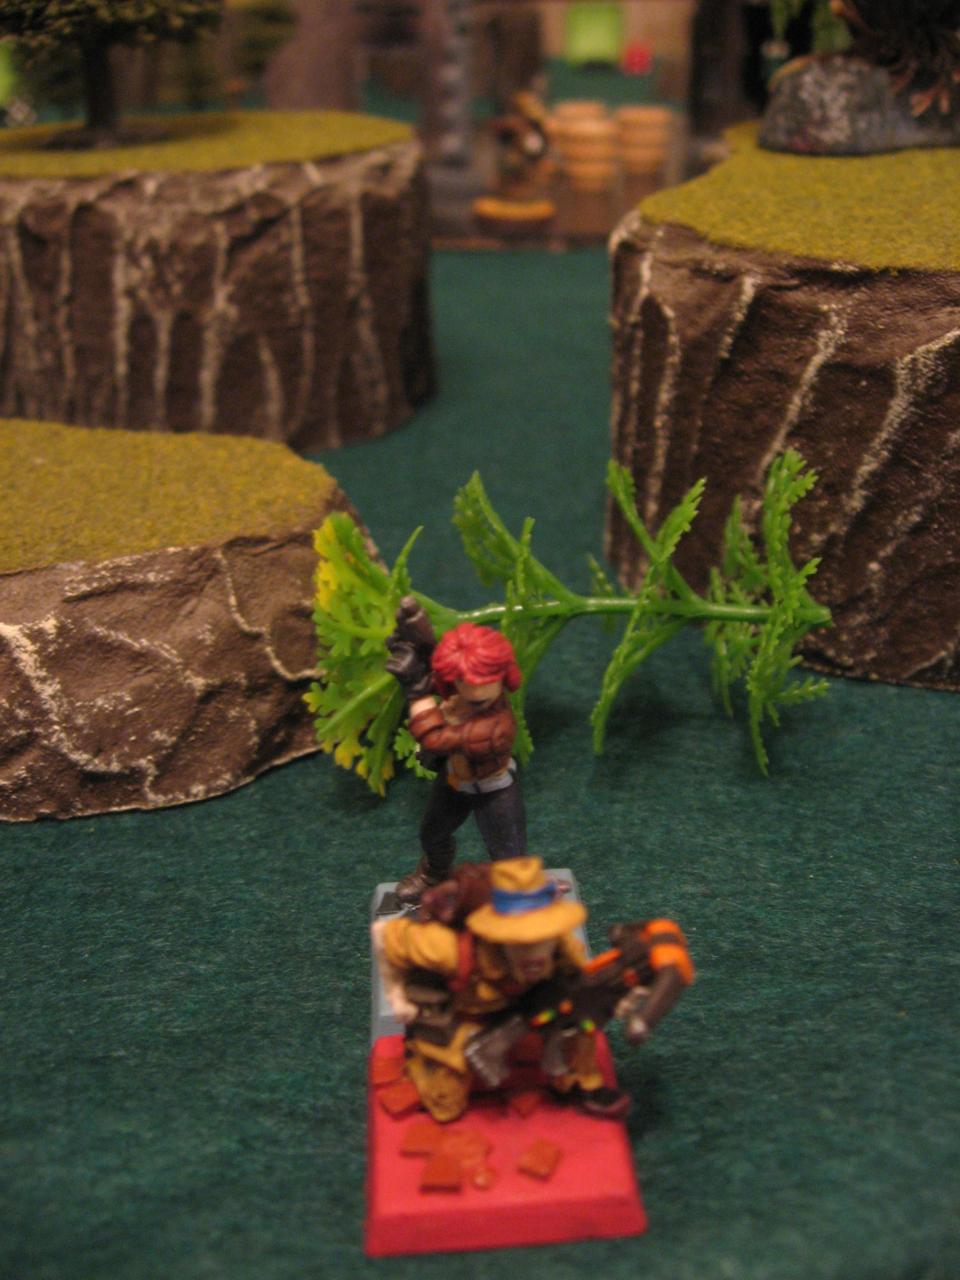
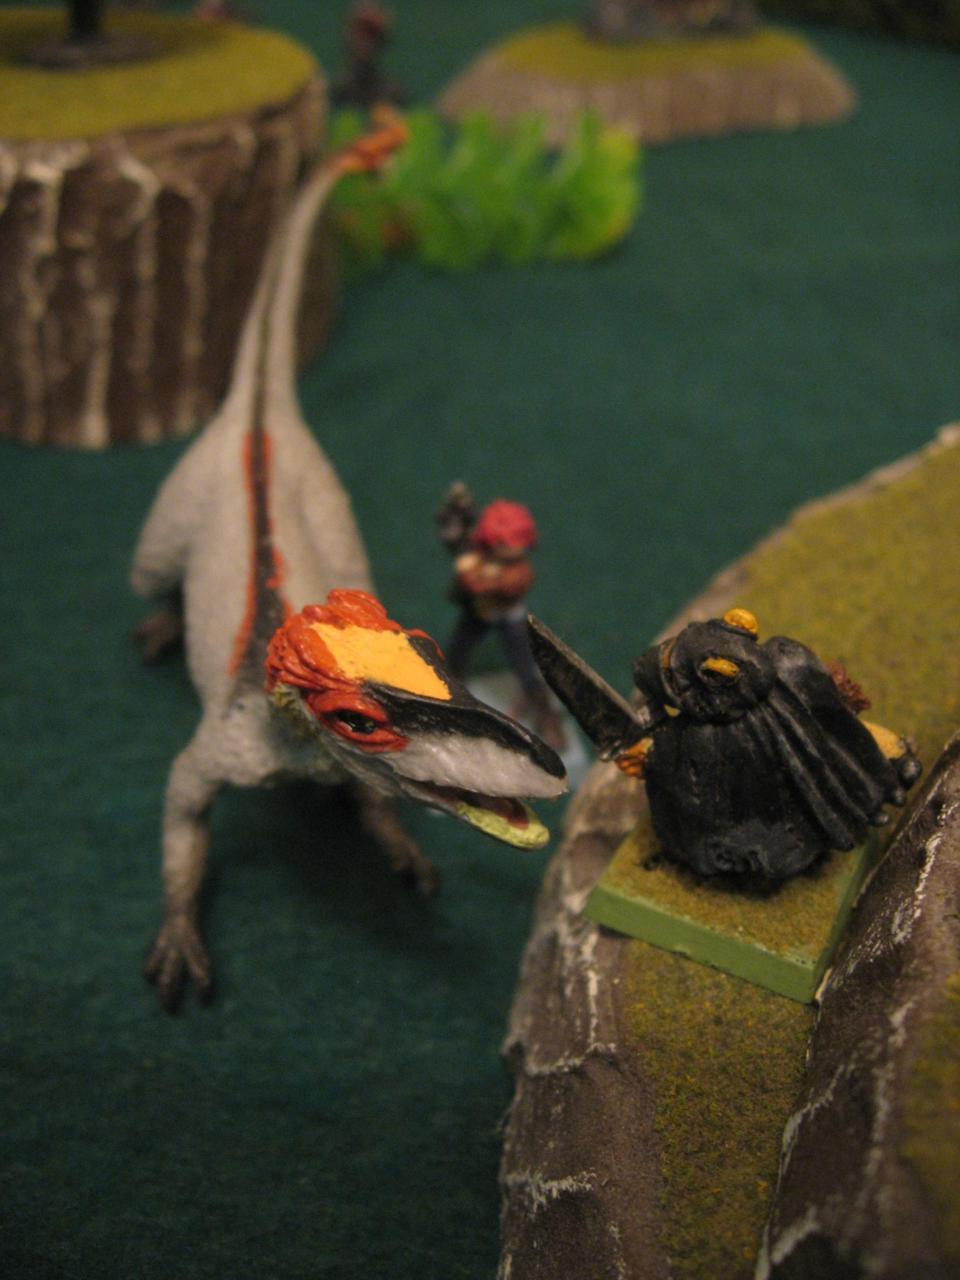
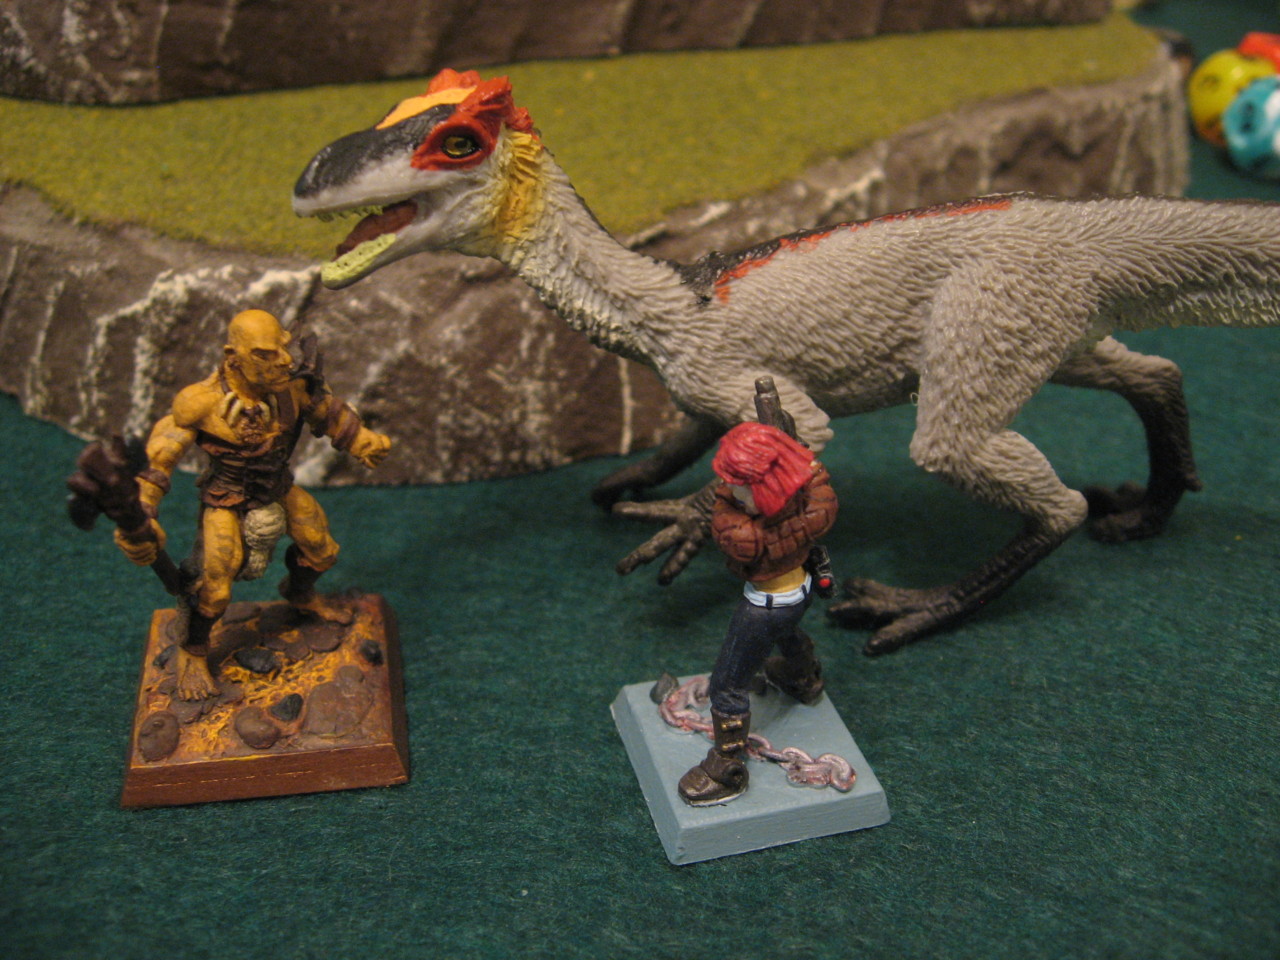
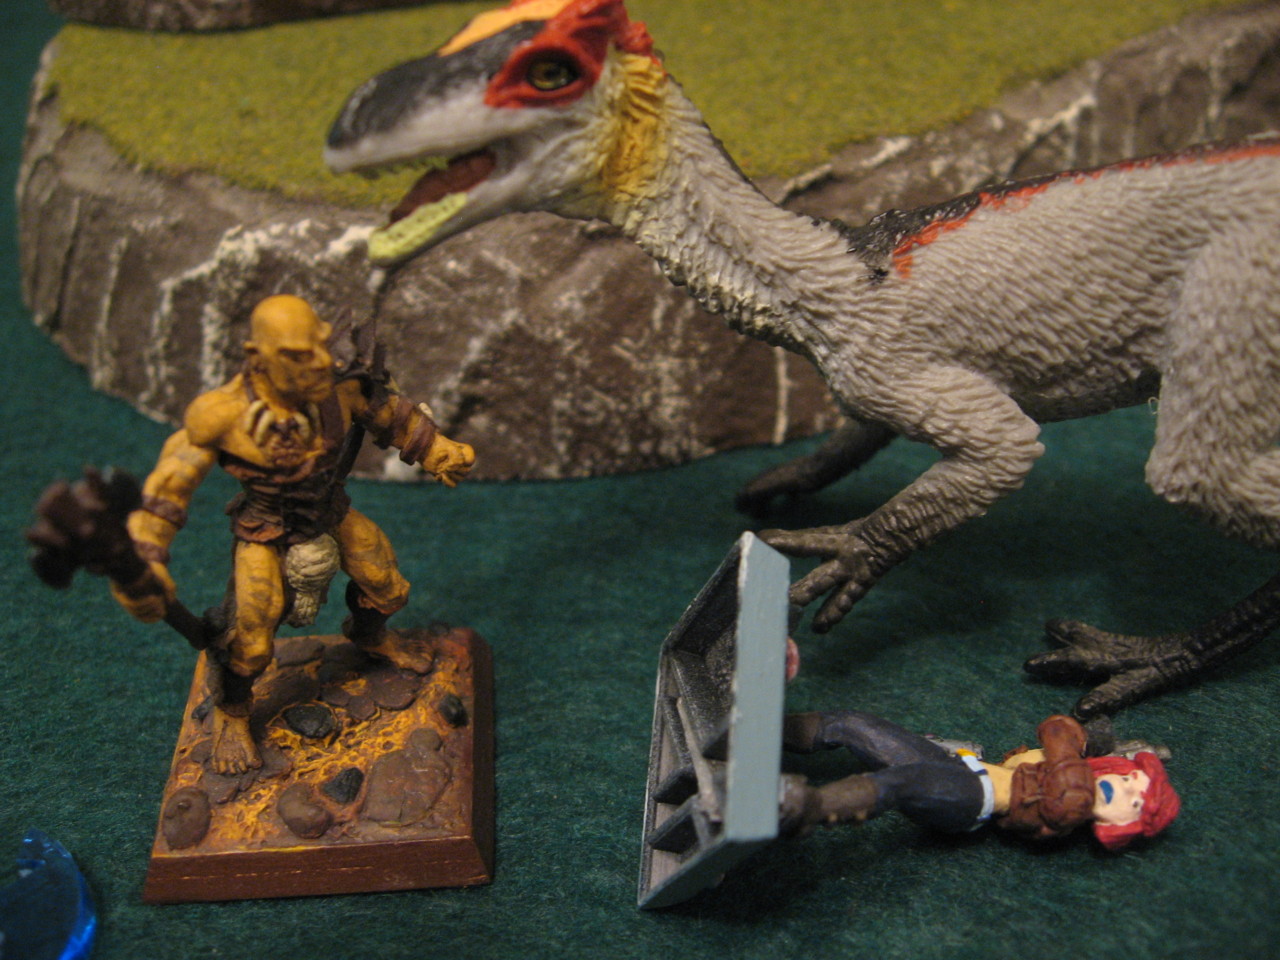
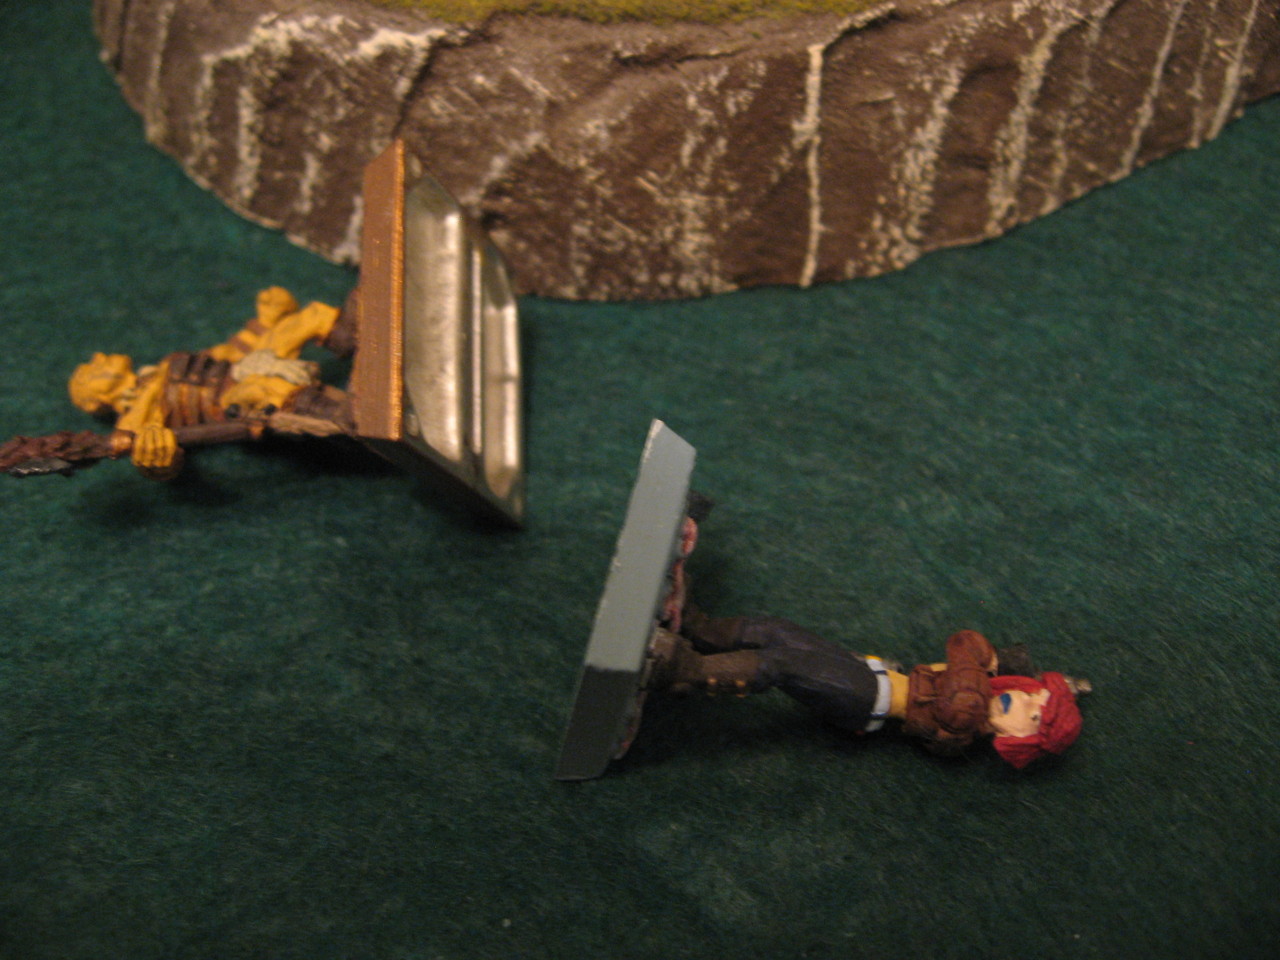
The Savages seized the initiative and Gladiator moved and heroically (for a villain!) Charged 6″ to reach Cecilia! She had already been wounded by a Tomahawk, so Gladiator was able to hit for 1+3 and take her out of action. The Drylands posse had failed their objective of keeping Cecilia alive. Now to see if they could hold out for two more Turns.
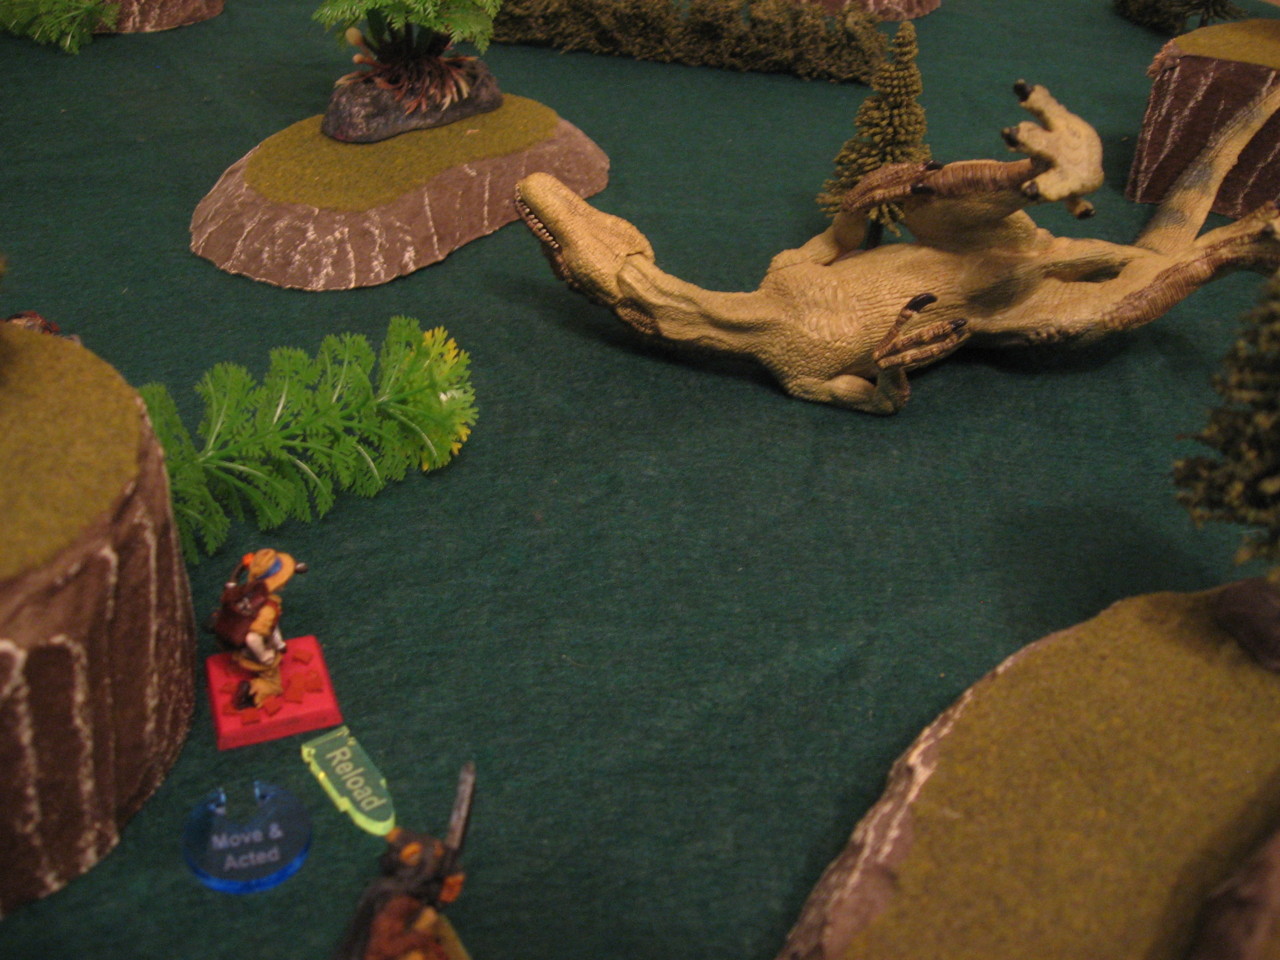
A hill had blocked Gordon from seeing his wife fall, so he continued to focus on the Terror. He edged behind a nearby cliff covered in overhanging vines, and lined up his Double Barrel Shotgun. The Terror slavered and almost looked to be grinning as Gordon squeezed both triggers (using Both Barrels). The massive attack hit for 9 damage which brought down the dinosaur!
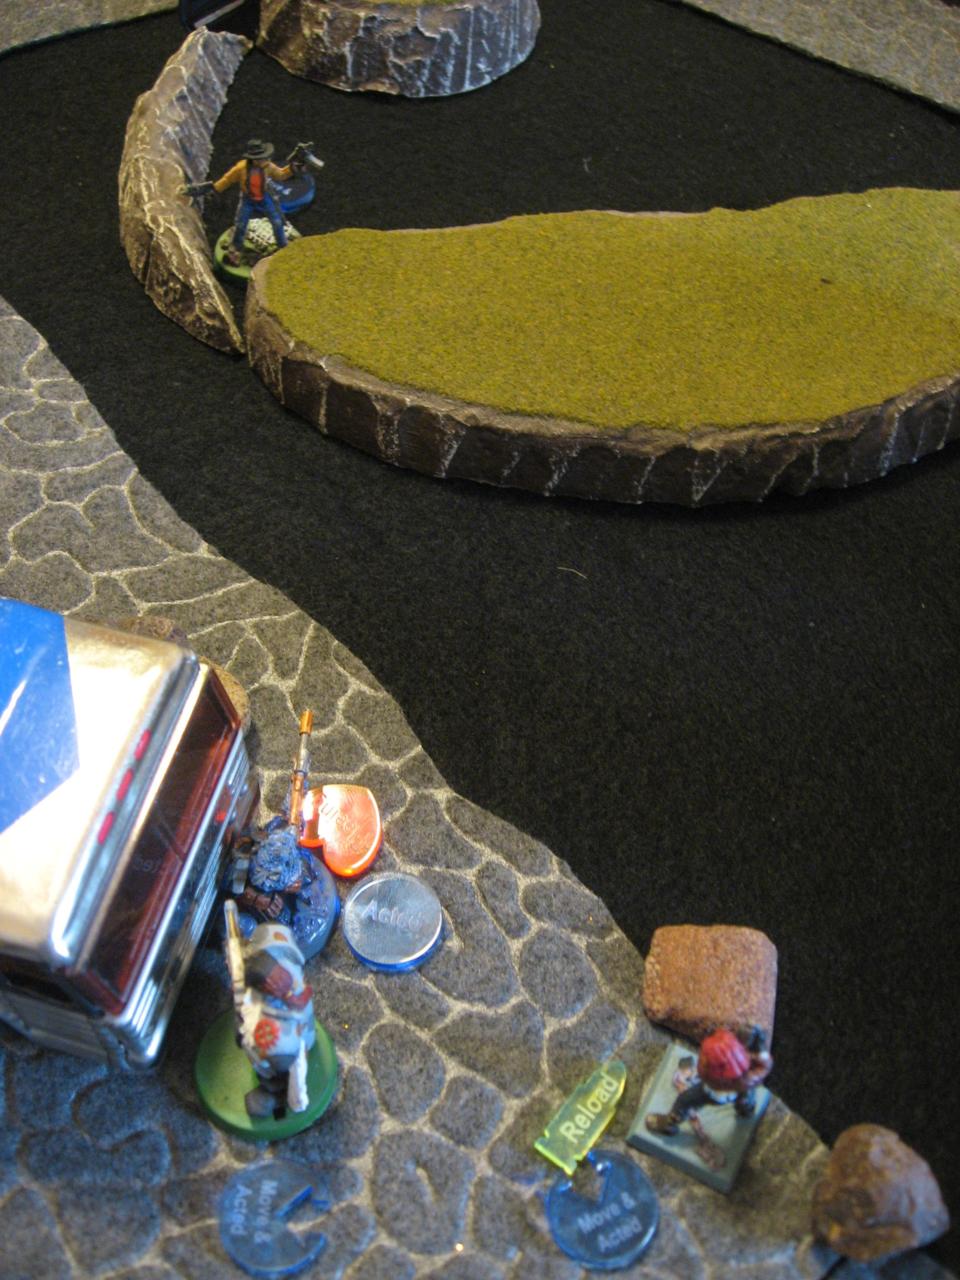
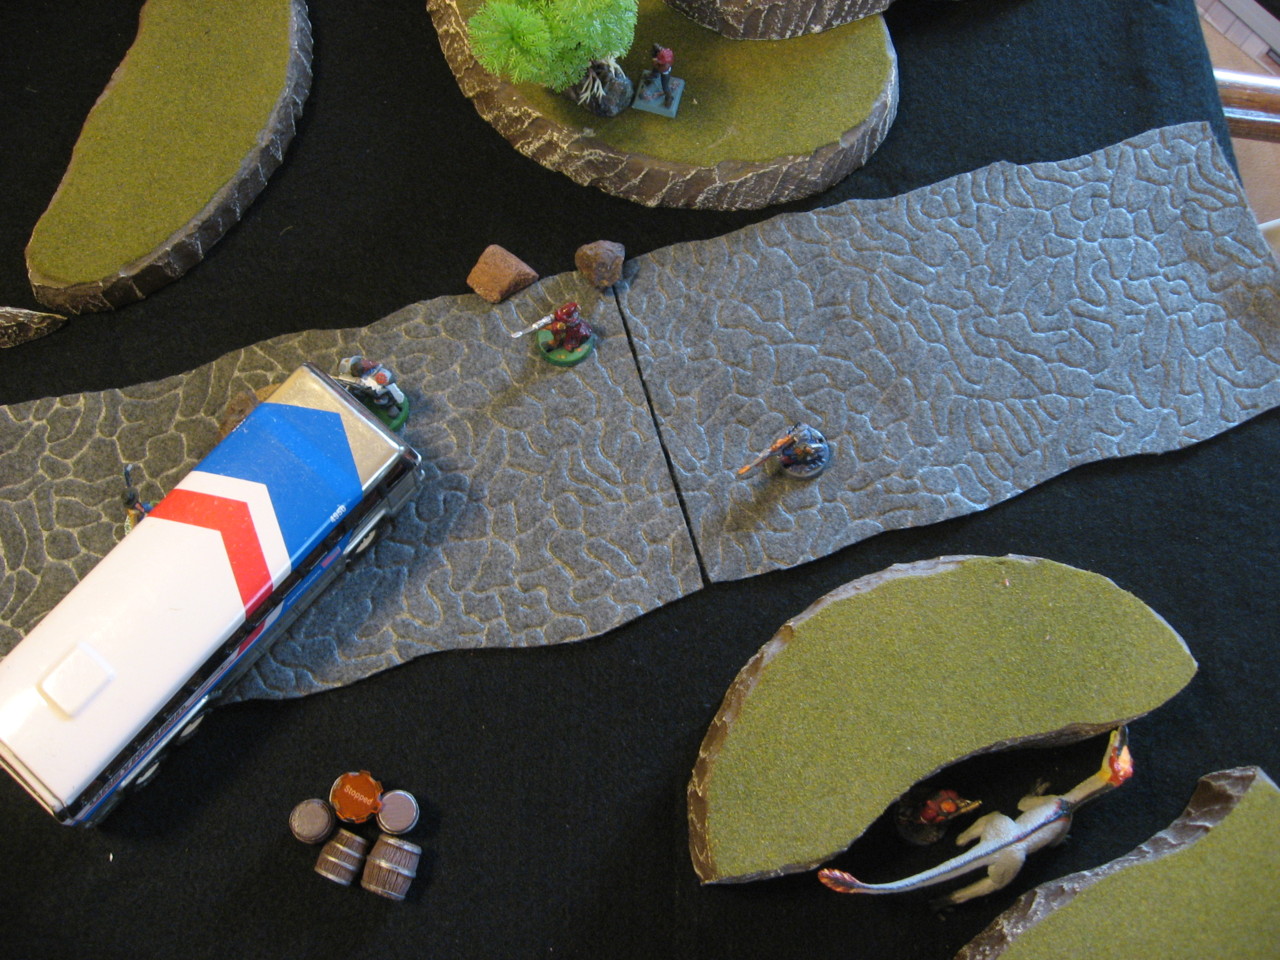
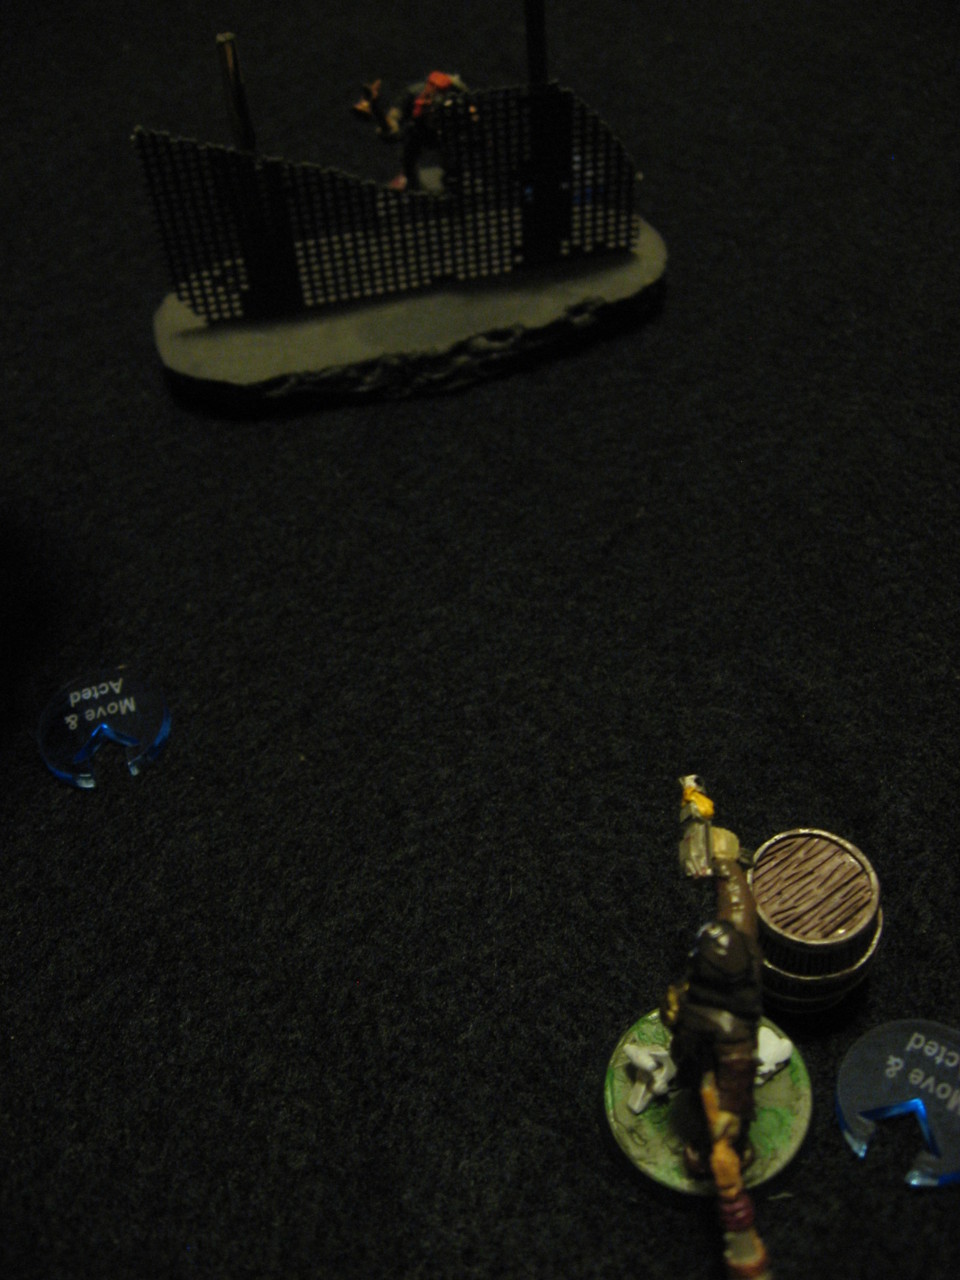
To the front of the convoy Gibson was nearly killed by another Tomahawk from Redbeard. Safely behind a tree Quidel took his time to line up his Heavy Pistol, and managed to kill Redbeard in response.
To the opposite end the Pirate ducked behind a hill and lined up a devastating shot against Rhodes. In response, having retrieved the Bolt Action Rifle from Kwabena, Rhodes fired and killed the Pirate.

wr-d23_0947wr-d23_0950wr-d23_0967wr-d23_0971wr-d23_0974wr-d23_0975
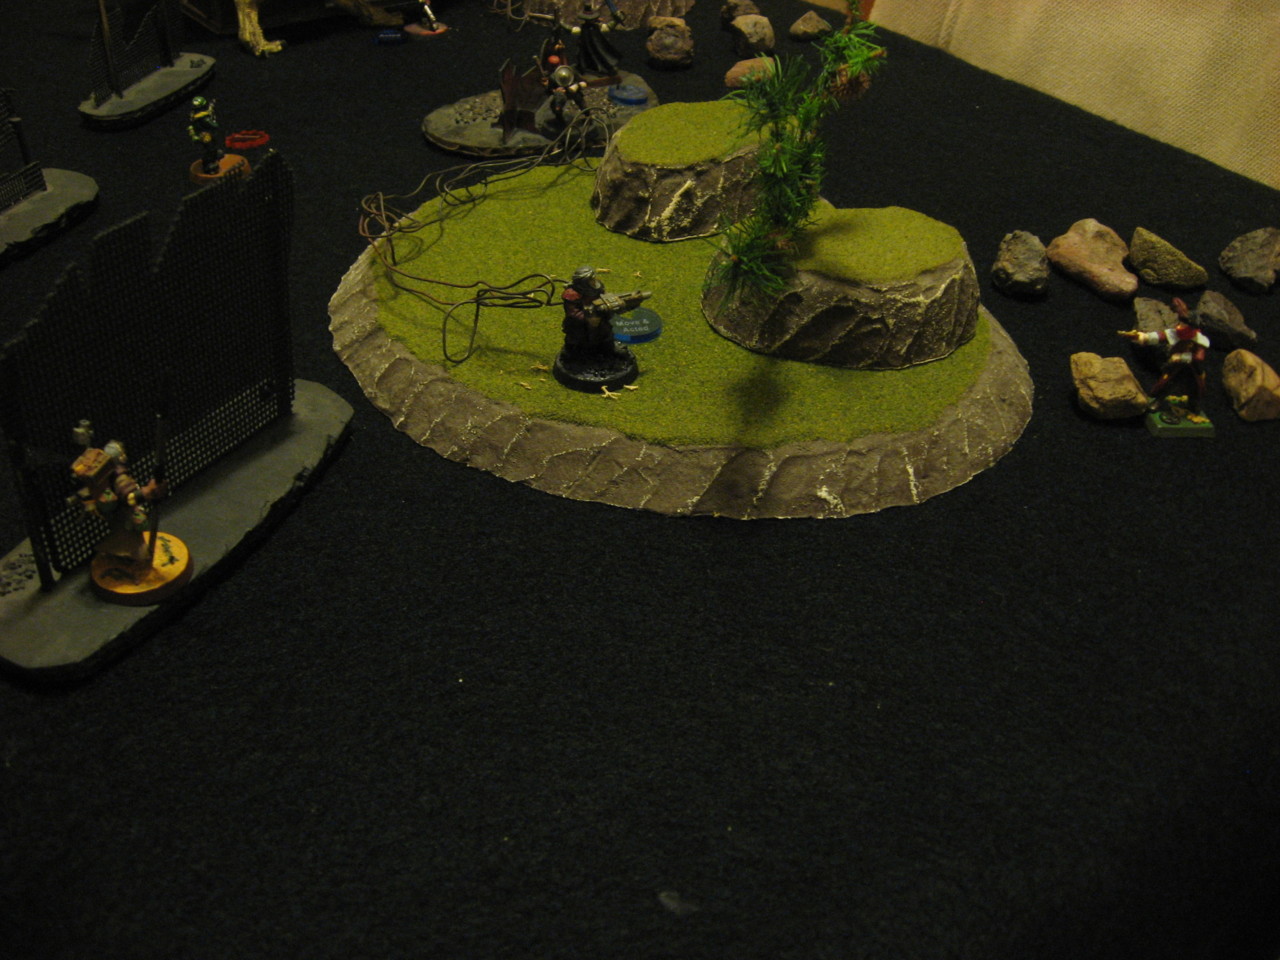
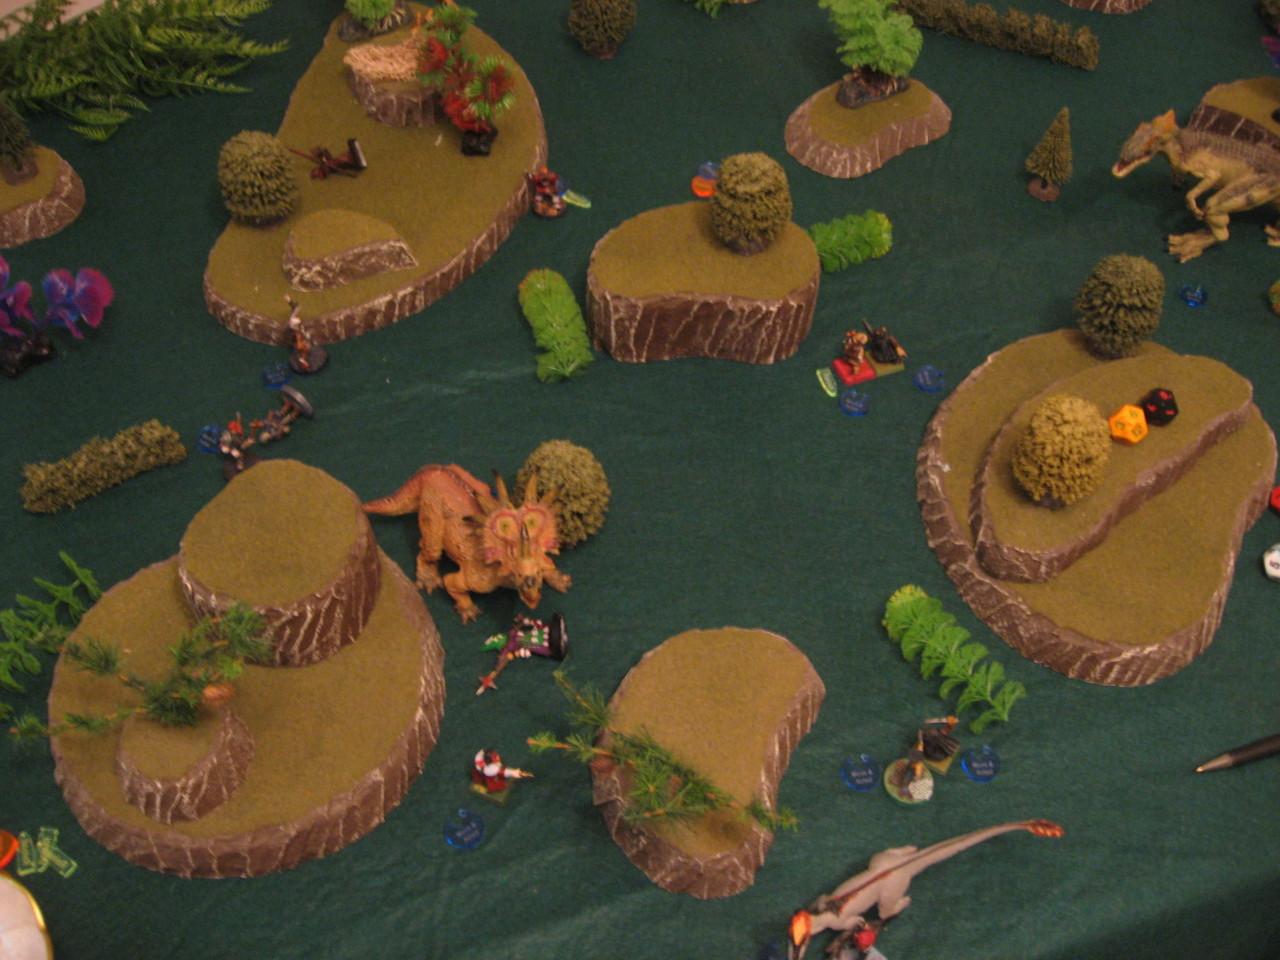
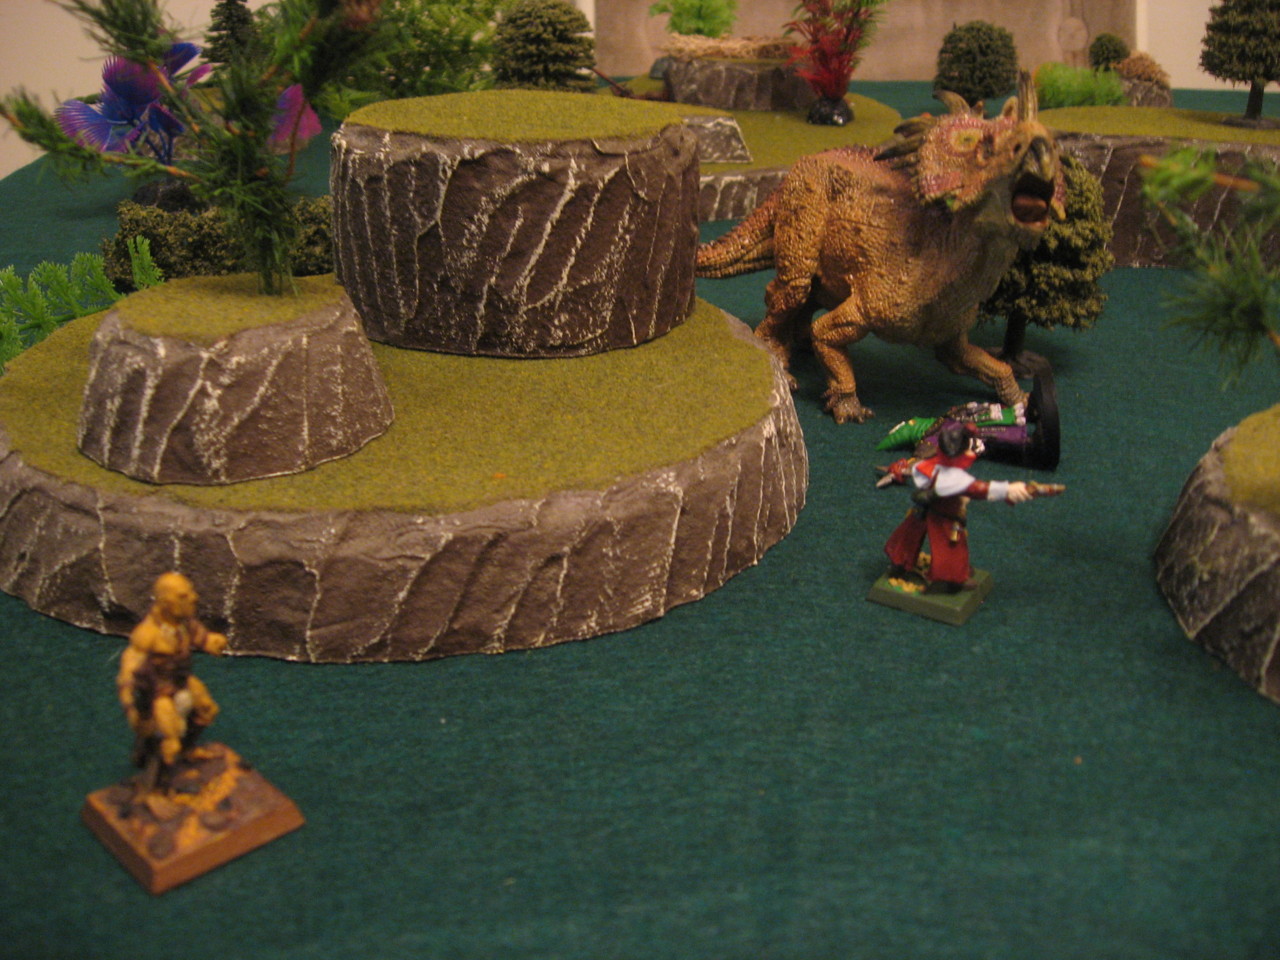
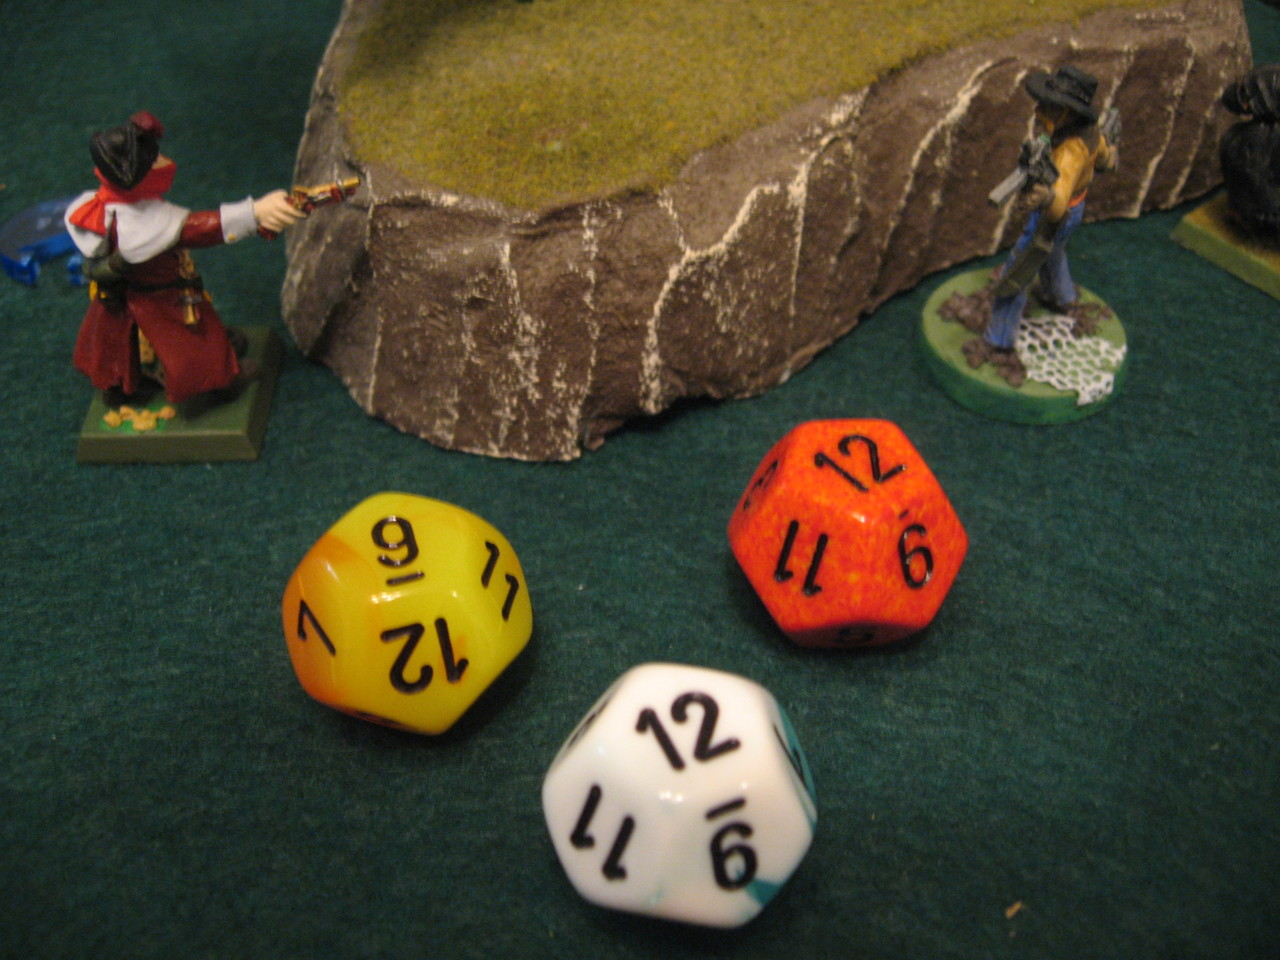
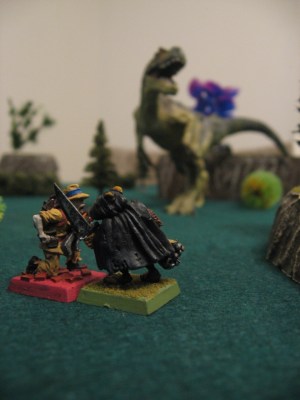
Quidel hangs out behind Cover to use the superior range of his Heavy Pistol, Gladiator before his Charge and the scene at the end of the caravan, Pirate lining up his attack, the phenomenal Tomahawk throw, Redbeard harassing Gibson, Redbeard being killed by Quidel

wr-d23_0955wr-d23_0956
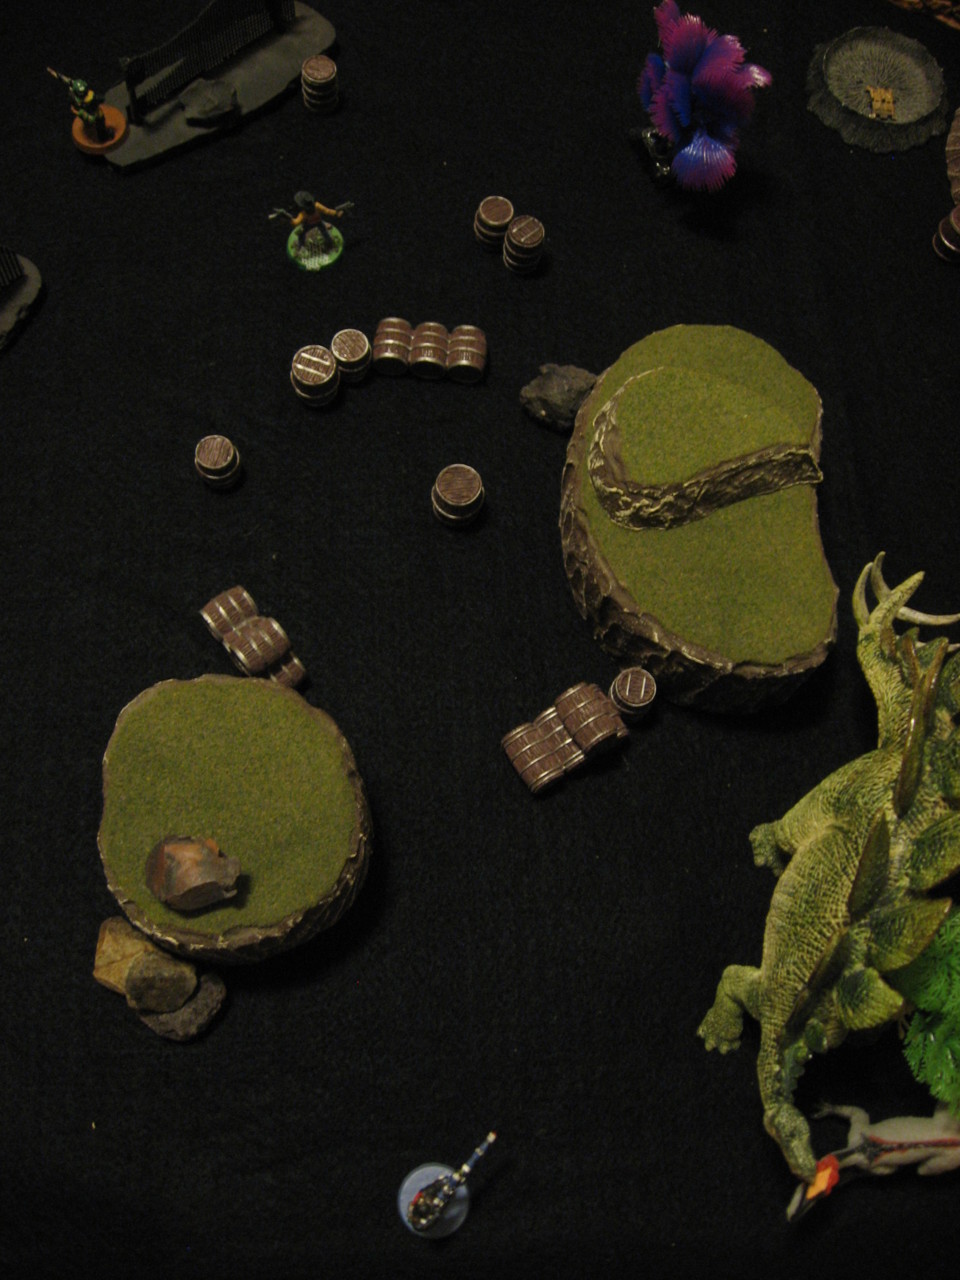
Gladiator impressively reaching Cecilia with a 6″ Charge, the deadly Club blow is struck

wr-d23_0961wr-d23_0962
Gordon unloads Both Barrels on the Terror, the beast is down

wr-d23_0978


Turn 5/6 – Savagery Grows
Of the dead both Redbeard and Pirate come back, redeploying in the middle near Gibson
Seeing more Savages pour from the jungle fog, Gibson fires a bolt of energy at Redbeard, missing his shot. From behind the tree Quidel lets out an inspiring Yeehaw!, and the re-roll is a hit on Redbeard. Unfortunately the fresh Savage could withstand the 6 damage, and moves forward to throw a Tomahawk and Gibson. The weapon hits the wounded man and he crumples to the ground, not even the sturdy cover of the hill preventing his defeat. Quidel tries to finish off Redbeard but fails to hit from behind the tree.
Dwaal, now unsaddled, hits and kills Gladiator in a lucky roll against the fierce Savage. Then Dwaal moves towards the head of the convoy to try to lend a claw. Meanwhile Rhodes manages a kill, this time bringing the deadly Bolt Action Rifle to bear on Redbeard, who doesn’t seem the attack coming and dies.
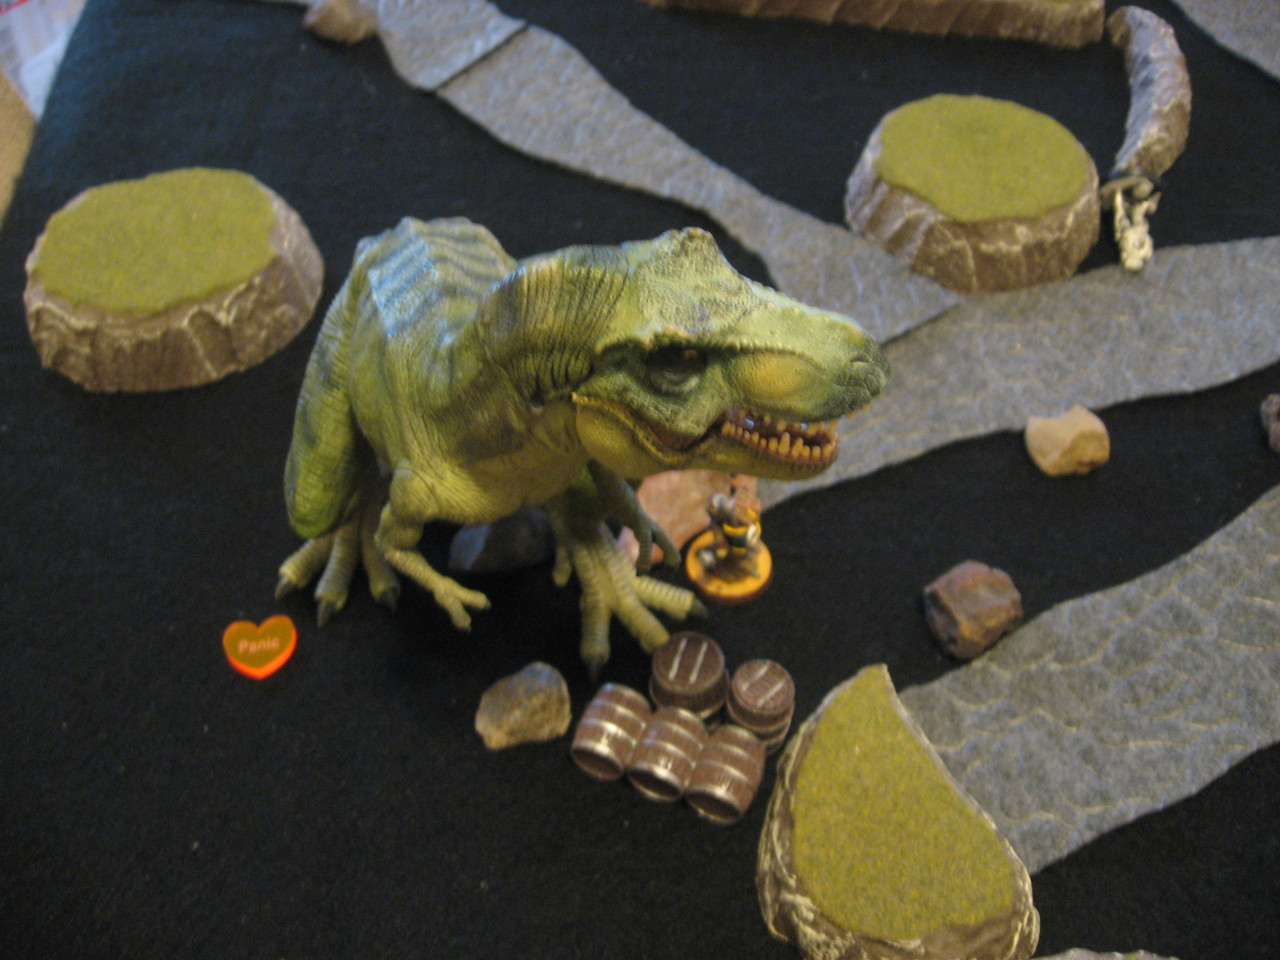
The Horned dinosaur randomly moves again, and with another stroke of luck for the Drylands posse ends up in close combat with Bones. The fierce dinosaur hits the man for 3 damage, while Bones returns the favor with his Club doing 4 damage to the dinosaur.

wr-d23_0983wr-d23_0985wr-d23_0986wr-d23_0990wr-d23_0981
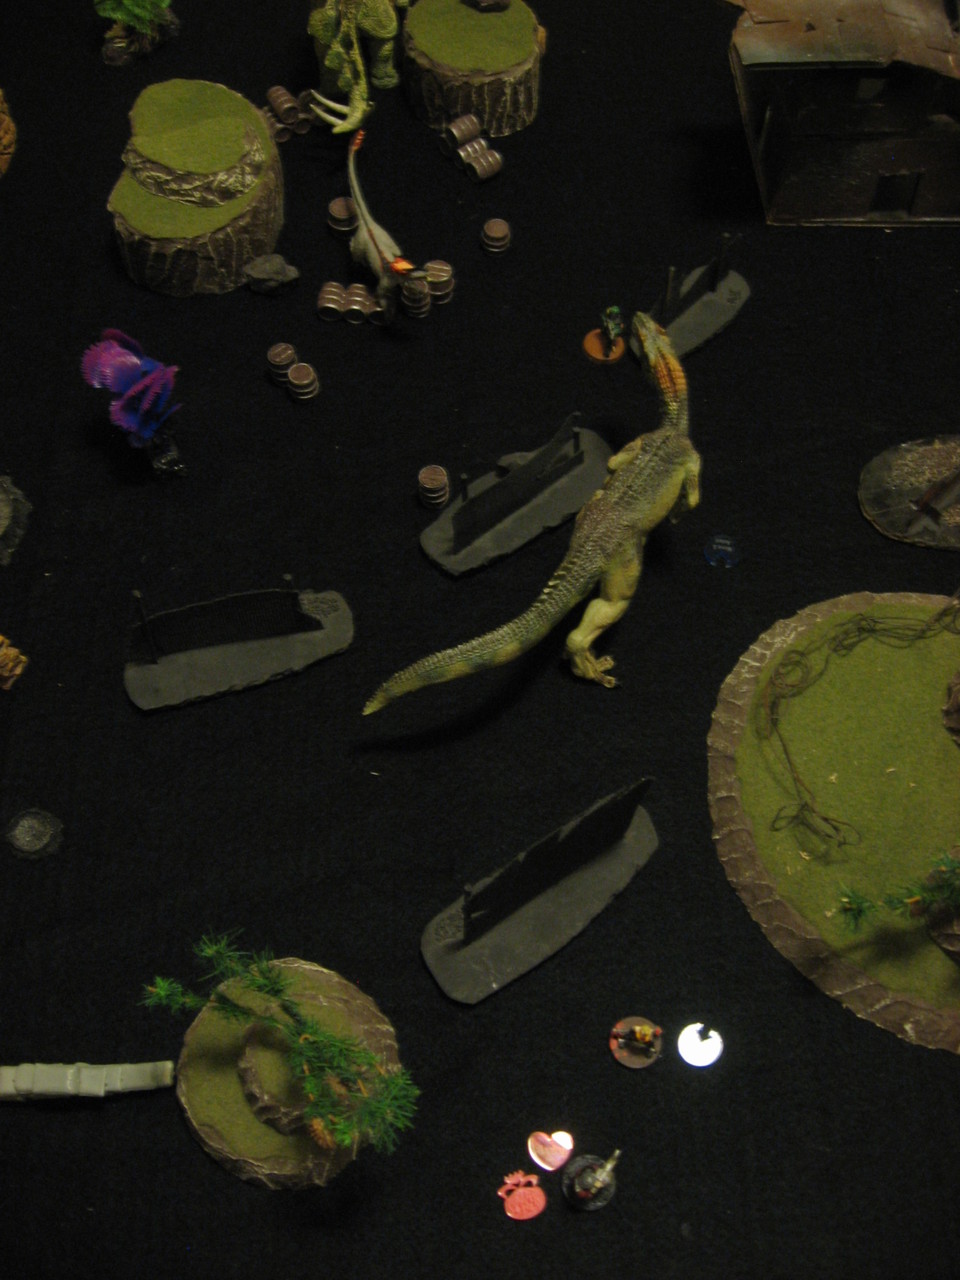
Pirate and Redbeard join the fight again, Gibson falls to a Tomahawk from Redbeard, Dwaal moves down the convoy with his bounding speed, Rhodes lines up a sniper shot on Pirate, Horned dinosaur and Bones locked in deadly combat


Turn 6/6 – Back Into the Mist
No Savages return to the board due to some incredibly bad rolling
Sensing that the Savages morale is about to break, the Drylands posse tries to push the advantage. Rhodes begins by firing his dual pistols at the Horned dinosaur, but only manages a single point of damage. He didn’t want to risk missing with the Bolt Action Rifle which is why he reverted to the pistols. Running high with adrenaline from his last dinosaur kill, Gordon tries to hit the Horned dinosaur with a Riot Grenade and knock it out of close combat (plus his Double Barrel Shotgun needed to be Reloaded). Unfortunately the grenade sailed wide without effect.
With deadly efficiency Quidel kills another Savage, this time downing the Pirate. Now the only living Savage left is Bones.
Dwaal swings around and easily Charges the Horned dinosaur, scratching desperately for 3 damage. In response the Horned dinosaur (randomly choosing a close combat target) stays on Bones and his for 4 more damage.
With a muffled scream Bones breaks from combat and runs into the jungle. Having lost interest in the battle, the Horned dinosaur also shambles off.
At the end Bones had 1 Hitpoint remaining while the Horned dinosaur had 5.

wr-d23_1003


Where’s Cecilia?!
Remember how at the start I mentioned the Savages goal was to capture or take Cecilia out of action? Well, they achieved it. And in the hustle and bustle of the battle no one noticed that her fallen body had been dragged off into the jungle…
wr-d23_1004wr-d23_1006

For what purpose? Well, given the reputation of Matron’s Den one can guess at the grisly reason.
After recovering and recuperating the Drylands posse and rest of the caravan manage to find Savage tracks heading south. Among them is a bloody trail that Gordon swears is from Cecilia. As the Drylands posse are still in his employ, they agree to help the man track down his wife. Besides, everyone liked Cecilia and wouldn’t wish her possible fate on anyone.

The Savages have a bit of a head start as they move Cecilia deeper into the jungle. The beauty of a campaign is the next battle will continue the story!
wr-d23_1007

End of Encounter Process
First of all are Wounds and Injuries. Both Amparo and Gibson were Taken Out of Action, unfortunately. I rolled 1D12 each, with a result of 7 for Amparo and 9 for Gibson. So Gibson is safe but Amparo will suffer a Wound! I rolled 3D12 next with a result of 8+7+1=16. Consulting the Taken Out of Action Effect I see that Amparo’s “Arm” location will be injured with a “Broken Elbow”. So he cannot get Critical Hits while the Wound lasts. Hopefully he can survive the next encounter and the Wound will heal up. At least it wasn’t too bad of a result though. If it does get upgraded to an Injury I could always return to Watterson and fix him up (after getting paid by Grogan for escorting Gordon, of course).

ShamanNext up are the rewards for taking enemies out of action and completing objectives. The Drylands Expedition and friends managed to kill 9 Savages and 1 Dinosaur. I didn’t feel that each Savage was worth +3 IP, so I settled for half. So 9 kills = 24/2 = 12 IP, +3 IP for the dinosaur. This +15 IP also worked out to +$150, and an additional +$30 for surviving the 6 Turns (unfortunately no additional Neodollars as Cecilia was taken out of action).
With the posse’s previous IP and ND and these new spoils they now have 24 IP (121 IP Total) and $210 ($1270 total).

As I mentioned last game I wanted to wait until I could buy really nice guns to re-equip Rhodes. Now was that time! So he got 2 new 300kW Six-Shooters ($80 each, $160 total). He gave one of his old 80kW Six-Shooters to Quidel (always good to have a backup weapon) and the other to Amparo (since he previously had nothing to do if someone got inside his minimum range).
This left the posse with $50, which they spent to buy Amparo (who had no Defense) a suit of Quilted Armor ($50, +1 DEF).

Quidel received an improvement using the 24 IP. By spending 15 IP his RTN was upgrading from 7 to 6.

The posse is left with 9 IP and $0. At the end of day three they look like this: Saloon Link.


So all in all that was a super fun game of Dinosaur Cowboys. Everything worked out really well in terms of the new rules and various mechanics I tried. Having a couple of Features really added to the feel of the game, and the Line Deployment fit in perfectly for what I visualized. Losing Cecilia was definitely a downside, but it does provide me with a good chance to continue the story (and probably end up raiding Matron’s Den).
The Drylands Expedition posse have worked well so far, and I’ve been happy with my choices. I’m glad I went for a fast dinosaur instead of a meatier one, since mobility matters a lot when you don’t know what the objective will be like. I could use a few more HP on everyone, but that might come after a bit more IP. In terms of equipment everyone is doing very well, and all I could see doing would be getting more versatility (maybe Grenades?).
Anyways you probably noticed I failed at doing a smaller write up :) This was still a lengthy process unfortunately. I’m going to hopefully play a game later tonight, or this weekend, and I might work on writing that one up smaller. Anyway, lots of fun with the v1.9 rules and still getting to see the posse grow. I should have enough IP next time to grant me a 4th Trait, and maybe +1 DEF to Amparo (and then I can shift his armor off to someone else). We’ll see though!

Brawl at Watterson – Windy River Day 1

DC-Windy-River_Game1-0005
Well I finally got some time to sit down and play my first game in the Windy River test campaign featuring the Drylands Expedition (PDF).

windy-river-day1The posse entered the map in the top left corner, simulating them continuing their south-east journey from Hope to the remote corner of Wyoming that contains Windy River. The scale of the map was 1 hex = 3 miles. Quidel had the slowest Movement of 3, which put them at 3mph overland speed, so 18 miles per day (or 6 hexes). Quite a range! Normally a larger map would have a scale of 1 hex = 1 mile, but for convenience sake (since Quidel has 3 MV) the 1 to 3 ratio was used for this campaign.
They walked along the broken and cracked pavement, stopping for a brief lunch outside of the town of Watterson. The flat plains around them didn’t affect movement at all, so the Drylands Expedition reached Watterson in the afternoon.
Quidel planned to head to the only saloon in town called The Dusty Claw. Gibson was in charge of Dwaal, so he went to the stables with the dinosaur. Crazy Rhodes took out a bottle of whiskey from his seemingly endless supply and headed to the jungle at the edge of town to drink. Eager to be “rebellious”, Amp also went with him.
Here is how the town of Watterson looks:
dc-windy-river_game1-0006
DC-Windy-River_Game1-0012Most townsfolk were still out hunting, patrolling the roads, gathering supplies, wrangling dinosaurs, etc. so the town was fairly empty. The barkeep (and part owner) Ortiz was available to talk to Quidel about the area. A stablehand helped Gibson with Dwaal. And a few rough looking characters were around town.
One named Pickaxe Pete was helping load barrels at the Warehouse. Although unknown to the Drylands Expedition, his friend and ally The Smecker was busy harassing a girl in the small house directly north of the stables. And the leader of their little gang was Ruth Storm, who had been drinking all day in The Dusty Claw after losing a new recruit to a rampaging Horned dinosaur.
You can imagine how this will go.


Campaign Variant Rules: Last Man Standing, Dual Wield
Local Variant Rules and Features: Clear Day, Town, Road, Out of Supplies (represents a loose no weapon policy in the town)
DC-Windy-River_Game1-0002
Pictured above are the Etchglen Hunters, a local posse that poach dinosaurs in the jungle south of the town. Download their PDF posse roster


Turn 1 – A Fight Breaks Out
DC-Windy-River_Game1-0013Inside The Dusty Claw, Ruth misinterprets a comment Quidel makes to Ortiz, which she reasons out to be an insult to the town. Smashing her half empty glass on the table, she starts yelling at Quidel. The debate turns heated, and unknown to the two posses outside, Ruth takes a swing at Quidel with the remnants of her glass.
The Etchglen leader misses the Drylands leader. Quidel is quick to react, but doesn’t want a big issue with the town, so he opts for a Brawl attack called Trip (which would apply Stop to Ruth). However he misses, and settles for moving out the front door of the saloon.
Here are the positions of everyone outside:
DC-Windy-River_Game1-0015DC-Windy-River_Game1-0016
DC-Windy-River_Game1-0019DC-Windy-River_Game1-0021
Left to Right: Jungle Fang, the Raptor of Etchglen, is just returning from hunting food outside of town (since the posse are too cheap to pay stable fees). Gibson talks to the stablehand with Dwaal nearby. Amp and Rhodes drink in the thin jungle near the edge of town. The Smecker in the house north of the stables, unknown to Gibson.

As Quidel emerges from the saloon, his brow furrowed in anger, Gibson notices from across the road and calls out to him. “Just a crazy drunk woman in there. Better round up everyone, she might have friends,” Quidel shouts back. His complaint is loud enough that Pickaxe Pete, at the nearby warehouse, hears the pair. The man is desperately defensive of Ruth Storm, and instantly drops the heavy barrel he was loading and tries a long 6″ Charge at Quidel. Unfortunately he didn’t roll high enough on the distance so is left aggressively posturing a few inches away.
DC-Windy-River_Game1-0025

Gibson sees the man approaching, and even though he isn’t too enamored with Quidel, he at least doesn’t want to see some local drive a pickaxe into the Duster Leader. Luckily the “Out of Supplies” Feature doesn’t affect Gibson since his Laserbow never has to be Reloaded. So he pulls back on the charging string and lets a blast of energy fly at Pickaxe Pete. Perhaps subconsciously wanting to avoid a lethal confrontation, Gibson misses his shot.
Following his friend’s lead, Dwaal snaps free of the stable harness and tries to Charge at Pickaxe Pete, but also fails his distance roll.
DC-Windy-River_Game1-0027DC-Windy-River_Game1-0029

Hearing the laser blast, The Smecker drops the girl he’s harassing and slams out the front door, loading charges into his double barrel shotgun as he approaches.
Meanwhile, stirred by a dinosaur aggressively moving towards it’s master, Jungle Fang boldly strides up the road and easily succeeds at Charging the unsuspecting Quidel. The Raptor lunges and lands on top of Quidel, clawing and tearing wildly. Quidel takes 7 damage from the attack and fails his Bravery Test!
DC-Windy-River_Game1-0035

Seeing a commotion further down the road, Rhodes and Amp put away the bottle of booze and advance across the pavement. Along the way both unholster and Reload their weapons in preparation for trouble. Meanwhile the stablehand dives for cover, and Ortiz hastily tries to kick the angry Ruth Storm out of his saloon.
That’s the end of turn 1. At this point I should mention the Objective, which is Strike Fear. Although this was a random roll the Objective seemed well suited since neither posse wants a bloodbath on their hands, and are really just trying to route and shoo away the other gang.
The first Posse to cause 4 Bravery Tests against the enemy wins. Note that taking an enemy out of action counts towards this goal. So you could cause three Bravery Tests then kill one of the people that took it, and that’d be enough to win.


Turn 2 – Conflict Escalation
DC-Windy-River_Game1-0038Pressured by Rhodes, Amp lines up a long distance shot (possible thanks to the “Clear Day” Feature) at Pickaxe Pete, who is clearly in line to attack Quidel. Amparo’s steady hand lets him land the impressive shot, hitting for 7 damage (2 hits, one of which was a Critical). Suddenly awash in searing pain from an unknown direction, Pickaxe Pete fails his Bravery Test and will Flee.
DC-Windy-River_Game1-0043Still growling and viciously snapping at Quidel, Jungle Fang continues his relentless assault. The dinosaur hits again for another 7 (that 1A-6D on RMC 6 is brutal!). Before Quidel can even react, he is taken out of action. Can you imagine leaving a saloon and having a Raptor leap on you and claw you nearly to death? Jungle Fang finishes his impressive Activation by moving towards his next victim: Gibson.
Since Quidel was the Leader and was taken out of action, every other character in the Posse needs to take a Bravery Test. And guess what? They ALL fail! Luckily Bravery Tests incurred by a Leader dying don’t count towards the number needed to win.
Hearing Quidel’s pained yells and seeing the blast of energy from Amp’s shot, The Smecker moves closer to the unsuspecting Gibson and unloads a single barrel of super heated plasma. The attack benefited from the “Shot in the Back” rule (10+ would Critical instead of just 12), but unfortunately the shot misses.
DC-Windy-River_Game1-0039

As he’s Fleeing away, Gibson sees the blast of energy from The Smecker fly over his shoulder. Quickly the man turns and fires his Laserbow at The Smecker, hitting with a Critical for 7 total damage, which causes the coward to Flee.

DC-Windy-River_Game1-0045Furious at seeing his friend hurt, Dwaal screeches and Charges at Pickaxe Pete, who was already marked Fleeing. Unfortunately the flailing, small dinosaur fails to connect with any claws.
Pickaxe Pete, disorientated and still Fleeing, heads his Movement of 6″ directly away from Dwaal. Desperately the man tries to Charge back in, but fails the distance roll and stays where he is.

Rhodes completes his mandatory Fleeing movement down the road, then reverses and Runs back towards the fight. Ruth Storm drops the rest of her glass and stumbles outside to see what the fuss is about. She nearly trips on the prone, bloodied body of Quidel. Shaking her head to try to sober up, the Etchglen Leader reloads massive batteries into her Handcannon.

At this point Quidel had failed a Bravery Test and was taken out, so Etchglen has a score of 2. Pickaxe Pete and The Smecker failed Bravery Tests so Drylands also has a score of 2.
Etchglen: 2
Drylands: 2


Turn 3 – Blood in the Streets
DC-Windy-River_Game1-0049Ruth Storm edges behind her loyal dinosaur Jungle Fang, using his tail both as cover and as support for her shot. Aiming she fires at Dwaal, who is exposed after Pickaxe Pete fled. The shot connects and wounds the dinosaur for 9 damage, which adds a Panic token.

DC-Windy-River_Game1-0048Further up the road Amparo, still Fleeing from Quidel being taken out, completes his mandatory movement then does an extreme distance shot at The Smecker, who is busy menacing Gibson. The shot hits for 8 damage and takes the man out of action. Amp has been consistently impressive so far this battle. Drylands now has a score of 3.

Having calmed slightly at having Ruth so close, Jungle Fang still knows what it must do. Moving forward from being The Dusty Claw, the carnivorous Raptor Charges Dwaal, hitting once for 7 damage which takes the smaller herbivore out of action. Now Etchglen also has a score of 3.

Gibson edges forward, keeping close behind a crater in the old pavement. Thanks to the “Clear Day” (+5″ Long range to any weapon) his Laserbow is able to reach Pickaxe Pete at long range. Steadying himself with two calm breaths, the Neotechnoist charges the bow and lets fly at Pickaxe Pete. The blast of energy hits the main square in the chest for 6 damage, which takes him out of action. This brings the Drylands Expedition score to 4, and wins the battle!

The remnants of Etchglen slink off into the fading light, hoping to avoid any further abuse.
Etchglen: 3
Drylands: 4


End of Encounter Process
So-Wild-WestSince this is a campaign, tracking IP, ND, and injuries is very important. The first step is to determine if any of the Drylands members suffered Wounds from being taken out of action. Quidel and Dwaal are the only two affected, so they have to roll 1D12. Luckily Leader’s get +2 to the roll and Dinosaurs get +1, and if they get 8+ on the roll they are unharmed. With crazy luck I rolled a 12+2 for Quidel and 11+1 for Dwaal, so there are no lasting effects from being mauled by a Raptor.
Next the posse receives rewards based on the encounter. In this case they took two enemies out of action (Pickaxe Pete and The Smecker) which gives +6 IP and +$60 ND. They also won the encounter so they receive an extra +$30 for a total of +$90. Since they had some leftover IP (3) they have 9 IP and $90 to use if they wish.

I considered getting 2x100kW Six-Shooters for Rhodes, since he’s leveraging the “Dual Wield” Variant Rule, but I think I’ll wait to upgrade him until I can go dual Handcannons (because that would be awesome) for 3A-6D. Instead $60 will be spent on a 200kW Six-Shooter for Gibson. His Laserbow is nice with never having to Reload, and against low armor targets the single attack isn’t too bad. But I got lucky with some rolls, like against The Smecker (who had AR 2) where Gibson needed 10+ to hit. In those cases I’d rather have a backup weapon, so a 4A-2D six-shooter sounds like a perfect alternative. Plus it’s technically similar damage to the Laserbow (1A-5D) so he can interchange them without any loss.
The remaining $30 will be saved.

As for the Improvement Points, all 9 will be saved for the time being. If I can get 10 IP then Quidel could have +1 MV, or I could give +1 AR to Amp.

So after their first victory, the Drylands Expedition looks like this (Saloon link).

Even though I’m only one game into the campaign, I’m already excited to see the growth and evolution of the posse. Hopefully I can get another game in this week (Wednesday), and then maybe next week. Not sure if I’ll be able to keep doing such fleshed out battle reports since they take close to 3 hours to write up :)

Changes and Notes From Play
– Change Saloon PDF export to not use decimal places for Neodollars
– Make “Strike Fear” objective not include Bravery Tests due to Leader death, since otherwise it becomes “Assassination”
– Note only 1 Panic token can be added per single attack (currently confusing with “multiple” wording)